Parties

Parties


Always ready for a party? Here are plenty of ideas for various holidays as well as anytime you feel like a little fun! The most recent party prep posts will appear at the top, then you can keep reading to see how crazy my annual party schedule really is! 🙂

Holiday Happy Hour 2017

It’s an especially busy holiday season for us this year with wedding planning at the same time as party & singing season, but we still managed to decorate and have our annual Holiday Happy Hour party! 35 of us enjoyed lots of friends, fun festive food, and even Santa flying across the moon with snow falling outside!


Glen made his family cheese ball recipe without any nuts as the Delicious Dairy Dalahäst this year, and I cut back some cookie varieties in hopes of a more sane party prep schedule, but most of the menu was the same since I always love it so much…Swedish meatballs with lingonberries, pickled salmon vs. pickled herring in a Santa dragon bowl, holly wreath Brie en croute with homegrown spiced loquat preserves, build-a-sandwich, manchego with homegrown quince “carne de membrillo”, krumkake, pepperkakor, Caroling Cookies, and a cookie decorating table enjoyed by kids & adults including frosting as well as special Christmas Coloring Cookies! Glen added some extra spicy cheeses this year so we arranged those on the pointy tree plate as a warning for weaker tongues like mine! 😉

There are several gargoyles and dragons that stay out year-round, so they got Santa hats and some even sported tartan bows that looked quite cute! We had the 8-foot moon up for Halloween 2017, and this might be its last year ever if we remodel my house like we hope, so I left it in place on the roof weighted with all its sandbags so I could project the same Santa flying across the moon with snow falling video I created for 2015. 🙂

Happy Holidays from Brittahytta! Jingling bells approach as Santa and his reindeer fly across the cold winter full moon with falling snow, dripping icicles, big ornaments in the front tree, giant wreath on the garage door, red ornaments and garlands decking the fence and windows, a peek into the living room with lots of lights and the main live Christmas tree, another tree on the front porch with a homemade door wreath, a Santa dragon bell, and my new haunted eyeball doorbell is even in the holiday spirit!


Please enjoy the full photo gallery below, and we hope everyone has a happy holiday season!
(more…)

Posted in Christmas, Edible Art, Gingerbread Creations, Parties | Tagged , , , , , , , , , , , , , , , | Leave a comment

last update before the big party!

Here we go…our Haunted Hollywood front show will be ready by the Friday deadline for the citywide decorating contest, perhaps Thursday if the programming goes well, our costumes are ready, and there are 25 unique menu items still to prepare for my big party on Saturday night!

Ghoulish Glen got me a whole kit from Hot Wire Foam Factory for my birthday, and the hot knife cutting tools have been fantastic for all the foam carving I’ve been doing this year. The kit also came with several of their coating products meant to protect foam sculptures. Our first major foam coat attempt was the garage proscenium arch, where we painted it with brushes that quickly got ruined, but we must not be applying enough coats for any real protection, since corners still crumble off easily, but adding more coats risks filling in the engraving I’ve done. Glen was so impressed the sarcophagus I built for the Mummy that he wanted to protect it. He rushed to buy more foam coat, concrete pigment, and a texture sprayer since he saw a video that the texture sprayer set to fine stream coated the foam with a thin coat. Everything arrived for Saturday spraying spread out on a tarp in the backyard, but the nice smooth foam carving I did with the heat cutting tools ended up looking more like a popcorn ceiling, plus barely catching the corners still chip off, so that was a big fail. The foam coat allowed cans of spray paint to work for the large areas of gold (normal latex paint with my sprayer would have done the same), and at least the delicately-carved hieroglyphics didn’t fill in too much, but all the detail painting of straight lines and face detail took much longer due to the bumpy texture, and none of the gold is smooth enough anymore to shine. Ah well…it still looks impressive at least!

We had rain forecasted last Thursday night, so Glen taped all the electrical junctions while I bagged the monsters, just after I had finished dressing Nosferatu, including hotgluing all his tiny buttons in place, and wrapping the Bride in bubble wrap, packing materials, dishwashing gloves stuffed with polyester batting, and a big roll of silver duct tape. The wind was worse than expected, and it poured so hard I couldn’t hear myself think, so I ran back outside to tie the bags better around the monsters. Those made it through fine, as well as the brown paper tree that had no glue but three coats of spray marine varnish…whew! I painted the tree with three dry-brushed layers of different brown which looks a lot more realistic now, then after painting I could finally pad and dress the werewolf in his red flannel lumberjack shirt.

The front show videos are ready (Ebony keeps trying to sit on the monitor shelf right where I need to see!), with last placement adjustments completed Monday night now that all the front monsters are in final position, fully dressed and lighted. The show is two separate videos synced together to show on the garage screen and the front projector on the monsters in the yard and the moon above the Hollywood hills on the roof. Now Glen gets to program them in VSA so they stay synced (see last year’s frustrating attempts to sync 2 videos via QuickTime where it never loops exactly in sync!), plus add a new fancy programmable LED strobe light with the show for some last surprises!

We did get the canopies up this weekend with the backyard furniture arranged a bit, and one of the movie poster slideshows is already set up on the lighted movie marquee on the back fence! Starting tomorrow I’m taking three days “vacation” from work to decorate inside my house and backyard, and plow through all the food prep for my big annual party on Saturday night! We have two interactive displays featuring famous monsters that are still in progress and depend a lot on Glen’s time, so I think I will leave those as surprises for now! Thankfully my dear friend Natasha is coming early on Saturday with her daughter so they can be house-elves, and Glen has already offered to help with food in the evenings too, so I have high hopes we can get most everything done in time!

Hope everyone has a happy Halloween weekend!

Posted in Halloween, Parties | Tagged , , , , , , , , , , , , | 1 Comment

more Haunted Hollywood progress…

Aaaah! Only TEN days left until my big party, and the front show must be ready before then since for the first time ever there is a citywide Halloween decorating contest, and I might have a chance at winning! Here’s how far along we are, with more behind the scenes details than the Eerie Elegance Facebook page

As of the first October Friday, we were getting to the point where I must be careful about giving away any surprises! Ghoulish Glen has been working on our first pneumatic prop, the Webmistress of the Dark is getting a new scratch-sewn outfit including a new steel-boned corset, and the front projector is hidden in final position, but I can’t show you any projections until it’s all finished!

Ghoulish Glen and I have been hustling constantly the past couple weeks, with me staying up to 4am way too many nights in a row, but as of last night we finally have all our classic movie monsters in position out front! Some still need to be padded and dressed, and the Mummy just needs some aging, but his custom-carved sarcophagus is waiting for some special supplies to arrive before it can be painted this weekend. Video work is still underway since I really want the front show ready to run by Tuesday night, then it’ll be 3 whole days off work for party food and finishing arranging inside decor.

All along I had been hoping to have fun making the Mummy’s sarcophagus detailed and realistic, but it was coming down to crunch time two weekends before the party and I hadn’t even started yet. Thankfully all the foam we thought we bought for monster exhibit backdrops was exactly enough to build a life-size sarcophagus of stacked foam deep enough to hold the Mummy figure we made, and all my new Hot Wire Foam Factory tools & products were essential since I could never have carved this much detail with my kitchen knife or jigsaw! We already ran out of the sample kit of Foam Coat and we both think this sarcophagus is worth protecting for years to come, so we are hoping a rush order of more Foam Coat will arrive by the weekend, and Glen has bought a texture sprayer to mix black paint with Boost & Foam Coat so it’s protected from elements, nicks and scrapes, and has a basecoat of color in one step before I have fun painting it gold with traditional Egyptian blue stripes. Yes, all the hieroglyphs are authentic and translatable!

We have had plenty of fun along the way as always. We finally got the tree and skeleton built for the werewolf last weekend, hacking a fake ficus tree Glen had at his house, so I used foam scraps from the sarcophagus to rough in the tree trunk shape large enough to hide the werewolf’s torso. Glen said it looked like the werewolf was wearing a dress, so I joked to Scary Jerry that it was my first draft of my wedding dress! haha… I continued the next day by using brown packing paper I’ve saved for years to make bark texture, strategically hotgluing to the base form and twisting roots at the base. I’m out of time so it’s not proper papier-mache, but it has been covered with three coats of spray varnish so far, and it still needs some brown accent paint before it’s done.

At least our costumes are very close to complete! My updated modern Webmistress outfit is almost done! The spiderweb mesh lace cape has new support for the standup collar that works much better than the 18-year-old original plan, plus I cut apart the teal web cape we found at Target as a second cape layer plus around the sleeves and inside the collar, and I absolutely love it! Even Ghoulish Glen was impressed at the collar! The steel-boned waist cincher is complete with laces, and I made a new dress from the same pattern as years ago, which now just needs to be hemmed after I try everything on together to check the length. I’ve also made a red brocade vest to update one of Glen’s several cheapo vampire outfits, but it still needs buttons & buttonholes, and I’m still hoping I can throw together a lace cravat better than the shiny ruffles attached to the costume shirt.

I am stressing that no party food has even STARTED yet with only ten days left to the party since in years past I’ve usually been more ahead of the game foodwise, but thankfully Ghoulish Glen has offered to help with any non-artistic recipes, so next week he will stir & mold all the gelatin body parts, make his family recipe cheese ball in a special surprise shape, and he is already an expert at the Violent Vertebrae from several years of experience, so that will be a huge help!

Hope all your Halloween projects are going well! Wish us luck getting everything finished, and I hope my next update will be public front show details… *crossing fingers*

Posted in Halloween, Parties | Tagged , , , , , , , , , , , , , | Leave a comment

Halloween season has begun!

I am sooooo behind on updates but at least for happy reasons! I have been able to post a few photos every so often to Facebook throughout the year while we’ve been working on Halloween, so I will link those here for posterity. You can follow the Britta Blvd and Eerie Elegance pages on Facebook, and Britta Blvd is also now on Instagram. Eerie Elegance is specifically for Halloween and spooky style, but Britta Blvd is for all my creative pursuits like parties, steampunk, costumes, edible art…and will also soon include projects for my own wedding in April! 😀

Since I had never seen the old classic monster movies, we started watching them in January, and I insisted on spooky selfies with the monsters…heehee!

Haunted Hollywood Scream Team 2017 with our buddy Boris as the Mummy

Haunted Hollywood Scream Team 2017 attacked by the Wolf Man!

We have been saving up the free Amazon points from my Prime Visa card all year to finance as much Halloween as possible. This has been immensely helpful since red velvet ropes and officially-licensed premium quality monster masks are not cheap, and getting them on Amazon completely FREE is infinitely better!

Free Amazon credit card points are already being invested in monsters for Haunted Hollywood! Fresh out of the folded flat box these already look good, and with some coaxing back into shape they will look great!

The two newest additions to our Haunted Hollywood crew have arrived!

Successful Haunted Hollywood Scream Team meeting today! New recipe testing, several display ideas solidified, front show outline well underway…glad we have several months since it’ll be a lot of work!

Ghoulish Glen and I took a quick trip to Florida in May…guess where we went? 😉 I bought the Madame Leota and Haunted Mansion wallpaper dresses at the new Dress Shop in Disney Springs, and we almost bought everything at Memento Mori, including “spirit photography” custom lenticular portraits! Now back to working our own Halloween projects this week…

Halloween hacking last night revealed we will need to explore pneumatics after all, but also produced our first “live” monster for Haunted Hollywood! I hacked an old motion-sensor candy dish whose hand disintegrated years ago with a plant puppet on loan from Scary Jerry. This result is hilarious as is, but if we can change the audio to “Feed me!” it will be even better!

Haunted Hollywood work continues! We think we have most of the other monsters dressed with thriftstore finds and easy fabric wrapping, but Nosferatu has a distinctive button-front coat that I will need to sew. I think one of my pirate patterns can be adapted easily enough by adding a collar. I could make stuffed dummies myself, but I can use $44 of free Amazon points to purchase these dummies, where buying fabric & stuffing must come out of my actual Halloween budget, plus my time to make them! We can always add PVC skeletons, wire, and more stuffing where applicable. Most of our monsters need special gloves anyway, but it is nice that these dummies have plastic hands already attached.

Gothic garden and ghostly greenery update! I’ve been nursing along the dark purple calla lilies I bought in pots during Halloween season for several years now hoping they would rebloom, and it’s not the right timing for Halloween unfortunately, but one has finally bloomed again! If I can track their bloom time reliably, maybe I can figure out how to force the bloom time to Halloween by when I plant the bulbs. Several dusty miller starts are growing well in pots and in the ground. My Japanese painted ferns had to be moved and I don’t think they’re getting enough sun for the new growth to be mottled, but my striped and solid purple secretia plants are so happy that I need to prune them more regularly!

Haunted Hollywood Scream Team writing day today! 8 hours of writing our front show today, a good start but still more to finish before August filming! Also, after attempting to carve my own foam heads, it looks like fabric stretched over a molded foam head might work best for a projected face.

Finally made it back to the electronics flea market but we bought more chemistry glassware for our Library Laboratory than electronics! We did score a nice vintage wooden & brass RCA Victor cathedral radio with stripped insides for only $20 which will be perfect to insert our own Bluetooth speaker!

Imitation is flattery? Spirit is now selling a Jack figure whose movement is eerily familiar. I guess we should have expected corporate copycats after we posted our how-to video of #JackSkellington for #Halloween2013, our very first #animatronic figure: https://youtu.be/cnm00b4ttWg #EerieElegance #nightmarebeforechristmas #halloween #animatronics #spirithalloween #stilllikeoursbetter

The #WebmistressOfTheDark was hard at work this week signing pre-ordered copies of #EerieEleganceEats: A Halloween Cookbook of CreepyCuisine! Get a personalized autograph in your own book by buying your copy from EerieElegance.com! …but did you notice the new bling? Ghoulish Glen proposed with a stunningly sparkly and naturally fluorescent diamond that glows in black light!

The moon has risen again! Haunted Hollywood is underway…

It’s so much easier to work outside in the cool of the evening that I was able to sketch and carve the entire vintage movie theatre proscenium header for the garage screen. Ebony snuggled up with some of today’s Halloween purchases, and enough work got done that we can enjoy a chocolate liqueur nightcap in our new spiderweb glasses from Target’s Halloween 2017 collection.

Sunday Halloween progress in 95F heat…ugh! The pipe organ is out of storage needing some minor repairs as expected but is in place for the Silent Silver Screen! My new hot foam knife made slick work of the Hollywood Hills, but I kept carving freehand scrolls & leaves with my woodburning tool in place on the garage until I finished the entire design. Edge cutting then painting will happen on the ground…

I hacked some cheap blowmold fancy skull frames from Michaels to fit our Haunted Mansion ghoulish portraits, plus the Haunted Hollywood Main Theatre Screen projector is now mounted and ready to be hidden by the chandelier! It was tricky since it couldn’t be centered on the window anchored on a ceiling beam, so I found enough scrap wood, shelving, nuts and bolts and had Ghoulish Glen as human clamp to make it work!

More tech Halloween progress last night: Glen found an amplifier on Amazon that made it an easy hack to play vintage radio in our vintage radio case! It took a $90 Thunderbolt to dual-link DVI adapter also from Amazon, but I am now up & running with Glen’s 30″ Dell monitor for video editing, starting with our buddy Bela…so much easier to see than my 15″ Retina Display MacBook Pro screen! I even got the Bluetooth Magic Mouse set up too!

By the end of this weekend, the Hollywood hills were painted and anchored to the moon with wooden reinforcements against the wind, and the carved foam garage proscenium was covered with foam coat, sprayed black, and back anchored in place around the garage, almost completely handpainted gold. Tonight I am absolutely exhausted but glad for this much progress for Haunted Hollywood!

Here’s a summary of this week’s Haunted Hollywood Halloween progress at Eerie Elegance! The 8 ft moon is rising over the Hollywood hills near the gilded vintage proscenium for the garage movie screen, and the living room is beginning to look like a theatre with the red curtains and custom carved foam frames ready for gold…and there’s even a center medallion for a crystal chandelier designed to hide the ceiling projector!

Stay tuned for Haunted Hollywood projects to continue after Annual Halloween Shopping Weekend!

Posted in Halloween, Parties | Tagged , , , , , , , , , , , , , | Leave a comment

new book Eerie Elegance Eats is now available!

Eerie Elegance Eats Front CoverFor 2017 Britta Blvd presents Eerie Elegance Eats: A Halloween Coookbook of Creepy Cuisine! This new book celebrates over twenty years of delightfully disturbing both children and grownups alike with Halloween recipes in a niche between gory horror displays and cute but tame kid-friendly foods, making the world smile with a touch of spooky style. Over thirty exclusive new recipes plus all your favorites from both previous Eerie Elegance books are now available as one convenient Cookbook of Creepy Cuisine organized in eight chapters:

Mad Scientist Body Parts
Beverages, Brews & Potions, with safe dry ice and edible glow effects
Creepy Cuisine Contest Champions
Scary Savories
Dastardly Desserts
Spooky Spiders & Skeletons
Dia de los Muertos Delights
and Gingerbread Goodies, including the giant Ghoulish Gingerbread Haunted House!

Autographed copies of Eerie Elegance Eats are now for sale directly from the author for $24.95 +S&H, Amazon is selling it worldwide, and a digital version is coming soon! See the order page for details!

Posted in Edible Art, Gingerbread Creations, Halloween, Parties, Recipes, Wizards | Tagged , , , , , , , , , | Leave a comment

A Star Trek Beyond Birthday

Star Trek Movie Night MenuWe had the smallest group since 2010 and it was roasting hot, but we still had a fun movie night for Star Trek Beyond, and Glen surprised me with an early birthday cheesecake! Thanks to the 7 die-hard movie-goers who celebrated with me and enjoyed Ice Trek Cocktails, Starfleetza Pizzas and S’more Trek not only with custom chocolates and homemade marshmallows, but even matching chevron graham crackers!

Trekkie CoupleI wore my classic Trek miniskirt uniform for 50 Years of Trek last year, but costumes are nowhere near as fun when it’s over 100F, so this year it was t-shirts and hair up for comfort! Glen fit my early-90s convention era Starfleet Academy shirt, and I wore my even older handpainted Spock tee with film camera tripod earrings in honor of movie night…I’ve enjoyed my Spock tee for about thirty years already, but I will sure be sad when it finally disintegrates, since it already has one small hole right in front!

Homemade Trek Chevron Cookie CuttersI have made several styles of Star Trek S’mores over the years, from 2010 for Star Trek II on National S’mores Day and Free Enterprise in two different styles using a homemade silicone mold and custom-bent cookie cutter, to 2013 for Into Darkness where I used marshmallow creme sandwiched between matching chevrons, to last year when I made matching chocolate and marshmallows, but ran out of time for matching graham crackers. Since I now finally have three chevron shapes in nesting sizes, I was determined to customize all three ingredients for S’more Trek!

Making Homemade MarshmallowsHomemade marshmallows make the most mess, so they were first! I used Alton Brown’s marshmallow recipe again, but for some reason I’m always almost out of corn syrup, so I add honey to make Spreading homemade marshmallows into the prepared sheet panup the difference, which gives them a nice flavor. You definitely need a stand mixer for this recipe! While it’s mixing, prepare a sheet pan with wax paper dusted thoroughly with powdered sugar so it’s ready when you need to work quickly.

Once the marshmallows have finally fluffed to the top of the bowl, spread quickly into your prepared sheet pan. Anywhere not liberally dusted with powdered sugar will glue permanently, so fair warning! I can never get the top surface perfectly flat, so I do the best I can while spreading them into the pan, then I use a greased sheet of wax paper to burnish the Smoothing the surface of the homemade marshmallowssurface by rubbing in circles with my hands. Again, be very careful, since if there is any plain wax paper that touches the marshmallows, it will stick forever! Let the marshmallows set overnight before cutting.

Cutting Chocolate Chevrons for S'more TrekWhile you’re waiting for the marshmallows to set, you can cut your chocolate! I had made chocolate chevron molds before that were intentionally the thickness of a Hershey bar, but they were sized for the classic movie Trek belt buckles, which was a small serving of chocolate. I had leftover modeling chocolate that hadn’t been eaten as previous Tray of finished Chocolate Chevrons for Trek S'moress’mores, so I remelted it in the microwave, spread it for thicker chocolates, then used the medium chevron cutter to cut as many chocolate chevrons as I could. If the chocolate is too soft, the cuts reseal themselves too quickly, but if the chocolate has hardened too much, it will crack as you push the cutter in, so try to find the sweet spot. Refrigerate the chocolate chevrons if it’s summertime, but don’t freeze chocolate.

Custom chevron homemade graham crackersNext were the custom chevron graham crackers! I’ve been using this vegan graham cracker recipe for years, and it’s always super-tasty with no special ingredients required to purchase. It is a very crumbly dough, and whole wheat flour doesn’t absorb water as well as white flour, so have some water handy to knead in when it gets too dry. It doesn’t roll into sheets very well, so I pat the dough together as much as I can to prevent holes, then use my rolling pin to smooth out the top surface, leaving the dough a good 1/4″ thickness so the graham crackers don’t crumble apart. Cut the shapes on a silicone mat so you can pull away the extra dough instead of transporting the finished shapes, since they are too fragile until after baking. Store just like cookies in an airtight tin for up to two weeks.

Cutting marshmallow chevronsAfter the marshmallows have set overnight, it’s time to cut them! Keep a bowl of water handy for dipping your cutter, or else it gets sticky too quickly. You can dust the cut edges with powdered sugar for plain designs, but I thought that my pearlized sugar in command gold, sciences blue and services red would be the perfect pop of color! Since the cutter pushes the marshmallow at the edges of the design, leave space when cutting the next marshmallow, otherwise you’ll have an oddly-shaped edge. As soon as I cut the marshmallow slab with the chevron cutter, I gently removed the marshmallow chevron from the cutter, dipped all the cut edges into a bowl of the colored sugar, then set aside, making sure I had an even number of colors for variety.

Completed platter of S'more TrekIf not serving immediately store your marshmallows in an airtight tin or bag so they don’t harden. When ready to assemble your S’more Trek, stack the chocolate and marshmallow chevrons on the matching graham crackers for display. For eating, remove the marshmallow from the stack to roast on a stick over the fire, then smush the melted marshmallow between the chocolate and graham cracker chevrons. Yum!

Chevron CheeseSince I always have an assorted cheese plate and the smallest chevron cutter fit the slices, it was easy to make a plate of Chevron Cheeses! Since there was more white cheese than orange, I made gold chevrons like Classic Trek shirt emblems. I had a few white stars leftover from the 4th of July, so I added those around the center.

Starfleetza Pizza crusts ready to grill!Grilling pizzas is popular for my movie nights since you can completely customize your own pizza! Starfleetza Pizzas are the perfect name (courtesy of my friend Eileen several years ago), and the chevron shape is not only fairly easy to form from pizza dough, but it also holds toppings well. I made the crusts from scratch using my bread machine with the same whole wheat sourdough recipe I’ve been using for years now. The dough is pliable enough that it’s fairly easy to form into any shape you like, then parbake on silicone sheets for 2-3 minutes to set the shape. Store in gallon zip bags with wax paper between crusts, and refrigerate for about 3 days or so, but if you are storing for longer, freeze instead.

Ice Trek CocktailsAs for the rest of the menu, Federation Fruit Salad was just my normal summer fruit salad with a fun name, and I recycled the Ice Trek Cocktails from last summer since they were tasty, using hard raspberry cider, raspberry syrup and vodka for The Redshirt instead of premixed margaritas and extra tequila, but I made more elaborate recipe cards for them.

Starfleetza with Chevron CheeseWe grilled some watermelon along with our pizzas, and I added a Chevron Cheese in the middle of my pizza to highlight the matching shapes. Everyone had a good time watching some funny Star Trek comedy sketches before the trailers and the main feature.

Small audience but still fun!Partying People on the PatioStarfleet Academy Glen

Surprise Early Birthday Cake!After the movie, Glen brought out a cheesecake with candles and everyone sang Happy Birthday to me! I was completely surprised! Glen was sneaky and used his car running in the driveway as the refrigerator for the Surprise Early Birthday Cake!cheesecake, otherwise I would have seen it for sure! See how the candle in front is shorter? He said “It was a small cake, not much room for candles, so I used the natural logarithm of Britta’s age = 3.8 candles, knowing how Britta appreciates geek humor.” Hahahaha…love it!

You can click below to read the full Ice Trek Cocktail recipes and see the rest of the photos…and stay tuned for the summer season finale of Cinema Brittahytta!

(more…)

Posted in Cinema Brittahytta, Parties | Tagged , , , , , , , , | Leave a comment

Fireworks & Fun 2017

For 2017, a fun crowd of 28 enjoyed Fireworks & Fun for the Fourth, with festive food, new patriotic patio furniture & decor, and a Rock Band and s’mores after-party as the traffic gridlock died down around our creative parking! Thanks to the City of Santa Clara for the show and everyone who helped us celebrate!

Since the 4th was a Tuesday, I had a whole 3-day weekend to spread out party prep, which worked well, since we had Halloween Scream Team work sessions that same weekend! I started with a patriotic pedicure before dressing up for Margarita Friday, mixing the custard base for the ice cream before dinner, which gave enough time to chill in the fridge to churn into ice cream after dinner, then it was into the freezer to harden and not touch until the party! I love the velvety smooth vanilla but that’s also why I only make 6 quarts of it once a year…sooo good!

I decorated the inside over the weekend, then cut and toasted the tiny star croutons, prepped the pastry brie, did all the advance prep for the various salads, and went for a solo 5-mile hike on my Monday holiday. I don’t hike with that hat, but I was going shopping for some last ingredients afterwards! 😉

The 2017 spring patio furniture overhaul was inspired by two turquoise adirondack chairs my grandma gave me for Christmas. I had been in the market for new patio furniture but never finding anything I liked enough that fit my style. I finally found some dark-bronze cast aluminum love seats and bistro table sets at Target with free shipping online. Those all required assembly (whew!), and Target’s aqua/turquoise cushion color for 2017 blended well enough with the wooden chairs that I decided I could have everything matching for summer, but what about other holidays where turquoise & aqua are not in theme? The first such holiday was 4th of July, so I thought red & white stripes using the turquoise as the “blue” should work well enough, plus work with my blue-green wicker plate holders I use for movie nights all summer. I found red & white striped plates that fit my wicker holders, and I bought red & white striped fabric online to sew a quick set of 4 pillow covers to fit the gold pillows that have now moved from living room decor to patio decor. I think it looked pretty nice!

This was our first fireworks party that Glen & I hosted together, but it was also our first 4th of July without party kitty Onyx, and I dressed Ebony and Obsidian in their patriotic collars and got a couple decent photos of them well before any guests arrived, but they hid the whole party as they always did. On party day Glen helped with sweeping, arranging outside furniture, setting up the “cornhole” bean bag toss game, & getting party ice, but it was still too hot for my hair to be down, so I twisted with red, white & blue hair and wore blinking LED jewelry with new patriotic earrings. Glen didn’t have any patriotic t-shirts, so glad he fit my Yosemite flag tee I got several years ago!

I ran out of time for my menu chalkboard, but we had mostly the same menu as recent years past, with the newly-added watermelon keg, and Glen wanted warm nacho cheese with tortilla chips, so I got out my small crockpot to keep the cheese warm on the inside patio table. Since I missed my bacon-in-the-batter mini Corndog Sparklers for 2016, I made sure to make them for 2017 (yum!), and Glen went extra decadent by dipping one in warm nacho cheese…wait, what?!? 😮

On the bar was lemonade, the watermelon keg new from 2016, and my traditional make your own Razzle-Dazzle-Tini station. A guest had brought a giant stars & stripes vodka bottle, so Skip bravely tried layering with that! Ellie had fun making her own without the vodka, perfectly layering her mocktail Razzle-Dazzle-Tini! Maybe she’s channeling her dad’s bartending skills?

Snow cones are always a hit on a hot day! Thankfully we not only had expert snow-cone maker Ellie in attendance to show everyone how to make their own snow cones, but the Ouye girls enjoyed them too! One of these years I’m going to have time to make myself a spiked snow cone again! 😉

Here was the rest of my menu for 2017: Patriotic Pastry Brie with Smorgabritta Spiced Loquat Preserves, Aged Manchego Slices with Smorgabritta Quince Preserves, Cheery Cheeses and Grilled Sweet Potato Salad, Tricolor Quinoa Apricot Cashew Salad, Old Glory Green Salad…

Festive Fruit Salad had the full assortment of summer fruit I enjoy, but since I put the pineapple, blackberries and raspberries on top in stripes, I took a photo before stirring everything together. 🙂 Those are the new Fireworks Oreos you see in a bowl, with popping candy inside the cream so they are like fireworks in your mouth! Not homemade but so fun that I’m going to look for them next year!

Since my poor loquat tree died over the winter, leaving my shed roof exposed, there was no storage location for the patio castle walls and archway, so we left them in place after Halloween, including the columns with the new copper dragons, who joined in the festivities by holding American flags for the occasion! I hadn’t hung the bunting yet, so Skip & Keith hung them from the patio ceiling, a new idea that looked great over the BBQ station & all the guest food!

I always like my Sparkling Sugar Stars with no frosting, just red & blue sugars sprinkled on the sugar cookie dough before baking. I usually make them with non-dairy margarine and egg-replacer powder so they are vegan. They are only slightly sweet, so refreshing if others bring more decadent desserts, and they are perfect with my annual 6-quart batch of Homemade Old-Fashioned Vanilla Custard Ice Cream. I dish up the ice cream just in time so we can all enjoy our dessert with the fantastic fireworks show, which was a blast yet another year! Thanks to the City of Santa Clara for the show!

The downside to living so near to such a spectacle is that everyone has parked in our neighborhood to walk to the park, so parking near my house is always a challenge, especially later in the evening closer to the fireworks show. This is why I start my party earlier, so people can stagger their arrival times and usually they get parking without walking too far away. Some first-time guests arrived too late to find anything close enough to walk, so we pulled both our driveway cars as close to the garage as possible, and with aiming guidance from Glen & others, I drove the Briata up on the grass to park sideways across my driveway, completely legal since no sidewalk was blocked! This freed up the sidewalk spot for our guests, and they were last to arrive, thank goodness! However, even a half-hour after the fireworks had ended, the street STILL looked like this…total gridlock, so might as well stick around for the after-party fun! 😉

This time I cut thick stars of dark modeling chocolate for the Star-Spangled S’mores, and in case no one wanted a fire like some previous years, I pre-melted marshmallows them in the oven over the graham cracker squares, leaving the chocolate stars separate until party time. This year we did have a real fire while waiting for the traffic jam to subside, so we roasted new marshmallows anyway!

You can see the full photo gallery with all the partying people by clicking the link below. Huge thanks to everyone who helped and had fun yet another year! Hope Santa Clara keeps having annual fireworks so I can keep having my Fireworks & Fun party! 🙂

(more…)

Posted in Outdoors, Parties | Tagged , , , , , , , , , | Leave a comment

Young Frankenstein for 10 Years of Cinema Brittahytta!

Igor & Inga with Fancy FrankWe opened our 10th summer backyard movie season with the first movie ever shown at Cinema Brittahytta…Young Frankenstein! Most of us had seen it before, but little Ellie had a ball viewing it for her first time, at the same age I first saw it! 14 adults & 3 kids made for a great celebration, enjoying the special themed menu, our Fancy Frank standing tall ready for Puttin’ on the Ritz, cloaked Glen with hunchback as Igor, yours truly in my lab coat as Inga, my new theatre trailer, and my new lighted movie marquee!

I first started showing backyard movies 10 summers ago, and I kept improving the experience over time with an 8-foot screen, better projector, and nice speakers. I didn’t edit my theatre policy trailer until a few years in, a very basic Star-Wars-style rolling credits into the distance over a basic starfield with my logo, but I thought it would be a nice 10th anniversary celebration to edit a new theatre policy trailer. I used the same soundtrack of audio clips from some of my favorite movies and my same hand-drawn logo, and the same text for the credits thanking everyone who contributed to Cinema Brittahytta, but I added teal theatre curtains opening to an aqua nebula moving starfield, and I added a little basic 3D to the logo spinning in from a distance at the end. Maybe for the 20th anniversary I’ll have finally learned real motion graphics? 😉

New Movie Marquee in the backyard!The other new feature for my home theatre is a digital lighted movie marquee! I had purchased several 32″ flatscreen TVs for previous Halloween use, and I didn’t have a use for them the rest of the year, so I thought why not build a frame and load a slideshow/video on a USB stick and use one of the TVs as a digital poster frame movie marquee! Since the TV isn’t balanced to hang vertically without a wall behind it, I had to mount it on the back fence, where I happen to have a bare spot for a few years until a new tree grows. Full construction instructions will be coming soon in a separate post, including lessons learned how to improve my next attempt, but I think it works really well!

Mixing a Walk This Way cocktailWhen guests arrived for Young Frankenstein, we started with two custom cocktails as is now my summer tradition. Here some brave souls are using my Young Frankenstein the Musical shot glass to mix a Walk This Way cocktail, which was quite tasty and popular, so it might return in another disguise for a different movie someday! This “Walk This Way” cocktail is as dark as Igor’s cloak. Once you Walk This Way enough, you too will say, “What hump?” Pour equal parts blackstrap rum, chai tea syrup, lemon-lime soda over ice into a rocks glass. Stir to combine, and enjoy!

Partying people on the patioFor flavor variety I also created The Frau Blücher: This straitlaced black & “white” cocktail is why the horses rear in fear every time they hear the name of Frau Blücher! *whinny!* Pour two parts lemon-lime soda into a martini glass. Gently layer one part black vodka over the top. Enjoy the black and “white” layers, but stir before enjoying a sip. Some of the partying people on the patio were partaking in that one. 😉

Young Frankenstein 2017 MenuHere is the full menu for Young Frankenstein, listing the two custom cocktails Walk This Way and The Frau Blücher, then Abby Normal Brain Pate and Assorted Cheeses for Puttin’ on the Ritz, Franken-Fruit Salad, Rollz in Zee Hay, and Franks-In-Steins! Can you spot the small foam Abby Normal brain that was a souvenir from the touring musical? 😉 The Abby Normal Brain Pate is the same Halloween recipe I’ve been making for years, still as delicious as ever with cream of mushroom soup, cream cheese, shrimp & creole seasoning, Authentic Ritz crackers for Puttin' on the Ritzthen my traditional cheese slices were there too, both ready for Puttin’ on the Ritz on a plate with the logo added front and center so everyone would realize they were the authentic brand crackers!

Franken-Fruit SaladFranken-Fruit Salad was just my normal summer fresh fruit salad renamed for the occasion, but our Rollz in Zee Hay really cracked me up, since they are Rollz in Zee Haydeep-fried eggrolls that are supposedly so addicting they are locally called “crack”…haha! I bought some canned fried onion strings for the bed of “hay” under the egg rolls, and voila! Rollz in Zee Hay! They are very tasty so there weren’t many leftovers. 😉

Franks In SteinsSometimes a clever name creates a recipe you can’t resist. These are basically pigs in blankets, a vintage classic appetizer, but by forming the dough differently and adding a pretzel handle, you have little Franks-In-Steins! These will appear again for our Haunted Hollywood Halloween this coming October, as well as in my new Eerie Elegance Eats cookbook!

Partying PeopleIt was a lovely evening, not too hot and not too chilly, so we didn’t use the firepits, and we have a new projector arrangement that allows for even more seating space! The original Cinema Brittahytta projector had developed some sparkles at the Young Frankenstein 2017 audienceedges by the end of last summer, not bad for a 9 year run, but since now I have so many other projectors for Halloween illusions, one of the newer short throw projectors was perfect nice and close to the screen, so less trip hazard of power & HDMI cables through the grass, plus more people can sit in the center for an even better view!

You can see a few more photos of our 10th anniversary summer season premiere in the gallery below. Stay tuned for a couple more movies this summer, starting with a trip back to the Wizarding World for Fantastic Beasts and Where to Find Them…

(more…)

Posted in Cinema Brittahytta, Parties | Tagged , , , , , , , , | Leave a comment

Beauty & the Beast Bookookies

Britta and her Beauty & the Beast BookookiesFrom November 2010 to September 2011 I was buying new hardware and setting up the new BrittaBlvd.com site, so there is a large gap for all my Cinema Brittahytta summer movies that year! Since the new Beauty & the Beast live action remake is almost here, it seemed a good time to catch up with details about when I showed the original Best-Picture nominated animated masterpiece in June 2011, especially my Beauty & the Beast Bookookies!

Closeup of the Beauty & the Beast BookookiesMy Beauty & the Beast movie night was when I originally had the concept of Bookookies that later appeared as my Caroling Cookies for Christmas. My inspiration was the opening story told along with gorgeous stained glass panels, so I transcribed the relevant phrases from the movie and sketched my own smaller versions of the matching stained glass images that could stand the limits of piping and food-coloring pen resolution. That determined the size of each large cookie.

Custom cookie cutters in processI could have cut the sugar cookie dough with a knife around a cardboard template, but I decided to make it easier on myself and make a custom cookie cutter out of copper pipe strap tape bent into shape then joined at the overlap using self-adhesive metal flashing tape. The holes in the copper strap make it a little tricky to Custom Bookookie cutter worked great!clean if your dough is too tall, but that usually isn’t a problem for me. These need to be handwashed of course, but I’ve made lots of custom cookie cutters this way over the years, including life-size Mardi Gras Mask Cookies!

Flood coat of royal icing as smooth as possibleAfter the cookies were baked and cooled completely, I spread a flood coat of white royal icing that dried overnight so the books would be as smooth as possible for drawing and lettering such details. I didn’t get my first edible printer until October 2011, so these original Bookookies were all hand-drawn and hand-lettered, sadly messier than I hoped since I was trying to make the book page curve without any guidelines to spoil my nice smooth white royal icing surface. I drew all the black stained Piping black royal icing between the color blocks of the stained glass designsglass lead lines and lettering with a food coloring pen first, then I went over the color block outlines with a thin bead of black royal icing, which also needed to dry overnight before I could continue.

Once the black royal icing was dry, I used the small tubes of gel frosting plus custom-tinted Adding the stained glass gel frostings and final edge details to the Beauty & the Beast Bookookiesclear piping gel to have a full assortment of colors for the stained glass effect. I waited until after all the gel was finished before using food coloring pens to draw the page edges and the purple book cover edge. Even though the gel tubes were small, I still needed to use toothpicks to get into the corners and the fine detail areas! You also cannot spread the gel around too much across any black lines or it will re-moisten the black food pen and smear black into the gel. The other drawback is the gel frostings never dry, so you cannot stack these cookies for storage or they will stick together and ruin the Patio table display for Beauty & the Beast, including my brass candlestick, a small clock, teacup and teapot as you-know-whodesigns. However they did give a beautiful effect, enough that my friends lectured me on making edible art that is too much work so they felt too guilty eating them! 😉

I also decorated my patio table using my brass candleabra, a small clock, teacup and teapot Glass cloche over a real red rose from my garden that happened to drop petals during the partyas you-know-who, a glass cloche over real red rose from my garden, that happened to drop a perfect amount of petals during the party, plus I displayed some Disney collectibles and my Disneyland photo with the Beast by the Cinema Brittahytta movie clapboard sign.

Disney collectibles and my Beast photo by the clapboard sign

It was a fun night with a simple backyard barbeque menu, 10 adults, one kid and one dog. We had at least one viewer who had never seen the movie before, and he enjoyed it enough that we have reserved seats for opening night of the new movie version this week!


Click below to view all the photos of the party, including closeups of all six designs of the Beauty & the Beast Bookookies!

 
(more…)

Posted in Cinema Brittahytta, Edible Art, Parties | Tagged , , , , , , , | Leave a comment

Halloween 2016 – The Party!

The Webmistress with her portraitWhew…another great Halloween party this year! The rain that had been threatening all week drizzled a little in the morning and the afternoon gusts of wind made it difficult for tablecloths, but the weather stayed clear for the party as the Webmistress hosted a Victorian Halloween, with most of the special spider-themed menu as planned, many clever and gorgeous costumes, and even small children loved my Waltz of the Spiders front show and enjoyed posing with and hugging Winnifred the Giant Tree spider, even if the jumping and shaking spiders along the front walkway were a bit scary for them. 😉 I think The Webmistress with one of her "babies"we were 58 adults and 11 kids even though I think I might be missing some of the friends of friends…but from the amount of glassware I washed immediately afterwards and rushed to pick up outside the next morning as I heard the wind and rain starting again, that seems about right! This is definitely an example of the perfect quote for me: “I am thankful for the mess to clean up after a party because it means I have been surrounded by friends.” 🙂 Thursday night party prep!Thanks to everyone who helped me celebrate my favorite holiday!

Thursday night was opening night for our front show the Waltz of the Spiders at Castle Brittahytta even though we stayed inside working on party food. It was drizzling constantly all evening but thankfully no wind, and everything still worked fine through the Backyard lightingadvertised showtimes as some friends & neighbors watched, but despite all our waterproofing efforts Canopy table lightingincluding investments in specialty outdoor boxes and taping the heck out of every exposed connection, by 11pm the front show circuit was down, and by 2:30am even the pathway electrical for all the jack o lanterns and the front webcam was down. This also meant that Glen couldn’t work on the backyard party lighting that night because it wasn’t safe to work with open power Small tables in the backyardcircuits in the rain. Thankfully Friday afternoon & evening was clear to get everything out Glen's backyard lighting worked so well!front working again by showtime, then Glen did a FANTASTIC job with the backyard lighting! He set up the purple beanbag spider with fun colors, enough lighting for playing the bean bag toss “cornhole” game to the side, and using my new paper lanterns with clamp lights and 100W CFL bulbs, under the canopies it was almost as bright as inside! We are definitely keeping that arrangement for future parties!

Inside food tableI wish I had been able to take more days off work, since by party week the only completed food were the Spiders of the Sea black rice crab cakes ready in the freezer and all the faces drawn on the Mandarin Jack O’Lanterns, but in the 3 days I did have, I finally caught up on food prep: 6 dozen hand-formed Sourdough Spiders, baked & piped 8 dozen Ginger Web Cookies, made 6 dozen Patio food tablePumpkin Pasties using the filling & pie dough I had prepped earlier, baked 7 dozen Ghoulish Gravestone cookies and Edible Medals for prizes, prepped 4 Slimy Spiders sculpted from cream cheese for green jalapeno jelly, prepped the Spiderweb Brie en Croute, and Glen and I finished his new recipe brainstorm Fal-Awful Arachnids!

I did pipe several dozen royal icing spiders and made cotton candy TWICE for Spooky Spiders in Wispy Webs after discovering my oldest cotton candy machine had finally given up the ghost after 15 years, but the seals on the spice jars were not as airtight as advertised, since Creepy Cuisine table in the backyardless than 24 hours all 48 bite-size butterscotch Wispy webs inside the jars had already melted from ambient air moisture. *sigh* I made more cotton candy the next day to keep in reserve in plastic bins, plus spun more webs on the bamboo picks, also saved in plastic in hopes of adding to the jars just before party time, but that recipe ended up cut for time, hoping no one noticed it was still listed on the menu board! Thank goodness I only spent free credit card points to buy the 48 spice jars. I thought I had finally solved how to serve cotton candy at a party but I was still foiled again…we’ll see what I can find by 2018 when the Webmistress hosts again…

The Gargantula Cheese Ball!Thankfully most of the special spider menu went reasonably well, including the hilarious and tasty Gargantula Cheese Ball, and those will be exclusive to the new Creepy Cuisine recipe collection book from Eerie Elegance, hopefully on sale by summer! However, as I finished the menu chalkboard on Friday night and it almost didn’t all fit, I agreed with Glen when he said “I think that’s too much food!” I usually have too many ideas than I can execute and expect some to be cut for time, which is one reason I wait until the end to write the Menu chalkboard with glass cauldron of Bobbing Apple Punchmenu chalkboard, but I was as prepared as possible for the make-ahead food, and I was hopeful for the last-minute fresh food. However, as it came down to crunch time with only Glen and me this year and no house-elves arriving early, the fresh fruit & veggies never happened, and the cheese plates, cookie plates, and apple slices with caramel dip barely happened only with gracious help from Keith & Doug when they arrived first.

I did have full my costume on before 7:30pm, but as I directed the last food being set out and let Cyd set up the lab experiment bottles, I insisted on using my new lighted test tube racks Glowing Ectoplasm Experiments!so I quickly poured green Powerade vs. green Gatorade into the test tubes, turned on the lights under the racks, and took some Ectoplasm Experiments photos! Then I finally socialized at my own party! 🙂

We were trying for Ogle the Owls and Ectoplasm Experiments as the party activities, but I knew the mix your own experiment hasn’t gotten much participation since it debuted in 2005, and even though I had quiz sheets ready on the coffeetable for Ogle the Owls, I ran out of time to verify what owls were out! People partied through the entire house, enjoyed the Watching the front show the Waltz of the Spiders at Castle Brittahyttabackyard couch seating areas and small food tables, played my new bean bag toss “cornhole” set, especially the kids, and roamed outside to watch the front show, then as people started trying to leave, I gathered them to the backyard to award the prizes…

We don’t always have Scariest Costumes, but this year the votes went to ghostly Jacob Marley complete with heavy chains and chin bandage (Nicholas), fancy Jack the Ripper with his stylish victim (Sean/Laura), and since I didn’t have a prize for Epic Hair, I gave Juanita a medal for Scariest Hair 😉
Scariest Costumes Jacob Marley and Jack the Ripper with his victimI didn't have an Epic Hair award so I gave Juanita Scariest Hair instead!

Most Creative Costume went to Melissa as a black & white photo even with gray makeup, Robin’s amazing spider braids with classy corset, and adorable seasonal fairies Winter Fairy Nola & Autumn Fairy Violet. I joked with Robin that I’ve lost count how many times she has won Most Creative Costume! 😉
Most Creative Costume Winners Melissa, Robin, Violet and NolaRobin's amazing spider braids! Definitely Most Creative Costume!

The Ultimate Costume category never disappoints! This year three groups went all out!

Star Wars Clan with Kaelyn as Padme, Karin as Leia, Ellie as Rey, Kevin as Kylo Ren, Alex as Obi Wan, and Nathania as Hana Solo
Ultimate Costume Star Wars Clan

The Barbieris arrived as the Edwardian-era Downtown Abbey Clan
Ultimate Costume: Barbieri Downton Abbey Clan

Last but not least was the Ghostbusters Family including Abby & Erin with inflatable proton packs (Annalise & Kira), clueless Kevin (Mike) and a glowing blue ghost (Angie)! I also insisted on taking a photo in the lab with the glowing Ectoplasm Experiments. 😉
Ultimate Costume Ghostbusters Family! Ultimate Costume Ghostbusters Family with glowing Ectoplasm Experiments
People were already leaving and I was requested to show Nola where all the owls really were, so no other prizes were awarded as a group, but I had seen some very clever Creepy Cuisine arrive, so I awarded prizes to those who hadn’t left yet, and have a couple saved Edible Medals for others who won in absentia:

Creepy Cuisine awarded individually: Mari’s Mum’s the Word mummy pizza pockets, Sheila’s Spider Deviled Eggs
Creepy Cuisine winner: Sheila's Spider Deviled Eggs

Creepy Cuisine in absentia: Robin’s Vampire Donuts, Ashlyn’s Beheaded Cauliflower buffalo style, Kian’s Zombie Balls pizza monkey bread
Creepy Cuisine winners in absentia: Robin's Vampire DonutsCreepy Cuisine winners in absentia: Ashlyn's Beheaded Cauliflower and Kian's Zombie Balls

After the prizes were awarded many of the early-night crowd left as they usually do, while the late-night people stayed to chat, including lighting the gas firepit on the patio for a little After-party around the gas firepit on the patiowhile, but I wasn’t able to join them. Even my traditional overnight guests had to get home for morning commitments this year, so Enjoying the outdoor furnitureall the guests had already left by midnight, very early for my Halloween parties, and no after-party for me to sit down and relax this year! I did get a couple of Sheila’s delicious deviled eggs and a couple cocktails so that was better than many past parties. 😉 I put away the food and did the worst dishes, then pooped out around 3am. It did feel much better to get 6 hours of sleep rather than get up early to make brunch for guests, and we were able to relax on our free day with morning rain. As the sun came out again, Glen took a long nap while I retaped all the power connections in advance of the next sprinkles so we could run our front show again, then we headed out to look at other local Halloween home haunts for a change, which was fun!

The full photo gallery is included below for your viewing pleasure! I was extremely lucky the past few years with fantastic professional photographer Cat as a party guest, but she moved to Texas, so I am extremely thankful this year that Tracia, Sean, Robin, and Keith took photos to add to mine! Hope everyone had a Happy Halloween!

Posted in Halloween, Parties | Tagged , , , , , , , , | Leave a comment

Halloween 2016 – Waltz of the Spiders at Castle Brittahytta

Happy Halloween everyone! Tonight is the last chance to see our 2016 show live while The Webmistress Hosts a Victorian Halloween at Castle Brittahytta. Over 10,000 spiders emerge from the castle doors and crawl over the towers, ramparts and gravestones of Castle Brittahytta to an original musical soundtrack while the Ghostly Guardian watches over the castle as she has done for a thousand years. Here is the video in 4K for your viewing pleasure!

I hope everyone has a fantastic Halloween! My party photos from the weekend will be coming soon, so stay tuned!

Posted in Halloween, Parties | Tagged , , , , , , , , , , , , | Leave a comment

The S’mores Awaken

B-Rey-Ta and BB-8It was the most anticipated movie of 2015, and even though everyone most likely saw it already, 18 of us enjoyed watching Rey, Finn, BB-8, Han & Leia in The Force Awakens as our last summer backyard movie! The S’mores Awakened the fun food, including Starkiller Cocktails, Frozen Lightsabers, and my carefully-arranged BB-8 Cheese Plate, and I even pulled together a quick Rey outfit to go with the purple lightsaber I built at DisneyWorld!

B-Rey-ta from The Force AwakensSince my heart has always belonged to Star Trek, I have never dressed up as anything Star Wars ever before, but since the votes landed with The Force Awakens for our Cinema Brittahytta summer season finale, I figured I could quickly throw together a Rey outfit for fun. I know my lightsaber is the wrong color, but I built my own at DisneyWorld and I liked purple best since there was no aqua or teal blade. 😉 The hair was perfect for a hot summer day, and we mimicked some poster poses pretty well! For the full details how I assembled the outfit, see my separate costume post here.

Menu & Cocktail CardsI got lucky and was able to brainstorm plenty of fun menu and cocktail ideas for this theme, like Frozen Lightsabers, Millenium Fal-cones (Make Your Own Snow Cone), Jakku Sunset, Starkiller Cocktail with Glowing Lightsaber Stirrers (“an elegant stirrer…for a more civilized age”), Kylo Ren Kettle Corn, and Finn’s Fresh Fruit Salad. I grabbed images from online and designed menu and cocktail cards with the free Star Jedi font, which looked pretty good!

Menu chalkboard with The S'mores Awaken, BB-8 Cheese Plate & Finn's Fresh Fruit SaladI wrote out the menu chalkboard in the same classic Star Wars font, starting with “A long time ago in a galaxy far, far away…” in the blue font from the opening credits, listing the menu in the classic Star Wars font, ending with The S’mores Awaken – Light Side or Dark Side?

Due to lack of s’mores consumption this year, I have been attempting to recycling homemade marshmallows all summer! What started as the Trek chevrons for 50 Years of Star Trek were cut into small stars and rolled in blue & red sugar for Star Spangled S’mores for the 4th of July Fireworks & Fun, then to transform them into The S’mores Awaken I used the white stars with The S'mores Awaken - Light Side or Dark Sidenormal milk chocolate bars as the Star S’mores Light Side vs. black modeling chocolate slabs and black stars for the Dark Side…heehee! Thankfully I still hada stash of black modeling chocolate I could soften and roll just fine, and painting the marshmallow stars with black food coloring went fairly quickly.

Robin says, “May the S’mores be with you!”

Cutting lightsabers from cardstock for popsiclesFrozen Lightsabers aren’t an original idea, but I still had a ton of single popsicles from a kind donation in July, so I figured why not use them? I found a nice graphic of whose lightsaber is whose and enlarged them to cover the popsicle stick and as wide as the popsicle. I printed onto cardstock, cut them out, then prepped with double-stick tape, since I couldn’t assemble these Ellie enjoys her Frozen Lightsaberuntil people arrived or they would melt! I arranged them popsicle down in clean ice in a big bowl, and Ellie & I enjoyed ours, but I’m afraid most of them melted before others had their chance.

Millenium Fal-Cones ready and waiting to make your own snow cone!Millenium Fal-cones Make Your Own Snow Cones were all set up and ready to go on the kid-height table by the waterfall, but since Ellie has been making them all summer, they weren’t used until later in the evening….when E & V suckered their dad into shaving the ice for them…lucky kids! 😉

Millenium Fal-Cones shaved by dad! Millenium Fal-Cones shaved by dad! Millenium Fal-Cones shaved by dad!

Beware the menacing red Sith glow in the Kylo Ren Kettle Corn! 
Some of the fun food was just renamed. Finn’s Fresh Fruit Salad was a new name for one of my favorite summer staples. I can always enjoy leftover fresh fruit salad! The Kylo Ren Kettle Corn was our normal kettle corn in the Cinema Brittahytta popcorn boxes but with a menacing red Sith glow from the depths! I do love my little submersible LED puck lights adding a little glow almost anywhere!


Creating Glowing Lightsaber StirrersI have been using glowstick bracelets as drink stirrers for years now, so of course they were natural Glowing Lightsaber Stirrers “an elegant stirrer…for a more civilized age” just by printing smaller versions of the same Frozen Lightsabers images onto cardstock, cutting them out, then using thinner double-stick Glowing Lightsaber Stirrers tape to add to the ends of the unwrapped glowsticks. I left them uncracked until the party (except for the proof of concept test) so they would be ready for my custom cantina cocktails!

I designed two themed cocktails that could both be made as mocktails for others and that could use the Glowing Lightsaber Stirrers. The Jakku Sunset was inspired by a Tequila Sunrise but with pineapple juice and gold rum for a more exotic feel. The Starkiller Cocktail was a color story using my knowledge that the black vodka layers nicely over full-Kevin plots using his Starkiller Cocktail...beware!sugar blue raspberry mixer…and the bright red maraschino cherry looked like the eye of the beam! We used my LED glasses to make them glow, I still had star ice cubes from Fireworks & Fun that gave that extra Bartender B-Rey-Ta with her custom cantina cocktailsfinishing touch floating on top against the black vodka, and Kevin sure looks like he was plotting for the First Order and the Knights of Ren as he sipped his!

I do believe that of all this fun food, I am most proud of my BB-8 Cheese Plate, not only for the rhyme and the mosaic-style execution, but that I didn’t see any other BB-8 Cheese Plates online! You might have seen my carrot cupcake fail from earlier this year, so there was no way I was going to go through that Creating my BB-8 Cheese Platemess again…but I always have sliced cheese for parties anyway, so this was the perfect answer! BB-8 is already orange and white, classic cheese colors, so I only needed to paint some black food coloring accents and it looked great! When Ellie walked in and saw it, her jaw dropped to the floor and she couldn’t wait to eat him! Robin & Nathania were also jumping at the chance to make him BB-Ate…haha!

Had to take this photo! ;)We could have started the movie earlier since it was dark early enough, but there were still some on their way, so we finally started at the normal 9pm summer movie time…and I couldn’t resist taking the iconic shot of the words scrolling into the starfield! 18 of us was a nice full house for our summer season finale…and we did have two kids Lightsaber fight!who brought their own lightsabers to duel with Rey! No fair that E had TWO red lightsabers…those Sith are sneaky! 😉

I sure had a blast that so many of my friends could enjoy summer backyard movies with me again. Hope everyone enjoyed their summers too! Stay tuned for next year’s 10th anniversary season of Cinema Brittahytta with special surprises in store!

Lightsaber fight! Lightsaber fight!

Posted in Cinema Brittahytta, Edible Art, Parties | Tagged , , , , , , , , , , , | Leave a comment

Rey from The Force Awakens

B-Rey-ta from The Force AwakensSince my heart has always belonged to Star Trek, I have never dressed up as anything Star Wars ever before, but since the votes landed with The Force Awakens for our Cinema Brittahytta summer season finale, I figured I could quickly throw together a Rey outfit for fun. I know my lightsaber is the wrong color, but I built my own at DisneyWorld and I liked purple best since there was no aqua or teal blade. 😉 The hair was perfect for a hot summer day, and we mimicked some poster poses pretty well!

Rey & BB-8Star Wars heroines always have unique hair! Rey has essentially three ponytails that aren’t pulled all the way through, so they stay in floppy loops. I don’t have very thick hair, and what I have is fine and currently layered, so even with brand-new elastics and Rey Full Outfitstarting with gel added to fully wet hair, I had trouble with my loops slipping out of the ponytails, especially at my neck. I always get so warm during summer movie nights that this hairstyle was a nice treat!

Rey is a scavenger so it was appropriate for me to scavenge her outfit from what I already had in my closets and craft supplies! I have new khaki hiking pants that tie at the knee which were perfect so that was easy. I didn’t have a cap-sleeve ivory Chopping a competitor swag tee into Rey's tunictunic, so I cut a competitor swag tee I had never worn and left it unhemmed. My mom had given me some fur-lined black boots that were the perfect look, so glad I kept them!

Cutting leather jacket scraps into Rey's double-beltI found some leather scraps in my steampunk stash so I was able to hack together Rey’s double-belt that stayed anchored with safety pins. My wrist cuff was an old brown belt also from my steampunk stash wrapped around my wrist then buckled.

Before I found my gothic wrought-iron Castle Modern bed, I had a garden arch as a headboard with some faux floral draping over some long loose-weave muslin I had dyed a pale periwinkle to blend with my darker periwinkle sheet set. I have kept the muslin of course, and not only did I know exactly where it was, but there were two matching fabric scraps the perfect length for the arm wraps! Since I’m taller than Rey, I was concerned I might not have enough muslin to drape front and back properly, but it was so long I actually had to pin it shorter!

B-Rey-ta from The Force Awakens Rey Poster

B-Rey-Ta and BB-8I had to have the lightsaber light my face while holding my BB-8 Cheese Plate, and we even had a lightsaber battle after the movie…no fair that E had TWO red lightsabers…those Sith are sneaky! 😉 For the full story of our Cinema Brittahytta summer season finale, you can click here

Lightsaber fight! Lightsaber fight! Lightsaber fight!

Posted in Cinema Brittahytta, Costumes, Parties | Tagged , , , , , , , , , | Leave a comment

Hogwarts Fun to Prepare for the Cursed Child

7th year Hogwarts student Britta show the new recipes Golden Snitches and Chocolate Frog S'mores to Prepare for the Cursed Child

Back in 2011 I thought I was retired from Hogwarts parties because the last movie was being released…then lo & behold, in 2016 not only was a new Wizarding World movie “Fantastic Beasts and Where to Find Them” due in November, but a new Harry Potter story in July! It is only 320 pages since it is the script of the stage play in London only, but since Harry Potter and the Cursed Child picks up 19 years after the Battle of Hogwarts, this was the perfect occasion for 16 of us to enjoy some Hogwarts-style summer Cinema Brittahytta fun and watch the final movie with the 19 years later epilogue to Prepare for the Cursed Child!

Full Hogwarts chalkboard menu with Chocolate Frog S'mores and Golden SnitchesI got out my Potter paraphernalia from storage, including collectibles like Honeydukes candies, my interactive wand, the Hogwarts crest tapestry, and the Mirror of Erised, plus my homemade decor like my spellbooks, Horcruxes, ballpoint feather quills and homemade leather Sorting Hat, I set out the Ogle the Owls contest with prizes, and I wore my homemade Hogwarts student uniform from 2003 with robe but no gray house sweater since it was too warm. I brought back classic recipes like mini Cauldron Cakes, Butterbeer Light, Frozen Butterbeer, and Polyjuice Potion Punch (aka Bubbling Witches’ Brew), Herbology Fruit Salad, included my two summer staples Four Bean Salad and Cheeses & Crackers, plus I added two fun new recipes: the Golden Snitch corn muffins, and custom Chocolate Frog S’mores! Ellie and I even had an intense wizard duel, and an early birthday present “magically” appeared as I cast Wingardium Leviosa!

Elias pulls a Butterbeer LightI still had some unopened diet cream soda in my stash, so a whole 2 liter bottle plus 1 1/7th cups of sugar-free Torani English Toffee syrup made a spigot jar of Butterbeer Light with “all the alcohol & calories charmed away!” Elias claimed one of my four Butterbeer mugs from Orlando and pulled himself a pint or so. 😉 I also had some flat leftover non-alcoholic sugar butterbeer that was perfect to freeze into pucks for my ice shaver, but it took a full 24 hours to freeze because of all the sugar. Beware that if you try to freeze the original alcohol version it might never freeze solid! Since I wanted the ice The Sorting Hat enjoys a Butterbeer Lightshaver available as Frozen Potions Class, I shaved all eight butterbeer pucks right before the party, and stashed the Frozen Butterbeer in a covered bowl in the freezer to scoop into cups or mugs during the evening. I was even lucky to have some left and still fluffy when I started reading my copy of the Cursed Child book the following weekend!

Hogwarts Student Ellie with some disgustingly foamy Polyjuice Potion punchSeveral other kids were expected but only two attended, so there was too much other fun like Ogle the Owls to do the Frozen Potions Class Ellie added some more potion ingredients to her Polyuice Potion Punch...would it yield unexpected results?!?with the snow cone machine. I did have some potion bottles set up plus my foamy Polyjuice Potion Punch, also known as Bubbling Witches’ Brew in my book Enhanced Eerie Elegance and in my video series on YouTube. Ellie added some more potion ingredients to Disgustingly foamy but extremely tasty Polyjuice Potion Punchher Polyuice Potion Punch…would it yield unexpected results?!? All I noticed was lots of energy into the evening for an intense wizard duel AFTER the long movie! 😉

"I open at the close...and I'm quite tasty!"I had scanned & printed edible Golden Snitch wings back in 2012 to add to a gilded modeling chocolate orb for the Hogwarts student cake for Piper’s Potter Party, and I always planned to make a batch of cupcakes to demonstrate possibilities and post the wafer paper sheets for sale on Etsy, but I never got around to it. Here was the perfect Same vegan corn muffins as Luscious Little Lionsopportunity, but I already had SO many sweets on my menu, I tried to think of something savory. Voila! The tasty vegan corn muffins that have appeared at two previous movie nights as Luscious Little Lions should be perfect! Cutting a thin slit to insert the cut wafer paper Golden Snitch wings I only had white whole wheat flour and not even a milk alternative, plus I used my shallower mini muffin pans, so they ended up a little drier than usual, but they still looked perfect once the wafer paper wings Completed Golden Snitch corn muffinswere carefully tucked into small knife slits in the crumbly cornbread! I couldn’t believe that I didn’t even think about Harry’s winning Quidditch catch in his mouth before we took photos! “I open at the close…and I’m quite tasty too!” 😉


Cutting around custom-printed Chocoloate Frog Card frosting sheets on homemade marshmallows
I didn’t have my edible printer until after I “retired” from my Hogwarts parties, and I had so much fun using the papercraft projects I had designed for my parties as edibles for Piper’s Potter Party, I wanted to try something new! I had already made Chocolate Frog cards & boxes as cookies, and s’mores are my summer special dessert, so Chocolate Frog S’mores were born! I didn’t have time to create new card designs, so I used the fun photos of my friends that were the original test batch years ago, including Dobby & Nearly Headless Nick from my Year 7 at Hogwarts party in 2007, Captain Glen, and myself as a couple different characters, printed them on frosting sheets in my edible printer, cut out all the cards, mixed up some homemade marshmallows (only 2/3rds of a batch this time but the same recipe as 50 Years of Star Trek), smoothed out the marshmallows as best I could, then gently set the cut frosting sheets on the sticky surface of the fresh Cutting the perfect size homemade vegan graham crackers for the Chocolate Frog marshmallow cardsmarshmallows while they set overnight. I crammed them closely together with just enough room to cut between them, and I was lucky my small metal spatula server was the perfect size, since my rolling pastry cutter would have overshot too much!

While I was waiting for the marshmallows to set, I baked my now-traditional vegan graham crackers, using the frosting sheet backing papers to cut the graham crackers into pentagons that were exactly large enough around the marshmallow cards to show. I didn’t bother making matching top crackers this time since I was already rushed for this party from too much July chaos.
Painting eyes on the custom-molded Chocolate FrogsOf course the chocolate was the frogs! I insisted on a realistic frog mold for my papercraft boxes and used the cutesy version for my Peppermint Toads, but the realistic frogs are quite small, so I thought the cutesy frogs would be a better amount of chocolate for the s’mores. It took a couple times of spooning melted Ghirardelli 60% cacao baking chips in my two molds to get enough frogs, then since now I have nifty Completed Chocolate Frog S'moresChoco-White edible paint, I added googly eyes to all the frogs…heehee!

The marshmallow cards sat on the matching graham crackers, but setting the chocolate frogs on the marshmallows completely covered all the fun people details, so I set the frogs in a separate footed dish in the center of the large tray so everyone could take a frog with their s’more.Why did everyone choose Dobby to roast?!?

With all the choices of cards, I’m not sure why everyone chose Dobby to roast?!? Poor Dobby! The frosting sheets don’t roast like the marshmallows do, Ben enjoys is roasted Chocolate Frog S'morehomemade marshmallows melt easier than storebought, and the lack of top graham cracker caused logistical issues, but Ben still enjoyed his Chocolate Frog S’more!

As we were enjoying the evening chatting, eating, and some playing Pokemon Go, since I had my wand out, Glen asked me what the levitation spell was. “Wingardium Leviosa” I replied. He said, “You Glen flies the USS Enterprise 1701-A drone right at me!have to do the right wand motion,” so I did my swish & flick. Then he said, “Now do it to the couch”…I did, and magically the USS Enterprise NCC-1701-A floated up into the sky!!! I had seen earlier this year that there was a 50th anniversary drone due in July, and he found it for my birthday! All the crashing was extra hilarious after seeing Star Trek Beyond the night before. Glen demonstrated his newly-practiced drone flying skills all around the backyard, Elias had fun catching it with a bean bag when it fell, and I got a couple fantastic photos and The USS Enterprise 1701-A drone complete with birthday bow on the bow! ;)funny videos! My first attempts flying inside after my first lessons were pretty bad, so I will need more practice for sure! Thank you so much, Glen!

Here are some videos of the 50th anniversary USS Enterprise NCC-1701-A drone in flight! Glen demonstrated his newly-practiced drone flying skills all around the backyard!


Frozen Butterbeer with my Hogwarts dinner!After the movie was finished, no one had any Butterbeer Floats, but some more Frozen Butterbeer was enjoyed, and several were toasting their Chocolate Frog S’mores over the fire pit. Outstanding Owl Ogler Ellie winning her prize from the treasure chestEllie wanted a prize so I told her she at least had to try to find some of the owls! She found quite a few, so I awarded her Outstanding Owl Ogler with her selection from the treasure chest! Not too long after, she challenged me to a wizard duel, which was quite a battle! Thanks to Glen for capturing all the intense wand action! 😉


Wizard Duel: Ellie vs. Britta Wizard Duel: Ellie vs. Britta Wizard Duel: Ellie vs. Britta

After such a fun party plus the refresher of watching the movie, I was definitely Prepared for the Cursed Child! You can see how much fun everyone had by clicking to view the rest of the photo gallery…and there’s one more movie before this summer season is over, so stay tuned!

(more…)

Posted in Cinema Brittahytta, Edible Art, Parties, Recipes, Wizards | Tagged , , , , , , , , , , , , | Leave a comment

Fireworks & Fun 2016

Fireworks 2016We had another year of fantastic Fireworks & Fun for the Fourth of July! The parking shuttle service was used for the first time ever, and 24 of us enjoyed a warm afternoon but a chilly evening with barbecue, snow cones, several salads, a new Fresh Watermelon Keg, Sparkling Sugar Star cookies, my traditional homemade vanilla custard ice cream, and new Star Spangled S’mores! Thanks again to the City of Santa Clara for the stunning show!

Festive Fourth Friday OutfitsThis year I paced myself much better by decorating and only making one or two food items each night, so during my weekend before the Monday holiday, I had time for Margarita Friday with friends, a patriotic pedicure, and even a Sunday evening hike! Little did I know that was an even better plan than I knew, since I woke up 5am party day miserable with suspected food poisoning…ugh! I called my mom to ask for any tips getting through it and if there was Professional Patriotic Pedicureany chance I might feel better by evening, then my dad insisted she drive the 3 hours to come help me. Thank you very much, Mom! I didn’t touch any food all day, party or otherwise, carefully sipping Gatorade & ginger ale to stay hydrated with electrolytes and sugar calories, and my mom set out all the party food and disinfected doorknobs and surfaces just in case I was contagious. I had to take several Mom taking a photo of the impressive fireworks!breaks to lie down, but thankfully all the guests had a great time as usual. My mom had been pondering coming to see “my” fireworks one of these years, and she was really impressed how close they were and such a perfect view from my yard! She was even taking photos to post on Facebook…haha!

Cutting stars from Star Trek chevrons...can't waste all those homemade marshmallows!Since I had made 50 special s’mores with homemade marshmallows for 50 Years of Star Trek movie night the week before, but not many were eaten, I found a Dipping homemade marshmallow stars in red & blue pearlized sugarmetal star cutter that fit just inside all the Trek chevrons to cut star marshmallows. While the edges were sticky, I dipped them into a mix of red and blue pearlized sugar, then used normal Hershey bar squares and the same graham crackers as the Trek s’mores. I had these all assembled and Assembled Star Spangled S'mores 2016 version, ready to arrangecovered on the big baking sheet so all that was needed on party day was to arrange them on the big silver platter. Robin did a great job!

Menu Chalkboard with Star Spangled S'mores 2016 versionThe fresh watermelon keg was new this year since Robin had seen it online & really wanted to try it. I was able to get the tap kit from Amazon in time, but Tracia scooped the watermelon to be the keg, and my mom & Kian turned the extra watermelons into juice, plus Ben brought more he had juiced at home. I heard it was refilled three times Fresh Watermelon Kegduring the party, so it was definitely a hit! I immediately froze the extra watermelon juice since I think another watermelon keg will appear before this summer is over. 😉

No one made Razzle Dazzle Tinis this year since I usually lead by showing everyone how to make them, and I quickly erased the Corndog Sparklers from the menu chalkboard since those were scheduled to be made the morning of the party and didn’t happen. My first guests Main Food for Fireworks & Fun 2016are always kind enough to help finish setting food out, and all the help was really appreciated this year since I couldn’t touch anything! In addition to the s’mores, Robin also arranged the Sparkling Sugar Stars, Kian helped using the stick blender to pummel the watermelon juice into submission, Rob & Bethani set out all the new patriotic fans I got in case it was too hot, and Tracia finished arranging my new little red, blue & white LED star lights on the tables, then I could take photos!

Outer Patio Food Table with WaterfallThe outer patio table with the bunting was for more guest food, the Sparkling Sugar Star cookies, and grilled items. Ben’s Chocolate Frosted Banana Cupcakes were tasty on their tier tower! Since that table was also already getting too full, we decided the kitchen dining table would be for desserts like Rob’s famous cheesecake, Sheila’s patriotic coconut cake, Nathania’s Oatmeal Fudge Bars, and Jerry’s Cherry Tart.

Here is the full menu of what I provided for Fireworks & Fun 2016:

Fireworks & Fun FoodRazzle Dazzle Tinis
Fresh Watermelon Keg
Make Your Own Snow Cone
Patriotic Pastry Brie with Smorgabritta Spiced Loquat Preserves
Aged Manchego Slices with Smorgabritta Quince Preserves
Celestial Cheeses
Four Bean Salad
Grilled Sweet Potato Salad
Outer Patio Food Table
Apricot Cashew Quinoa Salad
Old Glory Green Salad
Festive Fruit Salad
Sparkling Sugar Stars
Star Spangled S’mores
Homemade Old Fashioned Vanilla Custard Ice Cream

Ellie, Master Snow Cone Maker!Ellie is a master snow cone maker from all her practice during several summer seasons now, so she showed Elias how it was Ellie serving Marco a snow conedone, then they kept walking around asking everyone if they would like a snow cone…what excellent service! I wonder if their arms were sore the next day from all that manual ice grinding? I even had a couple plain ice snow cones myself. It was the only crunch I had all day and it tasted so good! 😉

Playing Rock Band before fireworksWe got out Rock Band while the sun was going down, but we didn’t turn everything on until the sun was completely off the screen, about an hour before the fireworks started. At Homemade ice cream ready to enjoy during the fireworks show!9:15 my mom dished up my homemade ice cream, this year on the outer patio table – why had I never done that before? We brought the fruit salad out and arranged with the star cookies as a little sundae More Rock Band after fireworksbar. With only 24 people this year, there is even more ice cream left over. At least I knew it tasted as good as usual since I licked the spoon on Friday night after I made it! 😉

The fireworks were over by 10pm, but traffic is a total gridlock all around my neighborhood for at least an hour, so some played Rock Band, while at least a couple others tried melting some Star Spangled S’mores over my new gas firepit. It sure was easier to light the gas firepit AND turn off, but I’m not sure if it gives as nice of a char flavor on the marshmallows? Kevin and Ellie seemed to enjoy them for sure!
Roasting a star marshmallow Freshly-melted star marshmallow on a Star Spangled S'more Kevin & Ellie enjoying their Star Spangled S'mores Kevin & Ellie enjoying their Star Spangled S'mores

There were plenty of fun things I missed but at least I took a few photos of partying people, and even attempted a quick selfie in hopes of showing my red streak in my twisted hair and my LED star necklace. 😉
Tracia & Cyd Marco, Ben & Robin enjoying the shade on the patio couch Partying People on the Patio Sheila feeds a Celestial Cheese to Festive Onyx
Finally some shade in the grass Partying People on the Patio Pile of Partying People? Party selfie with red hair streak and LED star necklace

I was able to put out a few flags, the paper lanterns, and my front door wreath the morning of the party, and I had decorated inside in advance, but totally forgot to take photos inside this year. A few more decor photos are in the full gallery below.
Outside Decor Outside Decor Outside Decor Patio Decor

You can see the full photo gallery with all the partying people by clicking the link below. Huge thanks to everyone who helped and had fun, especially my mom who went above and beyond the call of duty! Hope Santa Clara keeps having annual fireworks so I can keep having my Fireworks & Fun party! 🙂

(more…)

Posted in Outdoors, Parties | Tagged , , , , , , , , | Leave a comment

Cinema Brittahytta Season Premiere – 50 Years of Star Trek

Lt. Peterson to Enterprise...let's celebrate 50 Years of Star Trek!This weekend 18 of us celebrated 50 Years of Star Trek as the Cinema Brittahytta Season Premiere…as Jen said in her RSVP, “Yay, it’s officially summer!” Since it was so hot, I wore my Classic Trek lieutenant’s uniform I made 15 years ago, complete with vintage boots, and we enjoyed Redshirt cocktails and grilling Starfleetza Pizzas, but no one melted any of my homemade marshmallows of the 50 S’more Trek special s’mores I made, one for each year…darn!

Personal Trek Fun and ToysThere is so much great Trek to watch that it is hard to choose only one to watch to celebrate all 50 years, but for the sake of the next movie “Star Trek Beyond” opening in July, I chose to watch the 2009 reboot with Spock Prime and the new cast. Many of us had forgotten what an entertaining movie it is, and we were thankful we could still enjoy Leonard Nimoy and Anton Yelchin on screen even though they are no longer with us.

This was rushed decorating, since I only had 4 days after returning from a 2-week vacation in Spain seeing 26 castles in 10 days, so I only put up a few posters, got out all my Trek uniforms, and arranged all the Trek toys, collectibles, and photos I could easily find. I didn’t get the table Some of my Trek costumes and tshirts on displayarranged until after the first guests arrived, but then it looked great! I especially love how so many eras of my life have fun Trek photos to make me smile!

Special Trek slideshow then trailers before the movieI was able to throw together a quick slideshow of all the movie posters, some blooper shots from several TV shows & movies, plus my personal Trek fun since 1991 that included several friends who were in attendance. Little Julianna found me to tell me excitedly that she saw me on TV, and it was pretty funny to tell her to watch for her dad Jeff and Uncle Louie on TV too!

Sheila got into the Trek spirit by wearing the Spock shirt I painted in highschool!I have even more Trek tshirts in storage, but I got out the shirts I could easily find to be available for anyone to wear if they wanted, so Sheila got into the Trek spirit by wearing the Spock shirt I painted in highschool! Classic Trek style soft-focus courtesy of my smeary lens…we’ll call it an intentional effect! 😉

Partying People on the PatioThankfully the sun was behind the trees by the time people started arriving, so even with fans running on the screened patio, outside was much cooler. I was running around so much that my face never cooled down until after dark!

50 Years of Star Trek menu with S'more TrekHere’s the menu for the evening, with some of the quickest chalkboard art I’ve ever done right before guests arrived…it turned out much better than I expected. 😉

50 Years of Star Trek Menu: Ice Trek Cocktails with custom ice cubes from Classic Trek and The Next Generation! More details about Romulan Ale, The Redshirt, and the Vulcan Death Grip below. Starfleetzas – Grill Your Own Pizza, Chevron Cheeses, Federation Fruit Salad, Commbadge Chocolates, using NextGen commbadge molds I made in 2002, then hand-gilded with gold and silver luster dust, and finally S’more Trek, a full tray of 50 special s’mores, one for each year!

Ice Trek Cocktails on the barI knew I wanted to make a cocktail called The Redshirt, but it wouldn’t be Trek without some vivid blue Romulan Ale, then I added something green to be the Vulcan Death Grip. Yes, those are Trek shot glasses from my collection! The complete cocktail recipes are at Glen was brave enough to add more tequila to his Redshirt cocktail!the bottom of this post if you can’t read the cards in the photo. Only Glen was brave enough to add even more tequila to the already-mixed berry margaritas, but thankfully he survived the traditional redshirt fate! 😉

Classic Trek Chevron Ice Cubes for Ice Trek CocktailsBefore I left on vacation, I made several rounds of ice cubes using the custom silicone molds I had made years before, the Classic Trek chevron I made to fit custom s’mores several summers ago, and the Next Generation commbadge mold I made for the first Trek Mystery party in 2002. After I had enough ice cubes, I started molding chocolates, just melting my trusty 60% Ghirardelli baking chips and chilling in the fridge until set. I also made 30 Trek chevron Starfleetza pizza crusts before the trip, safely stashing them in the freezer, then I was on my way to Spain…

Pouring melted chocolate into the custom Trek chevron silicone molds Pouring melted chocolate into the custom NextGen commbadge silicone molds Unmolded Trek chocolates, ready for decoration Barely baking the Starfleetza crusts to keep their shape 

When I got home, there was still all the luster dust to paint on the chocolates, plus decorating and making other food! It was only a couple hours to add the gold to the Classic Trek chevrons, but it took a couple evenings to finish all the gold and silver on the Commbadge Chocolates. Too bad I didn’t see anyone eating them, but at least they looked great…ready for Captain Picard to tap and say “Picard to Enterprise!”

Painting gold luster dust onto the Classic Trek Chevron Chocolates Painting both gold and silver luster dust onto the Commbadge Chocolates Finally finished gilding all the chocolates! Completed Commbadge Chocolates 

I had a new idea this year to make my Violent Vertebrae rollups into Trek chevron shape as Reboot Rollups. The lavash bread doesn’t bend into points very well so the shape is only Reboot Rollups for 50 Years of Star Trekapproximate, but they worked pretty well. Spread the jalapeno artichoke dip on the lavash bread, taking out any large chunks, roll up inside foil, but instead of leaving as a round roll, squash lengthwise into a point on one side, with the two legs of the off-center chevron on the other side. Freeze overnight in this roll shape so they are nice and solid. Remove from the freezer and use a serrated knife to gently saw slices away from the roll while keeping the chevron shape. Arrange on a tray while they are still frozen for easier handling, then cover and let thaw completely in the fridge before serving.

Spreading the artichoke dip onto lavash bread for Reboot Rollups Forming the rolled log of lavash bread and artichoke dip into the Trek chevron shape Forming the rolled log of lavash bread and artichoke dip into the Trek chevron shape Cutting the chevron shapes away from the frozen rollup log 

Bending custom cookie cutters for Star TrekThe whole reason I finally bought a stand mixer was to make my own marshmallows several summers ago….but the cookie cutter I had custom-bent into the chevron shape back then had disappeared since it had been Cutting Star Trek Chevron Cheesesborrowed! To cut marshmallows you need a solid tall metal edge, not my copper tape I use for other custom cookie cutters, so thankfully I had another simple oval in my stash to bend a new Trek chevron. While I was at it, I made a smaller chevron a better size for custom Chevron Cheeses, which worked great!

Mixing the thin ribbon of boiling sugar syrup into the bloomed gelatinFinally, with the new cutter ready, and the pans prepped with wax paper, non-stick spray and lots of powdered sugar, I was ready to make the marshmallows! This time I used Alton Brown’s marshmallow recipe (full recipe at the bottom of this post), but I added some honey since I was at the tail end of my corn syrup. This added a nice extra flavor without affecting Marshmallows almost to maximum fluffthe sugar crystallization. After the thin ribbon of boiling sugar syrup was finally mixed into the gelatin and completely fluffed up stiff, it was ready to spread into the pans to set. I wanted to make 50 special s’mores, one for each year, so I filled one sheet plus almost half of the other, only Homemade marshmallows spread and dustedabout 1″ tall. I sprinkled more powdered sugar over the top then patted the surface with another sheet of wax paper to smooth the top flatter, then let them set overnight. The next evening I Flipping over the marshmallow slabflipped over the entire slab of marshmallow onto a freshly dusted sheet of wax paper, then using a dish of water to keep the cutter from getting too sticky, I was barely able to get 50 chevrons cut, but there are cutting scraps of course. Maybe I can save them for winter to cut up for hot chocolate, but it’s Cutting marshmallows is sticky stuff!too hot right now to enjoy them that way! As each was cut I dusted the reverse side with more powdered sugar and set them on another wax paper lined tray. I kept the cut marshmallows covered one Closeup of S'more Trekmore day until I assembled with my gilded Trek chevron chocolates and the purchased graham crackers into a full platter of S’more Trek!

I blew it and only took before photos of the Starfleetza pizzas in action, not any of the ones everyone made for dinner! Big thanks to Sheila for bringing a cheddar jack cheese mix to add to my mozzarella, plus setting out all the pizza toppings in my custom-melted space-age dishes I saved from the 2002 Trek Mystery party. 😉 Starfleetza Pizza Crusts ready with the USS Enterprise pizza cutter!Of course even though I made the crusts small enough they didn’t really need cutting, I had to get out the USS Starfleetza Pizzas ready to grill!Enterprise pizza cutter I got as a Christmas gift a few years ago! Heehee… It did make for an awesome photo in front of the perfectly positioned pile of pizza crusts!

As is usually the case with my movie nights, I am finally assembling my own dinner as the trailers are running, then I get to sit down in the cool night air and enjoy my dinner on my lap in front of the big screen. When I realized I didn’t have any finished Lt. Peterson's dinner: Starfleetza grilled pizza, Reboot Rollup, Federation Fruit Salad, Chevron Cheese, Commbadge Chocolate, and S'more Trek!Starfleetza pizza photos, I decided to take a photo of my dinner plate in front of my 25th anniversary Trek print with Kirk and Picard…then saw my own reflection too!

Keep reading for the full photo gallery plus complete recipes for the Ice Trek cocktails and the homemade marshmallows…and stay tuned for two more movies this summer!


(more…)

Posted in Cinema Brittahytta, Edible Art, Outdoors, Parties, Recipes | Tagged , , , , , , , , , , | Leave a comment

Holiday Happy Hour 2015

HolidayHappyHour2015 - 26I took a break for 2014, so I was eager to have my Holiday Happy Hour again in 2015! This year had a theme…Crystals & Diamonds! Not only do they go well with ice and snow, but December 13th, 2015, was my crystal anniversary marking 10 years of HolidayHappyHour2015 - 25Brittahytta, and it is also the house’s diamond anniversary at 60 years old!

I think it was a new record for Christmas parties, since the grand total was 53 of us celebrating the 10th anniversary of Brittahytta and Lucia Day Swedish Festival of HolidayHappyHour2015 - 29Lights at my Holiday Happy Hour! Not much food was left, two batches each of hot cider and mulled wine, refills of cookie plates, and the absolute disaster of the cookie decorating station are all evidence of all the fun. I even had some new edible art this year with the Delicious Dairy Dalahäst cream cheese dala horse, so that will get its own post. Everyone enjoyed my special new outside decor too, especially the kids, and that is best shown by the video included here. 🙂

Please enjoy the full photo gallery below, and I hope everyone has a happy holiday season!

(more…)

Posted in Christmas, Parties | Tagged , , , , , , , , , , , , , | Leave a comment

Halloween 2015 – The Party!

Halloween 2015 Scream Team with the full front show!Whew! My Halloween 2015 party was thankfully another grand success! Since people brought friends I didn’t know I’m not exactly sure, but I think it looks like our total this year was 67 people including 8 kids. Not an all-time record but not shabby at all! The weather cooperated this year, thankfully not raining until a couple days later, my new backyard canopies worked perfectly to spread out the crowd, I had international help for party prep this year, and I have one of my favorite Halloween Scream Team photos yet with my skeleton boys Scary Jerry and Ghoulish Glen standing with me as La Muerte in the ghostly graveyard next to the “live” skeleton mariachi band under the giant glowing harvest moon!

Glowing GraveyardThis year, we were inspired by the uniquely beautiful and creative Mexican traditions of Dia de los Muertos for our own Day of the Dead celebration! Our front show was the major effort this year, with a “live” skeleton mariachi band singing and playing for their ghostly ancestors in a joyous graveyard celebration lit by hundreds of flickering candles below a glowing harvest moon! Even though the show wasn’t fully ready for prime time until the wee hours of Friday morning, everyone at the party loved it! Some comments we enjoyed hearing were “your skeleton banter toed the line of too The Mariachis de Muerte have an audience!corny and succeeded” and “the graveyard looks just right and these stories are like the tall tales I heard at home in Oaxaca” plus “another amusement-park quality display!” Everyone said we outdid ourselves yet again, and even we aren’t sure how we can top this one! At 6am Friday morning when the skeletons were finally dressed and the multi-colored papel picado-style banners were hanging in the graveyard, Ghoulish Glen said to me, “I know we always try to plus it, but I think this time we multiplied it!” haha…

Skeleton Boys and Mariachi SeanSo many party guests took the Day of the Dead theme to heart, so we had so many painted skull faces and some fabulous outfits! I had my makeup on and was wearing a fun sugar skull tank top Carla & Erica with my front porch La Catrinawhile I was still performing the last party prep tasks as guests began arriving, but at least I was in full La Muerte costume out in the graveyard by 8:30pm!

Skull Sheila!The Calavera Cookie Contest decorating table was in use all night, so much that by morning there were only a couple cookies left of SEVEN DOZEN when the party started! The only quiz this year was Spot the The Calavera Cookie Contest table was in demand all night!Skeletons to find all the skeletons at the party (skulls-only didn’t count), but even though there were people sitting on the living room couch for quite a while, none of them ever looked up when they heard the knocking, so they missed the coolest skeleton of all, waving in the skylight to people below!

Partying people in the backyardPeople had already started leaving before 10pm, so I quickly tried gathering everyone in the backyard to Partying people in the backyardvote and award the prizes. You must be present to win, but I saved some edible medals for my favorite costumes and Creepy Cuisine!

Without further ado, here are the winners!

Creative Calavera Cookie: Ellie, Katie, Kian, Annalise
Creative Calavera Cookie winner Ellie! Creative Calavera Cookie winner Katie! Creative Calavera Cookie winners Kian & Annalise!
Spot the Skeleton: Supreme Skeleton Spotters Mari, Meghan, Nancy
Supreme Skeleton Spotter Mari! Supreme Skeleton Spotter Meghan! Supreme Skeleton Spotter Nancy!
Scariest Costume: Brock as Herman Munster
Scariest Costume winner Brock as Herman Munster!
Most Creative Costume: Katie as Jackie Kennedy, Robin & Charles’ outstanding paper masks
Most Creative Costume winner Katie as Jackie Kennedy! Most Creative Costume winners Robin & Charles for their outstanding paper masks!
Ultimate Costume: Brock & Shannon as Herman & Lily Munster, Gnome Family Cyd, Mike & Elias, Barbieri Mariachis with Piñata Ashlyn. Honorable mention in absentia for Jen the Pumpkin Boxtroll!
Ultimate Costume winners Brock & Shannon as Herman & Lily Munster! Ultimate Costume winners the Gnome Family Cyd, Mike & Sleepy Elias! Ultimate Costume winners the Barbieri Mariachis with Piñata Ashlyn! Ultimate Costume Honorable Mention in absentia for Jen the Pumpkin Boxtroll!
Creepy Cuisine: Scary Jerry’s Mexican Chocolate “Poo” cupcakes, Debi & daughters for their Puking Pumpkin. Honorable mentions in absentia: Erica’s adorable pretzel Skelly-Cakes & Kevin C’s delicious chicken wings
Creepy Cuisine winner Scary Jerry for his Mexican Chocolate "Poo" cupcakes! Creepy Cuisine winners Debi & daughters for their Puking Pumpkin! Erica's adorable pretzel skeleton cupcakes! Kevin C's delicious chicken wings
Ultimate Distance Award: all the Canadians! Not only did Shannon’s extended family travel the furthest to attend this year, but all of them helped immensely with party prep! I thanked them profusely in front of everyone, and I thank them again now!!!
Ultimate Distance Award: all the Canadians! Not only did Shannon's extended family travel the furthest to attend this year, but all of them helped immensely with party prep!

Party guests watching the front showAfter the awards were presented, everyone kept chatting, eating & drinking, sometimes going back out front to watch the show again, since it ran every 20 minutes. The last guests left around 3am, and I was so completely exhausted from only 4 hours sleep over The after-party...heh!2 days that I barely got the perishable food put away and some dishes soaking in the sink before I had a quick shower to get my makeup off, then crashed in bed at 4:30am…whew! What a fantastic night!

You can click to keep reading for my detailed party post-mortem, or skip to the end for the combined party gallery of ~300 photos from Cat, Kevin C. and me La Muerte in the Glowing Graveyardif you like, and you can also click over to Facebook or the professional album for all the photos taken by the fabulous Photography by Cat (aka Gamora from Guardians of the Galaxy for this Halloween).

There will also be other posts coming soon of our public show run including Halloween night, and for other behind-the-scenes projects including my elaborate La Muerte costume with giant sombrero and flickering candles above and below! Hope everyone had a fun Halloween like we did!

(more…)

Posted in Halloween, Parties | Tagged , , , , , , , , , , , , , | Leave a comment

Giant Gravestones!

More foam to make giant gravestones!My artistic vision for this Dia de los Muertos inspired Halloween has a secret plan that requires truly giant gravestones, larger than I have ever made before! Even though I recycled as much of the Spirit Materializer and other foam scraps as possible, those weren’t large enough for the main structures of the seven gravestones for this year, so I tied 6 big sheets of 2″ thick insulation foam to the top of my car and started designing.

Scary Jerry had given me a nice Day of the Dead coffeetable book for Christmas, the movie The Book of Life showed several designs I thought would be appropriate, plus I searched online for actual Mexican graveyard photos in hopes of adding some authenticity to the look. Those inspired my designs for shapes as well as colors. I’ll admit I never saw quite so many vividly-painted gravestones so close together without plain ones between, but I did see all my gravestone colors represented in real graveyard photos…yes, even the turquoise one! 😉

An extra-long jigsaw blade makes foam cutting a breeze, but leaves fuzz all over!In August, Scary Jerry & I worked on cutting and carving new giant gravestones. I had learned my lesson from previous foam cutting and purchased an extra-long jigsaw blade so I could cut all the way through the 2″ thick foam insulation sheets. I couldn’t find a smooth blade though, so the fine teeth spit fine foam dust everywhere! Sure glad I could use my back lawn for all this mess!

Adding levels for interest, including the old doorway archI had planned for levels and shelves to add interest as well as stability, so I used a lot of toothpicks toed in at angles along with glue to assemble all the shapes. For the shelves and brackets, I used scraps of old broken stone walls. Each gravestone also had an altar slab, with the gravestone sitting on the altar slab to hold them in place together. I Anchoring the glue with toothpicks toed in at angleswanted altars with stairstep levels that I had seen on so many authentic Mexican gravestones, but I didn’t want to double my foam cost, so I cut strips to make a vertical inset border that gave the impression of stairsteps. These strips also helped keep the vertical gravestones in position.

Gravestones with new sidepieces for stability and hiding effectsOnce I got them all standing, I realized that they were so tall that just rebar in the gravestones wouldn’t be enough, let alone too much of the secret setup in back would be revealed. Luckily I had enough large foam left to cut side panels for each tall gravestone which helped a lot with stability. I had tried drilling the rebar into the foam then inserting PVC, but this pellet foam will all of a sudden compress instead of drill cleanly through, ending up with giant PVC channels glued into the corners to slide over rebar pounded into the grass holds the Giant Gravestones in place even in wind!holes, cracks, or even complete breaks. After I repaired those, I used liquid nails to glue the PVC lengths into the inside corner of each side panel. Having that slide over the rebar plus tightly nested with the altar strips has held stable for all seven stones for a month now, even 7ft tall Señor Kilja only barely wiggling in some really gusty wind, so I’d call that a success! Whew!

Scary Jerry was using his own woodburning tool as our foam stone texture carver extraordinaireAs I finished carving the epitaphs and fine detail, Scary Jerry was using his own woodburning tool as our foam stone texture carver extraordinaire, “chipping” away Assembled giant gravestones hidden away looked pretty silly!at edges very artistically so they really looked like stone. I had to pack up for the last summer movie night then leave 9 hours later for a work trip to Brazil, so I crammed all the giant gravestones into my side yard to hide them and keep them safe, but it looked really silly! 😉

Yours truly spraying colorful Mexican-inspired basecoats on plain white foam gravestones...On Saturday of Labor Day weekend we went from plain white gravestones to painted and aged, thankfully using my handy sprayer with custom-mixed colorful Mexican-inspired basecoats from cheap acrylic craft paints. It was hot enough that the basecoats were dry quickly enough for Scary Jerry to try his hand at my water and spray paint aging technique. By Monday evening all the Front layout with test sombrerosgravestones AND skeletons were standing in place so we used some test sombreros to see how the full display might look…exciting to see the potential!

Scary Jerry aging gravestones with spray paint and dripping water after basecoats were quickly dry in the hot sunshine...The next weekend we were all working hard again. Scary Jerry was learning to accent paint gravestones Eerie Elegance-style, which means not so dark that it looks like cartoony like you drew with black marker, but dark I never thought I would need a stepladder to paint a gravestone!enough to read all the carvings at night. My previous gravestones have been table size at most, so I would accent paint them while I was sitting at my work table. I never thought I would need a stepladder to paint a gravestone!

First graveyard test of homemade PVC candles over custom-wired flicked LEDsI will save the complete candlemaking details for another post in case anyone else would like to try making some, but the short version is that I finally used all the rest of my old backyard sprinkler system pipe that I’ve been saving since 2006 chopped up into candle sizes. To get enough candles, we had to buy some new PVC, and make sure to get the thinner wall PVC for the best candle glow. We also discovered during our initial graveyard candle testing of the newly-wired flicker LEDs showed that the PVC glue drip candles work best without paint so the translucent glue drips refract the light better, plus that big blobs were best. For the rest of the candles, I sanded the lettering off (nothing else worked!), and since the old PVC was too grungy for sanding to get them clean, I only painted the bottoms, leaving the hot glue drips unpainted for best glow.

Ghoulish Glen at the soldering party assembly lineWe had a soldering party assembly line at my dining table to configure 80 flicker LEDs with pigtails long enough to run through the foam gravestones for custom-controllable candles. The soldering party assembly line continued until 2am, but we got all 80 flicker LEDs wired, soldered, heat-shrunk, tested & sanded!

Soldering such tiny wires together, but I did it all myself!The candles around the altars are battery strings of 10 small candles meant to clip onto Christmas tree branches. I found them as the perfect size for my La Muerte hat and our resident electrical expert Ghoulish Glen agreed it would be easier to solder strings together and change the power supply than to keep wiring individual LEDs. After a quick soldering lesson, I configured, tested, soldered, heat shrank and tested again for 200 candles on 20 battery strings to be Gravestone with candles alight, some decorations, still needs FLOWERS...ready to decorate the seven gravestones. Sure glad I can focus on such tiny work!

Some recalculations and a trip to Fry’s electronics store ended with Ghoulish Glen adding inline resistors to the top candles before wiring together with the battery strings. When he flipped the switch at dusk, I literally clapped my hands in joy as I saw all 273 candles flickering in the graveyard! 😀

Gravestone decorating is underway with all the loaves of Pan de Muertos I made and sealed with varnish and so many skulls I decorated, and we finally got the graveyard lighting design settled Sunday evening, thanks to our resident lighting expert Scary Jerry! The graveyard is entirely lit by the new indoor-outdoor colored LED spotlights from Spirit, including a color-changing one placed in the tree for some overall light. The skeleton mariachi band is on their decorated all LED lighting for the graveyard, including the candles!stage in the driveway, ready for programming, hats and jackets! Unfortunately the moon screen fell off Sunday afternoon, so we are building a new one from 1/4″ plywood and hoping to get it hung tomorrow.

If you click to view the entire gallery of step-by-step photos, you might be able to guess at my secret plan why these are such Giant Gravestones. 😉 I’m very glad I took the next three days off work since there is still too much costume work, decorating and food prep to do for any more posts until after my party is over! Wish us luck getting everything done by Saturday and staying working through Halloween night!

(more…)

Posted in Halloween, Parties | Tagged , , , , , , , , , , , , , , , | Leave a comment

modifying skeletons to move!

One of our major projects for Halloween 2015 is the Mariachis de Muerte, our skeleton mariachi band! We had already hacked one 3-axis skull kit to make Jack Skellington’s head for Halloween 2013, so Costco "poseable" skeletonswe felt pretty confident we could make the band talk and sing, but we also wanted them to play their instruments too.

The “poseable” skeletons that Costco has been selling the past few years won’t move in all the directions we need This shoulder only rotates on one axis nested inside the socketto play our musical instruments, so I’ve been working on modifying them all summer. The shoulders only move forwards and back, not a true rotation to get any angle to the arm, and the wrists only wave back and forth, no rotation either. Luckily I had one more expensive skeleton in my stash who had some better-designed joints, Better joint design on a more expensive skeleton from my stashso I used those as a model to modify my three cheaper matching skeletons.

The model skeleton had what looked like thin molded pipe straps, but the only molded pipe straps I could find at Cutting galvanized pipe strap tape for the new shoulder jointmy local hardware stores were the wrong sizes, plus were so thick I didn’t think my dremel would be able to make a decent hole through it. I found galvanized pipe strap tape instead that had predrilled holes and was easier to bend, so I used that for both the shoulders and the wrists.

Better designed wrist joint that waves and rotates vs. Costco wrist joint that only wavesThe wrists were fairly easy because the hand end and the arm ends were both solid enough to screw into. Make sure to screw the hand in first, or you can’t reach a screwdriver in the small gap after the arm ends are in place. If you need a servo to move the wrist, you might Completed and exploded new wrist assemblywant it a little looser than if you want to pose it to stay in position all season. I used metal washers between the metal and the plastic in hopes of not having the metal tape edges scrape away the plastic.

The shoulders were trickier because there was no actual socket to anchor the strap tape. These original shoulders removing the original shoulder showing the extra knob that nests insideare just an extra ball attached to the shoulder ball so that the tension of the socket New shoulder assemblyaround the thin junction between balls lets it rotate on one axis. I loosened the socket screws to let the whole shoulder knob out, cut off the extra ball joint with a box cutter, then used the extra ball piece as my anchor inside for the strap tape. This is not ideal since it wiggles around loose inside the shoulder, but at least we can get the proper angles for playing trumpet, guitar & violin!
New shoulder assembly exploded to show construction
I haven’t seen any skeletons with poseable fingers, but at least these hands weren’t molded mittens like some I have seen. Since the fingers needed to be poseable to play our instruments properly, I decided to try making not The finger bones were thin enough to cut apart with a box cutteronly poseable fingers for this year but articulated hands that could be controlled by servos in future years. Kids, do NOT try this at home! After all this frustration I didn’t think it was a coincidence that a couple skeleton hands were in a “certain” position! 😉 A box cutter and elbow grease cut the hands apart well enough, however these finger bones are so thin and the plastic melts so quickly that drilling through them cleanly is nigh Finger frustration and failure! Kids, do NOT try this at home!impossible. If you want controllable finger joints, don’t even mess with this plastic and just sculpt your own bones around notched tubing like I did for Jack Skellington in 2013. Aren’t you glad I learned this hand lesson the hard way so you don’t have to waste your time? :/

So, since that plan failed miserably, I wired what I could through the few successful holes in the finger bones, which unfortunately still would spin freely around the wires. In desperation I finally resorted to using my own Using my fingers as clamps with cool melt hot glue...be ready for tender fingertips!fingers as clamps to secure the cool-melt glue between the finger bones and wires so they would stay in position. Do NOT try this with anything but cool-melt glue, and if you’re not an experienced glue gun shooter or have other reasons for calloused fingertips, be very very careful since it will smart like a minor sunburn.

At least I finally ended up with poseable fingers, albeit fragile!My hot glue hack is lasting okay, but it didn’t work as well as I’d hoped, since as we kept moving the skeletons to engineer how they need to move for the animatronics, finger bones kept falling off. Thankfully I found most of the pieces, so after getting the hands into final position, I reglued them in place, and now they will probably stay the season. I think an off-season project will be to sculpt my own finger bones around tubing for all these skeletons so I can change from wire to string inside depending on the effects we need for the next project. Maybe I’ll be able to make molds and sell skeleton hand kits next year? Hmmm…

Building stands for the skeletonsWe needed the skeletons to stand on their own, and I was planning ahead for future years where the skeletons most likely will not be standing together, so we mounted each on its own scrap plywood platform, using the Spider Hill PVC feet we had custom PVC skeleton stands being painted bone color to blend inpurchased for Jack Skellington for Halloween 2013 and the Spirit Materializer pipe for Halloween 2014. We used smaller heavy-duty PVC so it would hide behind the bones better, but we needed to find the 1″ to 1/2″ reducer bushings that fit inside the 1″ feet tightly, since you can’t use an external joint reducer.

Trumpet in position!Now that they could stand on their own, how could we engineer their arms to play their instruments? We tackled the trumpet first, since that seemed to be a simple fixed arm position with a lever to rotate the shoulders. Little did we know! I didn’t want any permanent modifications to the skeletons so we could use them again for other scenes, so I only used wire and hot glue that I could peel off later. I spent an entire afternoon wiring the elbows and fingers around the trumpet so that it could rotate up into proper playing position, but I finally got it to look good! Glen spent another few days engineering a PVC assembly where we could pull down in back to rotate the shoulders up, but it stayed as mechanical only for a couple weeks.

violin and guitar working on servos!The violin was next since we expected it would be the trickiest, and it was! I wired the right elbow at a decent angle and wired and glued the wrist in place with the hand around the bow, so only the shoulder needed to move. I worked on wiring and gluing the left shoulder in a decent violin position while Glen worked on engineering how to get the shoulder to move at the correct angle. After a lot of trial and error we got him playing well enough using the servo tester…our first moving instrument! I do apologize in advance to all my string musician friends for the improper posture, but he’s only a skeleton without tendons or muscles! 😉

Next was the guitar, another fixed arm with a moving arm. I commented that half the shoulder joints I painstakingly modified were being glued and wired into fixed positions…heh! Ah well, at least they’ll still work Can you tell this guitar is only papier-mâché, cardboard & paint? ;)better for future years. When I built the guitar in the spring, I didn’t decorate it because I expected we would have to cut into the structure to add the servo movement, so I expected more papier-mâché repair work as well before any painting could happen. Luckily we learned from the violin shoulder and decided we could mount the servo on the arm and drive the elbow directly, not cutting into the guitar at all! I figured out how to wire it Skull tuning head and skull fret marker on the guitarthrough the main hole to the spine, leaving the wire in place to remove the guitar for finishing. I had fun with woodgrain painting techniques, decorating the tuning head as a skull, and even adding tiny skull and bone fret markers. The neighborhood audience we acquired while testing outside didn’t believe it wasn’t a real guitar!

Shaving away the shoulder socket for smoother servo and lever movementWe had the violin and guitar working great on servos, but the trumpet took the largest hobby servo plus a lot more testing power from larger batteries to lift properly. Since this setup rotated the shoulders every movement, we adjusted everything we could to make sure nothing was rubbing or binding, including shaving away plastic from the shoulder socket so the metal hinge would stop scraping. Sounds like the shoulder surgery my parents have both had. 😉

Carefully cutting the thick plastic skulls accurately was trickyThe skull kits came without teeth installed, no hole for movement clearance, and very detailed instructions. Even with our combined arsenal of tools, we still had trouble cutting the large hole! The plastic just melts when drilled or sawed, so by the time you have continued cutting around the circle, it has melted back together in too many spots. It took my new multi-cutter tool with the smallest blade Glen had, then I made all the cuts so Glen wouldn’t be blamed for ruining anything. 😉 Thankfully he agreed to be my vise at least! He drilled Ghoulish Glen working on the skull electronicsthe hole for the jaw rod, assembled and installed all the electronics, and even glued in the teeth for each skull, then they were finally ready to install on the skeletons. Now Glen thinks he has done enough skull engineering that he might be able to install the electronics in any plastic skull with a moving jaw, perhaps even the much lighter weight $5 ones from Target!

Adding JBWeld inside the neck pieces after spray foam insulation wasn't enough supportAnchoring the animatronic skulls to the skeletons was another challenge, since the skeleton neck pieces conveniently twisted off and on again, and the original skulls popped off a neck knob, but the neck piece itself was hollow, not enough to anchor the threaded shaft for the skull to stay firm while moving on its servos. I had a can of spray insulation foam left, so I cut off the knobs and filled the neck pieces to be solid, but the foam wasn’t tight enough to hold the necks on the skulls, ready for the skeletonsthreaded rod either. I tried filling with JB Weld down the center hole, which is solid for drilling, but it was too difficult to get enough JB Weld inside, so that still allowed the threaded rod to twist slightly…so it was back to my trusty friend hot glue for a big blob around the rod, neck, and nut to fix it in place. Sure hope it holds for all the shows but at least it’s easy to add more hot glue. 😉

painting the bright white animatronic skulls to match the skeleton patinaThe skull kits came with bright white skulls, so they needed to be painted to match the skeleton patina. I should have painted the skulls before mounting them to the skeletons, since that made for very awkward painting technique. Glen thought I looked like a mother wiping her child’s chin. Haha! We Hiding the mini controller board inside the skull...sneaky!did get the mini controller board hidden inside the skulls so only the CAT-5 cable ran down the back to the controller board, but we also should have planned to hide the control wires through the PVC before it was glued together, but Glen wasn’t convinced that was a good idea until afterwards. The spines hide the wires well enough until the hips, but I All three skeletons ready for jackets, hats and programming!drilled through the PVC feet and plywood bases then also through the top of the hip elbow joint so the wires can slide down one leg into the stage platform that will hide the speakers and controller board. Now all three skeletons are ready for their jackets, hats and programming!

Those of you who might want to try these modifications themselves can view all the step-by-step photos in the gallery below. Stay tuned for the rest of Halloween 2015!

(more…)

Posted in Halloween, Parties | Tagged , , , , , , , , , , , , , , , , | Leave a comment

Halloween 2015 is well underway!

2014 purchases for Halloween 2015!I had decided my Halloween 2015 theme last summer, as soon as I saw the first trailer for the movie The Book of Life about the Mexican traditional celebrations of Dia de los Muertos. I really wanted to make the costume for La Muerte with her candle-filled giant sombrero, so I decided to finally use one of the many theme ideas that had been on my Halloween list for years to go with my costume! As you can see in the photo, last year’s Halloween shopping weekend was mostly purchases for this year!

All-day Halloween work today with my Scream Team!I had brainstorms for a big front show like Halloween 2013, and we had several discussions, but April was our first all-day marathon, sorting through the old projects to recycle wood for new uses, checking sombrero sizes compared to my skeletons, and brainstorming story ideas along with decor walkthrough ideas.

Some of the many Dia de los Muertos traditions are decorating your ancestors’ graves and celebrating in the graveyard to remember them, sometimes even with music, so my idea was for our graveyard celebration to be hosted by a skeleton mariachi band! I found perfect toy toy trumpets from the dollar store!trumpets at the dollar store that I could easily spray paint gold…hooray! I earn Amazon points with my credit card, so I look there next for anything I need in case I can get for free. I found a toy plastic violin with now that was more realistic than I would be able to make, so that was “purchased” with free points. However, all the toy guitars were too expensive compared to making one from papier-mâché, plus making one would be lighter-weight and easier to hack Papier-mâché guitar in processfor animatronics where necessary, so I used my own steel-string guitar as a model. Bonus of making one completely custom is that the tuning head can be a fancy decorated skull with the tuning anchors incorporated into the skull design. 🙂 I thought of making the body as another skull, but since real skeletons are playing, I’d rather have it be recognizable as a guitar.

The Scream Team working on the show scriptI don’t want to spoil any surprises, but we had planned new characters and needed to film them with enough time for HD video editing, which takes a lot longer to render. However, we needed enough story and characters settled before we could film! It was already getting hot, so thankfully Scary Jerry hosted our Scream Team writing session in Halloween Scream Team 2015 ready for filming!his nice cool air-conditioned house! In 5 hours we got enough written to film the following week, when we set up the greenscreen studio, again thankfully in Scary Jerry’s very comfortable air conditioning, and filmed until midnight! I knew the greenscreen bodysuit I bought for $5 on Halloween clearance two years ago would come in handy someday!

Another Scream Team writing sessionWe were finally 75% finished with the script after another 10 straight hours on a Saturday. Thanks to Scary Jerry for hosting again so we could enjoy his cool air, and we even celebrated Ghoulish Glen’s birthday early with a striped candle in a slice of carrot cake and a new tackle-style storage box for his animatronics & electronics components. It took another Finally finished the script, with an assist from Onyx!several hours on another workday Saturday in September, but the Halloween 2015 show script was finally finished with an assist by Onyx! The following Saturday, we completed recording the entire show script my makeshift sound studio at the dining table. 3 hours Recording the show script on a super-hot Saturday with no AC & no fans...whew!using 3 mics to 3 laptops to record 3 separate vocal tracks while able to react to each other for better performances, all in record-breaking heat with no AC and fans off for noise reduction…whew! Now to build all of this into a working graveyard show!

Golden flowers purchased all summer have overflowed their boxes...Another iconic image of Dia de los Muertos is decorating everything with marigold flowers. Fresh flowers wouldn’t last the entire month I planned for my graveyard display, so I was on the hunt for the cheapest but decent-looking golden flowers for abundant decor. My local Michaels didn’t put out their fall and Halloween stock in early August, but I scored all summer at my local dollar stores and using Amazon points, so now my boxes are One of 12 marigold garlands from Amazon for free points...woohoo!officially overflowing with assorted stems of marigold approximations, but it seems like this still won’t be enough flowers for my vision for Day of the Dead! I’m not finished with my costume yet, which will require a lot of flowers but might end up with extras, but I have dedicated around 1600 blooms and 12 garlands to party decor for $360 so I have stopped buying. I’ve pretty much cleared out stock from both Michaels and both Dollar Tree stores in my wider neighborhood anyway. 😉

Scary Jerry = foam stone texture carver extraordinaireIn August, as Scary Jerry & I worked on cutting and carving new giant gravestones (more details to come in another post!), Ghoulish Glen worked on the animatronic skull kits, realizing he would indeed have to buy more servos after all. I had learned my Webmistress Britta hard at work with the jigsaw, getting foam fuzz everywhere!lesson from previous foam cutting and purchased an extra-long jigsaw blade so I could cut all the way through the 2″ thick foam insulation sheets. I couldn’t find a smooth blade though, so the fine teeth spit fine foam dust everywhere! Sure glad I could use my back lawn for all this mess! As Ghoulish Glen testing & assembling animatronic skull kitsI got the pieces cut, Scary Jerry was using a woodburning tool as our foam stone texture carver extraordinaire. I had to pack up for the last summer movie night then leave 9 hours later for a work trip to Brazil, so I crammed all the Assembled giant gravestones hidden away looked pretty silly!giant gravestones into my side yard to hide them and keep them safe, but it looked really silly! 😉

Labor Day weekend is a major build day for many home haunters, and my Scream Team had a marathon! On Saturday we went from plain white gravestones to painted and aged, thankfully Yours truly spraying colorful Mexican-inspired basecoats on plain white foam gravestones...using my handy sprayer with custom-mixed colorful Mexican-inspired basecoats from cheap acrylic craft paints. It was hot enough that the basecoats were dry quickly enough for Scary Jerry to try his hand at my Scary Jerry aging gravestones with spray paint and dripping water after basecoats were quickly dry in the hot sunshine...water and spray paint aging technique. We also built some screen frames, and even wrote more of the show script after dinner. Sunday we finished the frames and started the skeleton support mounts, then enjoyed a fun evening together with Front layout with test sombrerosa few more friends at the San Francisco Dungeon. By Monday evening all the gravestones AND skeletons were standing in place so we used some test sombreros to see how the full display might look!

Scary Jerry learning to accent paint gravestones Eerie Elegance-style... The next weekend we were all working hard again. Scary Jerry was learning to accent paint gravestones Eerie Elegance-style, which means not so dark that it looks like cartoony like you drew with black marker, but dark enough to read all the carvings at night. My previous gravestones have been table size at I never thought I would need a stepladder to paint a gravestone!most, so I would accent paint them while I was sitting at my work table. I never thought I would need a stepladder to paint a gravestone! As As you can tell by Ghoulish Glen's face, we are still working on skeleton engineering...and to think just a few years ago I hadn't even started decorating before October 1st!you can tell by Ghoulish Glen’s face, we were still working on skeleton engineering…and to think just a few years ago I hadn’t even started decorating before October 1st!

Soldering individual flicker LEDs to long thick pigtail wires to thread through the foam gravestonesAfter our script recording was complete, we turned the fans back on and had a soldering party assembly line to configure 80 flicker LEDs with pigtails long enough to run through the foam gravestones for custom-controllable candles. The soldering party assembly line continued until 2am, but we got all 80 flicker LEDs wired, soldered, heat-shrunk, First graveyard test of homemade PVC candles over custom-wired flicked LEDstested & sanded! After our dinner break, our initial graveyard candle testing of the newly-wired flicker LEDs showed that the PVC glue drip candles work best without paint so the translucent glue drips refract the light better. Duly noted for the rest of the candles I’m still making!

Another iconic Dia de los Muertos sight is lots of loaves of special Pan de Muertos bread, decorative Pan de Muertos bread loaf, bones and skull rising in shape before assemblyespecially as offerings on the gravestones, so I needed a lot of them! When I thought of making them all of papier-mâché I was discouraged, and I thought even one mold then using spray insulation foam would get very expensive, plus I would have to paint them all to look decorative Pan de Muertos loaf assembled and bakedrealistic. So instead I bought a 50-pound bag of all-purpose flour for $12 and I have used almost all of it baking 27 loaves of decorative Pan de Muerto for the gravestones! These were just my normal sourdough bread recipe, so I didn’t have to buy 27 loaves of decorative Pan de Muertos from almost 50 pounds of flouryeast, just kept feeding my sourdough starter before I left for work, started the bread machine when I got home, formed the shapes to rise a couple hours, then baked by bedtime to dry out completely in the still-hot oven overnight. Now these will be sealed with marine varnish like the papier-mâché so hopefully no critters will eat them while they’re on display in the graveyard! 😉

After a break for my Annual Halloween Shopping weekend, Ghoulish Glen and I were back at work all weekend, struggling with getting more skeletons moving, and most importantly, salvaging the giant moon screen from Halloween 2013 so it could hang above the graveyard. Repairing and reinforcing the 8-foot moon screen up on the roofWhen we built it the first time, Glen insisted the moon should have a single support so it would really look like it was hanging in the sky. That worked for two weeks thankfully through the party, but the following day, I heard a crash on the roof…the support fell sideways in the wind so the moon snapped in half! We got it repaired for Halloween night, then when we dismantled it, I stored it flat on my roof since no one could see it anyway. I should have covered it since the foam in direct sunshine for 2 years degraded a bit, but it was still usable with a little reinforcement of lots of Liquid Nails, thin Ghoulish Glen tried pushing the reinforced moon support but it wouldn't budge!scrap wood, and nail gun action…but I insisted on more stability for the support frame. After a couple redesigns, we came up with angled side braces and two full 2x4s as long feet, plus weighted with 60 pounds of sand in 4 flood control sandbags (bonus that I can use the sand for refreshing my brick pathways that I do every spring), and you can see it is so stable, neither Britta tried pulling the reinforced moon support but it wouldn't budge!of us could budge it! It was dusk by then, and really windy all day anyway, so the moon itself waited until the next day, after I painted the supports black to blend into the night. I really wish I had a photo of the Painting the moon screen above the graveyardsplits I had to do to move the center anchor brace of the 8-foot moon screen flat on the roof before we could hang it! hahahaha! Since this year’s video has the real moon image instead of just a yellow disk, it was a bonus that the weather had discolored the foam to look 2 years of weather exposure looks like pretty realistic moon craters!like real craters! I did give it a coat of primer to fade the darkest spots, but I kind of like the effect. 🙂

Ghoulish Glen demonstrating proper soldering techniqueI’ve been working on my costume in spurts for several months, but I needed Ghoulish Glen’s help for the candles for my hat and skirt, so I got a proper soldering lesson, and we reconfigured the strings so I only have one battery pack for the hat with the candles in the correct position, and a separate battery pack for the ones Soldering such tiny wires together, but I did it all myself!around the skirt. This also meant that I was able to reconfigure all TWENTY candle strings for the graveyard all by myself on Tuesday evening, stripped, tested, soldered, heat shrunk & tested again!

There are even more photos in the gallery below if you’d like to keep reading. Stay tuned for more updates since we still have LOTS more to finish before we are ready for my party on Saturday October 24th! Hope all your Halloween plans are going well so far! 🙂

(more…)

Posted in Halloween, Parties | Tagged , , , , , , , , , , , , , , , , | 1 Comment

The Hills are Alive with a Birthday Cinema Brittahytta!

Birthday Girl with The S'mores of MusicMy summer movie nights are good chances to view old favorites again, and 2015 is the 50th anniversary of a true classic…The Sound of Music! I invited my friends to sing along to help me celebrate my birthday weekend with a menu including A Few of My Favorite Things! 15 of us including 3 kids enjoyed Jerry’s delicious chocolate birthday cake with a crazy singing lotus candle, but since the movie was so long, no one ate any of The S’mores of Music I made…darn!

Teal Girls Unite!I didn’t have many decor ideas, so to go along with A Few of My Favorite Things, I used teal and aqua plates, napkins, and clothes. Ellie and Robin also wore teal in honor of my birthday, so we had to take a teal-girls photo! 😉

Iced Tea (a drink with jam & bread)It’s too hot in the summer for a proper cup of hot tea, so in the spigot jar I had Iced Tea (a drink with jam & bread). A few adults tried the special Edelweiss Cocktail. Cyd wasn’t able to attend but she helped design this custom cocktail using a sugar cube as the snowy Alpen peak in the bottom of the glass. Elderflowers are similar to edelweiss so I used St Germaine liqueur and it Elderflower liqueur Edelweiss Cocktails in several glass styleswas tasty. I found some drawings of edelweiss for the recipe card:

Edelweiss Cocktail

Edelweiss, Edelweiss, Every morning you greet me,
Small and white, clean and bright, You look happy to meet me.
Blossom of snow may you bloom and grow, Bloom and grow forever,
Edelweiss, Edelweiss, Bless my homeland forever.

1 part chilled vodka
1 part St Germaine elderflower liqueur
2 parts lemon-lime soda

Rim the glass with white sugar snow. Set two sugar cubes in the glass. Pour in the vodka, then the St Germaine, then top with lemon lime soda. The bubbles should mix the drink without disturbing the sugar cubes so your drink will be clean and bright. After several minutes, the cubes will turn into mountains like the Alps!

The Hills are Alive with the Smell of SausagesSausages are very Austrian and a summer BBQ staple for me, so I called them “The Hills are Alive with the Smell of Sausages” to be funny. I make several summer menu items all the time because I love the leftovers, so those and the last of my homemade ice cream from the 4th of July were A Few of My Favorite Things, plus my special request for Jerry’s fantastic chocolate cake!

Cutting wafer paper sheet music to fit marshmallows for The S'mores of MusicThe special s’mores this time were The S’mores of Music! The chocolate stars and graham crackers stored fine as leftovers from Fireworks & Fun, so I printed out some pages of sheet music from Do Re Mi and My Favorite Things onto edible wafer paper. Even after shrinking the music Can you read the songs on The S'mores of Music? :)smaller and using the giant marshmallows, only a short phrase would fit, so I cut them freeform by hand to make sure it was a recognizable musical The S'mores of Musicphrase on each marshmallow. That left a lot of music scraps, so I’m glad I used the much cheaper wafer paper than the expensive frosting sheets that I’ve used on marshmallows before! If you look closely you can see do, re, la, ti, and a few favorite things on the finished s’mores. 🙂

Partying people Partying people Partying people Partying people
Birthday girl with the crazy lotus candleWe enjoyed chatting, grilling and eating, then I showed 15 minutes of special pre-movie “vintage” entertainment before we used one of my silly lotus candles for my birthday cake. We had tried one of these candles for Cyd’s 60s cocktail party birthday but it never sang until 5 hours later. This one sang but Birthday girl cutting the delicious chocolate cakeonly turned very slowly. We were all listening to the candle instead of singing, until Robin tried to sing matching the squealing high pitch of the candle…haha! Jerry’s chocolate cake was delicious with my homemade vanilla custard ice cream!

Fantastic quality widescreen on the Blu-ray edition!This movie is so long that it even has its own intermission, but the die-hards made it through the whole thing! The film transfer looks fabulous, and so many of us had Ready for the movie!never seen the true widescreen version, which really makes a difference. Several of us sang along of course!

Last but not least, here is the special pre-movie “vintage” entertainment I showed on my big screen…highlights from my performance as Maria in our 6th grade class production of The Sound of Music! I had no idea how to do anything but belt out the notes since I wasn’t quite 12 yet, and everyone on stage is my age except for little Gretl. Even though we trimmed the show down, I still had 14 costume changes, and was often wearing double costumes in the Sacramento summer heat. As you forgive the brand-new consumer VHS recorder technology of 1983, watch for my wimple wardrobe malfunction, my Do Re Mi flub, and my intense “acting”…enjoy!

The full photo gallery is included below…and stay tuned next month for The Book of Life!

(more…)

Posted in Cinema Brittahytta, Edible Art, Outdoors, Parties | Tagged , , , , , , , , , | Leave a comment

Fantastic Fireworks & Fun for ’15!

Fireworks & Fun 2015Another year of fantastic free fireworks from Santa Clara so I had another fabulous Fourth…hooray! I love living one block away from the park with such a great fireworks view from my backyard! This year was the smallest fireworks party yet, but we were still 22 people and one little dog enjoying decent weather, fun food & a spectacular fireworks show! Keith took a video of part of the finale, and you can hear Doug next to him saying “Wait, that wasn’t the finale?!?” 🙂

This year was more hectic for me, since not only had I just hosted the last movie night the previous weekend, and I was frantically finishing sculpting & gilding some steampunk robot cake decor for Benjamin’s birthday, but I was also leaving for a 2-week vacation with Grandma touring Festive Homemade Ice Creamthe Canadian Rockies immediately after, so I was trying not to have too much food leftover that I couldn’t freeze. I did pretty well, giving the green salad away at the end of the party and taking the last of it as my airport lunch, but my freezer was packed absolutely full of leftovers. Nice to still have so much apricot cashew quinoa salad for work lunches when I got back from Canada!

I made pretty much the same menu as last year because most people enjoy it AND I don’t mind all the leftovers, especially the once-a-year Corndog Sparklers and homemade ice cream. 😉 This time the Sparkling Sugar Stars Cutting Chocolate Stars for S'morescookies were just red & blue sugar dusted before baking, so not overly sweet, but the Star Spangled S’mores were totally Finished Star-Spangled S'mores 2015different from last year. There were so many Big Hero S’mores leftover that I retrimmed the marshmallows, then mixed up some modeling chocolate and cut stars with another cookie cutter. The stars fit just right on top of the round marshmallows and looked great.

Stars & Stripes Brie 2015For the Stars & Stripes Brie this year, I scored stripes into the pastry under cutout pastry stars, but the scored stripes puffed too much while baking so you couldn’t really see them. Good thing the stars worked just fine!

Festive FromageI prepped the plate for Assorted Cheese & Crackers a couple nights before, so I had time to cut tiny stars from the white cheese. It looks so nice and it’s so easy, just takes some time and effort to poke the cheese stars out of the tiny cutter! The cheese scraps from around the stars are good for omelets or grilled cheese sandwiches. 😉

Fireworks & Fun 2015 Food TableHere is the main food table by the patio bar, with the chalkboard menu decorated the most ever, including fireworks, firecrackers, sparklers, red, white & blue stars, and even two accurate American flags at the bottom! Can you spot the Apricot & Cashew Quinoa Salad, Sweet Potato Salad, Festive Fruit Salad, Old Glory Green Salad with homemade star croutons, blueberries & balsamic strawberries, Stars & Stripes Brie in Pastry, Aged Manchego Slices with Quince, Corndog Sparklers, Sparking Sugar Stars, Star-Spangled S’mores and Uncle Sam’s Stevia Lemonade? 🙂

Sheila's Delicious Deviled Eggs!Sheila was wondering what she should bring, so I requested her absolutely delicious deviled eggs! I could have eaten the entire tray, so I was trying my best to stay away, and I was texting egg updates to others Shade-sitters had deviled eggs hand-delivered to them! ;)since I was afraid they might miss them! 😉 To make sure everyone got a chance, Sheila passed the tray personally to everyone who had already moved chairs into the one corner of afternoon shade. 😉

Outer food table ready for potlock goodies!The outer food table was decorated with a spare full-size flag and bunting for grilled foods, potluck goodies and the snow cones that didn’t get made because there were no kids this year and the adults didn’t want to work so hard! Fancy popcorn: kettle corn plus gourmet homemade popcorn from Ben!I buy the tasty kettle corn from Trader Joe’s for my Cinema Brittahytta popcorn boxes, and lucky for us that Ben made some fancy gourmet seasoned popcorn that was extremely tasty!

Making so many Razzle-Dazzle-Tinis at once!I created my Razzle-Dazzle-Tini layered cockatil recipe several years ago, but I had never made so many at once! All the shade-sitters wanted one, including a couple without alcohol, so the red lights were alcohol “danger” and the blue were safe. 😉 I lined up the glasses on the bar, sugared the rims with my red-white-and-blue sugar I mixed up ages ago (keep it in an airtight plastic tub and it keeps great!), then used the red Layered Razzle-Dazzle-Tini with star ice cuberaspberry sugar Torani syrup and the blue Rose raspberry mixer so they layered nicely. That’s all sugar, which balances fine with the clear chilled vodka, but it needs lemon-lime soda for the non-alcoholic version. Pour gently otherwise you end up with purple! Add a star ice cube and serve!

I served almost four quarts of my Homemade Vanilla Custard Ice Cream right before the fireworks started so we could enjoy dessert with a view, and it was another impressive show! I always love when the bright fireworks light up my backyard audience! 🙂
Fireworks 2015 Fireworks 2015 Fireworks 2015 Fireworks 2015

After the fireworks, since traffic leaving my neighborhood is horrible, I lighted the firepit for Star-Spangled S’mores! Since Louie was using the last of the coals in the dark, can you tell he added his own lighting for the photo? 😉
Sheila Roasting Marshmallows for Star-Spangled S'mores Roasting Marshmallows for Star-Spangled S'mores Jenna & Julianna Roasting Marshmallows for Star-Spangled S'mores Louie Roasting Marshmallows for Star-Spangled S'mores

All three of my kitties have matching patriotic bandanas, but as usual only Onyx was roaming the party, so I had to wait until everyone left to take photos of Ebony and Obsidian…who were so anxious to get out the patio food, they ended up SHARING the windowsill! You don’t even know how rare that is! 😉
Onyx was roaming the party as usual Princess Pose Siddy, I promise I'll take it off as soon as you hold still enough for a photo! ;) Ebony & Obsidian SHARING the windowsill!

I had my normal patriotic decorations in the front yard and inside the house, with my flagpole in a different spot this year since my plants have grown too much for the flag to fit along the front pathway anymore. Here are just a few, and you can see more decoration photos in the full gallery below.
Patriotic Brittahytta Front Porch Living Room Festive Floral Fireworks

Hope you enjoyed your Fourth of July! You can click to continue reading to see the entire photo gallery below. Sure hope Santa Clara puts on another fireworks show next year so I can have another fun party!

(more…)

Posted in Outdoors, Parties, Recipes | Tagged , , , , , , , , , | Leave a comment

Cinema Brittahytta – Big Hero 6

Big Hero 6 Menu with Special S'moresFamilies with kids understandably often have to change plans on a dime, so instead of the 16 expected, we just had a cozy crew of 8 this weekend for Big Hero 6 at Cinema Brittahytta, thoroughly enjoying our grilled pizzas, snow cones & special s’mores! An hour after everyone else left, 4 more special guests stopped by and made a little Ouye After-Party with more s’mores, kettle corn & fruit salad. 🙂

In the invitation I asked everyone to “bring your favorite San Fransokyo-inspired topping to recharge your batteries with grilled Personal Healthcare Companion Pizzas!” so obviously I had fun naming the menu, with representation of all major characters! I think my favorite name is Fred Zilla Fruit Patio food tableSalad…say it five times fast? 😉 I grabbed images online & made menu cards to make sure everyone understood the names, and I wrote them all our for the menu chalkboard, including drawing Baymax waving at the bottom. I didn’t make cards for Microbots Manchego with Quince, Callaghan Cheeses, or Krei Crackers, and the snow cones & pizzas were outside, but can you spot the signs for Hiro-Cane Cocktails, Honey Lemon-Ade, Wasabi Peas, Fred Zilla Fruit Salad, and Big Hero Smores?

Personal Healthcare Companion Pizzas cardSince the pizza table is outside and often has more of a breeze, I wanted to make the Baymax card stand up vertically for the Personal Healthcare Companion pizzas. I printed it full page onto cardstock, folded the bottom back across the bottom of the image, cut in along the bottom to fold the sides backwards, cut along the shoulders for shape, then folded the top down to stabilize Hiro’s head better. I used thin double-stick tape, then cut around Hiro’s hair so all the edges matched. After the shoulders were trimmed, bending the sides backwards met behind Baymax’s neck, so a little tape there held it perfectly. It looked better leaning back at a slight angle, so I kept trimming the folds where the sides met the bottom until I had the angle I wanted. This stood up pretty well on its own, but a breeze could knock it over, so I also used normal tape to stick the bottom flap to the vinyl tablecloth. Thankfully it stayed standing during the entire party!

Standup Baymax Card 1 Standup Baymax Card 2 Standup Baymax Card 3 Standup Baymax Card 4

Quick & Easy Baymax Paper PlatesI only had 11 plates left of my heavy-duty paper plates, so I quickly made them into Baymax plates for the pizza table out by the grill, and red square plates leftover from Lego movie night last year for the inside food table.

Assembling Hiro Toothpick FlagsSince I decided on Hiro-Cane Cocktails that ideally should have an orange slice & cherry garnish, and I had images of Hiro in his normal clothes and his super-suit, I thought of making toothpick flags, one side for each Hiro. I printed these on a single Assembling the Hiro-Cane Cocktail garnishes with the Hiro toothpick flagssheet of normal paper, cut them out, then used double-stick clear tape so it would stick to itself as well as around the toothpick. These came out perfectly and were so quick to Hiro Toothpick Flag Garnishesmake! After I sliced a couple oranges and notched them into half-moons, I was able to stick the toothpick through the cherry and into the top of the orange rind, and they sat in my glass holder just right!

I had designed the cocktail so it would still look cool without any alcohol in case any of the kids wanted to try it. Here is what the card said for the Hiro Cane Cocktails:

Hiro-Cane CocktailsHiro-Cane Cocktails

This tasty concoction is inspired by the classic Hurricane cocktail and our hero Hiro Hamada. Enjoy it as just a fruity mocktail or level-up to full knockout power by adding a boost of rum!

3 oz pineapple orange juice
1 oz sugar-free red raspberry syrup
1 1/2 oz dark rum

Pour the juice into a glass over ice. Gently pour the red raspberry syrup on the top edge to not mix into the juice. Carefully float the rum on top of the syrup and appreciate the layers as pretty as a sunset over San Fransokyo. Stir to mix well before sipping responsibly, since you might be called to action anytime as a member of Team Big Hero 6!

Personal Healthcare Companion Pizza crust, ready for the grillGrilled pizzas have been a big summer hit for several years now, so I thought round crusts with Baymax’s face would be perfect as Personal Healthcare Companion Pizzas. I made the same homemade whole wheat sourdough pizza dough I’ve been making for years, formed into circles, then before baking I used a small rectangular spatula and a round tea infuser to press the eyes into the unbaked dough. I Personal Healthcare Companion Pizza Tableonly bake these 3 minutes on a side so the shape is set but they don’t overcook on the grill. I also make these a week or two ahead and freeze them in bags with wax paper between them. If you have leftovers, they last in the freezer Pizzas on the grill - can you spot Baymax?quite a while, which is great since I love these pizzas…perfect for a small dinner!

I set out pizza topping basics, red sauce, habanero sauce, mozzarella cheese, goat cheese, real pepperoni & turkey pepperoni, crumbled bacon, sliced olives, artichoke hearts, fresh sliced tomatoes and sun-dried tomatoes, so people could load their crust how they liked, then set them on the hot grill off to the side. Can you spot my Baymax face pizza with pepperoni eyes? 😉

Dino & Little Go-Go Harley make Go-Go Snow ConesFor sweets we had Go-Go Snow Cones and Big Hero S’mores! The snow cones were more popular as an Drawing Baymax's face on marshmallows with my black food penappetizer, with my hand-crank ice shaver and several different syrups and juices, cone cups and spoon straws. Little Harley even came dressed as Go-Go, which was adorable!

How can an entire box of graham crackers have the middle pack completely broken?!?For the Big Hero S’mores, of course the obvious design was Baymax’s face on the round marshmallow. I cut the gigantic marshmallows in half to make a shorter disc shape, setting the sticky side down on wax paper, then drew the faces with my Finished Big Hero S'moresblack food coloring pen. Except for my brand-new box of graham crackers having the entire MIDDLE package broken and mostly unusable for pretty rectangles, the s’mores were an easy assembly of Hershey bar squares on the graham crackers, then placing the marshamallow faces on top…voila Big Hero S’mores!

Eileen is always clever, so she brought Go-Go Vegan Truffles, complete with hand-lettered sign in the Big Hero 6 font, plus some really tasty sushi!

We ran out of time beforehand, and the firepit had gone out while we were watching the movie, so we used the still-hot grill coals for marshmallow roasting. Here are our resident roasting experts demonstrating the Baymax Fist Bump: Balalalala! 🙂

Roasting Baymax Doing the Baymax Fist Bump Balalalala! :) Big Hero S'more

This was the first movie night ever to have sprinkles of rain! It made for an absolutely gorgeous pink sunset, with even a rainbow! I’d never seen a rainbow at sunset before, and it was pink! Since Dino & Harley were the first to arrive, they claimed the garden couch!

Sunset Rainbow! Chilling on the garden couch But it never rains on movie night?!? Thankfully just a few tiny sprinkles...whew! Ready for the show!

An hour after everyone else had left, Jeff texted me asking if they could still come by. They had two different votes what to do that Saturday, one for fishing and one for movie night, so Jeff thought they could do both with fishing first. Well, the fishing was several hours away, and poor Julianna was really sad they missed movie night, so we used the last glowing embers of the grill to roast more marshmallows, they enjoyed fruit salad, and even the rest of the kettle corn. Nice fun little after-party! 🙂

Ouye After Party Roasting over the last of the coals, an hour after everyone else left. Yummy! Ouye After Party

Two movies down, with two more to go before this summer is over!

Posted in Cinema Brittahytta, Edible Art, Outdoors, Parties | Tagged , , , , , , , , | Leave a comment

Cinema Brittahytta Season Premiere – Paddington!

Ren, Joe, Paddington, Britta & MikeWe had a fun crowd of 13 lucky viewers for Paddington, the season premiere of Cinema Brittahytta! Mike, Ren & Joe won the longest distance movie night attendance awards from the UK and Massachusetts, but Jeff & Louie won the oldest friends awards from 1990…ack!

The 2014 live-action movie Paddington got short shrift getting shoved out of the Christmas season here in the US, but it captures the goofy but sweet flavor of the classic books about Paddington Bear, who has always been a well-meaning klutz who often misunderstands his new world after moving from Darkest Peru to London. The movie includes a Paddington Menubunch of British self-deprecating humor that modern audiences will appreciate, and some just plain gorgeous cinematic storytelling moments, with fun references and a great message for kids of all ages.

My summer season premiere is often a little chaotic with getting the yard ready, reconnecting equipment, changing projector settings, so I don’t usually kill myself with the menu. The main themed food was Marmalade Sandwiches “in hat for emergencies” of course! I luckily had been given some homemade three-citrus marmalade by Nathania, so I spread that on my homemade whole wheat sourdough bread, and displayed them in a glass bowl inside an oversized hat I made Paddington's favorite Marmalade Sandwiches, in hat for emergenciesfrom scrap red felt.

While I was making the giant hat for the sandwiches, I made a smaller hat for the lemonade jar. I also Dressed-up lemonade jarmade a replacement red hat for the Paddington Bear my mom had made me when I was still in single-digit ages, since back in that era, Paddington had a yellow hat so that’s what she made for me. Of course I also displayed the tiny Paddington Bear I bought on my first visit to Paddington Station back in 1996.

From Darkest Peru custom cocktailEven with a basic menu, I usually can figure out a creative custom cocktail that goes with the theme, so this time we tasted From Darkest Peru, using Black Seal dark rum, unsweetened 100% blueberry juice, and ginger ale. I designed a little card with Paddington holding a serving tray, saying “Our friend Paddington Bear doesn’t often drink cocktails, but perhaps his dear Aunt Lucy would enjoy this creation inspired by their origins From Darkest Peru.” It was super tasty and super dark, barely allowing the glowing ice cubes to shine through!

British Style Bangers!I had already purchased some fancy sausages for the grill, which is a summer standard, but when I saw these “British Style Bangers” for sale, I had to get them! I made sure to keep these in their original packaging for everyone to appreciate before putting them on the grill. Mike is British, and he got a big laugh seeing these, trying to figure out what made them so British compared to other sausages! They were tasty though. 🙂

Jerry brought Bear Claws! haha!Jerry had the clever idea to bring Bear Claw pastries, and they were delicious as our dessert, after the grilled sweet potato salad, fruit salad, and five-bean salad that are also summer staples for me.

We finally got settled out in the yard after dark, so the movie began! Everyone enjoyed it, from kids to adults, and when Paddington finally acquired his traditional blue duffle coat, an icon was born again on the big screen. 🙂


An icon is born again on the big screen Cinema Brittahytta Season Premiere Audience

Stay tuned for next month’s movie…the Academy-Award-winning Big Hero 6!

Posted in Cinema Brittahytta, Parties | Tagged , , , , , , | Leave a comment

Cyd’s 60s Cocktail Party!

Cyd's 1960s Birthday Cocktail PartyHow do you celebrate a milestone birthday when the birthday girl doesn’t want the milestone announced? Have a 1960s cocktail party instead, and see if anyone clues in that’s the decade when she was born. 😉 I knew Cyd had seen some fun cake boxes showing tie-dye and other wild colors, but her favorite is angel food cake, so I decide to try a Psychedelic 60s Tie-Dye Angel Food Cake, plus my co-hostesses scrounged the internet for more fun ideas, like classic cocktails and a Vintage 1960s Pineapple Cheese Ball I couldn’t resist making!

60s Robin posing with a cookie cigaretteWe all got out our family heirloom fondue pots and used them for Mary’s mom’s vintage meatball in sauce recipe, cheese fondue, and smokey nitrates a la orange, one of Cyd’s favorites, all at the “warm food” side of the buffet. Mary’s delicious deviled eggs and Robin’s asparagus spears in blankets were in the middle, then Joan’s 60s green salad dripping in mayo dressing, chopped eggs & bacon, some cookie cigarettes, and my Vintage Mary enjoying the food in her vintage hair & outfitPineapple Cheese ball and the tie-dye birthday cake held down the other end of the buffet. We had a ton of food for our cozy group, and we all enjoyed it!

The bar was in the other room, stocked by yours truly, the portable party! To keep the bottle juggling to a minimum, we decided on Mai Tais in honor of the pineapple cheese ball and the popularity of tiki bars in the 60s, which gave me the chance to use my tiki ice cube tray, my new Disney tiki souvenirs, and my tiny teal tiki shot glass from Hawaii. 🙂 Here’s what I printed on the Classic Mai Tais with tiki accessoriesrecipe card:

Classic Mai Tai

There’s an age-old argument regarding who was the original inventor of the Mai Tai. Some say Don the Beachcomber and some say Trader Vic. We’d rather drop all the drama and get to the part where we make this time-honored drink using Trader Vic’s recipe.

"Flaming" Mai Tai by the fire pitThis classic cocktail was invented by Trader Vic at the original Trader Vic’s restaurant back in 1944, when he decided to create the world’s finest rum drink. While he was mixing ingredients, some friends from Tahiti happened to come in. They 60s Britta with her Classic Mai Taitried the results, and declared “Mai tai – ro aé!” which is Tahitian for “Out of this world – the best!” And that’s how the drink got its name.

Trader Vic’s Famous Mai Tai

4 oz Trader Vic’s Mai Tai Mix from the pitcher
2 oz dark rum

Pour over ice into an old fashioned glass. Stir well and garnish with cherry, mint and lime.

To make a Honi Honi (Hawaiian for “kisses”) substitute fine bourbon for the rum.

Mix Your Own Old FashionedFor our other classic cocktail, we chose the old fashioned, featured the past few years as Don Draper’s favorite on Mad Men. 😉 However, I never knew until researching that the classic old-fashioned cocktail has such controversy and rabid opinions surrounding it! I brought bitters, sugar cubes, maraschino cherries & orange slices, plus a rye whiskey, Canadian whiskey, and a bourbon for everyone to try their own combinations based on the various old fashioned rules. Since I knew the birthday girl had been wanting to try St Germain liqueur in new drinks, I added the Dolled Up Old Fashioned too. Here are the full instructions for both, plus the birthday girl’s snazzy 60s dress and homemade fur-trim coat!

Birthday Girl at the Bar!Classic Old Fashioned

The old fashioned has been the old-fashioned way to make a cocktail for about 130 years, during which time it has been in and out of fashion. Rye whiskey, bourbon or blended Canadian whiskey have all been popular. There is also a bone of contention whether the fruit should be muddled into the drink or only served as garnish. Mix your own variety and decide which you like best!

whiskey of your choice
orange slices
maraschino cherries
bitters
sugar cube
The professor uncomfortably sips his old fashioned while his wife and college student mistress get acquainted…yes there were backstories for these outfits!
Place a sugar cube into an old fashioned glass with a splash of bitters. Add an orange slice and maraschino cherry if you like. Muddle together until the fruit is mush, or until the sugar is dissolved. Pour in your choice of whiskey and stir well. Taste and add more sugar or bitters if you prefer. Add ice, then garnish with an orange slice and a maraschino cherry. Serve immediately and drink slowly.
Robin demonstrates a classic cocktail
Dolled Up Old Fashioned

2 shots whiskey
1 splash St Germain
2 splashes bitters
1 splash sour mix

Combine all ingredients in an old fashioned glass and stir well. Serve with ice and an orange slice.


Tie-Dye Angel Food Cake with Crazy Lotus CandleWe all enjoyed the lovely April evening around the fire pit, then decided it was time for cake! I had ordered these crazy lotus petal multi-candles from China online, and they were supposed to rotate while they petals opened, revealing several small candles already lighted, plus it was supposed to play the Happy Birthday song. Here’s what it looked like before we started…

How nice…the candle came with abstract poetry on the box! ;)…but first, we were laughing so hard at the poor translation on the box instructions that Robin had to read them aloud as poetry!

I lighted the center wick with one hand with my phone ready to record video with the other…whoosh, the center flame lighted immediately and they weren’t kidding to stay back 40cm! After the big flame subsided a little, the whole candle Whoa! Big flame!started rotating slowly and opening its petals. What I bought was supposed to have 14 candles and only had 8 inside, but it was still fun to watch…but it never sang! We waited watching it a bit, but still no singing, so we sang so Cyd could make her wish and blow out the candles!

The lotus candle starts to rotate and open its petals... The birthday girl dances as the lotus candle turns... It's open but it's still not singing! Time for us to sing! Make a wish!

The tie dye cake was a hit!We cut the cake, with everyone enjoying how the tie-dye showed through the entire cake, and I piped a bunch more whipped cream frosting on each slice for serving. Very tasty and the birthday girl loved it! After a game of Yahtzee – classic 60s party game! – we cleaned up and went our separate ways…but at 1am Cyd texted me that the candle had started singing from inside the garbage can! Hahaha….and it kept singing all night well into the morning! Better late than never I guess? 😉

Don’t forget to read the full instructions for the Psychedelic 60s Tie-Dye Angel Food Cake and the Vintage 1960s Pineapple Cheese Ball, and you can see all the party photos in the gallery below. Hope you are inspired to host your own 1960s cocktail party someday! 🙂

(more…)

Posted in Cakes, Costumes, Edible Art, Parties, Recipes | Tagged , , , , , , , , , | Leave a comment

Halloween 2014 – Studying Spirits with Miss Hermione G. Wells

If you follow Britta Blvd or Eerie Elegance on Facebook, you’ve been able to see each ghost video as I posted them on YouTube over the past couple months, culminating in this master walkthrough of all the ghosts. I’m still working on more video editing for the rest of the party, but you should watch this video in full before you will be ready to understand the Halloween 2014 Main Event!

Discover all six spirits haunting Castle Brittahytta as you explore the grounds, then listen carefully in the steampunk Library Laboratory as Miss Hermione G. Wells explains how and why she needs your help so you will be prepared for what comes next…

Studying Spirits with Miss Hermione G. Wells

…plus separate videos with more details,
one for each of the six spirits haunting Castle Brittahytta:

The Phantom of the Pipes Haunting the Garden Chapel

The Watery Wraith Haunting the Wishing Well

Swashbuckler Sally Haunting the Front Tower

Merry Madam Mead Haunting Her Jar

The Pumpkin Queen Haunting the Castle Garden

The Ghostly Guardian Haunting the Main Castle Tower

Now are you prepared to help Miss Wells? Stay tuned for the Main Event video coming soon!

Posted in Halloween, Parties | Tagged , , , , , , , , , , , , | Leave a comment

New Year’s Eve 2014

Happy New Year 2015!I didn’t have a Christmas party this year because I was asked to host New Year’s Eve! It was a small affair with 14 of us chatting and having a blast playing Rock Band until about 3:30am, with even an elusive 100% on Expert vocals with some Triple Awesomes for harmonies!

New Years Brie En CrouteThis time my party menu was fairly basic, with a couple sliced cheese plates, and several purchased items. I baked a round whole wheat sourdough loaf so the bread cubes could be for chocolate or the purchased spinach dip I displayed in the bread bowl. Cyd has a New Years tradition of reducing orange juice concentrate over Lil’ Smokies mini sausages, so I had to make the Smokey Nitrates a la Orange. 🙂 Trader Joe’s has some brown rice crispy treat bars that I cut into bite size fondue pieces, and I love their honey wheat pretzel sticks. I did make a pastry brie with stars and 2015 on top, but no other edible art, just my chocolate fondue fountain…which ran fine until about 1am, when we heard the motor burn out! Thanks for probably a decade of fine party Mini Oreos in the swan song performance of the Chocolate Fondue Fountainservice, and now you can rest in peace. The extra bonus is that fountain was always a pain to clean since you can’t rinse the chocolate down the drain or risk clogged pipes when it hardens, so this time I just tossed the whole thing in the trash, chocolate and all. 😉

When friends are too tipsy to hold cameras steady, you must resort to selfies. ;)My fanciest bit of fun was my New Years hat! I removed all the steampunk accessories from my black top hat fascinator and redecorated with a shimmery gold and aqua scarf, and some wired teal foil ribbon. That fascinator is perfectly balanced and the elastic fits perfectly behind my ears under my hair, so it’s easy to wear all night long!

Here are all the photos from our party with full descriptions this time. Hope everyone is having a Happy New Year so far!

Posted in Parties | Tagged , , , , , , , | Leave a comment

Halloween 2014 – The Party!

Miss Wells in the Library Laboratory explaining why she isn't at her own party and why she needs your helpSorry for such a delay, but everyone has been super busy, myself as well as my several photographers, so I’ve just barely gathered all the party photos and taken all my catchup photos. I still need to prepare some video to give you the full idea of my decor in a separate post, so my first tale told will be the party experience!

I say “experience” because this year was not just a party. In addition to the 6 ghosts and 7 moving portraits featuring the Verdigris family of Castle Brittahytta, Miss Hermione G. Wells was in the Library Laboratory explaining why she was not in person at her own party and why she needs your help, but that was just the beginning! The main event was an interactive mystery with an intricate plot told in 7 short acts over 2 hours, using two projectors and two VSA controller boards in the giant glowing-green-ectoplasm-powered steampunk device to show the “mad scientist” transmitting from Europe, the dead psychic medium leading the seance from inside an astral gateway vortex, and five ghosts summoned inside the large crystal ball using the energy of all the party guests participating in the seance…and there was even live interaction The Spirit Materializerwith Sir William Crookes and the Glowing Ghostly Guardian! You can get an idea by several photos here, but to understand and appreciate the full show experience, you will need to be patient for the full video I will be posting soon. In the meanwhile, some comments from party guests included “You really out-did yourself!” multiple times, “Loved solving the mystery!” and “Awesome main event! It was like being at a full scale amusement park!”

Of course our most ambitious party yet had to be threatened by the worst Halloween weather I have seen in 21 years! Couldn’t the California drought have continued for just a few more days? The only days it rained were the day of my party and Halloween day…*sigh* Definitely a lesson in worrying about what you can actually control, admittedly not a strength of mine, but also a lesson that my metal patio roof isn’t as watertight as it looks, since really forceful rain can push the overlapping roof pieces apart dumping water onto my normally Borrowed pop-up canopies saved us from the weatherdry patio! On Friday the wind was terrorizing me so badly I was literally frantic, and I was asking on Facebook for everyone to pray to anything they believed in for the afternoon to dry out to safely run electronics for my party, so Louie came to the rescue with a couple pop-up canopies for the backyard so we could still use the much-needed space for food tables and seating. Thank you so much, Louie! I think I will now be investing in a couple of those canopies for myself!

By party morning the wind had stopped but it was soaking wet everywhere. I thought I had covered all the electronics enough, but unfortunately two power circuits died overnight and wouldn’t come back just from GFCI reset because a couple power strips got wet from ground splash back, and they controlled all the front I couldn't have made it through party day without Tash & Glen! THANK YOU!!!yard & roof lighting plus those ghosts, the patio fridge and all the lab lighting! Ghoulish Glen came over before noon, used my hairdryer to dry out what was the riskiest, and waited for others since the rain had stopped by early afternoon. He had the knowledge & his circuit tester to isolate the bad connections to remove them from the chain. Thankfully the fridge was back running first so the party food was safe, and he had everything running again by party time…hooray!

With all that weather mess and the extra delay of putting up the canopies the night before, plus unable to set the tables early as I hoped, I was way behind on food prep even though I had scaled back my menu this year intentionally! My dear friend Tash, featured each year for Annual Halloween Shopping Weekends, came by herself this year all the way from Truckee, so she arrived at 3pm and said she was my “minion,” tackling anything I asked, no matter how dirty the job! There is no way this party would have happened without her and Ghoulish Glen both helping on party day! Thank you both so much!!!

Watching the main show live on the patioWith them both helping, I got the last unused steampunk junk stashed in the garage, and barely jumped in the shower at 6pm! The biggest food project that couldn’t be done by others was a plot point, so I got my makeup, wig & most of my costume on by party start time, but no crown or cloak since I was still doing food prep. That ended up working well, since I didn’t match any of the ghosts not in full costume, so I didn’t have to be in character, and I was another part of the Watching the main show on the living room webcam feedmystery until my big reveal in full costume in Act 7! The first act of the main show started at 8pm just as advertised, I switched the big TV from the portrait to the patio webcam feed, and I was out watching the audience and the show along with my Scream Team, excited that the guests were intrigued and loving it! Then I was back in the kitchen busy frantically mixing up 6 different flavors of jalapeño jelly green ectoplasm slime test tube shots before they were required at the end of Act 6!

Backyard Food Table by TashA few guests were driving to the party in an absolute downpour of rain with wipers on full blast, but thankfully we only had a couple drizzles during the party, and the wind stopped by around 5pm so we could reset all the towers & spires yet again barely in time. After all our bad weather luck causing delays, we pulled it out in the end, all ghosts and portraits worked, the castle stayed intact as needed, and the main event worked, but I didn’t get many photos of my own, so I am very thankful both Tash and Cat did such a great job taking photos! I never would have seen any of the Creepy Inside Food Table by TashCuisine if Tash hadn’t been taking food photos! Only 56 of us for this party compared to 80+ last year ended up being a blessing, since that made sure everyone who wanted to could watch the main event, either live on the patio or in the living room on the patio webcam feed on the big TV and speaker feed coming all the way from the back patio. Very glad that all worked, and even all three webcams stayed working all party, at least on the local network!

We had a ton of fantastic costumes despite the weather, too many to post individually, so check out the full gallery below. I am so glad everyone could show their creativity, and that Cat was able to get most of them Studying Spirits quiz sheets by Catdocumented for posterity! Costume prizes and Creepy Cuisine are traditions, and even though I thought Ogle the Owl must be getting old by now, a longtime guest told me how much she looks forward to it, and several newcomers loved it too! The problem is I have so many owls by now that it was too hard to edit my collection down to 21 on party display, so maybe next time it will be an undisclosed number of owls & see if anyone finds them all? 😉 We Exploring Ectoplasm Essences quiz sheets by Catalso had two new contests related to the main show. Studying Spirits was to find the true names of all seven spirits haunting the castle using the portraits and other family heirlooms around the castle, and Exploring Ectoplasm Essences was matching the flavor profiles to which ghost’s ectoplasm collection location. I made Edible Medals again and had extras, so a runner-up was awarded in each category as well, using the loudest cheering for the costume awards. Here are the winners!

Scariest Costume: Kevin S as Silence from Doctor Who, Billy as Skeletor
Most Creative Costume: Lori as R2D2, Comic Suit Kip
Ultimate Costume: Firefly Family, Gangster Family
Supreme Spirit Savant: Keith & Doug
Exceptional Ectoplasm Essence Explorer: Ashlyn, Erica
Outstanding Owl Ogler: Eleanor, Angie, Katie, Mike
Creepy Cuisine: Scary Jerry for Toxic Cupcakes, Tracia for Coffin Cakes, Kevin C in absentia (and Kip because I still had cookies) 😉

The Webmistress contacts Queen Meresinine in the crystal ballSince the main show ended about 10:20pm, after the awards several people started leaving, but that was the “how did you do it?” question time! There were actually more story questions than technical questions, which surprised us. We admit the story was probably a bit too involved for a party, when sometimes people would end up talking or laughing over plot points, let alone a bit complicated for people imbibing alcohol, so next time we will work on a less intricate mystery….but overall the feedback was Halloween Scream Team 2014 by Catpositive and people liked the story! Go Ghoulish Glen our Ghost Writer! 🙂

The very last people to stay around waited and watched the portraits to see our new surprises for this year. Queen Ergelise left her piano portrait in search of her sister Sarina over the fireplace, and in the hallway Queen Meresinine aka “Merry” sneaked into the Merry sneaks into the Pumpkin Queen's portrait to tease herPumpkin Queen’s portrait to tease her. They must have just barely missed her the first time, since it took over 20 minutes of watching, but they were rewarded! 😉 The full gallery for this post is below, with photos from Tash, myself, and I’ve included some of Cat’s here, but to see all of her fantastic photos, either go to her professional website for the full glory, or go to her Facebook album to see comments along with the photos. 🙂 Thanks to everyone who braved the weather to come celebrate with us!

Brittahytta Bed & Breakfast Brunch for 7 in the Backyard!I had a record number of overnight guests, and it was a lovely Sunday morning after the storm, so we ate our waffle and baked egg brunch in the backyard after I had only 90 minutes of sleep after doing dishes into the wee hours! I was so exhausted after they left that I took a 3-hour nap, then only had time for a quick peek at my own photos Sunday night while I did laundry and packed, since what do you do when you’ve just pulled off the most ambitious Halloween project in 21 years? You go to DISNEYLAND! 😀 Stay tuned for that amazing trip, then back to more detailed party decor!

(more…)

Posted in Halloween, Parties | Tagged , , , , , , , , , , , | Leave a comment

last Halloween update before the party!

ACK! Only 4 days until the big event! Overall we are doing well but it is definitely final crunch time! More wind was frustrating Sunday afternoon as I fought with more pieces flying off the roof, so I am not setting out the spires until the last minute. We had some sprinkles on Monday, At least this was the only rain damage from yesterday's weatherenough to make the contact paper garage door cover fall off completely (*sigh*), but gladly very light so I had time to quickly cover everything that might possibly get damaged, but as of now Saturday’s forecast is a 60% chance of morning showers, clearing by the afternoon. Clear later is good news for the party itself, but having rain that morning means that all the tables & chairs in the backyard can’t be set up until after the rain is finished, and I was hoping to set them up Friday night. We will have to go with the flow and hope for the best!

My pumpkin is still green & growing bigger every day!Due to the rain I was glad we hadn’t set out the plethora of pumpkins quite yet, since that also requires more electrical runs for all the lighted pumpkins, so that is scheduled for tonight instead. No more baby pumpkins set but my one is getting even bigger! No chance of turning orange in 4 days but maybe by Halloween night next week? Otherwise I’ll have a nice big Thanksgiving pumpkin to bake!

Mounting the Pumpkin Queen projectorSunday night we got the new Pumpkin Queen setup working, this year using my full-size Sharp projector firmly mounted under the eaves of my house with a $25 metal projector mount, instead of the UltraProjector that wasn’t bright enough. Ghoulish Glen tested the light spill saying Ghoulish Glen gets stabbed by the Pumpkin Queen“I’m a giant pumpkin” and receiving the stab perfectly! Haha! I’m impressed we can see the ghost even when using camera flash! Now all six ghosts are set up, but final tweaking and decoration is underway, and all seven portraits are working, including their new surprises!

Steampunk construction is still underway, using PVC scraps and joints like LEGOs then painting them “brass” which look great. I am on my EIGHTH roll of gold duct tape as riveting edging, but More Steampunk Silliness - can you spot the tagboard Victrola horn?boy does it look great and save time! I might be gluing rivets on the last sections down to the wire!

The giant device needs a “speaker” which wouldn’t have existed in 1914, so I made a Victrola-style “metal” cone from scrap tagboard then painted it gold. It really looks like metal now with the perfect curves, and it looks great on the giant device! I’ve even been cutting tagboard coverplates to clean up the edges where the PVC enters the foam. Cutting tagboard flanges to cover PVC seams into foam panelsThe main VSA projector is the fancy short-throw BenQ I bought last year for the pumpkin chorus, but our backstage space is so limited that my projector tripod box couldn’t work, so I build a custom tilt shelf that mounts directly on the fence. Even anchored in my old fenceboards, that Positioning the main VSA projector before building a custom tilt shelfisn’t going anywhere now! VSA programming is still underway too, but there is enough done that looks really fantastic, and a lot of what’s left is copying & pasting sequences from one section to another. I think we will actually make it!

Library Laboratory is looking lovely!Scary Jerry did a lovely job setting up my lab table, even “harvesting” some interesting foliage samples around my yard and mystical black cat hair clumps off my floor…brilliant! haha! More will be added since this was just the new glassware from this year plus the alcohol bottles, nothing at all from the big lab equipment box! I guess I need to go through my collection and keep only my Assorted Specimens Harvested by Scary Jerryfavorites now, since there’s not much space to actually mix beverages anymore. 😉

Thankfully both manuscripts are on schedule to be done in the next couple days, and I’m very pleased with how they are looking! I even bought some fancy trim for bookmarks, and dressed them up with some of the metal scrapbooking corners I had in my steampunk stash. The other Bookmarks for one of the illuminated manuscriptsfour spires still need to be sewn, but since I know they take an hour each and that the technique works, I’m getting other projects done first that haven’t been attempted before since they might need reconfiguring.

What’s left to do? A lot of course! One more large-scale drawing is required by hand due to size, and all the steampunk signage is still pending, but I will print them together to maximize the expensive gold label paper, so I want to make sure we’re not missing any labels first. I haven’t designed or printed the three quiz sheets, but they should be quick, since the text is all ready, just a quick layout job, then printing & cutting them. I plan on costume voting by crown noise Love these big gears I got for FREE!again so that saves a little paper and ballot counting time. The final grocery shopping will be in the next couple days, then since no gelatin body parts this year, my food prep will be completely different. I have a lot of fresh fruits and veggies planned, so there will still be a last-minute flurry to get all the food ready Saturday afternoon, and I will be running the oven pretty much all day to bake the 8 dozen Pumpkin Pasties, crisp the 258 Bone Breadsticks, bake the Brie En Croute, and bake the Spicy Bat Wings.

That’s it for now! Good luck if you’re hosting or attending parties this weekend! My next post will be after the party, but I can’t promise exactly when since we’re hitting the road bright and early Monday morning for Halloween at Disneyland! 😀

Posted in Halloween, Parties | Tagged , , , , , , , , , , , , | Leave a comment

less than two weeks to go!

This pumpkin is getting even bigger!First of all, if you’d like a Frightful Skull Fountain Kit, no one has any skeleton hands left in stock now, so I only have one kit left until next year. If you act fast, you can buy lucky number 7!

I’ve had a couple more baby pumpkins appear since last week, hand-fertilizing again with my paintbrush whenever I see them open, but so far the only one that has set is the one that was already growing larger last week, and it is even bigger now with a giant stem that seems like it might grow even more! Maybe I’ll have one orange Halloween pumpkin in prime walkway location, and it’ll be a game who can spot the one real pumpkin with all the fake ones in the vines? 😉

The inside is looking pretty good now! Scary Jerry helped me check the batteries and place all the black LED flicker & real candles everywhere, I got the rest of the portrait gallery up, including the enhanced moving portraits, and the guest bathroom is now all eerily elegant too!

Twelve of the ghosts & portraits received various enhancements since 2012 which required re-editing & re-encoding them all, but at this point the videos are completely finished for all the ghosts, all the portraits, and a new surprise, so that is a huge milestone to be that far along! I’m still cranking through some final video editing since we know a major display will need pre-skewing to keystone them properly, but I am very pleased that is the only video editing left!

Castle Brittahytta with roof lightingThe castle is still getting stabilization enhancements as time goes by, which is the drawback to attempting to set out decor earlier in the month since it has to survive the elements for longer. I love how clear fishing line is invisible, but it is so thin it ends up cutting into the foam so loosens the anchor, so this year I tried some rough brown twine. It seems to be cutting less into the foam, but there is also the drawback that you can see it. For the square towers it’s hidden in stone block seams, but I tied the round towers criss-cross front to back since that’s the direction the wind keeps blowing, and I can see the twine in daylight which is disappointing. At night it will be less visible, but now that we have added the spotlights, the next plan is to paint the visible twine a dark gray or black and see if that makes them invisible at night but not too bad in daylight. For years I have tried to make my Halloween decor look good 24 hours a day, not just at night.

Scary Jerry is our resident lighting expert, and all three of us were involved Saturday night rearranging spotlights for highlighting the towers without having any too brightly lit. I really like our setup, and to make sure everything can be seen from all vantage points, I was on my stepladder pruning in the dark while Scary Jerry stood at the different view points telling me what to prune…haha! It was much more efficient than me having to get down, run over to look, then run back & prune again, which is often what happens. 😉

Castle Brittahytta in daylightAs you can see from their absence in the photos, I’m still working on stabilizing the tower spires. Even the square spire was still going wonky in the slightest breeze with the tower pieces already tied down, and I couldn’t figure out how to stabilize the spire better. Scary Jerry had a brilliant idea to use the foam bubble grip you use to prevent throw rugs from slipping, and I had some, so I cut a strip, anchored it with a few toothpicks around the top edge of the tower, and put the spire back in place. Great idea! For the round spires, I decided to try one by opening the hula hoop, sewing a hem casing to fit, threading the hoop through the casing, then taping it back together before attaching the cone closure with the double-hook tape, and I think that will work. That is the one round spire you see in the phtoos already on the roof and it is still intact just fine. It will just be a matter of cutting through the hula hoop tape each time I take them apart for storage, then re-taping when they go back up. Now I still have to finish all the sewing though, and it’s taking about an hour per spire!

Pieces blown away by 20mph winds today :(I am very glad I wasn’t finished with the spires yet, since just as of this morning rare 20 mph winds have been blowing all day, even blowing interlocked-corner, tied-down pieces off the roof onto my porch around the corner! I have re-tied everything as tightly as possible three times in three hours already, and taken down the square spire and anchored it with bricks in hopes it won’t go airborne, but as I left for work, the round columns were still working themselves out of their bases and stretching the ties yet again. I hope the ties at least keep the columns on the roof and don’t break anything…and I sure hope this wind stops soon! The extended forecast shows at least 10-14mph through the end of the month, but I have nothing to measure to know how fast the normal breezes have been the past couple weeks when things have been stable enough on the roof. Wish me luck!

dollar store score of woodgrain contact paper...I even have some leftover!I did get the garage door converted to my wood planks at least! I found a whole bin of matching dark woodgrain contact paper at my local dollar store this spring, but I was afraid using its own adhesive wouldn’t come off the garage door segments to be able to be stored well for the next castle year. I would love to have magnet panels but those are pretty expensive, so I started with some double-stick tape instead, leaving the backing on the contact paper. Since my garage door rolls up, I can only attach the panels at the top unless I cut them, and I was afraid that cutting them might make the edges crunch together as the door panels moved. This was cheap contact paper, so a full roll was only half the height I needed, so I stuck two rolls together, overlapped to keep the backing paper on, then I did the same overlapping between the adhesive and the backing paper to stick all the vertical lengths together in one giant curtain. It was tricky to lift it all by myself to put into position, but I got it done. In the moist night air, edges have been curling, so tape around the edges will be required, but then I can’t open the garage door. The white border around the edge bothered me, and I don’t have enough spare foam to make a “stone” border this year, nor do I want to paint the border to match the house walls, since it looks better white the rest of the year. However, I did have more flagstone gossamer, so I taped that around the white border. It doesn’t match all the tan castle walls in the daylight, but at night it blends okay. At least now my garage door looks much more like it belongs at a castle, especially with my big 6-foot thick plastic rusty chains hanging like the driveway is a drawbridge, and I can still open it, but it’s been getting so Window insulation shrink film to reflect the ghost inside the shedwrinkled at the edges by opening the door and today’s wind was blowing it every which way, that I taped it all around and decided I just won’t drive my garage-parked Miata until the decor comes down.

Our major setup for this weekend that has continued into the week has been setting up the shed for the Phantom of the Pipes Peppers Ghost illusion. I saved the black-painted frame and screws inside the shed behind the organ, left the black fabric hanging Taping the shrink film onto the custom-built frame inside the shedinside the shed, and marked the floor positions with chalk last time around, so the setup should work out okay. Glen has a receiver & speakers to make the pipe organ louder (sadly it couldn’t be heard very well in 2012), so that has made it a tighter squeeze for equipment in the small space behind the Steampunk fun with a plasma globe!organ. That took most of Sunday evening, so Monday we built the frame and got the shrink film taped on, ready to shrink with the hairdryer tonight.

I can’t Ghoulish Glen & Scary Jerry wiring more lightsshow you too much of the other secret steampunk work we’ve been doing anymore since it would give too much away, but I can tell you it’s going well! Ghoulish Glen let Scary Jerry try some wiring too, and it works!

Handlettering for one of the illuminated manuscriptsI’ve also made good progress on both illuminated manuscripts but with still a lot of work left, and have a couple smaller Steampunk Photo-Chapeausteampunk prop surprises still to finish. However, since I have COMPLETELY FINISHED this fun project in just one day, I have written its own post…the steampunk Photo-Chapeau, otherwise known as the HatCam! See here for the full details and construction photos.

Most of the fruits and veggies can’t be prepared until party week, but I could make these adorable little Mandarin Jack O’ Lanterns! My friend Teje in Norway made these last year so I gave her a Making Mandarin Jack O'Lanternslong-distance Creepy Cuisine award (yes, I mailed her a prize!) and was inspired to make some myself! I drew a slightly different face on 74 mandarins, and will display them in two see-through bowls like this wire one. You could use full size oranges but Adorable Mandarin Jack O'Lanternsthe mandarin oranges look more pumpkin shaped and are a better size for finger food. They last several weeks in the fridge, and since you just draw faces on the rinds with a black marker, these can be done plenty ahead of time…and extra bonus that they are a healthy treat!

Unbaked Pumpkin Pasties in the freezerI am so relieved that my party baking is DONE! For my ever-popular Pumpkin Pasties, I bake the filling first, from frozen pumpkin puree I roasted myself from last year’s Halloween pumpkins. After the filling is cool, I spoon it into a plastic container, and it saves in the fridge fine for a week or so, ready for whenever I have time to make the pie crust dough, roll and form into pasties. Now 8 dozen Pumpkin Pasties are made but unbaked in the freezer, spaced apart on parchment sheets stacked inside my sheet pans with the plastic lids, ready to transfer to baking sheets on party morning. So glad I figured that out so many years ago! Gone are the Special Tasty Tombstonesdays of baking pumpkin pasties all night on party eve!

Since the Tasty Tombstones are specific to this year’s plot, there are only 7 designs, so 16 of each means I now have 112 cookies, not quite 10 dozen, so hopefully that will be plenty! Since not as many were eaten last time, I plan to split them into two plates in different areas of the party so they have more exposure.

Edible Medals ready for prize winnersThe same cookie dough makes the Edible Medals for the contest prizes. I am so thankful I did the artwork, edible printing, and cutting way back in April and May, since that takes a long time! Then I just had to mix up the cookie dough the day before to chill in the fridge, then spend the marathon evening rolling & cutting the dough for hours for both kinds of cookies. After they were cool, I added the ribbons, plenty long to go around even the largest noggins! 😉

Handcut Sourdough Bone BreadsticksI’ve also been a little frustrated how the sourdough bone breadsticks were more chewy than crispy, so I have tried three different recipes. I need 5 bowls of bone breadsticks so set around different areas of the party, so I figured each bowl could be a different kind, encouraging people to roam for different food. Using the cool metal non-stick bone pan for my sourdough breadsticks made them pretty large and more chewy than crispy, so this year I tried making smaller bone shapes by forming by hand and snipping the ends with kitchen shears. I also tried two other non-sourdough normal yeast recipes, so now there are 258 bone breadsticks safely in the freezer ready to crisp in the oven on party day! You can keep reading below for the three recipes I used, altered for bread machine use.

Next week will be the last pre-party post…sure hope we get everything done in time! 🙂

(more…)

Posted in Halloween, Parties | Tagged , , , , , , , , , , , | 1 Comment

Everything is AWESOME!

Everything is Awesome!The Cinema Brittahytta summer season finale this year was The LEGO Movie, so of course Everything was AWESOME! I always love celebrating creativity, so this was the perfect chance! I think we set a new Cinema Brittahytta summer record with 33 of us for LEGO Movie last night, including 2 babies & 6 kids! A few of us played LEGO Rock Band and grilled our personally-constructed Master Builder Pizzas until it was dark enough to watch the Simpsons LEGO episode, then laughter was everywhere during The LEGO Movie in 3D with old-school red/blue 3D glasses!

Clapboard with Candy Bricks Spelling LEGOExcept for one tiny Harry Potter collector set, I actually don’t own any LEGOs anymore, and my mom recently donated our family stash without asking me first (waah!), so I had none for decorations. I did find stackable interlocking candy blocks online so I bought those and built the LEGO letters for display, but they were pastel chalky colors like Sweet Tarts. I even searched in case there were cute LEGO plates and napkins I could buy. Alas, I didn’t find any that I liked enough, but I did see a ton of adorable party plate and napkin ideas, so I used those as inspiration to construct my own.

A white paint pen, and red and black permanent markers were enough to draw 24 different LEGO faces on cheap yellow paper cups. I used the LEGO Movie trailer I had downloaded last summer, pausing at different faces I liked and sketching them freehand. Hand drawn LEGO cups - every one is different!Can you find Emmett and Wyldstyle? 😉 I also saw square yellow plates turned into the faces online, but I liked the round cups idea better because they looked more like the round LEGO minifig heads, plus food would cover up the faces on plates. On cups we can not only keep appreciating the faces, but they also function as cup identification!

Custom LEGO paper plates using food ink printer on transparent labelsAt my local dollar store, I found square paper plates in bright primary colors, so I made those into 2×2 LEGO bricks by printing the LEGO logo circles with my food coloring printer onto transparent label paper. I knew from the Ghostbusters plates that the food coloring ink could still run if too much moisture got on the labels, but since it was only food coloring, no harm done to our food. You could also use a black food coloring pen and draw them all freehand, but that takes a while, plus you wouldn’t be able to run an embossing filter to make them look 3D.

Britta as Wyldstyle!I already had vivid red and bright teal clip-in hair extensions, and since I also have a black hoodie, I decided I could be Wyldstyle for the evening! I know it wasn’t the exact shades of turquoise & hot pink, but pretty close for stuff I already had on hand. I used some teal duct tape that matched my hair extensions to make the WS line artwork on the hoodie, curled and poofed up my ponytail with volumizing powder, used 2 cans of black hairspray, added the red & teal streaks in front of my hair, and added heavy black eyeliner and bright red lipstick, with a couple freckles drawn on each cheek too. Everyone assumed I was wearing a wig! haha…There was so much hairspray, it felt like a wig, or that I had curlers in my hair! I was very glad it all washed out before bed, but it did take two full shampoos, and gray splatters all over my shower that needed rinsing. 😉

Since LEGO is all about building your own creations, of course we built our own food! There were supposed to be at least a few kids coming, and I still had plenty of frozen pucks for the snow cone machine, so I was prepared to build our own Princess Unikitty Cloud Cuckoo Land Snow Cones with lots of rainbow colors from all the flavored syrups. Closeup of Construction Cheese & CrackersThis is great to entertain the kids since they have to turn the crank to grind their own snow! But the first kid to arrive was already when pizzas were being built, and the next kid wasn’t feeling well, so no snow cones this time…darn!

I always provide cheese slices with crackers, but this time I added pips to a few slices by cutting them out with with a drinking straw to look like LEGO bricks and called them Construction Cheese & Crackers! My standard summer party food was also renamed in theme as Kragle Corn (sticky kettle corn), Wyldstyle Fruit Salad (for her colorful stripes), Awesome Sweet Potato Salad (because everyone always loves it), and Bricksburg Bean Salad.

"Where Are My Pants?" CocktailsI laughed when I thought of the custom cocktail for this party…“Where Are My Pants?!?” Hahaha! That is the name of the goofy TV sitcom advertised all over Bricksburg, so I thought if you drank too many of these, you might also be saying the show’s tagline, “Honey, where are my pants?!?” heehee! It is still pretty layered LEGO colors by omitting the vodka, so safe for kids to enjoy as well. We discovered on the 4th of July that the sugar-free Torani red raspberry syrup blends into the Rose’s brand sugar Blue Raspberry mixer, but if you have the full sugar red raspberry syrup, it sinks under the Blue Raspberry mixer.

Nicely-layered "Where Are My Pants?" Cocktail“Where Are My Pants?”

1 oz Blue Raspberry mixer (Rose’s brand)
1 oz raspberry syrup (Torani brand)
2 oz yellow lemonade
1 oz 100-proof vodka (chilled)

Pour the lemonade into the glass until about half full, adding vodka if desired. Carefully pour the Blue Raspberry mixer down the side of the glass so it settles at the bottom in a blue layer under the lemonade. Gently pour the red raspberry syrup the same way so it settles at the bottom in a red layer under the blue. Garnish and chill with some colorful LEGO brick ice cubes. Appreciate the colorful layered construction worthy of a Master Builder, but stir the layers before drinking for best flavor. Beware that if you drink too many of the vodka version, you might also end up saying, “Honey, where are my pants?!?”

LEGO brick pizza crusts for Master Builder PizzasMaster Builder Pizzas was a no-brainer, and I made the sourdough whole wheat pizza crusts into squares this time, gently using a round cutter to make the 2×2 pip imprint in the dough before baking just long enough to set the shape, even though it would be covered by pizza toppings before eating. They were cute sitting in the blue bowl on the pizza table and everyone noticed Cutting cheese pips for the LEGO mozzarella sliceswhat they were! I did the same with rectangular cheese slices, using a metal piping coupler that was the perfect size to cut pips. I made the mozzarella as 2×4 but the cheddar was pre-sliced in squares, which gave some nice variety. I left the other toppings normal…it’s hard to change pepperoni, sun-dried tomatoes, olives, mushrooms & artichoke hearts into rectangular shapes! 😉


Mozzarella LEGOs for Master Builder Pizzas Cheddar LEGOs for Master Builder Pizzas Pizza table all prepped!
Anna's LEGO pizza before grilling My own Master Builder Pizza on the grill Craig's Master Builder Pizza and Minifig Cup

S'mores of the Special with molded chocolate bricks and rectangular homemade marshmallowsSince this was the last celebration of the summer, of course we had to have more s’mores! I had borrowed a brick silicone mold from a friend, so I used that to make ice cubes, using food coloring to make bright colors without affecting drink flavors, as well as the milk chocolate bricks for the s’mores. Each individual chocolate brick fit perfectly on the S'mores of the Special Gooey Goodnesssmallest section of a regular graham cracker as a mini s’more, and Galt & Lyle offered to bring homemade marshmallow rectangles, so we were all set to build our S’mores of the Special!

Galt Scarfing a S'more of the SpecialCyd the self-proclaimed pyromaniac enjoyed getting the grill started, and she & Mike helped me set out all the toppings, so pizzas were already underway before the majority of people arrived. Lyle started the firepit for me to get the marshmallows roasting, and I caught Galt scarfing a S’more of the Special!

LEGO Brick Melon Salad by Sean & LauraSean & Laura earned huge geek points by bringing their LEGO Brick Melon Salad! They cut various melons into matching rectangles, then they used a drinking straw to cut the pips, then stuck them back in only halfway. Excellent effect!

We can’t see the screen properly until the sun goes down completely, but we can see well enough to play Rock Band about an hour earlier, so a few played LEGO Rock Band this time, and with the LEGO band on the screen, it was fun to watch for the rest of the crowd who wasn’t playing. By the end of August it is dark enough for good projection by LEGO Rock Band8:30, but everyone is used to the rest of the summer needing to wait another hour, so we never get started as early as we could. As long as that means everyone is enjoying themselves, it’s all good…or should I say AWESOME? 😉

Instead of 15-20 minutes of movie trailers before the feature presentation, since The Simpsons had a special LEGO episode this spring, I thought the 20-minute episode would be perfect! It was a great episode with a good message, and not too far out like Big crowd for LEGO Rock Bandthe Simpsons can often be, so I felt it was appropriate even for the littler kids in our group. This was finally my chance to make my own pizza and mix my own cocktail to be ready for the movie, so I wasn’t out watching with everyone, but I heard lots of big laughs from the LEGO Simpsons audience, so I’m glad they enjoyed the LEGO Simpsons!

Then it was time for the main feature…in 3D! You have to spend in the 5-digits or use two identical projectors and crazy DIY setups for passive 3D projection, or one of my projectors can do active 3D with special glasses that cost $100 each, so there’s no way I LEGO Movie in 3D with old-school red/blue paper glasses!could afford to do that for a crowd. However the Bino freeware app can take a 3D version of the movie, display it split-screen right-left or top-bottom for passive-3D-capable TVs, convert it to red/blue or green/magenta 3D, or show it in normal 2D. I bought the old-school red/blue paper glasses in bulk online and figured we could try watching in 3D, then if there were too many complaints, I could quickly switch to 2D on the fly. There is a color shift even though the software is attempting to compensate for the red/blue split, so I don’t think I would do this for more impressive effects in a live-action movie, but it worked fine for LEGO Movie, and I got a great photo with everyone wearing their 3D glasses! We had several people who hadn’t seen the movie before, and I heard huge laughs coming from all of them…truly Everything is Awesome! 😀

You can enjoy even more photos in the gallery below. Thanks to everyone for another fantastically fun summer! Until next season! 🙂

(more…)

Posted in Cinema Brittahytta, Edible Art, Parties | Tagged , , , , , , , , , , , , , , | Leave a comment

Slimer Shots

Slimer Shots on the barMy scientist friend Amy had sent me the strawberry daiquiri DNA cocktail video a while ago, thinking I might want to use it for Halloween or some other crazy party. I had already decided to show Ghostbusters during my summer movies, so I thought of using kiwi as green ectoplasm Slimer Shots!

Amy works in labs and is a plant scientist, so she helped me figure out what to search for to find out if kiwis would even work with this process. Strawberries are perfect since they are octoploidy, with 8 copies of chromosomes, so there is plenty of DNA to extract. We found that kiwis are hexaploidy, so not quite as much DNA as strawberries, but it should still be enough to see Chopped Fresh Kiwi in Freezer Zip Bagthe DNA strands come out into solution. Since pineapple juice is already in the recipes along with rum, I thought kiwi would taste great with that combination, so full steam ahead!

So my ingredients would still be fresh, I didn’t actually start testing until the week of my movie night party, and when I was looking for the exact ingredients, I found that you can’t use canned pineapple juice or even pasteurized fresh juice, since the heat treatments have already deactivated the bromelain required for DNA extraction. The video just Hand-crushing the thawed frozen kiwi with frozen pineapple concentrate said “fresh pineapple juice” but didn’t explain why, but I found this detailed Instructable that used frozen pineapple juice concentrate, and had proportions to prepare more than just one cocktail at a time. I only looked at two major grocery stores, but I only found a pineapple orange blend, so I used twice as much to my 2 cups of chopped kiwi, hoping there would still be enough bromelain in total.

I peeled and chopped my kiwi into quarter-slices, then froze them overnight flat in a zip freezer bag. The Instructable warned against using a blender because you might chop up the DNA too much for long strands to be visible in solution. I added 1/2 cup of frozen pineapple-orange concentrate into my bag of frozen kiwi, let it thaw at room Straining the chunkstemperature (while I worked on more Stay Puft S’more details!), then smushed all the kiwi by hand inside the bag until I had close to a puree.

Next I used a fine mesh strainer and several passes with a spoon to get as much of the puree away from the seeds and thicker chunks, which took a while. I didn’t have quite 2 cups of final kiwi-pineapple-orange puree, more After lots of spoon squishing through the strainer!like 1.5 cups, but since you only use a couple tablespoons (50 ml) for each shot anyway, I figured that should last for quite a few cocktails. It was a lovely slime green color too!

Now it was time to test! I have an extensive shot glass collection, so I chose a couple Jack Skellingtons for testing. You need high-proof alcohol to extract DNA, recommended 80 proof or higher, and I had some Absolut 100 I had Absolut 100 vs. Bacardi 151never found a use for yet, so I decided to try that and compare results to the recommended Bacardi 151. I chilled the alcohols in the freezer, and refrigerated the purees (while I worked on more Stay Puft S’more details again!), then when everything was nice and cold, I ran my test.

I poured the chilled alcohol gently into the shot glass already filled halfway with kiwi-pineapple-orange puree, careful not to mix it into the puree, then I watched and waited. Bacardi 151 crowned the winner!It does take about 15 minutes for maximum DNA extraction, but I definitely saw fluffy, cloudy strands appearing in the clear layer! There were definitely more strands and they appeared more quickly in the Bacardi 151 test on the right side, so I still have my Absolut 100 waiting for a good recipe someday. 😉 The winner got the festive umbrella pick to scoop up the DNA. I love using science in my kitchen! 🙂

So, I can handle strong drinks, but even I could not sip the Bacardi-kiwi shot, even after it was stirred together! I filled the rest of the glass with lemon-lime soda and stirred well, then that was a tasty drink and nice to sip. Hooray!

Party Slimer Shots CloseupNow that I had a successful test and a whole bunch of prepared kiwi slime, I poured it into two small fancy serving pitchers, then there was just enough left to prepare 4 shot glasses. I covered them all with plastic wrap and stashed them in the party fridge, with the whole bottle of Bacardi 151 in the party freezer. I printed up a recipe card for the bar, complete with Slimer himself, got out a bunch of my tall shot glasses from my collection in the lighted corner cabinet, and Slimer Shots were all ready for the party!

Picking up the DNA with an umbrellaAfter we had already shared a bottle of tasty Riesling, the first round of guests were game to try some Slimer Shots! We definitely saw slime, and topping off with lemon-lime soda and stirring well resulted in a tasty tropical cocktail, with a festive umbrella pick to collect the slime. When my fellow tech-geek friends pull out their iPhones to take multiple photos, I know I succeeded! 😉

Below is the full recipe I used, plus the instructions from the recipe card for serving. I hope you enjoy your Slimer Shot DNA Cocktails!


2 cups peeled and chopped fresh kiwi
1/2 cup frozen pineapple-orange concentrate
Bacardi 151 chilled in the freezer
each cocktail = approx 2 Tbsp/50ml chilled prepared puree + 2 tsp/10 ml ice-cold Bacardi 151

Slimer Shots

fresh kiwi puree mixed with frozen pineapple juice
ice-cold Bacardi 151
lemon lime soda

Pour the chilled kiwi-pineapple puree into a tall shooter glass no more than half full. Gently add no more than 1 inch of ice-cold Bacardi 151 on top. Swirl a little to encourage the extraction. Over 15 minutes you will see fluffy DNA strands appearing in the clear layer that you can pull out with an umbrella pick to inspect the slime. After the extraction is complete, fill to the top with lemon lime soda, stir, and enjoy your Slimer Shot!

Posted in Cinema Brittahytta, Parties, Recipes | Tagged , , , , , , , , , , , , | Leave a comment

Who Ya Gonna Call?

Birthday Girl with Stay Puft S'mores and Ghostbusters DecorGHOSTBUSTERS of course! Not only is it the 30th anniversary this year, but there is a tie-in to the Halloween plot, so perfect for my birthday movie night! I have loved Ghostbusters from the beginning. I wanted to see this movie so badly I went on opening day BY MYSELF on the last day of school when I was 12. Going to a theatrical release all by myself is unheard of even to this day, so that shows how excited I was to see a movie that featured Zener cards with parapsychological research, let alone ghosts and science! Plus it looked really funny. 🙂

Hole in Vintage Tee - sadness!I bought a poster, since this had come out long before my movie theatre employment days, but I still have the logo tee I had made 30 years ago! I wanted it immediately after the movie and there wasn’t merchandise yet so I went to the screen printing shop in Sunrise Mall and had my own printed on the same powder blue I saw in the crowds at the end of the movie. Well, I have changed shape a bit since I was 12, so it’s much tighter to wear, and even sadder, the cotton wore a hole right on the chest! Guess it would just be a decoration this time…and I was glad I had acquired a new Ghostbusters shirt last Halloween I could wear instead.

Custom Ghostbusters Paper PlatesI didn’t find any Ghostbusters plates online, so I decided to make my own. I found plain paper plates very close to the same powder blue as the shirt, then I printed the No-Ghosts logo onto my water-resistant label paper but using my food ink printer. The water-resistant label paper works great with ink-jet inks, and I use it all the time for any bottle labels, but the food coloring inks don’t lock in the same way. First I cut the interior holes with a craft knife, then I cut out the rest, then centered each one on a plate. I thought 24 should be enough and I had extra plain blue plates if necessary. The plates worked great even though any moist food did make the design run, but at least it was food coloring so no harm done!
Stay Puft S'more Proof of Concept Success
My main creative menu items required some proof of concept testing in advance. Of course as soon as I planned to show Ghostbusters in the summer, I immediately thought of Stay Puft S’mores! You can read the full details of design, development and creation in a separate post, but here’s the first successful proof of concept Stay Puft S’more! Heehee…

Slimer Shot TestingThe other testing was inspired by the DNA cocktail strawberry daiquiri that’s been going around the internet lately. I thought using kiwi instead of strawberry would give a nice green slime effect perfect for Slimer the Ghost, so we could have Slimer Shots! Full testing and preparations are in a separate post, but Bacardi 151 did work better than Absolut 100, so I went ahead with the rum version with the bottle in the freezer, and the kiwi-pineapple slime all ready in the fridge, since you need everything chilled for the best DNA extraction. Yay, science!

Stay Puft S'mores Finally Finished!I was trying my best to have everything ready in advance, and I did pretty well, even while melting in the 100F heat with no air conditioning in my house, but the final assembly of the Stay Puft S’mores took longer than I expected, so I was finishing those in the kitchen when the first guests arrived. By the time I Birthday Girl with Two Dozen Stay Puft S'moresfinished, Ben & Lyle were taking photos even before I could get out my own camera! They loved them and so did I! There were benign happy faces as well as the angry Gozer faces, which made me laugh even more. 🙂 I insisted on some photos of me holding the Stay Puft S’mores in my No-Ghosts shirt by my Ghostbusters decor before I melted even more, then we were ready to party!

Slimer Shots at the BarWe did a couple Slimer Shots next, and those were also a hit! It does take about 15 minutes for maximum DNA extraction, and since kiwi is only hexaploidy where strawberries are octoploidy, there isn’t as much DNA in the first place, but we definitely saw slime, and topping off with lemon-lime soda and stirring well resulted in a tasty tropical cocktail, with a festive umbrella pick to collect the slime. 😉

Ghostbusters DecorYes, I bought the soundtrack album on VINYL 30 years ago, displayed here as decor under the movie poster, along with a summary storybook complete with photos. I even tried a tiny No-Ghosts logo in chalk on the clapboard, but that was Drawing the No-Ghosts O so small in chalk is tricky!trickier than I thought!

Below is the full Ghostbusters menu you can see on the chalkboard, mostly mundane summer staples with silly themed names. Thanks to Jerry for a couple fun names when I got stuck, especially for his delicious chocolate cake he made!

Tee, plates, s'mores & menu chalkboardCinema Brittahytta Kettle Corn
Blueberry Blast Hard Cider
Slimer Shots
Keymaster Cheeses & Crackers
Egon’s Sweet Potato Salad
Gozer’s Green Salad
Zuul’s Frightening Fruit Salad
I Ain’t ‘Fraid of No Bean Salad
Proton Packed Sausages
Chocolate Crossed Dreams Cake
Stay Puft S’mores

We grilled the sweet potato salad & sausages, and the boys were grinding their own snow cones again, but I slacked taking photos since I was running around trying to talk to everyone. There was a lull when we thought it would be a smaller crowd, then about 8:30 all of a sudden there were twice as many people! One of the boys asked if he could light the fire pit for s’mores, so I did get a couple really good photos of an angry Mr. Stay Puft being torched, smushed and chomped, then my iPhone said it was too full for any more photos! Doh!

Torching Mr. Stay Puft We almost got him! Mr. Stay Puft almost defeated... Mr. Stay Puft chomped and defeated once and for all!

No-Ghosts plate full of food, ready for the feature presentation to begin!
We started the movie just as I finally filled a plate to eat, with a tall glass of my blueberry homebrew cider, which was a hit again, but I don’t think we used up the whole 2 quart growler I mixed up that afternoon. Glad they enjoyed it, since it doesn’t last! I still didn’t cool off in the nice night air during the movie since I was directly in the path of all the hot air venting from the projector….darn! At least everyone else cooled down!

Happy Birthday to Britta!
We waited until after the movie for my birthday cake, an absolutely delicious dense chocolate cake with fudge frosting made by Jerry. Everyone sang but they got started slowly and dragged even slower, so several people joked that it was a dirge! haha…We used the last of the No-Ghosts plates for the cake, which didn’t smear the designs at all. Victor had brought a bottle of 14-year old Mead of Poetry, so we shared tastes with everyone, then some people hung around past midnight chatting this time! What a fun birthday movie night! Thanks to everyone who was able to come enjoy a true classic!


Angry Stay Puft S'more with Ghostbusters Decor Surviving Stay Puft S'mores

Posted in Cinema Brittahytta, Outdoors, Parties | Tagged , , , , , , , , , | 1 Comment

Finally More Fireworks and Fun for ’14!

Britta watching the fireworks!Sadly the city had stopped their fireworks show for several years due to budget concerns, so I had to find other fireworks to attend instead of hosting my party, but finally in 2014 I could host again…hooray! What was only 16 RSVPs the day before became 28 people including 2 babies and 4 super-excited girls under 7! It was warm but thankfully with a nice breeze making the flags fly and requiring jackets after dark. I brought back my favorite foods from previous parties, plus some new Star-Spangled S’mores, and we were able to have a great game of Rock Band for an hour before the fantastic fireworks started!

I think this might be the quickest turnaround time between two totally different major parties, since only 6 days earlier was the big Cinema Brittahytta Frozen Sing Along! I have had fireworks Cutting Star Croutons from homemade whole wheat sourdough breadparties soon after other movie nights, but those aren’t usually a major production. This time I quickly undecorated from Frozen and cleaned up, then it was full blast into the 4th!

I had made star croutons before out of some thin frozen cocktail bread in the freezer leftover from Christmas appetizers, but those were long gone, so this time I used a small loaf of homemade whole wheat sourdough I had baked and frozen. While it was still pretty hard, I cut very thin Toasted Star Croutonsslices, then after the slices had thawed, I used my tiny star cookie cutter to cut all the croutons. On a non-stick cookie sheet, I sprayed them with olive oil and sprinkled some garlic salt and lemon pepper, then toasted them at 350F for about 5 minutes or so. They were nicely crunchy but not even browned, which was perfect. I had new guests who were amazed I even had star croutons! 😉

Apricot Cashew Quinoa SaladI’ve been trying to experiment with all these new “superfoods” like chia seeds and quinoa, but I haven’t liked them in any recipes yet. Since my tasty Apricot Cashew Rice Salad always was better with wild rice anyway, I thought I could try quinoa and see how it worked. I thought I was making a double-batch so I made the oil dressing accordingly, but even only pouring a single-batch amount of the dressing on the double-batch of quinoa, it didn’t soak up anywhere nearly as much as rice, even after 2 days in the fridge! Duly noted for Frying the Corndog Sparklersnext time, but everyone agreed it was tasty! Too bad it’s because of all the olive oil, cashews and the wine-soaked dried apricots, so all that probably offsets any of the superfood qualities of the quinoa. 😉

Corndog SparklersI did get the Stars & Stripes Brie baked and the Corndog Sparklers fried by 2:15pm, but that wasn’t early enough, and I didn’t quite have as much ready the night before as I would have liked. This meant I was still trying to write on the menu chalkboard while the first few guests were arriving. Ellie set out crackers, helped assemble the green salad and stirred the fruit salad, and Sheila dished up the sweet potato salad and arranged the s’mores, including breaking up the graham crackers and chocolate bars. Thanks for being such good helpers!

Snow Cones!Since the food was set out, I had time to socialize, and not forget to take photos this year…hooray! I had lots of leftover ice pucks from the Frozen Sing Along party so why not make more snow cones? The girls had lots of fun with this! Ellie and Annalise making snow conesAs soon as Annalise arrived, she & Ellie were on snow cone duty, asking everyone else to be a customer so they could grind another ice puck into snow. Lucky me got to be their first snow cone customer…yum!

Face Painting and Snow ConesThere was also an advance request for face painting, since Ellie had just done it at school, so I got out my kit and my big hand mirror, and set them up at my plastic table in a shady corner on the grass. I think Ellie was the only painter, but the girls looked like happy customers to me!

Guest food table and waterfallBy the time we had more shade in the backyard, most of the guests had arrived, thankfully no one ever needing the parking shuttle service I had prepared for yet again, and the guest food table on the outer patio was chock full of deliciousness! The grill was going thanks to Kevin on coal duty, including grilling some watermelon (yum!), and plenty of partying people were enjoying themselves all around the yard. There was no way anyone should go hungry with two big tables of food like these!

Fireworks & Fun FoodAll my food was inside with my menu chalkboard by the bar. I even had my parchment scroll copy of the Declaration of Independence on display by the plates and napkins! Here is the full menu for 2014:

Make Your Own Snow Cone

Aged Manchego Slices with Smorgabritta Quince Preserves

Assorted Cheeses & Crackers

Stars & Stripes Pastry BrieStars & Stripes Pastry Brie with Smorgabritta Spiced Loquat Preserves

Festive Fruit Salad – white peaches, blackberries, blueberries, strawberries looked very patriotic

Old Glory Green Salad – greens with grape tomatoes, strawberries marinaded in marionberry balsamic vinaigrette, fresh blueberries, with star croutons, add your own chopped red onions, chopped walnuts, & feta cheese

Sweet Potato Salad – sweet potatoes, peaches, red onion, red pepper, lime juice, olive oil, cinnamon and nutmeg, steamed in the oven this time for more grill space for others

Apricot Cashew Quinoa Salad – dried apricots plumped in white wine, cooked red quinoa, green peas, garlic, onion, olive oil Sparkling Sugar Starswith cashews for crunch

Corndog Sparklers – miniature corndogs with a sparkling surprise in the batter ( = BACON! :-9 )

Sparkling Sugar Stars – non-dairy/vegan sugar cookies

Star-Spangled S'moresStar-Spangled S’mores

Homemade Old Fashioned Vanilla Custard Ice Cream

Stevia Lemonade – complete with jaunty Uncle Sam top hat 😉

Red Branch Hard Cider – pear, black cherry, and raspberry in growlers

Brittahytta Brewery Hard Cider – Patriotic Peach worked but I ended up without any Sheila's layered Razzle-Dazzle-Tiniblueberry juice after all, so no Blueberry Blast this time

Razzle-Dazzle-Tinis – I only saw Sheila have one of my specialty layered red, white and blue cocktails, and we learned that the sugar-free red raspberry floats above the blue raspberry mixer, where the sugar red raspberry from years before would sink! The wonders of relative specific gravities of different ingestible liquids. 😉

Playing Rock Band while waiting for fireworks
While waiting for the fireworks to start, we played Rock Band 3…woohoo! We couldn’t see well enough until the direct sunlight was gone from the projector screen, but that still gave us a whole hour to play! 🙂 It was mostly the little girls pounding away, which was just as well because all the equipment was having the worst technical issues I have ever experienced communicating to the game, so I don’t know what happened since it was last borrowed. At least they still had plenty of fun!

Fireworks 2014I served my homemade old-fashioned vanilla custard ice cream right on time at 9:15, just before the fireworks were going to start. The fireworks were as impressive as ever, making me smile from ear to ear…and the finale was as bright as the sun! Wow! Jerry was behind me and asked me to turn around so he could get a photo of me with the fireworks…what a fun photo! Thanks Jerry! It’s always fun to hear the wows & oohs at the fireworks, and this year it was Emma shouting, “Take pictures Mom!” every single time…haha!

I baked the same sugar cookie stars as before, since it’s nice to have something not quite Anna, Angie & Kira Roasting Star-Spangled S'moresas sweet as the homemade ice cream or other desserts people might bring, but I had a brainstorm after the Frozen Sing Along party that I could make some Star-Spangled S’mores! (full recipe instructions coming soon!) After Roasting Star-Spangled S'moresthe fireworks were finished, we quickly built a fire in the fire pit and enjoyed roasting marshmallows for our Star-Spangled S’mores. Hopefully the s’mores fun lasted long enough so most people avoided the traffic mess in my neighborhood, as was the plan. 🙂

People were mostly leaving by around 11pm to midnight, until it was Jeff & Audene trading turns on the massage chair and Rob chatting. We always seem to have at least one kid fascinated with Onyx, and this year it was tiny baby Kira. She did very well gently petting him so I even was able to get a photo. I’m so glad Onyx is such a good Rob even got to pet Siddy!calm boy! Ebony and Siddy were both hiding under the bed most of the party, but they both came out when most everyone else had left so that not only was Ebony begging for attention, but Rob even got to pet Siddy…that is very rare! I finally was ably to start putting food My festive 4th outfit, including red & blue stripes in my hair!away around 1am and finally got to bed about 4 with the dishwasher running…whew! Great party!

Since some previous years I was too busy and forgot to take people photos, I made sure this year to at least have my iPhone always at hand for a quick photo, so I got a lot of fun ones…and even got a couple good photos showing my festive stars & stripes pedicure and the red & blue stripes I put in my hair for the occasion! The full photo album is below if you’d like to see all the front yard decorations and my Festive Floral Fireworks. I hope everyone had a fabulous Fourth!


(more…)

Posted in Outdoors, Parties | Tagged , , , , , , , , | Leave a comment

Fashioning Food & Festivities for Frozen

My Cinema Brittahytta Frozen Sing Along party was a lot of fun, but it was also a lot of work fashioning such festivities! I was able to get everything done in time because my parents and I already had acquired lots of Christmas snowflake supplies over years of collecting, plus I spread out my projects and food preparations the whole month leading up to the party. Of course my Elsa the Snow Queen costume was finished a couple months before, thank goodness! I’m so glad I planned this well, because then I was able to enjoy my out-of-town guests and have a great time at my own party!

Hexagonal Pizza Crusts for Grilled Snowflake PizzasFirst up were the pizza crusts since they stay fine in the freezer for several weeks. I know they last that long because I love eating a pizza for dinner if there are any party leftovers. 🙂 I used the same whole wheat sourdough pizza dough recipe I’ve been using for a couple summers now, since it is always a hit. Since my plan was Grilled Snowflake Pizzas, I made hexagonal whole wheat sourdough pizza crusts so everyone could arrange their toppings to make their own pizzas as unique as individual snowflakes!

Cutting Sliced Mozzarella into SnowflakesI have a whole collection of modular make your own snowflake cutters from long before I became a Frozen fan, so in addition to using them for the Frozen Fractal cookies, I used the same cutters on two packages of sliced Mozzarella Snowflakes for Grilled Pizzasmozzarella so we could add various white snowflake shapes on top of our pizzas. I ended up with two full plates of stunning snowflakes, even the tiny stars that were cut out of the middles. The tiny stars were very popular with the tiny kids!

Snowflake labels as stencils with aqua glitter spray paintNone of the plates and napkins I found for sale fit my vision, so I decorated clear lightweight plastic disposable cups and plates with my own snowflake designs and aqua spray glitter. For the plates, I used removable label Finished Icy Snowflake Platepaper in my new cutting machine to cut more of the same snowflakes designs I had used for Elsa’s Sparkling Snowflake Cape, stuck the snowflake labels to the back of the plates as stencils, then used aqua glitter spray paint to give a sparkling coat of ice. Since this was only on the back of the plate, there’s no risk to the glitter getting into any food. I was able to resuse the same labels several times before they got so much glitter on them that they started curling upwards instead of sticking to the plates. I think about 4 pages of labels were enough for all 20 plates, but I did go through 3 cans of spray glitter, which was the largest expense. I used coupons on each can, but they were still $5 each and only small cans. One tip is that the glitter clogs the spray nozzle, so try to use up a Handpainted white snowflakes on plastic cupswhole can in one session, or you might end up wasting the rest!

For the cups, I used a white paint pen to draw assorted snowflakes by hand, lower than anyone’s lip would touch the cup just to be safe. After all those were dry, I used the last of the aqua spray glitter Finished Icy Snowflake Cupscarefully pointed away from the lip of the cup to spray only the bottom edge, using short sprays so the glitter would fade from clear to more aqua at the bottom.

I really love how these turned out! So elegant and just like Elsa’s ice creations in the movie! They were technically disposable, but since the plates were fairly sturdy plastic and none of the cups had cracked, I carefully washed them all by hand afterwards so I can use them again someday. I did spend about $35 on the full set of 20 plates and 20 cups, so nice to be able to keep them. 🙂

Glowing Food Table (by Debi)Lucky for me that my parents have a bunch of snowflake lights and giant plastic snowflakes for Christmas, so I borrowed those, and they made a huge impact! Even the small snowflake lights I taped to my tier trays, and it was so festive for an evening party. The larger snowflake lights had a subtle twinkle effect, not blinking enough to be annoying, but just a twinkle, which was Olaf and Elsaperfect. I used 4 strings around the outer patio and across the grape arbor bench which looked lovely over the firepit, one string across the french doors from the kitchen entering the patio, and another string over the food table across the posters. Some people did notice Snowflake Lights on the Patiosthat I placed the snowflake lights very carefully compared to the posters…one is in Elsa’s hand!

I love snowflakes for Christmas as well, so in addition to the cookie cutters for the Frozen Fractal cookies, cheese and pastry, I also have various snowflake silicone molds. I used one of the molds for decorative ice cubes but forgot to take any photos of them…oops! I wasn’t originally planning on s’mores since we already had “Do You Wanna Build a Snow Cone?”Pouring chocolate snowflakes for Love is an Open S'more to make, but as soon as I thought of “Love is an Open S’More” I could not resist! The less intricate snowflake silicone mold was the perfect size to sit on a standard graham cracker square, and also the smallest Frozen Fractal cookies fit on top perfectly! I have made custom s’mores Love is an Open S'Moreseveral times before, and I love my semi-sweet Ghirardelli, but s’mores just need the Hershey’s milk chocolate flavor to be proper s’mores. Two bags of Hershey’s milk chocolate chips melted in the microwave were plenty to make 18 chocolate snowflakes. The molds were deep and intended for Tash demonstrates how Love is an Open S'morebaking, not candy, so it was tricky to judge how thick to make the chocolate so I could remove it from the mold intact but not to be too thick for a s’more. Two spoonfuls ended up as too thick, so one spoonful of melted chocolate spread around into all the corners was just thick enough to remove from the mold, and only slightly thicker than a Hershey’s bar…perfect! They were set up as open s’mores on the plate, then you needed enough love to warm up your marshmallow to melt the “frozen” chocolate. Good enough story? It didn’t matter since they were s’mores! Delicious!

Cheese Snowflakes on the Cheese TrayI was on-schedule enough that the night before the party I had time to cut more cheese slices into snowflakes for the cheese tray. I used the normal rectangles for most of the tray, and I only had one snowflake cutter that fit inside the precut cheese slices, so I cut those out and arrange them on top over the cheddar so they would stand out. I love adding little details like this!

I realized while making the Brrrie in Pastry that I don’t think I have it as searchable recipe instructions. I think I can get some better photos from the beginning for the upcoming Patriotic Pastry Brie, but here are the basics. I purchase the baby Brie rounds and frozen puff pastry sheets. Thaw the puff pastry in the fridge for a few hours, unfold one Placing the Brie on the filling and puff pastrysheet, pinch the folds back together, then roll in all directions to stretch out the sheet. I use a large silicone mat so I don’t need any flour. I would recommend parchment paper if you don’t have a silicone mat. Keep flipping the pastry over between rolling it out or it will get too thin to lift off your rolling surface. Use the cardboard the Brie came in to gently mark the dough in the center. This is where to spread your fillings, and so you know you have rolled your sheet large enough. I used apricot preserves with dried cranberries for years, but after I started making my spiced loquat preserves from my own fruit tree in 2006, that became the hands-down favorite filling!

You can spread the filling to bake only on top of the Brie, or have it come down the sides a little. If the filling comes down the sides, you have a greater risk of developing leaks in the pastry, so fair warning. After spreading the filling, do not wait too long before putting the Brie round in place, since the pastry can start getting soggy and refuse to release from your rolling surface. Fold the pastry around the Brie, starting with the flat sides since they are the shortest. Trim the corners and fold them also to the center. This side doesn’t need to be pretty since it will be hidden, but you want to secure all the pastry so there are no holes, so pinch everything together well. Immediately pull the entire Brie in pastry gently off the rolling surface and set on Brrrie in Pastry ready to bakegreased foil on a cookie sheet, with the pinched pastry ends on the bottom. If you wait too long to flip it onto the cookie sheet, you will also have problems with the weight of the Brie squishing the pastry too thin.

Now you can roll out the corners you trimmed away and cut out whatever decorations you would like on the top. For this Brie I used snowflakes of course! If you work quickly, you should be able to stick the pastry decorations on the Brie just as raw dough, but if it takes longer to construct your design, you might need milk or egg wash as glue. I use a piece of foil large enough I can pinch it sealed as a tent and keep in the fridge overnight before Brrrie in Pastry and Little Baby Unicornsbaking just before the party. If you are saving it overnight, it is better to add the final milk or egg wash just before baking so it doesn’t get gummy. However, if you don’t use any sort of protein wash at all, it won’t brown very well. Bake in the oven at 400F for at least 15 minutes, maybe longer, but keep checking. Once it has browned and no spots are doughy anymore, remove from the oven. Let it cool several minutes, then pull away the foil to set carefully on a serving plate. If you set it out too quickly, your guests could burn their mouths! Since the Brrrie in Pastry is extremely decadent, add something healthy nearby like a plate of baby carrots as Little Baby Unicorns. 😉

Except for the plates and cups, most of the food styling and decorations were very inexpensive since I was reusing what I had or borrowing from my parents. I did splurge to Olaf standee as purchasedbuy two posters and the lifesize Olaf standee, but the diecuts around Olaf left too much white cardboard around his arm and his twig hair for my taste. I knew that was for stability because those areas were too skinny and easy to break, but I decided to try cutting them out and reinforcing them from the back. I used an extra layer of scrap cardboard behind Olaf standee after trimming and reinforcing his twigshis arm, but the twigs were too skinny for that. Since I was using hot glue to anchor the scrap cardboard to his arm, I tried building up layers of hot glue on the back of the twigs and the arm, letting each layer cool and harden before adding another. Not only did this reinforce the twigs pretty well, but they could also now even bend without creasing! Kids were Olaf and Three Elsas with Ice Hands! (by Natasha)even able to hold Olaf’s hand for photos. 🙂

I was very thankful that had finished all the final food prep the night before, and all the last dirty work to get the yard all arranged was done early enough for me to shower and cool down enough for all my Elsa makeup before my special guests arrived from a 5-hour drive! My dear friend Natasha brought her two daughters to their first Britta party, and Excited sisters!they were so excited! I had turned all the snowflake lights on already, so as they walked in their first view was of the twinkling snowflakes, Frozen posters, and the food table…and they gasped & hugged each other! Violet helping so well!I’m so glad they had such a fabulous time!

I had set aside safe ways they could help, like setting the crackers on the plates, putting the water bottles in the ice bowl, and stirring the fruit salad, but we ran out of tasks they were so helpful! They even each helped me put on one Elsa ice shoe…haha! We were all in our Elsa costumes and I was putting the last final touches on all the food displays when our next guests arrived…whew! This doesn’t always happen for my parties, especially for the crazy time that is Halloween, so I told Kevin how proud I was that everything was set out and our costumes were on before the party started…and he said we should go out and buy lottery tickets…haha!

Hope you can use these tips to create your own Frozen festivities! Don’t miss the full Frozen Sing Along party, including an adorable sing along video of Let It Go Live!

#Frozen #Elsa #Olaf #Fractals #recipes #snowflakes #snow #costumes #parties

Posted in Cinema Brittahytta, Outdoors, Parties, Recipes | Tagged , , , , , , , , , , , , , | 2 Comments

Queen Elsa at the Cinema Brittahytta Frozen Sing Along

Olaf and Four Elsas with Ice Hands! (by Natasha)Oh, I have been looking forward to this party for months, and my Cinema Brittahytta Frozen Sing Along was a grand success! 24 of us had an icy blast, including 1 baby, 8 kids, 1 dog, no less than 4 handmade Elsa costumes, including my full Elsa the Snow Queen regalia, and even Olaf made an appearance!

Thank goodness the weather was nice, not too hot but not too chilly, because I was in several layers of costume including my thick platinum blonde Elsa wig…whew! I had finished all the final food prep the night before (how-to Elsa finishing party prep (by Nathania)posts will be coming next), and all the last dirty work to get the yard all arranged was done early enough for me to shower and cool down enough for all my Elsa makeup before my special guests arrived from a 5-hour drive! My dear friend Natasha brought her two daughters to their first Britta party, and they were so excited! I had set aside safe ways they could help, like setting the crackers on the plates, putting the water bottles in the ice bowl, and stirring the fruit salad, but we ran out of tasks they were so helpful! They even each helped me put on one Elsa ice shoe…haha! We were all in our Elsa costumes and I was putting the last final touches on all the food displays when our next guests arrived…with Ellie as another Elsa! Photos were best in the shade, so we took a LOT of photos of the four Elsas with Olaf. We’ve all heard of “jazz hands,” but I said, “Everyone do your ice hands!” and they all knew EXACTLY what I meant! 😉

Snowflake lights, giant plastic snowflakes and waterfall lightsI had way too much fun with the food and decorations for this party. Of course I had fun with the names for the menu board plus I made signs or labels to display with each item, which you can see in the full gallery below. Lucky for me that my Menu chalkboard with bottles of Melted Snowparents have a bunch of snowflake lights and giant plastic snowflakes for Christmas, so I borrowed those, and they made a huge impact! Even the small snowflake lights I taped to my tier trays and it was so festive for an evening party. I love snowflakes for Christmas as well, so I already had the cookie cutters for the Frozen Fractal cookies, and various snowflake silicone molds so I made a bunch of snowflake ice cubes as well as the chocolate for Love is an Open S’more. I did splurge to buy two posters and the Custom-painted cups Olaf cardboard standee, and since all the plates and napkins I found for sale didn’t fit my vision, I decorated clear plastic cups and plates with my own snowflake designs and aqua spray glitter. They were gorgeous! I carefully washed them all by hand afterwards so I can use them again someday. I even Snowflake stencils reused as decorused the snowflake stencil labels I cut as decorations around the patio since they were coated in aqua glitter too!

Olaf's Summer Cocktails with customized drink umbrellasWe started the evening with small bottles of Melted Snow, and also Olaf’s Summer Cocktails: Mix whatever drinks that make you feel all nice and warm inside, then add a festive summer umbrella! I had bought a giant bag of cheap cocktail umbrellas, picked out just the blue and green ones, then used my cutting machine to make custom snowflake labels just the right size to stick on the open umbrellas. Lots of people used them, but of course I was the one who forgot to add an umbrella to my pina colada…oops!

Do You Wanna Build a Snow Cone?Do You Wanna Build a Snow Cone? I had everything set up on the bar to make your own snow cones, including “adult” snow cones as a pre-mixed bucket of snowy-white pina coladas safely tucked away in the Three Elsas enjoying the snow cones they built togetherfreezer…yum! Here are three Elsas enjoying the snow cones they built together!

Grilled Snowflake Pizzas ready to goWhen the coals were hot enough, we started our Grilled Snowflake Pizzas. The entire outer table was set with homemade hexagonal whole wheat sourdough pizza crusts, two plates of sliced mozzarella cut into various snowflake shapes, sauce Elsa's ice magic must work to make pizzas, too! and various yummy toppings so everyone could make their own pizzas as unique as individual snowflakes! Gail was the one who was able to keep her cheese in the snowflake shape, but arranging the toppings in six-way symmetry Gail's pizza kept the snowflake cheese shape!worked too. They were delicious as long as you remembered to take them off the grill before the bottom of the crust got too crunchy! 😉

We were finishing our pizzas by the time the other two clever food items arrived. I had baby carrots on my menu as Little Baby Unicorns, but Audene’s friend Debi, a first time guest, cracked us up with a carrot cake with piping saying “Like a Little Baby Unicorn!” Very clever! Eileen Two Elsas Dancing in the Falling Snowcontinued her streak of creative food contributions by bringing Frozen (Artichoke) Heart Dip and even printed her own sign! They obviously fit right in! 🙂

It was finally getting dark enough to see the looping snowfall video I had used on the front of my house for Christmas, so two Elsas started dancing and singing in the falling snow as Roasting marshmallows at sunset for Love is an Open S'moreothers started roasting marshmallows at sunset for Love is an Open S’more. I thought of the phrase and it made me laugh every time I said it, so it had to be done! I decided that milk chocolate snowflake shapes Tash demonstrates how Love is an Open S'morefrom one of my silicone molds would fit perfectly on a graham cracker, and I topped them with an extra Frozen Fractal sugar cookie. They were set up as open s’mores on the plate, then you needed enough love to warm up your marshmallow to melt the “frozen” chocolate. Good enough story? It didn’t matter since they were s’mores! 😉

Souvenir Bubble BottlesBefore we all got settled into our movie watching locations, we made sure everyone had one of the special souvenir bubble bottles. I admit I got this Blowing bubbles any time snow was falling during the movieidea from the Castro Theatre Frozen Sing Along, but it was really cute when the shadows of the bubbles floated across the screen whenever snowflakes were falling, so the three young Elsas spent a lot of the movie blowing bubbles!

It’s always difficult to get a photo of the entire audience when they spread out all over the grass, but Tash made a valiant effort! You can see we had quite a crowd in chairs, bean bags, and blankets. We even had a few more people to the left out of the frame! Large audience at Cinema Brittahytta - ready for Frozen!I couldn’t lean back too much because of my corset and my battery packs on my back, but sitting up properly helped my sing along posture. 😉 Speaking of singing, we had to rely on Kevin to sing all the male voices, of course doing an excellent job, but there were plenty of enthusiastic female voices of all ages and all abilities! I asked Tash to get up & try to get video looking back at us singing along to Let It Go, figuring if we got anything at all it should be cute. The beginning of the song was too dim on the screen to shed enough light on us, so I tweaked the image as much as I could, but as the ice magic gets brighter you can see us better, and you need to watch all the way to the end for maximum adorableness! 🙂

More bubbles and an Elsa shoe! ;)In their attempts to get the bubbles into the projector beam, my other two Elsas ended up sitting at the end of my chair. Violet had a sparkly snowflake headband (did you see her take it off at the exact time as the crown during Let It Go?), but Nola’s hair is long enough for an Elsa french braid, and Tash had made some of my aqua shimmer cut fabric snowflakes into Elsa-style hair clips…so cute!
Still enjoying the firelight towards the end of the movieWe actually had two people in the audience who had never seen Frozen before, but thankfully they said our singing and general merriment didn’t distract from their enjoyment of the movie. However, you can tell who had already seen it countless times by who preferred to keep roasting marshmallows over the firepit. It made for a nice tableau!

Olaf and ElsaAfter the movie was over, I couldn’t pack up the projector cart and speakers until I got out of my outfit, so I asked if anyone wanted photos with Elsa and Olaf before I changed…so there was another line, just like the princesses at Disneyland…yay! When everyone else was satisfied with their photos, I asked for some of me and especially the cape, since I didn’t get to take nighttime photos before. We still need to do a proper photoshoot like we did for the coronation dress, so hopefully before the summer is over we will get that chance, but this one with Olaf is pretty darn cute. 😉

During my photoshoot with my “fans,” everyone else cleaned up the outside for me! The regular movie night guests know to bring in everything off the grass onto the patio, so that usually happens quickly as everyone carries something, but even everything off the pizza table had already been taken inside before I could get a chance to take any more photos! I finally got out of my wig and dress (probably only 5 hours this time?) and into shorts and a snowflake t-shirt while a few stayed chatting all the way until 1am! What a great party!

Thanks to everyone who made it such a fun night! You can see the rest of the party photos in the gallery below, and watch for more posts how to make your own Frozen Fractals cookies, snowflake cups and plates, Brrrie in Pastry, and Love is an Open S’more!

#Frozen #Elsa #Olaf #Fractals #recipes #snowflakes #snow #costumes

(more…)

Posted in Cinema Brittahytta, Costumes, Edible Art, Parties, Recipes | Tagged , , , , , , , , , , , , , , | 2 Comments

Mary Poppins Movie Night

Backyard Movie NightThe Cinema Brittahytta summer season premiere this weekend was the 50th anniversary of Mary Poppins! 14 people and one cute doggie enjoyed the movie, even though the evening got a bit chillier than some expected. Maybe I need to get out the old solid wool army blanket next time?

I had spent all week getting the backyard and house party-ready, including prepping the food, baking cookies and frosting them Custom Cookie Cutter for Kite Cookieswith a thin coat of royal icing the night before, using a new custom cookie cutter to make a flying kite shape with space for a fluttering tail. While the coals were heating on the grill out back, my last task was decorating the Let’s Go Adam decorating Kite CookiesFly a Kite Cookies using my food coloring pens. The first to arrive were first-time guests, and Adam and his mom were enthusiastic to decorate their own kite cookies…hooray! They had never seen food coloring pens before, so they were excited to find some for their own edible creations at home!

Onyx "helping" Ellie decorate cookiesWhen Ellie arrived, Onyx was “helping” her decorate her kite cookies, but he moved too quickly for a good photo. I think the other cats know they are the talk of the party when they stay hidden in mystery. Every kid wants to see if they can find the other kitties! 😉

The Mary Poppins menu for Brittahytta Bar & Grill was Theatre Kettle Corn in the Cinema Brittahytta popcorn boxes, Jolly Holiday Cocktails, Fresh Fruit Salad, Grilled Sweet Potato Salad, Cheese & Crackers, and Kite Cookies! I had Mary Poppins Menufun with my new chalk marker pens. There were lots of reviews that these chalk pens don’t come off of new chalkboard paint and are only for real slate or non-porous surfaces, but I have enough years of real chalk residue on my painted chalkboard that these wipe cleanly off my board…whew! I think these will be quite fun for all the movies this season, plus my other parties!

Jolly Holiday CocktailsThe Jolly Holiday Cocktails were my simplest specialty drink yet, since I made a little card for my top hat holder saying “Choose a cheery parasol to make the beverage of your choice into a Jolly Holiday Cocktail! Add some extra magic with a glowing ice cube!” I had bought a ton of paper cocktail umbrellas at a discount party store, so they Magical Jolly Holiday Cocktailwere set up in my garnish display. Glowing glasses and glowing ice cubes help you find your drink during the movie, plus even work as flashlights for cleaning up afterwards. 😉

 
Our old family 8mm film projector was back on display inside the large lantern with the movie clapboard leaning in front. I’m not sure if the chalk colors work for the clapboard, even though I was able to layer the powder blue over the neon green to get a quasi-aqua color…should I go back to classic white for the old clapboard Movie Night Centerpiece & Kite Cookieslook? Since that was the centerpiece for the inside food table, I set out some old photos of my own Mary Poppins costume from when I was 10 years old. You can spy the finished Let’s Go Fly a Kite Cookies, and since I have a plastic top hat ice bucket, I used it for the crackers with the cheese plate…heehee! Even the lemonade jar had a tiny top hat but I didn’t take a photo of the whole bar…oops! I also missed the new Concessions marquee sign on the patio fridge, and the snazzy VIP ENTRANCE sign hanging over the gate. I’ll make sure to photograph those next month when we all enjoy my backyard Frozen Sing-Along, complete with Elsa the Snow Queen in costume…stay tuned!

Posted in Cinema Brittahytta, Outdoors, Parties | Tagged , , , , | Leave a comment

Holiday Happy Hour 2013

Partying People My Holiday Happy Hour was the first week of December this year. So many years it’s been too warm inside for my holiday party even to light candles, let alone turn on the furnace, but this year’s chill more than made up for it! The mulled wine and hot cider were scarfed, and good thing it was just under 30 of us since the patio bar was too cold to stay out there for very long, even with candles and space heater going! Cozy cookie decorating and chatting inside was a nice evening, with a bonus that the outside “snow” surprise showed through the windows inside too, especially the triangle window above the piano showing the moving blue glow looking like real snow falling!

Decorating early with MomThis year my Christmas decorating was a bit different because I had implantable contact lens surgery the week before Thanksgiving and was told not to lift anything or bend over while I healed! My party was scheduled only 6 days after my family Thanksgiving trip, which didn’t leave much time for baking or decorating, so since my mom was staying with me to help out when I was healing, she got out all my Christmas boxes and we decorated my house together, hanging all my garlands, and even putting up my outside lights just not turning them on. That was fun while I was attempting to be a patient patient (I’m not very good at patience or taking it easy!), and she got inspiration how to organize her Christmas decor better for storage. 🙂

Party before the partySince my party was on Sunday, I was able to attend Sheila’s snow party the night before hosting my own! Every 2 years, Sheila buys snow that is delivered to her house, and her husband arranges it on their front porch and their courtyard. I wore my long red velvet dress since it gave me the chance to wear my fiber-optic shawl and purse again…don’t you think the fabric sparkles echo the real snow on the ground? 🙂

Let’s start with outside decor because of my new surprise! I bought dripping LED icicle lights last year, so that was all set already. Since I had the whole-house projector, custom wooden projector box, and lighted present boxes already made for Halloween, I thought it would be fun to project snow falling on my house. With one good eye & my mom’s two eyes, we tested if the projector would send a focused image through the clear acrylic, and it was fine. What I didn’t consider was the projector not having enough ventilation, even with near-freezing Snow falling on Brittahytta!temperatures, causing the projector to shut down from heat after about 15 minutes. Finally after cracking the present box lid open a hair near the projector vent and propping the acrylic side away from getting sucked into the vent, it stayed working for the rest of the night in the chilly air. (Click the photo to see video!)

The snow looked much better in person since many people said the different size flakes and the different depths of foliage at first tricked them into thinking it was really falling from above somehow! The movement of the dripping LED icicles worked perfectly Closeup of Snow Falling on Brittahyttawith the falling snow. (Click the photo to see video!) Luckily this free snow video loop I found online was just the effect I wanted. The only thing I would improve for my situation would be for the background to be entirely black instead of the fade to blue at the bottom, since that shone too much light on my grass and slightly marred the illusion. I was so happy to have such a great reaction from all my guests. Several kids wanted to run into the grass to try to catch snowflakes! I would love to have real snow like Sheila’s party, but this is the best kind of snow, with no messy cleanup!

The rest of my decorations and menu were mostly the same, with the indoors cookie decorating table a hit yet again, so this will definitely remain a tradition as long as kids keep attending! My traditional menu of Scandinavian family recipes Decorating cookies!were all there, like krumkake, pepperkakor, fudge, toffee, pickled salmon, and Swedish meatballs, plus cranberry chicken, build a sandwich, cheese & crackers, manchego with quince preserves from my tree & a snowflake pastry brie with spiced loquat preserves also from my own harvest. The beverages were sparkling cranberry punch and hot cider plus mulled wine and full bar for cocktails. I only made 5 dozen krumkake instead of 10 dozen, and I knew I wouldn’t have time to do the snowflake cookies justice this year, but I did make my Caroling Cookies again to match my caroling luminaria bags on the tables.

Kitty Paw Stockings on the MantelI did finally get a third paw stocking for my third kitty, but I had to make one! Since I could only find super-fuzzy red material, I decided that now the stockings match each kitty by fuzziness level: middle fluff for Ebony, smoothest plush for sleek Obsidian, and super-fuzzy for super-fluffy Onyx. 🙂 Unsurprisingly, Onyx held court the whole party and had a great time. I even heard someone say “Onyx thinks he’s king of the party!” as they saw him draped across one of the dining chairs where he could see everyone! Ebony & Siddy stayed hidden until it was just Cyd and me chatting after others had left…then Ebony was sneaking manchego off the table while Siddy was finally allowing Cyd to give him tummy rubs for the first time. 🙂

I hope everyone had a happy holiday season! Click below to view all the photos of the 2013 Holiday Happy Hour…

(more…)

Posted in Christmas, Parties | Tagged , , , , | 2 Comments

Twenty Halloweens!

Only some of the front yard display
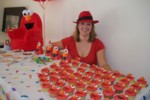
I am over the moon that last Saturday night was a very successful 20th Halloween party! I know we had over 70 people including kids & babes in arms, but we might have actually broken the 80 mark, and STILL had food left over! I couldn’t keep up with all the costume photos, so I am extremely thankful to fantastic photographer Cat Rodery for all the fabulous photos she took with her professional equipment! You can view the full resolution versions in all their spectacular glory on Cat’s website, but by viewing the album on her professional Facebook page you can see all the fun comments so far. 🙂

First of all, thank you to the party guests and trick or treaters who donated to my Eerie Elegance Trick or Treat for UNICEF Fund since we raised $115 for a good cause! There is still time to donate via PayPal until November 5th if you’d like to join us!

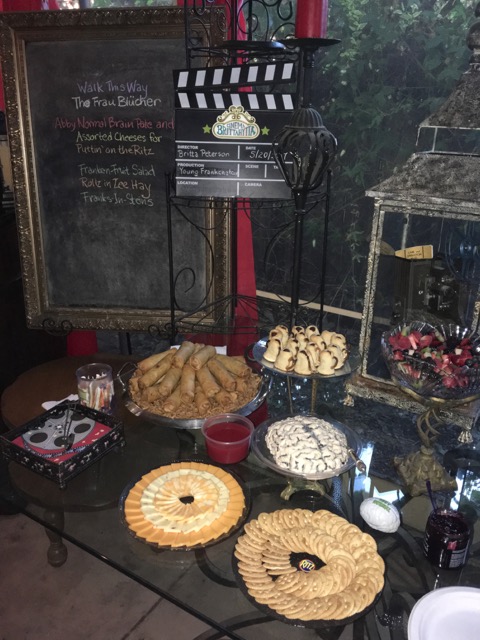
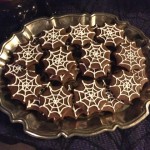
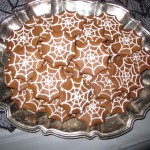
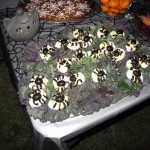
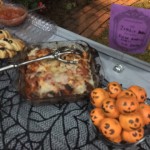
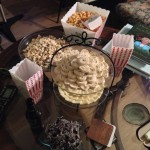
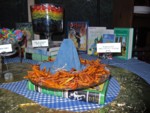
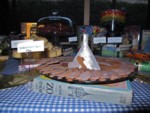
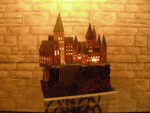
Eleventh hour chaos with two major secret projects (to be fully covered in separate posts later) led to gingerbread assembly of the Halloween Town village not even started by late Friday night, so I decided just Spiral Hill with the glowing moon, glowing pumpkins and new Tim Burton-specific Tasty Tombstones should still be an impressive centerpiece. It still took me probably 5 hours and 3 big buckets of Duff Goldman Edible Spiral Hill Centerpiecechocolate fudge frosting to cover it all! Since the two halves of the observatory worked as bowls, I served the gingerbread pieces as Deconstructed Halloween Town. The way the gingerbread was bending through the night from ambient moisture, it might not have survived assembly anyway. Otherwise I only had minor details from my wishlist that didn’t happen, like the spiderweb snowflakes, food signs saying Edible Art Details on Edible Spiral Hillhow long I’ve been making them (Eerie Eyeballs since 1994, etc), the Winners Wall, and carving any fruit or veggies into fun faces, which often is cut for time anyway. For so many ideas I’ve been saving for years now, plus having added those major projects and displays just this year, I am quite pleased at how much we were able to do!

Halloween Scream Team 2013 screaming we actually did it! :D
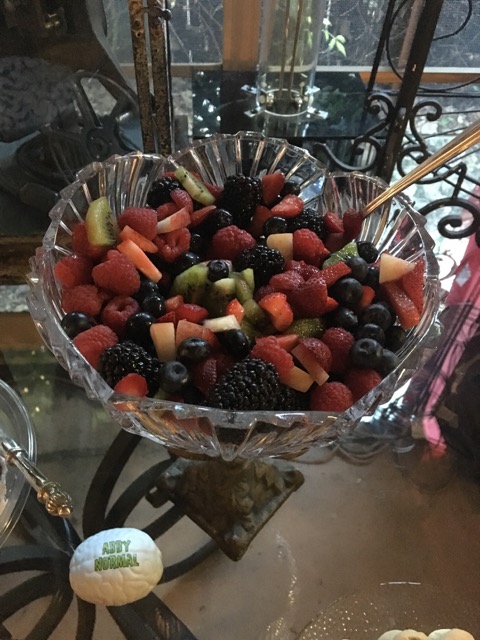
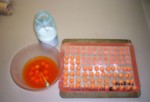
Of course the only reason we could do so much were the Halloween Scream Team plus my house-elves on Saturday afternoon, Kathy and my mom, also first-time Halloween party guests! My house-elves blasted through the list I printed for them in the two hours before the party, which was all the fresh fruit, veggies, Violent Vertebrae, cheese & bat wings, even including Kathy painting the eyeballs for me! That was the first time anyone else has Helpful House-Elves Kathy & Diane (Mom!)ever painted eyeballs for my party, but since she uses the techniques in my Enhanced Eerie Elegance book and Easier Eerie Eyeballs video, she did a great job!

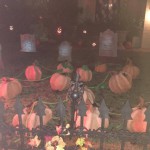
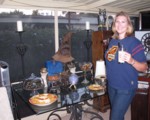
My last major decor project in the afternoon was getting the stripey bows and autumn ferns arranged in the graveyard, then I was in full makeup and most of my costume by 5pm but no wig, gloves or eyes, and wearing my teal skeleton apron so I could keep working on all the final setup. Glen made all the tables and chairs look Ruth & Sheila at one of the backyard tablesnice, batteries into lights and small jack o’lanterns, and hauled 6 big bags of ice for the big cauldron and party reserves in the garage sink, while I put final touches on all the decor. At 6pm, we got the main projection working and aimed properly, all battery lights turned on, turned on the Jack and Zero setup, I turned on the Sally projection in my bedroom, then I Partying people in the backyardthoroughly sprayed Glen’s black wig into Tim Burton messy style, touched up my makeup a little, then had my wig on by 7:20pm! Jen & John helped fill the punch bowls when they arrived, and my last projects as other guests were arriving was to change the arbor bench to an impromptu food table, and finally arranging Jack’s lab to show off all his experiments…whew!

Partying People in Jack's Laboratory
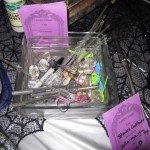
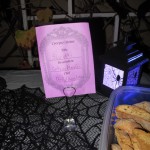
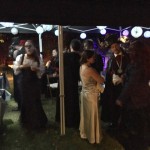
By 8:30pm the party was already full of people as I got the bat wings out of the oven, then it was party time for me! I passed out the Haunted Headstones and Ogle the Owls quizzes for everyone to do at their leisure. I got whatever photos I could, but there was so much going on that Cat was a true lifesaver with her attention to getting good photos of decor AND people! By 9:30, Sally Britta leading the Spooky Music Quiz
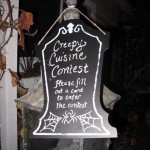
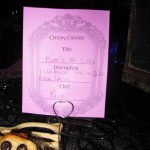
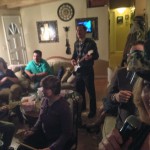
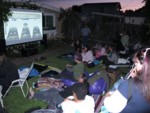
people were starting to talk about leaving, so I hurried to start the Spooky Music Quiz. I had planned the quiz to be run from outside, but enough people were in the living room that I stayed there mostly anyway, going out back to adjust the volume using my iPhone though the conductive thread I had added to my costume gloves. It was very nice that I had finally thought to record the number in front of the audio clip so I didn’t have to yell this time. 🙂 After we were done, I ushered everyone out to the backyard so we could grade the quizzes and vote for costume and Creepy Cuisine prizes. I really like the interactive group voting instead of the paper ballots I did for years, so this is the new tradition….and here are the winners!

Jessica Ties for Spooky Music Quiz
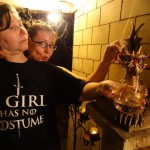
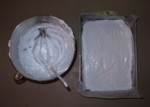
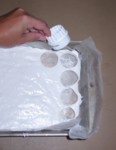
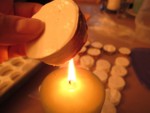
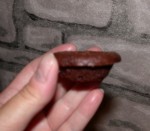
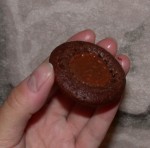
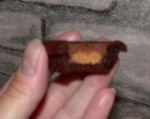
We had a tie for 100% on the Spooky Music Quiz, which was various unique covers of the Nightmare Before Christmas soundtrack you had to put in the order you heard them played. I was very glad I made both Edible Medals and little trophies, so I had plenty of prizes! Here Jessica is awarded the Edible Medal for Spooky Music Quiz.

Nathania triple-medaled with Spooky Music Quiz, Outstanding Owl Ogler and Haunted Headstones Hero!
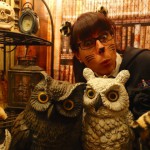
Nathania not only tied for Spooky Music Quiz, but also was Outstanding Owl Ogler and Haunted Headstones Hero!

Nathania and Kaye tied for Haunted Headstones HeroNathania & Kaye tied for Haunted Headstones Hero, but Nathania got the bonus question of which Singing Scarecrow was which member of the Halloween Scream Team!

Scariest Costume Grumpy Cat Jen & Bob Ross John
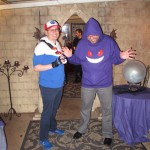
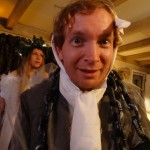
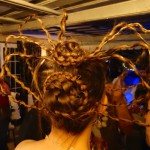
After the quizzes were awarded, it was onward to costume voting by crowd cheers and applause. Scariest Costume was a tie between Grumpy Cat Jen & Bob Ross John…the Edible Medal almost didn’t fit over that epic hair! 😉

Most Original Costume Mayor Doug and Talking Rose Kathy
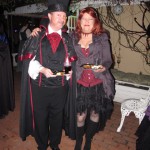
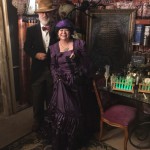
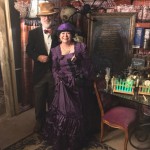
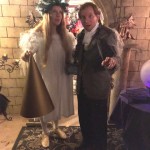
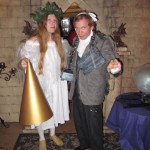
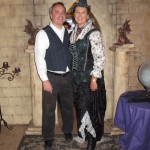
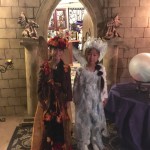
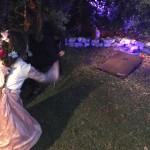
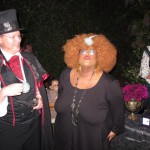
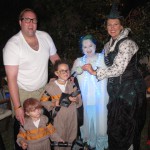
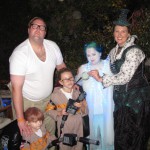
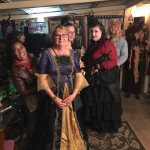
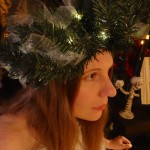
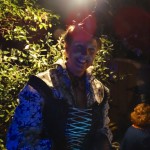
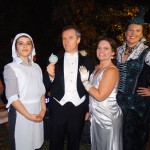
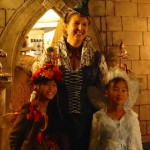
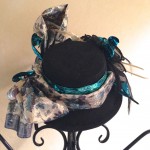
Most Original Costume went to Mayor Doug and Talking Rose Kathy, both excellent costumes! Boy was I glad I had double prizes to award!

Ultimate Costume Galt & Lyle's Retrospective of Twenty Halloweens
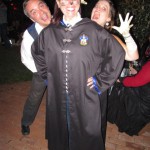
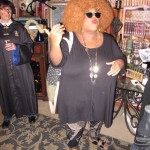
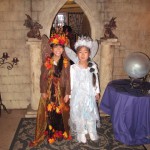
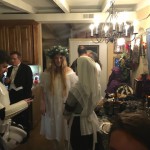
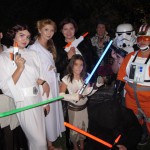
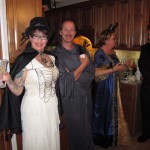
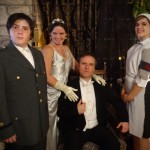
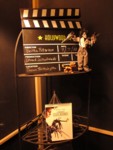
Ultimate Costume went to Galt & Lyle’s Retrospective of Twenty Halloweens! They put together pieces from costumes from all sorts of costume parties I have hosted. Brilliant idea!

Creepy Cuisine winner Scary Jerry for many delicious entries
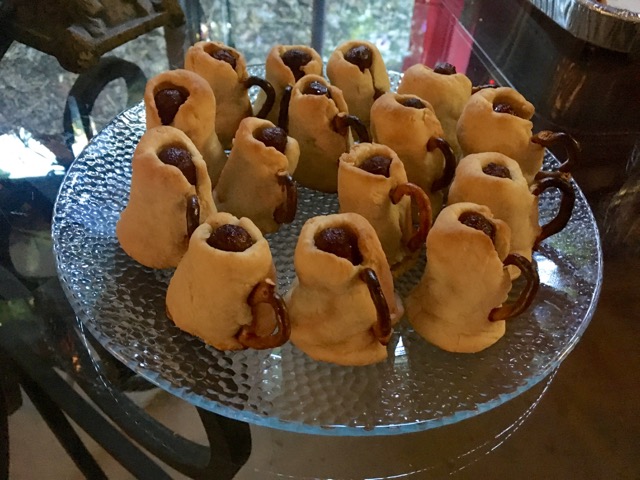
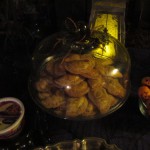
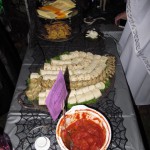
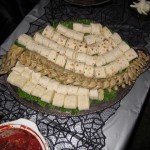
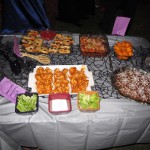
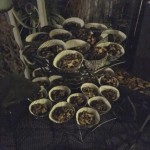
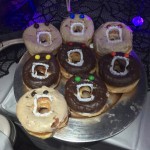
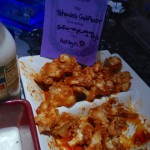
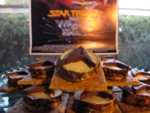
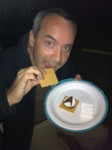
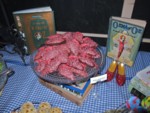
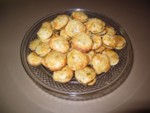
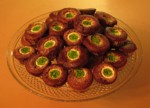
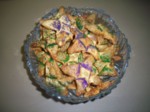
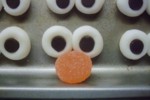
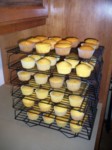
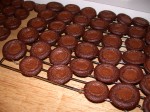
The first Creepy Cuisine award went to Scary Jerry for so many delicious entries like pumpkin cupcakes & meat pies!

Creepy Cuisine Rozanne the Pin Cushion Queen for her Finger Meat Pies
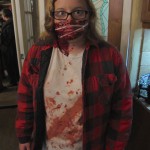
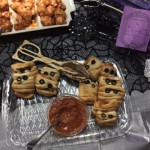
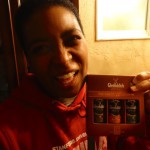
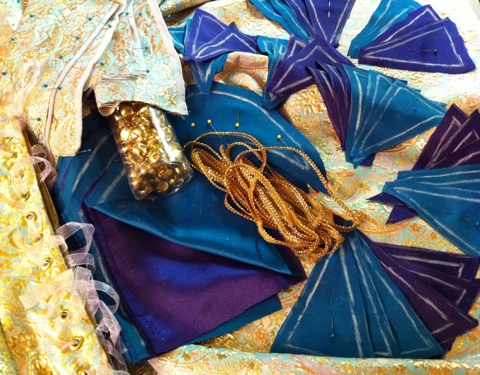
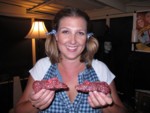
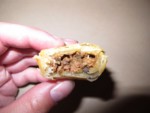
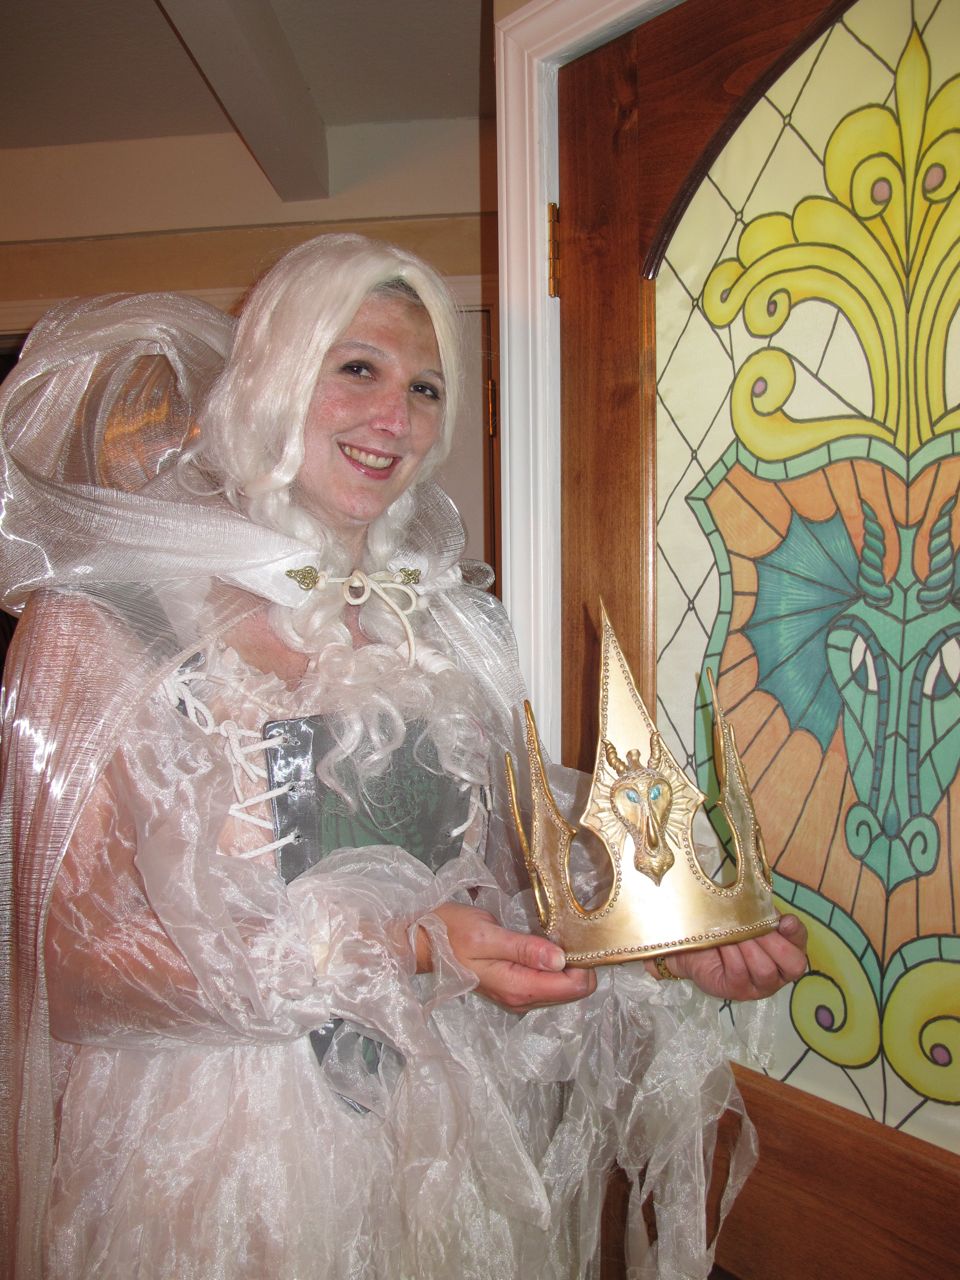
Several more were voted in absentia like Robert & Maureen’s Mummy Fruitcake and Kevin C’s coffin smoked potatoes, but I couldn’t award them prizes when they had already left…darn! Glad Rozanne the Pin Cushion Queen was still around to accept a prize for her Finger Meat Pies! Not bad for a first-time attendee! 🙂

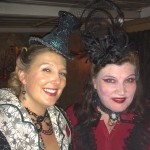
Since I had strongly encouraged costumes from anything in the Tim Burton universe, we had a lot of duplication, especially from Alice in Wonderland, but boy were they all fantastic costumes and so much creativity in interpretation, like Baby Alice Kira was wearing White Rabbit slippers while her mom Angie was the teal Cheshire Cat! The only group we didn’t get was all 3 Tim Burton’s together. 😉 Cat herded everyone together for some fabulous group photos…and I didn’t realize until someone else pointed out that the Nightmare Crew photo has THIRTEEN people…how perfect!

The Nightmare Crew of THIRTEEN

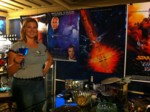
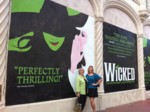
Of course the Jacks hit the Jackpot with the giant bus poster as well as animatronic Jack!

Jacks with the Jack Bus Poster Jacks with Animatronic Jack

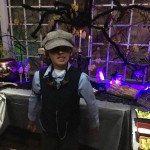
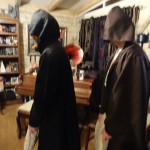
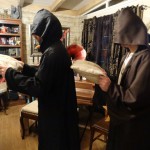
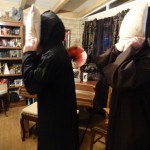
Barrel Obie, Shock Marcie & Lock Steve demonstrate effective minimalist costumes! 😉
Barrel Obie, Shock Marcie & Lock Steve

Quite an Alice crowd!

There were so many Mad Hatters they had their own tea party!
Mad Hatter Tea Party

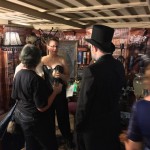
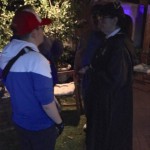
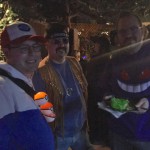
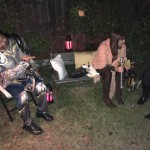
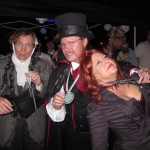
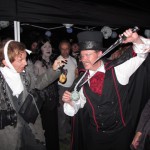
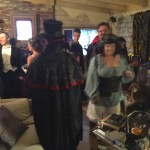
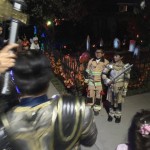
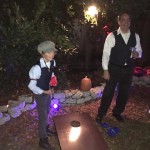
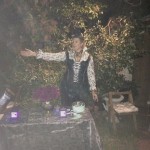
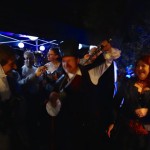
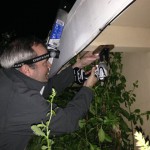
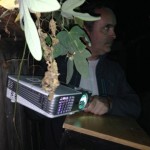
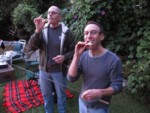
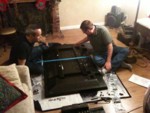
Tim Burton Craig & Tim Burton Glen Directing the Outside Display

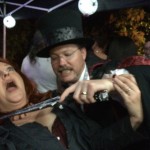
At least we caught two of the Tim Burtons in action “directing” the outside display (Craig & Glen)! For the other Tim Burton movies, we had a Pee-Wee Herman (Marco), Sweeney Todd & Mrs. Lovett (Nicholas & Elisabeth), a few from Dark Shadows (Nathania, Kaye & Jeff), a Corpse Bride (Mary Jo), and of course Cat’s own costume was so absolutely perfect for her since Lydia Deetz from Beetlejuice also carried around a giant camera. Cat was so dedicated to her costume authenticity she brought her other big camera to hold while her best camera could take a photo of her! 😀

Pee Wee Marco & Santa Jack Ben Dark Shadows Duo Kaye & Nathania Sweeney Todd Nicholas and Mrs. Lovett Elisabeth

Corpse Bride & Jack Camera Girl Cat as Lydia Deetz from Beetlejuice

Diane as Britta from the Future
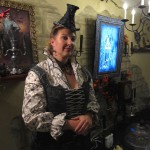
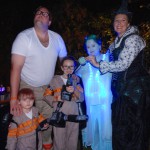
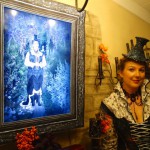
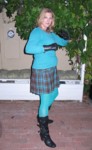
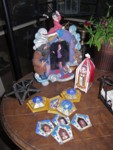
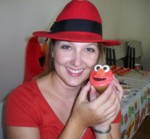
My mom isn’t really enthused about costumes these days, even though when I was young I remember she & my dad going to adult Halloween parties without me as a Rubik’s Cube, outhouse, and other creative things. When I heard she was coming to this party, I thought of how we look so much alike, and thought an easy costume for her would be to wear my giant Nightmare top hat with Jack scarf, duplicating this photo of me, and saying she was Britta from 25 years in the future! She found a great old photo of her at my current age and had a name tag showing the photo of me in the same outfit she was Mad Hatter Jeff and familywearing. She didn’t win a prize but people got a kick out of it! 🙂

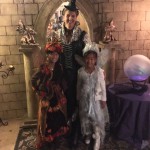
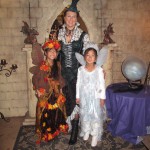
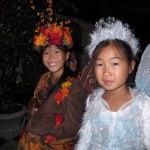
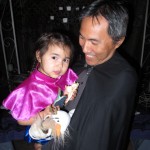
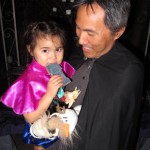
I don’t know where Jeff & Audene were for the costume voting, since I really think they should have won Most Original Costume. The concept was brilliant: Little Julianna was the Danny Elfman Music Fairy, and Jeff as Johnny Depp could change between movies by changing just a few accessories! I saw the Mad Hatter in the tea party group, Willy Wonka inside for a while, and Barnabas Collins towards the end, and I don’t know if I missed any others! His vampire cape was the one I made him in 1994 when I made my first Sally costume, so it was also a celebration of Twenty Halloweens!

Willy Wonka Jeff Dark Shadows Jeff and Sally Britta

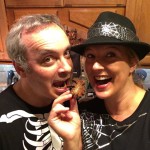
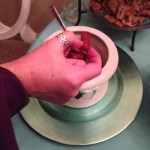
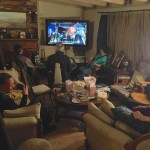
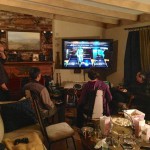
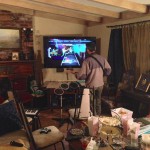
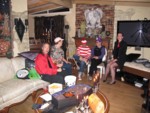
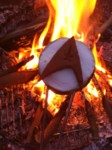
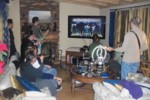
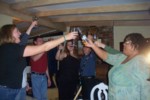
As the party was winding down, we ended up in the Undead Room watching the slideshows and videos of all of my 19 past Halloween parties, having fun reminiscing and laughing. When the bleeding heart came on one video, we decided we should sever and serve this year’s! Thanks to Eileen for catching it on video! You can see the little Danny Elfman Music Fairy being indoctrinated into Halloween spirit by helping catch the blood stream in the goblet! 😉

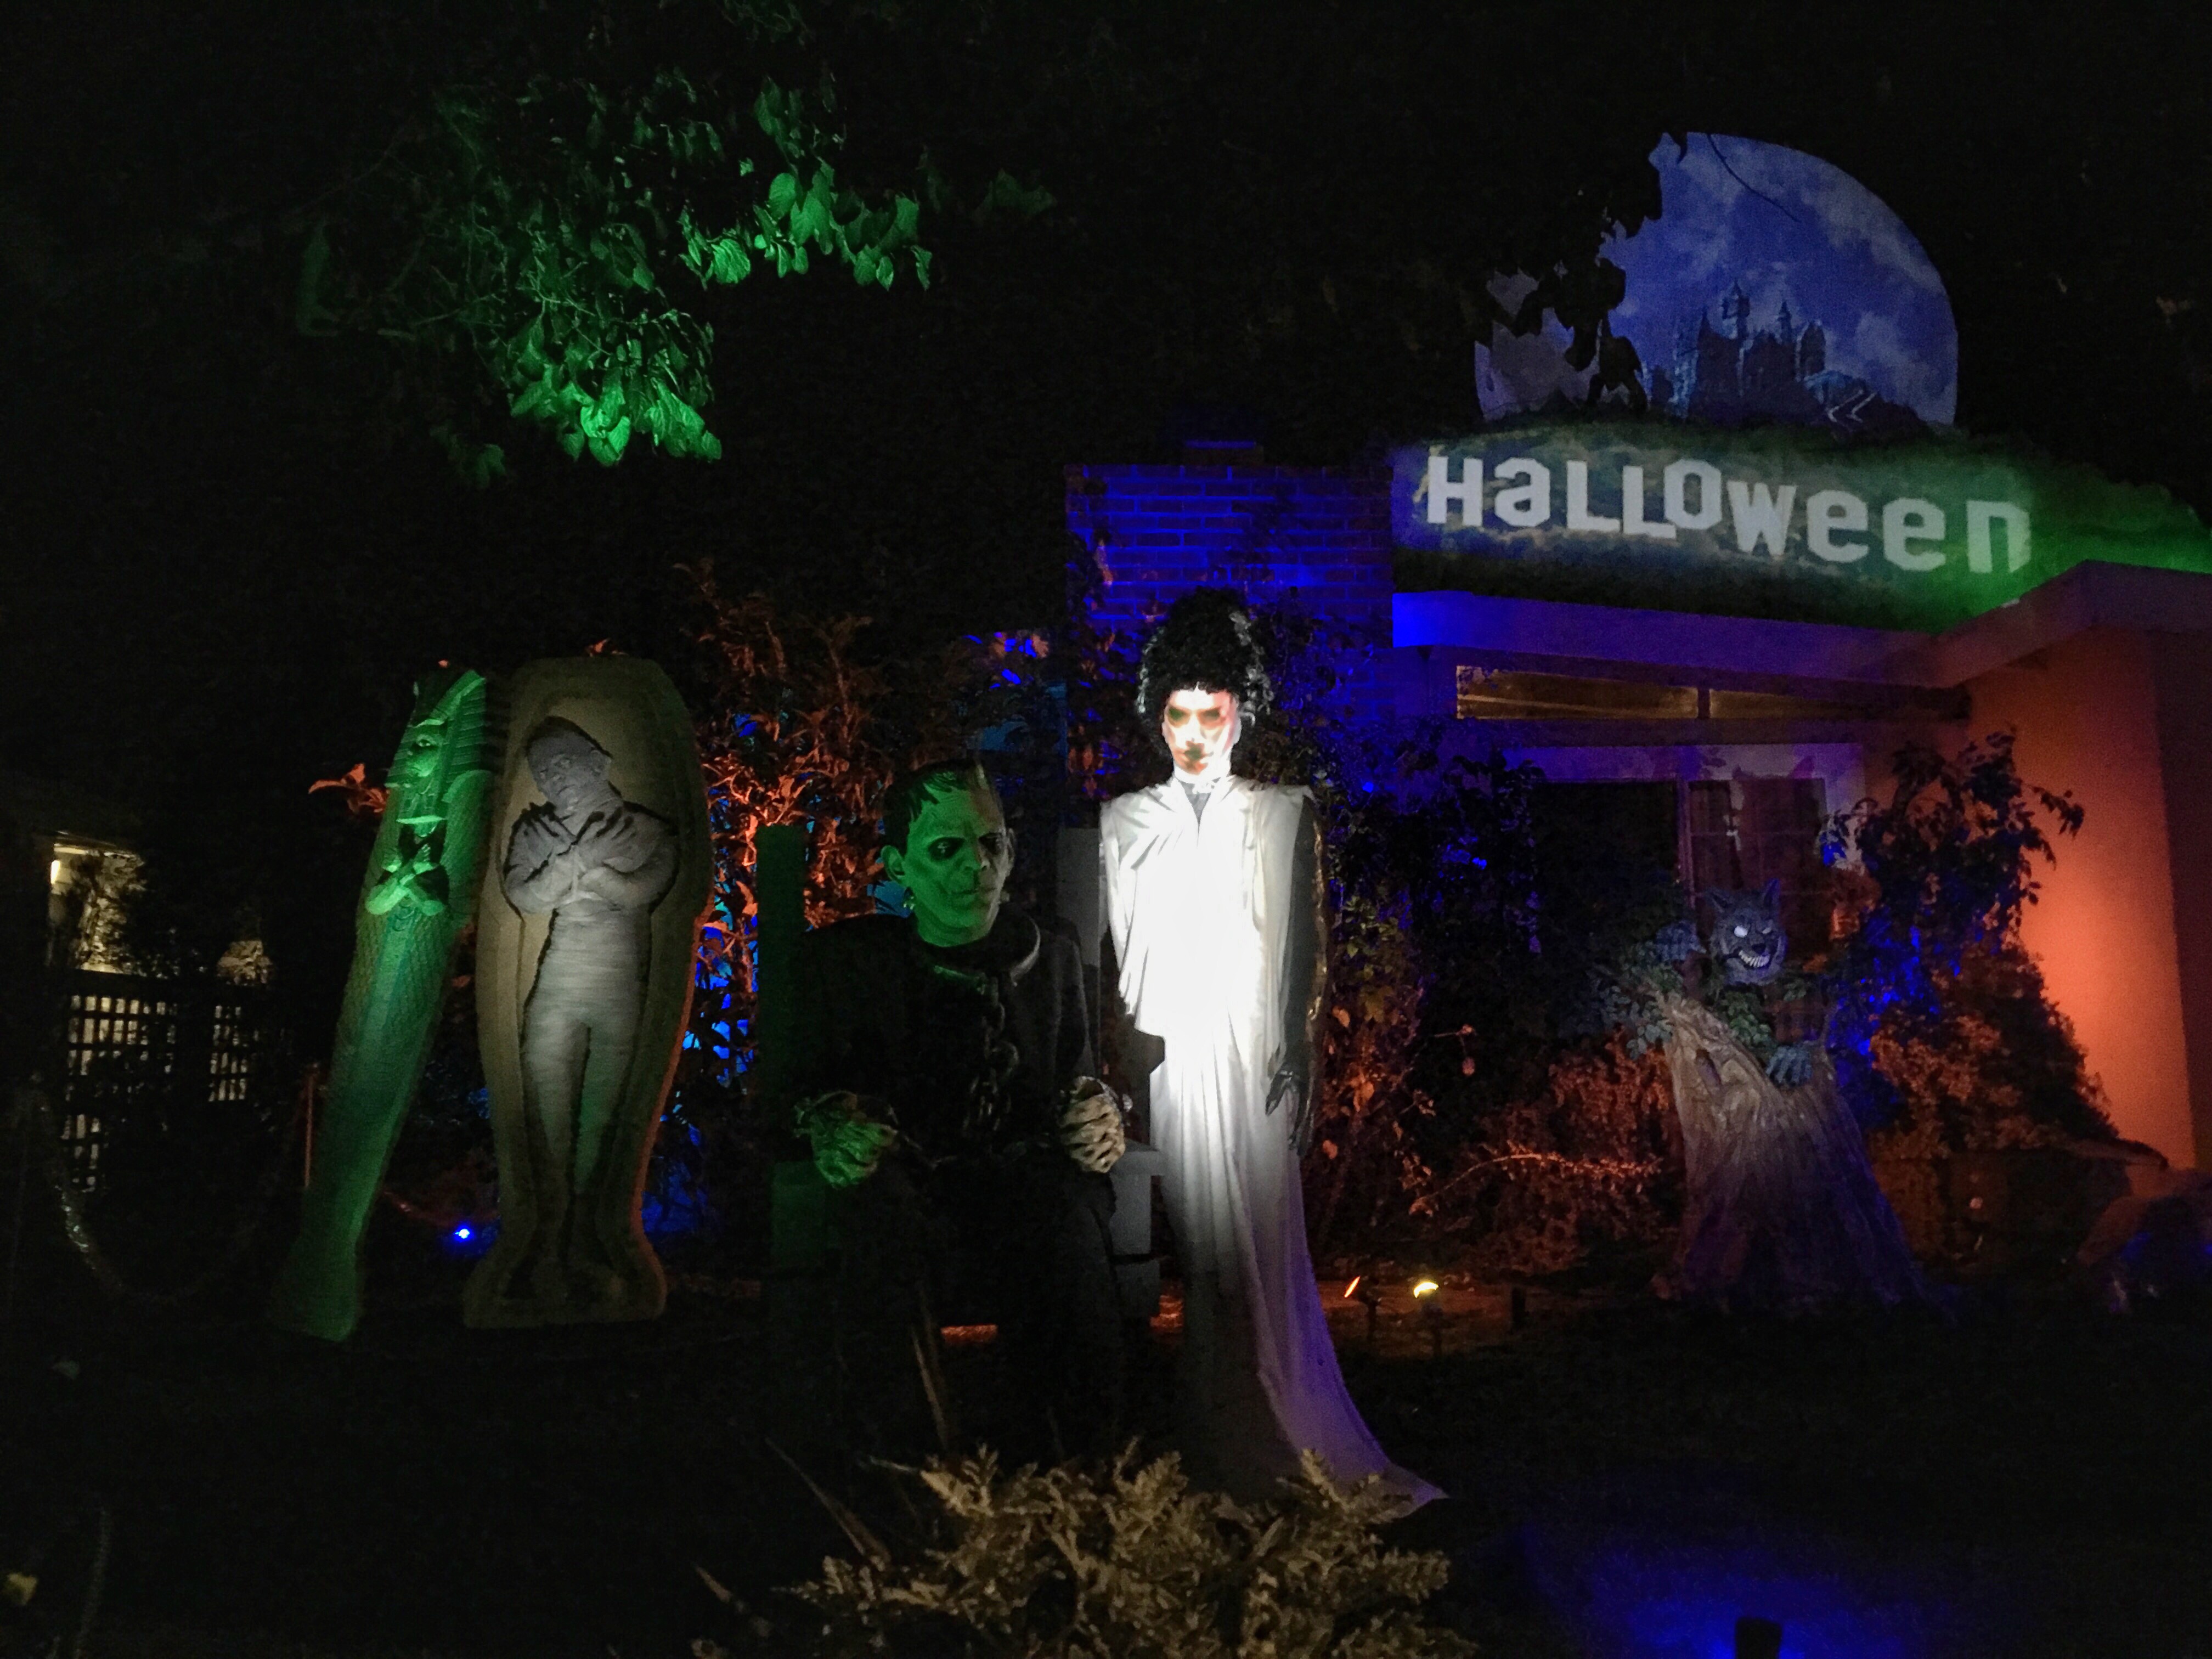
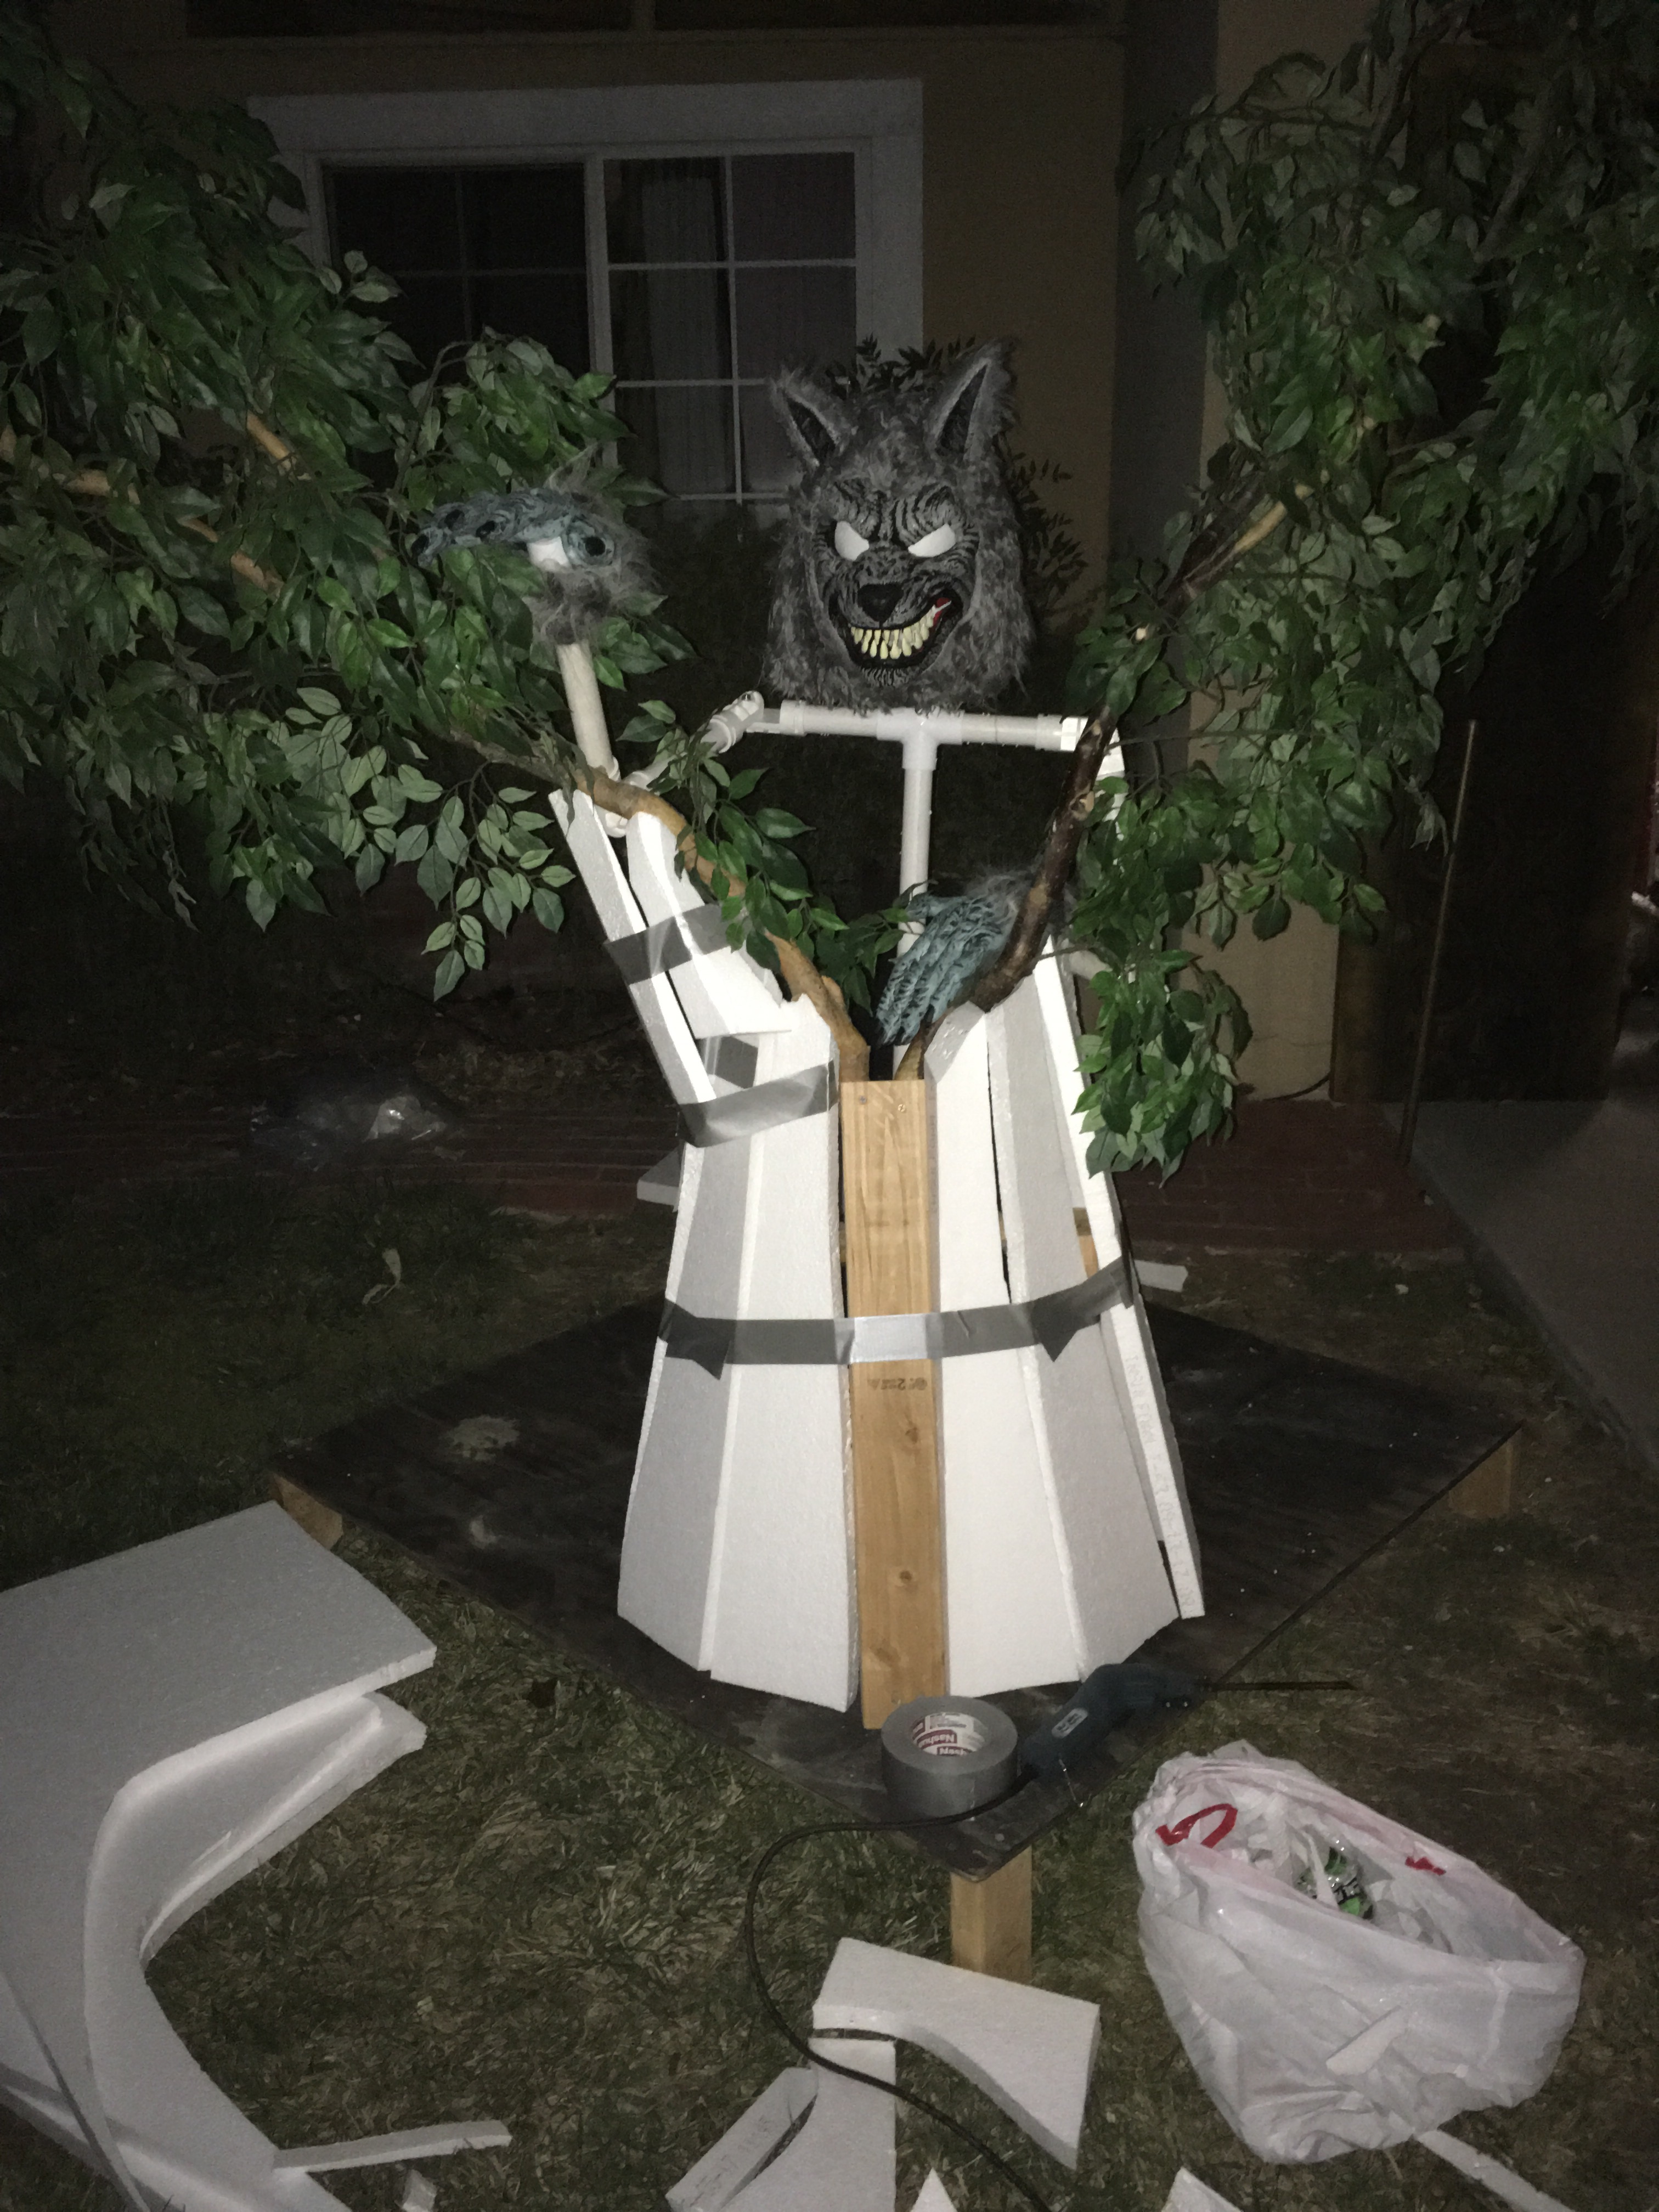
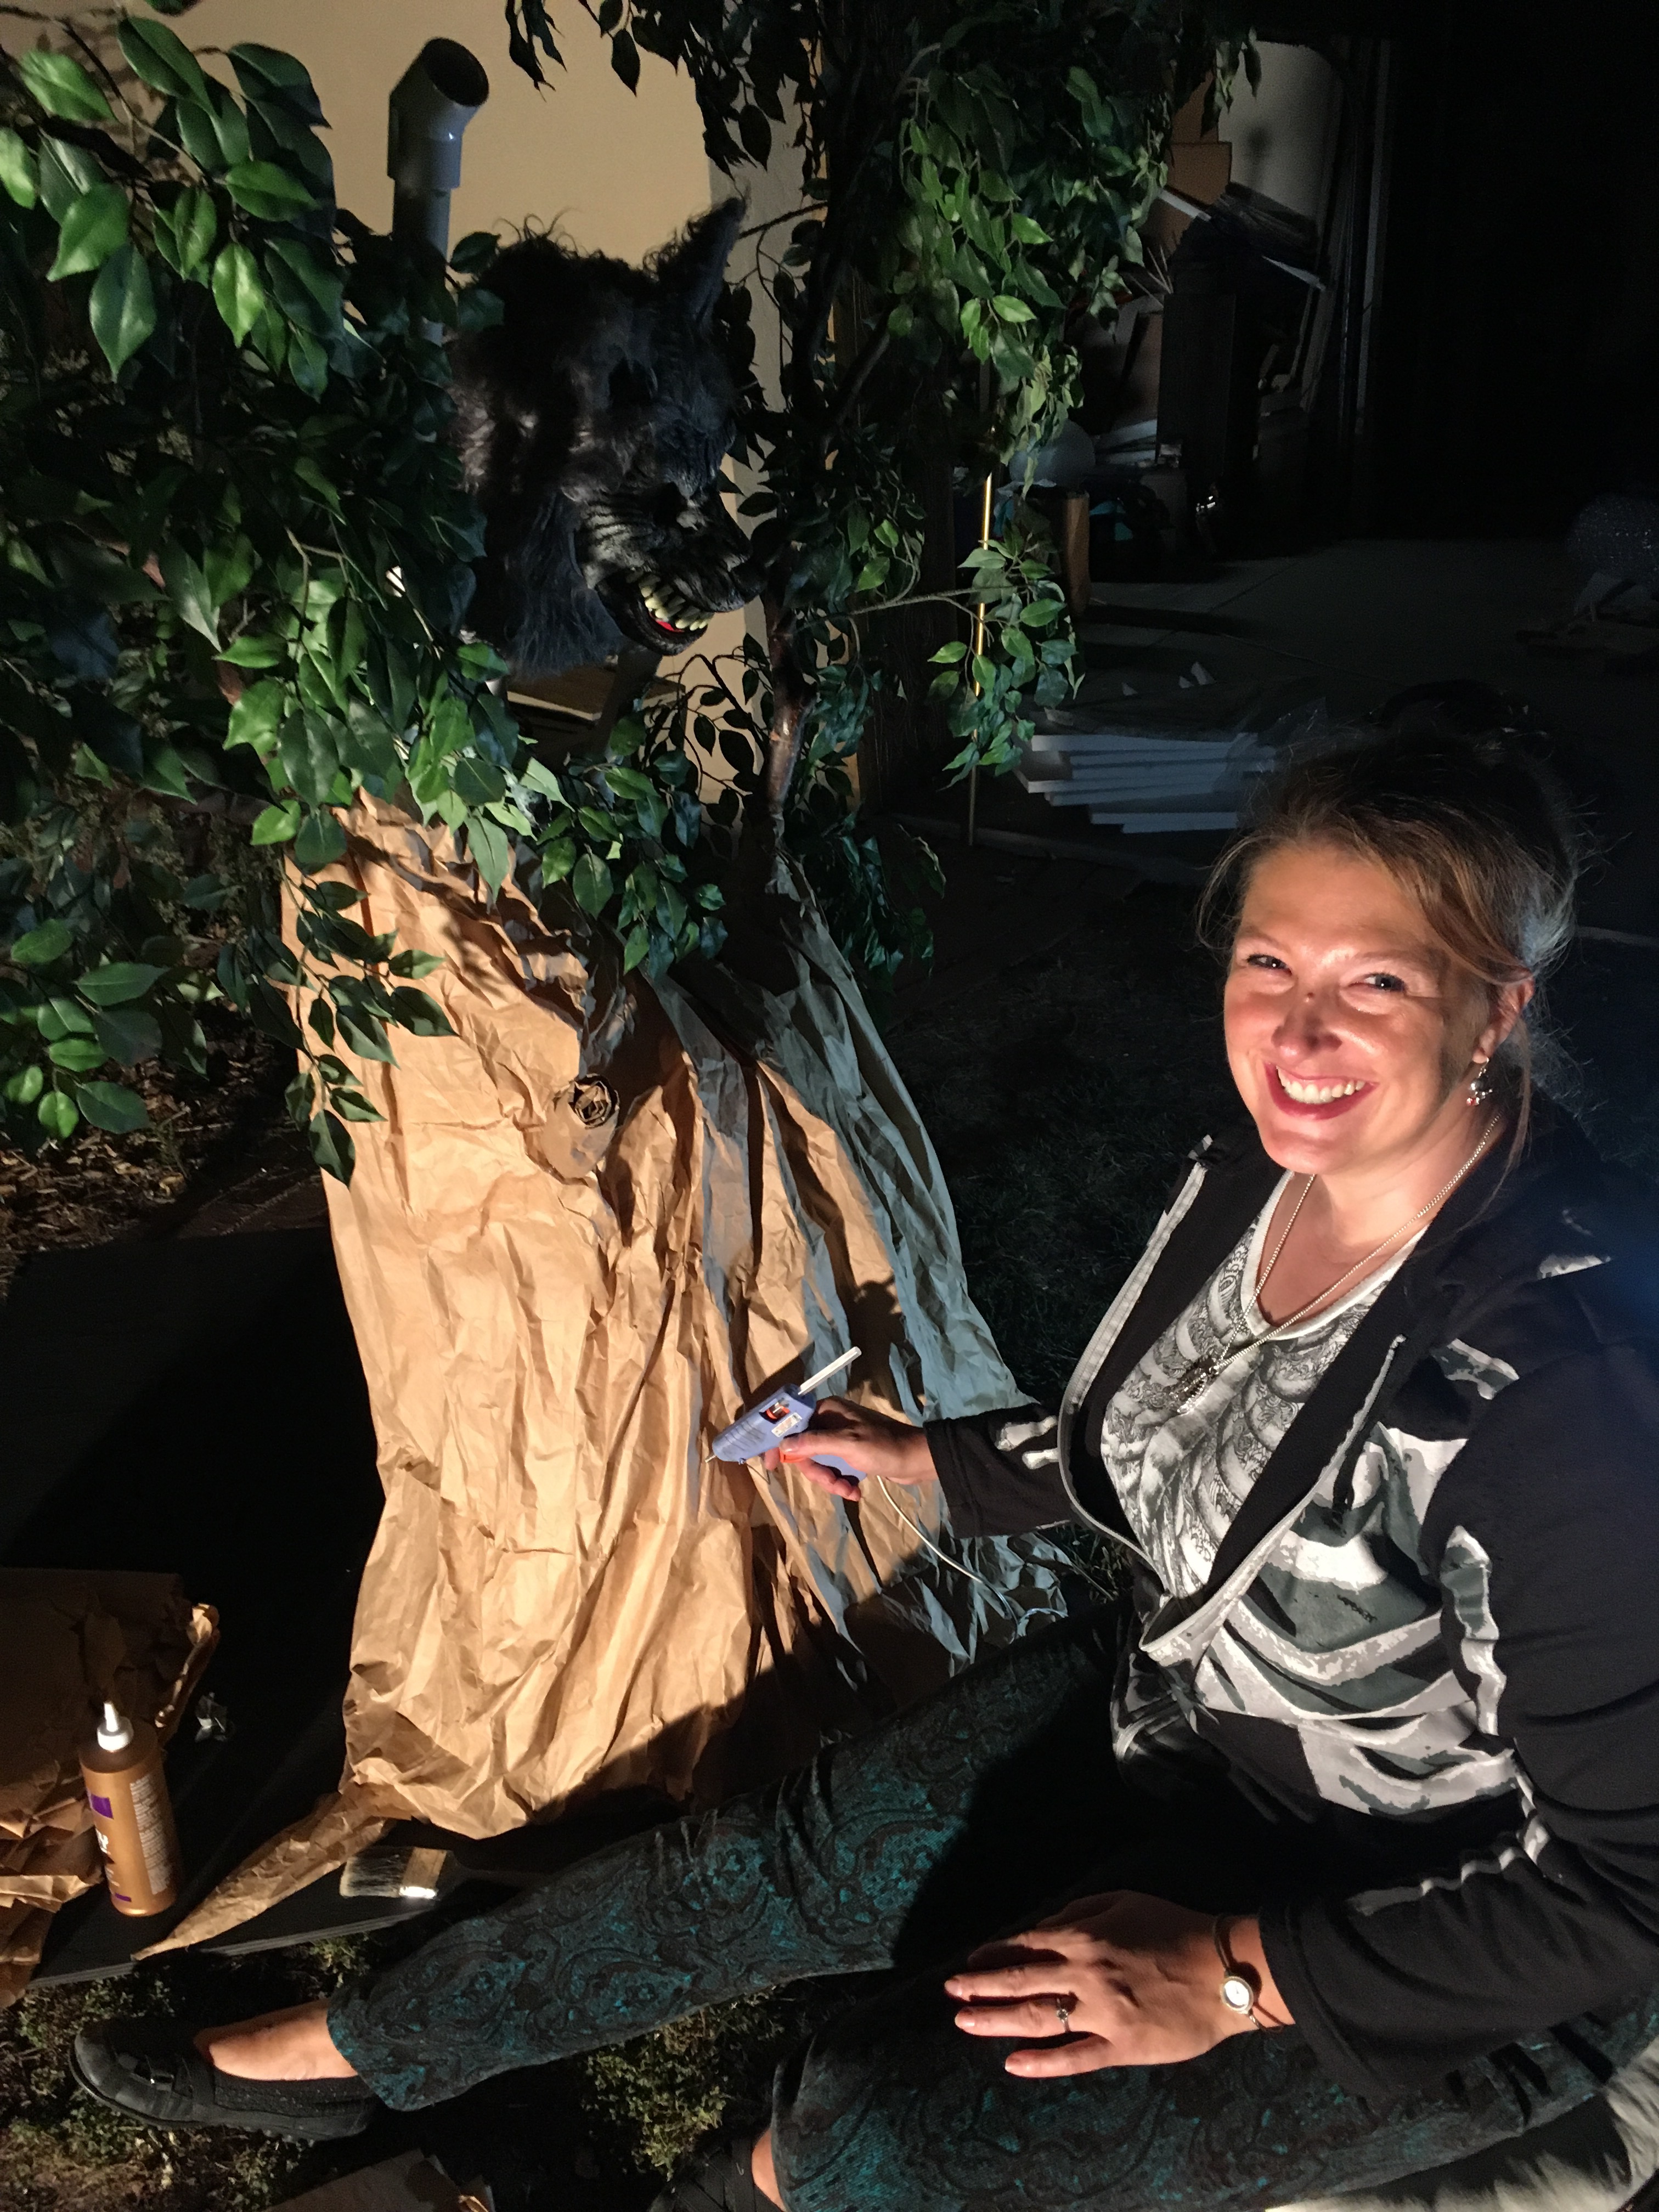
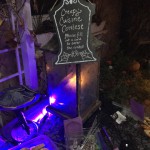
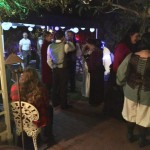
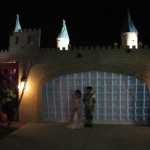
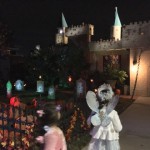
Now let me take you on a tour of the decorations. As you approach the house, you see three Singing Scarecrows, the Pumpkin Chorus in the graveyard of 13 all Tim Burton character gravestones, Jack in the Box peeking out, Snakey chomping the presents & Christmas tree in front, and the 8-foot moon screen above it all. They all sing This Is Halloween from the Nightmare Before Christmas movie of course!

Front View of the Front Show
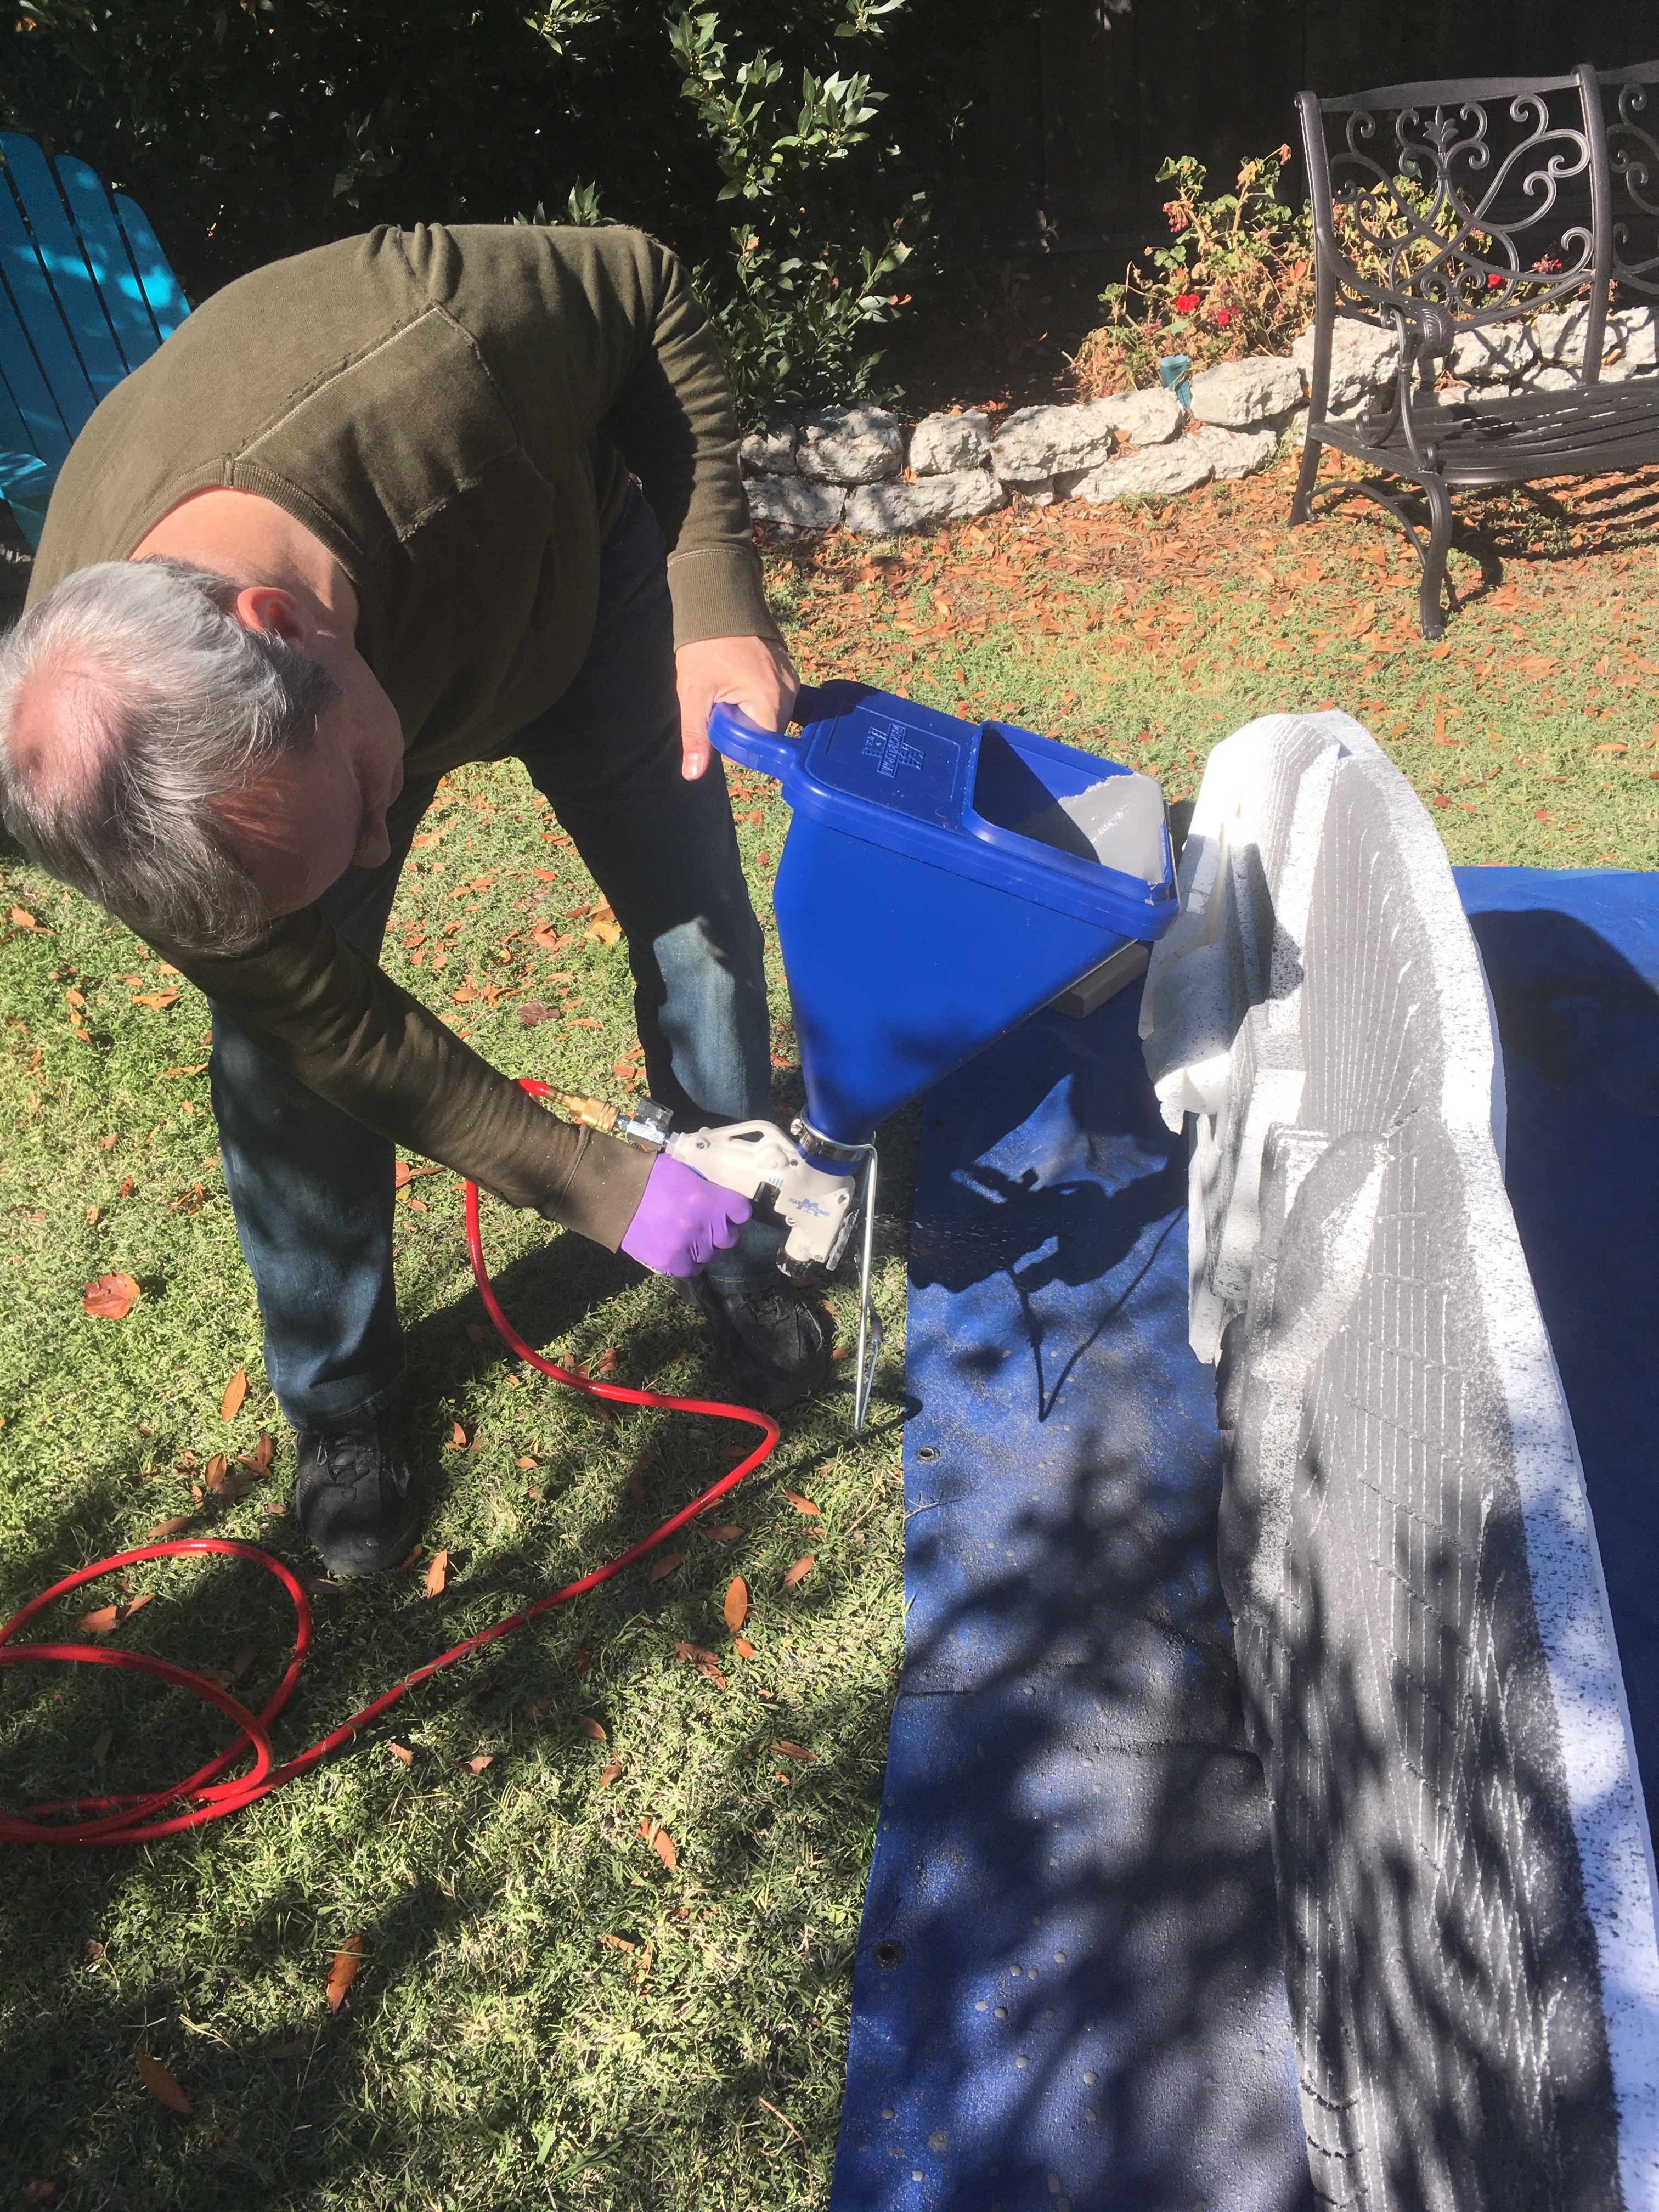
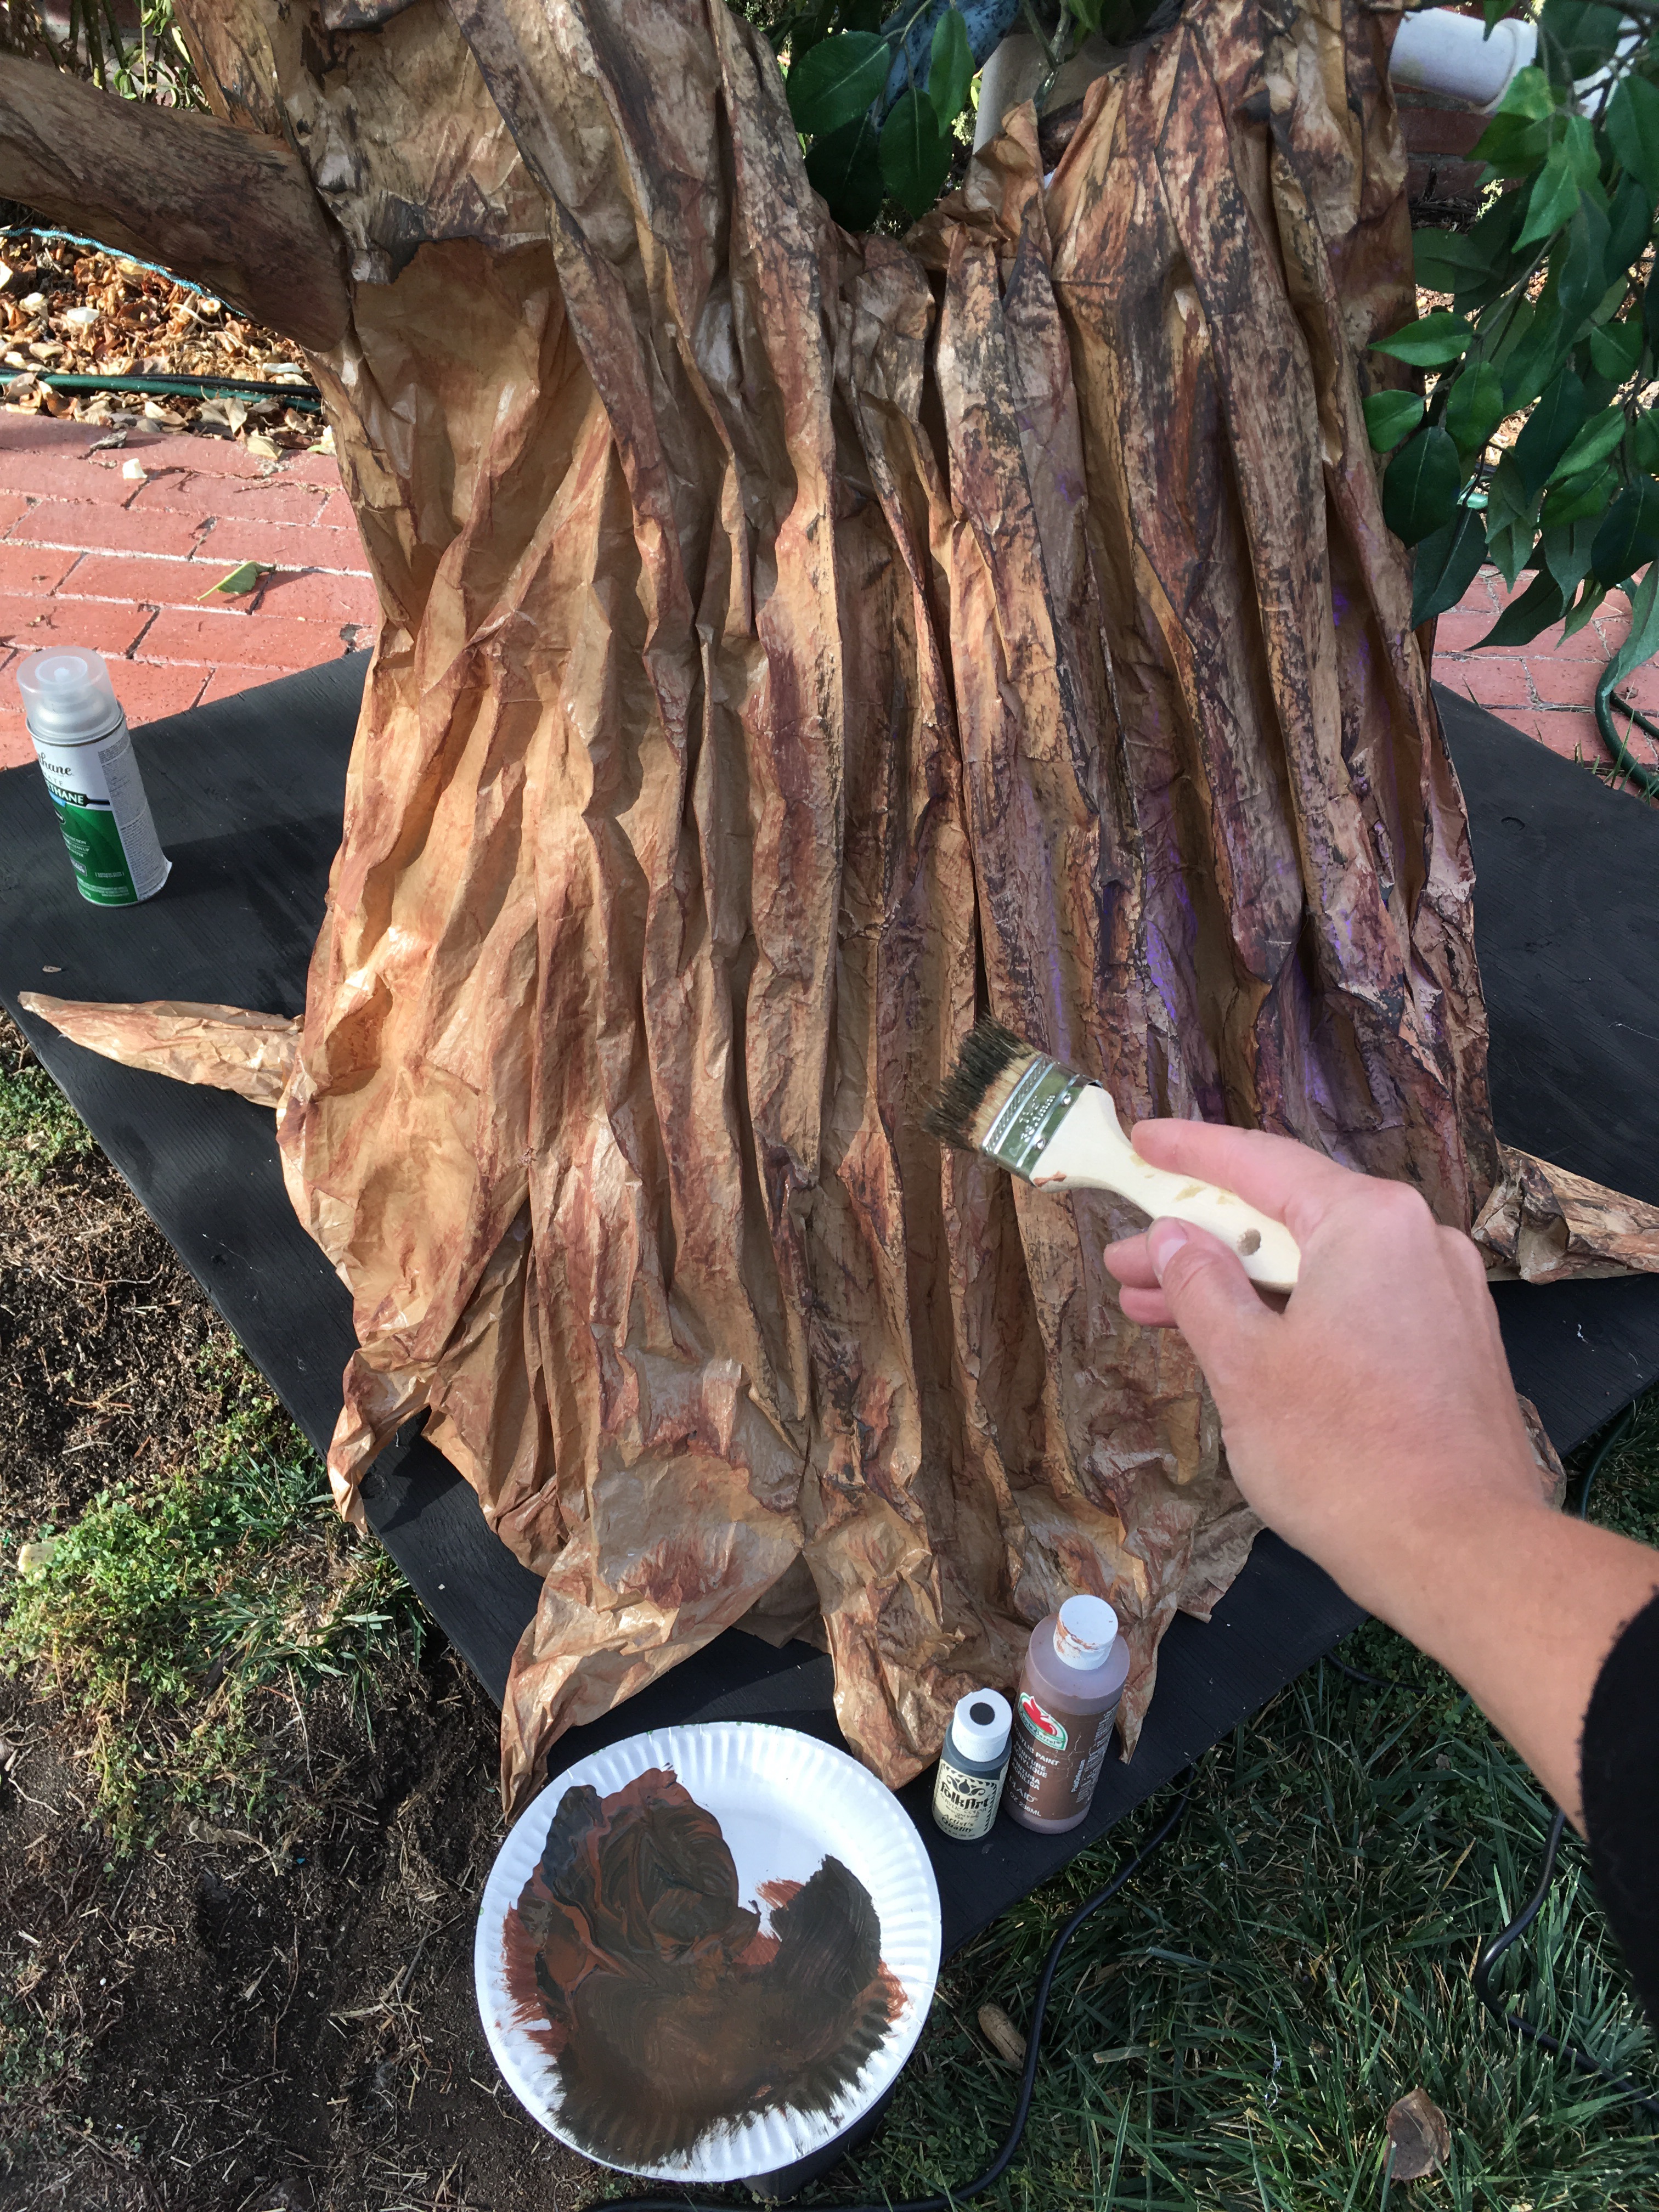
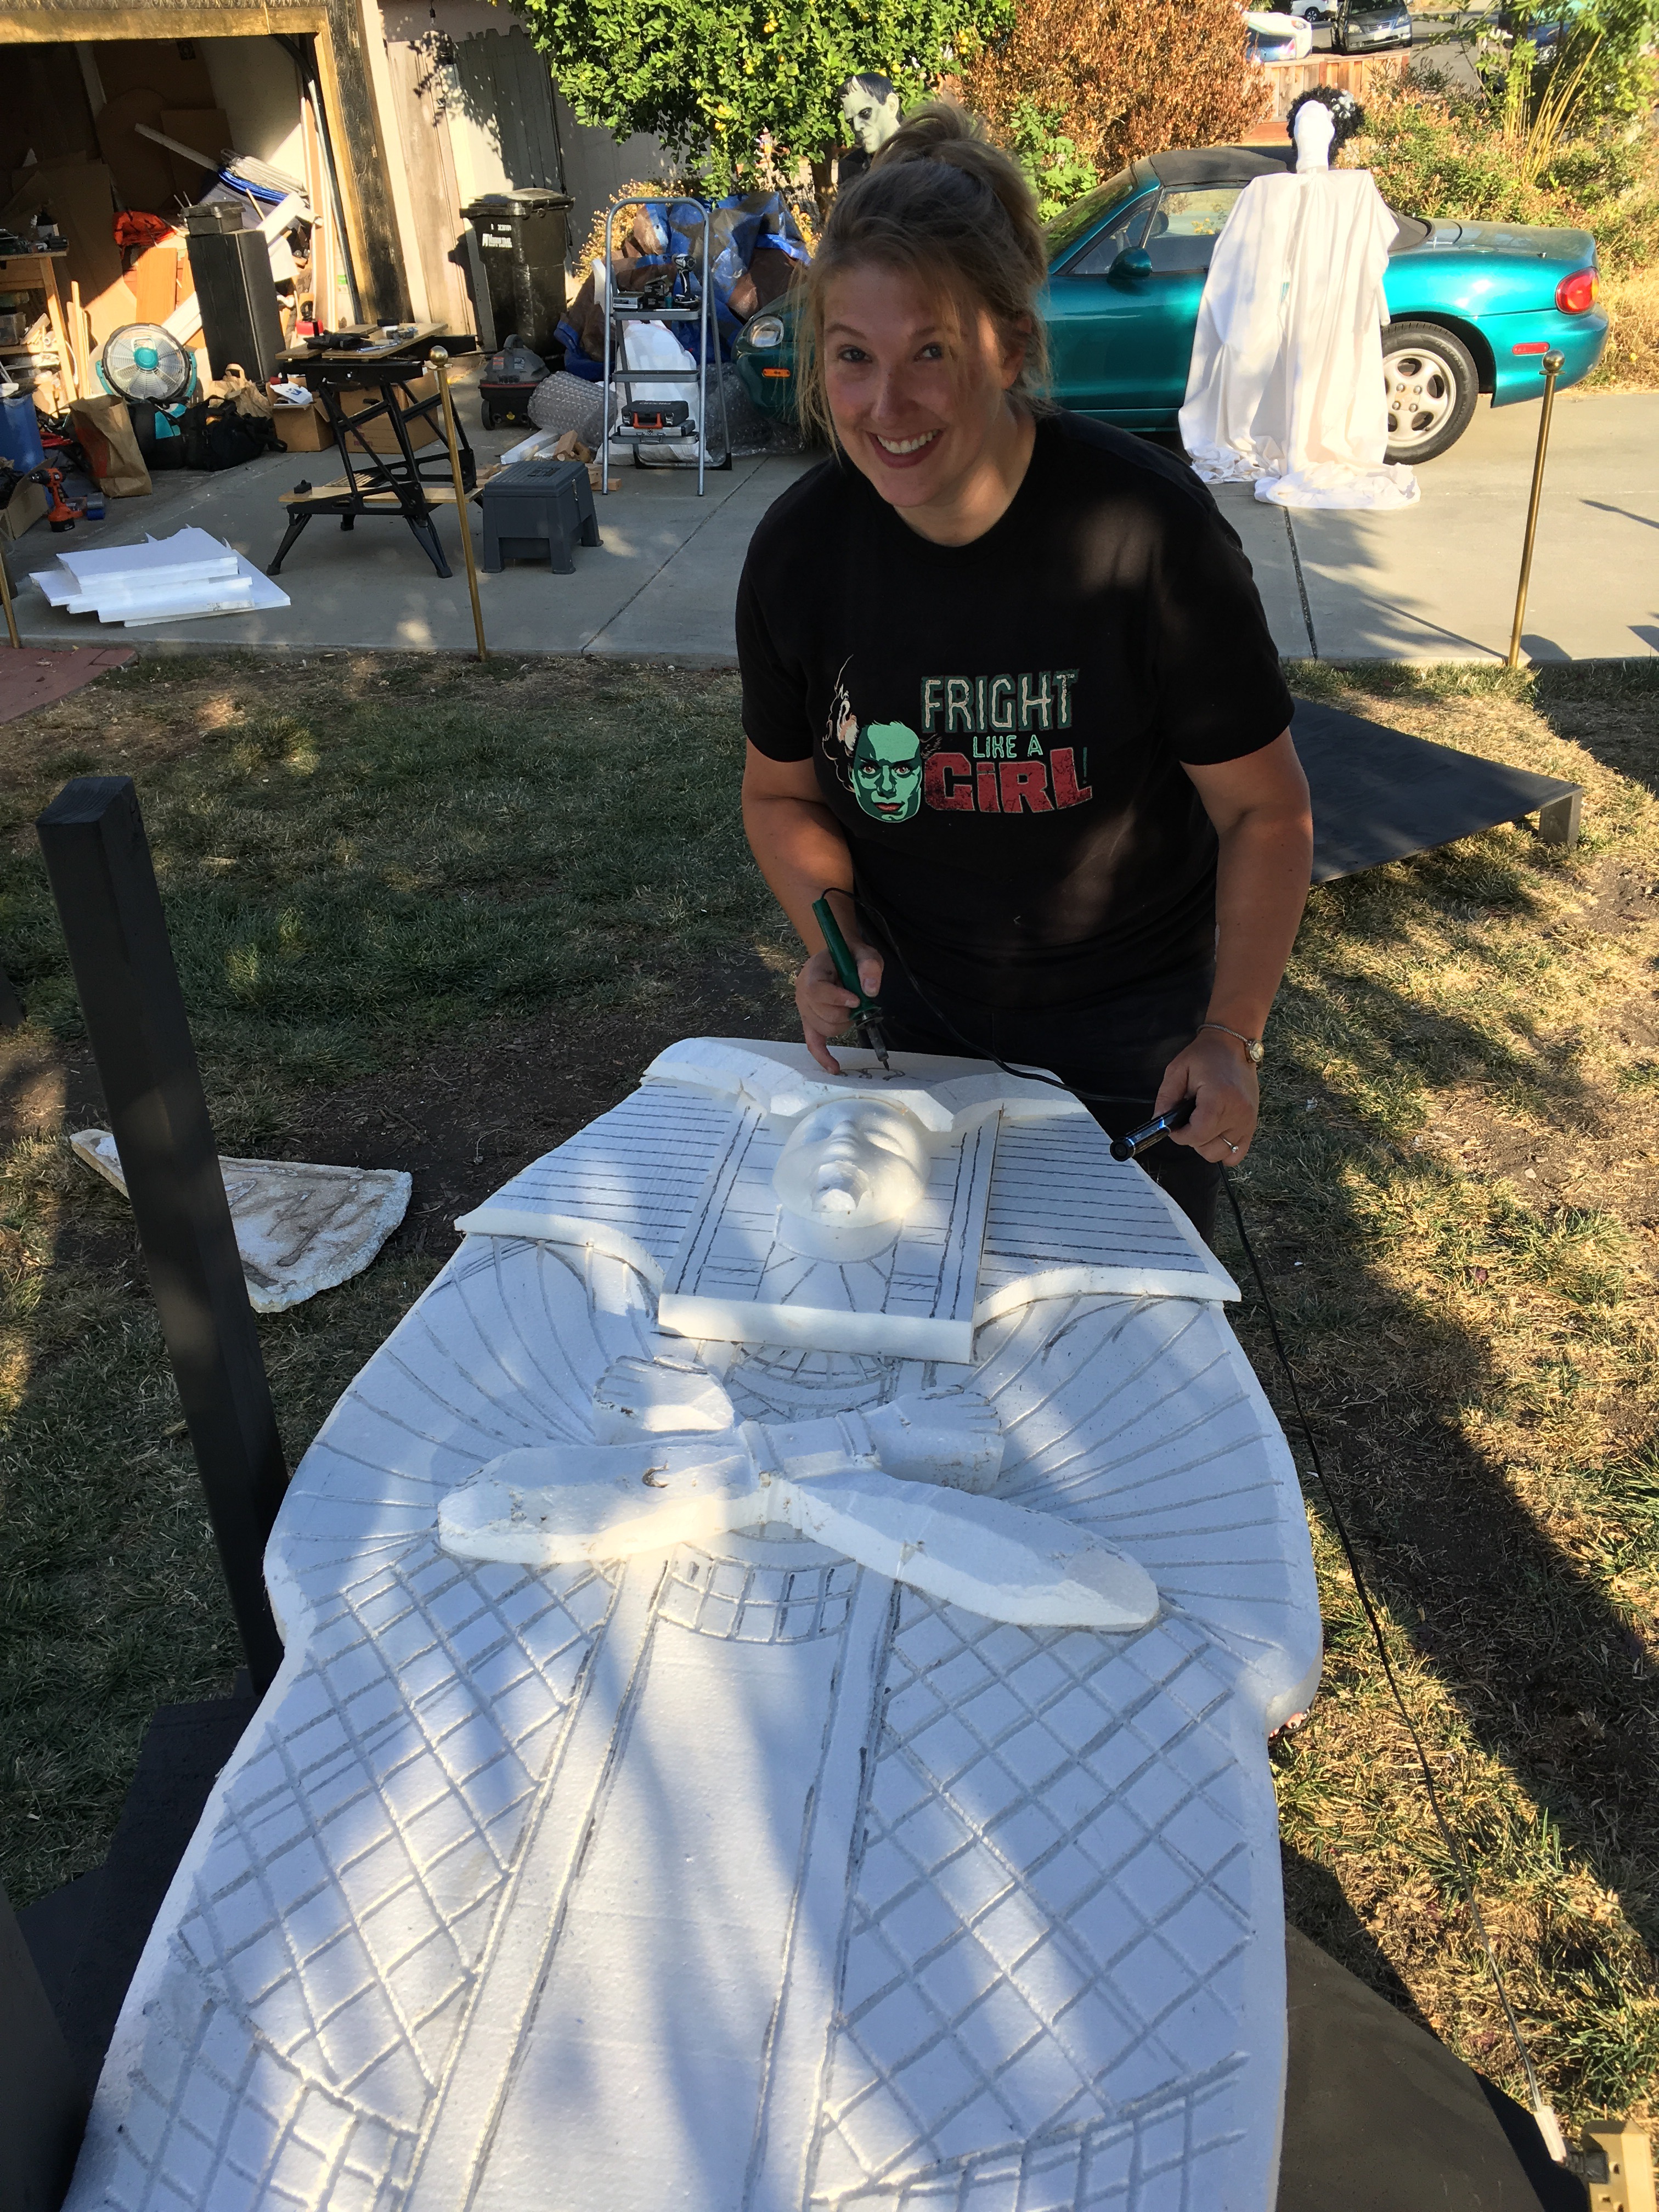
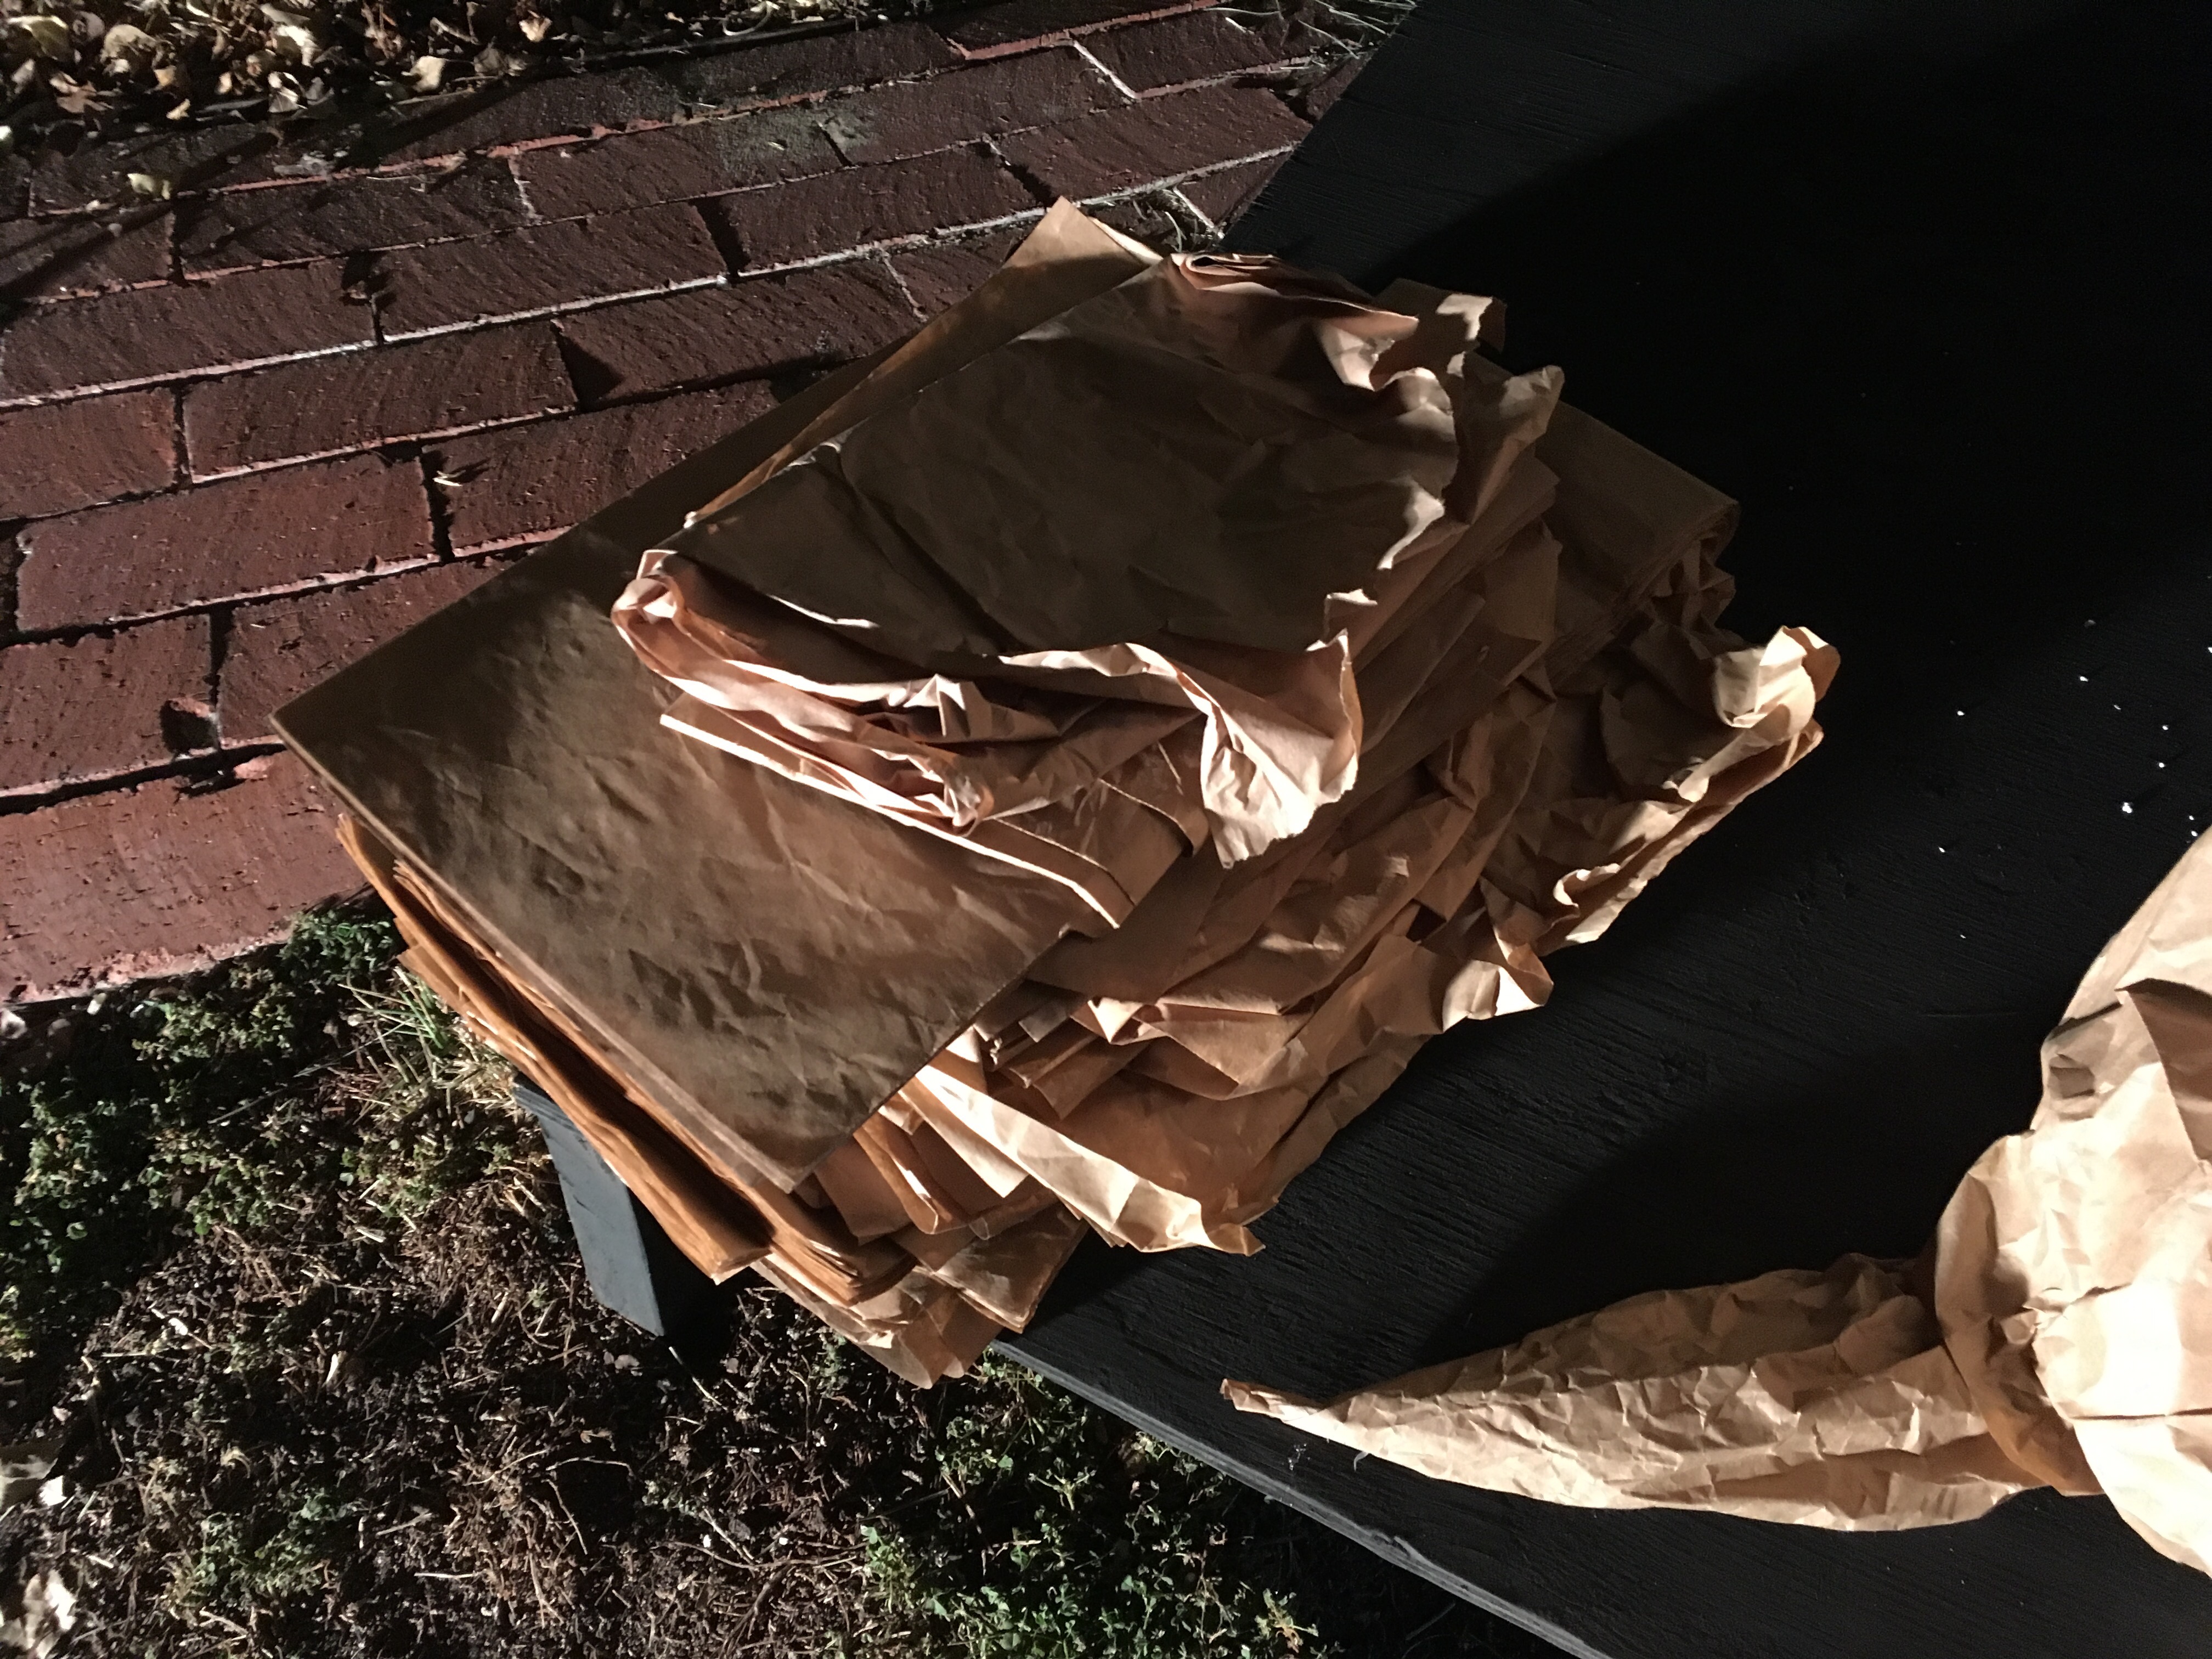
This was a huge amount of work by the entire Scream Team, not only Snakey and the lighted present boxes and new gravestones, but making larger papier-mache pumpkins than I could buy, filming our own faces made up as black & white jack o’lantern faces and lip-syncing to the song many many times, lots & lots of video editing by me, and the final evening it was still touch & go getting placement correct plus a final render that was finally party-ready at 6:30am! Full details will be forthcoming in another post of course. To give you an idea of the full experience, here is a walkthrough from the front sidewalk around the tree and up the walkway to the front door…

Ghostly Greenery urns in daylight
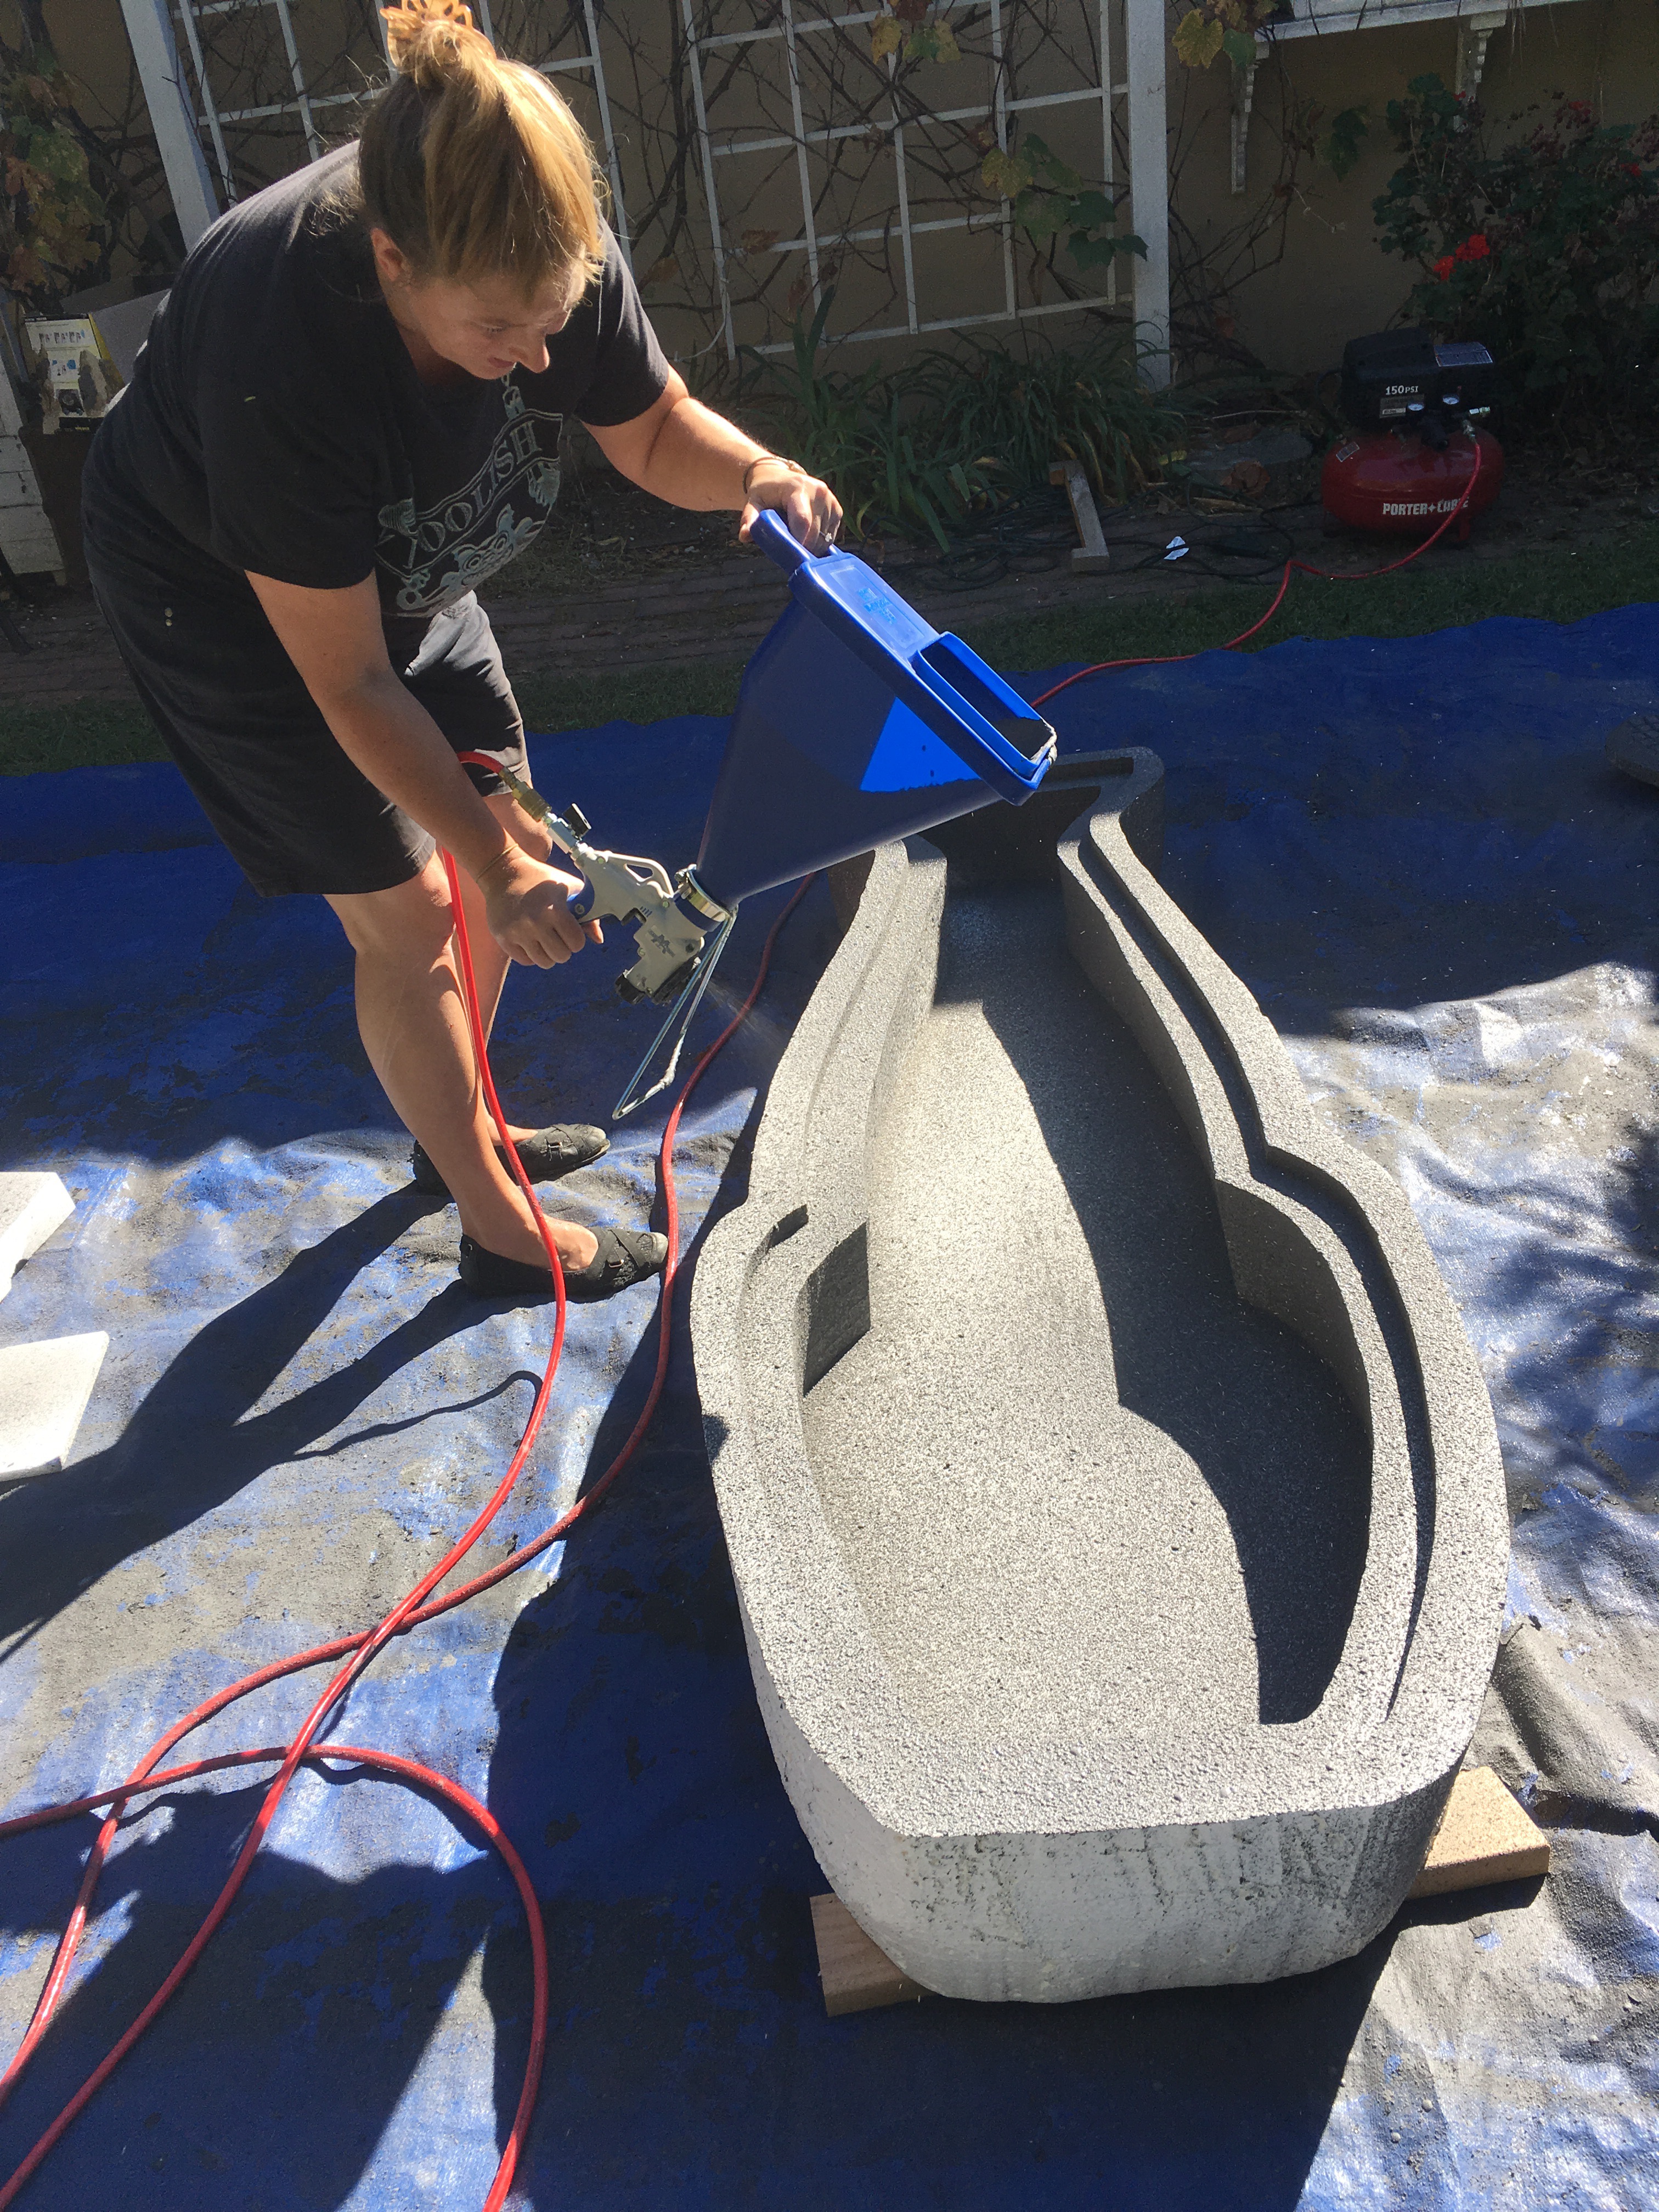
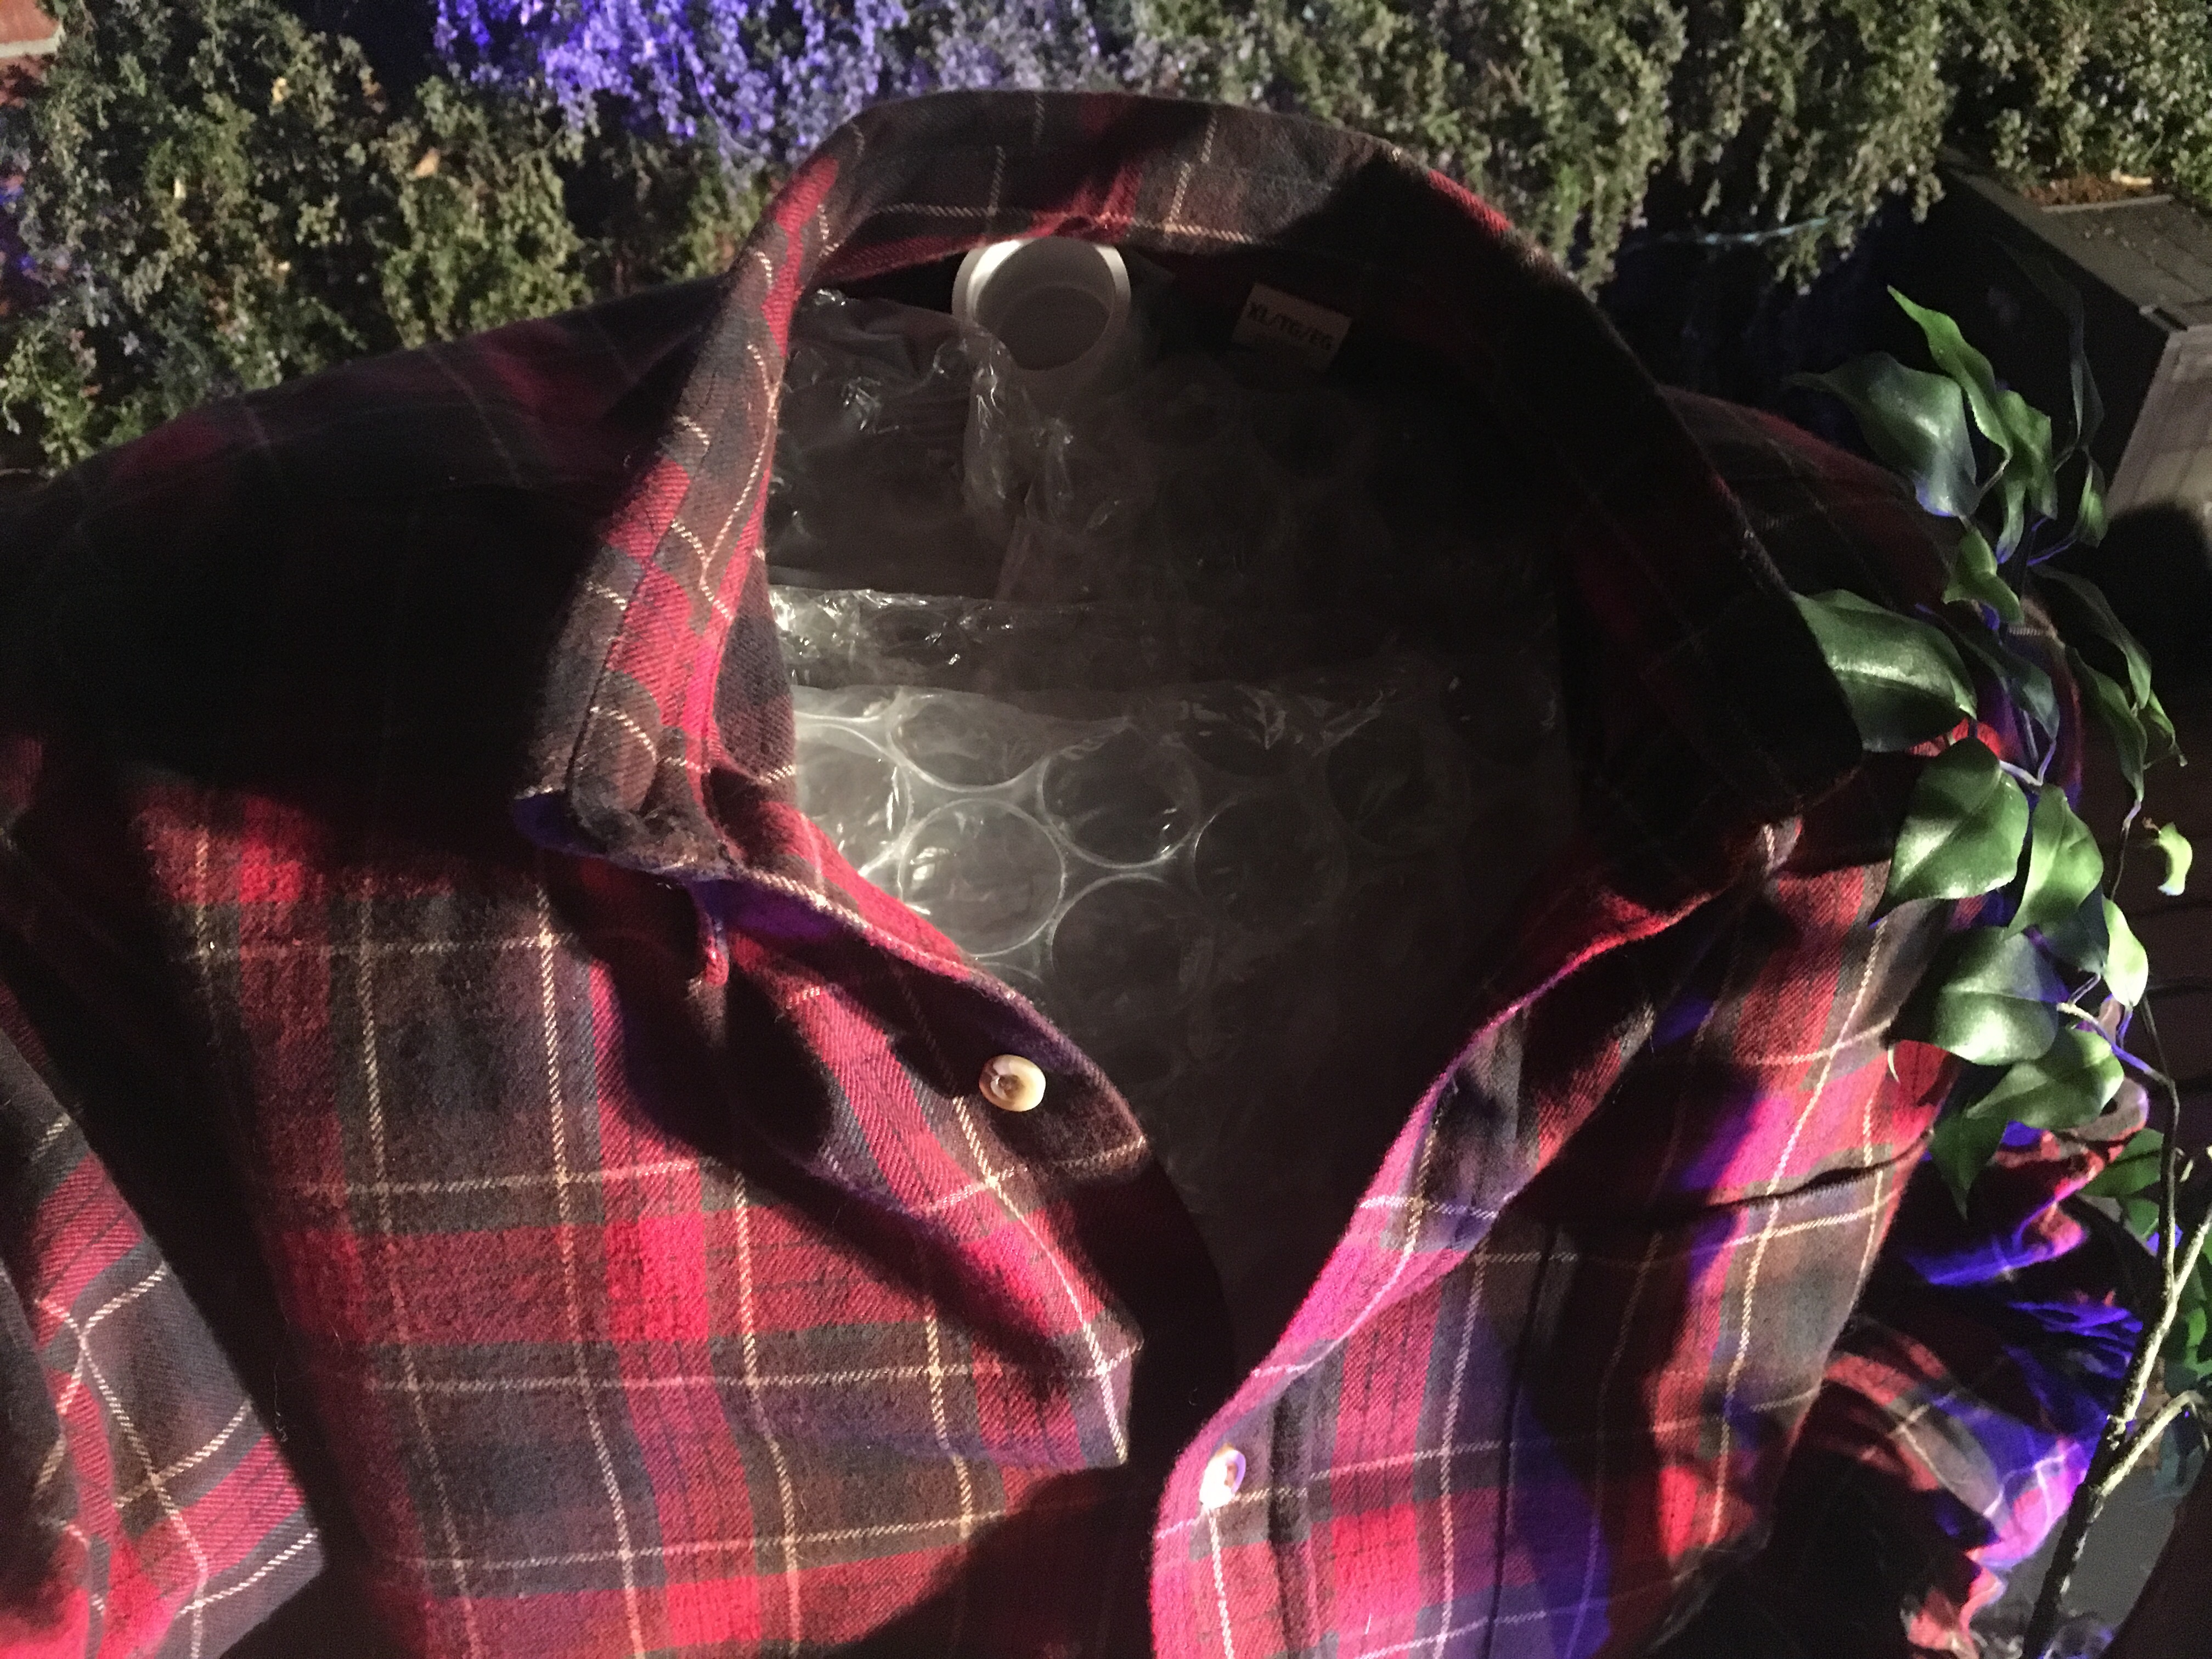
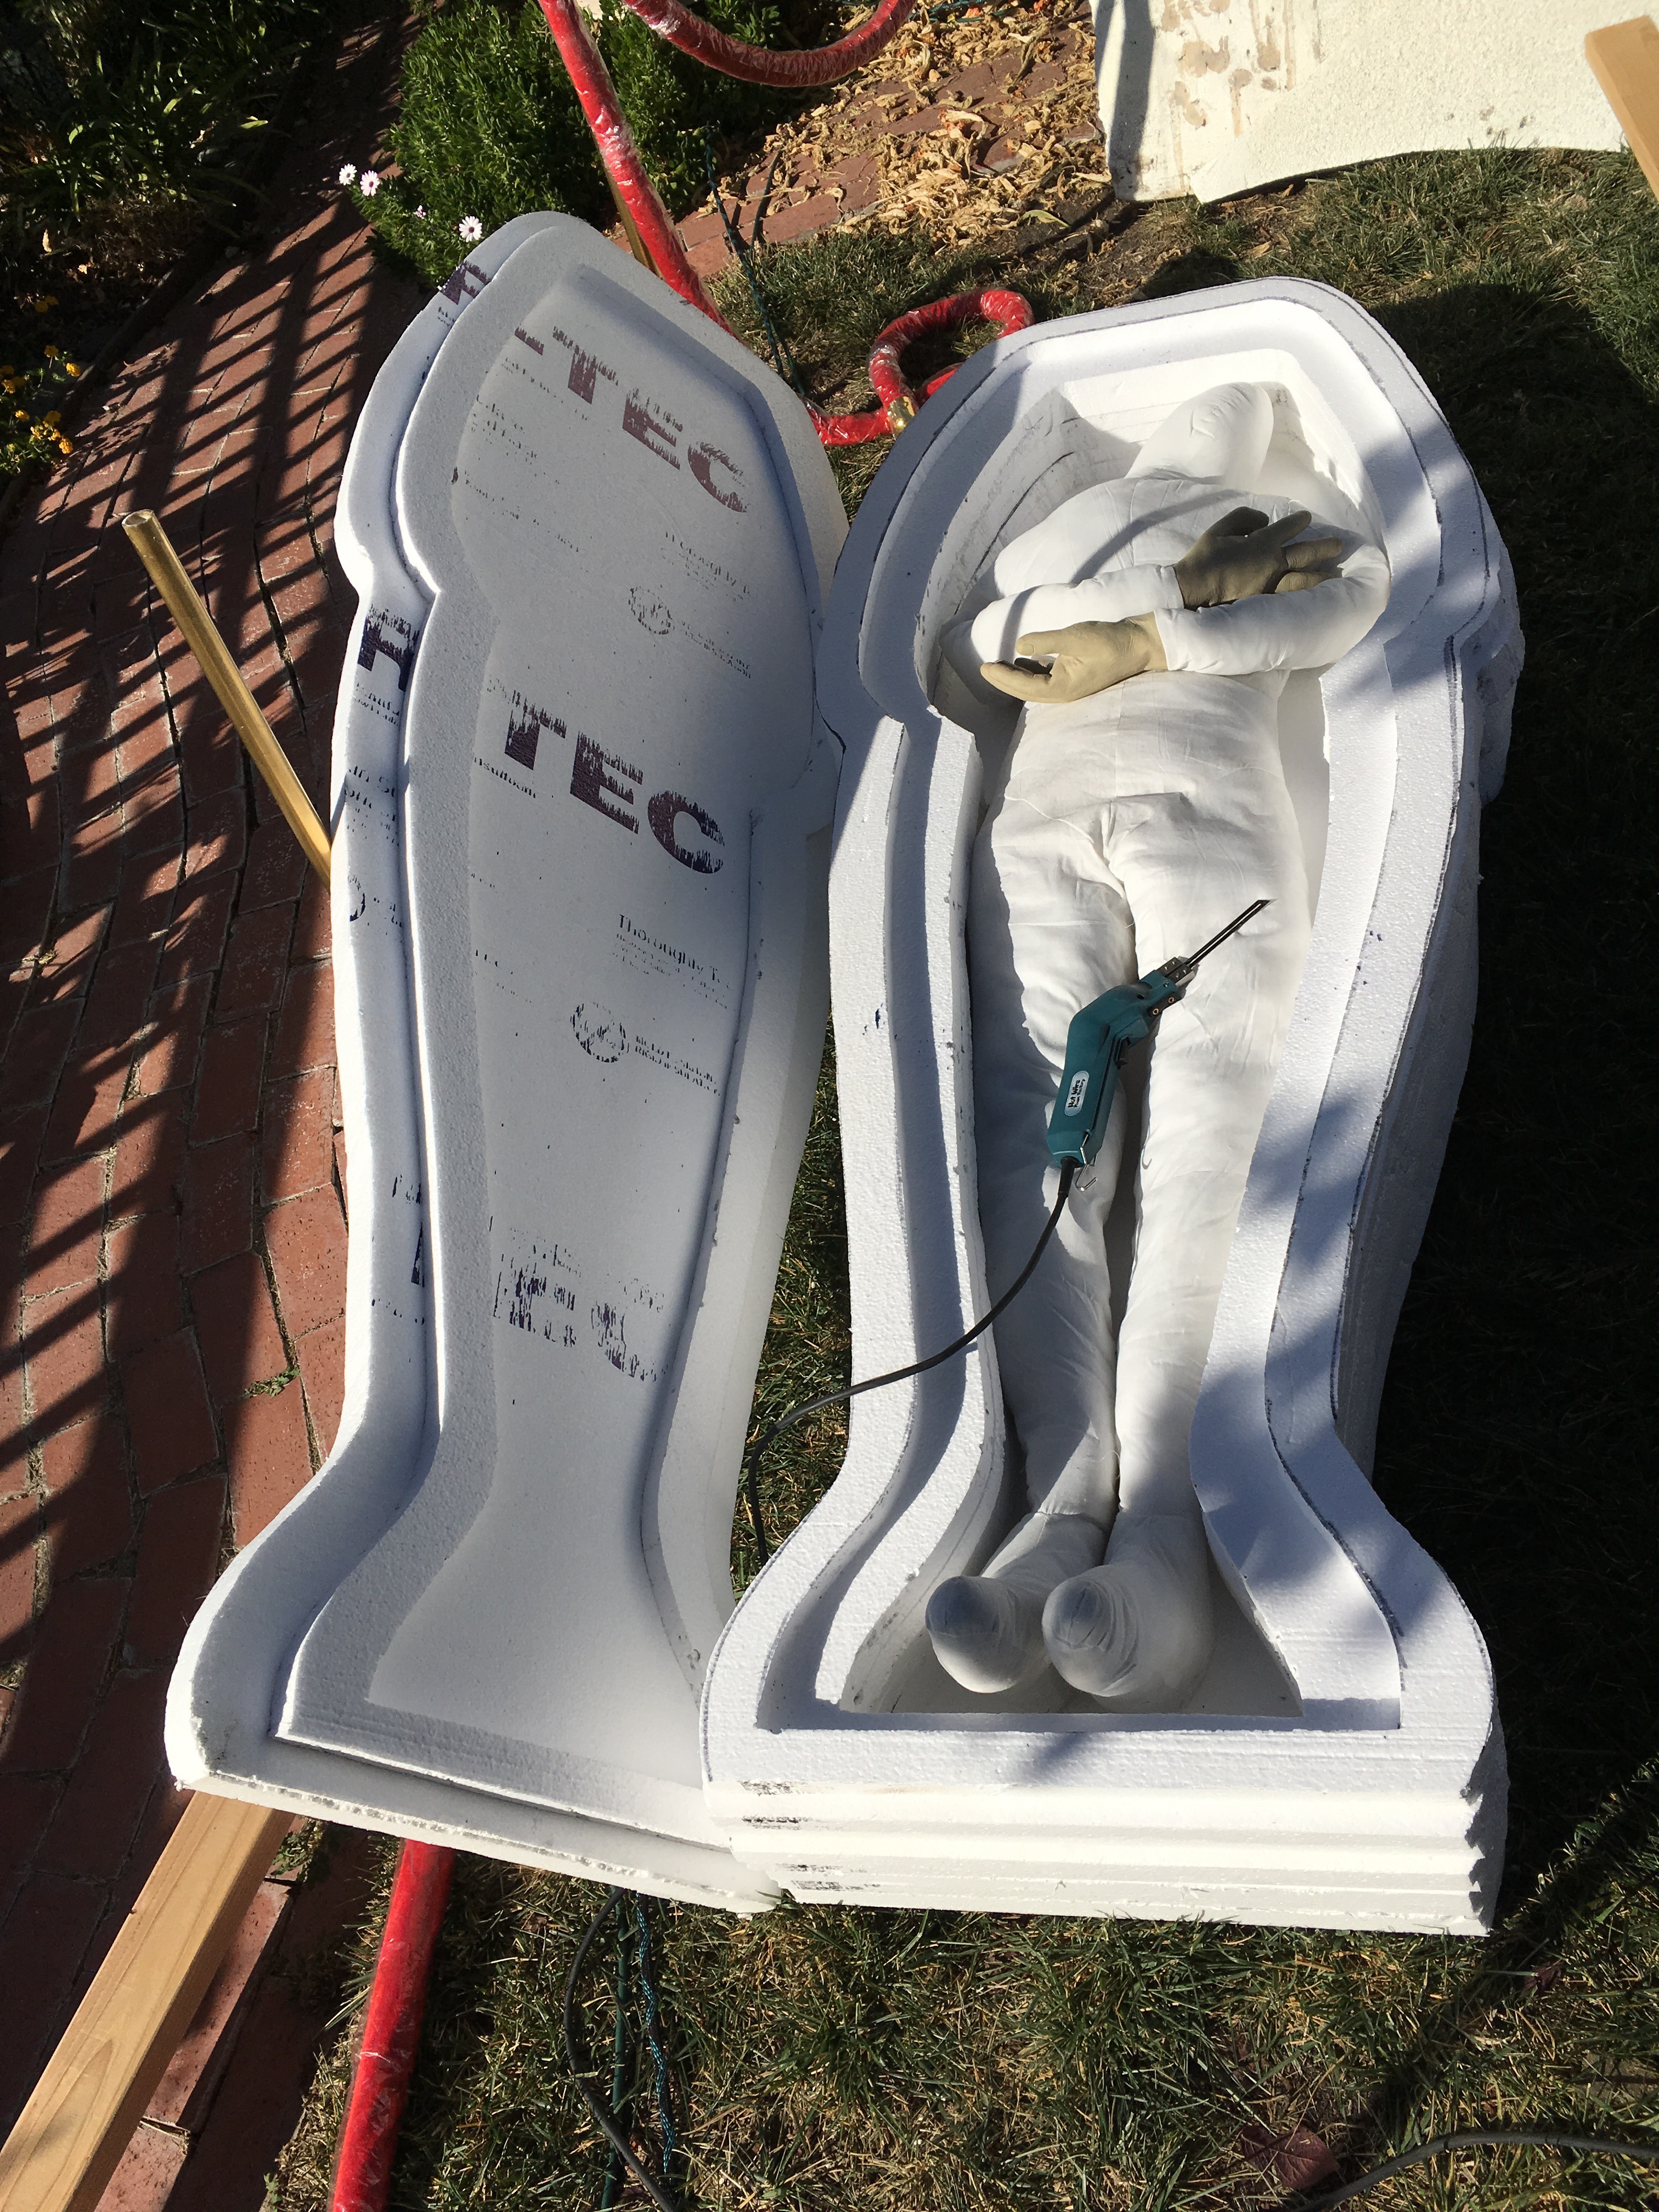
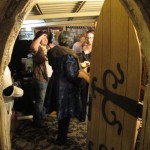
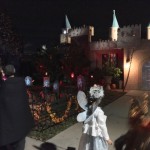
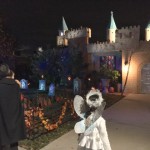
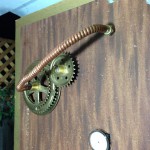
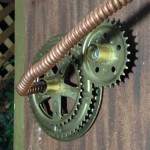
As you come up the walkway towards the door past more jack o’lanterns and black urns filled with gorgeous Ghostly Greenery, Jack Skellington turns and starts talking and gesturing to you and to Zero the Ghost Dog back at the gate. I made our life-size animatronic look like Jack, including body design, angles, head, functioning papier-mache jaw joints, moveable fingers & clothes, but my Jack & Zero on the front porch
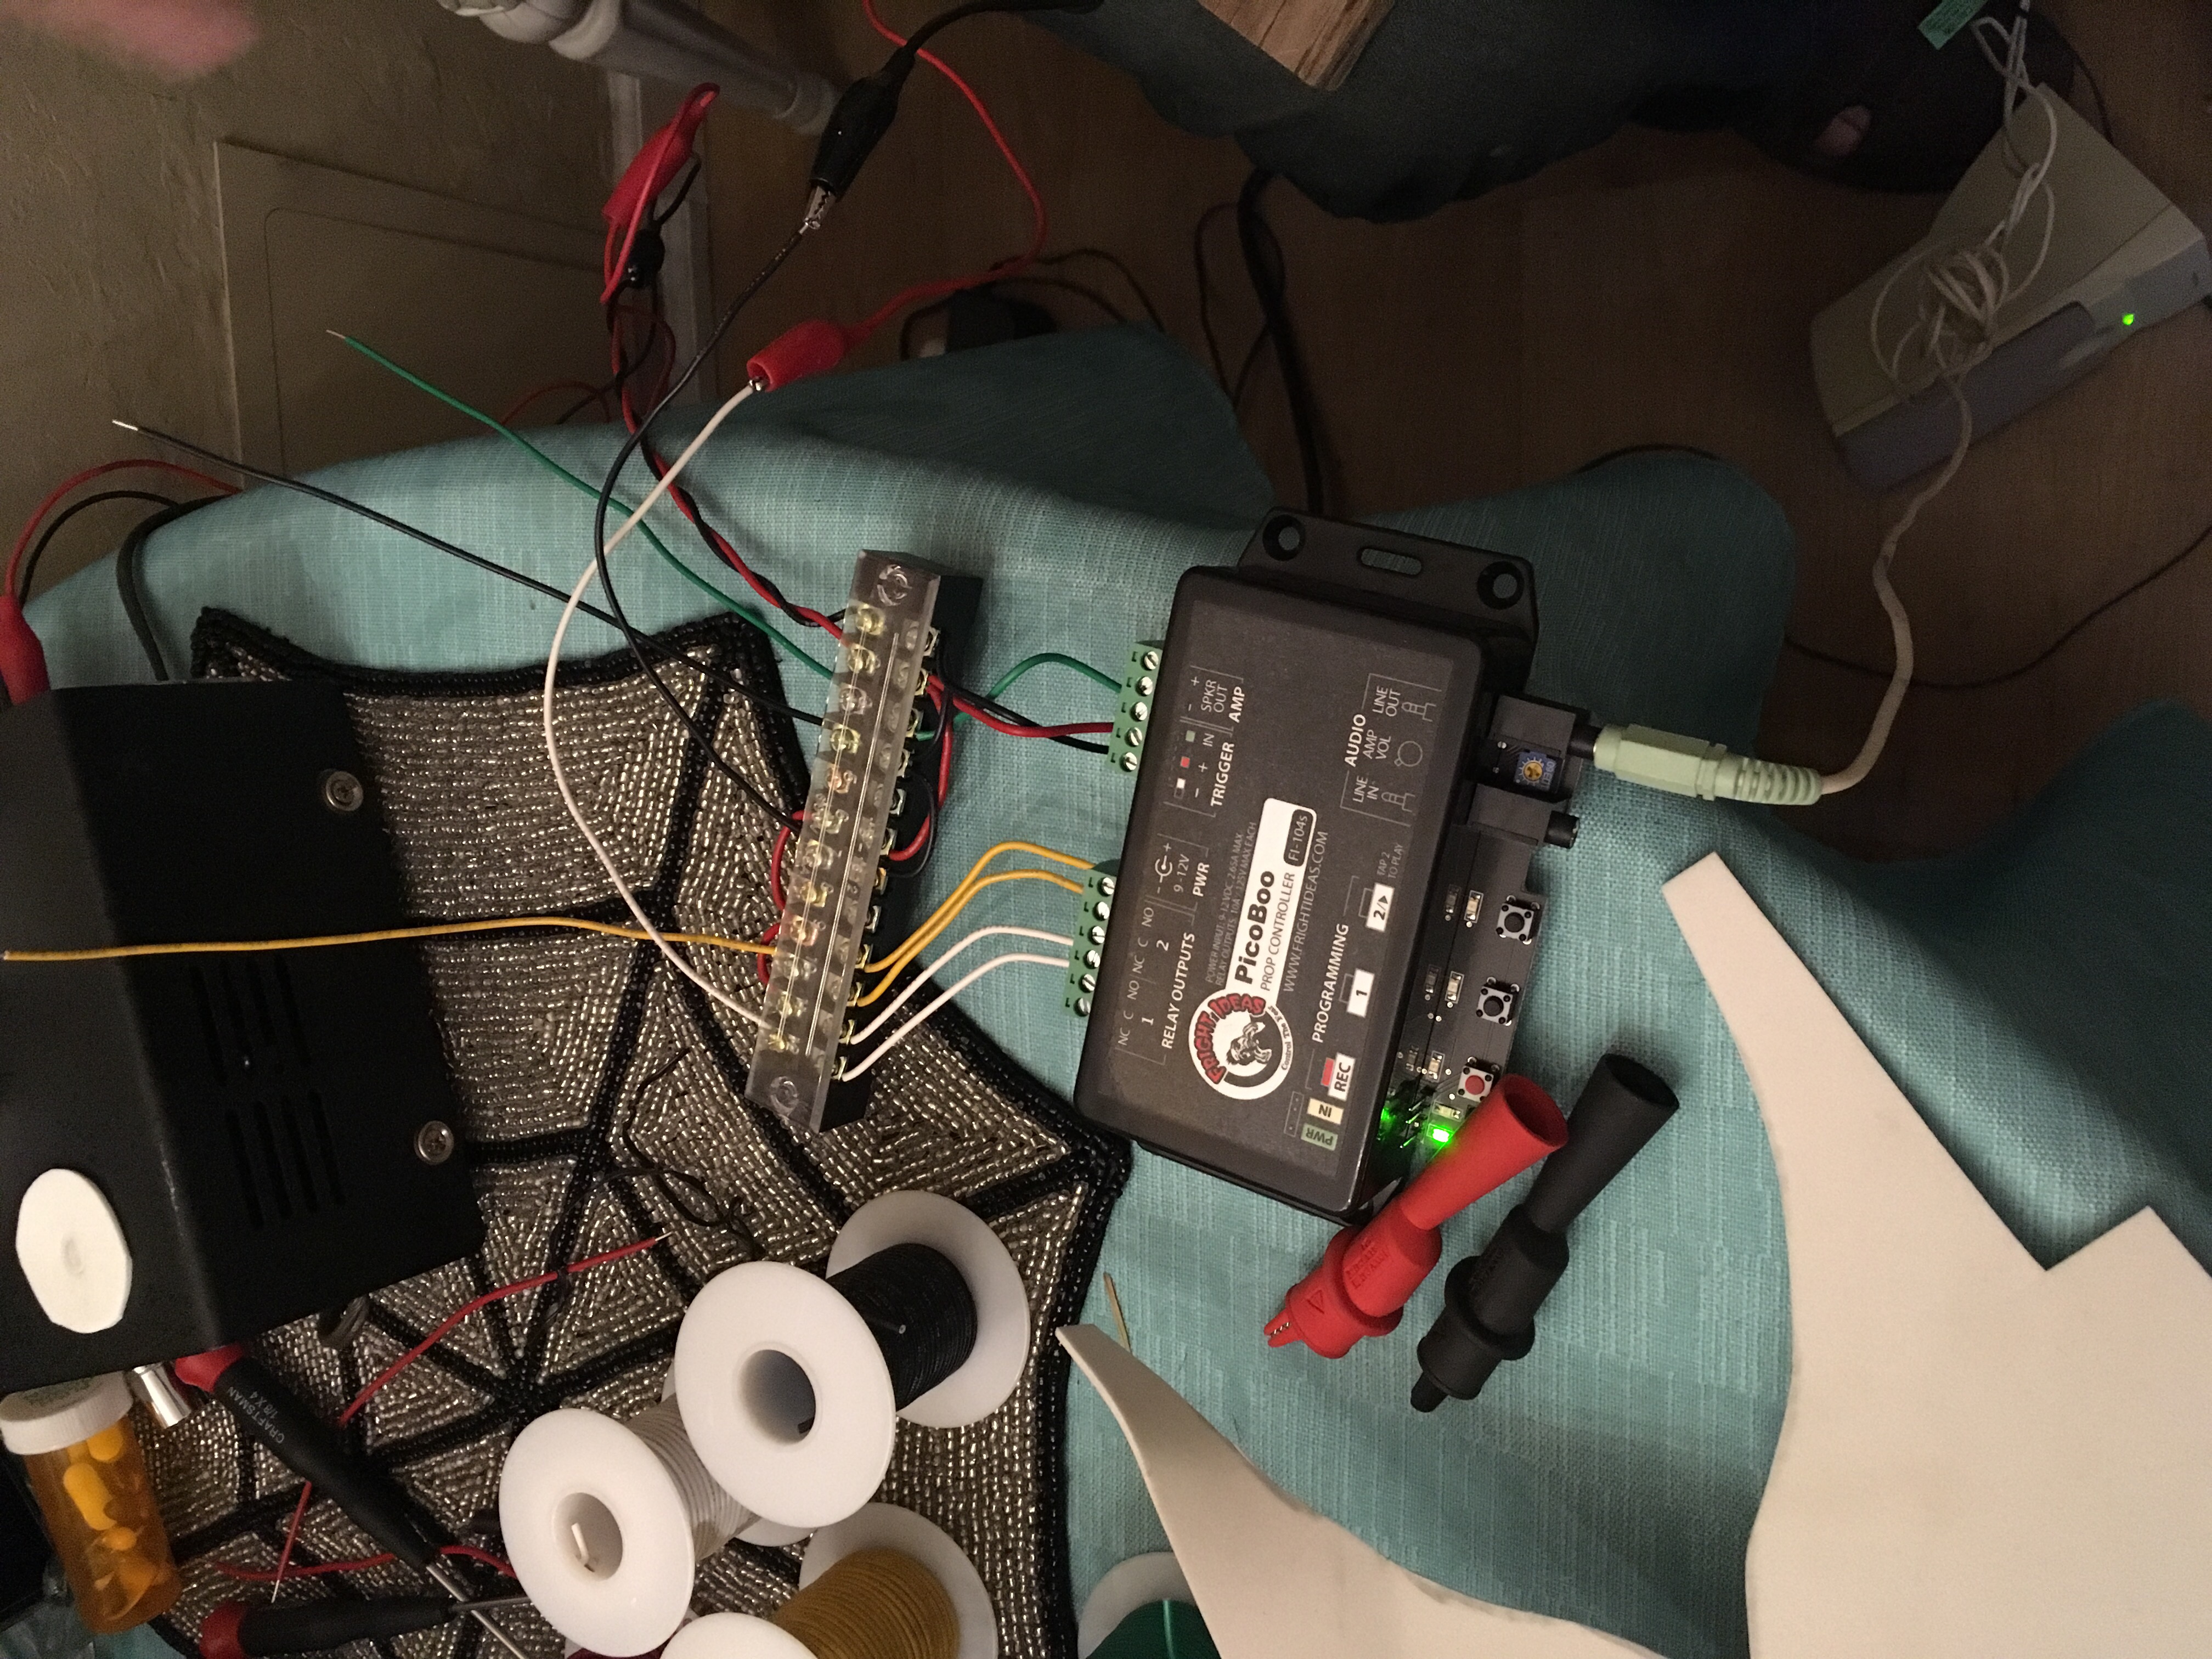
Halloween Scream Team was essential in making him come alive. Glen did all the research for servo work, electronics work, infrared trip sensor, and did all the movement programming, with Jack accuracy review by me. I wrote the script and barked as Zero, and our Jack voice was Jerry then digitally altered to sound more like Jack. Home-filmed footage of Zero barking & flying in loops was rear-projected at the gate on a screen with his physical carved foam gravestone in front. We were so pleased how it turned out and everyone at the party absolutely loved it! A Halloween Scream Team group effort for sure! More details of the trial & tribulations of this setup will be in a later post.

Halloween tree and spiderweb lace curtains frame the Undead Room
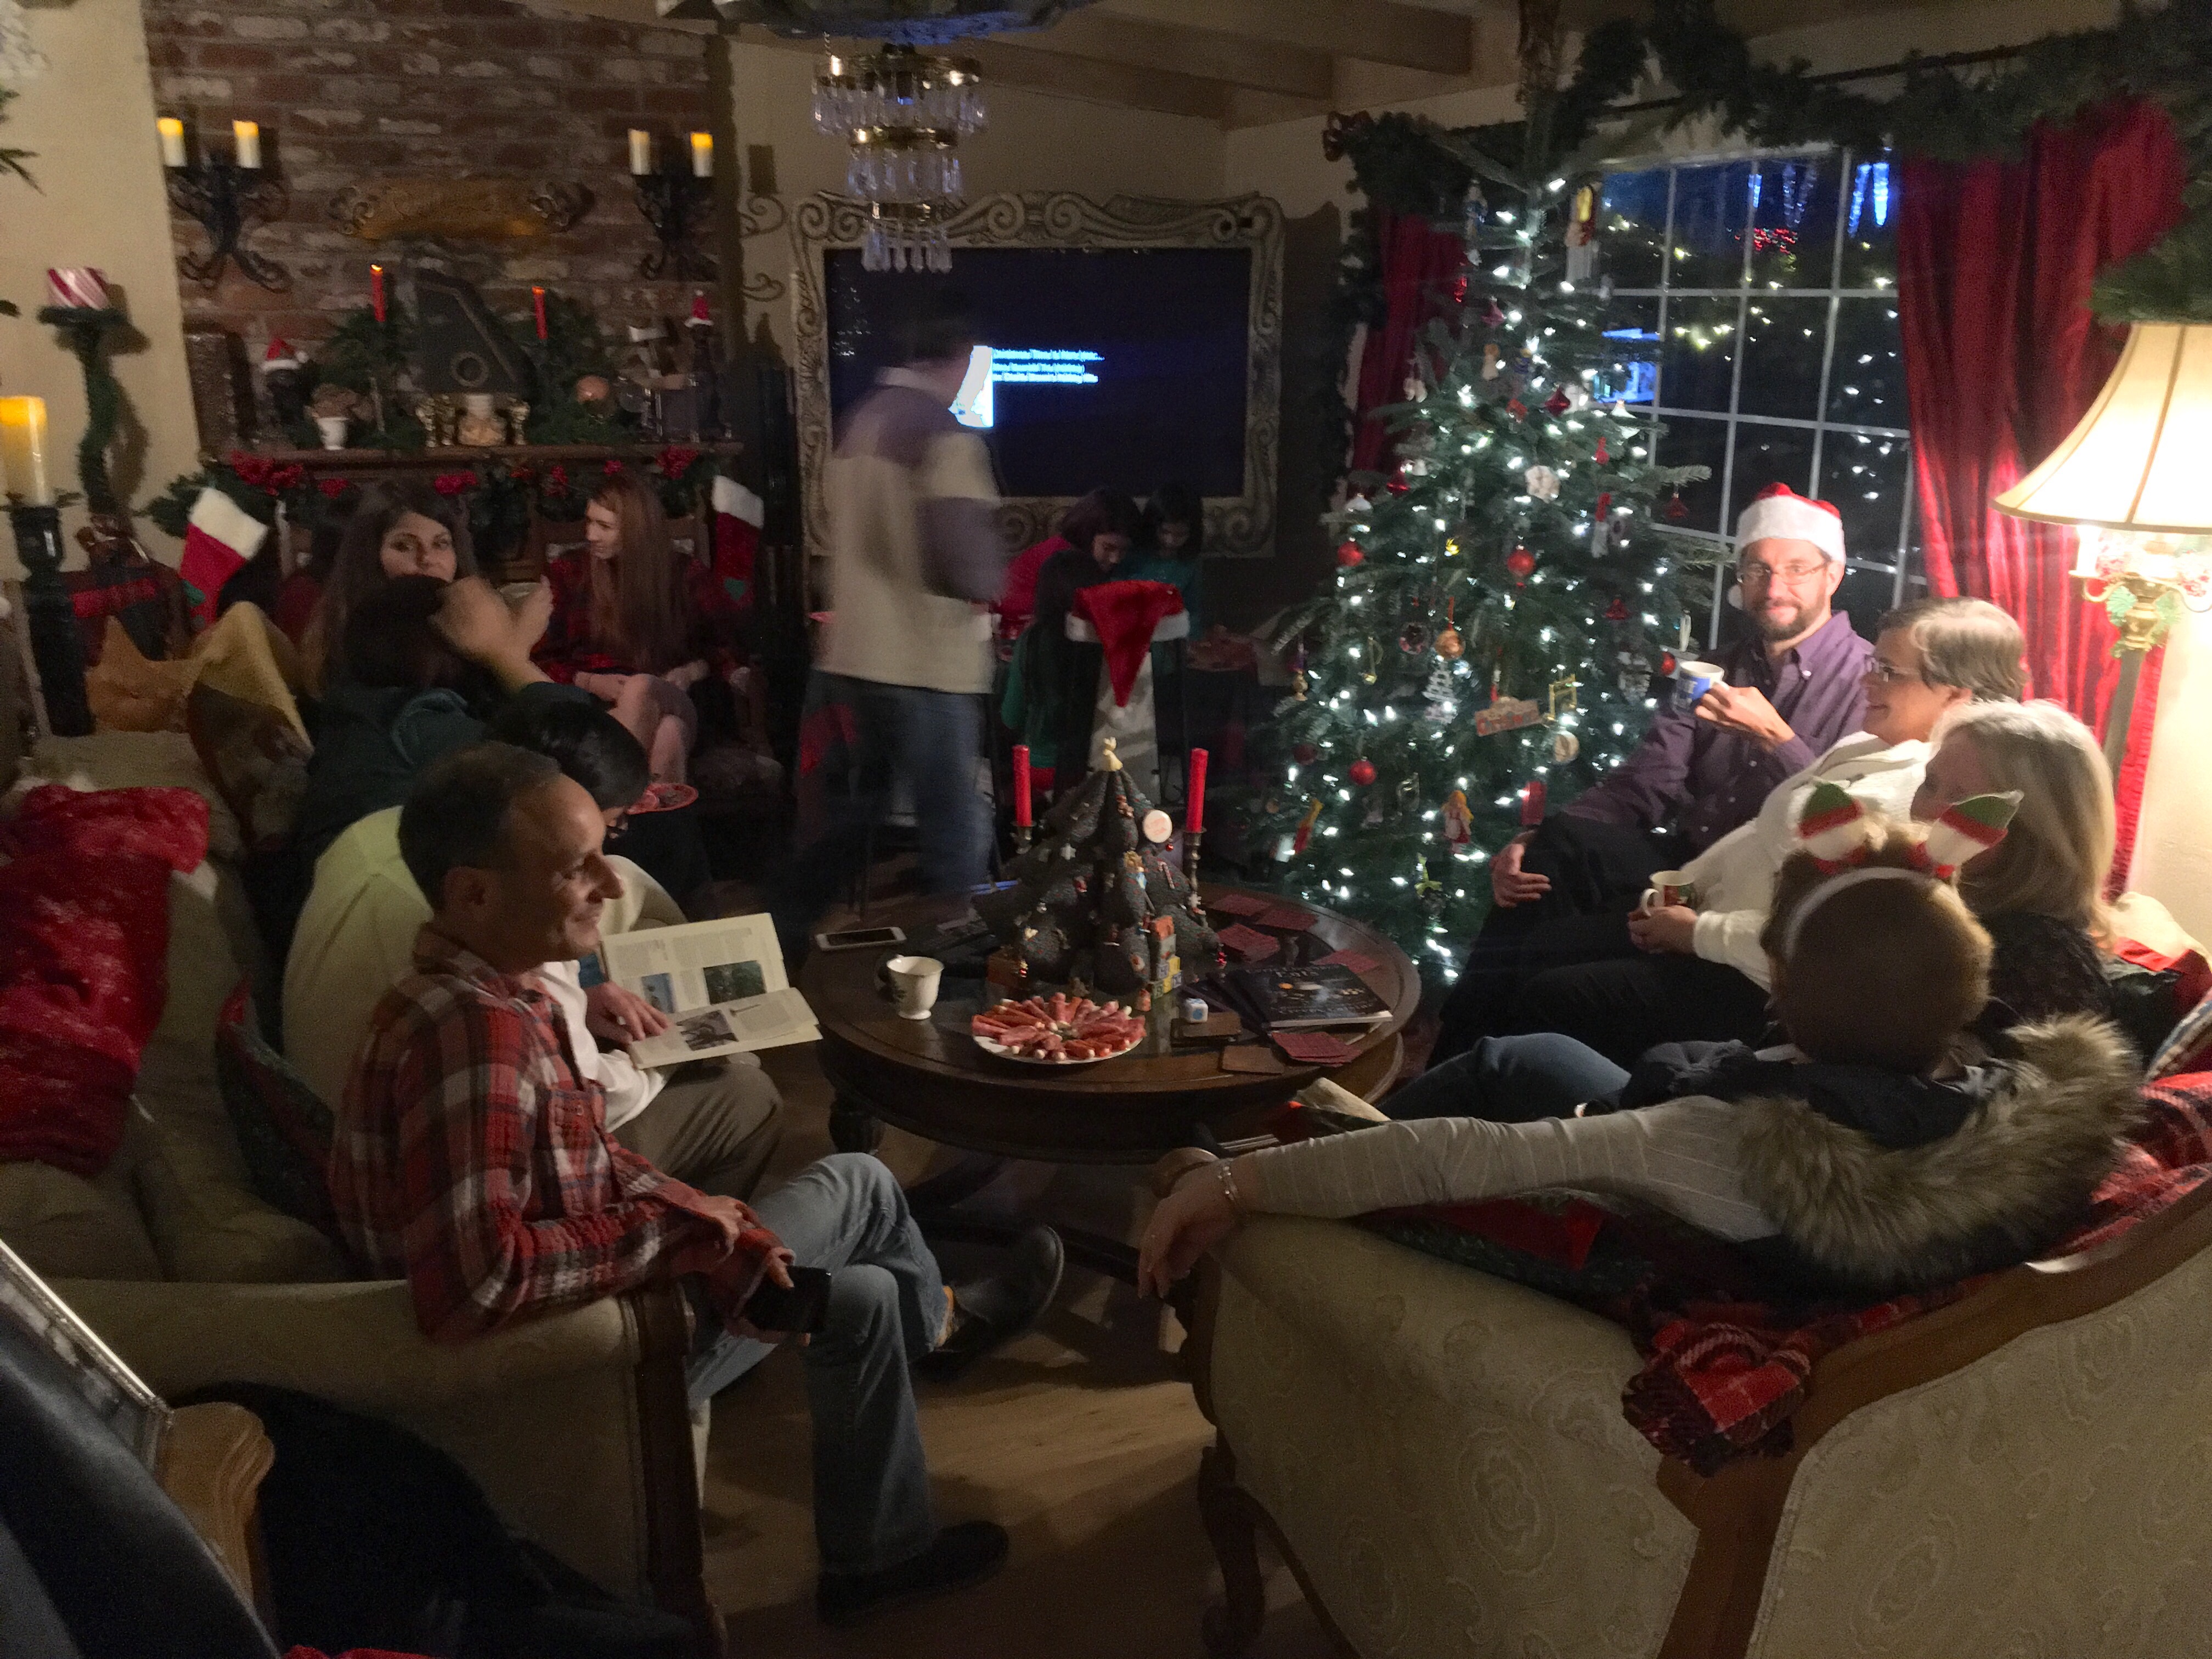
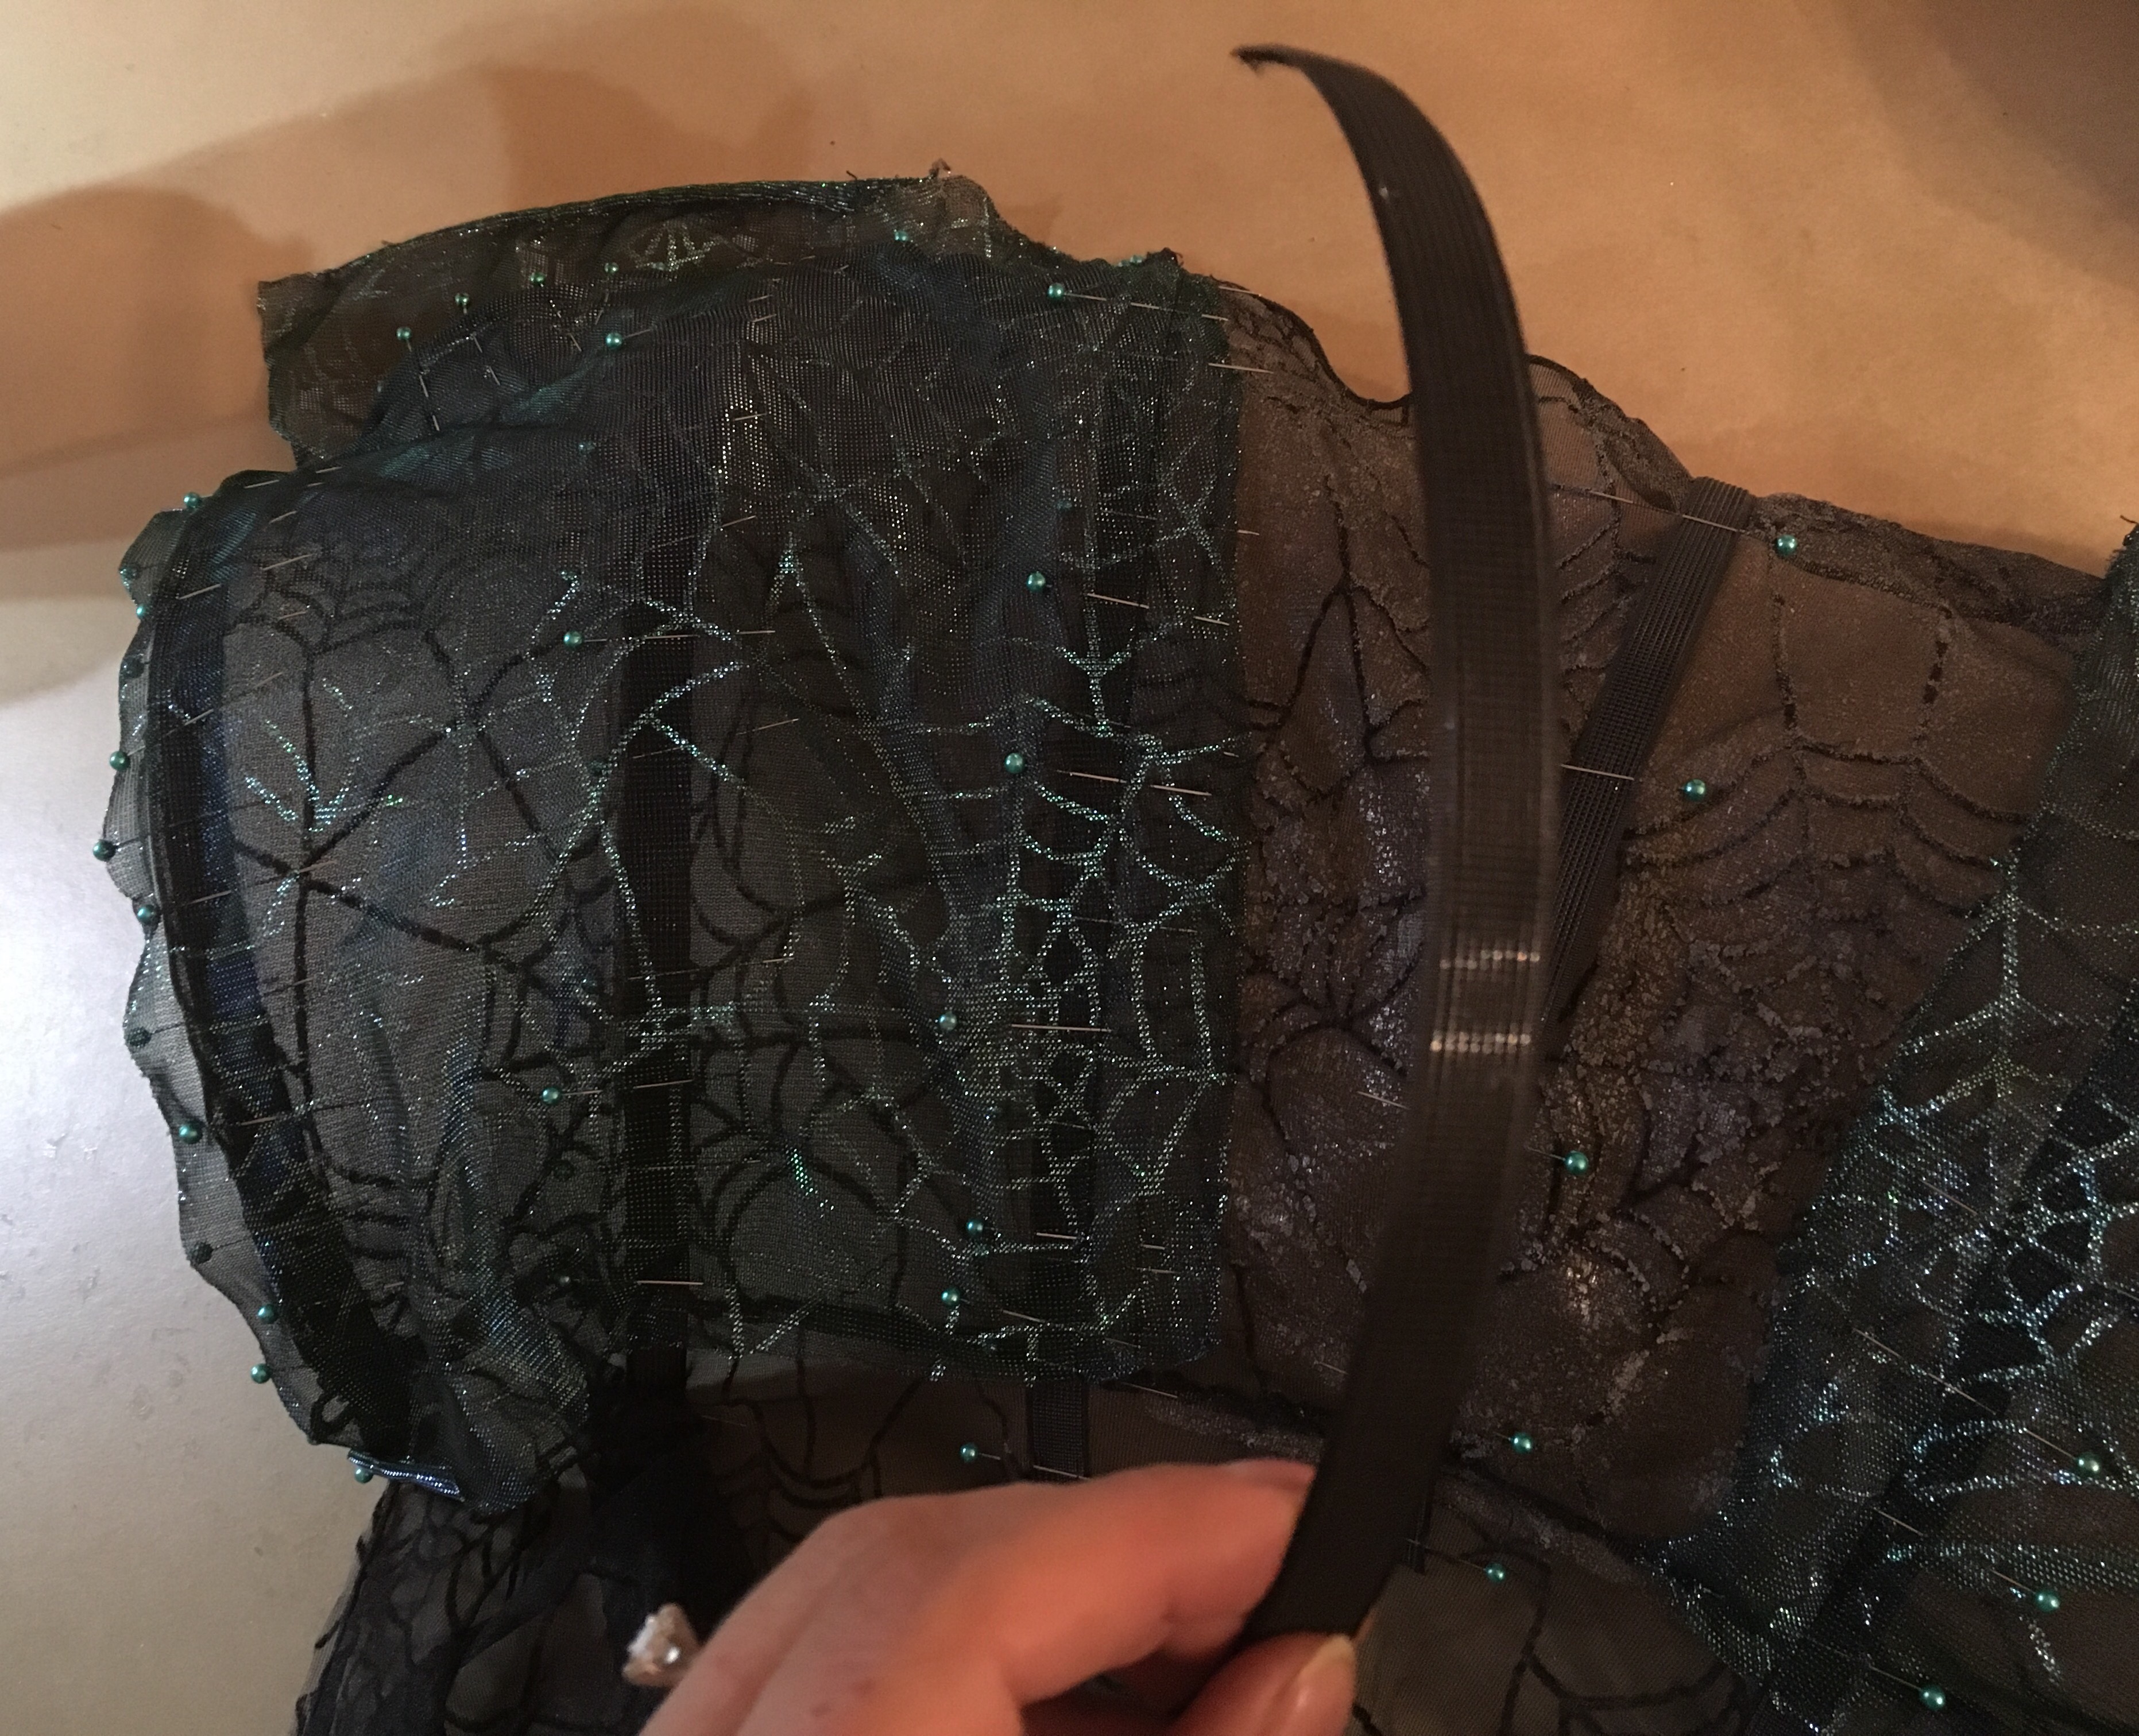
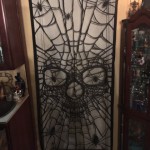
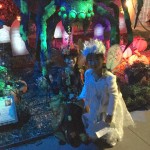
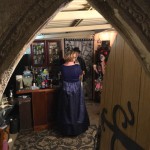
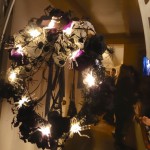
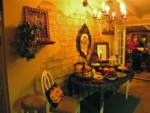
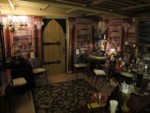
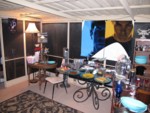
Next you see the Halloween tree through the spiderweb lace curtains, then enter to see the Undead Room in all its festive decor, with the Catoween tapestry, spooky pillows, black pine garland decking all the halls, orange lights, gargoyles covering the piano, and even colorful wrapped presents under the tree.

Marcie's Jack Cake in front of Edible Spiral Hill
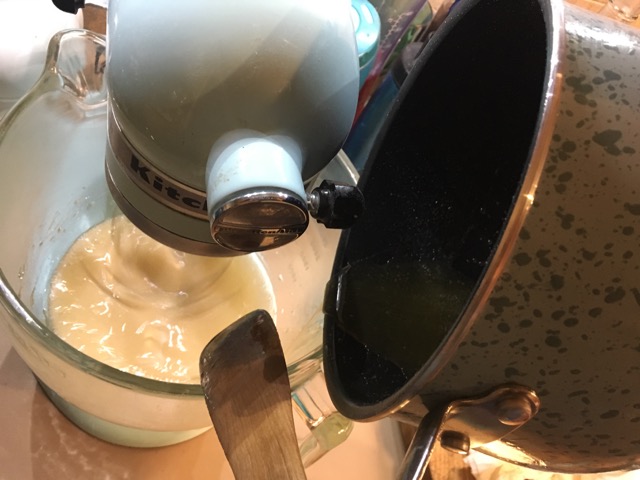
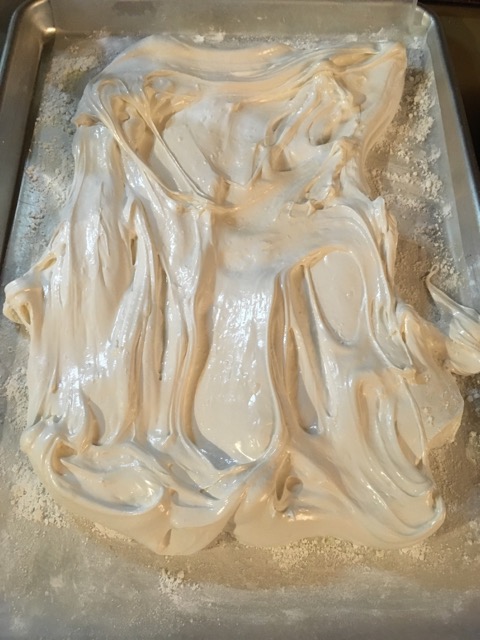
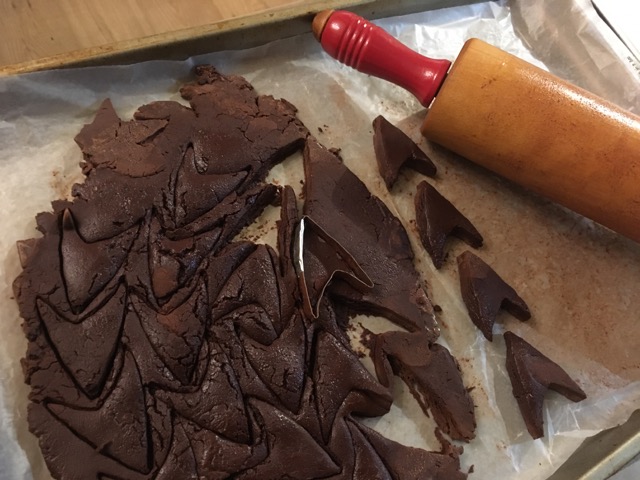
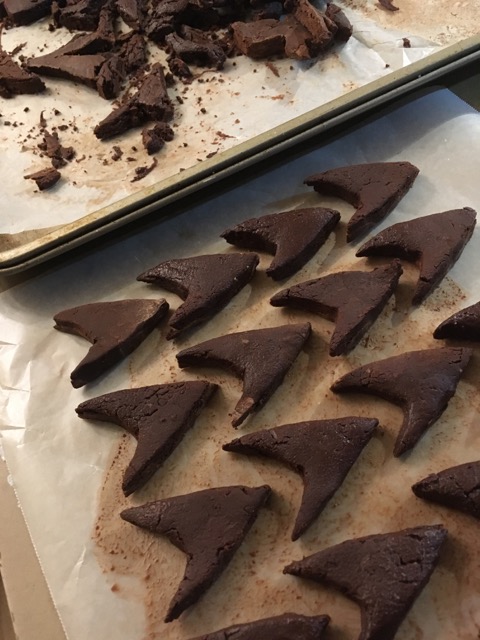
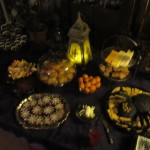
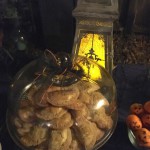
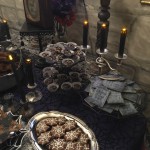
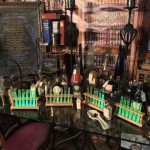
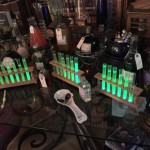
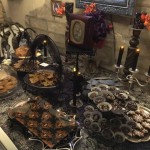
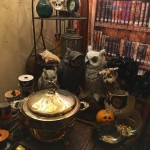
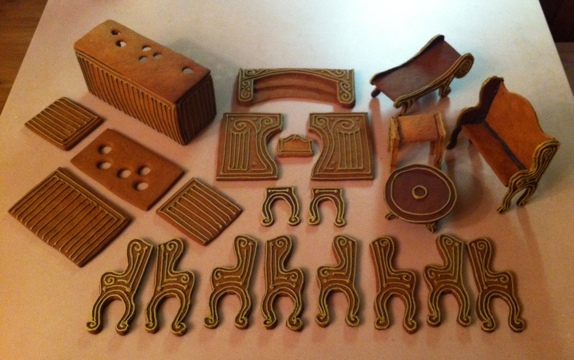
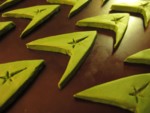
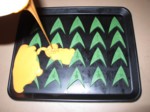
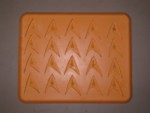
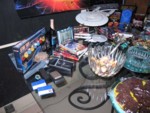
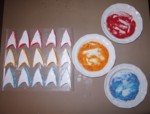
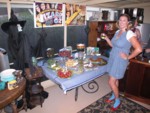
Continuing into the dining area, you see the edible Spiral Hill from the movie with glowing moon of fondant over glass tabletop, glowing sculpted pumpkins and shortbread Tasty Tombstones of all new designs I carved in foam this year for the pumpkin graveyard.

jack's Library Laboratory
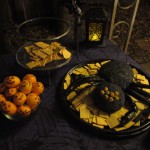
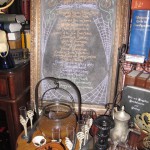
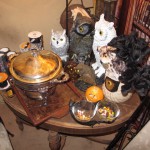
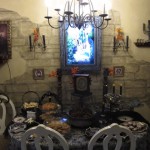
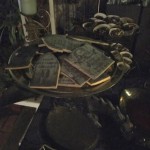
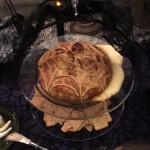
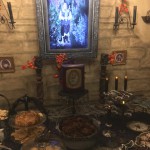
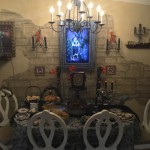
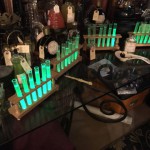
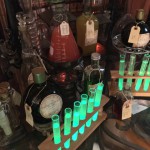
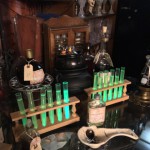
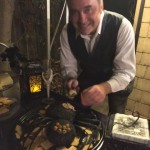
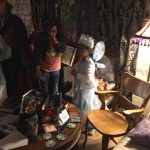
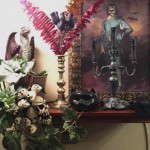
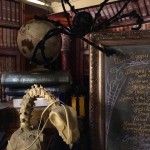
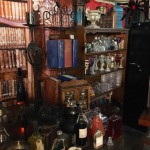
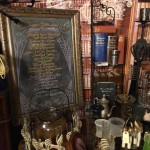
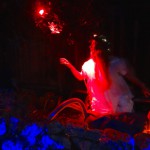
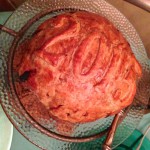
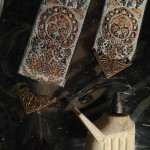
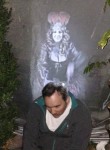
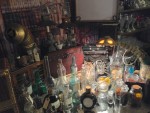
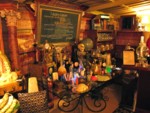
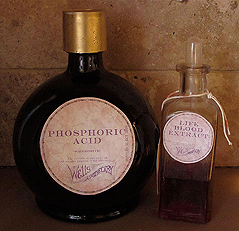
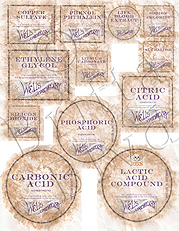
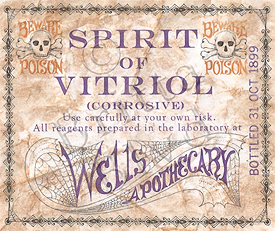
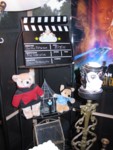
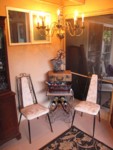
As you follow all the partying people, you enter Jack’s Library Laboratory, with bookcases at either end, and luscious red silk curtains framing the view out the “window” of Spiral Hill, where Jack is wandering, taking a break from performing his chalkboard calculations and Christmas experiments on his lab table, such as boiling ornaments, dissecting a teddy bear, and attempting Christmas candy that turned spooky. Even his purple tufted velvet chair is still ready to continue his experiments. The brie Jack Skellington Cheese Ball
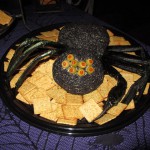
en croute was Jack’s face this year, and I covered a glass bowl vase with cream cheese to make a glowing Jack Skellington Cheese Ball. Yes, I saved that big moon main section of the movie theatre standee for 20 years since I was working at the theatre during the original movie release! It made a great “view” since we could see the glowing foreground pumpkin graveyard through the glass tabletop.

Sally's Sewing Corner
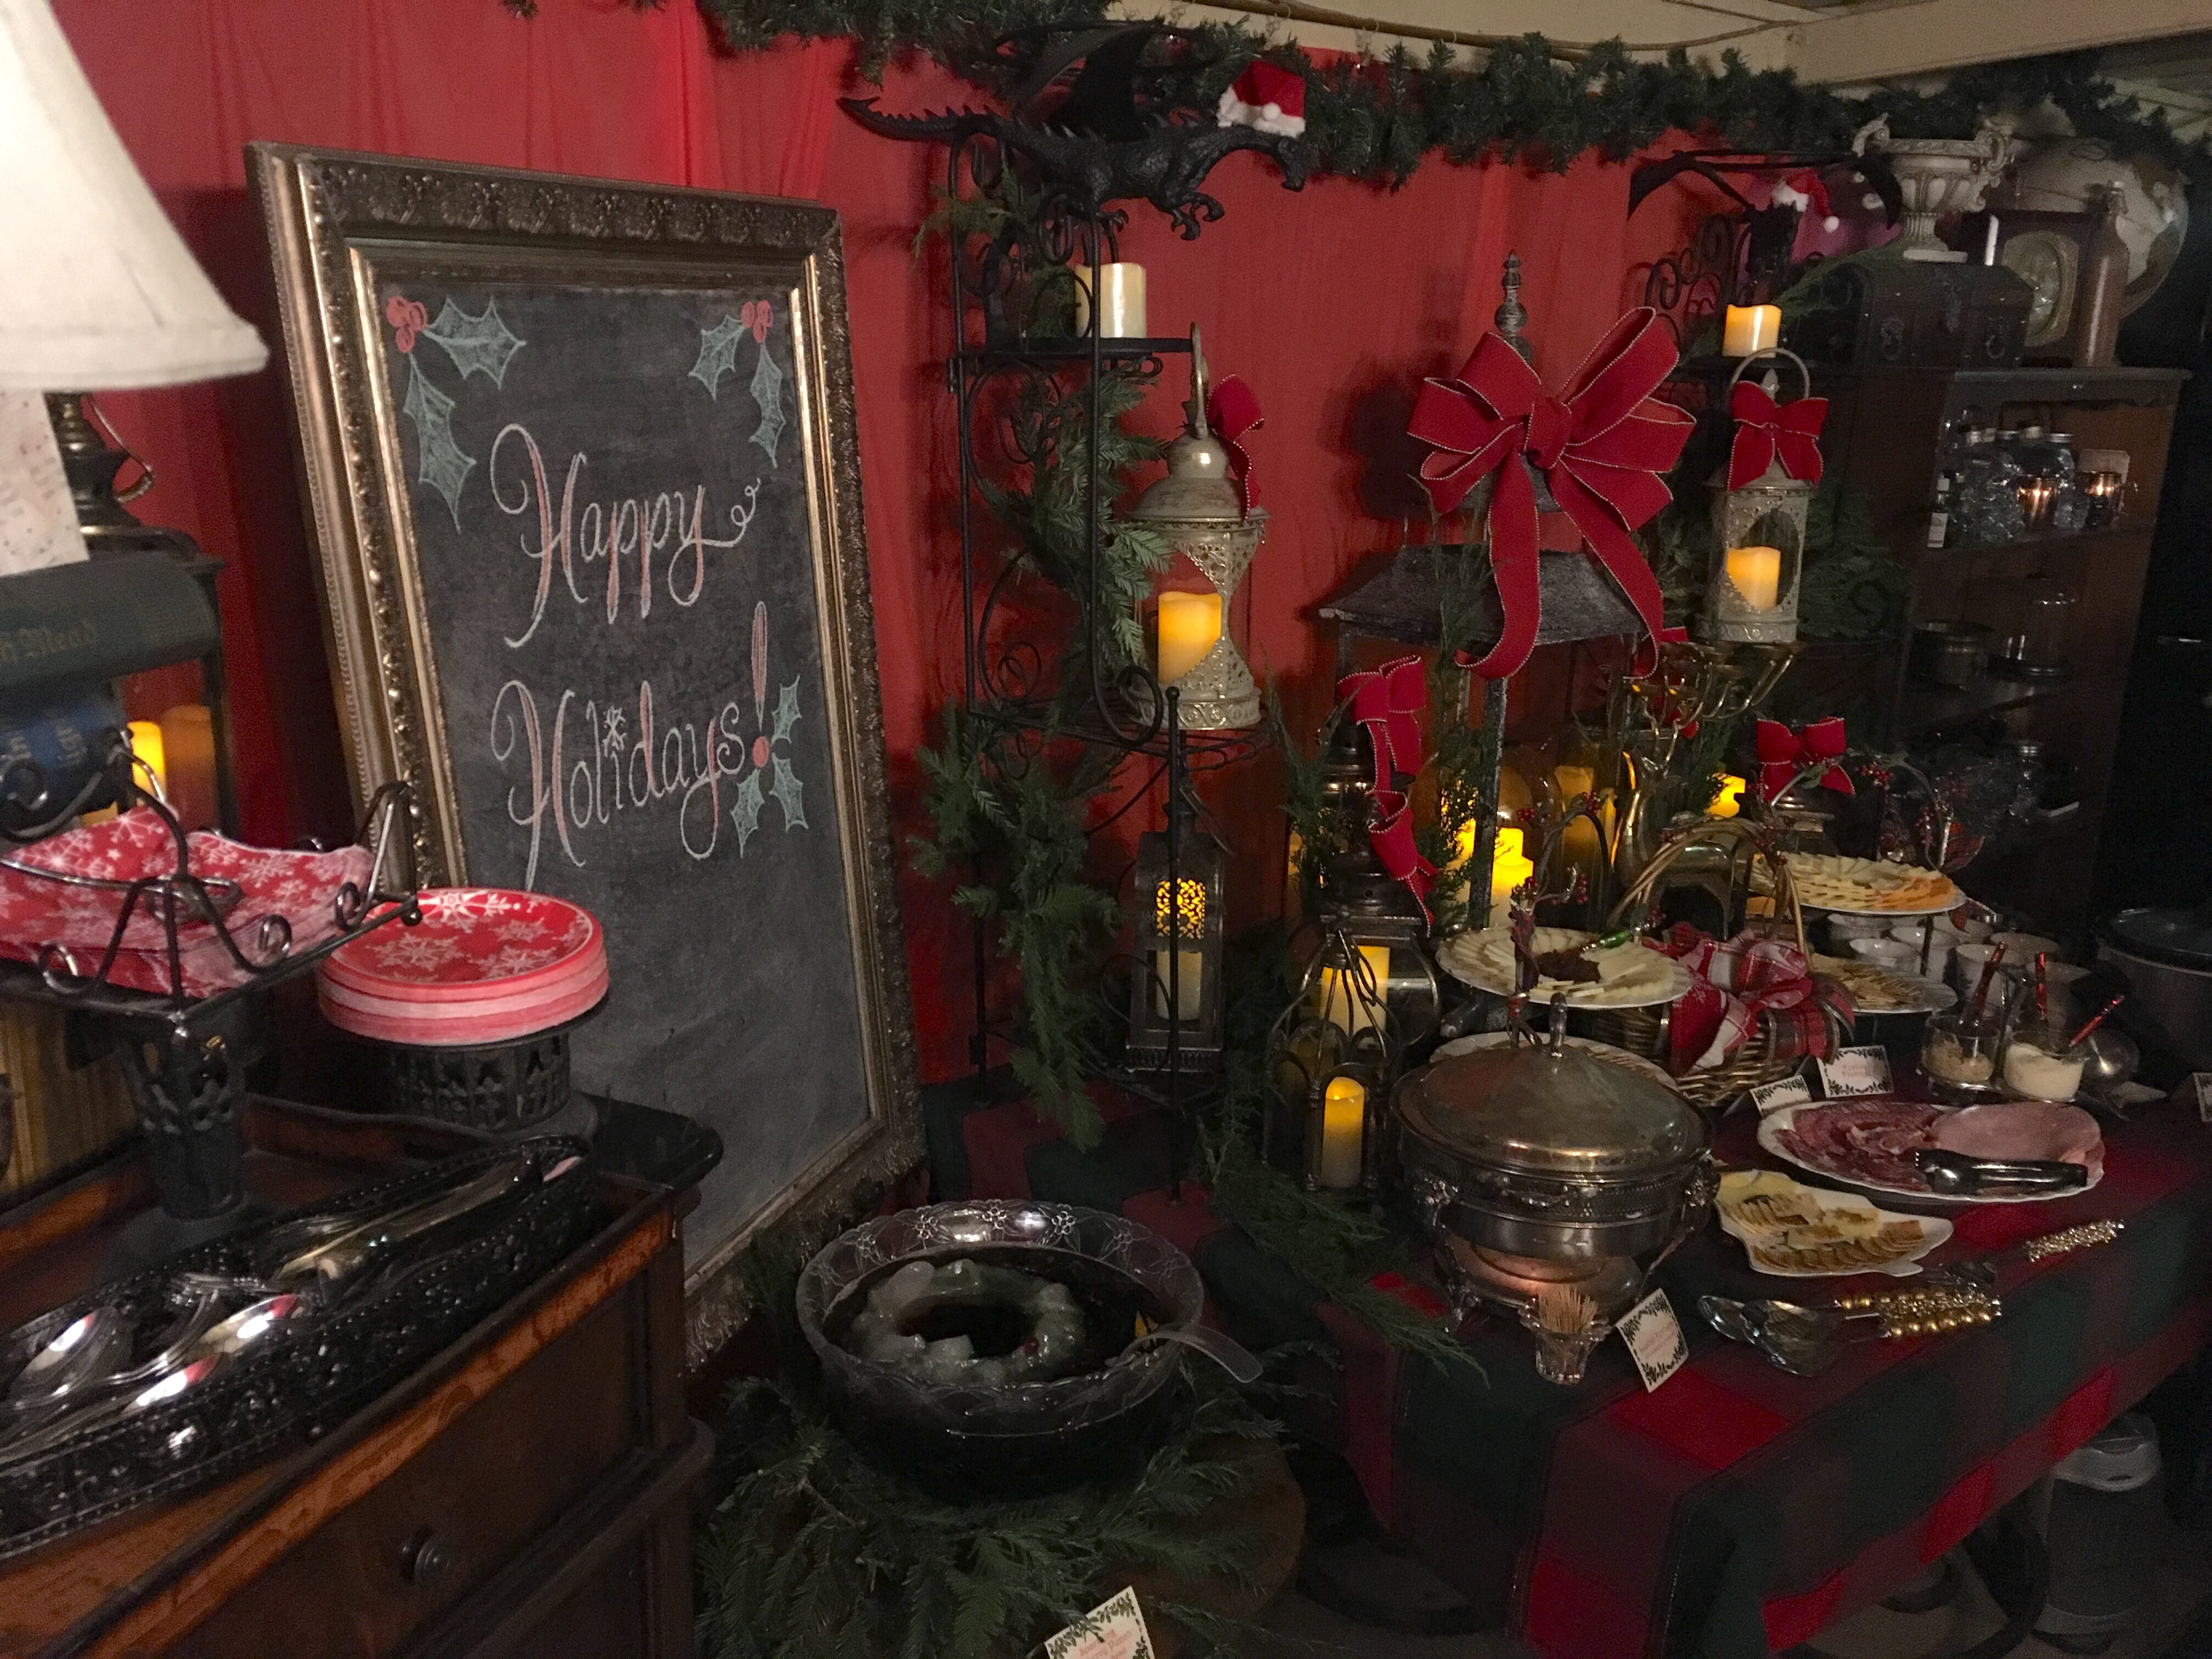
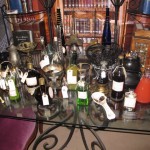
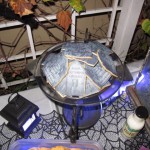
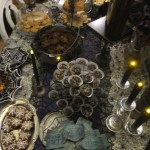
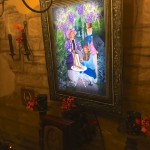
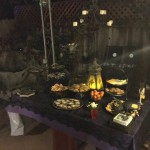
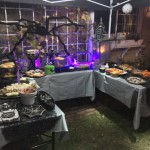
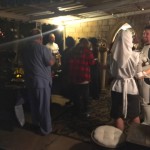
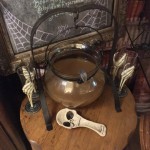
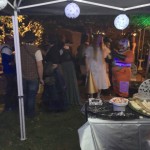
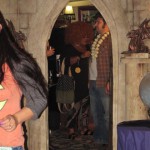
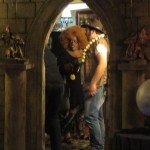
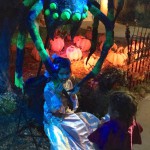
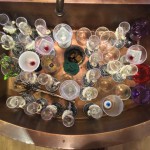
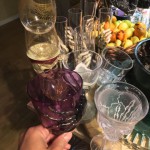
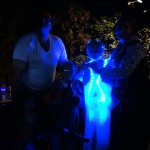
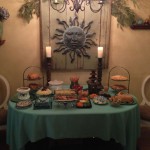
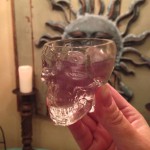
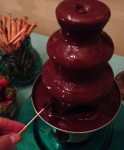
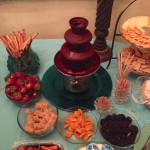
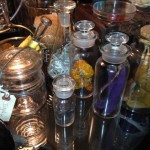
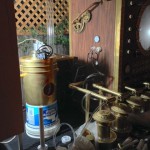
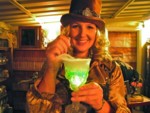
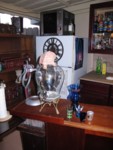
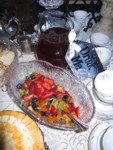
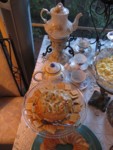
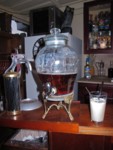
Through the archway door and stone columns, my outer patio was another food table with two punch bowls, skeleton hand goblets, and a projection of Sally mixing potions from the movie on my bedroom sliding glass door. Here is video of Sally’s Potions area, with Frog’s Breath Punch, Dr. Finkelstein’s Bizarre Brain Pate, the Frightful Skull Fountain, Sally’s Sewing Corner, a Halloween tree, and Sally mixing Sally's Potions
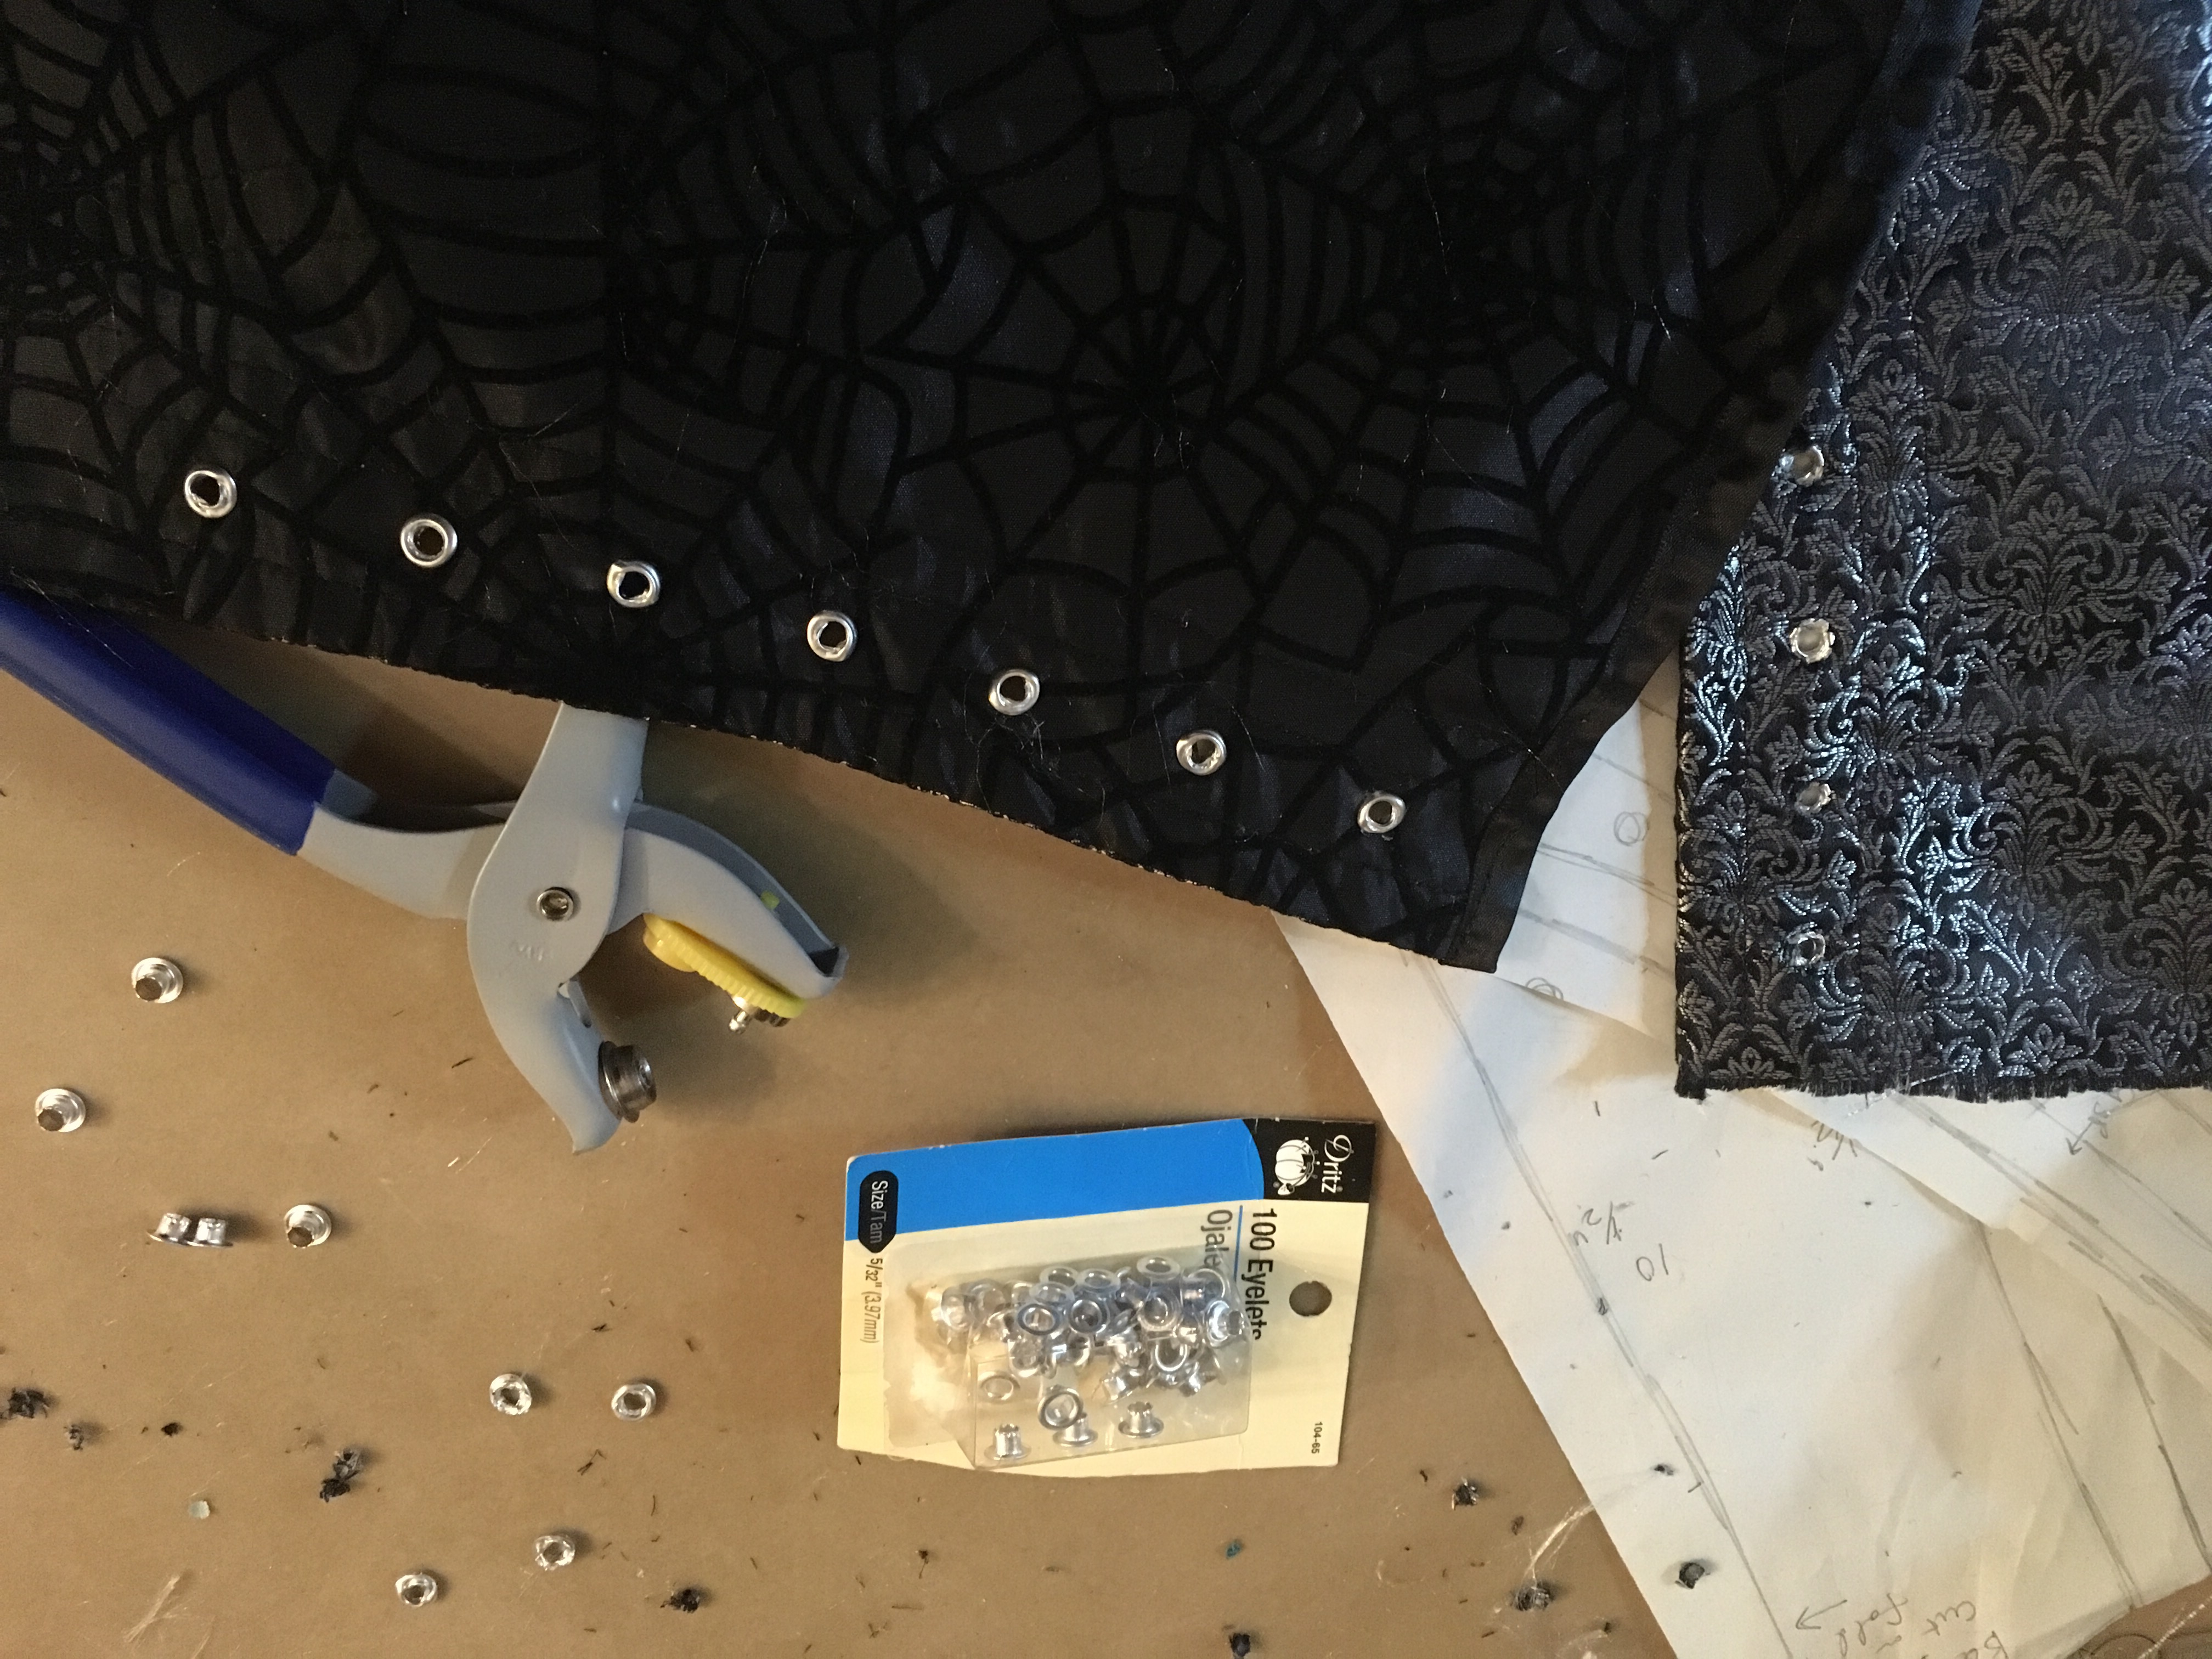
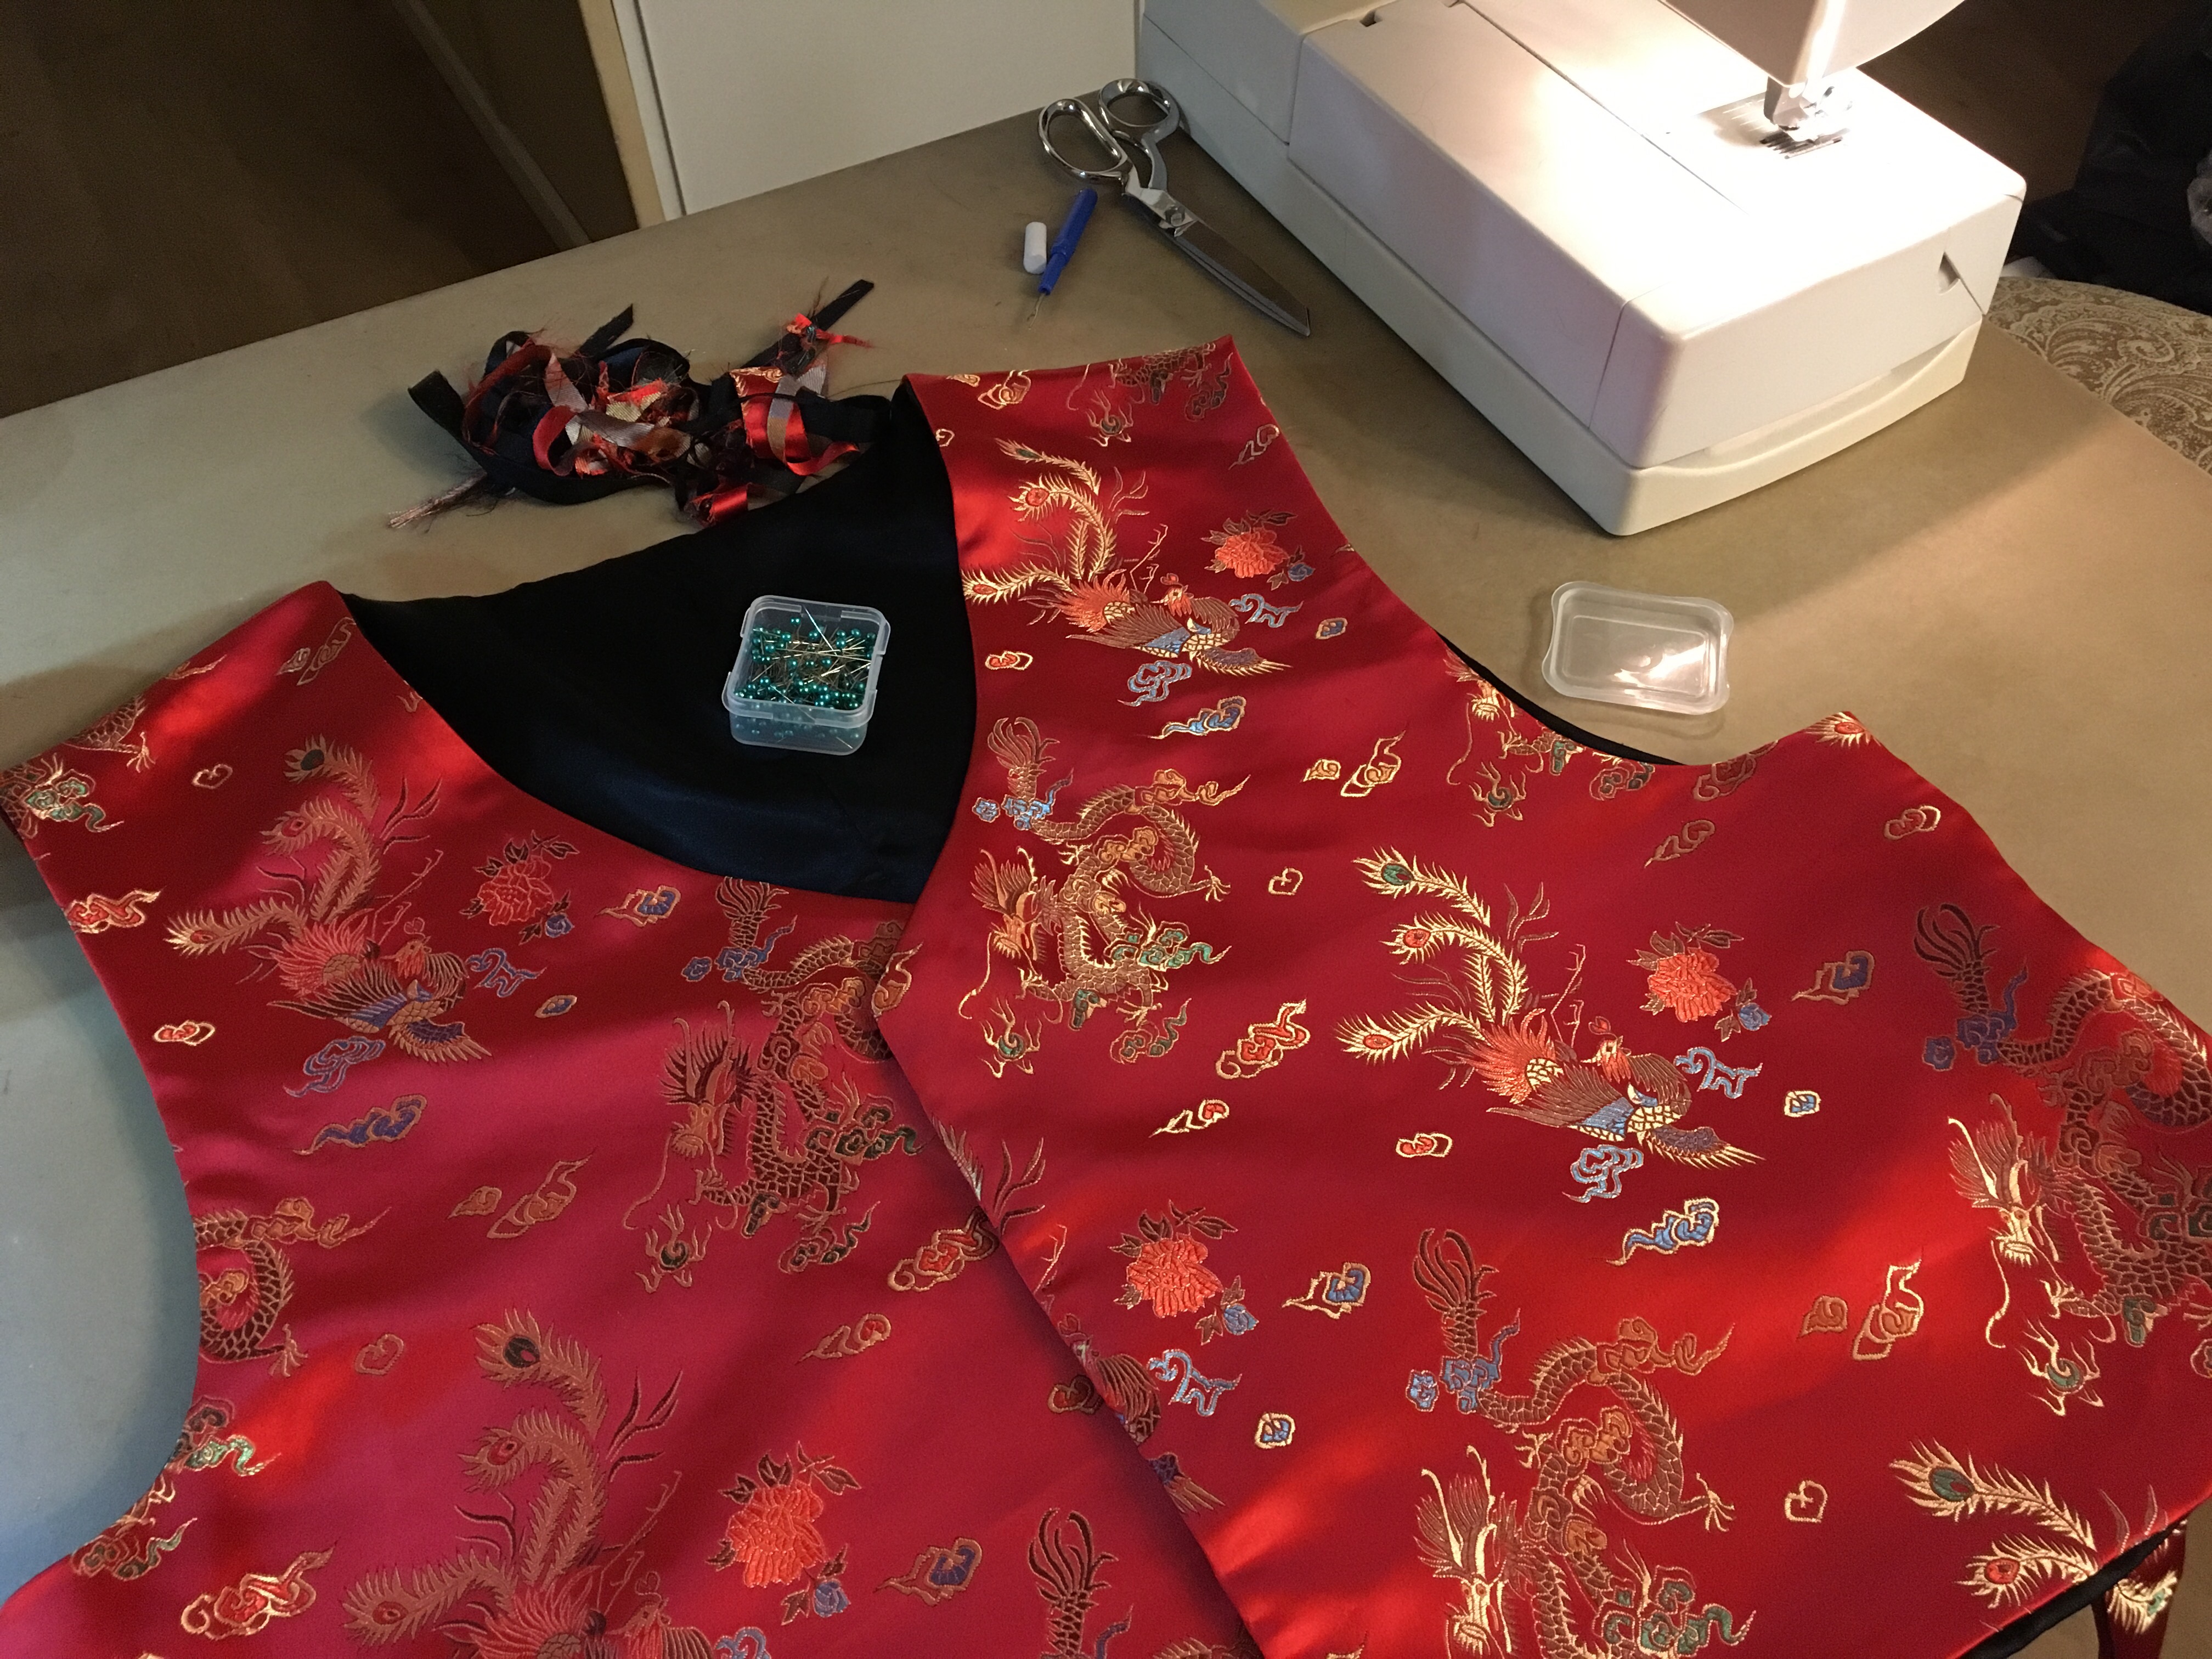
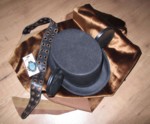
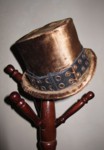
potions in the window. I saved my real trees from both past Christmases out in my yard, but all the needles still clung strongly to last year’s tree, so I thought it looked nice with orange needles and we had enough ornaments to decorate both trees. Sally’s sewing corner was an antique sewing machine on the corner table, with scrap red velveteen and white fur like she was sewing the rest of Jack’s Santa outfit, since the hat with beard was already finished on the stand.

Frightful Skull Fountain and Sally's Potions
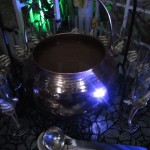
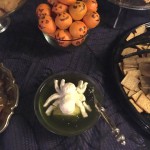
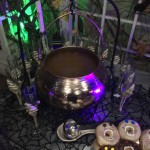
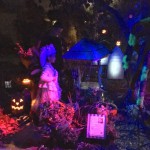
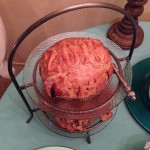
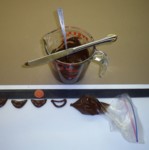
Frog’s Breath Punch is my Bubbling Witches’ Brew recipe in a new glass cauldron with dry ice. You can also spy Dr. Finkelstein’s Bizarre Brain Pate and Sally mixing potions in the window. You probably already saw the construction of Dr. Finkelstein from the party progress posts. I considered this a minor detail but several people were very impressed how movie-accurate he looked and that the concept was so perfect for my classic brain recipe. 🙂

Some backyard setup
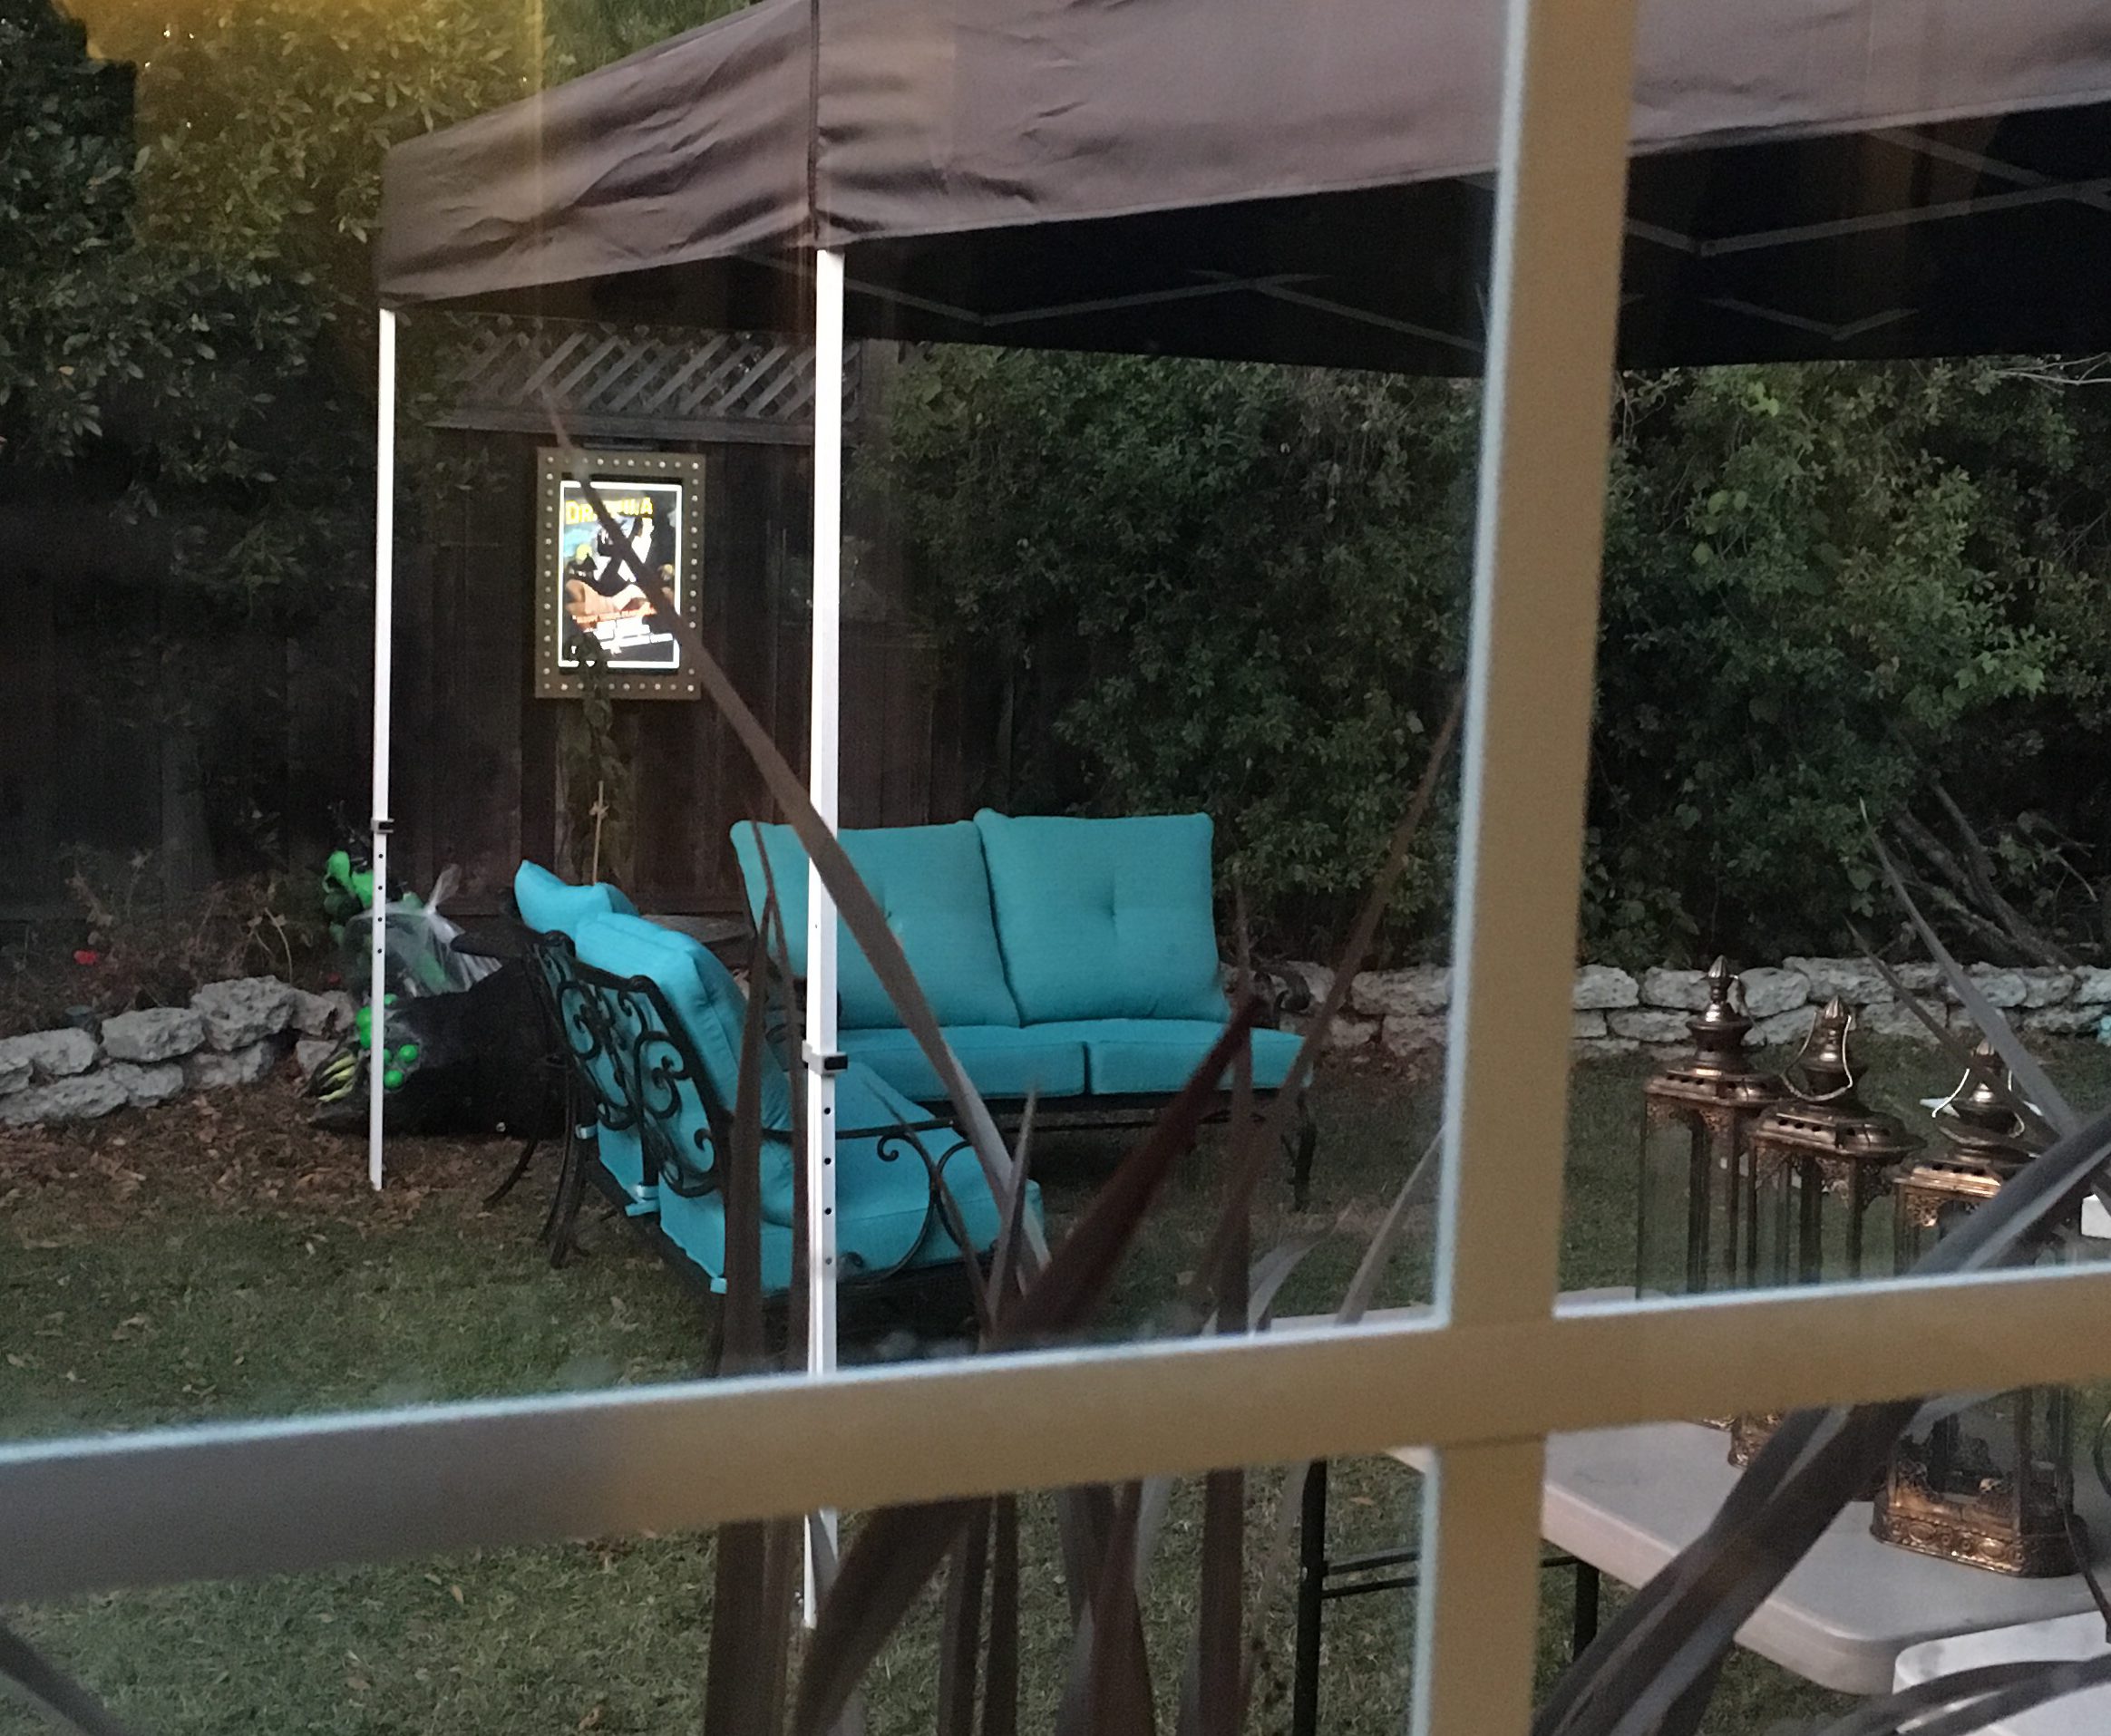
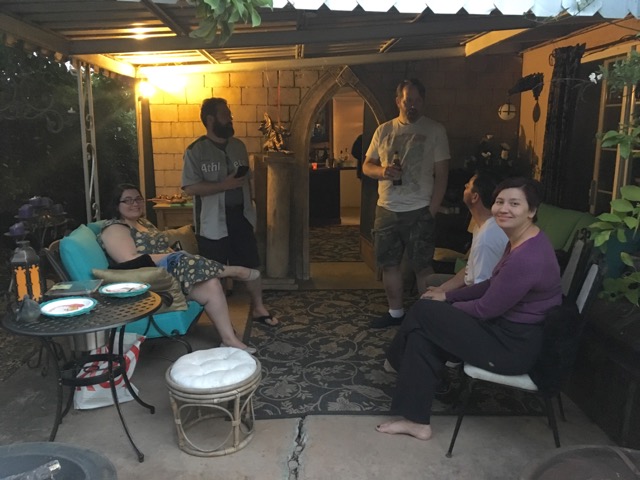
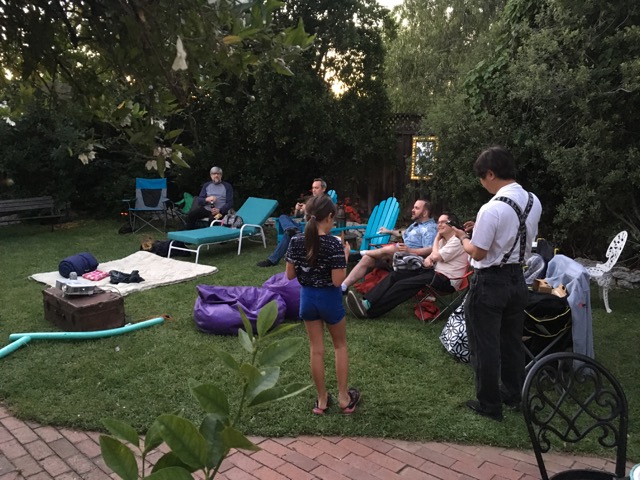
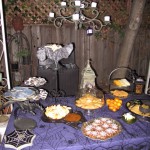
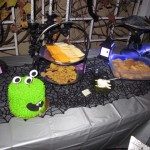
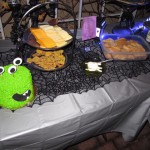
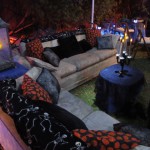
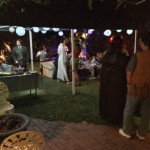
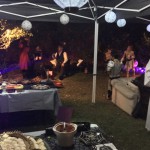
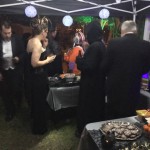
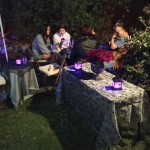
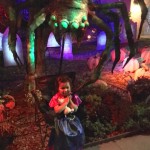
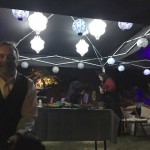
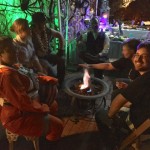
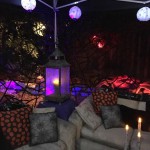
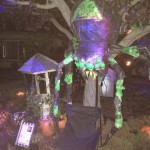
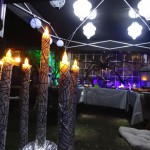
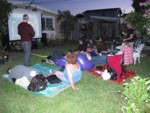
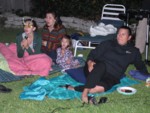
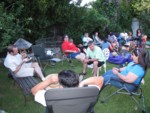
When I put out chairs on the back lawn in previous years no one seemed to use them, but this year Jerry suggested small tables with chairs. This worked very well and will be a new tradition too! Since I actually had my two small round tables free, plus the half-cardtable we’d been using all summer as a work Giant web & spider over the backyard food table
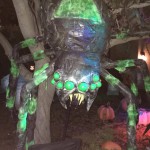
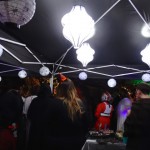
table, I got out all the extra chairs and set them up with a food table under the movie screen trellis, moving all the other yard furniture and the wishing well to discourage anyone wandering into the projection area towards the fence and gate. I hadn’t planned to use my giant web or any big spiders, but when I got the food table set up, the trellis Battery Jacko and Chomped Cheese Jackowas practically screaming for it! 😉 The 4 prelit short Halloween trees I got on clearance last year decorated the food table and the cardtable, and each table got a small battery jack o’lantern, plus a Glowing Jack O’Lantern Cheese Ball. Huge thanks to Glen for getting all the chair cushions on, tablecloths on and batteries working for this to look great when guests arrived!

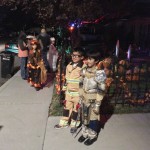
Halloween night I only got about 85 trick or treaters, but a few groups were so enthusiastic, videoing everything and pointing out details to each other, that gave them a guided tour of the inside decor as well. My Trick or Treaters watching the whole showfavorite of those enthusiastic groups was a family with their little boy about 5 years old who just came back from Disneyland and has been watching the Nightmare Before Christmas on constant rotation the past few weeks. He was so amazed by talking Jack, the singing pumpkins, and everything that it was a real joy to see! He even answered Jack a couple times, and kept excitedly pointing all the details out to everyone. I couldn’t resist taking a few snaps of my new “fans” watching the front show. 😉 We took the moon screen down on Halloween night around 11:45pm, and I took the gravestones and all electrical in the night of Nov 1st so I could finally turn my yard irrigation back on. I need some time to saw apart all the scarecrow branches and spooky fence (we pin-nailed them really well!), and all the pumpkins are still up for a while until I figure out where I can store them all.

My gallery of over 200 photos is included in this post below (a few are crops from Cat’s collection), and don’t forget to look at Cat’s 200+ photos on her main website, or her professional Facebook page too! Plenty of party photos for you people to peruse while I keep working on the big how-to posts for the secret projects of Jack and Zero plus the Singing Scarecrows and Pumpkin Chorus! Hope everyone’s Halloween was as fun as mine!

(more…)

Posted in Halloween, Parties | Tagged , , , , , , , , , , , , | 1 Comment

Last Halloween progress update before the party!

Boy is it crunch time! This was the last Halloween Scream Team work weekend before the party! It’s definitely a marathon this year going into the last push this week, so we’re trying to make sure we all get enough rest so we can make it to the finish healthy enough to enjoy it!

One thing I haven’t mentioned yet here is that to celebrate my Twenty Halloweens, I’m collecting for Trick or Treat for UNICEF, in cash at my party and trick or treaters Halloween night, but also via PayPal if you’d like to help celebrate! I will take everything collected by November 5th and send the total to UNICEF. I hope we can be festive for a great cause, since UNICEF’s Trick or Treat program has been running since 1950, and the U.S. Fund for UNICEF spends 90.4 cents of every dollar they receive on programs that help children. Only 6.7 cents goes to fundraising, and 2.9 cents to administration. So Hallway Decormany other charities have so much money go to marketing and administration, but UNICEF sends most to the children who need help.

I have taken my Nightmare Before Christmas collectibles (except shirts, pajamas & slippers!) and distributed them around the house on shelves, bookcases and things, so that should be fun for people to discover during the party. Here you can see the only spot large enough to hang my giant bus poster from the original movie release is covering my hall closet doors! You can also see some of the black pine garland with extra fun decor over the archway.

Skellington SlippersSpeaking of slippers, I bought these probably 10 years ago at Disneyland, but have been saving them in my closet so I wouldn’t ruin them. I decided that wearing them these couple weeks they should survive, and it’s the perfect time to enjoy them. Nice that it’s finally cool enough at nights to enjoy my flannel Jack pajamas too. 🙂

Jack O Lantern Cheese Balls using Fun Foam FacesAll the food I can do in advance is done until I start gelatin body parts on Thursday evening so I can paint them late Friday. The Brie en croute and other cheeses will be tackled on Friday, and fresh fruit and veggies aren’t until the day of the party.

Happy Cheese BallsI’ve taken a previous winning Creepy Cuisine entry and turned it into small Glowing Jack O’Lantern Cheese Balls to surround the gingerbread village and make all the food tables festive. The Creepy Cuisine winner used hard cheese for the face inserts so it would be thick enough for a wide cheese wall before the glass. The cheese has a tendency to crack for more intricate designs, so I decided to try using some of the fun foam scraps, washed thoroughly first of course. The foam is thin, so you can’t have as thick of a cheese wall, but I compensated by adding extra cheese to the sides and back. After the cheese has set solid in the fridge, you need to scrape any cheese edges away from over the foam and peel carefully, but it works great! Using the same technique over a larger glass bowl (that first needs to be baking support for Dr F’s lab building), I will make a big plain cream cheese glowing Jack Skellington head that will be in his laboratory. 🙂

Exploded Pumpkin DonutsThanks to Scary Jerry manning the deep fryer while I prepped them, we blasted through 9 dozen Donut be Scared Peekaboo Pumpkins on Friday night so they’re in the freezer for reheating day of the party. However if you get too much flour in the folds when re-rolling the dough, your pumpkins can explode like these! Nice to have snacks for all three of us, especially while smelling them the whole time we were making them!

New Tasty TombstonesThe new Tasty Tombstones & Edible Medals are baked, also using the plastic trophies with updated labels. One new quiz sheet is ready to print, with Haunted Headstones and Ogle the Owls, plus a secret extra bonus question. 😉

Edible Medals all ready!This year’s Spooky Music Quiz is all ready to go, including clips that include what number they are so I don’t have to yell. Why didn’t I think of that before?!? The AirPlay Remote app is working with my master iTunes on my MacMini and whole house speakers, so I can control volume, stop & start playlists on my iPhone, and I even added conductive thread to a couple fingers on my Sally gloves so I can use the touchscreen in costume! This means I can run the quiz from the backyard where there is more space, and everyone can play anywhere in the house or yard, as long as there is enough light to see the quiz sheets. 😉

My third webcam arrived on Friday, and I got it working on my internal LAN by IP + port, but can’t get the Mac Mini server to allow connections through it using DNS so it’s not reachable from outside yet. If I can’t figure that out this week, at least it can be image captures during the party showing Sally’s Potions and a bit of the backyard tables and chairs. Whatever is working by then will be live during the party at camera.britta.com, but fair warning my Comcast internet service has been nigh unusable many evenings this week, so I can’t guarantee they will be accessible during the party…sorry!

Jack’s clothes are well underway and looking quite dapper! We need the clothes to be removable for the last few days, so the planJack's Jacket and Torso is all seams to velcro in back. I’ve made a big white pillow as his torso, stuffed with 16 years of batting remnants after making baby blankets for friends, cut the arms and legs as long rectangles so they can be pinstriped before sewing, then fitted his jacket with tails to the torso pillow. I need to find a button in my stash, and only the arms have been pinstriped by Jerry so far since the paint pens were running out so I have a lot more painting to do, but the jacket is completely sewn except the arms, including interfacing on his squiggly coattails so you can actually see their shape hanging behind him.

Making Jack's Batwing BowtieI am loving Jack’s batwing bowtie. For the costume version, I used black fabric and wire, but after using the fun foam for all the graveyard fence spikes, I thought that might work better to support itself. It still needed wire reinforcement from the back side, so I hotglued some stiff electrical wire from my stash between a scrap foam layer, but this looks awesome on him!

Snake EyesI had sewed most of the snake last month, but due to other projects I didn’t get to sew the head until Saturday, then I dye both sections yellow but alas it wasn’t the bright yellow-gold I wanted. I couldn’t find matching balls the right size, so I sacrificed 2 of my gold shatterproof Christmas Spray Painting Snakey's Stripesornaments and painted them white. Sunday afternoon I spray-painted black stripes using scrap cardboard as masking along the way, then filled between with a brighter yellow spray paint. Jerry stuffed the entire snake with all the bubble wrap, packing peanuts, and newspaper I had, not an easy task since the Snakey lives!tail is sooo long! This is almost exactly what my vision was, how he curls around the tree perfectly, he is already digesting one of the presents, and has almost finished chomping a whole tree!

The lighted present boxes had also been started a couple months ago, but finally finished this weekend. I had cut acrylic sheets & clear corner protectors to the right Softly glowing green presentsizes a while ago, and prepped interfacing to diffuse the lights inside. There was enough wrapping paper Taller present is too brightleft that looked good so I only drew one design from scratch. The black bows are large mesh ribbon doubled over, and the orange bow on the biggest present is all fun foam so it will keep it’s shape. I really love all the color variety out front! Snakey needs a spotlight, and I Fun Foam Orange Bowneed a smaller light for the tall skinny present since I like the soft glow of the small green one better, so I’ll be shopping for more lights tonight. Glad I have a couple more evenings to try out more lighting design!

Patio decorating has begun but still has a way to go. I have rearranged the couch and table for Sally’s Potions in Dr. Finkelstein’s lab on the outer patio, but that table still has a couple final projects in process before it can become food display for the gelatin body parts and other classic “experiments.” Jerry decorated my other tree on Sunday, and it looks great with its natural orange needles! I switched the skull fountain into a Skull Fountain and another Halloween Treenew watertight cauldron so no leaks this year. The bar area is well underway turning into Jack’s Library Laboratory, with a new Laboratory Libations sheet to mix your own experiment, but the Christmas experiments in process still need to be set out along with the potion bottles, glassware, and there are a bunch of Halloween storage boxes still out there for now.

Gingerbread baking underway!Last night I started baking the gingerbread Halloween Town in hopes I’m done by Friday, since there is other food prep starting Thursday night! I’m a few hours behind since the dough was fighting me until I figured out to only make a quarter of a batch so I could roll while still hot. I’m trying to embed textures in the gingerbread so I can paint instead of icing everything, but that is only working intermittently. My structural gingerbread recipe includes soda which makes it puff, so tonight I’ll try a batch with no leavening at all to see if the textures stay better during baking. We did get the tablecloths under the foam base Sunday night since I don’t plan on moving the base after decorating it all. I hope to put all the final decorating touches on the rest of my house during the downtime during baking or waiting for pieces to dry or set, and have Halloween Town fully photographed so we can demolish and consume it before people leave the party!

I wish I could have taken the whole week off work, but I am taking Wednesday through the rest of the week off. All that “extra” time will be finishing the gingerbread I’m sure! There are still some major secret projects underway we’re hoping will make it in time, so Ghoulish Glen will still be working on those every night this week!

See you after the party…woohoo!

Posted in Halloween, Parties | Tagged , , , , , , , | 1 Comment

Merry Madam Mead & the Phantom of the Pipes

Since my parties are in tight quarters with guests roaming around at will, I never had a good location for a Pepper’s Ghost illusion. You need double the space to hide the original item that is being reflected into your final display, plus the illusion only works from a controlled viewing angle. I have always wanted to do a Pepper’s Ghost, and finally for Halloween 2012 I not only had the perfect concept and location for two Peppers, but also enthusiastic help!

The smaller ghost in the bottle of Merry Madam Mead should have been the easy one, but it ended up less successful because of bottle shape and ambient lighting. We will refine that one for 2014, but the Phantom of the Pipes inside my shed was called “Disney quality” by one of my guests! I do admit that of all six spirits from Halloween 2012, the Phantom of the Pipes was my favorite!

Merry Madam Mead

This Renaissance era Merry Madam Mead keeps giggling while pouring herself even more mead when it is obvious she has already imbibed plenty. Show this 2-minute clip reflected inside a bottle or jar in your bar to add some humor to your haunt. Perfect Too much halofor projectors, video screens, and especially reflected Pepper’s Ghost illusions. You are welcome to edit after purchase for your personal use as long as it is not distributed.

Merry Madam Mead was the first ghost we filmed, in the same exact outfit after filming her portrait inside, so we had not yet refined the double front lighting technique. With only direct front lighting, it lighted the black backdrop behind too much, so the best I could do in editing was a large fuzzy halo around her. This large halo also made it difficult to see any detail after being reflected plus in ambient lighting. Since it wasn’t a difficult filming setup, I might refilm this one with the better lighting setup for 2014, but I’ll need to borrow that wig again. 😉

The ghost in a bottle setup is simple: a video with audio looping on a digital photo frame placed flat facing up but hidden inside a fake book, reflecting into the bottle above through a thin piece of clear plastic cut to fit exactly inside the bottle at the correct angle to reflect to the viewer. The book is cut so the hole exactly matches the open bottle bottom, but the tower of books is intentionally tall so not many people were looking down on the bottle so they wouldn’t see the photo frame underneath. It was also placed in a corner so no one could really look at it from the side or behind.

Cutting the plastic for Merry's bottleI had spent awhile cutting that plastic to shape so no glue would be required since glue or tape would be visible and affect the illusion. Somehow when we set it into final position the plastic was no longer at the correct viewing angle, so my cohort was trying his best last-minute cutting as guests were arriving. I also never saw the double reflection at the top curve of the bottle during my testing. I had searched all summer for a big bottle shape with open bottom and this was the best I found which still was not good enough. What really irks me is that I had a spigot jar where the bottom broke cleanly off back in 2007, saved it in my garage for a year, then finally got rid of it a few years ago when I couldn’t think of any use for it. Sadly it would have been absolutely perfect for this! I’m almost tempted to buy another straight-sided spigot jar and see if I can duplicate the clean break for 2014!

The Phantom of the Pipes

This 18th-century French style Phantom of the Pipes peers knowingly over her shoulder at the viewer while sadly playing her own spooky fugue-style composition on a physical pipe organ (not included in the footage). This was designed as a life-size Pepper’s Ghost illusion to interact with a physical pipe organ prop. You could display this reflected onto a piano or your own custom-built props, with the reflection generated from a video screen or a projector. The pipe organ fugue on the soundtrack First shed Pepper's testis an original composition by Britta Peterson. You are welcome to edit the video after purchase for your personal use as long as it is not distributed.

After the Gate Ghost was successful, my partner in crime said “what about next year?” and my first reply was “I’ve been wanting to try a Pepper’s ghost using my pipe organ inside my shed.” He was shocked I immediately jumped to that elaborate of a setup! Talk about a challenge! We used an old glass tabletop that we could move around to check reflection angles, and our first testing using my existing projectors showed that we needed a much shorter-throw projector, since even lengthening our stream by The new Epson just might work!bouncing it off a mirror in the back corner, we were still nowhere near life-size to sit at the pipe organ. Luckily a new Epson projector was available for just under $500 that was the perfect throw…whew! At that point we knew our setup, which you can see in the diagram. By shoving the pipe organ all the way to the wall Peppers Shed Layoutand angling it for the keyboard and ghost hands to be visible, we could just barely put the image screen along the open door, large mirror in the corner, and projector in the other corner behind the pipe organ, with the reflective film at an angle but stopping before it would interrupt the projector beam reaching the mirror.

Original music this yearSince this ghost was playing the pipe organ, she needed music! I could have used some old pipe organ spooky standards, but I took this as an opportunity to compose a 3-part fugue, transforming the theme she plays on piano in her portrait into a haunting minor melody. I worked it out at my piano, but Garage Band didn’t have any good sounding pipe organs, so I connected my vintage Yamaha DX-7 keyboard to my MacBook Pro, and recorded each part live into separate tracks. It was really fun to write this kind of music again, and I’m glad not only did I really like the result, but even though during final testing it was running over & over to the point of annoying, I heard my cohort humming along, commenting “it’s kind of catchy,” so he liked it too! 🙂

Filming the Phantom of the PipesAfter we had the final music all ready and knew the final setup, we knew where to place the camera to film the ghost. We aimed for an average viewing height of 5 feet, hoping that would be midrange for both kids and adults. I covered the walls and ceiling of the shed plus the organ bench with black weedblocker fabric that stayed in place through the illusion, but the floor was old plywood that was fairly dark, so I left that uncovered. We knew we couldn’t get any image to be tall enough for feet up through the tall hair, so we blocked most of the skirt with the bench to lessen the ghost image area. For filming only, I also covered the pipe organ with black weedblocker fabric, then had to remember where the keys were while miming my playing! Since the costume includes a fancy white wig and is already pale lavender, I didn’t alter any of the costume, but I did brighten it during editing. We avoided too much halo so the detail would be more distinct. I definitely needed a director for this, since the back of a ghosts’ Taping the heatshrink film on the framehead is pretty boring to watch, so we finally settled on peering over my shoulder periodically like “I know you’re watching” which turned out pretty spooky!

For the final setup, we purchased large heatshrink window insulation film for about $20, and I built a frame of 1x2s since thicker wood would have messed up the Taping the heatshrink film on the frameangles, especially squeezing the door end where it needed to be. I spray painted the frame pieces black outside, but I had to assemble the frame inside the shed since the door opening isn’t large enough for the size frame we needed. To make the frame blend in with the floor I spray-painted with the frame base in place, fading the black from the frame out both sides to the normal floor color. That also made nice lines for knowing when the frame was in proper position. The heatshrink film is taped on first as stretched as you can, then you shrink with a normal hairdryer since a heat gun is too hot. We had read that Heatshrinking the film with my hairdryer to a taught mirror finishafter shrinking the cloudiness would go away, but there were still some places that remained fuzzy, and it collected lint & dust from static electricity. The problem is that once it was in place, there was very little room to access the ghost side of the film. I had just enough room to reach in from each side to light the battery candles on the pipe organ, but there was no way to wipe the dust off the ghost side of the film farther than my arm’s reach.

Final Setup in ActionHere is a still photo of the final setup “behind the curtain” side, and you can see how our angles made the image stretch wider than projected. I compensated for this by squishing the original footage by about 25% percent so she looked normal sitting at the pipe organ instead of extra wide. Sure wish I could do that in real life! 😉 I had the navy blue crushed velvet curtains in my Halloween Squished footage to compensate for projection angle wideningdecor stash, so that draped over a “rod” of scrap 1×2 sticking out at the top of the film frame to hide the projector glow and the mirror. Since peeking in through the doors you could turn to the right and see the entire “behind the curtain” view shown above, we fixed both doors in place using bricks and my big stone urns so the opening was narrow enough that not even kid-sized heads could squeeze through, but you could put your face right up to the opening and see the ghost perfectly.

She's looking at you!The point of all the candles was to see them through the ghost, and that worked really well. I arranged them in an aesthetically pleasing way and made sure not to block her face or hands. We were hoping the projection would be enough light for the keyboard but from 2 bounces and a reflection, it had lost so much light that we added an aimable & dimmable battery LED light aimed directly at the keyboard. That was the perfect lighting to see The Phantom of the Pipes taken by Cateverything in the background without washing out the ghost projection. The only drawback was that we thought the sound was plenty loud during all our testing, but ambient party noise plus the small door opening caused some people to miss my favorite ghost! It is such close quarters that it was very difficult to take still photos to explain the full setup, so you can watch this video below to see a walkthrough explanation of the setup while the illusion was running.

Whew! Now you know how we made all six spirits for Halloween 2012! Hope this inspires you to host your own ghosts someday! 🙂

Posted in Halloween, Parties | Tagged , , , , , , , | 1 Comment

Only two weeks left!

Scary Jerry Decorating the Skeleton TreeAnother exhausting weekend of party prep with the Scream Team, plus all week before that on my own every evening…whew! I now have 87 Brittle Bone Breadsticks underbaked in the freezer, ready for finish baking the day of the party, and my costume is now ALL DONE…hooray! Inside decorating is looking great, even though decking the halls still seems like Christmas even with black pine garland and orange lights. 😉 All the spooky wall art is up, but the black LED flicker candles still need to be set out. My dead Christmas tree from 2 years ago was still hanging on to its needles, but I finally got them off enough to bring it inside as a skeleton of a tree. Last year’s tree is clinging to its needles so I will use it outside as another tree to decorate. Scary Jerry put the lights on the inside tree and started hanging ornaments yesterday, but there are plenty more I’ve collected over the past several years on Christmas clearance and Disney Store online deals. Jerry has taken “homework” of present wrapping with him for this week to use all the fun ribbons, wrapping paper, and tablecloths as wrapping paper over empty boxes of various sizes, so under the tree will New favorite plant: Lion's Tail!look festive too. I hope there is still time to make the spiderweb snowflakes I designed, but that might get cut for time in favor of larger & more important projects…crossing my fingers!

When I was at Home Depot yet again for more project supplies and 2 for 1 mums for my potted urns, I found a new favorite spooky plant: Lion’s Tail! These blooms are sooo cool cut for Halloween displays, and it’s a drought-tolerant plant that will hopefully do well on drip-irrigation in my side yard and get larger. Here’s hoping!

Nightmare Gravestone Handpainting in ProcessAll 8 new gravestones are nicely aged and fully complete, including photos for new Tasty Tombstone cookies and a new quiz. I did the garden hose & spray paint aging one evening, then hand painted accent details over two evenings while watching the first 2013 Halloween Wars and the first episode of American Horror Story: Coven. 😉 I love how the aging technique makes the foam look just like real stone! In this photo you can see how the aging technique alone doesn’t bring out the carving detail quite enough, which is why I hand paint where necessary with watered down black paint. You can always go over again to add darker coloring, but if you start with too dark, it’s too cartoony and you might as well have just written the lettering with a Sharpie pen instead of carving. You can watch this process in action in the Tombstone Trilogy on the first DVD “Eerie Elegance: 13 Fabulous Frights” or watch the Eerie Elegance episodes available online.

Pile o' Pumpkins!All the hand painting on 13 pumpkins is almost done! There are 2 here in the pumpkin pile that have not yet been handpainted…can you spot them? I told the Scream Team that it looks like a lot of pumpkins all assembled together, but I was afraid when I spread them out around the yard they wouldn’t look like enough…but I was told they look like even more by Sunday evening when most were in final position, so that’s excellent. 🙂 Now to buy the fresh pumpkins to add to this pile!

Gluing the foam spikes on the fence postsSaturday after dinner after a long building workday, Ghoulish Glen and I cut and glued 152 foam spikes for the 76 fence posts, while watching the pilot of Game of Thrones and the Dark Shadows movie he hadn’t seen. 😉 This technique is from Stolloween which I saw from Jerry’s blog last season. Brilliant idea to make menacing looking spikes that are completely safe, just like a rubber knife! The spikes had to be Beware: Boys with Paint Sprayers! ;)glued together first so they could slip over the top of the post, then hot-glued in final position. Some of the seams popped open during painting so we need to touch up, but they look fantastic!

Both guys started painting on Sunday while I finished gluing the seams on the rest of the spikes, then I kept gluing the spikes on the posts while they were painting the fence panels that were already glued. I thought I had more of my oops paint than only Graveyard fence and only some of the pumpkinshalf a gallon, so we ran out of paint by 4pm…ack! I ran to the store and bought a new whole gallon of flat black, so that was plenty to finish, but then our sunshine left before the last coats went on, so we decided they could dry just as well in final position, then I could touch up with a can of black spray paint where necessary. We had gotten the first two panels up before I ran to buy more paint, and when I drove back and saw this view of the bright orange pumpkins nestled among the lush green foliage peeking through the elegantly spooky black fencing, I beamed from ear to ear! 😀

What a mess!Outside building is almost done! Over 2 days it went from gigantic mess spread out all over the front yard with painting tarps all over my backyard to almost party-ready! I will let you guess how this will all work together since I’m still saving several surprises. 😉 We used enough of my branch collection since the spring that the rest are now in the yard waste can or cut up for firepit use. The gravestones won’t be placed until next weekend when I have all the fresh pumpkins going into position with them.

Gluing the moonYes, that is a giant moon you spotted! A bit difficult to hide, so I’ll show you the funny story, but still won’t tell you everything. 😉 I have wanted a moon as part of this decor for several years, but I know that foam catches the breeze much too easily, and a large sheet of foam with a seam would be even trickier. Between my three ideas and Ghoulish Glen brainstorming at Home Depot Saturday morning, by Saturday evening we had a plan we thought had the best chance of working, including the wood frame built and ready to paint, but I needed some really good adhesive for the foam. I bought the adhesive Sunday morning and got everything glued together in my driveway before the rest of the Scream Team arrived. This is two 4x8ft sheets of insulation foam 1.5″ thick, Moon Support in Positioncut into half circles, the seam glued from the back down the length, a scrap of plywood perpendicular to the seam, then the corner scraps of the same foam sheets glued around the edges to help reinforce the foam from snapping off in any wind. I even notched the foam to fit snugly around the plywood edges and glued those down with weights to give it the best chance, then Glen went over everything later from all angles with the pin nailer in hopes of acting like hooks in the foam.

Passing the moon up to Glen on the roofWe had painted the angled wood frame on Sunday afternoon, and I wanted as long as possible for the adhesive to set before we attempted moving the moon, but I didn’t want to run out of daylight, so we started around 6pm to get it up to the roof. We used Glen’s Workmate portable workbench as a base, firmly anchored the angled wood frame in the vise of the workbench, then we passed the moon up to Glen on his Lifting the moon back to verticalback on the roof…haha! He held that position until I got up to help him, and then we figured out quickly that we would need Jerry up there so we could each hold a side of the moon while Glen could screw the bracket onto the top of the frame. Even though Jerry Jerry overcoming his fears!was worried, he thankfully screwed up his courage and helped us…thank you SOOO much! We absolutely could not have hung the moon without Jerry’s help! I did notice the ladder angle was pretty steep, so I repositioned it so it was more like stairs, and we got Jerry down safe & sound.

Hanging the MoonAfter we got the moon in position, we were still worried that if we did get a gust of wind and the foam did not snap off, it might act as a sail and send the whole structure off the roof into my Lashing the moon frame to my roof drain vent pipesyard…so in addition to using Glen’s exercise dumbbell he had brought before for other testing, I got my strongest rope (yes it happens to be aqua!) and we lashed through the corner of the wood frame around both drain vent pipes on my roof. The foam might still snap off if we get a strong wind, but so far it seems pretty darn stable, so it just might work!

There is still so much more to do, especially the secret projects I can’t reveal. 😉 Jack still needs clothes, more front yard props still need finishing but are at least in process. The patios have been messy work areas still, thank goodness I can spread out there, but now I think we are done enough with major building and painting that I can clean those up this week, arrange furniture, then decorate there. Jack’s laboratory might be a bit tricky so I want some time to see what works best. I will leave you with my front door wreath made from 95% clearance black pine wreath & garland, plastic battery Scary Door Wreath Reaching For You!eyes I’ve had for probably over a decade, purple battery lights from Ikea and fun wire ribbon from Hobby Lobby. It’s harder to tell in the photo, but the hands at the top of the door are reaching out, but anchored to the door at the wrists so it’s safe and won’t get tangled in anyone’s costume as they open the door all night. All it needs now is some teeth, and I just splurged on some pumpkin teeth from Spirit that should look great!

That’s all from me until next time, but there’s probably only time for one more party prep progress update before my party! Hope your Halloween season is fun so far!

Posted in Halloween, Parties | Tagged , , , , , , , , , , | Leave a comment

Halloween Shopping Weekend and more!

Ready for Annual Halloween Shopping Weekend!A full week ago was another successful Halloween Shopping Weekend! I love that even with both our lives getting busier every year, my childhood friend Tash and I can still make time to meet in Roseville for our Annual Halloween Shopping weekend! Roseville has superstores of Michaels & JoAnn, and Halloween City in addition to Spirit, plus a great Goodwill, Dollar Tree, and killer 99cent store that rarely disappoint. We Skellingtoesstart with a pho lunch, keep shopping until we stop for dinner at Strings, then hit Target after dinner, often closing down the store, then the next day we hit the rest of the stores on our lists. Not only do we wear fun spooky clothes, but this year I was inspired by the viral Jack Skellington manicure to do my own Skellingtoes! haha…

Halloween HaulBy the last store visit on Sunday, my new SUV looked like this! You can’t even see everything that was behind or inside the giant cauldron, but it cracked me up that one pumpkin never fell out after settling into that precarious perch. I did reorganize a lot and consolidated enough room to fit all the cornstalks my dad grew for me bundled inside a tarp that sat over the seats up to the front passenger window. Thanks again Dad!

Varnishing 13 PumpkinsThis year I have added these to my plethora of pumpkins:
10 more uncarved plastic pumpkins (cheapest were Home Depot & Target)
15 carved plastic pumpkins
13 large papier-mache pumpkins

Painting Pumpkins in ProgressI still need to get out my previous pumpkins from the shed to see what my grand totals are, then I will still need to buy fresh pumpkins to bring my count high enough! I am finally done with papier-mache (hooray!) so during last week I used over a gallon of marine/spar varnish for all 6 sealing coats (3 top & 3 bottom) on all 13 pumpkins, then on the weekend we sprayed the orange basecoat on all of them! Now for the hand-painted shading to make them more realistic…

Dr Finkelstein is finished!Speaking of hand-painting, Dr. Finkelstein is all finished! It was a bit tricky to paint inside his mouth, but I do like how he turned out. He was also sealed 3 full coats with the marine/spar varnish, and he survived standing water inside his head during a freak torrential downpour a couple weeks ago, so that varnish does work! Since even semi-gloss/satin is too shiny, I’m using acrylic paints over the varnish, and that brings the finish back to matte, much better for the original pale skin texture for the Doctor. I propped it up here so you can see his rivets from the front angle, but his head will be fully open at 90 degrees with a plastic tray inside, ready to serve my classic recipe the Bizarre Brain Pate. Yum!

Sally is almost doneSally’s gloves are finished with black plastic nails, and her dress has the handstitching still underway and taking forever. I can only do about an hour at a time since my finger loses grip to pull the thick needle through multiple layers of fabric. It should still be done this week at the latest. I will be very glad to have it finished during the first full week of October!

8 new gravestones8 new gravestones were carved and painted this weekend, but I can’t show you epitaphs because they will be a new quiz for this year. I can show you this one, since it will be the obvious one. I Nightmare Keychain & Gravestoneused my vintage keychain to duplicate the Nightmare Before Christmas logo to use for the 20th anniversary gravestone. When the movie came out, this was the ONLY item the Disney store had at all! It has yellowed over the past twenty years, but it’s nice sturdy metal with enamel design, so I’m sure it will last another twenty! This Jerry using my sprayer for the gravestoneswas the first time I could use my nifty sprayer on gravestones, and actually Jerry painted them for me, getting his chance to try my sprayer…it goes so much faster especially in all the carvings! Now I can use the garden hose with black spray paint aging technique, then hand-paint the detail in the carvings where necessary. I need to finish these soon so I can photograph them to be a new set of Tasty Tombstone cookies!

Outside building underway!Outside building has begun! Rotting fence boards scavenged from my parents’ spring house projects plus tons of branches collected from neighborhood spring cleaning are transforming my yard. They’re not finished yet, but can you guess what these will be?

Scary Jerry has an amazing Halloween village collection for which he designs custom carved and painted foam base structures to arrange all the buildings and accessories…so of course I asked for his expert assistance carving the foam base for under my gingerbread Halloween Town! All this foam will be covered in foil, the light strings will poke through the foil, then covered with buttercream frosting, and some Foam Base and Lights Ready for Edible Halloween Townchocolate cookie crumb dirt here and there, plus chocolate rocks. To save me some strife, I have bought 3 buckets of Duff Goldman chocolate frosting from Michaels using coupons plus a bunch of black & blue decorating spray to cover all this terrain. I will be mixing my own royal icing for all the gingerbread though. The moon you can see in the photo is a glass table topper that is wegded into a thin slot in the foam mountain base. This is such a tight slot that it is holding the glass just fine. Once the glass is cleaned, covered in white fondant everywhere it’s exposed, then hand painted with pale yellow shading, I think the lights behind the glass will make it glow like the real moon…here’s hoping!

As for general party prep status, I was freaking out a few weeks ago because there were no projects actually completed yet, then finally feeling better last week that so many items are at long last being marked DONE on my list…but there is still so much to do, and some really major things are still so up in the air, that now I’m wavering back and forth from optimistic to freaking out…I sure hope enough is successful that I feel accomplished this year! At least I’m sure we will all have a fun party no matter what!

Posted in Halloween, Parties | Tagged , , , , , , , , , | 2 Comments

humble beginnings

Part of my Halloween 2013 celebration plans include showing the past twenty years of party photos and videos in the background, which includes going back into the dark ages for the two Halloween parties I had before the original Britta Blvd began in 1996. There aren’t many photos, one thing I learned over the years was to document everything better, but here’s what I do have. You can see they are very humble beginnings – hey, First Eerie Eyeballseveryone has to start somewhere! – but the Eerie Eyeballs are there on the 1994 table along with the bleeding Haunted Human Heart!

Sally 1994 with budget decorThis was my first apartment after college, and I was on a very small budget from the insurance job I could find during that 1990s recession. I had made the Addams Family crest by handpainting cardboard in my tiny college dorm room for the movie promo in 1993, so I used that plus my Morticia costume on the walls as decor, along with some spooky movie posters. That was the Vampire Jeff 1994year with competitive apple carving since pumpkins were too big and expensive for me to provide, and we had plenty of fun costumes, including my original Sally, and I sewed the high-collar red-lined vampire cape and sash for my roommate Jeff, who wore his choir tuxedo for the rest of his costume.

Click here for the full page for Halloween 1994

Halloween 1995 was a much smaller party since that year my friend Tracia & I both had parties back-to-back, so we mostly chatted, played with the ancient camcorder and drank all night like you might expect of young twenty-somethings. This is when I Animaniacs!slaved over three full costumes turning us into the Animaniacs cartoon characters, but we got out of costume to be comfy pretty early in the evening. However that was when I added black tablecloths stapled to the walls, even though not full coverage due to expense, and my roommate Noah & I found fallen willow tree branches for attempts at more atmosphere. Noah bought a bunch of black & red candles and worked hard at melting them artistically into a big pile on a wooden board, which did look really cool. We were all MST3K fans, so I cut movie theatre seats with a ghost, witch & skeleton in the style of Joel and the Bots out of black paper and taped it across the bottom of my TV. I had black cardboard coffins to serve chips, and you can even spot my first First Mad Scientist Black Light Displayplastic cauldron that I still have today! This was the first black light mad scientist display, and also when we tested how the non-toxic fluorescent poster paints tasted when mixed with vodka and soda. There was so little paint in the solution that we had no adverse affects as expected, but it tasted very chalky so I do not Spooky Tree in Chalk on Black Paperrecommend it. It sure looked fun though! You might as well just use tonic water for the same effect with a solution that is intended to be ingested. 😉 I had traveled to New Orleans with my grandmother that fall, so I was inspired to draw a Scary Tree draped in Spanish moss in front of a full moon using sidewalk chalk on black butcher paper…which I still have and will hang this year in the hallway gallery in honor of my Twenty Halloweens. 🙂

Click here for the full page for Halloween 1995

Looking back at these now I am almost embarrassed, but they do prove a point I have made in both Eerie Elegance books and always tell people when they are amazed at what I do these days: Even starting small, you can build your Halloween collection over time, and two decades later, maybe you could be hosting extravaganzas like I do now!

Posted in Halloween, Parties | Tagged , , , | Leave a comment

more Halloween party prep progress…

Three Homegrown Sugar PiesIt’s been a very busy summer, working on Halloween between Cinema Brittahytta movie nights, and visiting my grandmother in Seattle, but now it’s back to all Halloween until November 1st!

The only other surviving pumpkinSince my last update, I have harvested the 3 sugar pie pumpkins since they were already falling off the stems, and since they already started getting soft, I quickly roasted them and froze the puree so I could use them in my Halloween baking. I saved all the seeds to plant next year, since that was a good hardy crop! However the Dill’s Atlantic Giants must not like my yard or conditions, since about 6 Pinstriped ornaments ready for the Halloween Treehave set and grown to about 8″-10″ diameter, but then the rinds never harden and they rot on the vine. They are still blooming so more keep setting, but I’ve already given up hoping to get any of those by Halloween. From the seeds I bought with free Amazon points, I still have some blue Jarrahdale and white Lumina seeds I’d like to try next year when the Pumpkin Queen’s patch is needed again.

papier-mache pumpkins in progressAll the pinstriping on the black ornaments was finished back in August thanks to Scary Jerry! He’s helped with a lot of the papier-mache too, but I’ve designed all the pumpkin shapes myself. I just finished the final paper coat on all 13 large pumpkins that still need to be sealed and painted, then I will be purchasing some fresh ones, plus adding to my collection of plastic pumpkins to get up Garage spikes ready to impale pumpkinsto the number we need. When I said a plethora of pumpkins, I wasn’t kidding. There will be 9 just above my garage roofline, among other places! Jerry & I were able to build the base for the spikes those 9 pumpkins will be impaled, using scrap planks and scrap 3/4″ PVC, but with purchased flange bases shimmed to the 1:10 pitch of my roofline.

Jack & Dr Finkelstein getting multiple coats of spar varnish sealerIt will come as no surprise that I want a life-size Jack Skellington at my party! However, I am saving some surprises to reveal during the party, so I can’t show you everything. I can show you that his head is now almost finished, including 3 coats of spar varnish to protect against moisture dissolving the papier-mache, plus paint over the varnish to avoid the shine.

Jack & BrittaHere you can see how Jack will be standing opposite my front door just off my porch. He is crouching down to fit under the wisteria and my roofline, but I think we have the scale of his limbs pretty good. We are definitely expecting people to want to take photos with him, just like me! 😉

These are Jack’s hands, in scale with his arms and face. These are made from two different structures since we learned the first material wouldn’t work as well, so it was remade into his left hand cocked at his hip. After the tubing was cut and notched, I Jack's hands being sealed with spar varnishadded a single layer of paper strips so the finger bones wouldn’t bend with the tubing, then sealed with varnish and painted white like his head. There has been a LOT more work happening, but that’s all the progress I can show you so far. Once I get him dressed I’ll be able to show you again. 😉

Improved Sally EyesMy Sally costume is almost done! Since I’m using the same shoes, socks, wig & tights as 19 years ago, it should have been done much earlier, but I have been slammed with the secret projects that have been taking a really long time to troubleshoot. Since my yarn wig was only a loop of elastic band, and that elastic had pooped Improved Sally Eyes with 19-year-old yarn wigout to overstretched anyway, back around May I handstitched it all to a wig cap to improve it. In June I took the original felt eyes I shaped around eggs and mounted them on the wire frame I used in my 1997 Sally reprise, then added the temple pieces of some lenseless sunglasses I had saved. I also added black yarn eyelashes and used fabric stiffener to keep them the correct shape. Now I have perfect Sally eyes that I can easily remove when I actually need to see!

Painting Sally's DressI still do have enough of my Blythe Spirit pale blue pancake base for my face and neck, but there was no way I would be able to keep makeup on my arms and hands with all the hostessing duties I do these days, so I searched long enough to find opera length pale blue matte stretch satin gloves that actually do reach almost to my armpits! Extra bonus since I was able to use free Amazon points too! I was hoping to handstitch yarn for 3D effect, but since the gloves are so stretchy, I don’t think that will work, Handpainted Sally Dressso I just drew the stitches with a permanent marker, just like the tights. I’m hoping to find some fake black fingernails during Halloween Shopping Weekend that I can just hotglue to be easier and more realistic shape, otherwise I’ll use black nail polish directly on the gloves.

I had to make a new dress since I have changed shape in the past 19 years, mostly in the chestal area, so this time I sewed an unbleached muslin sheath dress with added pockets (no, not the pocket she uses in the movie, but hidden seam pockets at each hip), then I handpainted all the designs as movie-accurate as I could, using textile medium added to a hand-mixed acrylic paint palette. You can’t see every view on her back in full lighting in the movie, so I had to take some liberties, some of which were inspired by more vividly-colored products like my Disney pins, shirts, and other collectibles. I am really quite pleased with the handpainted texture since I think it better represents the handmade stop-animation feel of the original Sally. I still need to handstitch the black yarn on all the “seams” for the 3D texture I want, then my costume is ALL DONE, maybe even before October begins!

Scary Jerry working on the graveyard fenceAfter years of wanting one but not wanting to store it, let alone the expense and work, I finally have a real need for a proper graveyard fence this year. Of course I had saved my original graveyard fence from Halloween 2003, so I thought it would be fun to use that as the design for a Ghoulish Glen & Scary Jerry helping with the graveyard fence3-foot high fence. Since we could screw the plastic edging in two places to each PVC post, we only needed to drill the bottom 1×2 as the cross-brace. This was a bunch of busy work, not difficult, and the most expensive part Graveyard fence ready for foam spikes and black paintwas the rebar I bought to pound into my grass so the fence posts can slide over the rebar to be stable. Next will be foam spikes on the top of each post, then I will spray everything black with my handy compact sprayer in a couple weeks.

Ghostly Greenery v1Since I have been making the rounds of hardware & home improvement stores almost every weekend for other projects, I couldn’t resist buying cool spooky plants when I saw them. Finally I found my dark purple ornamental millet again, this time in 1 gallon pots for only $6 each, vs. the 5 gallon pot for $25 I found a couple years ago. Each pot was badly rootbound and contained three plants in each, so I split them apart for several urns, plus planted two in the ground already, since mine died in the winter last time, probably from too much water in the pots.

Ghostly Greenery v2I was also able to split my pots of black mondo grass that have been doing so well in my window box. They were running out of space too, so I cut the entire outer layer away and split into the 4 black urns. My big dusty miller bush out front is starting to poop out, so I got some small 6-packs of starter for the pots now, and I can plant them in the ground after Halloween to keep my ghostly greenery supply going. Some red grass, purple sweet potato vine, and orange mums fill out the rest of the displays. So far the urns have lasted over a week in the sprinkler spray and drip irrigation, so hopefully they will stay looking nice through Halloween night!

Cardboard mockup of Halloweentown ready for gingerbread bakingAnother major project is my gingerbread Halloweentown! I won’t start baking until 2 weeks before the party, but I knew if I didn’t design it ahead of time, there’s no way I could execute with everything else last-minute that always ends up happening. I used my lighted collectible Halloweentown as models, then created mockups out of cardboard for each building at larger scale so they are easier to add details. The plan is to bake gingerbread around a glass bowl vase I have for the lab observatory “bubble,” and I hope that I will be able to pull sugar into the curly mountain. I’m not sure if I will make figures yet, since those are really tricky to make freestanding without cheating and adding internal structure, especially for Jack, so I’m ok if I do not have any Halloweentown residents as edible art this time. I have saved the battery tealight fondant jack o’lanterns that I made for the Ghoulish Gingerbread Haunted House from 2011, so that might be enough to decorate around the curly mountain graveyard pumpkin patch. I’ll use new Tasty Tombstone cookies in the curly mountain graveyard too. Hopefully this will be arranged on the dining room table inside on carved foam levels that I can cover with frosting and cookie crumb “dirt,” then there will still be room for some food plates in front as well. I’m not completely sure of all the setup yet.

I can’t believe I used to not even start major Halloween projects until October began! I remember I built my pipe organ the weekend before my party only five years ago…boy has this grown by leaps and bounds in only a few recent years! Hope your Halloween plans are going well!

Posted in Halloween, Parties | Tagged , , , , , , , , , , | Leave a comment

The Pumpkin Queen & Swashbuckler Sally

Onward to pirates & pumpkins! Both Swashbuckler Sally and the Pumpkin Queen were rear projected onto screens, both using compact specialty-use UltraProjectors, what you might think would be a simple technique, but there were some execution surprises both good and bad…

The Pumpkin Queen

This Renaissance era Pumpkin Queen approaches while menacingly sharpening a large knife, raising it as though to attack as she moves even closer, then she stabs and smiles while carving a pumpkin into a jack o’lantern. This 30-second clip for sale on Eerie Elegance was specifically designed to interact life-size with a large physical pumpkin on the ground in front of the image projected from the rear onto a scrim, but you could also use a video screen or reflected Pepper’s Ghost illusion.

Pumpkin Queen on setSince I had to get up sooo early to film her portrait with the live pumpkin blossoms before they closed up for the day, we filmed her ghost a different night. I used my dad’s antique knife sharpener since it looked authentic and made an ominous spooky sound, walking carefully towards the camera over the black backdrop on the grass, gently letting the sharpener hand to my side as I walked, but when I raised the knife, we could not get it to catch Backyard Filming Stagethe side lights that were carefully positioned to light me without lighting the black backdrop. My director/cinematographer lashed an LED headlamp to the end of the long piece of scrap PVC, and aimed that while I was walking and twisting the knife to catch the light. It took several takes past a lot of giggling due to his positioning of the pole and my “pumpkin shimmy” that was rated not for kids, but we finally got a few good takes! No physical alterations to this costume to make it ghostly, just faded the contrast and colors in post-production in Final Cut Pro, including adding the stabbing pumpkin sounds I recorded by stabbing a real pumpkin with that same knife used in filming. 🙂

The Pumpkin Queen Brandishes Her Blade The Pumpkin Queen Carves a Pumpkin

This was the same location as the Gate Ghost in 2011, which was a sheer black scrim with a full-quality HD projector, but we were reserving the big projector for another purpose, so we tried an UltraProjector behind a gray bedsheet. The UltraProjector is only 320×240 resolution with a super-bright LED as The gate screen in daylight with pumpkins placed properlythe bulb, so we had to place it over 10 feet away from the gate to get the Pumpkin Queen anywhere near life size. You could see her in person so we thought it would work okay, but she didn’t gather as much attention as the brighter Gate Ghost the year before, and I couldn’t get her to show up on video at all, only at the highest manual ISO setting on my good still camera. The lesson learned here is the Ultra-Projector is too small and too dim for life-size full-body people projections, but we knew we were pushing its limits.

UltraProjector in position behind the gate screenIt was very nice that the UltraProjector was lightweight enough for a normal tripod, only needed a power cord (and speaker if using sound), and it was already black so it was easy to hide, but despite killing myself the last two weeks before my party with various video protocols and converter software, I could never get the audio to stay in the file after conversion through the proprietary UltaProjector software, so no one could hear the ominous knife-sharpening or the thuds as she started carving the pumpkin. Thankfully this summer I have been able to work with Richard of UltraProjector.com and figure out the right format and encoding using other video converters for files to work with sound on my two UltraProjectors, so I’m Ghostly Pumpkin Queen Ready to Stabextremely glad that won’t be a problem in the future. He has new models out this year that can accept many more video formats, so that will be even less hassle for new buyers. All of this means the gate location will not use an UltraProjector in the future, but we do have other locations where the UltraProjector should work fine.

Since the Pumpkin Queen was designed to “interact” with a physical pumpkin in front, you need to supply that yourself, but that could be as easy as setting a real pumpkin on a stand in front of your TV or a digital photo frame while it displays the ghost. She’s definitely a Halloween spirit giving chills until the punchline, and you can own a copy from EerieElegance.com!


Swashbuckler Sally


This 18th-century pirate Swashbuckler Sally is brandishing her sword fighting an unseen foe from side to side. This 3-minute clip for sale on Eerie Elegance is perfect for projectors, video screens, or even reflected Pepper’s Ghost illusions. At Castle Brittahytta, Sally fought bravely all night long back and forth between three windows in the center tower. (Apologies for the video glitch when zooming in.)

Before you can project a ghost, you have to film the video. Sarina’s portrait and Sally’s ghost were filmed the same very warm day, and boy that’s a lot of hot plastic hair to wear! Since it was difficult to see her hair, hair, boots, lapels & cuffs against the black ghost filming backdrop, I used talcum powder to dust those to Raw Footage with Talcum Powder Dustingbe a lighter gray. This worked pretty well as a non-destructive alteration technique, since I was able to wash the talcum powder off afterwards. To make her more ghostly, I altered the contrast and saturation in Final Cut Pro.

This one rivaled the Watery Wraith for filming hassle, since it was high summer almost 100F that day, barely cooling down to the high 70s after dark, I had to wear 4 layers of clothing, long hot wig, giant hat, socks and boots, AND jump around brandishing my weenie plastic sword, hopefully keeping proper fencing posture (golly that coat was heavy to hold up my arm for so long), all while trying not to scoot the black backdrop out of position on the grass…whew! I weighed myself the next day & had actually lost 2 lbs of sweat! After my director had been chiding me for my sagging posture and asked me to try an ill-fated spin, Sally setup before darkI challenged him to try it himself! His feet got stuck really quickly, and he was in much more comfortable clothing and no wig or hat. 😉 At least we got plenty of usable footage for all that effort!

We were already running out of project time so we decided not to bother with any sword sounds or a speaker. Just as well since this was another UltraProjector and I didn’t get my audio issues worked out until this summer (see above). I have added sword swooshes and clangs for the version for sale, and she’ll be back in the tower for 2014 with speakers this time around.

My original plan was to aim the projector so it would reach across all 4 windows, but my cohort thought the different focus ranges would be problematic, so he came up with Sally setup in actiona clever solution. We placed a mirror held in position by bricks at an angle in the space between the front two windows such that the mirror reflected into a side window without blocking the image from the front two windows. When the ghost moved across the projected field and hit the mirror, she jumped to the side window. Since she was jumping around and disappearing a lot, this worked really well not knowing where she would appear next! This video (or click the photo) shows the rear view in action to be completely clear.

Sally in the Tower even before dark!Knowing how the UltraProjectors are not very bright, we were worried the huge streetlight by my driveway would wash out the ghost, but I was very pleasantly surprised that not only was the streetlight not a problem, but the ghost was plenty visible even before full darkness! The windows were the same gray cotton sheet as the gate, taped & stapled in back to the foam. Gray was perfect since it was dark enough to look like empty windows in daylight but not so dark as to dull the projection. Since the UltraProjector was aimed perfectly at the mirror and up on my roof out of easy reach, I left it in place from the night before my party through Halloween night just fine. Howling wind and rain might be trouble but the weather-resistant construction is a great feature of the UltraProjector, and the mini-tripod included with purchase worked great for this setup. Now you have two real-world detailed examples in case you’re in the market for an UltraProjector yourself. 😉

As I remind you that you can purchase Swashbuckler Sally complete with audio from the Eerie Elegance website to use as a projected or reflected ghost anywhere in your own haunt, I will also leave you with a video of Castle Brittahytta showing the Tower Ghost as well as Swashbuckler Sally in the center tower.

Now that you’ve learned how to display these ghosts, you will finally be ready for the Pepper’s Ghosts coming soon! Stay tuned for the secrets of Merry Madam Mead & the Phantom of the Pipes!

Posted in Halloween, Parties | Tagged , , , , , , , | 1 Comment

The Watery Wraith & the Tower Ghost

Of the six ghosts for Halloween 2012, there were two each of three different display techniques, so I might as well group them by technique. The easiest displays were the plain video screens showing the Watery Wraith in the wishing well and the Tower Ghost in the tallest tower, so I’ll start with them…

The Watery Wraith in the Well

Watery Wraith in the WellThe Watery Wraith Haunting the Well was an easy display setup with just a digital photo frame sitting inside the well, but quite challenging to film the ghost footage! I have a small wooden garden wishing well that has been in my backyard since before I bought my house. I’ve always wanted to use it for Halloween but had no good ideas until we needed ghost haunting locations. Why not have it haunted by someone wrongly drowned as a witch? This was the only ghost who was filmed before The Watery Wraithfilming her portrait, since this was my ghost dress from 2003 that was already in tatters, also the Ghost In Chains dress from my first video ghost in 2011. The Watery Wraith was also the very first ghost filmed for 2012, so we learned lessons that helped as we went along.

In the brainstorming emails from last spring, my mom offered that we could film me “drowning” in their backyard swimming pool 3 hours away from me, and my annual Halloween shopping weekend friend Tash made a special trip to be there to help with filming! I sewed a bunch of black weedblocker fabric strips together to make a large Pool Filming Setupblack backdrop 10x12ft, with a casing on one end for a 10ft PVC as a curtain rod so it could be used for filming other ghosts too, but I didn’t realize it should have been even larger to make sure there was enough background all around me.

For the proper perspective of looking down into the well, the camera needed to be directly above me, so I brought one of my microphone stands with an adjustable boom arm, and lashed a mini tripod to it to hold the camcorder. My ghost writer’s idea was to film under the surface of the water so we could put a layer of actual water over the image for realism, but we didn’t have a wide-angle lens or a deep enough pool to get my entire body in field that way, so the camera was about 5 ft above water level Camcorder lashed to the mic stand boomabout about 4ft out over the water from the pool edge, which was far enough we needed some exercise weights on the stand base to counterbalance the camera and boom arm. This setup showed the surface ripples in the water, which was perfect when shown on the digital photo frame, without any actual water required over the surface for the illusion to work.

We started in the deep end so I could actually pretend to drown. Getting the lightweight black fabric to stay on the bottom was tricky, since it wanted to float, and Ready for filming in the deep endstill needed rocks to hold the edges down, and it still wanted to float up in the middle when I moved above it. Treading water in a waterlogged dress while trying to look like you are drowning, all while being totally blind without contacts or glasses and only able to hear directions when your ears happened to be above water, was quite a challenge! I ended up sputtering & coughing up a bunch of water after each take. 😉 Since the chain was hollow plastic, it kept floating up around me, so I looped it through my big toes to try to pull it down, making it extra hard to tread water. You can see some “behind the scenes” footage here. We Filming the Watery Wraithstarted filming as soon as the direct sunlight was gone, and we tried artificial lighting but the best lighting was natural dusk that made the white dress & hair glow against the black background, so we were done before sunset.

After reviewing the footage we did get, we decided I could use the following evening moving the whole setup to where I could stand, thinking I should have more control without as much “actual” drowning & sputtering (so much for that plan, as you can see here), plus the backdrop being immediately under my feet should help maximize the black area behind my floating arms. Good plan, except that I had problems with too much floating! I had to balance exercise weights on my thighs to keep my butt Filming the Watery Wraithfrom popping up in back when I’d try my best to sink! After a bunch of giggle fits, I finally got the hang of it, plus getting the proper hand placement to cover wig edges when the hair would float as I sank, and slyly pulling the chain down with me, so we got enough usable footage to be worth the second setup. The wig & dress dried out fine, and I was able to handstitch all the tatters into the hems and add bright gold trim to film her portrait the following week.

I knew the actual audio wouldn’t be very usable except maybe some of the end sinking bubbles, so I set the camcorder on the pool edge and filmed a bunch of audio in the pool, gurgling, bubbling, and rattling some chains against an old metal anchor my The Wishing Well with black spray paint fading into the depthsdad had in the garage. I used those during editing to add enough sound to attract attention for passersby to lean over and look into the well. The volume on the Revealing the Well Display Setupdigital photo frame was pretty good, even though I had the edges covered with black felt to hide the rectangular display area.

Since the wishing well isn’t very deep, I helped the illusion of depth by spray-painting the insides black, fading from blackest at the bottom up toward the edge. In daylight everything was obvious, but outside in the dark it was quite believable. Since the well has a roof, I had to prop the digital photo frame at an angle using the power supply so Snow White Watching the Watery Wraith in the Wellit wouldn’t glare at the viewing angle. The kids really liked this one because since it was perfectly at their height, they could watch it for quite awhile. 🙂

What could improve the effect would be a smaller video on a larger screen with a bottomless tube you could set over the screen so you don’t see any rectangular display. However, you would have to disguise the portion of the screen that sticks out around the bottom of the tube, and you wouldn’t have the ability to adjust the viewing angle if you need to peek in under a roof. You can try it yourself by purchasing the Watery Wraith video including sound, from EerieElegance.com!

The Tower Ghost

I’m sure you recognize the Tower Ghost as my Glowing Ghostly Guardian costume, which you already know was a lot of work through the summer to make all the accessories like the spear, shield, and crown. Since I knew I was wearing the costume as a ghost for my party, we filmed Queen Brittahilde’s portrait first in early September, then I added the sheer white fabric to the leather bodice and talcum powder to the crown & spear for filming the ghost. I had made the ghost chemise and skirt earlier in the summer to be ready, and I braided the white wig to match when I Backyard Filming Stagebraided the copper wig for the portrait. By the time we filmed this ghost, we had enough practice with the backyard stage setup, hanging the black backdrop on the movie screen trellis, weighting down the corners on the grass, and lighting from each side to avoid lighting the background. Having no light hit the background improved the auto-contrast in the camera, and made the black match the absolute black I was able to generate by masking in Final Cut Pro, so it worked great.

The Tower GhostThis was easier filming than many of the 2012 ghosts, since standing in the tower, she only had so far she could move or she would be out of view. We knew we wouldn’t see her legs in the tower display, but I wanted to film the full body since you never know how we might want to use the footage in the future, or who else might want a full stature warrior queen ghost. 😉 My big fan was running to give some flutter movement to all my translucent tatters on the sleeves and skirt. We came up with a way to change hands with the spear that looked cool, and I imagined looking at the sidewalk and the front pathway, scrutinizing everyone coming near the castle, pointing when I saw someone extra suspicious.

My partner in crime had a spare 24″ computer monitor that conveniently rotated vertically on its stand. He also had two sturdy collapsible workbenches that stacked, so I designed the tall tower around the setup, aiming the arched balcony “door” to fit Tower Ghost Techexactly with the monitor. When we hauled everything up to my roof 2 days before the party, we realized my tower roof stabilization pole could snap into the back of the monitor stand and fit into one of the holes of the workbench. That was fantastically stable (which was a huge relief since none of that was my own equipment!), but it made the tower pieces not fit as planned, since the balcony opening had to be as close to the monitor screen as possible for the illusion to work. You could only see the offset tower walls from the far sides though so I didn’t worry about it. There was a bit of glare from the monitor surface and blue glow from the “black” areas of the video, but adding one layer of sheer black scrim taped taut over the monitor screen worked perfectly. It really looked like she was standing in the tower, looking down at everyone below, even looked like the spear came outside in front of the window in spots!

The Tower Ghost was even visible before total darknessAs for the video, if you read the Seven Moving Portraits post, you know I was scrounging for media players that would run video, and had a few iDevices of different generations at my disposal that were easy to hide, but getting them to work with the various cables I was able to acquire was a challenge. We had the space inside the tower to use a DVD player, but since my iPad was available and we did have a Dock to RCA cable, that worked fine with the iPad sitting on the lower workbench under the monitor. The trick was that none of the iDevices allow looping video (still annoying!), so I had to encode a 6 hour mp4 file to load onto my iPad, and was very glad that the battery lasted fine. I obviously didn’t leave the iPad out overnight, but since the foam tower structure provided cover from average overnight moisture, we were okay with leaving the rest of the setup through Halloween night.

The Tower Ghost of Castle BrittahyttaOf course Halloween day there was enough breeze to start tower failure…aack! Even though I had used monofilament to lash all the foam pieces to each other and bricks to keep them in place at the bottom, I had to reset everything quickly before any trick-or-treaters showed up. All the trick-or-treaters loved all my ghosts, and luckily they were gone by the time it started drizzling. I couldn’t manage the heavy monitor by myself on the ladder so I brought a trash bag up and covered it tightly to keep it safe, until its owner could come over and help me get all the equipment off the roof and dismantle the castle walls. You can see both the Tower Ghost and Swashbuckler Sally in the middle tower in this video.

Even though there is no audio track, the Tower Ghost is one of the best values, since you get 21 minutes of continuous footage of an ancient tattered medieval warrior queen silently watching and pointing toward the living, twirling her spear periodically from side to side. Buy your own copy on EerieElegance.com for only $5, no shipping!

Of course these were the “easy” ghosts…they get more complicated as we go along! Stay tuned for the Secrets of Swashbuckler Sally & the Pumpkin Queen…

Posted in Halloween, Parties | Tagged , , , , , , , , , , , | Leave a comment

Oz the Great and Powerful

Oz MenuThis summer has already been so busy that I’m almost 3 weeks behind telling you about the Cinema Brittahytta Season Premiere! I loved the new Disney movie from March, Oz the Great and Powerful, so I was very pleased it was out on disc just in time for my first summer movie night! I reprised a few of the still-applicable recipes from my Wizard of Oz birthday movie night a couple years ago, including finally completing the Cheddar Brick Road that was cut for lack of time back then. It was over 100F that day, very rare for the South Bay, so my new Over the Rainbow Popsicles were a hit!

Ready for the movie!I knew I wanted to show Hitchhiker’s Guide to the Galaxy on my birthday in July, and every two weeks seemed to be too much compared to the Halloween plans I knew were coming, so I decided on every four weeks this year, which only allows for three movies total (well, four if we count the Return of Clue as an indoor Cinema Brittahytta feature). Less frequency, plus new friends, and a new movie many had missed in theatres resulted in 18 of us enjoying the evening! It cooled off nicely as the sun went down, and it was nice not to need any blankets or jackets during the movie this time.

Grilled Sweet Potato Salad at the beginning of the Cheddar Brick Road
Everything I made was quite healthy as well as fun! The popsicles were 100% fruit, no sweeteners or artificial colors, the rainbow fruit salad also 100% fruit, the Emerald City Green Salad was pears, grapes, artichoke hearts over spinach and greens, with the Field of Poppies and Over the Rainbow Fruit Salad along the Cheddar Brick Roadonly dressing from the artichoke heart marinade. My Grilled Sweet Potato Salad is a summer BBQ staple that only has 1/4 cup olive oil with a bunch of healthy produce. In case any of my non-dairy friends arrived, it was Tofutti non-dairy creamy spread inside the tomatoes, so the worst thing for us was the Cheddar Brick Road. We still indulged, since a lot of the potluck Emerald City Green Salad Field at end of the Cheddar Brick Roadfare was decadent like fried chicken, pizza, and dulce de leche rice cereal treats…yum!

Which Witch Will Win?I don’t want to spoil anyone, but it shouldn’t surprise you there are several witches in this story. I created cocktails with alternate mocktail versions for each witch, calling it “Which Witch Will Win?” but the reasons for the ingredients of each I will let you discover from watching the movie yourself. 😉

Making the Field of PoppiesFor the Field of Poppies, I used a very sharp paring knife to cut small tomatoes into five segments but still joined at the bottom. Depending on the seeds, some fell out on their own while others needed scooping for the cream cheese Finished Field of Poppiesto nestle between the wedges. Last time I had spooned the non-dairy cream cheese into the tomatoes, but this time I got smarter and used a piping bag without a tip. A tiny spoon helped place the chopped olives so they didn’t fall all over, and voila, a Field of Poppies!

Over the Rainbow PopsiclesThere actually weren’t any rainbows in this new Oz movie but there were lots of bright colors so I thought I could get away with Over the Rainbow Popsicles. They were all fruit purée no added sugar or artificial colors or anything, and full details are in a separate post here.

Oz Menu ChalkboardNot in theme but perfect for summer, I had dug out my old manual ice shaver and frozen a bunch of the specific puck shapes to see if anyone would be up for the work of making their own snow cones. Some first-time boys read the menu chalkboard, and when they read “Make Your Own Snow Cones” they got so excited! After checking they could reach the bar and the shaver handle (I knew the glass table wasn’t stable enough for that action!), I Make Your Own Snow Cones in light-up martini glasses!got out the Torani syrups and light-up martini glasses, and the kids went to town, instant new best friends with regular guest Ellie! All my Toranis are sugar-free so at least they weren’t on a sugar high from those. 🙂

Everyone did have a good time, no Rock Band since adults were chatting & eating, but I said they could play any games they found on the PS3 until it got dark enough to show the movie, so a raver version of PacMan provided a bouncy soundtrack for awhile. 😉
Popsicles + Kids PS3 Raver Style Pac Man waiting for darkness
Hope you’re enjoying your summer too! Stay tuned for Hitchhiker’s Guide to the Galaxy next!

Posted in Cinema Brittahytta, Edible Art, Parties | Tagged , , , , , , , , | Leave a comment

Glowing Ghostly Guardian

Glowing Ghostly Guardian & PortraitOf course May is ending and I’m already well into plans for Halloween 2013, so it won’t surprise you that a year ago I was already working on my Halloween costume for 2012! I’ve already explained how it was last March & April when the ghosts & portraits were being worked out, and since I had splurged on a medieval style leather dragon bodice at the NorCal Renaissance Faire the previous fall, I figured I could be the First Queen in the family, the one who built Castle Brittahytta originally back in medieval times. This was the one completely new costume I made, and it was really two whole costumes since we filmed the portrait in full color, then filmed the ghost with different dress & wig, and I was the Glowing Ghostly Guardian live for the party, complete with glowing battery-powered fiber-optic hooded cloak!

Normal Density vs. High Density Fiber Optic FabricI had seen the fiber-optic fabric a couple years ago online but it was soooo expensive and hard to figure out a project that would be worth all that. I saw it referenced again on another blog last spring and thought that could be awesome as a ghost cloak! Bonus is that a hooded cloak could go over ANY future costume as a glowing ghost, so it could be an investment vs. a single-wear costume! The rest of the costume didn’t cost much at all, but because of the leather bodice & the fiber-optic cloak, this was the single most expensive costume I have ever done. I discussed options with the sellers since I needed panel sizes they didn’t offer in stock to make my cloak, and the higher-density weave sounded much better for my transparent glowing look, but at the same time I bought 2 normal-density panels to make a shawl & clutch just for fun. When they finally arrived in mid-June, I was very glad I paid almost double since the normal-density fabric has a more fabric-like drape but looks stripey as you can see to the left. Since there are over double the plastic fibers in the other, it is much stiffer to work with, but the starry field effect was perfect! I was a bit embarrassed how expensive it was, but hey, I know other women who spend a bunch of money on shoes & purses which I never do, so I considered this 20 years of fancy clothing expense I had never spent! 😉 Glad everyone at the party agreed the effect was worth it!

The First QueenA lot of the coordination for the portrait & ghost filming was how to ghostify pieces without being destructive, or at least film the portrait before any pieces would be altered to become ghostly. This was one where I had to film the portrait first so I could alter the bodice, boots & crown for wearing as the ghost for filming and the party. The portrait costume clothing was easy, since I wore my renfaire chemise & brown full-length skirt, my big lace-up 70s disco/Amazon Goddess/Valkyrie boots, and a gold choker from my stash. I scored the wig on Amazon for $14 of free points & braided some dollar store extensions into the wig to make it longer like the white wig I already had. What took so much work were the crown, spear & especially the shield!

Cutting the copper shieldMy parents have had a small sheet of plain smooth copper up in their garage for over 10 years never using it, so after begging for years but this time with a specific use, they finally let me have it. I have no idea how much this would have cost to buy, but seeing how copper wiring is stolen from random places, it’s probably a lot! Very glad this was free! The sheet was the perfect size for a shield, so I made a paper template for perfect symmetry, using the same design I had already made for the Ready to pound!fabric stained glass window, and used tinsnips and heavy gloves to cut the shape. I designed the spear point to use one of the larger copper scraps, but I knew there wouldn’t be enough for the crown, plus we decided gold was more royal for the crown anyway.

I sketched the dragon face in chalk on the back side of the shield, finally getting it just right, then I started my first metalwork! I had my mom’s old woodcarving chisels, a Dragon outline completerubber mallet, my big hammer, and two old throw rugs. I set up my station on the floor in front of the TV, but while I was pounding it was too loud to hear the TV anyway. 😉 Since I wanted the dragon face to stick out from the rest of the shield, I pounded the outline of everything from the backside first. The main rug was to protect my floor, but the other rug was folded Dragon becoming 3Dup inside the shield as plenty of cushion so I could actually bend the copper sheeting into shape. After a lot of pounding and bending, the edge was curved for safety, and you could tell from the front side it was supposed to be a dragon…and after a lot more trial & error pounding from both sides depending on the desired shape, it was a lot more lifelike, even with scale texture from a curved chisel!

Verdigris paste immediately after first applicationSince this is the Verdigris family and I was working with real copper, of course I tried my own real verdigris solution to accent the dragon on the shield. A paste of vinegar, salt & flour was the recipe I found online, and scrubbing with citrus peel first to make sure the copper was perfectly Adding more verdigris accents & rubbing away for shading effectsclean of any grime or skin oils, so I tried it. Once I got it to the proper paste texture that wouldn’t dribble into areas I didn’t want, it worked great, getting more intense over time, and I added more paste in areas like the eyes and the wings for more color there. I used more citrus peel & a nylon scrubber to fade areas away for shading effects. I like how it came out, but unfortunately it hid all the metal shaping I Verdigris complete!had done. I could have done flat verdigris for all you can tell…lesson learned! Also, the verdigris was fine for about six months from summer through Halloween and to Christmas, but after Christmas I noticed the thickest sections started flaking away, leaving the copper fine behind it. Lacing the strap to the back of the shieldObviously the flour was what acquired the patina from reacting with the acid and the raw copper. To keep your verdigris intact you should probably use a clear sealer to protect it.

Carefully placed holes for the strap lacesNot only did I have to hold the shield for the portrait, but it was to hang over the fireplace mantel as decor, so I added a scrap leather strap in back at an angle. Proper battle shields usually have a vertical strap for the forearm, but that wouldn’t hang on a hook on the wall, hence enough angle for both uses. I carefully chose some places to pierce holes that wouldn’t detract from the design, used some thinner strips of matching leather as lacing through the holes so Cutting the spear point to match the design only a small brown stitch could be seen from the front, then a chunk of scrap brown leather strap laced in back. The shield was ready for battle, or at least a battle portrait. 😉

I cut the spear point from the largest scrap of sheet copper, and used a long closet rod dowel from my wood stash as the spear shaft. I thought a darker wood would look better against the copper, so I Staining the spear shaftstained the pole first, and I cut the notch in the top for the spear point to fit. Of course the sheet copper was too thin for a real spear point, but for looks it was fine.

Sculpting the dragon claw on the spearI’m fond of Sculpey clay that I can bake in my oven, but since I had to form the dragon claw serpentine tail on the pole, there was no way I could bake it. I found some air-drying clay instead and hoped that would work okay. For the most part it worked great, only a little shrinkage factor made one section crack so I had to repair it. I sculpted nice knobbly finger claws so the spear point was the index finger claw, and used a smaller curved woodcarving chisel twice for each scale all the way down to the tail. I really like the look, but those scales took a long time…I almost didn’t finish before the clay was already hardening too much!

Brown wash over the copper gilding to age & highlight textureAfter the clay was dry and I masked the pole with tape, I used copper gilding paint over the entire dragon claw, making sure to get into all the texture. After the copper was dry, I used a thin wash of brown acrylic paint to give it some age. The gilding paint stays tacky, so even after the brown wash it still needed a coat of clear acrylic matte sealer. I made the mistake of trying a non-acrylic spray sealer once over this gilding paint and it ruined the color completely! Modge Podge works great so I stick to using that. Finally after several weeks the spear & shield were ready to go, but there was still the crown…

Cutting the crownI was actually working on these projects concurrently, since I could only pound the copper for so long until my hands were too tired to grip properly, so I would take a break or move to doing something else. Each coat of verdigris paste took overnight to show what it would turn into, so the clay work was happening while that was taking its time. I cut the crown from an aluminum ventilation pipe back when I was cutting the copper Baking Sculpey edges on the metal crowninto the shield and spear point. I could bend the bottom edge where the vent was supposed to nest inside the next pipe, and that was good for where it sat on my head, but the aluminum was too brittle to bend all the cut edges for safety. I could fit the entire crown in my oven so I used Sculpey baked directly onto the metal for safe & decorative rope edges.

Dragon medallion before bakingKnowing how much room I had on the crown, I sculpted the dragon medallion from Sculpey with the three horns as separate pieces, and made a silicon putty mold of the dragon so I could make a matching medallion for the Adding pearls to the crown Pumpkin Queen’s crown. I hot-glued the dragon to the crown along with some plastic pearls by the yard for some extra detail.

I spray painted everything gold so there would be no brushstrokes from the gilding paint, and I painted the dragon medallion for the Pumpkin Queen’s crown at the same time. Spray painting the crown goldAnother bonus is the gold spray paint doesn’t need final sealing like the gilding paint does, but it doesn’t shine quite as nicely either. To bring out the detail in the Final brown wash to age the crown after painting the eyes dragon especially, I used the same brown acrylic wash as I used on the spear. Finally the crown was ready, too, so the First Queen was ready for filming her portrait!

After the First Queen’s portrait was filmed, I could continue ghostifying her. Paint would risk permanent damage to the leather bodice, and that sucker was $200 so I didn’t want to ruin it forever! I started by covering the bodice and changing the laces to white cord. I had chosen the fabric carefully, wanting something translucent enough to see the dragon design, but still white enough to be ghostly, but boy this fabric Slipcovering the leather bodicefrayed a lot! I was also very careful with the seams, cutting them so they would fold to the inside out of view. Once all the pieces were covered, including handstitching the openings closed around the leather pieces, I cut tiny holes, not protecting them from fraying, but poking the white cord through the small holes sometimes caught threads, making them pull & puckering the fabric. Once it was all intact it looked fine, thank goodness!

Whitewashing the bootsThese old boots were already on their last legs, with the surface flaking apart and disintegrating, so I decided I could whitewash them without doing any further harm. I used thinned acrylic paint to let the texture show through just pale, not stark white. If I need laceup brown boots for future costumes, I will have to invest, but the white paint is staying intact so far so at least I have ghost boots now!

Tattered ghost dressFor the ghost dress, I bought about 5 yards of sheer white crinkled fabric that draped well. The dress is full length with long sleeves, but I made separate tattered cuffs so I could remove the cuffs when I needed to perform hostess duties! I used the same white cord as the bodice laces inside casings for the neckline and the sleeves so they can be altered to fit easier than using elastic (plus it’s more authentic). Yes, it’s very sheer up top, but the leather bodice was plenty opaque so I wasn’t concerned. For more layers of tatters, I made a separate two-tiered tie-waist skirt to wear over the dress. I didn’t shred the tatters until everything was in place on the dress form so I could see what should hang where. I sat on the floor shredding for quite awhile until the tatters were to my taste. 😉

I knew I could use some post-processing to fade the colors, but since the majority of the costume was already very pale, the color contrast wouldn’t match, so since I didn’t want to permanently alter the crown or spear, I dusted them liberally with talcum powder. That gave them a pale look, but you need to re-apply after a lot of handling. Since the tall tower window could only be so large because of the 24″ monitor we used for display, we decided against holding the shield so I could point at possible threats and have the tatters fluttering in the ghostly breeze. For filming, we used a large black backdrop that continued onto the grass in my backyard, two clamp lights on tall stands to light the subject without lighting the backdrop, and my tall fan oscillating on low to create the breeze. This is a screencap from the final ghost footage, not the raw video, but I love how it turned out!

Chief Engineer Glen soldering & rewiring the fiber-optic cloak At least that much of my costume was done before September even began, but the crowning glory was constructed last! One major drawback to the higher-density fiber-optic fabric is that there were more battery packs & LEDs required vs. the fabric width, and each battery pack was for 3 AAA batteries. Not only was that weight, but they were black battery packs and bright spots of LEDs I needed to hide at the neck seam and the bottom hem. Thankfully my partner in crime was not only my ghost writer, but he also has an electrical engineering degree & offered to rewire my fabric…how awesome is that!!! The power requirements for 6hrs straight use were too high to use any tiny coin batteries, but getting 13 packs down to 2 was so much easier to manage! He thought about wiring the 2 packs together, but that would require a wire down the full length of the cloak, and I thought it might be useful for the bottom pack to stay off, giving a fade-out effect. Each extra power supply had to be Wrapping the LEDs & wiring inside the hemscut out and a T junction inserted to wire the bundles inline together. The final design was one battery pack neck center back so it was hidden inside the hood, and the other at the bottom hem corner.

After everything was resoldered, I wrapped the LED bundles as tightly as possible with bubble wrap, but you cannot bend the fibers of course or they will break. I thought the bubble wrap would provide some cushioning against bending the fibers too far, plus there was plenty that came in the shipping box. You can see how the LEDs at each
Painting ribbon to cover the bottom hem LEDsend of the fabric panel are really bright, and those spots of light detract from the mysterious sparkle of the panels, so they needed to be covered. Around the neck I needed to roll the extra hood fabric over the seam anyway, plus there were so many LEDs closer together it looked more like a brighter glow than separate lights. But the bottom seam was bright spots that really bugged me. White felt wasn’t opaque enough, nor even white fake fur scraps I had, so Painted ribbon over bubble wrap around LED bundlesI resorted to some large wired brocade ribbon I had, painted it white with fabric paint so it would still bend, and folded that over the hem. That STILL wasn’t opaque enough, so I added some layers of tatters from the dress scraps too in hope of a fading effect. The final result still Power supply pocket in the bottom hemlooks like spots of light to me around the bottom, but such is life.

At least the ribbon folded over nicely to create a corner pocket that hid the power supply very well. I added a matching ribbon flap that tucked in around the top of the power supply and that kept everything in place just fine. Weight wasn’t an issue since it was the bottom hem anyway.

Carefully sewing the hood back seamI was concerned about catching both sides of the ribbon while concealing all the wires & fibers, so I hand-sewed around all the LED bundles. The only seam I felt safe using my machine was the back vertical seem of the hood, but it made me laugh sewing on glowing fabric! 😉

Cloak closureSadly the weight of the cloak & battery packs was just a little too much for the filigree clasp I bought, since it broke the 2nd time I tried it on, AFTER I had painstakingly hand-sewed it on of course! I used some of the same white cord from the dress & bodice lacing, tied it into the ends of the clasps, and ended up with a tie closure that lasted through all the wearings so far, thank goodness.

The wig was the same as my 2003 ghost just braided, and I added plain white makeup so I looked pale instead of a clown, then I was ready for the party! Of course I had to pose with my Tower Ghost partner behind me!

Two Ghostly Guardians Glowing Ghostly Guardian at the party
Happy Party Ghost

Everyone at the party was thrilled with my costume so I couldn’t help breaking character & smiling! I am so glad it turned out this well, and now I can have fun thinking up future ghosts who can wear the same glowing cloak! 😉

(even more photos continue below…)

(more…)

Posted in Halloween, Parties | Tagged , , , , , , | 1 Comment

The Candlestick

Candlestick Clue CardI’m sure you already saw my costume for the Return of Clue party, but did you figure out how I made it? Here is how to make your own Candlestick costume! 🙂

For the first Clue party, I just had to be Mrs. Peacock for the obvious color reasons. I used a bodice I had, plus fabric I had purchased for Britta Skeeter but never used, so I had it on hand as the perfect colors for Mrs. Peacock. That was fun, but I prefer making new costumes than recycling old ones, and I decided against a person just for fun. Last time there was a Rope & two Lead Pipes attending the party, but I thought Candlestick Design Sketchmaybe it could be fun to try using my height and natural curves to be the Candlestick! Extra bonus is that I had 6 yards of dark sparkly silver spandex I had bought over a decade ago as a possible Invisibility Cloak, so it should be fairly cheap too!

I did a rough sketch based on my own silver candlesticks, and I really loved the hat plus sleeveless column dress idea to de-emphasize my arms. I figured I should be able to use some hula hoops inside casings around the hem, but I didn’t know yet what I could use for the hat. Ideally I wanted it to curve at the edge more like metal than a floppy hat. When I sent the sketch to a couple people asking if they could tell what it was supposed to be, they guessed correctly but suggested less decorative rings, so I continued shopping…

Candlestick First FittingThe dollar store had several sizes of paperboard hula hoops, so I bought three different sizes and used two. I decided which ones to use based on how I could fit through doors in my house! I had to untape them to get the pebbles out since I didn’t want to rattle, but the plastic joining plug inside was also a bonus since then I could feed them into the casing later instead of sewing them in permanently. Once the dress was complete, I taped the hula hoops shut inside the dress so they wouldn’t pop open while I walked around. Since I wanted the spandex to stretch outward to the bottom skirt with a few seams as possible, I knew I would need the full width of the fabric at the bottom for the hoops and not as much through the body, but exactly how much was trickier. I had limited fabric, so first I propped my dress form on some boxes (it doesn’t extend as tall as me) so I could fold the fabric over to see how much I had left after the dress height and cut the neck hole to start with. I’ve worked with spandex before for my Seven of Nine jumpsuit, and it’s so hard to fit that I knew it would be easier to suck it up & know I would end up wasting fabric along the sides. To save the largest pieces of fabric possible plus make it easier to sew on the machine, I pinned side seams loosely on the dress form and cut away the large chunks first. After sewing those seams and sewing the back zipper in, I put on the steel-boned corset for closer side fitting, inside out like the photo so I could pin, chalk & sew on the same side, but this is still tricky to do on paper lantern as hat brimyourself, especially with very stretchy fabric! I was very glad that I could use the dress form to pin the hoops in place, especially for pulling the fabric tightly to create the concave curves between hoops. Even though it was hanging straight until the very last fitting through the legs, I still had issues needing to weight the back bottom hoop by sewing a brass hinge or it would pop up in back, so I think the dressform doesn’t have as much “back” as I do. 😉

fitting the paper lantern into the fabric hat brimI started working on the hat as soon as I had cut the largest chunk away from the dress form, so at least I knew I had enough for the brim, then I figured I could cover the rest of the hat using the largest side scraps. My mom & I spotted some giant globe paper lanterns for $4 at a party store that were wider than my shoulders and seemed to keep the curve I wanted if kept flat. Nice & cheap! I used that to cut the matching brim fabric, sewing around the outside leaving the head hole to turn inside out and squeeze in the lantern. Unfortunately the weight of the fabric pulled the lantern just enough out of shape it looked more like a floppy hat, so I cut a piece of corrugated cardboard from a scrap box about 1″ smaller radius so the very edge would still curve downwards.

two strainers becoming the hatI struggled for a bit trying to figure out what to use for the candle cup for the very top of the hat. Since the spandex shows every imperfection under it, I didn’t think papier-mache would work very well, so I went searching in my garage. I had bought a few mesh bowl strainers from a dollar store a few years ago as possible large dry ice containers for large cauldrons for Halloween and never needed them, but stacked end to end they were a believable candle cup…whew! I was finally out of hat buckram from the Music Man costume this spring, and couldn’t find any at my fabric store, so I got the stiffest iron-on interfacing I could and doubled it for the checking for fit before adding to the brimvertical section to meet the bottom bowl. Ironing it to the spandex fabric worked well, then it was a lot of fussy figuring out with hot gluing the interfacing to the bottom bowl, hot gluing the fabric around the outer edge of the bowl, gently pulling it as tightly as possible up to the edge to meet the other bowl. The top bowl I covered with a fabric circle, gathering around the open edge, pulling it tight so no puckers except for inside the bowl, much too tall for anyone to see when I was wearing it. 😉

pinning the hat togetherI had left enough fabric unattached so it would be a lining inside, but I just gathered it together. Assembling the top hat pieces together was just hot glue where the bowls met together, then I took a few stitches through where they met, making sure to catch the gathers inside the top bowl and inside the lining. These stitches kept the gathers tight & well inside the top bowl and kept the lining from falling out. Once I knew it fit for sure, I handstitched up the back seam, then copiously pinned it all to the brim.

handstitching the hat togetherI carefully sewed a whipstitch around the inside making sure it caught the brim and vertical hat portion without visible stitches on the outside, and instead of sitting comfortably on the couch like most of my handstitching, due to the brim I had to sit at my table instead. I left the extra fabric past the whipstitch so there would be no risk of fabric coming loose from the stitches after taking the hat on & off many times.

The Candlestick in the BallroomSadly I have thinner hips than fit in any corset properly, so the bottom edge of my corset showed as a line all the way around, breaking the smooth curve I wanted. Even though my “design team” had recommended removing the extra lines and rings, I carefully placed a stuffed ring channel exactly to cover the corset edge, which I think helps the overall design too. The very bottom hula hoop was a hem casing, but the higher hoop plus the hip ring were both scrap fabric sewn as a channel on the inside of the dress. I stuffed the hip ring because it was open in back where it met the zipper, and both hoop channels were open at the side seams so I could put the hoops back in after sewing on the machine. I will tell you that wearing a tightly-laced steel-boned corset while sewing for several hours is not the most comfortable, especially trying to Candlestick with her matching Cluekiebend to pick up any pins that drop on the floor! However it was more convenient when I had to keep trying the dress on, adjusting more, sewing again, repeat, etc. Glad my cats don’t care what weird outfits I wear around my house! 😉

I got the Candlestick costume completed by the Sunday afternoon before the party, so I set up my tripod for some self-portraits so my new costume could be one of the Cluekies! Here is the Candlestick with her matching Cluekie, plus posing in the Ballroom during the actual party. Most people recognized me as the Candlestick right away, so I consider that a success! 🙂

Posted in Mystery, Parties | Tagged , , , , | Leave a comment

The Return of Clue

Suspects in the Dining RoomSince I’m on a break from Mardi Gras for awhile, I wanted to do a different spring party this year. I did an Across the Clueniverse Clue party 5 years ago, but several people were disappointed they weren’t able to attend, and even those who did attend voted to have a reprise…so last Saturday night 20 of us enjoyed clever costumed company, fun food & friends, and watched the Clue movie at Cinema Brittahytta!

Weapons & Food in the LoungeThe nice thing about this party is that most of the menu was already planned from last time since it all worked well before, I already had weapon props, and even enough leftover floor tiles. It does help to be a packrat & save everything! However since I have remodeled my house significantly since 2008, and my parents gave away my dad’s childhood toy pool table, I had to redraw the special edition Brittahytta Mansion game board. Of course I didn’t want to wear the same costume again since it’s more fun to design a new one. 😉

Weapons & Food in the Dining RoomOne of my frustrations last time was not being able to find the perfect pipe wrench like the Clue game piece or the movie, not even in my grandmother’s basement, and antique tools online were too expensive. During our Halloween preparations last fall, I discovered that Glen inherited his grandfather’s wrench that was absolutely perfect! He graciously consented to displaying it on loan for the party. I had two revolvers last time, but I recycled one into my steampunk ray gun for Miss Wells for Halloween 2009, so I found another dollar store toy gun playset and did a quick silver spray paint job so I would have a complete set of weapons for each food table, one in the Dining Room and the other in the Lounge by the bar.

Making fabric pool balls for the Billiard RoomThe game of Clue requires 9 rooms, but my house is small, so it was tricky to plan the game board layout. Last time I had the kitties sequestered with my bedroom off-limits, split my living room into the The Billiard RoomLounge and Ballroom, and the toy pool table was on the patio near the bar as the Billiard Room. With all the furniture rearranging I’ve done, there was nowhere to fit a new toy pool table, plus I didn’t really want to invest in one, so I decided my bedroom could be the Billiard Room, with a rectangle of green felt on my bed as the pool table. About $10 of 72″ wide craft felt plus scraps from my stash made the table, the 6 “pockets” & the 8-ball were scrap black felt, and the other balls were scrap white velour, hand drawn with craft markers on the smooth side for better detail, and so the velour side would stick to the Onyx on the pool table of course!felt. Not sure anyone noticed or looked closely enough, but I even shaded the balls so they would be a more realistic trompe l’oeil effect. I think it turned out decently for a cheap decoration that took a few hours while catching up on TV. I fully expected kitties to snuggle on the pool table, but I didn’t think Onyx would curl up inside my deflated costume! 😉

My custom game board from 5 years ago was my Visio house floor plan printed out, hand sketched with pencil, then scanned to add the text for the floors and secret passages, printed again, then handcolored with pencils since I was running out of time Custom Clue Game Board 2008and Photoshop was too unwieldy with a mouse to fill in so many areas with the right colors. It was still funny since it included furniture details that made it obvious, plus the tile floor in the entryway and hallway functioned as game board tiles. When I remodeled my kitchen in 2009, the china cabinet moved from the foyer area out to the patio, where it has stayed for bar glassware, plus I ripped out all the tile flooring and carpet and replaced with laminate wood flooring. All that plus the furniture rearranging, like my old couches & dining table moved to the patios when I bought my new ones, caused me to tweak what I could in Photoshop by rearranging where they were, and I used the updated floor plan to get the pantry & kitchen changes accurate. I even took a photo of one of the floor tiles so I could show Custom Clue Game Board 2013them accurately plus work out the game layout since I only had 26 tiles leftover from last time. After I finally got everything updated possible on the computer, I sent it to my iPad for coloring and adding new items. I was still finishing that part on Friday night before the party! At the last minute I thought of taking a photo of my wood flooring to use instead of handcoloring, and that really finished it off well. Saturday morning I printed it in 9 overlapping sections so I could physically cut & paste it large enough to be the game board. I cut along edges of rooms, so there are 8 separate pieces of paper held in place with double-sided tape on that board, but I thought it looked great!

Room Lettering on Clear Contact PaperLast time I had access to a plotter so printed out all the room names at size and traced them onto the contact paper. Unfortunately I ran out of time to fill in the letters so they were hard to see, plus all the tile floor I had with dark grout made it really busy to read, and the carpeted areas didn’t stick very well. This time I just hand lettered everything, tracing letters after I drew them the first time so there was as much consistency as possible. You need a permanent marker since water-based pens just bead up and don’t stick, so I was getting a bit of a headache from fumes by the end of the evening, but this was another catching up on Lounge Outlined with White PaintTV project for a few hours. I didn’t put these on the floors until the day of the party since my housecleaners came the day before. They really worked well, with the clear edges blending into the floor so well some people asked if the words were on the floor all the time or if I had cut out the individual letters! It all depended how the light reflected or not of course, and by the end of the party, shoes had scuffed spot of the black lettering away in high traffic locations, so these aren’t something you can keep for the next party. The only rooms that were a visibility issue were the Conservatory and the Lounge, since my new patio carpets are black fields, so I was sitting on the floor painting white around the lettering with acrylic paint about 1pm the day of the party. 😉

Pickled Herring Dyed RedFood prep was mostly fresh on the afternoon of the party, but I dyed the pickled herring red by plopping a couple drops of food coloring in the jar and giving it a good shake a week before the party so the color had a chance to soak into the fish. I Cluekies in processalso made Cluekies this time, using costumes from 5 years ago that I had originally designed as card cookies for Robin’s game night party last year, adding my new costume that was ready the week ahead, and including the Clue game board from the Classic Board Game Cookies I did this January.

Mrs. Peacock's Proof = Blueberry Balsamic Chicken SkewersBy the time I finished the game board work Friday night, it was 2am and I couldn’t keep my eyes open since I had a bad week for sleeping, so I went to bed & got up about 9:30 for party day prep, the most sleep I’ve ever gotten before a party in years, but I really needed it! The patios thankfully stayed pretty clean from the marathon yardwork the week before and final sweeping on Friday, so after mixing up the blueberry balsamic marinade and soaking the chicken, I arranged the flowers I bought into two Clue-colored bouquets for the tables, I put the floor lettering in place, Professor Plum's Puzzlement = port-soaked plums & preserves brie in pastrytaking photos along the way, painted the outlines on the patio lettering, and assembled the game board. By then I could put my hair in curlers and get my makeup on before putting the chicken on the skewers, prepping the pastry brie, and baking them in shifts. I got my corset on, breaking a nail & scraping my knuckle drawing blood (sheesh!), then it was time to start the fresh food prep, veggies first, then fruit, thankful I felt I had the time to make them look decent. I never set out the crackers, cookies or cheese before my costume goes on because that would leave the food tables unsupervised from kitties, but I had my costume on except for hat before the first guest arrived about 7:15…woohoo! The hat was just too much while I was still bending over setting out food. 😉

Suspects Shaken or Stirred I’m very glad I continued the Suspects Shaken or Stirred idea from last time, since everyone loved creating their own cocktails! It helps to have a very well-stocked bar with a lot of choice available, a veritable adult’s playground, but also plenty of The Shroud of Scarlet layered custom cocktail for Suspects Shaken or Stirredmixers for those who don’t drink alcohol. (Don’t worry, the “arsenic” in the underage Professor Plum’s hand wasn’t alcoholic, and her mom was present at the party.) I only got photos of the layered drinks when the creators called me for the camera since most were consumed immediately. 🙂

Everyone was having so much fun socializing that I didn’t start the movie until around 9:30 or so, then some stayed out in the Conservatory talking while the majority got comfy in the Ballroom to watch. Even our youngest guest thought the movie was funnier than she expected for something made back in the mid-80s, “long before you were even thought of” as I put it. 😉 Since people started to leave after the movie was over, we never voted on any costumes or cocktails and we didn’t play the game, but it was already past 11pm so I understand. The last guests left around 1am after even more fun chatting, including some giggle fits at Muppet discussion where you just had to be there. 😉

The full party photo gallery is below, including all 9 rooms, all decorations, and everyone’s complete array of costumes & colors, but first here are some fun highlights!

Professor Plum experimenting with arsenic in the Lounge bar Conservatory Ben with his Mr. Scarlet Cluekie! Marco as Professor Plum with Ropes Tina posed perfectly in her costume as the Cook from the Clue movie!
Professor Plum experimenting with “arsenic,” Ben & Marco in great costumes, and Tina perfectly posing as Cook from the movie!

A Plethora of Peacocks The Candlestick in the Ballroom Glen thought of this costume after he arrived at the party. Mr. Clueless is posing in the only room of the house that was not part of the game. ;)
A Plethora of Peacocks, your hostess the Candlestick in the Ballroom, and Mr. Clueless posing in the only room of the house that was not part of the game. 😉

Suspects in the Ballroom Mr. Boddy was killed by the Rope in the Library (see the book?) Plum Cyd with her Miss Boddy Cluekie! About 2/3rds of the guests wanted to watch the movie while others stayed chatting in the Conservatory...
Supects in the Ballroom, Mr. Boddy was killed by the Rope in the Library (see the book?), Plum Cyd with her Miss Boddy Cluekie, watching the movie in the Ballroom…

Huge thanks to everyone who came and enjoyed themselves! I love how creative everyone was! You can click to continue to view the entire photo gallery, and stay tuned for the design & construction of my Candlestick costume in an upcoming post!

(more…)

Posted in Mystery, Parties | Tagged , , | Leave a comment

Mardi Gras 2011

Peacock Britta shows off a gorgeous Hurricane poured by Kevin C.

Happy Mardi Gras! I hope everyone will “Laissez les bon temps rouler” today! No party for me this year but since 2011 was when my new server was still not set up yet, I wasn’t able to update that year’s party at the time. Seems like today is the perfect time to catch up! 🙂

27 of us “let the good times roll” for the 2011 Mardi Gras Masquerade! We had festive costumes & masks, delicious Hurricanes were flowing with good food, and just about everyone decorated an edible mask!


Here are the winners:

Best Mask: Cyd – Most Creative Mask: Tracey – Best Costume: Mardi Gras Barbieris
Most Creative Costume: Nathania – Who Got Da Baby? Angie – Best Edible Mask: Kaelyn

Cyd won Best Mask Tracey won Most Creative Mask Mardi Gras Barbieris
Nathania wins Most Creative Costume Angie Got Da Baby! Kaelyn wins Best Edible Mask

Edible Mask Examples Before Pretzel HandlesNew for 2011 were three different life size mask cookie shapes made from copper pipe strap tape! I made the eye cutter a separate piece so it could be used with any mask. After cutting around my cardboard template for two years this seemed like a luxury! I also got fancier with the decorating, using layers of glitter sugar and lacy icing plus feather lines and edible pearls. When ran out of basecoat icing I just sprayed a blank cookie green which was more of a fabric texture effect. I only decorated 11 so there were 30 available for guests to decorate.

My custom edible mask to match my costume broke before I could model it! Waah!I did have some breakage issues due to moist weather, but most of them lasted through the party. Large pretzel rods are still the most reliable handles I have found so far. If they break, it is the cookie breaking in the middle, not the stick. Sadly the one I decorated with blue and green specifically for my peacock costume broke before I could take my picture with it!

 
Fruits decorated with feathered pears, celery brushes, curled beets & mini pepper flowersAlso new for 2011 were fancy food garnishes! I never had time before but that year I felt I was far enough along with all the other party prep to spend a lot of time Friday night cutting vegetables in fancy ways from the book More Edible Art: 75 Fresh Ideas for Garnishing I had received as a gift many years ago. As of midnight Friday night I had all the veggie carving done I wanted to try, all soaking in various containers of ice water on the table since there was no fridge space.

Veggies decorated with a celery rose, curled beets, mini pepper flowersI think I needed to cut my celery thinner to get the celery brushes curlier, but the mini pepper flowers turned out well. The bright beet stems must be notched then they will curl in ice water. I need more space in the fridge to do this properly, since I just had these out on the counter overnight & kept adding ice cubes, but when I slept (yes I actually got some sleep!) they got warm enough they weren’t curling much. Since the fruit would dry out too much being cut in advance, I couldn’t have fun with those until just before the party, but I was able to feather some pears. It will be fun to experiment more when I get the chance. The celery rose is really impressive for how easy it is!

Candy Covered Pretzel StarsI had leftover shaped pretzels from Christmas that were still tasty, so I picked out all the star shapes and dipped them in colored candy melts and matching colored sugar for sparkle to make them into Mardi Gras bling. These were fun & easy and were a nice little extra snack for all the partying people you can see if you keep reading… 🙂

(more…)

Posted in Edible Art, Mardi Gras, Parties | Tagged , , , , , | Leave a comment

Holiday Happy Hour 2012

Dining Table and PatioHoliday Happy Hour 2012 last week was another fun evening with 29 adults & 7 kids! Since the last-minute decorate-your-own cookies was so popular last year, I planned ahead with easier gingerbread shapes and a warmer location this year, and the mess afterwards was evidence of the good time had by all! My traditional menu of Scandinavian family recipes were all there, like krumkake, pepperkakor, fudge, toffee, pickled salmon, and Swedish meatballs, plus cranberry chicken skewers, build a sandwich, cheese & crackers, manchego with quince preserves from my tree & a snowflake pastry brie with spiced loquat preserves also from my own harvest. The beverages were sparkling cranberry punch and hot cider plus mulled wine and full bar for cocktails. 6 dozen Sugared SnowflakesI did get 6 dozen Sugared Snowflakes decorated this year, different shapes each year since I have so many interchangeable snowflake cutters now. The Caroling Cookies were the new edible art this year, since they were developed for last year but I had printer issues making them miss my party, but I guess they were too hidden on the bottom tier since I didn’t see anyone eat any…darn!

Partying PeopleIt was very cute as the first kids gained experience at the cookie decorating table, then they would proudly show the new kids who arrived how everything worked. Hungry crowd, since we went through 3 bags of Swedish meatballs so the oven was going almost all night! Plenty of partying people enjoyed the patio bar and the cozy decorations everywhere. My other giant candle lantern became a snowy centerpiece with 3 boxes of rock salt as snow with fresh Cookie Decorating & Partying People in the Living Roomgreens and red berries arranged inside, and fresh greens decked all my halls, plus my faux garlands. Onyx was social all night as usual, and when it was down to only 4 of us chatting in the living room, even normally-shy Ebony revealed herself, insistent on everyone petting her, and helping clean up afterwards by sitting between the holly wine glasses on the shelf. New kitty Obsidian stayed hidden all party, but within 5 minutes of the last guest leaving, he was out begging me for tummy rubs. 😉

Click below to view all the photos of the 2012 Holiday Happy Hour…

(more…)

Posted in Christmas, Edible Art, Parties | Tagged , , , , , | Leave a comment

Seven Moving Portraits

Webmistress WritingYou probably already guessed that my moving portraits were inspired by the Harry Potter universe, specifically my trip to the Wizarding World theme park in March. Actually, the first idea was normal portraits to go with each ghost as a matching game, but then I decided I had enough budget to buy or otherwise acquire all the necessary video panels in addition to the extra ghost electronics equipment, so if I had to dress up for the portraits again anyway, why not film video?

Preparing to cut a foam frameThe original idea spark was knowing I wanted to move from one ghost last year to several ghosts this year, but how, who were they, and what would be their stories? While standing in line in Orlando, I had a glimmer of a thought that maybe I could use some of my previous costumes as members of the same noble family from the time of the founding of Castle Brittahytta and throughout its history. They were the same family since I couldn’t avoid them all looking like me, even though I borrowed some Cutting the lip to nest around the photo framewigs from friends and bought a couple more to help me look different enough. I wrote some basic character sketches based on costumes I had, came up with some fun names that wouldn’t sound out of place with Britta, arranged them in an approximate timeline, including how a branch ended up in America for Hermione G. Wells to inherit the castle. My “ghost writer” turned those character sketches into an elaborate epic plot that will take years to reveal…awesome!

Carving the foam frames with woodburning tool & dimmer switchObviously my 60″ plasma big-screen TV permanently in my living room would be one portrait, I borrowed my parents’ extra 32″ flatscreen TV, and I borrowed a 17″ flatscreen monitor from a friend, but I needed 7 screens total for all the portraits. I don’t have enough wall space to hang all flat panel TVs everywhere, plus that’s more expensive than even my expanded budget, so I was hoping to use photo frames for smaller portraits, then buy one medium flat panel TV that I could use as an external monitor for video editing year-round. After some research & comparative pricing, I Brown basecoat for 32" flat panel TVfound Aluratek cheap basic photo frames on Amazon, with various sizes all the same brand, bought a small one as a test using all free points from my March vacation Amazon Visa spending, and after online searches and Windows-only video conversion shareware, finally got the video converted from QuickTime to the Motion JPEG AVI with mp3 audio format that works on most photo frames…whew! Over the summer I kept buying more when the month was up and I had more Amazon Visa points to spend, until I had three 12″ 4:3 aspect ratio frames and a 32″ widescreen TV that could run video off a USB flash drive!

Foam frames dry-brushing gold over brown basecoatOf course all those panels were black modern frames, not very portrait-looking at all. I had enough thin foam sheet scraps to make custom carved foam frames for the 3 small portraits and my 32″ TV. All those frames were styled to the portrait inside, some as extra character clues that won’t come into play until later stories are revealed. For all the frames, the foam was cut out to nest around the electronics so they would stay on without any tape, and for the most part that worked. I painted them all with a brown basecoat first, using an old brush to cram paint into all the carved areas, then after the brown was dry, I dry-brushed with gold paint to leave the brown showing all the carved detail.

Fabric Frame Silver SpiderwebsEver since I got my big TV several years ago I have wanted to disguise it for Halloween, but I kept looking for a way that would be stored easier than big carved foam strips. Since I didn’t have any content to show on the big TV anyway, that kept getting shoved “until next year.” Last year I started looking for anything I could print myself on long spools of paper, but no luck until my friend showed me Spoonflower.com. Fabric is so much better than all the cheap vinyl decorations, since vinyl shines in light, including flash photography, ruining your atmosphere. I had investigated printing fabric last in 2008, and it was quite expensive and required more Ergelise's Portrait in the Living Roomyardage that I thought I might use. Spoonflower still isn’t cheap, but it’s more reasonable, and you can buy a single yard. I took photos of a bunch of frames at other houses and my own, plus some of my carved own frame designs from foam for spookier themes, designed the fabric, then placed my order for the heaviest fabric they have. The fabric is still not as thick as I’d prefer, so I add iron-on interfacing to the back so the edges won’t flop as badly, plus that helps seal the edges from fraying. The closer your Fabric Frame is to the width of your actual panel frame, the least risk of flopping. Because the monitor wouldn’t hang flat against the wall and tipped forward a bit, Sarina’s frame tended to flop at the top unfortunately, but I still liked the illusion. Three of my portraits used Fabric Frames, and I had them ready early enough to sell a few this season on Etsy!

Sova Set Starring EbonyThe portraits themselves required planning with the ghost filming, since many made sense to film the same evening while I was in costume, wig and makeup. It was easier to control the set lighting by waiting until after dusk. The only one we filmed the ghost first was Sova, since we needed the original tattered all-white ghost dress to film the Watery Wraith in the well, then after that was done (and fully dry again!), I altered her dress into a tidier princess dress by folding all the tatters into a wide handstitched hem and adding fresh gold trim to the neckline. I had planned for Sova to have long blonde hair, but my secret circle all voted it was easier to Sarina on Setmatch to her ghost with the same long stark white hair, so it became part of her character story. There were so many back and forth suggestions from online video clips requiring resetting and refilming the next day, that I requested my “ghost writer” to be present as director for all future filming! That worked much better since he couldn’t ever come up with anything in advance when I asked, but on the spot his ideas were many and great.

Ergelise on SetWe intentionally made the portraits sitting still for quite awhile, trying their best to behave, with only minor movements like eyes blinking, looking around, adjusting their hair and clothing to proper portrait appearance, candles flickering, crystal ball changing color, and leaves rustling in the breeze, so they would only attract attention on second glance “hey, did that just move?” Since it’s much easier to loop a static background, all of the portraits left the frame at least once in their long loop, and most had several clips linked together in the long loop, so they left several times. We didn’t want them all leaving at the same time, so all the clip timings were different on purpose. A short loop with a lot of movement would be really obvious it was just looping, but if the loop was 10 minutes or longer, we sincerely doubted anyone would ever stand around watching the whole thing to find out when it looped! Each character had at least one action specific to her character, Merry's Portraitlike Ergelise turning to play her piano, Sova shushing her hooting pet owls, Sarina brandishing her sword, and the First Queen greeting people at the entrance. However, we did come up with “easter eggs” in case someone happened to be walking by at the right time, many of which are clues to the larger story, with some that won’t make sense until years from now. There were also some that were just funny, like Queen Meresinine “Merry” Verdigris, so you should watch that one all the way to the end. 😉

Pumpkin Queen Photo ShootI think the most hassle was the poor Pumpkin Queen! First of all, when I originally made the costume in 2008, I never finished the leaf sleeves nor the final crown decoration, plus now she needed the Verdigris dragon emblem on her crown too, so those were added this summer. At least the sleeves were already cut out and I knew exactly where they were. Then I kept waiting and waiting for my pumpkin vines to bloom, but once they finally did, the blooms would close up before noon…ack! I am not a morning person, especially on my precious weekends when most of these were filmed! That explains my puffy eyes…heh! Since I didn’t even plant my pumpkin seeds until mid-July, the blooms were very late, but we finally had enough to look good by early October. The day beforehand I arranged all the pots & fake pumpkins Fake Pumpkins wtih Real Pumpkin Vinesin my backyard in a shady spot for best lighting, including tying mini plastic jack-o-lanterns to the vines like baby pumpkins, then we got up super-early for the last chance at the local flea market for cheaper video cables, came back to put my contacts in & get in wig, makeup & costume so we could be done filming before 11am. At least once we got started it went fairly quickly, since there was Pumpkin Queen Portraitonly so much she could do to care for her precious pumpkins, and we knew the noisy backyard audio would need to be replaced anyway. As a tie-in to the original music I had written that Ergelise played on the piano in her portrait, I sang the Ode to Verdigris a cappella to the pumpkins and added the audio in post…but I think my favorite part is how the orange skirt poofed out when she squatted so that she looked like a pumpkin herself! 🙂

Webmistress Set - same place, different backdropYou might have noticed by now that each set is also specific to each character, even though many were filmed in the same spot in front of my large living room window. This is perfectly appropriate for painted portraits which often tried to represent the character with props and still life arrangements around the subject. I even researched possible poses to be authentic to each era. Not only did the Pumpkin Queen costume finally get finished to my original plan after a 4 year hiatus, but the Victorian Webmistress also got her “dew on spiderwebs” beading after running out of time last year. Set design was fun, gathering stuff from around my house that might be useful, making sure the backdrop colors were different for each so the location wouldn’t look the same but still be period-appropriate, and even making new props, like the Verdigris crest stained glass window. One big unexpected problem was the volume seemed loud compared to normal conversations, but the ambient chatter of party noise was so loud, no one could hear the portraits that spoke! I cranked up the volume on those later in the evening, then some people were able to hear them, but duly noted for 2014 when the clues will be more meaningful, especially what the Webmistress says as she hangs over the dining table. 😉

There were some frustrating technical difficulties I couldn’t figure out how to overcome. Using the exact same video formats & settings from QuickTime through the Windows conversion program, I ended up with a perfect Sova audio track timed with the action for a long video, but no matter what I did, after converting to Motion JPEG AVI, the Merry audio always went off track about 3 minutes into the video, so that the clinks when she poured and sips she took were heard before the action happened…annoying! The monitor I borrowed squashed Sarina fat even though she First run of the Webmistress...iPhone4 to HDMI worked...whew!was the proper 4:3 aspect ratio already, and my fancy new TV that could loop USB video showed words onscreen that it was looping, so I had to make a 5 hour mp4 myself to put on the USB stick so it would last the whole party without revealing the silly looping message. I felt like I was in video format hell between getting all these settled plus the ghost videos…my kingdom for one good video standard format across all platforms & devices!!!

There were also big hassles with using Apple iDevices to export video to displays, even though it was nice to have such a small device to hide instead of a DVD player or computer. Online research revealed there were a billion versions of the Apple dock to video cables over the past few years, and some devices would play with old but not new, and I couldn’t nail down model numbers or anything to have confidence buying anything that was a $25-$40 gamble. We had an older iPod Touch that never was used because we had no cables that would work with it. I was VERY glad that the iPhone 5 came out in September, since both my mom & I needed new phones, so I was able to borrow her iPhone4 with a $15 flea-market dock to HDMI adapter even though it didn’t pass-through USB to charge as it should have. I used my iPhone4 to The First Queen greeting guests opposite the entrancerun Sarina’s portrait via a dock to RCA flea-market in-box cable that had a USB cable that did charge. Since iOS doesn’t have a loop option on the Video app (QuickTime does so why not iOS?!?), the option to create a video playlist is now gone, and no 3rd-party apps would export video over the cables we found, I was stuck with creating 5-hour video files to last the party. Thankfully my mom’s iPhone4 fully-charged was able to run 5 hours of video for the Webmistress portrait without dying!

Here was the final equipment breakdown for all seven moving portraits:

Ergelise: 60″ plasma TV with receiver speakers with MacMini input looping QuickTime mov

Sarina: 17″ monitor (no audio) with iPhone4 dock to RCA playing 5 hour mp4

First Queen: 32″ TV with built-in TV speaker with USB video playing 5 hour mp4

Webmistress: 32″ TV with built-in TV speaker with iPhone4 dock to HDMI playing 5 hour mp4

Hallway Trio: 12″ Aluratek photo frames with built-in speakers with SD cards looping Motion-JPEG/avi/mp3 format videos

Hallway PortraitsSome last technical notes…You need to plan for hiding power cables and media player input devices when arranging your portraits! The big plasma TV wasn’t moving from its giant articulating mount and couldn’t be rotated vertically, hence why it showed Ergelise at the piano as a logical horizontal portrait. I placed the larger portraits in prominent locations where I had nearby outlets under my table, couch or piano, which were also good places to hide the media players. Since I have shelf space above my hall closet where some of the haunted portrait gallery is usually displayed anyway, I put all 3 small portraits on that wall with their power supplies going up to an extension cord up there, and any visible black cables I painted to match the wall color with leftover paint. This also means you have to rotate your video so that the power cable end is the top of the video. To keep the most resolution and video quality intact, we filmed all the vertical portraits with the camera turned vertically, but some needed to be rotated 180 degrees based on which way the panel decided to display it. They were a bit of a pain to edit though, since rotating then rotating back was horrible for any masking plus took forever to render, so I got a crick in my neck watching sideways! I did try some various filters to attempt brushstroke effects, but I didn’t like any of them since they muddied the detail too much. The irony was that one guest asked specifically for me to send him what effects I used to make them look painted, but I told him it was just standard def video displayed on HD equipment! 😉

The Webmistress of the DarkLast but not least were the nameplates. I finally found gold foil inkjet label paper last year, so I printed all the nameplates and stuck them to the frames so they would look like engraved metal. Little did I know that the label adhesive didn’t want to stick to paint or fabric very well, even though it stuck to the plastic trophies last year just fine. 😛 So next time those might have to be glued or some stickier tape to keep them in place, since they are necessary to identify the true names of the ghosts!

It was a LOT of work all summer long all the way down to the crunch time on party day, but overall I was very pleased with the portraits and the guests were impressed too, thank goodness! You can see all the moving portrait photos in the full gallery below if you’d like to click to continue reading. But this was only half the filming & video work…I still have to tell you about all the ghosts, too!

(more…)

Posted in Halloween, Parties | Tagged , , , , , | 1 Comment

Spooky Spider Rosettes

Spider Rosette Form and Black Sanding SugarLongtime readers might remember that I’ve been trying to make savory Fried Spiders for years, but only minor success since they were very fragile and many fell apart on the display tray. When I saw this spider rosette form on Amazon, I absolutely had to try them!

First Spooky Spider was a Success!I have enjoyed eating rosettes many Christmases in my life, but I had never tried making them before and my mom never made them either. Luckily I have a friend Kathy who is the Rosette Queen, so I asked her and she graciously replied with her secrets. I used her tried & true recipe & tips, replacing the eggs & milk with vegan substitutes and added a couple drops of black gel food coloring while mixing in my blender that is older than I am. Frying them in the deep fryer also older than me, then sprinkling them with fine black sanding sugar instead of powdered sugar, we had adorable fuzzy, black, crispy, fried, tasty tarantulas!

Thank you Angie!These take a LONG time since you are frying each one individually for 2-3 minutes, adding sugar while reheating the metal form, then repeating, so it took about 5 hours to make almost 9 dozen, which was only two batches of batter. I was so glad that Angie volunteered to help, since not only was I able to get other decorating done while chatting with her while she fried spiders all afternoon, but she had a nostalgic blast back to when she & her mom would make Christmas rosettes in North Dakota! They always used granulated sugar on their rosettes, so Angie knew tips how best to use the black sanding sugar. I love it when a plan comes together!

I was a little sad that most of my party food went uneaten because it was so warm inside, but the benefit to having 7 dozen spider rosettes leftover is that now I know as long as they are kept in a good airtight cookie tin with wax paper between layers, they last over 2 weeks still crispy and tasty! One week is probably a slightly better flavor, but I enjoyed eating them all the way to the end, black tongue & all. 🙂

Spooky Spider RosettesSpooky Spider Rosettes
aka Fried Spiders

adapted from
Kathy Henricks Traditional Scandinavian Rosette Recipe

2 eggs, slightly beaten (or Ener-G vegan egg replacer)
1 cup milk (or rice milk)
2 teaspoons granulated sugar
1 cup all-purpose flour
1/4 teaspoon salt
1 tablespoon vanilla extract (or almond or lemon)
couple drops black gel food coloring
canola oil or vegetable oil for frying

Add eggs (or egg replacer) first in blender and mix well. Add sugar and milk then mix again. Sift flour before measuring into blender, then add salt and mix again until batter is smooth and about the consistency of heavy cream. Add flavoring and food coloring. Let the batter set for about 30 minutes in a flat-bottomed shallow container large enough to fit the rosette iron form. While the mixture is resting, heat the frying oil to 375F, either in a heavy pan or deep fryer. Oil should be hot enough to brown a piece of bread while counting sixty.

Once the frying oil is up to temperature, dip the rosette iron into the hot oil to heat it for at least two minutes, then drain excess oil on paper towel. Dip heated iron in batter to not more than three-fourths its height. If only a thin layer of batter adheres to the iron, dip it again until a smooth layer forms. It will be partly cooked, from the heat of the iron. Plunge batter-coated iron quickly into the hot oil and cook from two to three Not enough batter left to stick on the iron, but it cooked the outline!minutes until active bubbling ceases. Remove from iron and drain on paper towels. If they will not release on their own, use a table knife to gently push them off the iron. Immediately put the iron back into the oil to reheat, then sprinkle the finished rosette with powdered or granulated sugar. If your rosettes are not crisp the batter is too thick, and should be diluted with milk.

One last hint from me is to use a container only slightly larger than your iron form shape for less waste. Even though we had the perfect size flat-bottom dish, I still had a layer of batter that refused to stick to the iron when it got too low…but the hot iron cooked the spider in the dish! 😉

Hope you enjoy making Spooky Spiders!

Posted in Edible Art, Halloween, Parties, Recipes | Tagged , , , , | Leave a comment

Halloween 2012: The Party!

Webmistress and the Dining TableMy most epic Halloween yet was a success! 62 adults & kids attended my 19th annual Halloween party! My glowing fiber optic cloak for my medieval warrior queen Ghostly Guardian was a big hit. It was fantastic that all the adults were impressed at my multiple hauntings, but I think my favorite reactions to all 6 ghosts were from the kids ages 3 through 7 who absolutely loved them and had to keep going around looking at them again & again! Thanks to everyone for a great party, and HUGE thanks to Cat for taking such fantastic photos! Very nice to have a professional photographer as a party guest! 🙂 I’ve included some of her shots here, but check out her whole party album at Photography by Cat!

How was this party so epic? Not only did the castle get a new tower and 5 faux copper verdigris spires, but there were 7 moving portraits and 6 ghosts that were all members of the same family throughout its history, starting with the founder of Castle Brittahytta almost a thousand years ago. Except for the Ghostly Guardian which was Castle Brittahytta - can you see 2 ghosts in the towers?my new costume for this year, each character was inspired by a costume I already had, then my “ghost writer” and I created a story for each of them that informed the performance and setting of the portrait and the ghost. I filled up a full terabyte hard drive with video footage & render files from all 13 filming sessions throughout the summer with me as actress, wardrobe, makeup, set design, and editor! I was very glad to have my “ghost writer” assist as writer, director, lighting design & cinematographer. We have more background & story than we expected anyone to notice during the party, since we The Ghostly Guardianwanted the moving portraits to seem natural with less frequent content repeats, plus telling the saga of this family will continue for years well into the future. There was some additional planned epicness that didn’t make it into this party, which explains all the steampunk stuff I collected that you won’t see, but I won’t reveal any of that yet since it definitely WILL happen for 2014! Next year is already set as the 20th anniversary of Nightmare Before Christmas as my 20th annual party, you see. 🙂

Partying People InsideI was extremely thankful that my “ghost writer” was in the trenches with me with only 3 hours sleep and frantically getting everything ready all day. Amazingly even after such a trial by fire, he still wants to help again next year & onward! 🙂 At least I was getting into costume before the party start time of 7pm, but the final food prep would never have happened so well without Melanie’s help from 4:30pm well into the party! She did the Violent Vertebrae, veggies, fruit, cheese, crackers & cookie setup! Thank you SO much! Guests started arriving at 6:59 and kept coming! Partying People OutsideIt was so warm inside I cut the final oven use from the menu so no bat wings or brie in pastry, but we still had plenty of food. It was so warm inside that my food on the dining table was left idle in favor of all the Creepy Cuisine brought by guests since that table was outside where it was comfortably cooler. By 10pm people were starting to talk about leaving, so I herded everyone to the back patio for the awards. Each winner received an Edible Medal of vegan shortbread on a stylish black & white ribbon!

Outstanding Owl Ogler was tricky because 11 owls were all in the portrait and frame of one of the characters, including her necklace! I know some people found the necklace so it was definitely visible, and that was expected to be the tiebreaker owl, but there was still a tie with 20 of 21 owls found by both Patrick & Angie!

Outstanding Owl Ogler Patrick Outstanding Owl Ogler Angie

Supreme Spirit Savant was who found all the true names of all 6 ghosts and 1 character. This required searching for clues around the castle, even some edible clues! We expected many people to stop at the 4 easiest with nameplates on their portraits, but Cyd & Angie both deciphered the “rosetta stone” Tasty Tombstone to translate the runes on the First Queen’s portrait! Angie even double-medaled…woohoo!
Supreme Spirit Savant Cyd Supreme Spirit Savant Double-Medaler Angie

After 13 consecutive years, I took a year off from Spooky Name That Tune, so it was only the costume contest and Creepy Cuisine left for awards. It was already getting late so I didn’t collect written votes this year, but collected everyone out back to cheer for their favorites. I think this worked pretty well, and definitely easier than me Scariest Costume = Ashlyng the Weeping Angeltaking the time to tally up all the votes!

Scariest Costume was Ashlyn as the Weeping Angel from Doctor Who…she was creeping up on everyone all night then revealing her scary face, just like in the show. Most Creative Costume = Jen as Hurricane SandyBut keep out of the way of her cardboard wings!

Most Creative Costume went to Jen as at-that-time-still-pending Hurricane Sandy, complete with inside-out umbrella, rain poncho and nametag sticker “Hi My Name is Sandy!” Very clever!

Ultimate Costume = Elisabeth as the Tardis
Usually Ultimate Costume goes to a group, and I saw two contenders, the White & Dwarves Mining & Construction team, or the Doctor Who Crew…but the overwhelming cheers went to Elisabeth and her handmade Tardis! Fantastic job!

Scary Jerry wins Creepy Cuisine for his Finger Cookies
Scary Jerry brought tasty almond Finger Cookies, but the Creepy Cuisine medal didn’t fit around his head! He said he liked wearing it as a headband…haha!

Louie's Buffalo Wing costume won Creepy Cuisine! ;)Ashlyn double-medaled with her Eye Candy Creepy Cuisine, and since so much of the other Creepy Cuisine had been consumed before I could see it, I awarded the last Creepy Cuisine Edible Medal to Louie since his costume was Buffalo Wing with Blue Cheese Dressing!

The Watery Wraith in the Well by CatNow delving into decor! To describe the experience, as you walk up to the castle, you first see the well under the front tree, hearing rattling chains and gurgles of someone in distress. Looking into the well you see the Watery Wraith, trying her best to keep afloat despite the heavy chains dragging her down into the depths (click for video)

The Tall Tower Through the TreePeeking out between the tree branches you look up and see the tall tower with the Ghostly Guardian medieval warrior queen on the balcony watching over everyone who approaches (click for video)Swashbuckler Sally in the middle towerTo the right in the middle tower windows you see the ghost of Swashbuckler Sally sparring with an unseen foe back and forth from window to window (click for video)

The Pumpkin QueenWalking up to the front porch through the pumpkin vines, you see the ghost of the Pumpkin Queen haunting the gate in her pumpkin patch, a few pumpkins already carved as jack o’ lanterns with flickering lights, even including an owl pumpkin. She appears in the distance, walking towards the gate, raising a big knife menacingly as she comes closer, but as she arrives at the gate, she bends down and starts carving one of the pumpkins in the pile…

The Living Room with Ergelise's portrait and the copper Verdigris shieldInside the house the big TV is now a wall portrait named Ergelise Queen of Verdigris at her piano, but every so often she moves, and sometimes turns around to play (click for video). You see her wearing an elaborate signet ring and a unique necklace of a copper dragon with a crystal orb. Other moving portraits are in the living 3 More Moving Portraitsroom (click for video), above the piano (click for video), above the dining table, and 3 on the wall in the hallway, but only some have nameplates. Above the fireplace is a copper & verdigris dragon shield that must be the Verdigris family crest, with a similar design in the
stained glass pantry door

The Ghost in the Bottle in the Library LaboratoryVenturing out into the Library Laboratory, on the table in the corner there is a large bottle on a stack of books that has a small ghost inside…it looks like she is laughing & toasting everyone, refilling her brass mug from a large bottle (click for video)

The Phantom of the Pipes taken by CatFarther out into the yard you hear pipe organ music coming from the chapel and the door is open so you peek in. You see the ghost of an 18th-century French style woman in elaborate white wig & tiara playing a somber tune on the pipe organ. She plays for awhile, turns to look over her shoulder, fades away, then reappears and begins to play again (click for video)

Trick or Treater pointing at a ghostWhen my friend who has attended 17 of my 19 annual parties arrived, she immediately said “I see what you mean by epic!” Everyone echoed her, which was extremely gratifying after so much work, and even trick or treaters on Halloween night were highly impressed, as you can hear in this video, even if you can’t see much… 🙂

I know this was already a long post, but this is nowhere near the full story yet! Still to come are separate posts with details and behind the scenes how-tos about my Ghostly Guardian costume including the glowing fiber optic fabric cloak, the moving portraits, and each ghost, since the ghosts used so many different techniques. Stay tuned for those coming in the next couple weeks, and be sure to check out all the party & decor photos below!

(more…)

Posted in Halloween, Parties | Tagged , , , , , , , , , , | Leave a comment

Happy Halloween!

In the final 2012 episode of Enhanced Eerie Elegance, there’s still plenty of time to make your crudite tray into Vicious Veggies with quick and easy tips for last-minute Halloween parties!

My huge Halloween party was a grand success on Saturday, so no further party prep to update, and I’m still taking catchup photos on Halloween night when everything is set up again for trick or treaters before I can show you everything properly. There is a LOT to document that I will split into separate project posts to do them justice, so keep watching for a week or so…but for now here is just a peek… 🙂

The Phantom of the Pipes

Hope everyone has a fabulous Halloween! Happy Haunting!

Posted in Halloween, Parties | Tagged , , , , , | Leave a comment

Only 4 days until my party!

Happy Tuesday again! Today, watch how to make your own cheap & simple Spooky Spellbooks in the fifth 2012 episode of Enhanced Eerie Elegance! Only one more episode before Halloween!

Fresh fruit & veggies are still to be purchased, and that’s a significant part of this year’s menu, but my freezer is overflowing with Bone Breadsticks! I have just over 200 now ready to finish baking on party day, so I sure hope that’s enough! The giant cream cheese Sinister Skull won’t be carved & assembled until party day, but I’ve made a few smaller cream cheese skulls to place on the other food tables to spread out the creamy goodness. 😉

New Tasty TombstonesThere aren’t as many cookies this year, but 9 dozen new Tasty Tombstones are ready to serve. It took forever to cut out all those the frosting sheets, but they looked great. Unfortunately I had to replace the Nucoa non-dairy baking margarine that I haven’t been able to find anywhere since February. Very sad my trusty non-dairy baking friend seems to have disappeared! I was forced to buy the ONLY vegan margarine at Whole Foods, at triple the cost, and it doesn’t work quite as well as even the reformulated Nucoa. All the other margarines on the shelf include milk, so not good for my non-dairy friends or my vegan friends.

Ready to make Spooky SpidersSpooky Spiders black rosettes are scheduled for Wednesday so they will stay fresh & crispy in my airtight cookie tins, and so my friend & trusty house-elf Angie can help. The pumpkin donuts will be Thursday since there is NO FREEZER SPACE LEFT, then the deep fryer can be put away before the housecleaners come on Friday. The donuts will be reheated on party day to crisp again, then we’ll see if I have time after they cool to decorate them or not. Glad they are tasty just plain too!

Faux Flames are readyInterior wall art of spooky portraits and other items are very nearly arranged to my satisfaction and I’m sure that will get done this week. All candles, real & fake, are ready to go. Due to all the major projects still in process, both final patio setups are still underway. I’m always worried about hanging the bookcase mural wallpaper too early since you never know when rain might surprise us in late October! It rained Sunday night just as we got the first major decor up on the roof with forecast to keep raining until Thursday…ack!

Last yardwork of lawnmowing, edging & pruning was done on Saturday since now I need to decorate outside! Sprinklers should be ok to keep running until Friday unless we have a ton of rain, then I will set out all the pumpkins & the pots in their final arrangement and turn off the sprinklers until after I undecorate. When it’s sunny again, the potted pumpkins might need hand-watering so I’ll keep an eye on them.

Resealing the Skull Fountain againThe skull fountain keeps leaking while it’s stored in the heat, so I’ve sealed it yet again with silicone caulking. There was also a sticky splashback problem last year even after drilling more drainage into the plastic skull, so I’ve tried again. That mess was a pain to clean up since it even splashed onto the bookcase wallpaper as well as all over the chalkboard & lab table, but it needs to stay in the Library Laboratory for secret reasons. The lemonade cauldron will be on the outer patio.

The castle walls will be going up on Thursday since I’m worried about wind blowing them down, let alone the rain forecast until then. I couldn’t find large clear washers for sale, but I had some clear acrylic scraps, so I cut them into rectangular washers & drilled screw holes myself. Hopefully these will stay in place better, since last year the day after Halloween, wind started blowing down ramparts one by one as I raced to take them down Faux Flames are readywithout breaking!

Webcams are ready! Ideally I would have 3 webcams this year but I waited too long to decide to buy, so I’m just moving the inside cam to the backyard to view the outer patio. Since the wifi doesn’t reach through my stucco walls very well, especially to the back, I have a maximum-length ethernet cable running out my living room window & over the roof to the backyard. No advance peeks this year since not only is rain not good for electronics, but there are too many spoilers! On party day the webcam links will be live at camera.britta.com.

That’s all the time I have until after the party! Everyone enjoy your Halloween weekend and Happy Haunting!

Posted in Halloween, Parties | Tagged , , , , , , , , , | Leave a comment

Less than two weeks to go!

For today’s Tuesday update, learn how to make your own adorable & delicious Donut Be Scared Peekaboo Pumpkins in the fourth 2012 episode of Enhanced Eerie Elegance!

Ack! Less than two weeks to my party so I’m starting to freak out more & more, but I am taking all of next week off work when usually I only take one or two days off, so I hope that helps me get everything done!

Pumpkin Pasties ready for the freezerSpeaking of pumpkin donuts, those are planned for early next week, along with my first attempt at making rosettes with my new spider form. After those are both done, the deep fryer will be put away again. In other food prep, as of late Friday night, just shy of 8 dozen Pumpkin Pasties are now in the freezer on covered baking sheets, ready to bake on party day, which is a huge relief since they take a long time to prep. After several sessions with the bread machine, I’m now up to 128 Bone Breadsticks in the freezer, but if I have over 60 guests like last year, that’s only 2 each, so I think I still need more. Glad that’s more of a timing and waiting issue so I can multitask!

Hand-fertilizing my first female pumpkin blossomI might just get a real pumpkin in my patch! A different female blossom I hadn’t noticed yet had just closed when I checked on Saturday morning, so I gently pulled the petals back and fertilized her well with plenty of pollen I collected on a cotton swab. The other female blossom still is nowhere near opening yet, but I can hope. I will definitely plant my pumpkins earlier next year, now that I know the pot idea works so well in my yard.

Painting the papier-mache pumpkinsMy papier mâché pumpkins are finally done! I gave up on a plain paper final coat so I used brown paint as a primer coat so no text showed through. After that coat was dry, I sprayed orange lines on the highlights of the pumpkin ribs first, then lightly filled in the shaded grooves. The orange was too bright when I was done, so I lightly dusted with Painted papier-mache pumpkins with real pumpkin vinesbrown again to tone down the orange to a more natural pumpkin color. I think they will fit in nicely with the other pumpkins, but they won’t last through sprinklers. I know because I forgot and left them in the grass overnight…oops! Only a few spots got soggy and try dried okay in the sunshine, but I won’t make that mistake again!

New Bathroom DecorMy eerily elegant new bathroom decor is done! The best fabric of silver webs on black this year was glitter over crushed velvet…very luxe looking but the glitter sheds EVERYWHERE! I’m very glad my housecleaners are coming the day before my party, since hopefully they can take the extra glitter with them. 😉 I like how the strip of web fabric added to the silver clearance valance ties in the the web curtain now sewn behind the valance. I would Jeweled spider hanging on tasselrather have a plain black silk curtain for the rest, so I’ll keep an eye out to upgrade next year. Probably a different tieback for more contrast, and the black tassel blends in too much. Perhaps I can design a custom silvery spider tassel next year, too, but the beaded spider is okay for now.

My house interior is getting there! The Victrola is set in place on the piano, most of the black LED taper candles are in place, tapestry and spiderweb lace curtains and pillows are out, and the Catoween tapestry is over the couch, but hanging the spooky wall art is still in process due to secret projects still underway….bwahaha!

Painting the Faux FlamesThe pipe organ now has its own Faux Flames! It took an entire new can of black spray paint for just these since the paper tubes sucked up so much paint it required several coats until I Finished Faux Flames Flickering on the Haunted Pipe Organwas satisfied. I still need to paint the other individual tealight covers and the rest of the LED tapers for inside decor, but that’s easy to do between other projects.

Major construction is going fairly well, but still a lot to finish! The castle has some new architectural features, several of which were painted with final accents just as dusk was falling Sunday evening. I never thought I’d use leftover paint from my aqua bathroom for Halloween projects, but it was Can you guess what these are?perfect and worked like a charm in the power sprayer I bought last year. More foam carving and painting to come this weekend though!

There were two more extremely late nights of essential party prep, but I can’t reveal more…so I think that’s all I can tell you for now, sorry! I’ve re-arranged my own party prep schedule for this weekend a bit because I am very excited to attend Scary Jerry’s Halloween party this Saturday! I love meeting new friends because of Halloween! 🙂

Only one update left next week before my epic grand party plans will be revealed!

Posted in Halloween, Parties | Tagged , , , , , , , | 2 Comments

Halloween is getting closer…

Happy Tuesday again! Check out the third 2012 episode of Enhanced Eerie Elegance to be inspired by all sorts of flora that can be Ghostly Greenery!

EDIT: After restoring the entire decade’s worth of photo library from a recent backup, thank goodness I now have photos working again!

First Female Pumpkin BlossomMy real pumpkins are still doing very well, and I think this is finally the first female blossom! I noticed it Saturday morning, and here on Tuesday it isn’t much bigger yet, let alone open, but I’m keeping my eye on it to be sure it gets fertilized. Crossing my fingers!

I hadn’t started decorating inside yet so my housecleaners could do a thorough job before I made it more difficult. Now the stone walls are up, soon to be joined tonight by the spiderweb curtains, matching lampshade, door panel and pillows. Since I’m borrowing the antique Victrola from my parents which is on the piano, the gargoyle collection has to move somewhere. They might end up distributed this year since there is already another plan for the fireplace mantel.

New Dragon Sconces with New Faux Flames (unpainted)Speaking of decorations, I splurged again. I have had my eye on these solid iron dragon candle sconces from DesignToscano.com since before I bought my house! Since I got the dragon light set last year, I decided these would look nice flanking the tapestry on the living room. I also should have a similar style dragon bell coming soon that I will use year-round on my front porch since I don’t have an electric doorbell. Glad I found their 20% off lunchtime sale online!

Pipe Organ Candle PlanningAs for candles, after several years of being on my list, I am FINALLY decorating the pipe organ with new Faux Flames! I’ve saved paper towel and toilet paper tubes that are large enough to fit LED tealights, balled up foil to support the LED tealight far enough inside the tube so the lame plastic “flame” doesn’t peek out but you can still reach it to pull out the tealight, then used up about 75 glue sticks as wax drips. For the pipe organ these are in clusters, stuck together by the pile of “melted wax” at the base. You can see them lighted above in on the dragon sconces since of course the sconces have candle New Faux Flames - Wax Finished Before Paintingspikes, making battery candles a problem unless they have a tube around them. I just finished the last of the wax drips on everything last night after buying another big bag of glue sticks, so they’ll be spray-painted black next. Since they’re only thin cardboard, they aren’t suitable for outside or overnight use, but inside they’ll be fine for years I’m sure. I’ll probably make a few more in different colors for other holidays and year-round use for my wall sconces.

I’ve been watching for more LED tapers, but Shindigz.com still has the best price vs reviews. I did see some cheaper ones on Amazon but with horrible reviews. When I saw 30% last week and knew they sold out last year, I decided to grab more…sadly only a couple days too early before they DID do a 50% off sale after all…darn! I still have some unpainted from last year, so if I paint all those black, I can fill ALL my taper holders with LED candles this year, then this new order will be painted red for Christmas, plus I should have a few left for other year-round colors too. Final price including shipping came out to $2.91 per candle which isn’t bad when they will never burn down…but 50% off would have been even better!

Making Bone BreadsticksParty food has begun! My bone breadsticks batch takes 1.5 hours in the bread machine to make 15-20 bones but only requires 1/4 cup fed sourdough starter, so I’m doing one or two batches during other Halloween project marathons before the starter loses its oomph. I’m up to 36 Baked Bone Breadsticksbarely-baked bones safely in the freezer to be crisped in the oven on party day, with more to come over the next two weeks. Pumpkin pasties need to happen soon too, then the new Tasty Tombstone shortbread cookies will also be in advance. The rest of the food will wait until party week.

New major prop construction has also begun, and a new gravestone is finished, but they are secrets I can’t show you anyway! 😉 Plenty more to do, and this year I have asked for the whole week off work before my party in hopes of getting everything done. I’m already worried, especially now with my computer acting up! Wish me luck!

Posted in Halloween, Parties | Tagged , , , , , , | 2 Comments

Halloween update

Happy October! It’s Tuesday update time! Check out the second 2012 episode of Enhanced Eerie Elegance, Carved Stone Walls: Part 2, teaching you painting & aging techniques!

Pumpkin vine as tall as me!The tallest pumpkin vine is now taller than me! Even the plants that aren’t as big are blooming well, but I still haven’t seen any female blooms yet, so we’ll see if I ever get pumpkins. I’m glad all these are still doing so well! I will definitely try a front yard pumpkin patch again next year, pots for sure, and I might actually try planting a few way out front along my pathway.

Fake pumpkin progressAbout 3 layers of strip papier-mache seemed enough for the fake pumpkins to hold their shape, so I cut them off the cauldron forms, then papier-mached them back together. I’m making one more midsize pumpkin with one layer completed already, then I’ll try some plain tan craft paper as the final layer of papier-mache on all three in hopes I don’t have to paint a primer coat before painting them orange. I won’t spend the time making even more of these, since they do take awhile, and I found a nice huge jack o lantern at Target for only $30, plus others for extra 25% off 40% sale price. With 5 to 10 fresh pumpkins from the grocery store that I will leave whole to bake after Halloween, I think I my pumpkin patch will be well-stocked.

Original music this yearI don’t think you’ll figure out any secrets by me revealing that I have written original music for this Halloween! I haven’t written anything in this style since college *mumble*-years ago, so once I got on a roll, it was really fun that it was working as I’d hoped. I wrote it at my piano, scribbling onto score paper, then entered it into Sibelius on my Mac to be sure it fit together properly. For final recording, I had to get out my ancient classic 80s Yamaha DX-7 keyboard since Garage Band doesn’t have the exact sounds I wanted. Very nice that 30-something-old tech can still play with new…but why does writing music always work best after midnight? 😉

Halloween Shopping Weekend HaulI wasn’t sure what I would buy this year during Halloween shopping weekend, since I have already been buying party stuff since May, but I did find a bunch of cool stuff. I found the hooting owls at BigLots so I bought two (thanks to Cruella on Facebook for the heads up to look!), more spiderweb dishtowels at Ross to go with the ones I already own, finally a brunette wig for my wig collection at Halloween City for 30% off, but nothing I wanted at Spirit. Since I had already bought the elegant towels from JoAnn, and my costume fabric was purchased back in April, all I bought was some craft supplies, and black crushed velvet with silver glitter spiderweb pattern for new bathroom curtains. I found a silver valance on clearance + coupon at Bed Bath & Beyond to glam up the bathroom curtains too. Hobby Lobby had a black tassel I will use as the tieback in my redecorated bathroom, but their pumpkins were the Funkins expensive ones, which I can’t handle buying even half off! I did score on other pumpkins, which I will also be using for next year’s Nightmare Before Christmas party, so they are a good investment at the prices I found. The plain ones were at Michaels at 40% plus 25% entire purchase, and I especially love all the cute cutout faces in all sizes from Target. Only one Target gargoyle that I couldn’t resist, a web fleece blanket, some cool wire web tier stands, and I did get the elegantly gothic black plastic platters, only disappointed they weren’t any larger.

Sadly I can’t show you any of it without giving too many surprises away, but after some small final handstitching details tonight, my costume will be *completely finished* the first week of October! That hasn’t happened since I was Daphne from Scooby Doo in 2002, and that was a much simpler costume. Maybe planning that far ahead is a once a decade thing? 😉 It doesn’t let me off the hook though…I need all the time I can get since I still have plenty else to do!

Until next time!

Posted in Halloween, Parties | Tagged , , , , , | Leave a comment

Halloween is in full swing!

Letter from WellsBe sure to stay tuned, since from now through Halloween, every Tuesday will be something new, with project status here, and including new episodes of Enhanced Eerie Elegance on the Eerie Elegance blog!

My party invitation was sent this weekend! I had no idea this is already my NINETEENTH annual Halloween party…wow! Someday I need to get 1994 & 1995 online, since my web presence only starts at 1996. Sure is funny to look back on those early days, especially compared to what I do now!

Of course you can tell by that letter that I have been planning this Halloween for quite awhile now. I had the first kernels of an idea standing in line at Disneyworld & the Wizarding World of Harry Potter back in March, and by April the kernel had grown to truly epic proportions, egged on again by the same friend who helped me with the Gate Ghost last year. I always enjoy Halloween, but having a collaborator who is also enthusiastic makes it so much more fun! However, the nature of the “epicness” requires most of my work to remain secret until my guests arrive at the party…but I will try to show you what I can without giving too much away!

All 8 Fabric Frame DesignsToday’s Tuesday announcement is that my new Fabric Frames are now available on Etsy! I had announced pre-orders on the Eerie Elegance blog and the Eerie Elegance Facebook page, but now my custom-printed fabric from Spoonflower.com has arrived, and it looks great! On my list for years has been how to disguise big-screen TVs for haunted houses & castle environments, but it kept getting squeezed off the list for time and lack of screen content anyway, so I put a giant spider over it & carried on. Last year I started looking for anything I could print myself on long spools, but no luck until my friend showed me Spoonflower.com. I had investigated printing fabric last in 2008, and it was quite expensive and required more yardage that I thought I might use. Spoonflower still isn’t cheap, but it’s more reasonable, and you can buy a single yard. I took photos of a bunch of frames at other Fabric Frame 7 - Pale Gold Curlshouses and my own, and I carved some of my own frame designs from foam for spookier themes, designed the fabric, then placed my order for the heaviest fabric they have. The fabric is still not as heavy as I’d prefer, but by folding the mitered corners instead of cutting them, the edges still should not flop. Fabric is so much better than all the cheap vinyl decorations, since vinyl shines in light, including flash photography, ruining your atmosphere.

Fabric Frames are $25 each plus shipping $5 US / $17 international. Each kit includes 4 sturdy fabric strips 4.5″x58″ long, instructions and double-sided tape as a compact & easily reusable solution to transform your flatpanel TV from a sleek & modern black hole into a fancy “carved” picture frame that belongs in a haunted house or castle! Check out the 8 designs in my Etsy shop or at the Eerie Elegance order page.

Tasty TombstonesThere are two other new products for this year! I already announced the Tasty Tombstones for sale on July 13th, and I’ve already sent out two orders, one for custom epitaphs! These premiered at my party last year, using photos of my custom-carved & painted foam gravestones, with epitaphs changed digitally into the “punny” thirteen names I’ve been using for years…and they still make me laugh! There’s still plenty of time to buy these printed frosting sheets to use on your own cookies for your Halloween party!

GateGhostCloseAlso, as of last week on the spooky 13th, I announced the Ghost In Chains video I used for the Gate Ghost last year is now for sale, only $5 for the silent digital download to use in your own haunt!

This ancient tattered Ghost In Chains is silently screaming and reaching toward the living as her aura brightens and fades, until her last attempt causes her to disappear. Show this 48-second clip as a silent loop for your personal haunt in isolated viewing locations like a high window or a corner where audio cannot be heard. Perfect for projectors, video screens, or even reflected Pepper’s Ghost illusions. You are welcome to add your own sounds after purchase for your personal use as long as it is not distributed. You can purchase the Ghost In Chains video on the Eerie Elegance order page!

Dragon Crest Stained GlassAlrighty then, back to projects! The first project was a new fabric stained glass panel for my pantry door. This is the new crest for Castle Brittahytta, and fabric markers and normal markers both work great on white lining fabric. I had tried using my free leftover canvas curtains for a Mardi Gras mask stained glass panel before, but that fabric was definitely too thick. The lining fabric is perfect! I will be making more of these for other holidays for sure, since they are fun to design and fairly quick to make! Just make sure you tape the fabric to cardboard so it doesn’t slip or wiggle and to soak up the ink that bleeds through the fabric.

Web Beading for the WebmistressSince I didn’t get the beads done on my Victorian Webmistress costume last Halloween, I decided while I had time I should finally get that done. I had though I would handstitch individual beads, but then when I found a nice iridescent aqua fabric paint, I decided that would be infinitely easier, especially for the dots to come closer together towards the center of each web. It looks like I imagined now, like morning dew on spiderwebs in a garden, and so much better than the plain black on black!

Planting Pumpkins mid-JulyI decided to try another pumpkin patch this year. I didn’t have luck at this house a few years ago, but I have a new location idea this time. I was keeping my eyes open all May & June for seedlings at my local stores, but I never saw any…odd! I had seedlings bought & in the ground by July 5th last time I tried. Luckily I had one pumpkin leftover from last Halloween, and it was only barely starting to rot, so I planted chunks of pumpkin flesh with seeds & First Pumpkin Blossoms Sep 9th 2012guts still attached into several pots so I can move them around and a couple spots in the ground. Since I had been waiting for seedlings to buy, I was later than I should have been to plant seeds in mid-July, but at last now I have had male blossoms for a week, so I should be seeing female blossoms pretty soon now too! I might get a few pumpkins growing, but the most important needs are blossoms this month, then plenty of vines by Halloween. I can always supplement my patch with fake pumpkins. 😉

Cutting TrianglesBack in June, I borrowed my parents’ van to buy my big building supplies for Halloween, but when I brought it back, I brought some pressboard sheets with me so we could cut them with my dad’s circular saw. Many Facebookers have tried to guess what these are for, but no one has been correct yet! You can keep guessing, but this is another surprise…sorry!

Cool Junk from ParentsIt won’t surprise anyone that there will be new steampunk props, especially after reading the invitation letter from Miss Wells, so I have been collecting junk since April too! My dad let me scavenge in his garage & greenhouse, so More Junk from the Electronics Flea MarketI had quite a cool Halloween Haul in June, not sure exactly what I’ll use yet, but full of possibilities. My partner in crime knew about a special electronics flea market that runs once a month early Saturday morning, so we’ve been twice and found cool stuff for cheap that should be very useful, several pressure valves, a few working Halloween Haul from Grandma's Basementelectrical meters, and even an old Frankenstein-style knife switch! Then my parents had already brought some stuff down from my grandma’s basement, but when I visted her in August, I filled my suitcase with a dismantled curvy brass chandelier and all sorts of cool brass bits! The lantern, iron scroll & washboard had to stay until my parents’ next RV trip, but quite an awesome Halloween Haul. Thank goodness they didn’t charge me extra for such a heavy load on my flight home!

Carving the Owl FrameSince you’ve already seen the Fabric Frames for sale, you probably guessed I made frames for my own party, so I think I can safely show you these without revealing any secrets. 😉 Storing a giant Painting the Carved Dragon Framefoam frame to fit my 60″ plasma TV would be a pain, hence the fabric idea, but for small wall frames, I had fun designing & carving on foam with my trusty woodburning tool. A basecoat of brown then a topcoat of cheaper gold paint, and they looked good enough to clean up in Photoshop to print onto fabric to sell to others!

Well, I have been busy with so many other things too, cutting & pounding sheet metal, carving in clay, gilding paint, and even more sewing, but I can’t show any of those…darn! Even though a lot has been finished already, I think I’m only about halfway through the giant project plan…yes, the epicness requires not just my notes list like previous years, but a huge shared project plan on Google Docs with over ten accompanying files! I really hope everyone will enjoy the party as much as my partner in crime and I have had planning it! 🙂

Until next Tuesday!

Posted in Halloween, Parties | Tagged , , , , | Leave a comment

Moon S’mores

ET doll overseeing his Moon S'moresI only got back late Thursday night from my vacation with my grandmother and it was already time for another Saturday Cinema Brittahytta! Any classic scifi series would be incomplete without ET the Extra-Terrestrial, and what would ET be without Reese’s Pieces and the iconic bike flying across the moon? …so I combined them as Reese’s Pieces Moon S’mores!

First I tackled the moon, well before my vacation! Since the actual movie shot in even gargantuan marshmallow scale would be too small to see the Moons printed on frosting sheets to fit on large marshmallows cut in halfbike, I found the Amblin logo online, measured to fit my big marshmallows, then printed it on frosting sheets. I cut the big marshmallows in half so each would have a fresh gooey surface for the frosting sheet to stick. After cutting the marshmallows distort while they dry out in open air, so store them in airtight bags or plastic until serving.

Round Graham CrackersI’m sure glad I like these vegan graham crackers, since I’ve been making them all summer! To go with the moon shape, I used my nesting circle cutters, choosing one slight larger than the marshmallow for the chocolate, then the next larger size for the graham crackers. This allowed everyone to see that the chocolate disc was covered in crushed Reese’s Pieces. 🙂

Pulverizing Reeses Pieces I thought that whole Reese’s Pieces would be too large, so I crushed them inside a zip bag using a rolling pin. I left larger chunks so they could be identified by color and candy coating. It only took half a large bag, and I had bought the candy on sale 2 for 1 before I knew exactly what my menu plans were, so now I have a lot of leftovers…a bit dangerous since I love them!

Melted chocolate spread into circles and covered in crushed Reeses PiecesI traced the smaller circle cutter on wax paper, spooned melted Hershey’s chips and spread them into discs. I had thought of stirring the candy bits into the melted chocolate, but then no one would be able to tell until they tasted, and might not be obvious they were Reese’s Pieces, so I decided on more of a candy bark effect. While the chocolate was still soft, I sprinkled the crushed candy over the top, making sure to have some visible around the edges to peek out from under the marshmallow moon.

ET MenuThere were enough homemade whole wheat sourdough pizza crusts leftover from Close Encounters that I got those out again with as many toppings as I had left. I also cut some pineapple and the rest of the Forbidden Planet watermelon into cubes and put them on skewers for the grill to be different. I have a bumper crop of grapes this year, so I had a big bowl I picked to serve. Everything was ready by 7:30 with no guests yet, so I had plenty of time to take photos.

Dinner & a movie (well trailers first - this was Hotel Transylvania)Sheila arrived first, then Jerry & Troy for their first-ever movie night! The fruit skewers were ok but still got soggy before any good grill marks, so maybe watermelon slices are still the way to go. We enjoyed grilling our pizzas, Jerry & Troy liked my homebrew blueberry hard cider, then Jeff & Audene showed up with Julianna right as we started the movie, but they had to leave a few minutes in because of a phone call. Darn! The four of us enjoyed the movie – it remains a great one! – and stupid me forgot about needing tissue, so I had to resort to using my greasy pizza napkin…heh! Glad my makeup stayed on ok! 😉 We finished our s’mores after the movie, and the extra crunch & flavor from the candy was very tasty!

Jerry's S'more Roasting a Moon Britta's S'more (Post Movie Crying)

Full photo gallery below…and there’s only one movie left for this summer so stay tuned!

(more…)

Posted in Cinema Brittahytta, Edible Art, Parties | Tagged , , , , , | Leave a comment

Close Encounters of the Party Kind

Close Encounters MenuThis week for Cinema Brittahytta, 11 of us enjoyed Close Encounters with Flying Saucer Pizzas, a Devil’s Tower Potato Salad, Alien S’mores with homemade Musical Marshmallows by Lyle & Galt, and the Brownie Briquettes served in the tabletop grill made a command performance again! A few people saw a couple Perseid meteors during the movie, but I missed them all…darn!

Devil's Tower Potato SaladI have never seen Close Encounters before, but I knew there was a scene where mashed potatoes were shaped into the distinctive lava plug mountain Devil’s Tower. I didn’t think mashed potatoes were summer BBQ fare, but I thought my grandma’s recipe for potato salad molded into shape would be hilarious. Seeing that everyone laughed, I think it succeeded!

Alien Face Graham CrackersEven with my crazy schedule that week with the giant cake, a face painting gig, and 4 special events to attend, I was able to make some Alien S’mores, cutting the same vegan graham cracker recipe I’ve been using all summer into shape with an egg-shaped cookie cutter, and poking the nose & Alien Chocolate Eyesmouth detail directly into the dough. I traced the same cookie cutter onto wax paper and spread melted chocolate as matching oval shapes, then used the rest of the melted chocolate to pipe the large almond-shaped eyes onto the faces.

Alien S'mores with Musical MarshmallowsLucky for me that Lyle & Galt offered to make homemade marshmallows for the s’mores, and they brought them as Musical Marshmallows in the light grid from the final first contact scene…fantastic, clever AND extremely tasty!
Grilled Watermelon & Grilled PeachesLyle has become my master griller lately! I started grilling the watermelon because I need the practice (the slices need to be nice & thick, then about 2-3 minutes per side to get nice grill marks with carmelization & smoky flavor), but he helped finish them for me, and put the white peaches on to grill…both were very tasty! Thanks Lyle! 🙂

Flying Saucer Pizzas on the GrillThe personal grilled pizzas were such a hit for Forbidden Planet that I brought them back as Flying Saucer Pizzas! I served some of the same ingredients as last time, some others brought some fun toppings too, and this time we had plenty of crusts, thank goodness. Everyone’s looked so tasty I wished I could eat them all! 🙂

Brownie Briquettes AgainSince Tracia & Kian had made a special trip from Davis to stay overnight & attend movie night, by special request I reprised the Brownie Briquettes again. This time I used royal icing instead of marshmallow creme, so the orange sugar didn’t soak in as badly, but the powdered sugar always soaked in, so Glen Eating a Brownie BriquetteI had learned my lesson & only decorated them the hour before other guests arrived. They looked great in the foil-lined little grill again, and they were a hit with all the people who had missed them before, as well as those like Glen who enjoyed them the first time around! 😉

Everyone was enjoying making pizzas so much that not many were able to make s’mores before we started the movie, so we continued making them after the movie was over. I got some fun photos of the gooey alien s’mores…hooray!

Master Griller Lyle grilling watermelon & peaches - yum! Kian & Lori Grilling Pizzas Galt & Lyle Roasting Marshmallows Movie time! After-movie s'mores Gooey Goodness Gooey Glen Britta's Alien S'more

As always, you can click to see the entire photo gallery, plus read my grandmother’s potato salad recipe I used for Devil’s Tower…enjoy!

(more…)

Posted in Cinema Brittahytta, Cupcakes, Edible Art, Parties, Recipes | Tagged , , , , , , , | 1 Comment

Monster Munchies & Door S’mores

One of my own MonstersThis past Saturday night 23 of us enjoyed Monsters Inc with Door S’mores & Make Your Own Monster Munchies cupcakes! It is still one of my favorite Pixar movies, and now we’re all caught up for the new Monsters University movie next summer. Afterwards little Boo-age Emma was running around telling everyone “BOO!” & squealing with giggles…I guess we created another monster! 🙂

Door rectangles sized for HersheysYou already know I’ve been on a custom s’mores kick this summer, so of course for Monsters Inc I had to make Door S’mores! Using the same vegan graham cracker recipe, I used my pastry wheel to cut rectangles that were the proper size around 3 blocks of traditional Hershey milk chocolate bars, then I scored the panel patterns into each door and added a little dough Door S'more ready for toasted marshmallowball doorknob. The bottom crackers were cut to match but no decoration added. Some doors opened right and some opened left just for variety, and I was able to squeeze out 21 sets out of the double-batch of dough.

I had thought of making monster cupcakes when I chose the movie, but how exactly? I decided I had enough vivid cupcake papers & matching sugar colors, that I would make red velvet cupcakes but also blue, green & purple velvet to match, plus cream cheese frosting even though it can be problematic in summertime. So many kids & adults have liked the decorate your own idea lately, I decided I could make assorted monster bits and we Monster Bitscould all play like Mr Potato Head to assemble our own Make Your Own Monster Munchies.

Since my birthday was the day before, I wanted an easier day than marathon baking, so the only party prep I did was to have great fun piping royal icing googly eyeballs, and sculpting tentacles, teeth, horns, antennae & arms out of fondant scraps. It took too long to mix colors since so many scraps were too old & dry, so I had to get to my birthday dinner before making anything red, purple or green. I think my favorites are the little hands and the suckers on the tentacles. 🙂

Tapping the Royal Icing Eyeballs into ShapeThe larger eyeballs looked better using the flat side, but the smaller ones had decent shape once I let the royal icing set just enough so it wasn’t sticky anymore, then tapped down the piping point into a round eyeball shape. After they were dry I used a black food coloring pen for the pupils.

Blue, Green, Red & Purple Velvet CupcakesMy buttercream recipe is more reliable for decorating especially in summer, but I know everyone loves cream cheese frosting with red velvet even though it doesn’t last well in California heat. Cake goes stale more quickly when refrigerated, but frosted cupcakes would need to stay in the fridge if made in advance, so I made the frosting several days ahead, but I didn’t bake & frost the cupcakes until Saturday right before Layered Rainbow Velvet Cupcakesserving. From reading the recipe (see the end of this post for the full recipe), I wasn’t sure if one batch would make a full 3 dozen, so I made two batches, each separated into two colors. I probably could have made one batch & separated into four colors, since I had a lot more leftover than I expected!

Since this batter was plenty thick to spread vs. pour (probably because I’m used to oil vs. butter in my cake recipes and this was real butter AND yogurt), I tried some rainbow cupcakes with the leftovers. It was already a very thin layer of batter for 4 colors in each cupcake, so I Rainbow Velvet Cupcake Showing its True Colorsdoubt you’d ever be able to get more colors into cupcakes very well. It did take longer than my disher for sure, since you must carefully spread only the top of the layer to the edges without disturbing the layer underneath. If I had thought of using piping bags for the batter, that might have been easier. Not only did they work, but since I used thin white papers, the color soaked through in a lovely rainbow!

Frosting & Fuzz I had planned on the same easy fuzzy fur technique as the Elmo cupcakes several years ago, but that was with my reliable buttercream. This cream cheese frosting was too solid for piping or spreading right out of the fridge, and there was a very small window at the right temperature before it started melting. I figured out how to work fast enough to pipe one only inside the edges, immediately dip in the matching color sugar, gently smush so the frosting would spread to MJ & Benjamin Making Monstersthe edges and be completely covered. If any frosting was hanging over the paper edges at all, it started dripping pretty quickly, so I gave up on any dome frosting shape. I really like the fuzzy frosting fur matching the cupcakes & the liners!

Of course I had to make a couple example monsters of my own, and by then Louie, MJ & Benjamin had arrived, so MJ & Benjamin made some monsters with me! By then more people were arriving, so Marco & Ben helped grill the watermelon as I got more food out from the Spa-Yeti a la Diablo by Eileenfridge like the cheese tray & fruit salad. Eileen is definitely a theme party kindred spirit…she brought spicy pasta as “Spa-Yeti a la Diablo – Be Careful…It’s Abominable!” complete with a sign of the Yeti serving his lemon snow cones!

I was missing the s’mores firepit action since was frantically trying to make some red tentacles & arms to add to the monster bits, so Louie nicely offered to take photos for me! Not as many s’mores photos this time, but a pretty good messy one of Benjamin…now he thinks we get s’mores every time they come to my house! 🙂

My blue Monster Munchie with the only Mike cocktail Make Your Own Monster Munchies Benjamin's Door S'more Firepit Fun

Even after years of party hosting I still can’t ever get the food quantities exactly right! This time I had TONS of leftover cupcakes, but not enough Door S’mores. I would rather people come last-minute & have fun even if they can’t RSVP, but that often means I don’t have the right quantities of food. It seems like the easy potluck idea for Cinema Brittahytta has lost its charm this year after working so well for several years, so I need menu ideas that aren’t too unhealthy for me to eat lots of leftovers when we don’t end up with a large group. If you have easy, healthy and YUMMY summer BBQ recipe ideas for a crowd, let me know!

As always, you can click to see the entire photo gallery, plus read the Rainbow Velvet Cupcake recipe…enjoy!

(more…)

Posted in Cinema Brittahytta, Cupcakes, Edible Art, Outdoors, Parties, Recipes | Tagged , , , , , , , , , | Leave a comment

Personal Planet Pizzas & Flying Saucer S’mores

Flying Saucer S'moresAfter busting out the Bright Butterflies birthday cake in record time, I ran home to get set up for Forbidden Planet movie night. I had planned for double food quantity vs RSVPs, but little did I know that wouldn’t quite be enough for the largest audience yet this summer, 18 total including the butterfly birthday boy! Everyone enjoyed the Personal Planet Pizzas and the Flying Saucer S’mores, and Forbidden Planet is definitely classic sci-fi worth watching!

The Flying Saucer S’mores were the same vegan graham cracker recipe I used for War of the S’mores, Vegan Graham Crackers Againbut I rolled them thicker this time, and cut simple circles for the main discs and the small bridge domes. I think they were too much cracker vs s’more but others liked them since they like thicker cookies. I think for the next special s’mores I’ll try a thickness between them in hopes of a happy medium.

Chocolate CirclesI had used 60% Ghirardelli chocolate before since I wanted the eyestalks to be as stable as possible. I love Ghirardelli and there are so many fantastic gourmet chocolates these days, however I think the classic s’more flavor is Hershey’s milk chocolate. When bags of Hershey’s milk chocolate chips were on sale, that sealed the deal! I traced the larger circle cutter onto the back of waxed paper, melted the chips in the microwave, then either a piping bag or just careful spooning and spreading gave decent chocolate circles.

Adding the domes to the Flying Saucer S'moresYou need to melt the chocolate completely, but it will need to cool a little before it is stable enough to stay in one place. When it doesn’t leave strings or drips everywhere, use a piping bag with coupler only or large round tip to pipe a tower of chocolate in the center of each large disc, then gently set the small circle on top. Hopefully this won’t squish out all your chocolate and you end up with the flying saucer dome shape like these.

I tried cutting a big marshmallow to be a white disc between large disc layers but that made them look more like hats than flying saucers. So I left them stacked in saucer sets with the chocolate circle between and let the roasted marshmallows be added later. Yum!

Whole Wheat Sourdough Pizza CrustsEarlier in the week I had made all the crusts for the Personal Planet Pizzas from whole wheat sourdough peasant bread (recipe included at the end of this post – hey it’s vegan too!). I made two batches in my bread machine, one batch each evening so the sourdough could feed again overnight. Each batch made 9 rounds about 6.5″ in diameter, and 3 fit on my silicone baking mat. I only baked them 2 minutes each side at 350F just so they would set enough not to fall through the grill. When they were fully cooled I froze them with wax paper between them. They were thawed on party day in just a couple hours at room temperature and ready for toppings.

Personal Planet Pizza ToppingsI bought a LOT of toppings to try and cater to the healthy and the hedonistic! For sauces we had pesto, Alfredo sauce and organic marinara, then grated mozzarella, a 3-cheese combo, crumbled fat-free feta, crumbled Gorgonzola, crumbled goat cheese, fresh basil, baby spinach, sliced red onions, sliced white and baby bella mushrooms, sliced olives, sun-dried tomatoes, artichoke hearts, fresh sweet peppers, roasted peppers, roasted garlic, sliced ham, pepperoni, grilled chicken, Italian sausage. Whew! I almost ran out of aqua dishes…almost! 😉

Grilled Watermelon, Grilled Pineapple, Fruit Salad and Forbidden PlanetLyle and Galt arrived first, so Lyle helped grill the watermelon and pineapple before pizzas went on. I knew grilled pineapple was tasty but OMG grilled watermelon is soooo good! I’m not a huge fan of plain watermelon, but after grilling it was smoky and carmelized, and even the juice leftover on the plate was to die for! Perfect that I already had a watermelon to cut so I could leave Lyle’s special Forbidden Planet watermelon intact for everyone to see! 🙂

Galt's Yummy Personal Planet PizzaWith a quick spray of olive oil, we put the plain pizza crusts top down on the grill for crunch, then people were allowed to load up their toppings and get back to the grill. I think about 6 pizzas fit at the same time which isn’t bad. Everyone ate them so fast I only got a photo of one person caught in the act! I almost didn’t get one myself since by the time I was ready to eat there were only 2 crusts left! They were very tasty. Everyone raved about the crusts and most assumed I bought them somewhere. I think these were popular enough to reprise for another movie, especially since I have toppings leftover that will last a while!

The light was already fading when we started the s’mores fire in the firepit, and I think my entire collection of telescoping roasting sticks got used…awesome! Again, the gargantuan marshmallows were a bit too much for the Flying Saucer S’mores I made, but it made for some fun photos…haha!

Elias' S'more Roasting Marshmallows Forbidden Planet with Firepit Britta's S'more (used a smaller marshmallow)

Forboding Flying Saucer S'mores with Roasting Stick Lurking Behind Lyle's S'more Galt's S'more Pizzas on the Grill

No Rock Band this week since everyone was busing making pizzas and s’mores…but a good time was had by all! As always, you can click to see the entire photo gallery, plus read the full whole wheat sourdough pizza crust recipe…enjoy!

(more…)

Posted in Cinema Brittahytta, Edible Art, Outdoors, Parties, Recipes | Tagged , , , , , , , , , , , , | 1 Comment

War of the S’mores!

War of the S'mores!It was looking like a very small group for War of the Worlds movie night, but a surprise visit from my college buddy Dave & his family doubled the attendance! When it was just them & me before others arrived, little Jackson asked, “Is this a party?” and I replied, “Yes, now that you’re here!” 🙂 All 8 of us had a blast with the War of the S’mores homemade graham cracker flying saucers with chocolate eyestalks, and the adults enjoyed the Martian Heat Ray cocktails I created!
Martian Heat Ray in Glowing Red GlassI had never seen War of the Worlds & wanted to wait to see it for the first time on my big screen, so it was a little trickier to come up with special recipes. I knew the specific flying saucer with “eyestalks” that shot heat rays, so I ran with those ideas. For the Martian Heat Ray cocktail, I had a couple bottles of blood orange soda, and even though cinnamon schnapps would be most obvious, I don’t have any in my bar, so I decided spiced rum and ginger liqueur could be tasty “heat.” First try in my tiny tasting glass was excellent! It’s still spicy & tasty if you make it with ginger ale & blood orange soda without the rum for the no-alcohol crowd. Of course we had to drink these in glowing red martini glasses! 🙂

Summer grilling is s’more season and I think custom s’mores are fun to make. I have made custom chocolates and custom marshmallows before, like for Star Trek II: The Wrath of Khan, but I wanted the shapes to be specifically the classic War of the Worlds “eyestalk” flying saucers, so this time I also made my own graham crackers!

Homemade Vegan Graham CrackerI had not seen this film before, so I was going by screenshots only for the design. I made my own kidney-shaped cookie cutter the size I thought was good for s’mores without being too pointy. I found a vegan recipe that looked good using only whole wheat flour & molasses, not special graham flour, so I tried it. I think I rolled these a little too thin, but they were nice and crispy and they held up perfectly for s’mores. (See the end of this post for the full recipe.)

Attaching piped chocolate eyes to stalksSince the cookie dough was crumbly & too fragile for thin stalks to hold together, I made the “eyestalks” by piping melted chocolate onto wax paper with the eyes separate from the stalks. Once they were firmly set, I gently pulled the stalks off the wax paper and glued them to the back of the eyes that were still on the wax paper, helping support the stalk with a little more piped chocolate at the other end, and very very carefully putting them Bracing Eyestalks for Chillingback in the fridge to set. Once those were all set, I piped more chocolate to glue the stalks onto the top of the top crackers, but they needed more support while chilling, so they were circling spare plasticware until they set.

Menacing Eye from White Chocolate & Orange SugarAfter the stalks were solidly in place, I quickly added an eye of melted white chocolate immediately dipped in orange sugar for the heat ray. Don’t wait to pipe several eyes at once, since the white chocolate sets too quickly for the orange sugar to stick!

I left the bottom crackers plain, ready for freshly-roasted marshmallows to melt on chocolate, but of course I piped out chocolate wafers to match the saucer shapes too! I Cute Martian War Machines!traced the cookie cutter onto the back of wax paper, then piped on the other side so I could aim properly. My fridge was full of cookie sheets with chocolate setting in various shapes! 😉

I admit that’s a lot of rounds of chocolate work just for s’mores, but everyone loved the “cute” design. I joked that some production designer from the 50s must be rolling in his grave at his Martian War Machines being called “cute!”

As for the evening itself, Dave & family were early, which meant too light for any Rock Band to proceed outside, so there was a lot of both boys running & jumping into the bean bags on the grass while his parents & I caught up since I last saw them a whole year ago. I got out the drum set so the boys could bang on it, and I told Jackson we couldn’t actually play the game until there was no sun on the screen anymore…so he was paying Police Rock Band with Dave!attention! He also kept stalking Onyx and was really trying to get a glimpse of the elusive Ebony. He finally got a good look at her when I fed the kitties when no one else was inside, then I brought Jackson back and stood whispering with him peering from the doorway. 🙂

Glen, Shelia & Ruth arrived, then when it was finally just dark enough, we started Rock Band, and after a couple random songs as I kept checking my salmon on the grill, I heard Poor marshmallow incinerated by a Martian Heat RayThe Police start playing…aaah! Dave’s college band played Message in a Bottle dedicated to me at one of their early gigs, and Dave & Wendy went with me to the Police reunion concert a couple years ago, so that was totally awesome to play Police Rock Band with Dave…woohoo!

The boys are too young for staying up for an after-dark movie plus the long ride home to Oakland, but I insisted we all must have the War of the S’mores before they left! We used my firepit for the first time in over a year so the boys could see their marshmallows roasting. The gargantuan marshmallows were a little too large for my flying saucer crackers, but the ooey gooey mess was loved by all! We even had a roasting stick duel with proper fencing technique between Glen & Ruth. Of course I made everyone pose with their s’mores, and I cracked up at the results…hahahaha!

Britta's s'more Jackson's s'more with Daddy Dave Wendy's s'more Sheila, Glen & Ruth's s'mores!

As always, you can click to see the entire photo gallery, plus read the full homemade graham cracker recipe…enjoy!

(more…)

Posted in Cinema Brittahytta, Edible Art, Outdoors, Parties, Recipes | Tagged , , , , , , , , | Leave a comment

The Circle of Life

Lion King FoodThe second summer Cinema Brittahytta movie was The Lion King, perfect for 9 of us of all ages, even the little ones! I showed off my own family tiki carved by my grandfather in its happy new home in my garden, and my fun menu included Bugs & Grubs, Iced Tea-Keas, Luscious Little Lions, and Tribal S’mores with gargantuan marshmallows that were a huge hit! 🙂

After a sweltering 100F(!) day, the backyard was lovely in the evening shade. We enjoyed grilling & chatting until it was dark enough to play some Beatles Rock Band, then it was time for the main feature. Little Ellie’s interpretive dance to the opening Circle of Life was Lion King Decor & Foodadorable, but it was extra fun that Jeff could come with his wife & little daughter, since it was Jeff & me who saw the first Lion King trailer together in late 1993 and said “We HAVE to see that movie!” It was one of my first promos working at the movie theatre, so for patio decor I had the official poster one-sheet, numbered on the reverse side, Scar & the hyena trio from the standee, some static cling leaves from the original Disney theatre decor kit, and I wore my well-loved & now-faded moonlight shirt for the occasion.

Decorating Bugs & GrubsTrader Joe’s sells a bunch of chocolate-covered dried fruits, including some that are brightly-colored, so I decided that could be a very easy way to make Bugs & Grubs! I used my black food Bugs & Grubs with Fernscoloring pen to draw some legs & eyes on the brightest ones, mixed them with the dark chocolate ones in a clear bowl lined with organic fern clippings from my yard, and voila…”tastes like chocolate!” 🙂

Iced Tea-KeasI am taking poetic license for Lion King “tribal” to include tikis even though they are not African, mainly because I found the tiki ice cube trays at the dollar store that were too perfect with the reveal of my own garden tiki that Iced Tea-Keasmy grandfather carved. I hope we can call them awesome “tribal carvings” and keep having fun. 🙂 The Iced Tea-Keas were tasty but harder to see, since the iced tea didn’t really show the detail of the fun molds, but it was nice to have a flavorful unsweetened tea option.

After the Iced Tea-Keas were all frozen in several batches and the molds washed & dried thoroughly, I outlined just the detail with white chocolate candy melts, let them set in the Making Chocolate Masks for Tribal S'Moresfreezer while I melted milk chocolate & 60% Ghirardelli chips together, the poured the brown chocolate over the white detail. After they set up solid in the fridge, I used my food coloring pens to add some colors to them. I’m still not sure if it Coloring Chocolate Maskswas the chocolate getting too warm or it gumming up my pens that made the color stop transferring to the candies, so about half stayed the white accents only.

Tribal S'more nicely toasted over the coalsI had found gargantuan marshmallows recently, so huge that I can toast the outside three times and still have almost a whole normal marshmallow left, so I used those with normal graham crackers with the tiki masks as the chocolate, ready for melting. Not only did we have many rounds of successful s’mores, but even plain marshmallows were roasted!

Little Girl, Big Grill! The tiki oversees Ellie's destruction of her Tribal S'more Nathania enjoying the gooeyness! Die-hard marshmallow roasting over dying coals

Luscious Little LionsLast but not least were the Luscious Little Lions…so cute! These are the same vegan maple cornbread muffins with coconut manes I made as Cowardly Cornbread for my Wizard of Oz birthday two summers ago. Since I was trying to keep that party as vegan as possible, I had found this recipe and it worked well enough to try again with plain water instead of soymilk. I didn’t bother with the whole corn this time, and I doubled this recipe for about 30 since my mini muffin silicone pan is taller than standard size.

Luscious Little Lions (aka Cowardly Cornbread)

1 cup plain soymilk or water
1/4 cup non-hydrogenated vegan margarine, melted
2 Tbsp. maple syrup
2 tsp. apple cider vinegar
1 cup stone-ground cornmeal
1 cup all-purpose flour
1/4 cup sugar
1 Tbsp. baking powder
1/4 tsp. salt
1 cup frozen corn (optional)
1 cup shredded coconut flakes

Preheat oven to 375 degrees F. Use a silicone mini muffin pan and spray with non-stick cooking spray, or line 12-cup muffin pan with paper liners. Whisk together soymilk (or water), melted margarine, maple syrup, and vinegar in bowl. Whisk together cornmeal, flour, sugar, baking powder, and salt in separate bowl. Stir wet mixture into dry mixture. Coconut added to cornbread batterFold in corn kernels for large muffins, optional for mini muffins.

Spoon or scoop the thick batter into prepared muffin pans about 2/3rds full. Sprinkle shredded coconut around edges of each muffin. Lightly tap the coconut flakes into the batter so it will stick during baking. If any stray coconut is in the middle, tuck down into the batter or scoot aside.

Bake mini muffins 15 minutes at 375F. Since the coconut is touching the moist batter, it won’t toast as quickly. Coconut should be lightly toasted brown the same time the muffins are done.

If making full-size muffins, bake 20 minutes, or until toothpick inserted into muffins out clean. The longer cooking time might burn the coconut before the muffins are done. Cool 10 minutes in pan then unmold. If you keep these enclosed under a glass dome or inside a cookie tin or plasticware, the crispy coconut will start to sag from the moisture in the cornbread, so best to bake these only a couple hours before serving if you can.

Finally I will leave you with my garden tiki watching over my waterfall. I am very proud to have one of my grandfather’s carvings in my own yard! 🙂

My own garden tiki, carved by my grandfather!

As always, you can click to see the entire photo gallery…enjoy!
(more…)

Posted in Cinema Brittahytta, Cupcakes, Edible Art, Outdoors, Parties, Recipes | Tagged , , , , , , , | Leave a comment

Marauders Map Comparison

Last but not least in my series of Wizarding World comparisons is the infamous Marauders Map!

Please be aware that no official version was available for sale when I drew my Marauders Map. My resources were a cool animated screensaver showing the movie map unfolding and zooming in different views, the screenshots from the 3rd DVD including the closing credits, and the DVD insert paper that showed only the cover of the map. I also drew mine before the Half-Blood Prince book came out, so I didn’t know the Room of Requirement wasn’t supposed to appear. I didn’t have any hands-on experience with the official version until I bought mine in Florida at the Wizarding World of Harry Potter theme park…and I was shocked how large it is! No wonder some of my Etsy feedback has been “a perfect size for little hands.” I think the official one is actually larger than the movie version compared to Harry’s hands, but that’s up to the Warner Brothers product team. 😉


The full story of how I drew my Marauders Map, what inside jokes are included, and my self-imposed size restrictions are located on my main Marauders Map page, but the short version is that I created this to include in my Year 6 at Hogwarts party invitation which was only a quarter-sheet to save paper. That meant my folded map had to fit inside the envelope, and because I was making EIGHTY of them, cutting & folding each one from a single letter sheet from my small home printer was already more than enough work!

Those size restrictions explain why my map is not only much smaller, but also shorter in comparison to width than the official version. I also could not include as many layers of folding since I only had a single letter sheet of paper to start with and didn’t want my final folded map too small inside the invitation envelope. I thought the Hogwarts “title page” that unfolded to reveal the castle interior was a good element to include, then mine reveals the castle floor plan as well as the grounds. Their heavyweight paper does feel like it should last awhile, compared to my letterweight off-the-shelf parchment paper, and their extra unfolding layers seem attached well. I would have LOVED to include as many layers as theirs, but I knew it would be biting off more than I could chew for the quantities I needed to make!

When I opened my official version, I was impressed at the amount of fine detail, and I immediately looked for footprints, but there weren’t any at all! I double-checked that I tapped my wand & recited the “solemnly swear” line correctly, but still no luck. I expect this is because they used the original background movie art for their official map and the footprints & banners were all added digitally later so they could float around easily, but that was really disappointing to me, especially for $50. On my map you can see I show several people, house-elves, Mrs. Norris and even other magical entities!

Official CloseupMy Map Closeup

Now that you have seen them side by side, you can buy the official Marauders Map on eBay or at the theme park, you can buy my much cheaper & smaller handfolded parchment version on Etsy, or you can download my PDF with step-by-step instructions and enjoy the challenge of making your own! All I ask is you abide by my terms & conditions listed below…and have fun! 🙂

Original Artwork © Britta Blvd. For non-commercial use only. Sale or distribution is prohibited without express authorization. You may print as many copies as you like for personal parties or events, craft projects and gifts, but you are not allowed to sell the finished items as your own work. Please respect the hard work that created these for your enjoyment!

Posted in Parties, Wizards | Tagged , , , , , | 2 Comments

Bertie Botts Comparison

Continuing my comparisons of my wizard party papercraft to my recent Wizarding World of Harry Potter theme park purchases, here we have Bertie Botts Every Flavor Beans!

Jelly Belly had started selling Bertie Botts flavors by the time of my first party in 2002, however the boxes were not like the movies at all, so I drove to Fairfield to the Jelly Belly factory since that was the only place you could buy them in bulk. The beans were also very expensive, so I mixed them with normal-flavored Jelly Bellies to stretch out my supply. My movie prop replica box design wasn’t quite ready by that first party, but by the Year Five party in 2003, I had Bertie Botts boxes along with my first Chocolate Frog boxes!

Not only did Scabbers enjoy scarfing inside the box on the train in the first movie, but there was a nice still image in the DVD extras that helped me immensely. It only showed two sides so I duplicated them for the other two sides. Once I figured out the paper folding design so I could have a box floor above the level of the pointy feet, I drew everything by hand on paper, then scanned & cleaned up the graphics on my computer. The vertical red stripes were added in Photoshop along with the other colors and the text inside the banners. This version has appeared at all my Potter parties since 2003, and it is the same one currently for sale on Etsy.

Bertie Botts Boxes Comparison

Along the left side you can see the actual movie props, my papercraft in the middle, then the theme park version on the right. Since we never saw the top, I took the liberty of designing a star flag petal closure that also allowed the tassel to hang properly. You can tell that there is a clear window on the movie box itself when Scabbers is inside it, so I had taped scraps of clear plastic inside the windows of my boxes to hold the beans inside. The theme park version on the right has a cellophane bag of beans inside instead of clear windows attached to the box. Clever solution but not movie-accurate. 😉 I like the thinner red stripes like the movie, and I understand they would be much more difficult to mass-produce and transport, but I wish they could have included the pointy feet and the red tassel on the theme park version.

Of course I had to try an edible rice paper version too! Sorry I didn’t have extra beans around to put inside my boxes, but I doubt the rice paper would hold them since it is very fragile. Gum paste with frosting sheets would work for sure, but gum paste doesn’t taste very good. However, I’ll bet I could easily make sugar cookie boxes assembled with royal icing that could hold beans just fine! 🙂

Theme Park, Papercraft & Rice Paper Bertie Botts

Posted in Parties, Wizards | Tagged , , , , , , | Leave a comment

Chocolate Frogs Comparison

I recently visited the Wizarding World of Harry Potter theme park in Orlando, and of course I absolutely had to buy candy at Honeydukes to bring home, especially to compare to the movie prop replicas I designed for my own parties way back when!

If they had sold “official” Chocolate Frogs that looked like the movie version when I was hosting my parties, I definitely would have bought them. Sadly they were not available so I used screen shots from the DVD of the first movie and designed my own. My first versions were a little larger than the current version on sale in my Etsy shop that goes with the custom frosting sheets for edible card cookies, but since I wanted the inside of the lid to match colors, I shrank it a little to be able to fit on a single letter sheet in my printer. I refined the design over my several years of parties to have easier instructions and less paper cost, but they are still a challenging papercraft project because of the pentagonal peaked box and the nesting lid and base. Many of my Etsy buyers agree that the effort is worth it! 🙂

Chocolate Frogs Comparison

As you can see the official theme park version is quite different from the movie prop version. We only saw closeups of the Chocolate Frogs in the very first movie, so these are 11-year-old Harry’s hands, but it’s still not as huge as the theme park box! The movie version has a lid that nests over the base edge, plus a lip around the Chocolate Frogs Comparisonbottom of the base, which is how I designed mine. The theme park version has no bottom lip, the sides are taller so they stretched the quatrefoil design, and the lid is attached to the base with scallops that tuck into the sides of the base. The chocolate frog itself is solid and HUGE! The card fits perfectly inside the box & looks very close to the movie version, but Godric just boringly stands there looking straight ahead, so I think the lenticular movement is wasted.

On the lid, I think it was a very odd choice to place the fold overlap right in the middle of the word Frog. I worked hard on getting that to not conflict with the lettering in my design. I think that looks really goofy with the cockeyed F separate from “rog”! Of course they have the technology to be fancy with actual metallic gold Papercraft, theme park and edible Chocolate Frog boxeslettering. I would love to add real gold foil to mine, but I did add a texture pattern in the gold color to help look metallic.

Since I had already played with baking Chocolate Frog Card cookies that fit inside the papercraft boxes, I decided to try printing the boxes on edible rice paper. Assembling them was tricky since the rice paper needs gentle scoring to fold instead of tear, so patience is required. They are very fragile so I don’t think they would support a cookie card very well, but they worked! Just a tiny dab of water with a small brush and a squeeze where I would use double-sided tape glued the rice paper together. Too much water dissolves the rice paper completely of course. I am still impressed at the resolution I can get on the rice paper and frosting sheets…you can even read the text on the back of the rice paper card! 🙂

Rice Paper Chocolate Frog Card

Posted in Edible Art, Parties, Wizards | Tagged , , , , , , | Leave a comment

Mardi Gras 2012

Another Mardi Gras Masquerade is over, this year with 27 people including 6 kids letting the good times roll! This makes 10 Mardi Gras parties over more than a decade, so I’ll be taking a break for awhile in hopes the costume enthusiasm among my friends might return. I started hosting Mardi Gras because so many people couldn’t come to Halloween and loved the chance to wear costumes, however the past few years of Mardi Gras, only the Barbieri clan has consistently come in festive attire. I love that they are still showing their creativity, but that doesn’t make for much of a contest! 😉
Emma the Fairy enjoys eating her matching Dainty Doubloon cookie
The new Dainty Doubloon cookies were a hit, only 5 left out of 5 dozen, so I’m glad everyone enjoyed them, including Emma the lavender fairy!

And the winners are…

Best Mask – Laura’s gorgeous teal peacock mask (and I didn’t even vote!)
Most Original Mask – Elisabeth’s Makeup Mask
Best Costume – Peter Pan Barbieri Clan (+ guests)
Most Original Costume – MJ’s Gold Lamé Medusa
Best Edible Mask – Sheila’s elaborate icing got the most votes
Who Got the Baby? MJ did, and from Ashlyn’s homemade King Cake this year!

Laura won Best Mask! Peter Pan Barbieri Clan (+ guests) MJ Medusa won Most Original Costume! Sheila won Best Edible Mask!

Edible Prize RibbonsAll the winners received an edible prize ribbon! These were one of the surprises, and everyone did enjoy them. Now the winners don’t have to worry about goofy prizes they don’t want cluttering their houses, since after they’re done showing off their prize, they can enjoy eating it! The medal in the center was a sugar cookie with a printed frosting sheet saying which category and the year & location of the party, then I used marshmallow fondant for the ruffles and the ribbons. They dried well since they had several days safely in the pantry on parchment paper and cooling racks for air to get underneath as well, but the ribbons were still fragile enough they started Kian's Feathered Maskbreaking off as I arranged them on the serving plate, so the ribbons would need to be thicker next time. I have another idea to make hanging cookie medals using real ribbons, so watch for a Rice Paper Feathers, Music and Brocadesnon-Mardi Gras example of those coming soon.

The other surprise was that I printed a whole assortment of real feathers from game birds to ostrich plumes on rice paper to decorate the edible masks! When I was cutting them out for my own masks, I noticed even though the weather hasn’t been moist this week, the feathers would curl, so I left them as whole papers for the decorating table. I also printed various brocade patterns in Mardi Gras colors and sheet music to use as overlays on the masks. Thankfully there were enough crafty people this year to enjoy this! I think Kian used the most Audene's Lovely Edible Maskfeathers on his mask! Audene & Jeff were only able to “stop by” with baby Julianna on their way home, but Audene really wanted to decorate a mask & couldn’t resist the brocades! If she had been there early enough for the voting, she might have given Sheila a Festive Fancy Jolly Jester with Edible Mask and Hurricanerun for her money!

My costume was a Festive Fancy Jolly Jester, an idea I have had for many years now but not sure how to execute. I used the brocade corset I made for the Mardi Gras Fairy costume in 2009, added matching bloomers, gold gloves, curly pointed slippers, teal & purple points at neck, wrists, knees & ankles, all with gold jingle bells, matching brocade stick mask with jester points, and a matching hat! I was shedding jingle bells all night, but since I made the slippers to go over my fleece clogs, they were the most comfy costume shoes I’ve ever worn. 😉

I’m glad everyone who attended enjoyed themselves! Keep reading for more details and the full photo gallery!
(more…)

Posted in Mardi Gras, Parties | Tagged , , | Leave a comment

Mardi Gras Masquerade this weekend!

Mardi Gras 2012 Living Room so farThis will be the last update before the party on Saturday! I feel a bit behind schedule since I was hoping to be farther along with my edible mask decorating by now, plus since I have another round of houseguests coming only a couple days after the party, I’m saving some of the decorating for after thorough housecleaning on Friday. I’m still hoping I can get a decent night’s sleep before the party this year…we shall see!

Overall party prep is going well. For my surprises with the edible printer, I have been able to limp along by soaking the print head in white vinegar & water overnight then printing a Giant Mask Reflectionfew more rice paper pages the next night, so I have enough copies at this point at least to reveal the surprises. I think the longterm plan will be to remove the print head after each use & keep it soaking in an enclosed plastic tub in vinegar & water, since from online research it doesn’t seem I can purchase a replacement print head very easily or cheaply to keep onhand as a spare. The cartridges now come with reusable clips instead of tape so they are easy to store between sessions, and since I have a couple cartridge sets now, I have 2 ink refill kits on their way.

4 dozen Edible Masks with Pretzel HandlesThe kitties were sequestered overnight & all day today in the bedroom (and patio) so all 4 dozen cookie masks could dry thoroughly. One edible mask broke last night before it got a pretzel stick handle so I ate it…mmm tasty! Seeing the breakage from previous years, I am crossing my fingers the weather stays clear so the cookies stay stable through the party!

Done already!

5 dozen new Dainty Doubloon cookies
7 dozen Spinach Balls
5 dozen Tricolor Scrolls
3 dozen life-size edible masks with pretzel sticks ready to decorate
30 voting ballots printed & cut
Webcast prepped with both webcams working
All grocery shopping
Major decor (giant mask, draping, candles, tinsel)
My costume!
…and a couple edible printer surprises too! 🙂

Still to do:

Arrange frostings, sugars, sprays & sprinkles for mask decorating
Decorate my dozen edible masks & add last couple pretzel sticks
Drape beads everywhere after housecleaners dust
Hang decor masks on walls
Final decor
Arrange hurricane glassware for Bourbon St Bar
Menu chalkboard
Fancy veggie cutting (celery roses, celery brushes, pepper flowers, etc)
Bake King Cake & hide the baby
Brie en croute
Make Shrimp Pate
Bake Creole Chicken Skewers
Cheese tray
Fancy fruit cutting (feathering pears)
Fresh fruit & veggie trays

Wish me luck getting everything done so I can have fun & “Laissez les bon temps rouler!” 🙂

Posted in Mardi Gras, Parties | Tagged , , | Leave a comment

Mardi Gras Dainty Doubloon Cookies!

Mardi Gras Dainty DoubloonsVoila! Dainty Doubloons for Mardi Gras! Doubloons are the coins thrown to the crowds along with beads during the Mardi Gras parades. I have a few authentic ones from New Orleans, plus fake plastic party store versions, so just last week I had a 3am brainstorm to use my edible printer to make doubloon sandwich cookies to show off both sides of the coins!

I put all my doubloons directly on my scanner, resized all to the same 1 7/8″ for my smaller circle cutter, adjusted colors since some of the authentic coins were silver, then after several hours in Photoshop the artwork was ready. Unfortunately I’m learning a lot the hard way about the struggles of my edible printer! I had read online before I purchased that the reason to buy Canon is because you can remove the print head, which gets clogged easier with the food Making Dainty Doubloonsinks, but I hadn’t had any problems yet. Well, yesterday it printed 5 pages perfectly, then cyan refused to print and magenta reported low. I had a whole extra set of cartridges at least, but after many many rounds of “deep cleaning” that wastes a ton of ink, my last magenta was almost totally gone, and cyan still wouldn’t print! I removed the print head to soak several hours yesterday as I baked 4 dozen life-size edible masks, then let it dry overnight. Today I was able get all the frosting sheets for 80 of these cookies printed plus one other surprise, then cyan pooped out again with plenty of ink, so the print head is soaking yet again. I still have another cool printed rice paper idea that will be for the edible mask decorating, so I’m still hoping that will work before the party on Saturday!

The Dainty Doubloons are now listed on Etsy along with my other frosting sheets. Now back to baking the rest until the sugar cookie dough runs out!

Posted in Mardi Gras, Parties | Tagged , , , | 5 Comments

Mardi Gras party prep progress

Hooray! My Mardi Gras costume is completely done a whole week before the party! I thought my previous photo already gave it away by accessories let alone all the triangles, but I’ll keep it a surprise for now. It did help that I used the same brocade corset & stick mask I made for the Mardi Gras fairy a couple years ago, but I did embellish them, plus had what seemed like a billion new small pieces to assemble. 🙂
Fabric Stained Glass Window
Party food is relatively on schedule! 5 dozen Tricolor Scrolls & 7 dozen Spinach Balls are baked & frozen for reheating on party day. These have both taken so long to bake properly on party day that I’ve decide to try pre-baking them to see what happens. The Spinach Balls must have had too much moisture since they flattened a bit while baking…now they’re more like mini-patties? They’re still tasty at least! The Creole Chicken Skewers will be one evening this week, the Shrimp Pate on Thursday, and everything else will be fresh the night before or day of the party.

All the decor boxes have been out and a couple things have been arranged, including the fabric stained glass window that I made last year for the pantry door, but there is still a lot of decorating to be done. I caught a nasty cold earlier in the week so I’m a few days behind on my party prep schedule, but thankfully there’s a whole week left for a little each day. I already made 3 giant batches of sugar cookie dough so I can make plenty of life-size edible masks again for myself and guests to decorate, plus two new cookie ideas…yes there will be fun new edible printer action happening this weekend! 🙂

Now onto decor, other party food & new cookie creations!

Posted in Mardi Gras, Parties | Tagged , , , | Leave a comment

Mardi Gras prep has begun!

The annual Mardi Gras Masquerade is only two weeks away! House decorating has begun, and my costume is underway with brocade corset and teal and purple glitter satin…can you guess what it will be?

20120205-011003.jpg

Posted in Mardi Gras, Parties | Tagged , , , | Leave a comment

Holiday Happy Hour 2011

Decorating Holiday Houses & Snowflakes
Another Holiday Happy Hour was a grand evening with 33 adults & 7 kids throughout the evening! The mini gingerbread Holiday Houses appeared for the second year in a row, this time as a decorate-your-own activity with all sorts of fun sprinkles and frosting colors, which the kids absolutely loved. My traditional menu of Scandinavian family recipes were all there, like krumkake, pepperkakor, fudge, toffee, pickled salmon, and Swedish meatballs, plus cranberry chicken skewers, build a sandwich, cheese & crackers, & a snowflake pastry brie with spiced loquat preserves from my tree. Sparkling cranberry punch and hot cider plus mulled wine and my Brittahytta Brewery hard cider rounded out the beverages.

Christmas ChairsChomping Chairs

The biggest project was that I redecorated the Ghoulish Gingerbread Haunted House into the Giant Gingerbread Holiday House! That was a lot of fun, and the full details will be its own post, but to go along with the giant house, I made several extra gingerbread chairs frosted with white royal icing. Of course hilarity ensued with the Christmas Chairs! 🙂

Plenty of partying people enjoyed the patio bar and the cozy decorations everywhere. Baby Julianna had her first krumkake and enjoyed it as much as her dad, Jeff Krumkakehands! Little Elias was amazed at how many rooms were decorated, even the bathroom! 😉 We had a second wave of guests arrive around 8pm keeping the party hopping, and holiday cheer was had by all!

Partying People Proud kids with their creations

Click below to view all the photos of the 2011 Holiday Happy Hour…

(more…)

Posted in Christmas, Edible Art, Gingerbread Creations, Parties | Tagged , , , , | Leave a comment

Halloween 2011

Another Halloween party is over! We set a new Halloween record this year with 66 party guests…wow! It didn’t feel cramped so that surprised me when I counted everyone the next day! Thankfully the weather cooperated both for having all the patios available for guests and food, as well as for the new decorations and FINALLY the Ghoulish Gingerbread Haunted House!

The Gate Ghost = Secret Project #1 Castle Brittahytta = Secret Project #2 Ghoulish Gingerbread Haunted House with Fog Glowing Ghoulish Gingerbread Haunted House

…and the winners are…

Ghoulish Gingerbread Haunted House – Angie got all 13 spooky stories first!
Name That Tune Spooky Movies – Angie & Doug tied with 9 of 13
Creepy Cuisine – Tastiest – A Deathly Bite (Maple Coffin Cake with Spider) by Robert & Maureen
Creepy Cuisine – Best Presentation – Bloody Glass Cutcakes by Scary Jerry
Scariest Costume – Galt & Lyle Loving Each Other to Death
Most Original Costume – the Barbieri Solar System
Ultimate Costume – Cyd the Vintage Tintype

Prize Winners with Trophies A Deathly Bite by Robert & Maureen Bloody Glass Cutcakes by Scary Jerry
Galt & Lyle Loving Each Other to Death Barbieri Solar System Cyd the Vintage Tintype

The costumes were fantastic and so much clever Creepy Cuisine that it was challenging to judge! Everyone had a great time, even after last-minute gingerbread chaos as guests were arriving led to food prep chaos, I was still in full vintage Webmistress of the Dark costume by 8pm, and the Rock Band after-party continued until 3:30am! I’m still recovering from only getting 6 hours sleep total from Friday to Sunday, but it was a blast! Hope everyone had a Happy Halloween!

Keep reading for the full party post-mortem & to see the entire photo gallery. There will be a separate post for the Gate Ghost (Secret Project #1) and Castle Brittahytta (Secret Project #2), plus another post for the Ghoulish Gingerbread Haunted House, telling its three-year story of planning & execution!

(more…)

Posted in Halloween, Parties | Tagged , , , , | 3 Comments

Even more Halloween party prep progress…

Here we are, last chance I’ll have time to write up my progress until my party is over! I’m taking Thursday and Friday off work so I can hopefully get everything done and even some sleep along the way if I’m lucky. 😉

Skeleton Hands from Pottery BarnAnother splurge arrived! Pottery Barn had sold out of these skeleton hand spigot jar stands last year before I even got the catalog, so this year I ordered online back in September, but they didn’t ship until Oct 17th. The jar was sold separately for $70(!) so I just bought the stand, which was expensive enough! It doesn’t fit my spigot jar, but it does fit my crystal bowl, so I think it will hold some lighted Mojitoes nicely.

New Archway DoneEven though it was well past dark, all the major painting was finished on Sunday night, including the new archway for the patio. Here it is in place, along with the two freshly-painted plastic gargoyles that will hang on the walls flanking the archway after the door goes in. I’m letting my kitties enjoy the patio for as long as they can, since they’re cooped up during the party, and they can’t open the screen door but they can scoot open the arch door!

I was able to drill through from my garage to the patio, so the patio webcam is still working, now without ugly cables! I hope there’s enough lighting, since the main patio light fixture has failed, not working even with brand-new bulbs, so I’m relying on the chandelier, floor lamp & lighted lab display. A new patio light fixture is now on the list for the next Stitches Project Weekend with my dad in February.

Secret project #1 is a go, all technical issues resolved with replacements, stable stand built and painted, ready for testing in final setup Friday night. Crossing my fingers for no rain but the forecast looks good so far…I can’t wait to reveal this one!

Sewing by StreetlightEven though I was painting well into Sunday night and sewing by streetlight in my driveway, secret project #2 is all ready for installation tomorrow! I think this will rival the gingerbread haunted house as the most elaborate and time-consuming single Halloween project, but I do think my guests will be surprised and impressed. I would still be painting if I hadn’t invested in my new sprayer that worked like a charm!

New Prize TrophiesI didn’t have enough trophies leftover from last year for all the contests, plus I couldn’t find those skeleton hands this year, so I whipped up some new trophies, now all ready to print out the labels on my new inkjet gold foil label paper!

Lavender Gray Siding Piped on Exterior WallsSpeaking of gingerbread, I decided that piping royal icing siding would give the look I want better than rolling fondant and stamping with woodgrain pattern, plus hopefully help protect the gingerbread against ambient moisture. All the exterior wall siding was piped Monday night, using about 9 cups of royal icing! I decided this year to splurge on meringue powder instead of having a ton of egg yolks leftover, but I’ve already almost used the whole can! Even though my hand and arm were sore from piping the stiff icing, I really do like the look. After I took the photo, I shaded the walls with black & purple sprays for some run-down haunted feel.

Black Chocolate Railings, Brackets & GateI peeled off all the black candy melt shingles from last year (no one has black candy melts this year so I’m sure glad I bought a ton last year!), melted some into modeling chocolate to rollout for the shingles & some window trim, then melted more plain directly in a plastic piping bag in the microwave. These are the railings, brackets & gate that I sure hope will survive assembly! I made them thick, and I hope the back side will be a cleaner look since it will all be flat, but we’ll see. I did a test peel at a railing corner and removed a spider, and those were okay already. If they seem too fragile or are warming up too quickly from handling, I’ll pop them in the freezer so they’re nice & solid before attaching to the house. Once they’re on I think they’ll be fine, but they will also be one of the last things for fear of anything falling on them or me bumping them while decorating other bits or adding figures!

Last night, I decorated the chairs and pipe organ with “carved” detail piping, brown icing on raw gingerbread. Tonight I will add purple fondant tufted cushions to the chairs, couch, benches & lounge chair, then royal ice them together and brace them to dry in proper shape.

Candy Pipes for OrganOf course my haunted house must include a pipe organ! 🙂 The pipe organ pipes are hard candy sticks sprayed with silver luster dust from the Ace of Cakes decorating line since handbrushing luster dust wouldn’t look as smooth. You can see the other pipe organ pieces in the carving photo, with the two curved sides, music stand, and the curved double keyboard. I’ll add white fondant for the keys, then pipe black chocolate for the black keys, then add the pipe rank to the Custom Costume Hatback during assembly. It also has a matching bench that will get a fondant cushion but will probably be mostly covered by character clues.

I have finished my costume enough to wear, but I’m really hoping to squeeze in a little more accent decorating if there is any chance. Here is the matching hat I made from scratch. Any guesses yet? 🙂

Thankfully the inside is mostly cleaned and decorated except for the kitchen that is always a war zone, especially with all the gingerbread work going on. Friday the housecleaners come, some of the best money spent so I can avoid the drudgery of party prep and concentrate on the fun stuff. 🙂

Still to do…

Design & print the inside walls on frosting sheets for the wallpaper only, leaving the raw gingerbread for brown piping as dark wood wainscoting. Since I’m printing anyway, I’ll print wood flooring (already found good clip art to tile into large sections), some portraits directly on the walls, and Lord Byron’s big bookcase I photographed last fall. 😉 All of those will be accent-piped for 3D detail for frames and furniture edges.

Roll out black modeling chocolate for shingles & window trim – shingles won’t go on until after assembly anyway so the roof can be completely stable before adding extra weight.

Figure out exactly how I can put other food on the gingerbread table. This is getting tricky! For the large enough yard to include all the gravestones & the jack o’lantern walkway, I won’t be able to rotate the house, so it’ll have to be at an angle so people can walk around to see the inside rooms.

Assemble the haunted house! Extra hands scheduled from 5-7pm Thursday for this task! 🙂

Decorate outside! Both secret projects are outside, plus pirate corner, ruins & gravestones will go out on Friday & be tested with fog machines & lighting. Some touchup is usually required for the gravestones from being in storage all year.

Set up the lab! I can’t do too much setup on the tables before the library walls go up, otherwise I’m in danger of knocking over lab glassware. Since the walls are only paper and it gets moist at night, I don’t want them up too many days since they can get soggy, so they will go up on Friday, after the housecleaners vacuum both patios for me & clean the rest of the house!

Final party food! Donut Be Scared Peekaboo Pumpkins, Bizarre Brain Pate, Haunted Human Heart, Eerie Eyeballs, Vicious Veggies, Ferocious Fruit, Freshly Flayed Flesh, are all coming in the next couple days, plus the freezer prep will need rebaking the morning of party day.

Print & cut voting ballots, including Ghoulish Gingerbread quiz sheet!

Set out the owls for Ogle the Owl – have a couple new owls so I’ll need to pay attention to how many, plus retire a couple from rotation.

Set up the outside food table! Since my patio couch is facing the pipe organ, and the forecast is decent, I’m putting the Creepy Cuisine table out on the brick patio, complete with extra lighting so people can see well enough. This will probably help the witch cauldron lemonade get more traffic by the shed. I might put the skull fountain out there too since the lab is cramped with the love seat in there now, but it needs power for the fountain. We’ll see what I figure out. At least I finally fixed the pinhole leak in that cauldron!

Hope you are thoroughly enjoying your Halloween season! I’ll let you all know how the party goes with complete photos! 😀

Posted in Edible Art, Gingerbread Creations, Halloween, Parties | Tagged , , , , , | 1 Comment

More Halloween party prep progress…

Mini Fondant Jack O' LanternsI’ve made a lot of Halloween progress this past week! Since I can’t assemble the gingerbread haunted house until the last couple days, I’ve been working on the accessories so they’re all ready to put in place. I can’t show you the figures because they are part of the quiz, but at least they are as complete as they can be before putting in place. These are mini hollow jack o’ lanterns hand-sculpted from marshmallow fondant that are open on the bottom to sit over LED flicker tealights. I will paint them orange later but I was so excited they turned out so well I already took a photo!

New MojitoesI’ve also been experimenting with new Mojitoes, since the original recipe I thought was solid enough for the first book in 2008 was acting weird in 2009, so I took a year off last year. These are lime gelatin with mint extract, rum & evaporated milk, and conveniently one box of gelatin (1.5 cups liquid) makes a dozen of my toe molds. I think I finally have the best plan for making the food-grade silicone molds with the least amount of material, so I plan on selling them next season with the recipe included. I will be making “virgin” Mojitoes too, with different color toenails so everyone is aware which ones they’re eating!

Tasty TombstonesSunday evening was a continuing frustrating fight getting the gingerbread all baked first, so when I finally got out my new edible printer, set everything up, and printed my first frosting sheet of Tasty Tombstones, I was literally so happy I squealed for joy! 😀 These are the first batch, and I decided to try baking the sheets directly on the tinted gray shortbread, and they worked perfectly & taste great! (And since I used margarine, they’re even vegan, including the frosting sheets!) These are images of my foam carved & painted gravestones, with the original eiptaphs edited out in Photoshop, then with my favorite “punny” epitaphs instead. These will populate the haunted house cemetery (one you cannot see in the photo is a clue!) as well as I have 5.5 dozen more to serve at the party. Since I can mail the printed frosting sheets in flat-rate USPS Priority Mail envelopes, I plan to sell these next season too, as the set of 13 punny ones with the recipe included, as well as a blank set to write your own epitaphs with food coloring pens, or custom epitaphs for a higher price.

So for party food progress, I am very pleased that these are already done:

4 dozen Savory Spiders biscuits in freezer, ready to bake party morning
5.5 dozen Pumpkin Pasties in freezer, ready to bake party morning
5.5 dozen Tasty Tombstones ready to serve, plus 14 for the cemetery
3 dozen Mojitoes so far, easy to whip up a dozen to set in the fridge overnight so will continue
11 dozen Brittle Bones safely in plastic hoping they don’t go soggy
Freaky Witches Fingers dough is chilled, ready to form & bake soon

Dragon SconcesThe Etsy-profits spending spree continued with these dragon sconces I’ve had my eye on for years from DesignToscano.com. I finally splurged on the set of 6 for Halloween decor now, plus permanent installation in the castle I will build someday. 🙂 2 will flank the pipe organ, 2 will be out front as part of secret project #2, one will be in the dining area, but I haven’t found a place for #6 so it’s safely in the box.

Since the current Airport Express models allow wifi and cabled ethernet now, I have solved the patio webcam wifi issue by avoiding it! A long ethernet patch cable from the Express inside the garage out to the webcam is working like a charm now, but the cable is thick enough it won’t fit through the door gap like the thin power cable does, so I will be drilling a hole this weekend for the cables to come through the garage wall to the patio up at the ceiling corner. Cron jobs are set up to capture final party prep & the party, so it looks like the webcast will be a go again!

Hopefully I won’t jinx myself that I think I have now solved all the technical difficulties that cropped up for secret project #1, so that is definitely a go! Secret project #2 is well underway, and the new paint sprayer has been working great with only a little water required to thin my paint, but has a LOT to finish this weekend. I am very pleased to have two house-elves who volunteered this year, one for extra hands & collaborating with the two secret projects, and another for Thursday evening, Friday evening & party day prep! I painted all the LED tapers black one by one over several days, but since it’s spray paint over wax, it can easily be scratch or bumped off, so I have saved the original plastic box packaging for later storage. All the gingerbread haunted house pieces were baked over the weekend & are safely in plastic bins with silica gel until decorating commences this weekend, but I still have to get my costume done first so all the non-food projects can clear the main worktable. Here are a couple hints since the shirt & skirt are now complete…can you guess what my costume is yet? 😉

Costume Hint 1 Costume Hint 2

I’ll try to update again next week before the final party prep crunch! Hope everyone is enjoying your Halloween season!

Posted in Edible Art, Halloween, Parties | Tagged , , , | 4 Comments

Halloween 2010 Party Post-Mortem

Another Halloween has come & gone! It was another great party, with 35 adults, 7 kids from babes in arms to tweens, and the first Halloween rain in a decade, but fantastically creative costumes & deliciously creep cuisine from everyone! This post is so late because I kept hoping to post a few more photos along with this, but our server has been struggling so badly lately (see below), that I finally decided not to wait any longer.

I can’t remember a wetter October since I’ve been hosting Halloween! Due to the wind & rain, I didn’t get out the fog machines, nor did I try the projector ghosts for fear of damaging the electronics. Hopefully next year my weather luck will come back! I also knew I didn’t want to use foam or cardboard, but I didn’t get the chance for the plasma TV frame, nor did I get photos chosen for that slideshow, so that’s on the list for next year too. This year the Gingerbread Gargoyles got decorated so people could tell what they were, I did finally get the prize trophies done, after at least 4 years of having the idea on my list, the ruined walls were finished for out front by the pirates, and all 13 travel photos got finished & framed for the quiz “Where in the World is Miss Wells?”

Even though the rain was on & off all day, thankfully it didn’t actively rain during the party, but it was still chilly enough no one ventured past the covered patio. Just as well that I didn’t spend time decorating the backyard this year. Many were searching for all 21 owls inside & outside, and I insisted everyone try the Miss Wells quiz even if just to appreciate my Photoshop efforts. 😉 Except for the oldest, the kids ended up watching The Nightmare Before Christmas in the guest room, having a grand time, while around 10pm the adults played the Name That Tune Spooky Shows quiz. Somehow either when I prepped the quiz back in August or transferring to my iPhone I ended up with only 12 clips instead of 13…ack! I tallied the votes for the costumes, some furious competition between categories, then announced the winners, presenting them all with their custom trophies! I did sever & serve the Haunted Human Heart again out in the lab, to the lovely disgusted looks on faces around me. 🙂 About 11pm people started leaving, with the last guests gone by midnight, fairly early for Halloween, but everyone said they had a great time!

And the winners are…!

Scariest Costume = Glen attacked by spiders
Most Original Costume = Bugs Bunny Ruth & Elmer Fudd George, complete with gun that said BANG!
Ultimate Costume = Bun in the Oven Audene with Chef Jeff, complete with detailed recipe including sugar & spice, with alternate snips & snails, & warnings of oven being tempermental while baking!
Ogle the Owls = Piper got all 21 first! Since people kept asking me for hints, this was more difficult than I thought!
Where in the World is Miss Wells? = Mari! Everyone got them all, so I picked number from 1-20 to break the tie
Creepy Cuisine = Glen for his glowing jack o lantern cheese ball!
Name that Tune Spooky Shows = Ben & Marco with 11!

For all the photos I’ve been able to post so far, including all the costumes & all Creepy Cuisine, click here.

For even more details, you can keep reading…
(more…)

Posted in Halloween, Parties, Uncategorized | Tagged , , , , , | 6 Comments

Halloween Party Prep Progress

I’ve been in a whirlwind of party prep so far, and excited that Eerie Elegance book sales finally cracked the 800 mark this week, but first a little bit of news…Karen Waschinski was kind enough to post a nice review of Eerie Elegance and a few of my recipes as part of her Halloween Studio Tour website, a group of artists banding together to benefit Bat Conservation International. Karen makes very cool plush sculptures…her miniature rats & bats are adorable, but my favorite is the dragon!

Now for the party prep progress! Food first:

  • 4 dozen witches fingers safely in airtight tins
  • 5 dozen meringue bones in airtight plastic (larger bones this year so not the usual 14 dozen)
  • 6 dozen pumpkin pasties in the freezer
  • 5 dozen mini jack o lantern pumpkin spice donuts in the freezer
  • 4.5 dozen gingerbread gargoyles ready for piping decoration
  • shrimp already ground & refrozen for the brain later
    (since the food processor was out for the pie crust dough, this way I don’t have to clean it again for this party!)

I think that’s almost half the menu, which is awesome! The fresh stuff & gelatin body parts have to wait of course, but I feel much better having this all done already, especially since the gingerbread mansion must be assembled this weekend since I’ll be gone most of the week before my party on my work trip!

As of 3am Friday morning, Miss Hermione G. Wells’ leather buckle bodice is ALL DONE, so I can finally put the sewing machine away! Since the top hat is already done, and the rest is reused from last year, with a couple more accessories on the utility belt, that’s my costume finished a whole week before the party…thank goodness!

As for decor, it’s beginning to look a lot like Halloween! 😀 I was lucky & very thankful to have a house-elf appear last Saturday afternoon for several hours! Not much outside decor yet since I’m afraid of more rain this weekend like this past weekend, but if even I don’t get to decorate any more inside, Castle Brittahytta and the Library Laboratory will still feel nicely spooky!

  • skeleton hand lights in front corner bushes
  • started new aging technique on gravestones & foam stone walls
  • both backyard sheds covered in flagstone gossamer to match
  • purple web fabric cover for front porch light
  • 12 new pillow covers in 3 spooky fabrics – more elegant than the old cutesy pumpkin pillow covers
  • new inside wall decor – plaster wearing away from stone walls – filmed for a future podcast
  • spooky portrait gallery in hallway
  • gargoyle collection arranged on fireplace mantel
  • living room tapestry & web curtains
  • black candles in all candleholders (thanks Melanie!)
  • new canvas curtains hanging in patio – had waited until after summer season over (thanks Melanie!)
  • all bookshelf wallpaper murals ready to hang to cover all patio walls this year, but not hanging until party time in case it gets moist outside
  • all spooky drinkware in place on the bar bookcase – fills 4 shelves! (thanks Melanie!)
  • patio garage door & fridge are “hidden” bookcase functional doors
  • wine fridge & side of patio fridge covered with woodgrain contact paper
  • 13 frames all in place & 8 images already edited for new quiz “Where in the World is Miss Wells?”
  • skull fountain reinforced & in place over the skull lace tablecloth on a sturdier table in the corner
  • shelf-safe potions already in lab bottles with new labels (thanks Melanie!)
  • new permanent patio bar chalkboard = Michaels half-price frame sale (but still $50!) + $3 thin MDF + $5 chalkboard spray paint = invested since will be year-round, especially Cinema Brittahytta in summer!
  • curtains behind pipe organ on outer patio
  • rewired pipe organ so iPod & keyboard play through built-in speakers
  • new gold & black foam carving detail for pipe organ
  • same foam stone walls for arch door on patio
  • outer patio furnished more as another interior room, including Creepy Cuisine table
  • Name That Tune quiz audio clips already edited & arranged in playlist
  • finished new gravestone aging techniques – painted moss plus vines – filmed for a future podcast

Still on the list:

  • decorative frame around the plasma TV back in place against the wall, with digital photos as the artwork cycling through (has to be landscape format though). Haven’t chosen the photos yet, not sure if I should use canvas fabric, paper, or cardboard, for the fancy frame.
  • revise projected ghosts to higher contrast – Zoombox/DVD projector will work sitting on gate arbor & shooting onto house wall, but last year’s DVD only shows white blobs so needs more detail. Tested new projector but the ancient DVD player won’t play the new burned DVD and I need the PS3 for the living room TV.
  • finish 5 more Miss Wells travel photos but shouldn’t take too long since images already selected & prepped.
  • finish new ruin aging techniques – painted moss plus vines
  • new quiz sheets Miss Wells, gingerbread mansion, 2010 voting – need to design, print & cut
  • prize trophies – have had this idea for 4 years I swear, so hoping it finally gets done with a new cooler brainstorm from this week
  • all the fresh party food of course! Waiting for menu signs until the last minute in case any items need to be cut from the menu

Wish me luck getting the gingerbread mansion done this weekend, even with moist weather forecasted! :-O Hope everyone is enjoying their Halloween season!

Posted in Halloween, Parties, Uncategorized | Tagged , , , , , , | 4 Comments

Halloween Party Prep Progress & New “Antique” Wells Apothecary Labels for sale!

Happy October everyone! I’ve been back from my adventures overseas just over a week now, and I’ve already made excellent Halloween progress! My first major project is not only completed for my own party, but available for sale!

Inspired by authentic antique pharmacy jars, these weathered apothecary labels are perfect for your vintage mad scientist laboratory! For only $6.95 plus shipping, the Wells Apothecary Label Package includes 20 pre-printed labels plus 20 write-your-own labels in various sizes on 4 full pages to trim as you like.

I even figured out how to use Paypal better, so now I have a shopping cart where shipping can be combined if people buy up to 5 items in one shipment for me to squeeze into single flat-rate USPS envelopes. I’ve already had a handful of orders for the DVD + autographed book together, so I can easily see someone buying all DVD + book + set of labels for the single $5 domestic US shipping!

As for other Halloween progress, you’ve probably guessed by the apothecary name that I’m continuing the Hermione G. Wells theme this year. I ran out of time & never found the supplies I wanted for the leather buckly bodice last year, so that’s on the plan this year, plus last weekend I already covered a cheap costume top hat with the same bronze upholstery velvet I used for the spats, and I love it with the grommeted belt as a hat band! I think I’ll remove the buckle to use a cool aqua map cameo I bought last year, but there should be time for that later. I also might need to scavenge that belt for some of the bodice since the grommets are so cool, so I’m not altering the hatband until the bodice is complete.

I have a huge to-do list this weekend, including getting out all the boxes from the garage, my annual Halloween shopping trip with Tash is next weekend, then thankfully there are still 2 full weekends before my party! Even with the mandatory 3-day work trip getting home 24 hours before party start time, I think I’ll be able to get a lot of major new projects done!

Posted in Halloween, Parties, Uncategorized | Tagged , , , , , , | Leave a comment

the end of summer… aka Fun with Homemade Marshmallows

Cinema Brittahytta did not end with my Oz birthday…there was still a whole month of summer left, even though this year the weather was so cool it didn’t really feel like it! 🙂

I knew I wanted to show a Trek-related 3 week series, then we added Kick Ass the week before since it was a new release, and I had missed it in theatres when I was in Australia. I really liked it but boy was it violent! Most definitely rated R, and if you didn’t like Kill Bill, don’t even bother, since the violence is on that level. No special food that week, but I raided my closet to throw together a Teal Girl outfit ala all purple Hit Girl from the movie…heehee!

I also finally bought an aqua stand mixer as an early birthday present for myself, inspired by wanting to make my own homemade marshmallows. I tried vegan gelatin which didn’t work, then I tried maple bacon marshmallows just for fun which I liked but got mixed reviews. I also experimented with colored sugar techniques, and knew I would do some kind of special Trek marshmallow creation but not sure exactly what.

The next week was Star Trek II: The Wrath of Khan, still the best Trek film ever! I found out it was also National S’Mores Day, so that made my special Trek food obvious…Trek S’Mores!

Since my chocolate mold was only Next Generation commbadges, which did NOT go with classic movie Trek, I made a new silicone mold for milk chocolate chevrons since s’mores must be milk chocolate, and made a normal batch of marshmallows (boy that stuff is STICKY!), cut into large rounds that exactly fit on the half-graham cracker and fit the chevron just like the belt buckles in Wrath of Khan.

Even though I hoped they would be melted later like proper s’mores, for presentation I pre-toasted the edges of the marshmallow rounds over a candle. I think they turned out great, we had a blast roasting them over open flame in my firepit, and everyone enjoyed them!

I have been dying to show my fellow geeks the movie Free Enterprise for a couple years, since it makes me laugh so hard but needs the right audience to appreciate it. Since Wrath of Khan figures in the plot, I thought it was perfect to schedule after Khan, and it was well-received…yay! We mixed our own Romulan Ales with Absolut Citron & blue curacao, and I got out almost all of my Trek collection & posters to make the patio look like the apartment of one of the main characters. 🙂

We closed out the season this week with the newest Star Trek, the reboot from last year complete with matching Spock & Kirk posters, and since it was the season finale, I wanted to make one last special dessert…Trek marshmallows in command gold, sciences blue and services red! It was finally warm weather so we didn’t roast these marshmallows but everyone liked them…I think the red ones were demolished first…? 😉

I found a metal cookie cutter I wasn’t using and bent it into the Trek chevron shape to cut a new batch of homemade marshmallows, then I dipped the sticky cut edges into colored sugar…services red came out of the jar, but command gold was yellow & orange mixed, and sciences blue was a mix of light blue and purple. This time I wore my Live Long & Prosper cutesy Spock shirt, and I was so hot getting everything ready in the triple-digit heat that I never did cool down! We saw “movie rat” a couple times, which has become a game to see who notices him first running so fast across the roof or power lines. Cinema the Cat came back during the movie to hang out with us, getting nice pets from everyone, then he went to the patio to hang out with Onyx who was inside my bedroom looking out at the patio. Ebony is still protective of her territory, but Onyx & Cinema seem to get along just fine. Cinema stayed out on the patio until well after everyone else left. Since he hasn’t come by too often, I’m glad he joined us for the season finale. 🙂

Now that the movie screen has been taken down, my summer is over…even more so because this time next week I’ll already be in Ireland, and by the time I return to California, it will officially be autumn!

Posted in Cinema Brittahytta, Edible Art, Parties, Uncategorized | Tagged , , , , , , | 4 Comments

Halloween season has begun…with Eerie Elegance: 13 Fabulous Frights!

I’ll admit I’ve already been working on a couple Halloween projects, but I’m officially kicking off Halloween 2010 with a special Friday the 13th announcement…*drum roll please*…

New for 2010 is the DVD Eerie Elegance: 13 Fabulous Frights – the perfect accompaniment to the Halloween party book Eerie Elegance! Watch over two hours of full quality video to learn these projects and recipes demonstrated by your Halloween Hostess, Britta, Webmistress of the Dark. Ideas range from the simple and budget-conscious to elaborate environments and everything in between, so there is a project for everyone inside Eerie Elegance!

Originally released online as a weekly seasonal series in 2008 and 2009, all THIRTEEN episodes are included on the DVD in full quality video to watch anytime you’d like to get into the Halloween spirit! To order your copy, please visit www.EerieElegance.com!

Happy Friday the 13th everyone! 🙂

Posted in Halloween, Parties, Uncategorized | Tagged , , , , , , | Leave a comment

my Oz birthday!

The first movie I ever remember seeing was The Wizard of Oz on TV. It became the first movie I ever loved, watching every annual broadcast, reading the original books by age 5, as many as I could get my hands on, and I even saved up $10 allowance to join the International Wizard of Oz Club when I was a tween! When I saw that the new remastered edition of the Wizard of Oz movie came out on Blu-ray last fall, I decided to go back to my roots and have an Oz birthday this year. 🙂

My Oz birthday actually started with taking my mom to see Wicked the musical in San Francisco two days before my actual birthday. It was the worst traffic from Sacramento to SF I’ve ever seen at midday on a Sunday, making us late, but we only missed the first song, & she really enjoyed the show. Hooray!


Mom & Britta at Wicked in San Francisco

I used free Amazon points to buy the Blu-ray “ultimate collector” set for myself & decided the perfect night to show it was on my birthday since it landed on a Tuesday movie night. Since I told people it was my birthday, over twice as many people came than usual, so it was 25 of us plus little Ellie and greyhound Gus – quite a turnout! I’ve never had so much food be gone at the end of a party! Obviously everyone enjoyed the food! Sure made cleanup easier, but only about half the people had actually told me they were coming in advance, so I had only made about 3 dozen of everything. I found a dress at Target that was close enough to be Dorothy-esque, found a paper gingham tablecloth that I trimmed to make Onyx’s bow & my hairbows, and painted a pair of thriftstore shoes with red paint & red glitter to make my own Ruby Slippers. 🙂 I even played software pirate to get a copy of Heartless: The Story of the Tin Man onto my PS3 as pre-movie entertainment (I couldn’t figure out a way to do it legally so I apologize!), and everyone enjoyed that too, surprised it was so well done. I also had a lot of fun with the menu, since I made all of these below, and arranged them along the Yellow Brick Road on the food table with my Oz movie posters from my childhood bedroom walls, my vintage & new Oz books, other items from my small Oz collection, and even the Wicked Witch of the West from my Halloween decor made an appearance gazing into the crystal ball!


Dorothy Britta and Toto Onyx on the Oz patio…watch out for the Wicked Witch of the West!

Oz Menu:
Over the Rainbow Fruit Salad – stacked in my trifle bowl
Ruby Slippersvegan red velvet shoe-shaped cupcakes decorated with red sugar for sparkle
Lollipop Guild – purchased coiled mini lollipops
Yellow Brick Road – gold foil since I ran out of time to make the cheese bricks (darn!)
Scarecrow’s Sweet Potato Straw – sweet potato fries
Tin Woodman’s Axes – vegan gingerbread axe cookies
Cowardly Cornbreadvegan mini muffins with coconut manes & painted faces
Field of Poppies – tomatoes cut into poppy shapes with cream cheese & chopped olives for the flower center
The Wizard’s Emerald City Salad – green salad, spinach, snap peas, marinated artichoke hearts
Glinda’s Bubbly Goodness – non-alcoholic (“good!”) sparkling pink lemonade
Wicked Witch of the West – black vodka with sour apple mixer layered as black & bright green


Huge thanks to Mary Jo who came a little early and made the first Wicked Witch of the West cocktail to enjoy while she cut strawberries and was in charge of the deep fryer for the sweet potato fries!

There were so many people I wasn’t sure if they wanted to play Rock Band, but when Kaelyn requested it, I asked them to sing the Beatles “Birthday” for me…very fun, and different from the now-traditional 17+part made-up-on-the-spot harmonies my singing friends usually do! 🙂

Full documentation, with step-by-step food albums, and even some short videos of some birthday cards that are very cute, are here in gallery of course. I had a really fantastic time, so I’m very thankful to everyone who joined me to celebrate!

Posted in Cinema Brittahytta, Parties, Uncategorized | Tagged , , , , , | 5 Comments

Cinema Brittahytta so far…

I’ve been having a lot of fun with the Cinema Brittahytta backyard movie night series this year. Not only is the patio looking very nice and so usable with the new wetbar, but I’ve been updating my director’s clapboard each time with the evening’s film title & date, and thinking up silly food & decoration ideas when I can. 🙂

Since each year there are still people who haven’t seen it, I’ve decided the traditional season premiere should be the hilarious classic “Office Space,” but this year the night I picked in May was a rare rainy week, so we stayed inside & watched on the big TV instead, still playing Beatles Rock Band beforehand. Due to crazy schedules & Memorial Day we didn’t start up again until June, then Sweeney Todd & the new Alice had already been requested but had to wait until the requestors could attend, so I added Batman & Batman Returns before, classics that we agreed still hold up 20 years later. Then after Alice when people were discussing various Burton films and enough sounded willing, I showed Edward Scissorhands to finish the Tim Burton series for this summer. I could watch Tim Burton all summer, but I know not everyone can, so I thought it was pretty good that I stretched it to five in a row! heehee…I didn’t get Rock Band working outside until Sweeney Todd, but now we’ve been playing each week, which is so much fun on the big screen & plenty of space to spread out. About 8:30pm we can see the game on the screen well enough to play, then by the time it’s getting too dark to see the colors on the instruments, it’s time to watch the main feature. 🙂

Season Premiere Office Space

Even though we stayed inside to watch the movie since the ground was too soggy, this was the public debut of the patio wetbar project with all the movie decor, including the old family 8mm projector.

Sweeney Todd – The Best Pies in London

I made miniature beef & Guinness meat pies inspired by a Jamie Oliver recipe, and I served them with devilish laughter to those who didn’t yet know the plot. 😉

Alice in Wonderland Mad Tea Party

I used Mad Hatter-style millinery, my own silver service, teacups & teapots with lace tablecloth, and even borrowed some of Sheila’s stash to create a Mad Tea Party with cocktails in teacups, including “Drink Me” iced tea and an “Eat Me” pastry Brie…then we played Rock Band with Kaeyln in the guitar shades and little Ellie didn’t want to give up the mic! 😉

Edward Scissorhands

I couldn’t think of special food for Edward since unfortunately all the sugar cookies were scarfed on the 4th of July, but I did bring my action figure home from work. 🙂 We enjoyed Ruth’s red velvet cupcakes and Sheila’s deviled eggs with slushy fuzzy navels in glowing martini glasses…yum! Only 5 of us that week but we still had a great time playing Rock Band beforehand!

Harry Potter and the Half-Blood Prince

I got out my easiest to reach Hogwarts decor, including the Sorting Hat, crystal ball, some candy boxes, one huge spellbook, one Horcrux, the Snitch, baby Norbert & a wand or two, plus I made butterbeer ice cream and miniature devil’s food Cauldron Cakes. Butterbeer was also on tap of course, even butterbeer floats for those who could handle that much sugar! 😉


Since I have never seen the 1982 original, and the sequel comes out this December so others have requested it, we’ll be watching Tron next week (aside from glowsticks & lights, any other theme ideas?)…then an even more special menu is in the works for my birthday the following week, when we will watch the stunningly remastered Blu-ray version of the first movie I ever loved…The Wizard of Oz! 😀

Posted in Cinema Brittahytta, Parties, Uncategorized | Tagged , , , , , , | 1 Comment

Fireworks & Fun 2010

The Fifth Fireworks & Fun party was last Sunday and was a blast as usual! What was only 15 RSVPs the day before became 33 people including a newborn, 2 toddlers, and 2 dogs! It was warm but thankfully with a little breeze making the flags fly nicely, I was able to experiment with a few new recipes still loving my barely-year-old kitchen, and we were able to have a great game of Beatles Rock Band for an hour before the fireworks started!

As of early June the city announced they weren’t sure if they could afford to hold the annual fireworks show, but due to popular demand, they decided to accept donations toward the $80,000 cost. I definitely donated since this was the fifth fabulous fireworks in a row! Not only do I love fireworks in the first place, but the spectacular show allows me to have a fantastic party that everyone enjoys! Thank you again, Santa Clara! 🙂

Since I didn’t have the kitchen remodel chaos this year, I planned my full standard 4th of July menu, and even had everything possible ready to set out as soon as people arrived. I tried a couple new edible experiments, and even some custom homebrew hard cider blends Patriotic Peach and Blueberry Blast!

For the first edible experiment, I had seen a recipe for mini corndogs in a magazine last year, and since I have inherited my mom’s deep fryer that is older than me, I decided to try it. Instead of cutting normal hot dogs in half, I thought of using Lil Smokies miniature smoked sausages, so doubling the batter recipe for 12 made well over twice as many. I set up the fryer outside on the outer patio on the extra food table so it wouldn’t smell up the house, then 4 hours before party start time I mixed up the batter, with pre-cooked bacon pieces for the “sparkle”, then used 6″ bamboo skewers so the length would look more like a fireworks sparkler than a mini corndog. These were easy to fry, but it took an hour to make about 4 dozen, and I ran out of batter before I ran out of Lil Smokies. I kept the finished corndogs warm in the oven, then set them out when the party started in a glass floral frog so they would stand up, and everyone loved them! These are a keeper!

How To Make Corndog Sparklers

Posted in Outdoors, Parties | Tagged , , , , , | 2 Comments

Mardi Gras Masquerade 2010

Even though the perfect storm of scheduling conflicts had a lot of regular attendees lost to other events, whether Chinese New Year, Valentines celebrations, or going away for Presidents Day holiday weekend, still 20 of us had a fabulous time, with Lyle bringing a delicious homemade King Cake, everyone enjoying decorating the cookie masks, and Kevin C playing bartender all evening with his hurricane recipe, much better than the one I found. Kevin, I think you have a new annual job! 😉

This year I only decorated 10 edible masks as inspiration for the 30 plain ones for guests to get artistic. I did try a new marbling technique with food coloring into the wet royal icing basecoat swirled around with a toothpick, but I didn’t think of the idea until most were already iced, so I only tried 3. I think they turned out very cool, but I would use other icing vs. straight food coloring since it was too dark, plus some spots didn’t dry properly. The effect looks a bit like feathers, and nice to have finer detail than you can ever get with a piping tip.

This year’s new idea was fried wonton Jester Hats…but as I feared, no one guessed what they were until I told them! Maybe little heads of something edible to be wearing the hats would give a better clue? They were cute enough & tasty without being super sweet or heavy, but they take forever to fold the wontons, and I used the deep fryer which is a bit of a mess. I may try again next year without frying them & see if I can make it easier and more identifiable.

Even more details if you’re curious…

Posted in Mardi Gras, Parties | Tagged , , , | Leave a comment

Mardi Gras Madness is underway!

My annual Mardi Gras party is 4 days away! I’m not quite as enthused this year since it’s the perfect storm of Presidents Day holiday weekend, Valentine’s Day, Chinese New Year AND Mardi Gras all the same weekend, so most likely only about 15 people are coming, but I’m sure we’ll still have plenty of fun. I’ve decided to do an easy costume this time, using tricolor costume bits I’ve gathered over the years to be a sparkly Mardi Gras Girl. I decorated my mask Sunday evening with some giant plastic jewels to go with the sparkly necklace I had. Most of the decorations are in place, but beads still need to be draped everywhere plus food tables set up, and the housecleaners are scheduled for Friday so everything will be nice & clean. Friends have volunteered to make the King Cake this time, so that’s a long project for Friday evening off my plate!

I think we’ll have plenty to eat…here’s what’s already done:

double-batch crab puffs in freezer
10 dozen spinach balls in freezer
5 dozen tricolor scrolls in freezer
2.5 dozen creole chicken skewers prebaked in freezer
40 life-size edible mask cookies baked, ready for decorating

Add those to the shrimp mold, pastry brie, sliced cheese & crackers, fruit & veggies, plus the King Cake coming, and we have a decent spread! Since there’s always so much punch leftover even for the larger parties, I’ve decided to forgo the punch this year & only have hurricanes plus the full bar. There is one more edible experiment I’m hoping to figure out, but that will remain a surprise. 🙂

Decorate your own edible mask was such a hit last year that I’m only going to decorate 10 as examples, leaving the rest with white basecoat icing, and more table space so more people can decorate at once. I bought reusable plastic candy/icing mini-squeeze bottles with tip covers so no one will have to wait for icing, I have extra decorating sprays in hopes we won’t run out, and I’ll get out my fun confetti sprinkles this time too. I can’t wait to see everyone’s creativity this year!


Bejeweled & Bling

Laissez les bon temps rouler!

Posted in Mardi Gras, Parties | Tagged , , , | 1 Comment

New Year’s Rockin’ Eve 2009

To usher in the new decade I finally went hi-def, including a 60″ plasma Pioneer Kuro HDTV, new HDMI 7.1 surround sound receiver, new HD service with DirecTV DVR (horrible UI, just until the new DirecTivo sometime later this year!), and a PS3 Slim as not only my Blu-ray player but to play Beatles Rock Band! Yes, I splurged on Rock Band 2 for game & instruments, plus the Beatles game to do triple fab harmonies! This was mainly an idea for the summer as pre-movie night entertainment in the backyard, but I have a feeling it will be used plenty even before then! 😉

New TV install just before Christmas with first Beatles Rock Band!

I bought the TV from bestbuy.com online when it finally went on sale for Black Friday, but due to my own party & crazy caroling weekend schedule, it made the most sense to be delivered Dec 21st on my first day of vacation. I invited people over that night to help setup & play the first Beatles Rock Band, since even though I installed the articulating wall mount to the wall studs myself in advance, the delivery guys refused to help me put it on the mount when they finally showed up at 5:30pm. Thankfully Glen & John R were already on their way over so they did the main mount setup on the TV as others trickled in just in time for the TV to get up into place around 7:30pm. Then it took a village to setup the TV & accessories! Glen, John R, Kevin C, Ben, Jen & John all helped set up various items according to their expertise, so I’m very glad they all came! Jen has Beatles Rock Band on XBox so she knows her way around the game & brought her 2nd microphone, and it worked great, so Ben & I nailed all sorts of Beatles harmonies, while others played guitar or drums, for at least an hour! It was a LOT of fun, so fun that it wasn’t until most people left I thought about getting a photo of me playing in front of my new TV!

Beatles Rock Band at Christmas…even got my DAD to sing! 😀

Since my whole family loves the Beatles and it was just us for Christmas this year, I figured we could trying playing all together so I brought my PS3 & all the stuff with me. I did get everyone to play at one point, just no more than 3 at once…but not only did my non-musical dad try guitar a couple times, but he started singing Twist & Shout, so I quickly gave him a mic! Awesome! The only drawback was that I totally forgot the entire drum set at my parents’ house when I left…argh! I’ll get it the end of January when I visit again…but I did get a pretty aqua Fender bass controller for Christmas from Grandma. I keep laughing because I own a real Fender Strat guitar AND a real Fender Precision bass, but I have to have fake ones to play the game!

New Year’s Rockin’ Eve 2009!

Cyd had to work early New Years Day so I promised her we would toast at East Coast midnight (9pm local) so she could get home early. Just in case other friends didn’t have plans, late on the 29th I sent an evite for a low-key casual Rock Band New Years…and ended up with 13 guests! I put all the Christmas decorations away & went with teal to usher in the new decade. 🙂

I had gotten back from Christmas with my family to an email from Kevin C, already so addicted to Beatles Rock Band from his one evening playing at my house that he was quizzing me what to buy where! He bought everything that day on Amazon, so he had it by the 30th, and already had played more than me by New Years Eve! Since my guitar had a flaky strum key & I had forgotten my drums at my parents’ house, Kevin brought his guitar, drums & mic, so we had THREE mics for all 3 harmony parts! We got TONS of “Triple Fabs” which is when all 3 mics hit 100% the whole phrase!

Of course with that large a group, not everyone could play at the same time, so that gave the others some time to nibble & chat. When West Coast midnight was approaching, we had to stop them from starting another song so we could toast…I couldn’t get the TV to switch to channels quickly enough, so we just used our iPhones for the countdown, toasted, then it was “GET ROCK BAND BACK ON THE SCREEN!” haha…Our early girl Cyd didn’t leave until around 2am, only getting a 90 minute nap before working all day, but she said it was totally worth it! Others started trickling out around then, but a core group of Jeff, Audene, Kevin, Ken & Rob stayed with me, moving to normal Rock Band around 4am, then I think around 5:30 we stopped playing…I finally got to bed after 7am…that’s the latest I’ve stayed up for New Years in 5 years! 🙂

Early on in the evening, before about half the others even arrived, I climbed carefully behind the new TV to take this video with my little camera, but it was the only video I took since we were all having way too much fun. Forgive the quality since this was just my little point & shoot camera, not a real camcorder or anything, but it’s still funny. 🙂

Thanks to Rob for grabbing my camera every so often to help me document the fun evening! The whole album is in Gallery here for anyone who’d like to see more of the crazy fun. The replacement guitar arrived this past week, and I’m shopping for best pricing on 2 extra mics so I don’t have to borrow anymore for Triple Fabs, and I’ll get my drum set back by February 1st. Now people are saying either they must stay away from my house or they’ll be sucked in to the Brittahytta Beatles Rock Band vortex, or they are already vying for “playstation-sitting” responsibilities during my next big trip!

Hope everyone is having a Happy New Year so far!

Posted in Parties, Uncategorized | Tagged , , , | 1 Comment

Holiday Happy Hour

Well, my best laid plans were thwarted a bit last Thursday…on my drive home the Briata freaked out with the check engine light coming on, then after atrociously long lines at the grocery store, I came home to a dripping leak in my bathroom skylight! No time for any food prep Thursday night after all that chaos, just enough picking up & final decorating so the housecleaners could clean for me on Friday, as I was face painting at my company party that afternoon, then going straight to Margarita Friday, even though traffic was so awful I didn’t get there until everyone else was already finished with dinner…oh well!

Even though I had checked all the other skylights Thursday night, when I got home Friday night there was a new leak in the hall bathroom skylight, after I had already been up on the roof with plastic sheeting & bricks for the other leak…so Saturday morning during another quick break in the rain I got up again with more plastic & bricks. Thank goodness my temporary measures are working well, then when everything dries out at least a week or more, I have exterior roofing caulk I just bought to seal those leaks from the roof side. I guess my house heard me & is coming up with a project list on its own!

The only changes to the party menu were my own version of sugarplums in place of the pepperkakor I didn’t make, and the snowflake cookies ended up as “decorate your own” activity since I ran out of time to decorate those. That was actually pretty fun, with several people decorating snowflakes, so I think I will plan for that better next year. 🙂 Yet another year there was plenty of food so I didn’t even bother heating up the crab puffs. They used to be ubiquitous, but now I think it’s been a couple years since I’ve had any at any of my parties…amazing!

The actual party menu

Posted in Christmas, Parties, Uncategorized | Tagged , , , | Leave a comment

December already?

As of yesterday, it has officially been 4 years since I owned my house…wow! Time flies, and I’ve done a lot of improvements in just 4 years, but that will be a separate post in January when I plan for next year’s projects… 🙂

This Sunday December 13th will be the 4th anniversary of walking into Brittahytta as owner for the first time, so why not celebrate with a Holiday Happy Hour? I’m expecting around 50 people anytime after 5pm, so hopefully we’ll all have a lot of festive fun!

I’m sure I’ll be running around crazily at the last minute as usual for any of my parties, but I’m in a fairly decent prep position at the moment:

outside decorations done except for front door wreath
inside decorations almost done – just final touches left
4 dozen sandbakkels are made, a little more dough left to make maybe 1 dozen more
14 dozen intricate sugar cookie snowflakes baked, need to decorate
chocolate covered toffee made
double-batch of fudge made to cut into squares
10 dozen krumkake made – took 6 hrs standing at the stove – ugh!
pepperkakor (gingerbread) dough chilled in fridge – should make 5 dozen tonight I hope

The party menu (subject to change)

Posted in Christmas, Parties | Tagged , , , | Leave a comment

Halloween 2009

I do really like having Halloween week to enjoy after my party is over, especially when I did NOT get sick this year! Unfortunately I still got too busy with other fun social events, including Margarita Friday in costume, and the Gourmet Chocolate Walk in San Francisco as “grownup trick or treating” on Saturday afternoon, so I still didn’t get the chance to carve a pumpkin after all…darn! Maybe next year…except that since Halloween will be on a Sunday, I’ll probably barely have party stuff cleaned up enough for the photo shoot while I get trick or treaters at my door… 🙂

So, on with the Halloween 2009 Party Post-Mortem! Another fantastic big bash for Halloween at Castle Brittahytta! Numbers were back up this year to 54 including 6 kids ranging from newborns to teens, and I still absolutely LOVE the enthusiasm of my guests! That makes all the lack of sleep and hard work & pitfalls in party prep totally worth it! 🙂

The Final Push of Party Prep

Posted in Uncategorized | Tagged , , , , | 7 Comments

Halloween coverage

I’m still working on the party post-mortem, which will now be combined with Halloween day plans, but before I might forget, here is the press coverage I know about this season:

In the About.com Pool & Patio section:
Eerie Elegance Author Shares Secrets for Outdoor Halloween Decorations & Parties:
An Interview with Britta Peterson, Webmistress of the Dark

(keep reading past the ads in the middle)

Eerie Elegance radio interview with Shannon Medaglia on Edmonton, Alberta, Canada’s 104.9 Easy Rock – October 31st, 2009

Thanks to Lisa & Shannon for such nice interviews!

From googling, I found myself and/or book mentioned on a few other blogs & such…

Host a wicked Halloween party
Sunday, April 26th, 2009

All Hallows Eve Menu & Digital Freebie
Sunday, September 27, 2009

Foodie Halloween
Tuesday, October 27th, 2009

Halloween Party Ideas
Friday, October 30th, 2009

I hope everyone had a horribly haunted Happy Halloween! 🙂

Posted in Uncategorized | Tagged , , , , , | 1 Comment

Episode 9 for 2009!

For the last episode for the 2009 Halloween season, learn how to make one of the very first spooky recipes in the Eerie Elegance repertoire – the Haunted Human Heart that bleeds tasty raspberry syrup! That’s it for 2009, and I only realized while editing that brings me up to lucky spooky number THIRTEEN podcasts total since I started! How perfect is that? 😉

You can watch the entire episode from EerieElegance.com, it’s split into part 1 & part 2 on YouTube, and on iTunes by searching for “Eerie Elegance” or by subscribing to the series. You can join my over 220 Eerie Elegance Facebook fans if you like, and the Eerie Elegance Agonizing Accessories store on Zazzle.com is open for business. Book sales are still going strong…still no day since August with zero sales!

Eerie Elegance – Haunted Human Heart

My party this past weekend was a grand success with over 50 guests who had a blast, and I’m still writing up my party post-mortem & organizing photos, so that will come later this week…but tonight is my first chance at a relaxing evening, so I’m going to take advantage to rest in my eerily elegant decor & maybe convince a kitty or two to cuddle, since I haven’t really sat down much all weekend!

I hope everyone has a fabulous Halloween!

Posted in Uncategorized | Tagged , , , , , | 2 Comments

Episode Eight & Pentultimate Party Prep Progress

Eerie Elegance 2009 Episode 8 is out today, showing how to mix your own experimental Spontaneous Sentience as one of the many possible Laboratory Libations! You even get a sneak peek of my new Steampunk Study in process. Only one more episode on the schedule for 2009!

You can watch the entire episode from EerieElegance.com, YouTube and iTunes by searching for “Eerie Elegance” or by subscribing to the series. You can join my almost 200 Eerie Elegance Facebook fans if you like, and the Eerie Elegance Agonizing Accessories store on Zazzle.com is open for business. Book sales are still going strong…no day since August with zero sales!

Eerie Elegance – Spontaneous Sentience

This weekend was a frantic push to make up for lost time from Star Wars in Concert, but thankfully I got a lot done! It was several weeks behind my intended schedule, but at least I got the cardboard mockup made for the gingerbread haunted mansion yesterday! The back is all open like a dollhouse except for the top tower, so you’ll be able to see through the windows from the front, but I can turn on lights & set up figures inside from the back, plus people can see even more details by turning it. It’s on a leftover chunk of EcoTop counter from the kitchen remodel sitting on my large wooden lazy susan like the Hogwarts castle was. Since there’s no way it’ll move from the table without a lot of help, so it’s on the skull lace tablecloth with plastic protection over it for now…glad I thought of that before I started actually building anything! I like the design, loosely inspired by Addams family & a couple other mansard roof Edwardian/Victorian houses. It should be relatively easy to bake & assemble, less pieces in number but larger pieces than the Hogwarts castle, and then the decoration is what will make it cool. I have to make all the quiz characters & accessories the next couple evenings, then bake the gingerbread Wednesday night or Thursday day. Since it rained again on Monday, I’m not putting any gravestones out or paper decor on the patio until the day before the party so they won’t get ruined.

I steampunked a LOT of random lab stuff on Saturday…even my straw dispenser since it was lime green plastic I didn’t like anyway! LOL! I wasn’t going to use the oscilloscope since it was too modern but then I thought it would look great with woodgrain contact paper & some “brass” accents…I really like it this way! I assembled the spare water heater parts with my chunk of ductwork leftover from cutting my kitchen vent hood into a contraption I really like. My costume is in great shape & is presentable even if I run out of time for any more. I would like to add the jewelry I planned & a holster or two for my ray guns, but we’ll see how much time I have. Thank goodness I’m done with the sewing machine this early!

Aside from cleaning up the project mess that can be stashed last minute on the garage floor with Miata parked in the driveway, most of the house & patio is decorated at least so that feels much better than how I started the weekend. I’m still still choosing the last tracks for the music quiz, which I’m listening to on my iPhone on my long commute to & from work, and no food is made yet except the bone cookies, but food is better made closer to the party anyway, and I’m not doing as many cookies this year since I’m doing the gingerbread mansion. Thank goodness I’m taking both Thursday and Friday as vacation days from work this year, since I’m gonna need the extra day!

Now back to party prep, since way too much still to do! 🙂

Posted in Uncategorized | Tagged , , , , , | Leave a comment

down to the wire already?

Less than two weeks until my party and only two episodes left before Halloween Day! Eerie Elegance 2009 Episode 7 is out today, showing how easy & effective it is to make the Simple Spooky Spectres I first made back in the last millenium! You can watch the entire episode from EerieElegance.com, YouTube and iTunes by searching for “Eerie Elegance” or by subscribing to the series. You can join my 183 Eerie Elegance Facebook fans if you like, and the Eerie Elegance Agonizing Accessories store on Zazzle.com is open for business. Book sales are still going strong…no day since August with zero sales!

Eerie Elegance – Simple Spooky Spectres

Only a little Halloween party progress since last week because of the Star Wars in Concert chaos from Friday through Sunday. Singing for 30,000 screaming fans total in 4 stadium gigs with fabulous orchestra, giant LED screen of film footage, smoke & flame effects, & even lasers, with singer friends from across the past 20 years of my life…now that was an experience of a lifetime! Definitely worth sacrificing some Halloween prep time for that! 🙂

I was barely able to film & edit my podcast for this week between Star Wars gigs, and last Wednesday was singing rehearsal, but Thursday & Monday I did get quite a lot done really. My ruffly costume blouse is all sewn except for bottom hem & buttons (I HATE sewing buttonholes!) and it looks great! The portrait gallery is now inside in the hallway in place of my normal travel artwork, all the spiderweb lace & tapestry curtains are up in the living room with just enough matching purple spiderweb lace for a piano scarf, the pillow covers are changed & silly seasonal pillows are out, the bathroom towels & rug are set up, the skull door knocker wreath & spiderweb doormat at the front door, the fringe is pinned on the new spiderweb lampshade, and my brown velvet spats are underway.

I am extremely thankful I hadn’t set out gravestones or hung the bookcase paper yet since there is a HUGE storm today, windy & pouring rain, so that would have ruined the paper through the screened patio! Whew! But that must go up this weekend, since it’s the last weekend I have before my party…ack! The to-do list for this weekend is truly scary, with not only food to make, but lots of major projects including the gingerbread haunted mansion & my leather costume bodice, plus I want the Steampunk Study set up as much as possible, especially the lab equipment, so I can film the next podcast with that backdrop…wish me luck!

Posted in Uncategorized | Tagged , , , , , | Leave a comment

Brittle Bones & Happy October!

It’s already October, which means Halloween is even closer now! Eerie Elegance 2009 Episode 6 is out today, the Britta Blvd Halloween classic Brittle Bones! Extra bonus for me is that my first party food is all set to go plenty ahead of time. 🙂 You can watch the entire episode from EerieElegance.com, YouTube and iTunes by searching for “Eerie Elegance” or by subscribing to the series. You can join my 169 Eerie Elegance Facebook fans if you like, and the Eerie Elegance Agonizing Accessories store on Zazzle.com is open for business. Sometime last week I passed the 500 books sold mark & more are selling every day…woohoo! 🙂

Eerie Elegance – Brittle Bones

The fireplace mantel is finally ready to test hanging on the brick fireplace, then staining can begin. All the foam stone walls & gargoyle entrance columns are cleaned up & set up, but there are bits of touchup & repair to do. Storing painted foam outside doesn’t last very long, these are on their 4th year now, so I think new foam structures are in my future next season. Time for something new by then anyway! I have the flagstone gossamer & the lab chalkboard hanging in the Steampunk Study, so next will be the library bookcases on the walls over the flagstone. I painted the pipe organ with a black wash to give it spookier atmosphere, and I’ve tested my iPod & battery speaker with my pipe organ playlist – two items on my list last year that escaped me from lack of time. I ran new extension cords around to the back & to the windowbox since my new brick pathway foiled my previous setup. The skirt is sewn, my costume blouse is cut & pinned hopefully to sew tonight, and a purple spiderweb lampshade matching the curtains is underway for the living room, plus another curtain panel for the piano window…which means the giant cat eyes will move to staring out the office window to the backyard instead of the front…heehee! Way too much still to do as always, plus I don’t have much time this weekend since instead of staying at home doing Halloween projects, I will be PAID to sing Star Wars in Concert at Arco Arena in Sacramento & HP Pavilion in San Jose…does that mean I should have watched the prequels by now? oops! 😉

Posted in Uncategorized | Tagged , , , , , | Leave a comment

The Tombstone Trilogy is complete!

Episode 5 is out today, completing the Tombstone Trilogy! Hope you enjoy them, since the entire 3-part series is about 30 minutes & chock full of tips I’ve learned while making 23 gravestones by now. Bonus points if you can read the epitaphs on the example gravestones & name the characters & what they’re from. 🙂

You can watch the entire episode from EerieElegance.com, YouTube and iTunes by searching for “Eerie Elegance” or by subscribing to the series. I’ve got 152 Eerie Elegance Facebook fans now, and I’ve set up the Eerie Elegance Agonizing Accessories store on Zazzle.com and already earned $7 royalties there!

Eerie Elegance – Haunted Headstones – Part 3: Painting & Aging

The official party invitation has been sent, one month to party day, and I’m still testing Mojitoe moldmaking techniques down to the wire since that’s on the schedule to film this week! My fireplace mantel is under construction probably halfway done, but I keep running down both batteries from so much drilling & screws, so that will be continued next weekend. My local thriftstore seems to have caught on since I’ve last needed costume leather, since all their leather jackets are now $30 or more, so I found a pair of leather pants (!) for $10 that aren’t the perfect color, but I think I can make it work for my bodice. I did find a pair of shoes for $5 to scavenge for 8 matching small buckles, plus a few other steampunk props. Speaking of steampunk, the serendipitous result of my 29-year-old water heater dying last Thursday night is that I scored on leftover copper pipe & mechanical bits for my lab display! After hearing & seeing how much I did myself on the kitchen remodel, the repair tech even showed me how & actually let me solder the copper overflow pipe myself with his blowtorch…cool! That might have to be my next tool for my growing collection! 😉

Posted in Uncategorized | Tagged , , , , | Leave a comment

Eerie Elegance Agonizing Accessories now available!

Do you like the Beware the Brocade design? You can now buy all sorts of silly things like shirts, bags & more at the Eerie Elegance Store on Zazzle.com! You can scroll through this nifty display below, or you can always find it on the Eerie Elegance website.
create & buy custom products at Zazzle

Note that if you select a shirt with the design you like, you can change the shirt style to whatever you like, long sleeves, ladies vs. mens or kids, whatever. Hope you like them! I’m going to get my dad a silly tie for Christmas…haha!

Posted in Uncategorized | Tagged , , , | Leave a comment

should have been four parts?

Episode 4 is out today! Little did I know how much I had to say about gravestone carving & layout…I had 30 minutes of good content my first editing pass, then it took 4 more hours to chip more & more content away down to under 10 minutes! Guess I should have made Carving its own full segment, but I did get it down to the essentials, and the ‘director’s cut’ is probably too long anyway. Pardon the plane overhead…I didn’t hear that one while filming or I would have done another take. The wind was the precursor to the freak thunderstorm we had that night, so I’m glad I got the filming done in the nick of time!

You can watch the entire episode from EerieElegance.com, YouTube and iTunes by searching for “Eerie Elegance” or by subscribing to the series. You can also become a fan of Eerie Elegance on Facebook. I’ve got 131 Facebook fans in just one week, the majority of them people I’ve never met…wow!

Eerie Elegance – Haunted Headstones – Part 2: Decorating & Carving

I am testing various Mojitoe moldmaking techniques in hopes I can come up with one I can reproduce for a decent cost so I can sell the mold along with my recipe. So far I have a gorgeous 6-toe free-standing food-grade silicone mold with spectacular detail, but it used $25 of liquid silicone supplies! The cornstarch press mold technique didn’t work, so next is trying to make a closer-fitting mold form for the silicone, since that might bring the cost down enough.

Halloween shopping weekend was as fun as ever, and I still came back with a fairly full trunk, but we were a bit disappointed in the selection, especially at the cheaper stores who usually have good Halloween basics we can make into other things. It looks like they’re stocking less inventory overall due to the economy. Honestly, the past 5 years or so I had been disappointed in how MUCH Halloween stuff was available, removing the fun challenge of making your own, so I don’t mind. I totally scored at the Goodwill store for lots of steampunky goodness for the study! No leather jackets there like I need though, so I still need to scavenge locally for those so I can make my costume bodice. Now that I’m back in town, it’s full “steam” ahead for the study and my costume! 🙂

Posted in Uncategorized | Tagged , , , , | Leave a comment

The Haunted Headstone Trilogy begins…

Episode 3 is out today! There is an entire Haunted Headstones chapter in Eerie Elegance for making my realistic carved foam gravestones, so I decided to split up the episodes as a trilogy to get everything in. Part 1 is Designing & Cutting which is just under 10 minutes, so it’ll be a good half hour total watching the entire set when it’s finished! The gravestones are messy enough they are best done outside, and I have new neighbors with active little kids and a dog, so pardon some of the background noise. A lot is filmed in the dark since that was after the noise finally went to bed! 😉 You can watch the entire episode from EerieElegance.com, YouTube and iTunes by searching for “Eerie Elegance” or by subscribing to the series. You can also become a fan of Eerie Elegance on Facebook!

By having filmed these, that means I have 4 new gravestones already well underway for my own decor! The most intricate two are completely carved ready for a base coat of paint (which also means the filming is already DONE for part 2 – hooray!), but I have to finish carving the other two before I’m ready to paint. My biggest splurge for this year’s decorating arrived from New Jersey last week = 2 wallpaper murals of a fancy library so I can make my patio bar into “walls” of bookcases as I’ve wanted to do since 2006. My own costume I’ve only spent $20 so far (well those are shoes & tights I will wear normally, so maybe those count as normal wardrobe, not costume expense?) since I’m using closet finds & fabric I’ve had in my stash, but I still need to find old leather jackets to sew my buckley bodice. This weekend is our annual Halloween shopping trip with my friend Tash, so I’ll be on the lookout for fun accessories!

Eerie Elegance – Haunted Headstones – Part 1: Designing & Cutting

After the Cinema Brittahytta Season Finale tonight (last movie night of the summer), the patio will start transforming into the Steampunk Study!

Posted in Uncategorized | Tagged , , , , | 1 Comment

Halloween continued…

Whew! Technical difficulties almost prevented it, but here is this week’s Eerie Elegance episode…everything you ever wanted to know about the infamous Eerie Eyeballs! Seriously, it’s about 18 minutes long, and I think I answered every single question I’ve ever gotten in email about making my eyeballs, so it’s chock full of good info & especially closeups of the painting technique. Again it’s split for YouTube into part 1 & part 2. You can watch the entire episode from EerieElegance.com and iTunes by searching for “Eerie Elegance” or by subscribing to the series.

For my own Halloween planning, I have completed the herculean task of clearing the way in my garage chaos to get at the Halloween boxes & shelves, and in the process finding other good supplies for the Steampunk Study and/or my costume that goes with it. Always nice to finally find a reason for something I saved from long ago! I have decided on the 13 favorite spooky characters for the gingerbread haunted mansion quiz (I’m not telling or the party guests reading will be spoiled for the quiz!), and I’ve decided on epitaphs for 4 new gravestones to make…which is good since I plan to film the making of my new gravestones for the next 3 podcasts!

Eerie Elegance – The Infamous Eerie Eyeballs

However the next couple days will be Halloween hiatus since I get to be hostess for my grandmother, cooking for her in my new kitchen & driving her around California in my convertible! 🙂

Posted in Uncategorized | Tagged , , , , | 5 Comments

Halloween season has begun!

Here we go! Halloween season has officially begun! Not only am I already deep in my own party planning, but Eerie Elegance book sales have gone from selling less than 10 books each month through June, to about 40 sold in July, and 85 in August…definitely ramping up!

I did not allow myself any concrete Halloween planning until my kitchen remodel was absolutely finished, otherwise I was afraid I might get distracted & never finish the kitchen! Wheels are always turning in my head, however, and in the past couple weeks I’ve written up my Halloween party prep wishlist for this year, including the 2009 series of Eerie Elegance podcasts…with the first episode released on schedule TODAY! 🙂

I didn’t expect to have so much information about royal icing & the spiders I make with it, but it ended up 15 minutes, so had to be split for YouTube into part 1 & part 2. You can watch the entire episode from EerieElegance.com and iTunes by searching for “Eerie Elegance” or by subscribing to the series. Scroll down to see my glowing iTunes review! Thanks amberdawn91! 🙂

Halloween, here we come! 😀

Eerie Elegance – Awful Arachnids – Royal Icing Spiders

Posted in Uncategorized | Tagged , , , , | 7 Comments

My Hogwarts Castle is a Sunday Sweet!

I made it on the Sunday Sweets edition of the CakeWrecks blog! The blog started with horribly hilarious professional cakes gone wrong, but then she decided to take a break each Sunday with a different theme of really nice cakes. Last week’s theme was Harry Potter, and they mentioned they’d do a second round this week, so I humbly submitted my gingerbread Hogwarts for consideration, wondering if there was too much gingbread vs. cake that it wouldn’t qualify…but I made it on today!

Not much is said about mine in the post, nor much description explaining gingerbread+cake, but in the comments among many oohs & ahhs, I got one of the best compliments ever!

“Ms Avery said…Wow, a Hogwarts cake even better than last week’s — didn’t think it was possible!”

You see, the Hogwarts cake featured last week was none other than the one made for the LA movie premiere of HP5, made by Charm City Cakes and featured on the Food Network show Ace of Cakes! …and she liked mine BETTER! 😀

Admittedly the reason I submitted myself was because I think mine is at least as well done as that fondant-covered styrofoam Hogwarts (that didn’t even light up!)…but confirmation from a complete stranger is very nice to hear!

We started our 2009 mini-Pottermania on July 6th with a Cinema Brittahytta showing of HP5 in BluRay glory on the 8ft screen & nice speakers, 20 of us enjoying leftover party food from the 4th, and Butterbeer Floats with leftover homemade custard vanilla ice cream…YUM! :-9 Then the majority vote was to see HP6 at a sane hour instead of the midnight opening, so 18 people accompanied me to the 8:15pm showing opening day. Only Kevin C & I were Gryffindor students in costume, unfortunately no Slytherin representation after all, but I brought 4 liters each of chilled Butterbeer & Butterbeer Light (very refreshing on a day so hot it gave me Snape hair! :P)..and even my Chocolate Frog design was resurrected by my freed but always loyal house-elf Rubby (Ruth)…she even designed Famous Witch cards for Juanita & me with hilarious glowing descriptions on the back!

Chocolate Frog Card – Famous Witch Juanita Harris

Posted in Uncategorized | Tagged , , , , | 7 Comments

Elmo says Happy Birthday!

Louie’s son Benjamin turned 2, so he had an Elmo birthday party this past weekend. I was commissioned to make the birthday cake, so we decided on Elmo cupcakes, limiting food coloring use by using red sugar over white frosting & making separate features that could be scraped off if necessary.

I haven’t prepped 6 dozen cupcakes for any event before…it took a lot longer than I expected! Frosting even a big cake never takes me 2 hours, let alone making so many individual features for the faces took 4 hours! I used my new drop-leaf counter, plus my oven for the 2nd time! 🙂


Voila! Lots of Elmos say Happy Birthday!

How to Make Elmo Cupcakes

First, mix up marshmallow fondant or similar edible clay for eyeballs. Thankfully I already had some white marshmallow fondant in my fridge, otherwise that would have been another couple hours a day earlier to make that. I had barely enough for 72 pairs of eyeballs, so close that I was going back & remaking the largest eyeballs to squeeze more out of the batch!

I used large orange gumdrops for the noses, cutting them in half so I had more, but there still wasn’t enough orange in 3 bags of gumdrops, so I put the white & yellow ones in a glass bowl & added yellow & red food coloring in water until it looked the same shade of orange. I let that sit awhile for the color to soak in while I was piping smiles. The water soaked all the sugar coating off, so to make them match the other gumdrops, I added lots of granulated sugar, since it kept soaking in!

Melt some semi-sweet or dark chocolate, then use a piping bag or baggie to pipe chocolate smiles on a non-stick sheet like my Roul’Pat or SilPat. Try to make them thick enough to hold together later, especially at the corners. Keep these in the fridge to set up solid.

Roll the marshmallow fondant into eyeballs based on the size of your cupcake face and gumdrop nose, and poke a chocolate chip pointy side in for the pupil for each eye. Set on a non-stick cookie sheet or SilPat at room temperature to harden. Overnight is best.

(break for 5 hours of kitchen backsplash tiling!)

Bake the cupcakes in paper liners per the cake recipe and cool completely. (6 dozen took 2 hours just to mix & bake in shifts!)

(sleep at least a few hours!)

Mix your favorite buttercream frosting, use a piping bag with coupler with no tip to swirl frosting neatly onto the cupcake, even surface with offset spreader, dip into bowl of red sugar, sprinkle red sugar around the edges where the dipping method missed. Repeat until all cupcakes are fuzzy red Muppet faces. I was expecting maybe an hour, but this took me a full 2 hours for all 6 dozen!

Safely transport all your goodies to the party. I don’t have cupcake transport containers, let alone for 6 dozen, so I used bubble wrap in boxes for non-slip surface, drove very carefully, and brought the red sugar as a repair kit, which did need to be used in a few cases. Since it was so warm, I kept the chocolate smiles on the Roul’Pat over icepacks in a large baking pan!

Add the features to each cupcake. The chocolate smiles were melting in my fingers barely touching them, so I brought small metal tongs to help me. The tongs also worked well to pick up the pairs of eyeballs without deforming them. Add the eyes first, then the gumdrop nose to help hold the eyes in place, then tuck the top lip of the chocolate smile into the red sugared frosting until you have the correct mouth placement.


Voila! Lots of Elmos say Happy Birthday!

I was also “hired” to do face painting for the party, so I have photos of each of my “customers” in the same gallery, including the birthday boy here, getting Elmo painted on his hand! 🙂

In other news, the last 20″x20″ section of the grouting for the kitchen backsplash will happen tonight…AFTER 19 of us see Harry Potter and the Half-Blood Prince, complete with Wizard Rock, costumes, Butterbeer & Butterbeer Light! 🙂

Posted in Cupcakes, Edible Art | Tagged , , , | 2 Comments

Fireworks & Fun 2009

The 4th annual Fireworks & Fun was a full week ago on the 4th of July of course…my first party in my new kitchen! We had 26 adults, 2 toddlers & 2 dogs, so a good-sized crowd with plenty of room for everyone to have a great view from the lawn. The traffic & parking were worse because so many other local cities had canceled their festivities this year, and the fireworks might have been a slightly shorter show, but more than made up for it with the amazing finale…wow! The weather was perfect again this year, with a nice breeze making all my flags fly nicely, but due to my kitchen chaos barely being settled enough less than 24 hours to party start time, it was all-hands on deck getting the food ready!

Fireworks & Fun 2009!

Posted in Outdoors, Parties | Tagged , , , | 1 Comment

Mardi Gras Masquerade 2009

Sorry for the delay in the party recap, but I’ve had 6 houseguests in 7 days, so I’ve been a bit busy since the party!

Even though from RSVPs I had been wondering if this year might beat out 2005 for the smallest Mardi Gras, there were 24 of us letting the good times roll, including two of those under 2 years old, so a good turnout, especially considering the weather turned a bit nasty with wind & rain right at 7pm. There were very few costumes this year, only Cyd the Bar Wench, Kaye in her corset, the Barbieri family, Robin & Charles, and myself, but a few others came with some purchased masks. Everybody who came said they had a great time, so that’s what counts! 🙂

I hadn’t made the Tricolor Scrolls in many years, so I decided to try again with different purple, green & gold contents, which were a big hit! My secret new cookie idea was lifesize edible stick masks, including some iced plain white for guests to decorate for us all to vote for a prize for Best Edible Mask. I knew this would be a great kid party idea, but you never know depending on the mix of adults who might come who might be enthused or not. Well, I had more people wanting to decorate than I had space for them to work, so I think I will work the kinks out of the concept & try again next year! I did get my prize medals finished, from supplies I had bought 2 years ago or earlier, so I was glad for that!

And the winners are…

Who Got Da Baby? Ashlyn did!
Best Mask/Most Creative Mask = Robin’s gorgeous beaded wire mask
Best Costume = The Bollywood Barbieris
Most Creative Costume = Charles the Frat Boy with Beads
Best Edible Mask = Cyd (perhaps sympathy votes?)


Mardi Gras Fairy Princess Britta displaying the new lifesize mask cookies

More details if you’re curious…

Posted in Mardi Gras, Parties | Tagged , , , | Leave a comment

Mardi Gras party prep progress

Thank goodness for the long weekend! I still have a long ways to go, but I have made great progress in getting the Mardi Gras Masquerade ready for this coming Saturday! My fairy costume is very nearly done, some tedious handstitching left on the top of the bodice, and details like adding ribbon to the mask & things, but at least wearable already! I could have been further along, but I really wanted to do the wings a certain way, which took something like 12-16 hours of handstitching I swear! 😛 A lot of the food is ready to go, but since I’m making new cookies which are a surprise, they are taking longer & more ingredients since they are oversized. All those need to be decorated tonight after work but at least I have 50 baked that haven’t broken. There were more that were either attacked by stealthy kitties (tag-teaming ganging up on me isn’t fair!) or just broke from being too thin in places.

party prep so far, starting 2 weeks before party day:

Posted in Mardi Gras, Parties | Tagged , , | 2 Comments

new “kitchen computer”

Last year I saw this fancy new “kitchen center” Pandigital PANTV1512 15.6-Inch Kitchen Technology Center Digital Picture Frame on Popdgadget & thought it would be a nice space-saving idea to replace my bubble-style iMac kitchen computer for recipe use…however it seemed a bit expensive & overkill since I don’t think I’ll need an HDTV in my kitchen! The cabling for HDTV service would be annoying so not worth it. Wifi would be nice though…so since I’ve built up some free Amazon money from my Visa, I thought I’d look for it in case it came down in price yet. Nope, still $400. However the “you might like” Amazon suggestions showed the lesser expensive Pantouch digital photo frames with preloaded recipes from Bon Appetit, one drastically on sale for only $130 …aha! Completely within the free money I have right now! I couldn’t find the wifi USB dongle on Amazon, but I did find it on Bed Bath & Beyond online for $30, so I figured to order the frame, see if I could put my own recipes on it easily enough, then I could always add on the wifi later if I wanted it.

So for a third of the cost (free for me!), this can be a photo frame to put elsewhere if I’m not cooking (in addition to the internal memory it has slots for several types of media cards, plus for a USB thumb drive), plus I can move this around the kitchen wherever is most logical for that recipe. It does have to plug in for power though so can’t go absolutely anywhere. This model only comes with the black frame, but it is removable, so I can always make my own prettier frame surround for it if I want to. For the extra cost for the “kitchen center” it would have been built-in wifi, HDTV-ready with a larger screen size, and more preloaded recipes, but I don’t think I need all that. I added a couple books & a DVD I’ve been saving on my list to combine for free shipping, and I still have some free money left. The books showed up earlier last week, so I’ve already finished reading one of them. 🙂

I got the digital photo frame yesterday, so I connected it to my computer to see how the recipe files worked. It’s not the most elegant navigation system, and I might end up using the remote more than the touch feature since it’s only around the border, but we’ll see. It will not display text files or PDF, even TIFF, only JPEG, so I will have to convert my text recipes to images to view them, but that’s a big plus for scanning from cookbooks or magazines since no conversion to text necessary! To see if it was worth the effort, I took quick & dirty screencaps of most of my online Mardi Gras recipes to see if I could read them. The included USB cable worked fine, mounting as “Pandigital” on my Mac desktop, so I could just drag & drop files to copy them over to the 512MB internal memory, eject the USB drive, then it would reboot automatically after it disconnected. Hooray it worked! The image isn’t huge, but still larger than recipe index cards. 😉 I definitely would not go any smaller than the 10.4″ diagonal image size though if you’re going to use one for your own recipes. Unfortunately my nice sale price has gone up $100, but you can still get the frame without the Bon Appetit preloaded recipe collection for $200. The king cake recipe was too long for a screencap, so I cobbled that together in Photoshop (InDesign would have been better but I didn’t want to deal with it with my headache last night), and now all my Mardi Gras recipes are on my new “kitchen computer” in time to use for the party in 2 weeks!

In other Mardi Gras news, my fairy wings are complete enough to wear but I would like to embellish them more…but since the dress & bodice are barely begun, those will come first. The Creole Chicken Skewers are prebaked & in the freezer, and the spinach ball goop is in my fridge ready to be rolled into balls & frozen. Glad I have a 3-day weekend inbetween to decorate & make party food! 🙂

Posted in Mardi Gras, Parties | Tagged , , , | 1 Comment

more press!

I forgot to google myself for the Canadian Press stuff until after the other article came out today…here we go! Looks like these came out on the 20th/21st so I’m late to the party! No wonder I’ve been getting autographed book orders from Canada the past week! 😉

Ghoulish or gross? Finding the right balance for Halloween entertaining
(This seems to be the longest version)

Halloween party food that takes guts to eat

Halloween entertaining: drawing the line between ghoulish and gross

‘Eyeballs’ are a versatile ingredient on Halloween menus

‘Eyeballs’ are a versatile ingredient on Halloween menus

Eerie eyeballs to eat
(too bad they didn’t use my actual eyeball photo provided with the CP article! :P)

Posted in Uncategorized | Tagged , , , , | 2 Comments

newspaper article

The Contra Costa Times & Oakland Tribune ran a Halloween food story in today’s paper that includes my book and quotes from me. If anyone knows anyone who gets those papers, I would really appreciate any copies you can collect! Here is the online version of the article which doesn’t usually include the same photos as the print version.

A Halloween feast for guests and ghouls

Posted in Uncategorized | Tagged , , , , , | Leave a comment

Halloween 2008 Party Post-Mortem

Whew! Another fun Halloween party is over! I must remember quality over quantity, since my quantity of guests has been dropping the past couple years, down to 31 this year, but I’m sure that number would still inspire “guest envy” like in that one Amazon review. 😉 I can say my quality of enthusiastic guests has remained fabulous, with fantastic costumes, and even clever food, and what I like the most is seeing my friends’ creativity!

The Party

Posted in Uncategorized | Tagged , , , , | 1 Comment

last episode for 2008

Savory Spiders with Gooey Guts is now live!

My annual Halloween Party Post-Mortem with photos will be later today I hope!

P.S. I don’t want to jinx anything since it’s not for sure yet, but let’s just say please send your positive thoughts about me to Chicago since you might have a really cool reason to watch Oprah on Halloween day! 😮

Posted in Uncategorized | Tagged , , , | 4 Comments

episode 3 & party prep update

Episode 3 is live! One of the most frequently requested “how did you do that?” questions over the years is answered in Eerie Elegance: Glowing Mad Scientist Display! Only one more episode for this season, and I’m thankful the editing can wait until AFTER my party! 😉


In party prep news, the pipe organ has made huge leaps & bounds of progress over the weekend but is not finished because Liquid Nails takes too *%& long to dry *sigh* but the shed is cleaned out & black curtains have been hung to hide my storage with room for the pipe organ to be inside the graveyard chapel. For my costume my crown is mostly done, the bodice lining & fabric is cut & pinned, and the skirt cut out but will need experimentation so plenty left to do on that unfortunately. Some new LED candles are complete which won’t give off much light but will be safer in the wall sconces (someone actually lighted the decorative candles in the bathroom that made a mess onto my Halloween towels last year!). My Beware the Brocade Victorian-inspired lampshade is done which matches the new purple sheer spiderweb curtains. The piano window facing the street has the giant cat eyes window cling, which I absolutely LOVE! I swear it looks like Ebony since it is her eye color, and Onyx never has that same mischievous look on his face. 😉 The gargoyle columns are still fine since I was able to fit them in the shed all year, but the foam walls for the chapel & patio suffered in the giant winter windstorm, flying into my neighbor’s yard so I had to collect the broken pieces, so I knew those might need some help. Some of the foam was eaten away so will need to be repainted as “distressed” but there was only one small piece completely missing that is easy to repair & hide behind a column, so it could have been much worse! The touchup paint can wait until later this week.

My to-do list is so huge I will not inflict you with it here…ack! No food is done at all, and there are usually a couple batches of cookies baked by now…ACK! I only found tiny purple potatoes so far, so we might not have Batato Chips after all, so I’ll hit a few more stores this week to see if I can find any. Also since my new kittens last year shredded a few of the flagstone gossamer walls trying to climb them, I just ripped them down & shoved them in bags, so that won’t be easy to put back up, so I keep postponing in case I have to keep the walls white – yuck! Wish me luck getting everything done!

Posted in Uncategorized | Tagged , , , , | 9 Comments

quickie update

These are fabulous Tim Burton-inspired wedding cakes…I would LOVE to make something like this if I only had the time! I have to save my gingerbread haunted mansion idea for yet another year (going on 11 years postponed idea now *sigh*) but my hope is to have little figures all around, maybe from all sorts of different spooky movies then it could be a quiz also? Maybe next year!

I’ve gotten a lot of work done on my costume thank goodness, but no sewing quite yet, and the pipe organ is probably half-finished so I think I have a chance of finishing that today. There’s another long-postponed idea that is finally happening! The witch is hanging with her brew stand in a different place this year, the foam walls are in place but need touchup since the giant windstorm had blown them into my neighbor’s yard this past winter, and several decorations are setup inside the house, so there is progress being made. No flagstone walls up yet nor any party food prepped and only less than a week to go, so it’s definitely frantic mode already!

I’m sore from yesterday’s all-day party work, so I thought I’d use my slow start this morning to update here…now I’ve gotta get stuff done!

P.S. 130 copies of Eerie Elegance sold, but the 2-day shipping I paid extra for isn’t doing much since I’m still waiting for my next shipment, so 6 people who have ordered autographed copies are waiting for books to arrive at my house. Sure hope they come soon!

Posted in Uncategorized | Tagged , , , | 1 Comment

Eerie Elegance Episode #2 – Freaky Witches’ Fingers

Episode #2 is now live – Freaky Witches’ Fingers!

Subscribe on iTunes!

Podcast Archive


(This one was 11 minutes, just barely too long for a single YouTube segment. For some reason when splitting the segments, Part 1 is fine, but the YouTube encoding goes out of sync with the video for Part 2. I have no idea why since my split QuickTime version I uploaded to YouTube was fine. Watch the QuickTime version here, from iTunes or EerieElegance.com for best results.)

Posted in Uncategorized | Tagged , , , , | 2 Comments

Halloween press & projects, plus books shipped!

I just got off the phone being interviewed by the Canadian Press, an agency that feeds stories to news outlets across Canada. They have no idea which outlets will run the Halloween article, but anyone in Canada please watch for my eyeball recipe and quotes from me about how Halloween just keeps becoming more popular. She thinks it’ll be the week before Halloween, so please let me know if you see it! 🙂

In Eerie Elegance news, I got my first 10 books finally this week, but they have already all been shipped out today since you guys already bought them all…wow! I didn’t expect that many people to want autographed copies! To quote Sally Field, “You LIKE me! You REALLY like me!” hahaha! I clicked to send the email shipping notification from USPS so hopefully that will work. Everyone who had purchased as of this morning was shipped today via USPS Priority Mail, and there are 20 more on their way to me to replenish my stock. Also, review #6 showed up on Amazon today, and reading it I got a little verklempt! aawww…not sure if Lori from PA is a blog reader but just in case, thank you SO much!

Interestingly my ad revenue is half the rate as last year at this time, so I don’t know if that’s because I have more recipes on my own page leaving less reason to click away, or if my book ad is taking attention away from the Google ads, but it’s still not shabby. I have already more than made up for the difference in ad revenue by book sales profit since I’ve hit 110 books sold as of today!

Two new Halloween projects have been completed this week…a new front door wreath of 40 pairs of mini skeleton hands plus a skull door knocker, and very eerily elegant pewter spider charms on the end of black silver-caged beads. One will replace the stupid spider hanging from my new web tier tray from Target, and I’m not sure where the rest will hang yet. They would also be lovely jewelry so I might make some more into new Webmistress of the Dark jewelry for myself…LOL!

More Halloween projects this weekend I hope, plus editing the witches’ fingers podcast for Monday! Have a great weekend everyone!

Posted in Uncategorized | Tagged , , , , | 7 Comments

Eerie Elegance video podcasts!

The first Eerie Elegance podcast is now live! 🙂

Eerie Elegance has its own blog now, with its own RSS feed, mainly for the podcast releases.

iTunes also approved my podcast already! It isn’t searchable yet, but you can find it directly at this link and subscribe if you like!

Subscribe to Eerie Elegance on iTunes!

It is also on YouTube but since it’s 13 minutes long I had to split it into two parts:

The archive will also be here on the Eerie Elegance website.


This was the very first project we filmed, unscripted live, so forgive my rambling with random extra words, and we were still figuring out best techniques & lighting in my home kitchen. I had to film all the others myself, but I think I got better at the rambling…Hope you like them!

Posted in Uncategorized | Tagged , , , , | 1 Comment

Eerie Elegance update

Another quick update on Eerie Elegance…

  • Book flyers are at several local costume stores, Wishing Well in Roseville, Affordable Treasures in Los Gatos, and Spirit Halloween stores in Roseville, San Jose & Santa Clara
  • Resale flyers have been given to Books Inc in Mountain View, and Borders & Barnes & Noble in San Jose, but I’m not expecting much since their Halloween displays already look set
  • 83 books sold in September, 87 total as of today, and still going!
  • 5 reviews now on Amazon.com, all 5 of 5 stars! I am SO happy everyone is liking the book so much!
  • First video podcast (Bizarre Brain Pate) WILL go up Sunday night, but I’m still editing this weekend
  • I’ve set up PayPal and USPS stuff so that I can sell & ship books personally with flat-rate USPS Priority Mail print at home postage & customs forms…but that means I need to GET my books first! I’m still waiting for my 10 I ordered on Sep 15th *sigh*So, whoever still wants autographed copies you can order directly from me via the PayPal link on my order page…and if you all already bought your copies already, that’s fine too…no setup costs to me for the PayPal or USPS stuff, and I learned a lot. 🙂

    Now there is one more non-Halloween project that MUST get finished this weekend but I’m very close, so I’m hoping to start this weekend on new Halloween projects. Last weekend’s annual shopping trip was successful in many ways!

    Happy October & Happy Friday!

    P.S. I saw this Nightmare Before Christmas Ultimate Collector’s DVD Set at Borders and I SOOOO want it…*drool* I must have a talking Jack Skellington!

  • Posted in Uncategorized | Tagged , , , , , | Leave a comment

    quick update

    Too much going on, so only a quick update right now! I’m finally completely over my cold, but also played piano for a wedding on Saturday which occupied my entire day, so I haven’t even had the chance to sort through my Alaska photos, let alone write up the trip, and I want to do that soon! However, here’s the latest on Eerie Elegance

  • 54 copies sold as of this morning, slightly more via Amazon than my e-store, but it’s all good!
  • Amazon now shows my product description, plus it’s showing Martha Stewart’s Halloween book in the “Customers Who Bought This Item Also Bought”…good company, right? 😉
  • Books have now arrived in Germany, Norway, Tucson, Tacoma, and Foster City (so the crazy-far-out delivery estimate they gave you when you ordered thankfully isn’t very accurate!)
  • 3 video podcasts have been filmed this week, but not yet edited, and I’m hoping to film a fourth tonight. Thanks to the four of you who voted! 😉 I’m hoping to release a podcast per week on Sunday nights up until Halloween.
  • I’ve figured out how to setup a reseller discount, so now I need to make up a flyer I can take to bookstores, party stores & Halloween stores in hopes they would like to stock my book.What I do need is to improve the Eerie Elegance website, especially with customer testimonial quotes if possible, plus reviews on Amazon. Now that books are getting into people’s hands so you’re seeing the real product firsthand, if anyone would like to help out by writing an Amazon review or providing me a quote for my website, I would really appreciate it! You can either email me or comment here…just give me permission to use what you say as advertising! 🙂
  • Posted in Uncategorized | Tagged , , , , | 16 Comments

    Eerie Elegance update

    This just in! Eerie Elegance is now available on Amazon as well as my e-store!
    Eerie Elegance Cover
    Amazon.com
    $19.95 + S&H
     

    Eerie Elegance Banner 300x75
    EerieElegance.com
    $19.95 + S&H


    I checked yesterday on Amazon but it wasn’t there yet. Funny thing is my mom’s friend found it this morning & bought a copy before I even knew it was available! I had been warned in the FAQs it might take up to 15 days to be listed so I was planning on being patient. Maybe having already sold 16 copies in the first 2 days without Amazon’s marketing machine encouraged them to get a move on. 😉 After you receive your copies, if you feel so inclined, please write a review on Amazon!

    Thankfully my nasty cold is finally on the way out, so tonight I hope to be able to start organizing my Alaska photos and writing my trip summary. I hadn’t been sick since early last October, but if not being sick for 11 months kicks my butt like this cold did, I’ll gladly take a lesser cold every 4 months or so instead! 😛

    Posted in Uncategorized | Tagged , , , | 6 Comments

    Halloween season has definitely begun – Eerie Elegance on sale now!

    Each year I’ve been posting when Halloween season begins for me, but this year it’s here in a REALLY big way! Finally, the big news I’ve been hinting at is here! I am VERY pleased to announce that my first book is now for sale, just in time for Halloween season!
    Eerie Elegance
    How to Host a Haunt and Other Fabulous Frights
    Britta Blvd Publishing 

    $19.95 + S&H + US sales tax where applicable
    available worldwide
    www.EerieElegance.com

    Eerie Elegance Banner 625x153


    For those of you who have been asking why my Halloween pages on Britta Blvd have not been updated in recent years, this is why! I have been working on this book since the summer of 2006! It contains my large collection of Halloween Recipes with a few new ones not even on my website yet, with extra how-to photographs and explanations, plus the decoration & display how-tos I have been asked about via emails for so many years. Everyone who asked “How?” helped me refine my explanations, so thank you for asking! I really appreciate not only the support from friends and family, but especially the support from Halloween fans I’ve only met online, who all said I should write a book. 🙂

    Now begins the “marketing” campaign! There are already links to Eerie Elegance all over Britta Blvd, and the book will soon be listed on Amazon.com as well as my own e-store, but I would appreciate any help or ideas any of you can provide. If you have a blog or website, please spread the word, and there are banners you can use on the Agonizing Accessories page on the Eerie Elegance website. Next on my list is a press release I can send to the several newspaper reporters who have interviewed me for articles over the years…then who knows what else? 🙂

    I also plan on filming a few video podcasts of individual recipes and/or projects as teasers for the book, so here’s a poll for you to vote which recipes or projects should be the first 3 to be filmed:


    Enormous thanks to…

  • my editing and development crew, whether early on or in the final crunch: Natasha, Tracia, Nathania, Teje, Robin, and my mom Diane.
  • all my fellow Halloween fans from all over the globe. It is always so much fun to hear from you!
  • all my party guests, friends & family over the years for being my captive audience! I hope you’ve had as much fun as I’ve had!Everyone’s encouragment and support over the years caused me to write this book, so I couldn’t have done it without you all!

    I hope you enjoy Eerie Elegance!

    P.S. Alaska was a blast, but the proof copy of my book was waiting for me when I got home, so this takes priority over documenting the trip. Never fear – full Alaska details should be here later this week. 🙂

  • Posted in Uncategorized | Tagged , , , , , , | 5 Comments

    Fireworks & Fun 2008

    This weekend was Year 3 for Fireworks & Fun, which is still lots of fun and awesome fireworks! There were 30 people total again plus Gus the Greyhound, this time including 5 babies, 2 toddlers & 2 tweens, which was a good-sized crowd. Everyone stayed through the fireworks which were fabulous. Thankfully it was cooler this year, with a nice breeze making all my flags fly appropriately, and with Kaelyn’s help around 3pm, we were able to get all the food ready before most of the guests arrived! Thank you so much, Kaelyn!

    Fireworks & Fun 2008!

    Posted in Outdoors, Parties | Tagged , , , | Leave a comment

    unexpected excitement!

    I was able to get enough people for a Tuesday night Cinema Brittahytta & potluck BBQ, so about 11 of us had eaten, chatted with cocktails & cider, started the firepit, and gotten comfy in our chairs & blankets, voting on a smaller scale picture this time to try out Sheila’s vintage portable movie screen, and the side gate was still open since people had been coming in that way. We were about 45 minutes into The Producers (Lane/Broderick movie) not even 10pm yet, when we saw lights bobbing…

    (more…)

    Posted in Outdoors, Parties | Tagged , , | 3 Comments

    curiosity got the best of me

    I recently saw that the Spanish version of the Muggle’s Guide was no longer available on Amazon except a few copies from Spanish-language booksellers in Florida, so I used $25 of my free Amazon money to finally see what my Harry Potter party chapter looks like in Spanish.

    Since the guide will never be reprinted, it seemed a shame to never have seen it, especially with the current copyright crackdown chaos in the news that is disgusting me at the melodramatic behavior of all involved. At least now my curiosity is finally satisfied, since even though I am no longer a “superadmiradora” as the description calls me, it’s still fun to see my name in print in Spanish! 😉


    Closeup of my name & URL inside the book…

    In other news, I’m off to Disneyland tomorrow bright & early!

    Posted in Uncategorized | Tagged , , | 9 Comments

    Across the Clueniverse

    Across the Clueniverse was a success with 20 people who had lots of fun! The whole point was for my guests to have a chance to be creative and have fun, and I was not disappointed! The costumes were all fabulous, everyone loved my themed food, we watched the Clue movie including all 3 possible endings, and we even played the game on my custom Brittahytta Mansion Special Edition board. I even got all the dishes done by 2am last night and the kitties let me sleep in all the way to 10:45am today, so I’m very glad after the 3 hours sleep Friday night & 5 hours Thursday night!

    I had not assigned characters to people, so I was pleasantly surprised that with only 20 people we actually had at least one of every suspect! I was Mrs. Peacock, Galt was Professor Plum, Melanie was Mrs. White, Nat was Mr. Green, and Jack was Colonel Mustard. We only had one double, which was Miss Scarlet (Lyle) & Mr. Scarlet (Ben), so that voting was the only one that mattered for that category, and ended up as a “dead” tie anyway with 7 votes to each Scarlet. Most Original Costume was Robin as the Rope, only beating Chalk Mark Cyd by the final ballot. Other creative costumes were Charles as the Lead Pipe, Amy as a Red Herring, and Jeff J. as the Confidential Envelope where you put the whodunit cards for the Clue game. The nicely-vague Special Award went to Johnathon as Wadsworth the Butler complete with tux & tails, and Best Princess was Galen even though I kept trying to call her Miss Mustard in her yellow Belle dress. The prizes were bragging rights! I had never found silly little prizes that seemed appropriate and didn’t get any medals or certificates printed out. The favorite Suspect Shaken & Stirred cocktail was Black & Blue by Jeff J., but several recipes, including the Red Herring by Amy, were later recreated by other guests who wanted to taste them. I am so pleased everyone was being so creative with the drinks! We should have tried to take a group photo like for a game box cover but I didn’t even think of it, and too much was going on then people were removing costume pieces or already leaving anyway. At least we have everyone’s suspect photos in the gallery album!

    Final Party Prep

    Posted in Mystery, Parties | Tagged , , | 3 Comments

    party prep for Across the Clueniverse

    Since I was unable to have a Mardi Gras party this year because I was on my way back from the work cruise, I decided to have a party for which I’ve had a glimmer of an idea for years – Clue! Yes, the Miss Scarlett, Colonel Mustard, Mrs. Peacock board game we all know & love! Not long after I graduated college & had my own place, my mom gave me a pair of large silverplate candlesticks, and I said “These look like the one from Clue!” A few years ago when Melanie was cleaning her closet, she gave me a floor-length red velvet dress and I said “This would be the perfect Miss Scarlet dress!” The idea was percolating in the back of my head along with tons of other ideas, but with my Potter parties and already too many other theme parties each year, I had no idea when I could fit in a Clue party, so didn’t give it much thought. Then last year I had three people on separate occasions and completely independently say to me “You know what you should do? A Clue party!” When I first heard of the schedule for the work cruise conflicting with my Mardi Gras plans, I decided to skip Mardi Gras and try a Clue party later in the spring.

    I have seen the Clue movie again recently thanks to Ben’s DVD, and the cast is stellar & hilarious, but it doesn’t fit my personal mental image of Clue. Mine uses the colors with the suspects and is in a bit more vintage setting, earlier in the 20th century than the 50s. Why? Maybe the first game box art that I ever played perhaps? That only affects my own costume, so it shouldn’t stop my guests’ creativity! Anything related to the Clueniverse, which spans over 50 years and many versions, is fair game! We will vote on most original & best costumes before we play a life-size version of Clue, using Brittahytta Mansion as the game board and our winning suspects as the game pieces to move around the house, with the traditional assortment of weapons at hand. Appetizers will be cleverly-themed, but I won’t spoil the surprise for my readers who are lucky enough to be able to attend. 😉 We might also watch the Clue movie if the group feels so inclined.

    Party prep was started awhile ago of course, but since I’m not intending this to be as elaborate as far as house decorations, it seems much easier than last year’s craziness! It’s less than a week away and my own costume isn’t even done! I did test one new recipe on friends, which was a success, and I have deemed two other recipes as fine since I already prepped them since they will keep fine in the fridge, so that’s in good shape. Here is what I have been able to do so far:

    My kingdom for a pipe wrench!

    Posted in Mystery, Parties | Tagged , , | 2 Comments

    save the date

    Halloween 2013 will be the 20th anniversary of The Nightmare Before Christmas, so I will do my entire Halloween party ENTIRELY in the theme, including skeletal reindeer with coffin sleigh on my roof, Jack’s experiments, Sally’s potions, monster wreath, etc, etc…I will resurrect & improve my Sally costume for the occasion as well. I will warn partygoers in advance so hopefully they can all come in NBC costumes, with prizes for the most original and most obscure. I need an occasion to do this rather than just any old Halloween, otherwise I might do it earlier. I’ve been tempted many times over the years, but I feel I’d need to do the entire party in the theme otherwise it won’t work, since it’d be too Christmasy vs. Halloweeny.

    Can you tell I just got back from seeing The Nightmare Before Christmas in 3D? If you have the chance, go see it, since the 3D is awesome, and seeing it again on a big screen there were details I noticed in the background that even _I_ had never noticed before!

    Posted in Uncategorized | Tagged , , , | 6 Comments

    Halloween 2007 party post-mortem

    Whew boy! What a month…honestly, this is the worst October in general I have ever had, so I’m ready for it to be over! Of course saying that I’m wondering if I’m jinxing myself for something even worse happening in the next couple days…let’s hope not!

    The party did go well, but I would never have made it through at all without my helpers, especially Kael who came over again on party day. Thanks SO much Kael! I could not have managed this year without the help. The added stress & worry about my poor kitty feeling so awful sure didn’t help. During all my frantic party prep I was still feeling so sad every time she would look up from her water dish, drooling everywhere, meowing at me to help her, but she only wanted so much petting or hugging, and I had already done all I could do for her until Monday. It was still very hard for me to see since I feel so helpless. I put up my new Black Cat Crossing road sign on my bedroom door so party people would leave her alone which worked well. We heard her meowing every so often since my bedroom sliding door is to the patio, but every time I checked on her she wasn’t even under the bed or in the closet like most parties, so I hope that meant she was calmer this time. Since it was only making it hard for her to drink, no costume for Kylie this year.

    So, for the party itself now…only 40 people this year, so backsliding a bit for numbers from last year, unsure why but sometimes it happens. I had figured from the Evite count only being 42 it wouldn’t be much larger than that, and there were 4 who had RSVPd and didn’t show. It was still a fun crowd who all said they had a great time. The ones who hadn’t been in the loop yet for how many things have gone wrong for me this October said they never would have guessed, so that’s good! Since we had 55 people last year which fit in this house fine, 40 seemed a little small to me, even though we still couldn’t all crowd into the living room for the music quiz, so the patio speakers worked well to expand the quiz out there too.

    Name that Tune Spooky TV Themes: So many people all got 11 out of 13 that I just had them all claim a prize, but I forget who! I think it was Nat, Nathania, Tracia, Daniel, who else won? Help me remember please!

    Scariest Costume: Dave as Senator Larry Craig, complete with toilet seat, bald cap & muscle men magazines – he got more votes than the really creepy Grim Reaper, so truly scary! 😉
    Most Original Costume: Jack & Johnathon as Jack & Coke…heehee!
    Ultimate Costume: Robin & Charles as The Spartans ala 300, complete with hand-hammered brass cloak broach & armband – they even got compliments via webcam & email during the party!

    Creepiest Cuisine: Since your Halloween Hostess was sole judge and I couldn’t decide, plus I have plenty of prizes, I gave three awards:
    Best Appearance: Deviled Eyes by Dave & Wendy – yolks dyed red with an olive slice as the pupil
    Most Clever Presentation: The Last Temptations by Lyle – little chocolate confections with candy corn garnish, but with little signs describing the various temptations
    Most Daring Culinary Risk: Frosted Bat Wings by Ruth – chocolate covered bacon! She won because they were not only clever but really tasty! 🙂

    Halloween Party Post-Mortem

    Posted in Uncategorized | Tagged , , , | 3 Comments

    Halloween party prep progress

    Busy & frantic of course! I’ve done a lot so far, but since I wasn’t able to do as much the first couple weeks of October as I’d planned, I’m very behind from what I wanted to do this year. Some projects are being postponed yet again, but a couple I’m holding out hope I might just be able to finish them before Saturday night…especially since Thursday night not only will I probably have ‘s help again, but also an eager teen Alton Brown & Duff Goldman fan! Hooray for house-elves! 🙂

    Sorry no pix since I haven’t had the time to organize or upload, so you’ll just have to wait until afterwards… 🙂


    Halloween party prep progress so far

    already done!

  • all foam stone painting done, including better aging technique & new crack detail, for new gargoyle entrance columns, new entrance archway, patio walls, chapel walls & bell tower – big thanks to Ruth who came over for a couple hours on Saturday afternoon and painted the base coat on the columns for me! 🙂
  • shed doors completely painted – functional & beautiful! Thanks for all the help, Dad!
  • cauldron & tripod with stand ready on patio
  • extra table out on patio already with canvas tablecloth
  • my devil costume is finished – best name so far is Incendia (courtesy of Angie) but I’m still not quite sure
  • configure both webcams for broadcast & upload
  • 7.5 dozen witches fingers safely in their airtight tin
  • 6 dozen pumpkin pasties safely unbaked in freezer
  • 9.75 dozen gravestone cookies baked and iced (thanks for helping Angie!)
  • black & flesh candles into holders – thanks Angie!
  • 22 dozen tiny meringue bones (19×7 fit on each cookie sheet)
  • guest bathroom completely decorated
  • living room stuff out, Catoween tapestry, pillow covers, but needs arranging
  • new hardware & padlock on treasure chest
  • Mad Scientist glowing drinks testing pretty much done…neon food coloring didn’t glow either, so we’re restricted to blue tonic & green B-12 really, unless I get the chance to cook spinach tonight to see if that juice really glows red. None of the spinach juice containing drinks I bought ever glowed.still to do
  • finish the Name that Tune quiz – just need to edit 2 soundfiles into clips
  • cleanup & decorate screened patio/bar area
  • design & paint back window stencil – might have to be postponed but I’m holding out hope!
  • finish painting lace curtains – this is going slower than I thought so only one curtain panel is half-painted – I really hope this doesn’t have to be postponed!
  • set up mad scientist display – after major food prep is done, since table space required, especially with helpers!
  • set up graveyard – no earlier than Friday
  • test new fog machine w/ chiller – backyard or front yard?
  • set up pirate corner in backyard – no earlier than Friday
  • make mojitoes as many times as I can – only 9 toe molds – trying some as rum jello shots & some without
  • all gelatin body parts (brain, heart, hands, eyeballs) – Thursday evening
  • cut & bake Batato Chips – Thursday evening
  • form & bake Savory Spiders from dinner rolls – Thursday evening since I’ll have help
  • mini cookie cutters for sliced cheese – Thursday if helpers are fast?
  • all fresh food – Friday night/Saturday afternoon
  • sleep at some point? heh…I probably won’t get to post again until after the party, so I hope everyone has a great weekend!

    P.S. Kylie is taking her medicine like a good kitty but neither the sneezing nor eye is better or worse…

  • Posted in Uncategorized | Tagged , , , | Leave a comment

    eBay update

    The eBay seller replied this morning that they had purchased the ebook with “full resale rights” so had no idea permission wasn’t given. I replied that eBay will still take the listings down as a violation, but if they would give me the contact details who they purchased from, I would follow up to explain to them as well. No further reply yet. I’m fine to leave it at that & I’ve already saved a search to get email alerts for anything from that seller. All 4 listings are already gone from eBay.

    Another email came in this morning saying she read a blog that had 3 of my recipes but no credit so they thought I’d like to know. Yep, they were my recipes all right so I submitted a comment saying they were verbatim from my website & here’s the link. The blog author replied very quickly & apologetic, since he purchased that content that claimed to be “unique” and said he obviously was lied to since he checked out my page. He offered to take down the post but I said a link & credit was fine, so he’s already updated. This thief seems to have wider distribution than I knew, but there’s only so much I can do. I don’t want to spend my time policing the internet for theft of my ideas…I’d rather keep creating more ideas!

    So, a bit frustrating, but the GOOD points in this are that I’m popular enough to steal from, plus I actually have “fans” that are watching out for me, otherwise I would never have known about these in the first place! After I thanked her profusely & let her know what was going on with the blog author, the lady this morning replied she’s glad she’s done her good deed for the day! 🙂

    I’d really much rather post about my Halloween party prep progress but I’ve been too busy with actual work…maybe tomorrow…? The genereous but no-longer-blue-haired Angie () is coming over tonight to help me out, so that will be fun!

    P.S. I just checked, and my October ad revenue as of right now is $444…bringing the “Halloween season” total (Aug 1 to current) to $734! Nice! 😀 Don’t worry…I’m prepared for it to drop back to only a trickle as of Nov 1st…

    Posted in Uncategorized | Tagged , , , | Leave a comment

    more that I did NOT need this week *sigh*

    Reader Tammy just alerted me in comments that my photos & ideas are used in an ebook for sale digitally on eBay that include resale rights. I suspect this is the same joker that was doing the same thing 2 years ago just not on eBay. At that time that person had stolen ideas from all over the web & was selling as “sell this ebook to your users” in forums, so the person who alerted me by a cellphone call when I was in Scotland spread the word back then. Since my content is free and out there for so many years, I figure there’s only so much I can do. Unfortunately with the Marauder’s Map mess, I only joined the VeRO program for ebay.co.uk, not US, so I’ve go to go through the whole darn fax crap all over again. *sigh* I did the “ask seller a question” link telling the seller I’m reporting them since they’re using my images without permission.

    This is exactly why I don’t have my decoration how-to’s on my website, and why I’m working on my own real book instead. It makes me steam to see the greedy, opportunistic ones making money off people who generously provide their ideas online. That is not right in the least.

    Thanks, Tammy, for letting me know. I’ll shut this person down in eBay if I can, since I know I’m not the only person they stole from, then I’ll get back to having a Happy Halloween…

    Edit: there are 4 active listings for the ebook, so all 4 are now reported by fax…now it’s up to eBay…

    Posted in Uncategorized | Tagged , , , | 5 Comments

    Mental Floss

    Mental Floss Magazine is using 3 of my recipes & photos in their article today about Gruesome Halloween Party Food.

    That fleshworm is pretty nasty & realistic…and yes, the infamous Kitty Litter Cake is also featured…thanks, but I still think the kitty litter cake doesn’t fit with my Hallloween themes… 🙂

    Posted in Uncategorized | Tagged , , , | 5 Comments

    Halloween progress

    Well, I’m nowhere near as far along as I should be on my Halloween projects due to the whiplash, plus I got a nasty cold over my annual Halloween shopping weekend that’s made me even slower. Forcing myself to slow down is one thing, but laying down to rest my neck properly requires absolutely no drawing, painting, computer work, even eating, so that’s a work stoppage to me. Very foreign concept to watch TV without doing any projects at the same time, but at least I’m fairly caught up on the new shows this season. 😉

    Halloween shopping weekend was a success as usual…

    Posted in Uncategorized | Tagged , , , | 6 Comments

    Halloween Recipes finally updated!

    Hooray! After 7 years of no new content on Britta Blvd, I have finally updated my Halloween Recipes page as of tonight! 😀 There are about twice as many recipes as 2000, so I even had to split my table of contents into two columns. 🙂

    On that note, since they’re still under development they’re not on the public recipes page yet, but Batato Chips from purple potatoes are a success, plus some Savory Spiders with Gooey Guts are in the works as well. The Mojitoes are okay as-is, but to hold together in the toe shape, the gelatin takes about an hour to dissolve in the rum & soda mixture, so that’s not as successful as I’d hoped. I think they’ll still be funny as a pale green toe sitting in a skeleton hand goblet with a clear lime soda, mint and rum drink. 🙂 Speaking of drinks, glow research has begun, with the best glowing edibles so far being bright blue tonic (blech!) and chartreuse-yellow B-vitamin-tablet in water (double blech!) so I’m searching for more things I’d actually WANT to drink…even though mixing those together does give a very nice glowing aqua teal color… 😉

    Hope everyone had a good weekend!

    Posted in Halloween, Parties, Recipes | Tagged , , , | 4 Comments

    small world indeed!

    Check out Robin’s post from yesterday…hahaha! I’ve been saying for over 10 years of www.britta.com that the world keeps getting smaller every day that the Internet keeps growing… 🙂

    It’s a Small, Wacky World

    Thanks Robin!

    Posted in Halloween, Parties | Tagged , , , | Leave a comment

    Halloween season has begun!

    Halloween season never really ends for me, since my brain is making new plans all year long, but it is highly apparent that the rest of the world has a ramp of interest that begins in August, reaches its height by Oct 31st, then drops off like a cliff. This year I have Google AdSense giving me a sense of my website traffic, and July was the Harry Potter frenzy of course, with $36 July 1st through 21st, but by mid-August, Halloween had outpaced Hogwarts by miles! My August total was $66, and now only halfway through September, I’m at $80 more already! Obviously not enough to live on (yet?), but enough to inspire me to get my act together, finally update my Halloween Recipes page after 7 years with no new content (I’ve been working last week & this week, and I’m SO close to finishing – just need to do the final formatting & image placement!), and try my best to get Halloween 2005 & 2006 pages up this season. Of course this is difficult since working on new Halloween projects is SO much more fun than documenting ones I’ve already done! hahaha…but speaking of new projects…

    Mojitoes

    Posted in Halloween, Parties | Tagged , , | 4 Comments

    my NBC11 interview

    I created a YouTube account just to host my NBC11 interview in hopes of saving our webserver traffic load…For those of who you haven’t seen it already, enjoy! 🙂

    Posted in Parties, Wizards | Tagged , , , | 8 Comments

    more party press! Epicurious.com

    I got email late Saturday night from an editor at Epicurious.com asking how my party went and if I had any new recipes…here’s the article live!

    http://www.epicurious.com/features/blogs/editor/2007/07/harry-potter-re.html

    😀

    Posted in Parties, Wizards | Tagged , , , | Leave a comment

    Year Seven photos so far

    We’re still collecting party photos from people, plus I did clean up the absolutely necessary stuff, but decided to relax & read vs. thoroughly clean up & take decor photos yesterday (no spoilers please since I’m only 2/3rds through!) but there are quite a few good pix here already:

    http://gallery.britta.com/Year7

    I don’t have the video yet of my news spot, but when I do & get it posted, I’ll let everyone know… 🙂

    Posted in Parties, Wizards | Tagged , , , | 1 Comment

    Year Seven at Hogwarts

    It’s all over! 78 total guests throughout the party! 5 less than the Year Six party, with a lot more room to move at this house, plus thankfully only in the 80s vs. 100+ degrees! Only 15 of them were kids, then plus Bud the dog again, who even got Sorted this year! 😉

    (Edited 6:41pm: oops, looking at photos I realized I forgot three who came and hadn’t RSVPd…revised totals: 81 total guests, 16 were kids!)

    Peerless Potion = The Patterson Family was the only group really making potions except for Beginning Potions, so they got a group medal

    Outstanding Owl Ogler = Kaelyn who found 26! I thought I only put out 24? heh…

    Honorable Horcrux Hunter = Daniel – tie-breaker based on most enthusiasm that he found them all!

    Stupendous Spell Spotter = no one did, so I “auctioned it off” so now Karin has homework! 11 inches of parchment to me by Friday showing that you’ve completed the entire quiz! 😉

    Whirled Word Wizard = Tracy, since Dave, Wendy & crew got through 38 rushing to finish in time for the prizes! 😉

    Most Creative Costume = Doug as Firenze the Centaur, with hind legs & freshly-grown beard just for the costume!

    Most Authentic Costume = Ben as Draco, complete with freshly-bleached hair and full robes, tie, prefect badge & wand

    Best Costume – Ruth as Nearly-Headless Nick (hostess got most votes as the dragon but is ineligible to win!)

    The Dobby Award for Best Edible Creation = Tracia for her Pensieve Pinwheels, complete with runes saying “PENSIEVE PINWHEELS YUM YUM” around her Pensieve Bowl! It was hard to decide with some very clever entries, but that extra bit of enthusiastic detail edged her into the front running for the Gilded Sock trophy!

    (Thanks to Keith for tallying the costume votes as I was deciding and presenting on the other awards! That worked very well!)

    Year Seven at Hogwarts – Full Party Details

    Posted in Parties, Wizards | Tagged , , , | 8 Comments

    NBC11 Interview – watch @ 5pm, 6pm & 11pm!

    After going to sleep at 5am (ugh!) I set my alarm for 8am so I could iron my white shirt for my Gryffindor student uniform while my eyes were waking up enough for my contact lenses. Still in my bathrobe at 9am, at my door arrives Kevin, aka Kevvy the House-Elf who already cut all the butterbeer labels for me last Saturday, saying “I thought you’d like someone to take photos during the interview since I’m sure you’ll want to blog this!” AWESOME – you read my mind, Kevin! Thank you SO much!!! 😀

    As I was frantically trying to make myself camera-ready by 9:30, I missed my phone that due to the 4.0 earthquake in Oakland this morning the live reporter & crew were sent up there instead, but they’d still be sending a camera & reporter hopefully by 10:30 for a later edited spot. At least I was ready & had extra time, plus they can edit me & chop out anything stupid…heh! I think it went well, they were impressed with all my stuff (“have you thought of doing parties for a living?” was unfortunately off-camera!), Kevin agreed I sounded fine (whew!), and they have way more footage of course than I’m sure they’ll be able to use. The plan is they will edit together a segment, and whoever the reporter is live at whatever local bookstore line they choose, they’ll report, then cut to my interview, but unsure yet whether 5pm, 6pm, 11pm or all three. My Tivo is set for all three, but I don’t have an easy way of exporting from the Tivo, so I hope one of my more up-to-date AV-geek friends will catch it on an exportable format! Mary Ann Favreau (sp?) is the reporter, and she made sure to get my URL correct since she said they’ll be linking it on NBC11.com. I mentioned about my Google #1 status for Halloween Recipes and she said “We’ll have to remember you for Halloween!” haha…!


    NBC11 Interviewing Britta – July 20th

    I’m on too much adrenaline to take a nap, and my dragon costume isn’t ready yet and I wanted to wear it to the bookstore tonight…still have to finish the last ice cream cone spires on the edible Hogwarts castle, which was used as the backdrop for my interview. That was totally worth the lack of sleep to have it so ready for TV, even though it’s not quite complete! 😀

    Party tomorrow & plenty to do! Everyone enjoy their weekend, HP-related or otherwise!

    Posted in Parties, Wizards | Tagged , , , | 4 Comments

    ACK!!!

    Oh my gosh…NBC11 just called and their feature reporter really wants to do the story but he’s the live at 10am guy, so he’ll be here with the truck & broadcast mast at 9:30!!! I gotta set my alarm to be hair & makeup ready before they get here!

    So please everyone local, set your Tivos for NBC11 for 10am, and she said it’ll be on a LOT, at 5pm, 11pm, maybe Saturday too!

    *breathe, breathe*

    Done with 11 chocolate cakes to make up the cake cliffs, all the gingerbread castle buildings are assembled except for each roof, but entire display still needs assembly…going to the grocery store now for the last fresh provisions..I usually do that the night before, but since NBC11 wants to see some food mocked up in the morning, I’m going now!

    Posted in Parties, Wizards | Tagged , , , | 2 Comments

    party press!

    This article came out today, for the Contra Costa Times and Oakland Tribune:

    Pigging out at Hogwarts

    NBC11 will be coming to my house 11am on Friday to interview me in my decor – ack! All you Bay Area crew, set your Tivos for the news! Hope I don’t sound stupid! 😛

    Posted in Parties, Wizards | Tagged , , , | 4 Comments

    Plethora of Potter Plus Party Progress!

    Of course the Pottermania really started back months ago when I was shocked that Book 7 would be released this year! I’ve now reached the magic $100 mark where Google AdSense will actually send me a payment, even though Hogwarts has only barely edged out Halloween in my total ad revenue…heh! I’ve had three party RSVPs by actual owls, two adorable plush owls & one beautiful card, which make me grin from ear to ear! 🙂 Only two press inquiries about my recipes so far this time around, but I’m flooded with email requests for the free download of my Year 6 Marauder’s Map…I’ve had about 120 requests just since June 26th! A rough count since I’ve started only sending them out via email not quite a year ago brings me to estimate conservatively perhaps 1000 copies have been downloaded for personal fan use. I swear by now it seems like any Potter-themed birthday party, book release party, or movie party will be using my map in some fashion this year…crazy!

    Return of Wizard Rock

    Posted in Parties, Wizards | Tagged , , , , , , | 4 Comments

    Fireworks & Fun 2007

    Since the first Fireworks & Fun party last year was so successful, even though we had the choir competition all weekend AND I’m hosting a giant Hogwarts party in a couple weeks, I decided I could still have a 4th of July potluck BBQ since the view of the fireworks are so great from my yard. 30 people had fun this year, which included 3 small kids, and 6 people did leave before the fireworks started, but still felt like less throughout the party than the 25 people last year…weird! Even Gus the Greyhound came, got dressed up in patriotic style to match Kylie the Kitty, and was completely calm during the whole fireworks show – what a good dog!

    Fireworks & Fun 2007!

    Posted in Outdoors, Parties | Tagged , , , | 2 Comments

    Successful Inaugural Cinema Brittahytta!

    Tonight was the inaugural Cinema Brittahytta and everyone had a great time!

    What, pray tell. is Cinema Brittahytta, you ask?

    Posted in Outdoors, Parties | Tagged , , , | 2 Comments

    score!

    Look what I found for FREE today!


    semi-functional electric organ

    Around the corner from my house they are doing a major remodel down to the foundation, and today I saw this sad organ out front. I figured at the very least I could salvage the keyboard for my Halloween pipe organ, of which I’ve already been acquiring free PVC pipe scraps for the pipes. I asked if they were offering it for free or trying to sell it, but the owner said she’d just like to get rid of it, but that “it actually works, but it probably needs tuning.” Sure I thought, since many of the keys are stuck and it looks in pretty sad shape, but still it’s FREE! I continued on my walk to Longs, came back, tried lifting the organ but it’s too heavy for just me & no wheels so I couldn’t take it around the corner by myself. My neighbor who has a dolly wasn’t home, so I came back & sweetly asked the workers onsite if they had anything that could just roll it around the corner and I’d bring it right back? They said no, but how heavy was it? Two guys lifted it & said, “We’ll just carry it over there for you” then the 3rd older guy, who had not offered any help before, said “Put it in the pickup then just unload it after we drive it there” so they did. Hooray! I gave them each a bottle of Brittahytta brew, apologizing that it wasn’t cold & thanked them profusely! Did I mention I was wearing a short denim skirt & a tank top? Maybe that helped…hehe…Now it’s sitting in front of my garage since I don’t have space for it inside the garage yet! I’m going to try making space before I leave for our concert tonight, but if not, the Briata might have to live outside for a day or two until I make the space.

    Oh, I did plug it in…technically it works, and I’d take that sound as a Halloween spooky chord, but it NEVER SHUTS UP so, no! I might try fiddling around with the keyboard, since it seems like it’s only doing this because so many keys are stuck in the down position. I’m sure I won’t hurt anything any worse & just might learn something! The pedals even seem to work a bit, but only on one stop. Something had made a nest inside, so I carefully pulled out the shredded newspaper, but didn’t find anything alive or otherwise. This will obviously be a post-Potter project however!

    Happy Friday everyone!

    Posted in Halloween, Parties | Tagged , , , | 5 Comments

    defeated before I begin

    An engagement party which overlaps at least half if not more of my guest list has just been scheduled exactly the same night as my final Hogwarts bash, which means the main crowd will be leaving my party before it even really gets going and won’t come in costume, or they just won’t come to my party at all & go straight up to the city. Trying to start my party any earlier then 4pm, it’ll be too scorching hot for anyone to enjoy themselves, let alone I know there’s no way I’ll be completely ready for guests that early. I’ve even made significant progress these past few days on my dragon costume and almost completed the ice treasure chest, too… I don’t begrudge the happy couple of course or anyone who wants to celebrate with them (sure wish I could celebrate with them myself!), it just really sucks that I happen to be the conflict, since I don’t want people to have to choose…*sigh*

    Posted in Uncategorized | Tagged , , | 6 Comments

    little miffed

    I just read that PotterParties.com has been resurrected by The Leaky Cauldron, with what seems like little credit to the original content-generators from two years ago. Individual recipes are still credited, but all of my leader paragraphs of suggestions from the main decor, recipes and costume sections are no longer credited to me, since last time I was listed at the front of the How to Host section as the “expert”, and now there is no mention of my name at all. I think I might even write a note to TLC saying that although my content was allowed to be used in good faith, it was with credit, and I don’t feel it is proper for them to use the same content this time around without crediting the source. All they’d need to do is preface each section that contains my content with “from Potter Party hostess Britta Peterson (link)” or something similarly simple and I’d be fine. The ideas from other contributors are still credited as “submitted by” since they were set off from my content originally. Perhaps they didn’t realize that by redesigning their home page, they removed any mention of my name? We’ll see how I feel tomorrow.

    more candid thoughts…

    Posted in Parties, Wizards | Tagged , , | 7 Comments

    Mardi Gras Masquerade 2007

    Another Mardi Gras Masquerade is over! This year it was 22 of us including 3 kids, which was a small crowd compared to many of my recent parties, but not a record low…that was only 17 back in 2005. The horrible blustery weather probably had a lot to do with it. As I was still running around doing party prep, the rain was so loud on my roof a few times I could barely hear myself think! The lesser amount of people was good for being able to talk, and I was ready enough I got to socialize aplenty, but I still didn’t get to eat or drink during the party much! 😉

    More details if you’re curious…

    Posted in Mardi Gras, Parties | Tagged , , | 3 Comments

    Mardi Gras party progress

    Whew…I’m even more tired this week than in Vegas! Back to my old habit of staying up all hours but still having to get up for work in the morning…ugh! 3:30am bedtime last night which was the worst this week, but I’m getting there!

    Mardi Gras party prep so far

    Posted in Mardi Gras, Parties | Tagged , , | 3 Comments

    Mardi Gras season is here!

    How did this become a trend to be out of town or busy with after-work events right before my parties?!? 😉 I think it started with Halloween 2002 when the Choral Project sang at the National Cathedral in October, plus I was moving out of my apartment & into the duplex at the same time! For Mardi Gras 2005, when our work kickoff event was local but required me out at events every evening & back for early meetings the next morning, I’d come home around 11pm & do party prep until I couldn’t keep my eyes open. Then NANOG in LA was the week before Halloween 2005, but that was only a week so I worked around it, decorating before I left, working on mad scientist tags on the flight, etc. This past Halloween it was my own fault for going to Oktoberfest when I was invited, and I only planned to stay after Oktoberfest vs. before so I’d be in town for our concert, which was moved to when I was gone anyway! 😉 Now we have kickoff in Vegas this time, plus I’m staying the weekend after to see a highschool friend who lives there, so I’m missing both pre-party weekends, leaving me only 5 days when I get back before the party! Perhaps some might say that the parties aren’t enough and that I have to create extra excitement for myself…? 😉

    Mardi Gras party prep so far

    Posted in Mardi Gras, Parties | Tagged , , | Leave a comment

    hectic holidays

    Catching up…concerts first…

    Posted in Uncategorized | Tagged , , , | Leave a comment

    Happy Halloween!

    Photos are now posted in my gallery for this weekend’s big Halloween bash!

    Halloween 2006

    Hope everyone is having a Happy Halloween today!

    Posted in Halloween, Parties | Tagged , , | 2 Comments

    Halloween 2006 Party Post-Mortem

    Whew! Another successful party, with a record of 55 attendees throughout the evening, amazingly never feeling crowded! Hooray for nice weather & enough party space to spread out from living room to large kitchen to screened patio, covered patio & new brick patio, plus the firepit to take off the chill! 🙂 I even got the majority of the cleaning & dishes done before I went to bed at 2:30 (the 2nd time around after “falling back”)…hooray!

    Who won what?

    Scariest Costume = Nat as Death, the Grim Reaper
    Most Original Costume = Box of Popcorn Dave & Pink Cotton Candy Wendy
    Ultimate Costume = Patnoes of the Rings: Gandalf the White Xtopher, Frodo Lisa & little Gollum Xander!

    Haunted Headstones quiz = Scarlett Nathania & Rhett Kevin with 43 of 57 possible – great job!
    Name that Tune Spooky Movies = Obi Wan Barbieri (Doug) with 24 of 31 possible – great job!

    We had lovely Ghoulish Goodies brought by guests, including Pimples (cherry tomatoes filled with cream cheese) among lots of tasty treats! I had provided sheets to fill out the title, description & “chef” in hopes we could vote later, but with all the quiz grading & costume voting going on, I think people were through with voting by then. Thanks to everyone who brought something! I love your creativity & the food was delicious!

    Only a couple people filled out Lab Reports of their mad scientist drink experiments for Laudable Libations, so we didn’t vote on those either, also the “done voting” effect, but people were definitely making plenty of potions! Between the open bar in the “library” on the screened patio, mad scientist laboratory in the kitchen, bountiful beverages were had by all, alcoholic or otherwise. 🙂 Everyone said they had a lot of fun, and I had several first-time guests who were blown away…always nice to hear even if I didn’t get everything set up exactly the way I wanted…as always! 😉

    Full Party Post-Mortem

    Posted in Halloween, Parties | Tagged , , | 1 Comment

    more Halloween party progress

    First, the Tucson paper did run the article…as reported by my mom last night:

    My friend Sherril saw your article tonight in the Tucson paper. She called and said “Britta is weird!” They printed the eyeball recipe and the witches fingers and someone else’s recipe for toes. Your eyeballs were the teaser on the front page of the paper. Your name is in it, too. She is going to mail the article to me. She got a kick out of seeing it, said it was pretty creepy stuff. hahaha.

    Heehee! 😀

    More party prep progress since Monday night, after choir rehearsal of course…

    • altered Melanie’s costume to fit her – the chains were too long 
    • tested out my own costume for hair & jewelry options – I am a Vintage Vampire in a teal corduroy Renaissance-style dress
    • purchased costume adhesive specifically for fitted fangs – hope it works!
    • spray paint & hose aging technique done on screened patio walls, chapel walls & bell tower
    • backyard mostly cleaned up for party ready
    • got out decorations I plan to use this year (gotta change things around to keep people on their toes!)
    • setup yard power extensions & “Disneyland spooky” lighting in backyard
    • hands setup in the hedge (I’ll leave this as a surprise vs. more description…heehee!)
    • more tests for where to put inside webcam – think I found a good spot that can easily be turned for living room vs. kitchen, but the wifi cam doesn’t have a tripod mount fitting – argh!
    • 4 dozen gravestone cookies iced & lettered in Old English style
    • about 7 dozen Awful Arachnids (royal icing spiders)
    • with louienet‘s help, got the wifi cam to spit out image captures on a schedule via a cron job – the motion detection trigger setup stopped working this week, so I would have had to click a web button every hour during the party to get it to save otherwise! 😛

    So all the advance food is ready, the gelatin making starts tonight, gelatin decorating & fresh food prep tomorrow & Saturday during the day, with finishing some last props, decorating & cleaning inbetween! Wish me luck!

    Posted in Halloween, Parties | Tagged , , | 2 Comments

    MSNBC.com linkage!

    Just found out from a Halloween email that my page is linked from the MSNBC.com “Test Pattern” Halloween page! Look for the “great scary recipes”, bones & fingers mention!

    Also, it’s pretty funny that I or my family have contacts in both cities where my recipes are being included in articles (Tucson AZ & Bristol UK), so they’ll keep an eye out for me… 🙂

    Hopefully I’ll have time to post more Halloween party prep progress a bit later…we’ll see!

    Posted in Halloween, Parties | Tagged , , | Leave a comment

    more Halloween party progress…

    We had a recording session all day Saturday, but between Friday night, Saturday night & Sunday, I did get more Halloween party prep done! Sunday was my only daylight before the party, so I had to take advantage while I had the chance!

    • construction & design of the bell tower is finished except for mounting the bell – non-glue dovetail “cornerstone” joints are a success – hooray! This means the bell tower can store flat! 🙂 
    • entire chapel is carved for this year (future plans are to enhance with more carving detail, stained glass windows, maybe a roof on the bell tower, we’ll see)
    • bell tower & chapel walls painted with tan base coat (still need to do the spray-paint aging technique!)
    • chapel door cut from scrap fake wood paneling remodeling leftovers
    • new archway door cut from scrap fake wood paneling remodeling leftovers
    • Halloween accessories from inside the shed all cleaned up, hosed off, drying in the sun
    • 4 dozen witches fingers cookies done
    • 4 dozen gravestone cookies baked, royal icing setting, still need epitaphs
    • 6.5 dozen pumpkin pasties are pre-made & frozen to be baked the morning of the party
    • (still have double-batch crab puffs in the freezer, so I won’t make more)
    • 14 dozen Brittle Bone cookies done
    • Awful Arachnids barely started, but at least royal icing is black & in the piping bag!

    Other non-Halloween specific tasks but that really needed to be done before the party:

    • finally planted jasmine vine out front, included moving another juniper bush 
    • mowed front lawn, including raking leaves & sweeping gutter & sidewalk
    • finally planted both grapes & potato vines, one set on each white arbor

    …still need to DECORATE!!!

    Posted in Halloween, Parties | Tagged , , | 2 Comments

    Halloween progress!

    I’m finally getting caught up enough from being away so long that I can post some Halloween 2006 updates!

    I’m wondering how much party progress detail I should post, since now I have more & more local readers who are party guests, so if I post too much, they won’t be surprised when they show up to the party. Also if I have grand plans that don’t end up working out, I don’t want them disappointed. We’ll see how it goes, since I’ve already heard from several people I only know from online “how come no Halloween blog updates from this year yet?” so I don’t want to disappoint them either!

    Some of my Halloween recipes will be published in Tucson, AZ, and Bristol, UK in local papers or magazines, and I have been promised tearsheets from each to see for myself. 🙂 I almost got included in a karaoke book for the UK this summer, but I was so swamped at work it was too late when I finally could reply.

    I have successfully replied to 60 Halloween help requests so far since August, even while on vacation! Gotta find a way to make consultant fees off of all that time spent! 😉 Of course the real time suck is all the emails that come in the last couple weeks before Halloween, so that will come pretty soon. I’m noticing a frequency uptick even just today during the day!

    I have a working draft of my own party book “Eerie Elegance” that so far I’ve spent many hours writing this summer (boy, when I get on a roll, I either remember other ideas I’ve done before or have even MORE related ideas!), but it’s on hiatus right now for the sake of this year’s party. I am hoping to get more good photos of me doing party prep this year, especially for inclusion in my book, but since I always end up working on party prep into the wee hours, it’s hard to have other people take photos of me. I might set up the tripod & timer just to see what I can get. Of course that also means I have to look presentable while baking – always a challenge! 😉 The big question is whether to self-publish or try to shop an outline & an example section to a publisher. I’m still up in the air about that, since I like the full-control idea of self-publishing, but supposedly there’s more financial potential from working with a real publisher who would do the distribution for me. Of course, I could get really lucky & someone could see my self-published book & want to offer me a deal…hey it worked for the kid who wrote Eragon! 😉

    Now on to the immediate Halloween party progress, in roughly chronological order so far…not much executed yet, but I’m getting there…some of this was done before I left on my trip of course but had to be done for the party’s sake!

    Halloween Party Progress

    Posted in Halloween, Parties | Tagged , , | Leave a comment

    Fabulous Fourth Fireworks & Fun!

    Happy 4th of July everyone!

    About a month ago I got a city newsletter that mentioned a big event at the city park, ending with a fireworks display. That’s the park only one block away from my house, so I thought for sure we could see fireworks from my house, so I tried to have a low-key, small BBQ potluck so I wouldn’t be killing myself just one week after the big concert when I was already exhausted. Well, my low-key small BBQ potluck was still 25 of us, but that was a very manageable amount and we all had a great time! One friend said “one of the best 4th of Julys I’ve had!” Hooray! 😀


    Fabulous Fireworks From My Backyard!!! 😀

    Food, Glorious Food!

    Posted in Outdoors, Parties | Tagged , , , | 4 Comments

    Harry Potter Crafts on The Leaky Cauldron

    It seems The Leaky Cauldron has a new section for Harry Potter Crafts, and several of my PotterParties.com entries are used in the Food and Potter Parties sections. Josee actually asked for my YM several months ago, but no one ever asked me for any of my party crafts to be included. Oh well…I can’t read the real TLC on my Mac anymore anyway since their AJAX redesign, since anything I click on crashes my browsers, which has disappointed me that they’d shut people out like that. 🙁 Needless to say, I’ve stopped reading anything on Leaky except the RSS feed on my LJ Friends list. To find out where I appeared in the new section I had to wait to use my work computer. I’m personally getting the feeling like I did with Trek conventions…that it’s grown past the cool stage into so huge it’s not as fun anymore. *sigh*

    Posted in Parties, Wizards | Tagged , , , | 4 Comments

    Mardi Gras 2006 online at Britta Blvd!

    Not a record, but amazingly a decently-timed update to my official website! 😉 I got the Mardi Gras 2006 webpage completed on Wednesday, including the webcam stop-motion movie! I also got the webcam stop-motion done finally for Mardi Gras 2005 last night…whew!

    Of course, there’s still Halloween 2005 to do, let alone both Year Six at Hogwarts AND sadly even Year Five at Hogwarts that are missing from my website…let alone all my travels since about 1998, and a TON of costumes… 😛 Ah well…

    Posted in Mardi Gras, Parties | Tagged , , | Leave a comment

    Muggle’s Guide in Spanish now for sale!

    As mentioned back in November 2004 when we heard the rights had been purchased by a Spanish distributor, the Muggle’s Guide is really available now in Spanish! 🙂

    Amazon has it for sale ($32? ack – I want a copy but I can’t even read it when I get it? hmm…) but with no photo, so here’s the photo sent me…maybe it’s that expensive since it’s only in hardback?

    Posted in Parties, Wizards | Tagged , , , , | 2 Comments

    Mardi Gras 2006 gallery

    The gallery photos are now up if you’d like to see…we’ll see when the official Britta Blvd webpage gets finished, seeing that I only got MG2005 online a full year late! 😉

    http://gallery.britta.com/mg06

    Hope everyone had a good weekend!

    Posted in Mardi Gras, Parties | Tagged , , , | 2 Comments

    Mardi Gras 2006!

    Overall, another successful party…whew!

    Posted in Mardi Gras, Parties | Tagged , , , | Leave a comment

    Mardi Gras progress…

    Busy busy week! Except for the holiday Monday when I quickly got all the transplants I acquired from my parents’ house in the ground in my own yard (including defeating the nasty huge palm thingy!), my non-work hours have been crammed full of Mardi Gras party prep, so no computer leisure time, and work has been busy enough I haven’t been able to post either!

    So, onto Mardi Gras progress…

    Posted in Mardi Gras, Parties | Tagged , , , | Leave a comment

    it’s that time again!

    Mardi Gras Masquerade 2006 is just under 2 weeks away!

    Party progress has started at least!

    Posted in Mardi Gras, Parties | Tagged , , , | Leave a comment

    funny Potter Party story

    So, I have been stuck in really draining all-day meetings for work several days the past few weeks…one of those days I got an email from a co-worker asking for Potter Party help since another co-worker was having a Potter-themed birthday for her daughter over Thanksgiving weekend. Since I was stuck in the meetings & not even at headquarters, I replied to start with my website & www.PotterParties.com for ideas, and offered to answer any questions she had. She thought my website was great & thanked me for the help. I would have offered to borrow my Sorting Hat, but it was still in the window display at commuknity in San Jose…

    So, back from Thanksgiving this week, I saw the co-worker who referred me to her, and he said he had tried looking for the Muggle’s Guide for her since he remembered the party chapter I was in but couldn’t find it at the local Borders. Then the party host came by my desk to update me on how her party went, which was fine. It was a slumber party and the girls had a lot of fun. The funniest part though was that she came home with a bunch of cool bottles since she was planning a Potions class, and her daughter saw the bottles & said “Oh, are we doing Potions?” Her mom said “Yes, my friend from work has this website since she’s done parties before.” Her daughter says “Hang on, let me get out my book!”…and she comes back with the Muggle’s Guide and goes right to the party chapter and the Potions photo! Her mom recognized the photos from my website and tried to explain to her daughter that I was the same Britta who was listed in the opening of the chapter, but her daughter didn’t believe her that she could possibly know me! They had to go to my website to find the exact photos from the book before she would believe her mom!

    I still think that is HILARIOUS! hahaha… 🙂

    Posted in Parties, Wizards | Tagged , , , | 1 Comment

    Halloween party photos!

    This isn’t the official Britta Blvd webpage yet, but my gallery has the complete set of full-res photos from my party this weekend. 235 photos total, so I recommend viewing by slideshow! 😉

    http://gallery.britta.com/Halloween2005

    Enjoy!

    Posted in Halloween, Parties | Tagged , , , | 1 Comment

    Halloween 2005 Party “Post-Mortem” Report

    Another successful party! 43 attended including 2 babes in arms, a new Halloween record! Mostly a Choral Project crowd again, but it was back to the Jeff J. winning streak for Most Creative Costume since he came as iSilhouette, also known as jPod/iTunes man/iPod man…basically the silhouettes with white earbuds & iPods you see in all the ads, including his face painted black! Hilarious! Everyone said they had a fabulous time “as usual” even one said “a BLAST” so I think everyone really did enjoy it. Nothing ever turns out perfectly of course, which just gives me something to strive for next time around…like my disaster of a bedroom that includes my carryon luggage still unpacked from the LA trip this week! Ah well…at least the downstairs looked fine… 😉

    Full Halloween 2005 Post-Mortem

    Posted in Halloween, Parties | Tagged , , | Leave a comment

    Final Halloween 2005 Party Prep Progress!

    Since I’m posting this after-the-fact anyway, I might as well post my final Halloween party to-do list. This was rearranged a bit from what was originally planned because chaos always happens at the last minute switching things around or postponing to the next day, but this way you brave souls who actually care to read can have a peek into the inner sanctum of Britta’s party planning – heh! Also, remember that some of the list items take longer than others to actually complete so a short list doesn’t necessarily mean less work was done! 😉

    Thursday Oct 27th

    Posted in Halloween, Parties | Tagged , , | Leave a comment

    Oct 21st Halloween Party Prep Progress

    (instead of backdating I’m just pretending… 🙂

    In the week between my last Halloween party progress post and leaving for my LA business trip, this is what I got done…

    More Halloween Party Prep Progress

    Posted in Halloween, Parties | Tagged , , | 2 Comments

    Halloween party prep progress

    Sorry! I thought I was going to get a Halloween update posted last week, but things got busy, including some unexpected Potter stuff I hope will be public soon… 🙂 So, aside from satisfying my corset fascination lately (heh!), here’s what’s been done since I last checked in!

    Halloween Party Prep Progress

    Posted in Halloween, Parties | Tagged , , , , | 2 Comments

    Halloween 2004 webpages DONE!!!

    Yes, I know, another horribly long & embarrassing delay, but Halloween 2004 is now finally online at Britta Blvd…just in time before Halloween 2005!

    The Halloween index has been updated as well, including details for this year’s party and webcast. Back to getting this year’s party ready now! After some sleep, I should be able to finish a party prep progress post since I’ve gotten a lot done this past week… 🙂

    Posted in Cinema Brittahytta, Parties | Tagged , , , | Leave a comment

    Muster the Monsters – Halloween 2005 has begun!

    By not only my own preparations having started, but also by the email requests for help I’m already getting, Halloween season has officially begun! Last year I posted with the 2003 traffic graphs for www.britta.com, which showed the ramp up to Halloween. 2004 was much the same as you can see here, but with even more traffic.

    Aww, how the World Wide Web has grown over the years! 😉 What will be quite interesting to see is 2005, since from May through mid-July I had a large ramp for Potter Party stuff, both 5000 unique visitors via PotterParties.com, plus a ton more who just found my site via Google. Since that has subsided but not really dropped off as clifflike as November 2004 or 2003, I think 2005 will show that August just kept going head on into Halloween season. I’m getting suggestions that I could make some decent money by using Google AdSense on www.britta.com. I understand at least Google ads are topical and at least not completely garish, since they could even go at the very bottom of the page, underneath my design layout, but I’m not sure about it. Anyone have any comments whether I should start that or not? It would be nice to make money off my hard work on the parties & projects I describe, let alone the webwork I’ve done to display it, but somehow that smacks of the “dark side”…yes, this coming from someone in the Marketing department of her employer, I know! 😛

    Anyway, for those with enough time to keep reading, back to Halloween plans for this year…

    Posted in Halloween, Parties | Tagged , , | 1 Comment

    enjoying the summer

    I have still been recovering all week from the big party last weekend. Aside from finishing Half-Blood Prince already Monday night and getting my party photos posted, I’ve done some cleaning, mostly gooey things like dishes and potion bottles, but I’ve been trying to let myself relax a bit as well. Unfortunately my cat hasn’t been as cooperative at letting me sleep through the night as she usually is – maybe it’s too hot for her as well? I have no air conditioning but I have a 2-story place, which is usually only a problem over here for a few days each summer, but this week has been a doozy. It’s hard to get motivated to do things when it’s so hot! Good think I live alone and my cat doesn’t care, since I don’t mind having a huge decoration mess around for awhile. I am leaving the stone walls and black ceiling up through Halloween to save myself time for that party (plus I like the effect!), so it’s a matter of taking the Hogwarts-specific stuff down and putting it away safely…plus I have to reorganize since I have two new HBP boxes now, so I’d like to put decor in those for storage vs. the boring normal boxes I had before. 2 OotP boxes, 2 HBP boxes…woohoo! 😉

    In other news, we now have all our lodging settled for the hiking in Scotland + week in London trip are taking in September – hooray! Two hotels in Edinburgh and London, a lodge in Torridon, the Macdonald Hotel in Kinlochleven near Glencoe, and the Snooty Fox Country Inn near Carlisle/Lake Country. Gotta love staying at a place called “The Snooty Fox!” 😉 Since he has a spiffy digital SLR camera he bought last year before our choir tour, he’d like more practice taking landscape photos, and he’d never been to Yosemite, we had discussed a couple months ago to try taking a day to go after the Glacier Point road was open but before our trip. We finally had the chance this weekend, so we did. Ironically I realized that even though I have been to Yosemite in 1996, 1998, 2003 & earlier this year, this is the first time I’ve been to Yosemite with an American since 1993! 😛

    Yosemite in July Gallery Album

    and at Glacier Point

    We took some cheese & cracker party leftovers and a fresh fruit salad for a picnic and drove the Briata (of course!), leaving Cupertino about 8:30am. We made it to the Big Oak Flat entrance around noon, to Tunnel View around 1:30, and up to Glacier Point for our picnic lunch about 2:30. It was hot, and I’d never been to Yosemite on a weekend, let alone in the summer, so it was much more packed with people than I had even seen! We still had fun, though. We left the valley after sunset about 9ish, making it to Oakdale by 11ish where we ate at Denny’s, then back to my place about 1:30am. Around 455 miles, with all but the first 80 miles with the top down! A very exhausting day, but a lot of fun and beautiful scenery. Today is hot again so I’m having difficulty wanting to move at all, let alone leave the spot on my couch where my fan is blowing on me, so I figured I might as well settle the Yosemite photos and update my blog… 😉 Maybe after it cools down I can do some more party cleaning…

    Hope you all had a good weekend!

    P.S. The iPhoto to Gallery plugin is SWEET! 😀

    Posted in Uncategorized | Tagged , , , , | Leave a comment

    finished reading

    *sigh*

    ARGH!

    hilarious bits too of course…

    How sad is it that you are jealous of fictional characters half your age for their love lives? 😉

    Anyway, I won’t say anything more for now…my original guess for the HBP was wrong, but a co-worker called it, and in the beginning of reading the book I did start suspecting who it ended up being…cryptic enough for ya? 😉

    Now I can finally get some much-needed sleep…only 4 hrs each night Friday & Saturday due to the party, then last night between cleaning & photos I read until midnight when my eyes could no longer stay open, but it was warm enough I had trouble sleeping, then the damn cat decided to be annoying starting at 5am, plus a full day of work…

    On the plus side, my party photos are on my home gallery, along with those taken by some other party guests…

    http://camera.britta.com/gallery/Year6

    Good night!

    Posted in Uncategorized | Tagged , , , | 1 Comment

    Emeril’s Halloween Recipe Challenge

    Thank you VERY much to who told me about “Emeril’s Halloween Recipe Challenge” on Thursday night! We’ll see if Emeril’s team likes my Eerie Eyeballs recipe with my “anecdotes and other Halloween traditions,” but I have a feeling he wouldn’t make them on the show because the decorating takes too much work..but we’ll see! Wish me luck! 🙂

    My Food Network Emeril’s Halloween Recipe Challenge Entry

    Posted in Halloween, Parties | Tagged , , , | 1 Comment

    Year Six at Hogwarts Success!

    Sorry I was much too busy to post any further updates before the party, but that’s the way it goes!

    Last night around 10pm, Ben went in dementor costume, along with Jen in full Ravenclaw Quidditch gear to the Sunnyvale Borders to stand in line for our 18-book order for the party. At 11:30pm, Melanie as a Muggle (slacker because her costume was all finished! Admittedly it would not have fit in the Briata over to Borders, so probably just as well) and I as Bellatrix joined them, staying until 1:30 to actually get our books! Ben left his in the batch until leaving the party to avoid temptation, but Melanie read the first chapter this morning. I did not want to be tempted to keep reading vs. party prep, let alone be careful when talking to party guests, so I have not yet opened the books, let alone even reading the inside cover!

    It was overall a successful day amongst many glitches, even though not necessarily a success in the way I envisioned. Too hot for many planned activities, and not enough table space for all the food that did actually arrive (some fabulously creative entries!), but people (I’m counting about 83, but it really seemed like more I think!) all still said they had a great time, which is what matters! 🙂

    Black wigs itch horribly on a hot day! Hopefully my couple Bellatrix photos came out okay even though I was literally melting. At least I have some good photos from last night at Borders when I wasn’t melting, so those might have to do. I had to take out my contacts & rinse them twice this afternoon because sweat kept dripping into my eyes! But everyone loved how I stored my wand in my cleavage…like a breast dagger from renfaire lore…I figured out last night on our way to Borders to pick up the books when I had no pockets that my new shorter, more “sinister”-looking wand from Simone from Brazil fit very nicely there, and it seemed a very Bellatrix thing to do…oh, and I have been christened “Brittatrix” by several different people now, even though that sounds more like a dominatrix than a Harry Potter character…*raises eyebrows*!

    Somehow the majority of the voting ballots went missing before counting! I had seen a ton overflowing the cauldron where everyone was putting their votes, but when Ben offered to count them for me, there were only 25 ballots, including only 4 for the Best Edible Creation award, which of course was a 4-way tie. Very suspicious! Someone accused Draco Malfoy (no one came in that costume by the way), and I said someone must have cast Evanesco to vanish them… 😉 I still haven’t found them, but when it’s light I’m going through all the trash anyway. Gilderoy at St Mungo’s won Most Creative, the most elaborate of several Dobbies, this one complete with makeup matching his ears, won Most Authentic, and Ben the dementor won Best Costume. Of those who were left around 10ish, we awarded the quiz winners, including Ogle the Owl, Spot the Spell matching game, and Whirled Words (anagrams), but since most of the votes went missing, plus so many people had already started leaving, the First Annual Dobby Award for Best Edible Creation (a statuette of a gilded sock!) went unawarded….darn!

    Again, no Best Potion was awarded since it was so hot, people mostly stayed outside to catch a breeze when they could, meaning they only drank the lemonade or the canned/bottled drinks in the large cauldron cooler. However, the creativity displayed with all the Best Edible Creation entries replaced the Best Potions creativity more than enough! I will definitely need to post all the entries eventually when I work on BOTH websites (yes, the Year Five webpages never got done before Year Six happened – too bad I know but oh well).

    I have to admit my personal highlight was that long-lost highschool friend Amanda convinced her gracious friend to wait around while we reminisced about highschool & caught up on what’s happened inbetween, long after the majority of guests had already left (only 11ish). Amanda beats my overnight guest for longest distance traveled to the party, since she now lives in Las Vegas but was in Sacramento visiting so she could come to the party…hooray! 🙂

    It was when showing Amanda the highschool reunion pix from 1999 reunion she didn’t attend that I saw my email that my mom had checked the webcams at 7ish & saw the outside cam had stopped broadcasting…why does it only cause problems during parties – argh! It has been broadcasting just dandy all week long…I see from the captures it actually stopped about 6:12pm, but we never really did anything outside, so not much was missed I don’t think. No Quidditch at all – too hot! Kids kept asking when we could play, but I kept telling the kids they could play Quidditch when they adults left the cool grass in the shade, which of course never happened! 😛 We did do the kids treasure hunt, but since several kids were older this time, I let them read the clues, which wasn’t loud enough for the smaller kids to hear, so many smaller kids who had been looking forward to the treasure hunt were overwhelmed by the speed & inability to hear. Unfortunately that’s what happens when I don’t know the exact ages & abilities of the kids, but I did have enough variety of kid activities (pretzel wands, potion mixing, blowing bubbles, decorating hats & capes, and free drawing) that they all seemed to have a great time anyway.

    Since it’s much too dark at this hour, after a bunch more chatting into the wee hours with my overnight guest, the leftovers I’d like to save to eat later have been put away if they need to (cookies & breads last fine) with the major cleanup to happen tomorrow when I can see clearly. Before we can try waffles for brunch since I’d like to play hostess to my overnight guest, I need to find the kitchen counters in all the mess!

    Oh, and my cat has gotten out after being social after it was down to just the 5 of us towards the end, and being a black cat I can’t find her for anything…this will be the first night she’s been out by herself ever, so I hope she’s okay. I even poured out some crunchy food so she’d hear, so I’ve left her a way back in & hope she’ll come back when she’s hungry… 🙁

    Update: Kylie was back inside, acting nonchalantly, as of ~4:30am…whew! I’ll be able to sleep much better now knowing she’s safe inside… 🙂

    Posted in Parties, Wizards | Tagged , , , | 1 Comment

    another press mention!

    I got this email from an East Coast co-worker this morning:


    So I was reading the Post Food section, and saw the tease on the front page about the Harry Potter feast. I said to myself, I should send the link to Britta.

    Imagine my surprise when I see you’re credited with one of the recipes!

    http://www.washingtonpost.com/wp-dyn/content/article/2005/07/05/AR2005070500403.html

    This one didn’t contact me personally, so either they found PotterParties.com & actually paid attention to the crediting, or they found my website directly. Either way, it’s nice they credited me properly. 🙂

    More party progress later when I get photos loaded in…among other things, the tree trunk garbage can is finished! woohoo!

    Posted in Parties, Wizards | Tagged , , , | 2 Comments

    Year Six at Hogwarts party progress

    Even with attending the SF Symphony fireworks concert at Shoreline Amphitheatre Monday evening, I have gotten a lot of party prep done this week…scarily I’m feeling like I’ll actually get everything done…we’ll see what really happens! 😉

    Here’s some of what’s happened since I last checked in…

  • Staples has these nice tagboard preprinted parchment scrolls for like $1, which I used last time for the Nerf Quidditch rules. There’s a green background, but by cutting the scroll out from the background, it looks very cool. The drawback is you can’t fit it in a printer, so hand-lettering is usually what I do…however, I did print the Best Edible Creation contest flyer out large in two 11″x17″ sections, then after I ripped the edges as close to the lettering as possible, I tried oiling the white paper to make it translucent, which worked pretty well. I fear for the spray adhesive not sticking to the still-greasy paper, so I’m leaving it flat for now and will only hang it for the party…less chance of gravity working against me I think.
  • I’m at about 6 layers of papier-mache plus a thick layer of spackle on my tree-trunk garbage can. This is an idea I’ve had for a couple years now, since I never have good garbage & recycling receptacles for my parties. My mom had seen a Martha Stewart show on how to make upside-down plastic buckets into small tree stumps for Halloween decorations, but I mutated that into using the round plastic garbage can I have, putting plastic around it so the trunk isn’t permanently attached to the can, then starting with as many paper grocery bags as I could find, first to block out the organic-looking trunk shape, then to keep covering in layers. I think now with the spackle it will be sturdy enough, plus the spackle has the added bonus of looking very much like bark for texture – hooray! Painting & sealing is next…
  • Since the RSVPs are up to about 20 kids now (ack!), and I had originally only made 11 capes & black paper hats to decorate, I made 14 more of each. The capes are made out of two 3’x50′ rolls of weed blocker fabric, which is essentially slightly thicker gossamer you purchase for more money from party supply websites.
  • I bought (well, used free JoAnn pts) more white felt since I’ve changed my plan for blocking off my staircase, using the front door piece of flagstone gossamer (only needed for Halloween) for a fake wall, so that is handled – cut to size, stapled & taped.
  • I played around with furniture arrangement to get Potions into the kitchen while still having space for the main food table with clearance. By using a smaller tabletop, I think it’ll be perfect! Since the Potions table was already moved, I decided to get out the bricks & shelves & bottles to start setting everything up. It bugged me wasting the paper & gold thread ingredient tags on the liquid potions, so to improve on that, I got gold-edged scrapbooking tags on 50% off sale (made the free JoAnn pts go farther!), painstakingly cut the parchment printed ingredients to tag size, then used laminating sheets to stick the parchment to the metal tag edges, also hopefully making the tag water-resistant! Add a gold elastic cord (also free JoAnn pts) to the tag, and removable & reusable Potion ingredients tags! 🙂
  • Both the kids prize chest and the adult prize chest are filled, and all the prize buttons are done. The Best Edible Creation statuette is all finished too…I won’t tell you what it looks like so you’ll be surprised…heehee!
  • Spot the Spell, Whirled Words and Ogle the Owl sheets are all printed – 60-80 copies each! (the little kids won’t do Spot the Spell or Whirled Words)
  • The signpost has been put up outside, with the 4 destinations written in chalk. (Maybe I should have referenced the original when I was setting it up? Ah well!)
  • I also have purchased stuff for the last new prop I’d like to make, so we’ll see what happens timewise. I would like to make the Quidditch scoreboard from the movies, which will be a challenge, and will be only manually functional by hand-changing the numbers, but we’ll see. Since all the spending I’ve been doing at JoAnn Fabrics & Crafts for this party has been all totally free money (I had $100 free from my JoAnn VISA card & still have $45 left! – that’s what happens when a new laptop, UK airfare plus major auto maintenance all happen in 3 months!), plus the tree trunk garbage can is only costing the glue since I already had the spackle, I figured I could spend some on Michaels for this one project.
  • 8 dozen chocolate frogs are done, and I’m stopping there even though they’re small. There is no way I’ll have spiffy boxes for them all, so only a token few with be put into the pentagonal movie-style boxes I designed for the last party.

    Only one week to go – wheeeeee! 😀

  • Posted in Parties, Wizards | Tagged , , , | 3 Comments

    funny!

    http://www.news-journalonline.com/NewsJournalOnline/Lifestyle/Headlines/03AccentFOOD01070605.htm

    Excerpt:

    “If Hogwarts had Home Economics, then Britta Peterson would be the teacher. She’s with the Web site PotterParties.com, and knows a thing or two about the importance of setting the right mood.

    “I go all out for my ‘Harry Potter’ parties, transforming my house into Hogwarts, complete with fake stone walls and Quidditch hoops in my backyard,” she said.

    If that’s a bit too involved, she recommends using a plastic cauldron as a centerpiece, turning ordinary books into “spell books,” and having a few magic wands on hand. The Web site has a lengthy list of decorating ideas, complete with instructions. Go to www.potterparties.com for details.”

    Especially funny since I’ve never taken a Home Ec class in my life! haha…! Yes, this was an “interview” via email, since he wrote to PotterParties.com about this article, and since he was asking about the party planning side, they suggested I reply to him. 🙂

    Posted in Parties, Recipes, Wizards | Tagged , , , , | 4 Comments

    New Cauldron Cakes

    While working on PotterParties.com, I saw Lexicon_Bel~’s version of Cauldron Cakes, which sounded yummy, especially since my clever idea of cotton candy smoke ended up failing last summer (the cakes are so moist that the cotton candy melts as soon as it comes in contact with the cauldron – doh!). My full-size cupcake Cauldron Cakes were not eaten as much at previous parties, probably because they were that large. Since it’s already looking like 75 people are coming, maybe more (ack!) I’m trying to stretch my food as far as possible! I found mini-Reeses peanut butter cups and used my mini-muffin pans last night with a Betty Crocker devils food cake mix, so these are bite-sized, which also means one cake mix gives you around 11 dozen adorably cute Cauldron Cakes…hooray!

    By filling the muffin cups about half-full, then gently setting the peanut butter cup in the center, the cake batter rises around the edge of the candy and over the top edge of the muffin cup, making a cute little rolled edge to the cauldron. The chocolate of the peanut butter cup nicely bubbles on the top, too. I think these came out so cute! 🙂


    New Mini Cauldron Cake – side view

    Bel’s original recipe calls for marshmallows, which I knew would bubble perfectly, but they contain gelatin and I have some hardline vegetarians coming, so I wanted to use something else. A blob of cream cheese was yummy, and one drop of green food coloring made a nice swirled potion effect, but the blob was too irregular, so it just looked like a cream cheese brownie. The caramel Hershey’s kisses upside-down just made a caramel volcano that glued too well to the bottom of the pan, albeit tasty, and the white/milk kisses right side up to have the white show were just engulfed by the cake batter. The mini peanut butter cups were the perfect size, but if they were pressed down into the batter too far, there was risk of the chocolate gluing to the bottom of the pan, making it a mess to get out of the pan! Two bags of mini-Reeses only lasted for 7 dozen, so the last 2 dozen were the white/milk Hershey’s kisses turned upside down for the milk chocolate to show and bubble. The cauldron edge is larger, so not as cute, but if people get really hungry to plow through all 7 dozen, I don’t think they’ll be complaining… 😉


    View of the bubbling chocolate potion on top


    Cauldron Cake Cross-Section


    A Cornucopia of Cauldron Cakes! 😉

    These are now safely in my freezer with the 9 dozen Pumpkin Pasties, to be thawed two weeks from tonight, the night before the party…I can’t believe it’s so close!

    Posted in Parties, Wizards | Tagged , , , , | 3 Comments

    Year Six party progress – FOOD :-9

    Hooray! As of last night I have a good handle on the party food I’m providing, so now I can get back to decorations without feeling too stressed… 🙂

  • Bertie Botts & filler Jelly Bellies already purchased
  • pre-sliced cheese already purchased in fridge
  • 8 dozen cockroach clusters were done this weekend
  • 5 dozen licorice wands done! (I used sour candy “licorice” wands since no one likes the black licorice anyway)
  • 6 dozen peppermint toads done!
  • crab triangles already in freezer
  • “parchment scrolls” already in freezer (purchased Party Swirls)
  • 2 full batches of pumpkin filling baked for pasties
  • 2 full family pie crust recipes (~3 pies worth each) made from scratch to be sure it’s veggie-safe (purchased pie crust uses lard – how lame!)
  • 9 dozen pumpkin pasties made & frozen unbaked

    Everyone loves the pumpkin pasties, including me, but they are time-intensive and take FOREVER to make…hence trying to create a time-saving plan. I had tried baking these a couple days ahead of the party before, but the pastry starts getting soft & soggy after about one day even in airtight containers, so I’m trying a new plan this year. The filling is baked in advance anyway so it can be put into the pasties, so there’s no risk there. Since all the hard work is making up the pasties in the little shapes with the filling inside, making them up early but freezing them as unbaked pastry is the new plan. This way I can just take them out of the freezer the night before or morning of the party then bake them nice & fresh without killing myself staying up all night making pasties…whew!

    Now, back to decorations & activities…maybe I’ll feel I have enough time to post some prop construction photos later… 😉

    Aww…now I’m hungry! I want a pumpkin pasty…darn!

  • Posted in Parties, Wizards | Tagged , , , , | Leave a comment

    Year Six party prep update

    Amongst taking it relatively easy to get fully over my cold, plus seeing Batman Begins Saturday night (awesome!) and the end of the year choir party Sunday afternoon, I have made excellent progress so far with the Year Six at Hogwarts party!

  • Invitations went out first week of June, with the follow-up email a week later
  • The online FAQ went up June 15th
  • 75 gold paper plates have been painted with the Hogwarts crest
  • Best Potion recipe cards are printed & cut (~60)
  • Costume contest ballots are printed & cut (~60)
  • Best Edible Creation contest entry forms AND voting ballots are designed, printed and cut (~40)
  • My Bellatrix Black Lestrange costume is done
  • Ben’s dementor costume is done
  • The webcams are configured & placed as of Friday evening – remember this is a sneak peek! 😉
  • Friday night I stapled up 400 icicle lights (white lights on white cords) on my ceiling so this year stars will be peeking through the black ceiling 🙂
  • Saturday all the black ceilings went up (thanks Melanie for the extra hands!)
  • Also as of Saturday, almost all the stone walls are up (the kitchen wasn’t ready yet so it’s next)
  • The Sorting sticker badges are cut (~45, so I’ll probably need to print more going by RSVPs so far!)
  • 11 kids capes are done (cut to length, drawstring channel sewn, ribbon threaded)
  • 11 kids paper cone hats are cut, still need to add tape & elastic thread to them
  • All adult and kid prizes are settled & in their respective treasure chests
  • Young Wizard Treasure Hunt has been updated with new clues
  • New Beater bats have been purchased
  • Quidditch hoops & the Nerf Quaffle have had touch-up paint jobs (Nerf Quidditch was rough last time!)
  • 8 dozen Cockroach Clusters are made

    So you don’t think I’m absolutely crazy, some of these tasks have been done over the past couple weeks, not all this weekend! 😉 Of course there is PLENTY still to do, including a few new props and LOTS of food to make, even with the new Best Edible Creation contest helping feed the masses, but I do have just under 3 weeks to do it all, so hopefully I’ll get it all done. What I’m most worried about is getting the Year Five webpages up before this party happens…hmm…wish me luck!

  • Posted in Parties, Wizards | Tagged , , , | Leave a comment

    time to breathe…?

    I have been running non-stop for two solid weeks, I swear. Not only have I been frantically designing, creating & mailing my Year Six at Hogwarts invitations every waking moment not at work, but I have been staying late at work most days for the final stages of a several-month project for a total overhaul of the web portal for my product I manage…which just went live last night at midnight! I am relieved for that to be done. There’s still a bunch of training and other cleanup that needs to happen, but at least the major deadline is over.

    Now I have to figure out my specific plan of attack for Year Six plans so I can work into the schedule how to get the Year Five webpages finally written, plus if there’s any possible chance of editing the choir UK tour DVD, which is coming up now on a year since we left at the end of June…*sigh* I only have myself to blame, since my spring catch-up on projects time was uncharacteristcally very unproductive this year…oh well…back to getting things done now at least…

    Off I go outside for lunch for the first time in what seems like forever! 😉

    Posted in Parties, Wizards | Tagged , , | Leave a comment

    PotterParties.com!

    www.potterparties.com
    It’s up! It’s finally up! 🙂

    No, still not my Year Five webpages yet (gah!), but this is the secret project I’ve been working on since March. The Leaky Cauldron invited me to assist them with their How to Throw a Potter Party section (gee, I wonder why? heh), so I accepted and have been working secretly with that crew ever since. I even helped out by creating a bunch of the interior title images in addition to the how-to content, of course. It’s been fun, but these last few days have been completely crazy, since just as we thought we were ready to launch Monday morning, TLC’s server crashed from so much increased traffic from all the recent news plus speculation about the clues that were being left around on Sunday aternoon. An additional server was purchased & expedited but is still in process of being configured, so the final decision was to quelch discussion for now but launch PotterParties.com anyway since fans were going crazy waiting so long to find out!

    What was really cool that I didn’t know until right at the tail end, was that other fansites were sponsoring and included in the secret. Mysterious question marks went up Sunday evening at the sites below, sparking speculation across the fandom. Even when TLC’s forums were taken down from the load issues with too much traffic, users migrated to other fansites to discuss, making new friends in the process. Right before going live tonight, the last clues were puzzle pieces making up the PotterParties banner image, one piece on each fansite, which they put together and found the site at last, around midnight EDT…whew! Not only are fans excited about the new website, but they have met new friends and think the “magical cooperation” within the fandom is fabulous, as do I. 🙂

    Here are the news releases on the various sites who participated:

    http://www.the-leaky-cauldron.org/MTarchives/week_2005_05_15.php#007026

    http://hpana.com/news.18601.html

    http://www.veritaserum.com/

    http://www.mugglenet.com/

    http://www.harrypotterfanzone.com/

    And now for some much-deserved sleep…ahhh…

    Posted in Uncategorized | Tagged , , | 4 Comments

    how sweet!

    Wow! Simone from Brazil sent me a little Potter Package! I had sent her my address since she wanted to send me one of her party invitations so I could see it. She included the Bertie Botts bags of candy she had made for party favors, a little purple witch magnet, some other trinkets, a small wooden wand (that I think I might just use for Bellatrix!), and an adorable photo of her daughter made up as her own version of Chocolate Frog cards…awww…how nice of her!

    Posted in Parties, Wizards | Tagged , , | 1 Comment

    positive parties

    I often think that my work on my parties and the website work documenting them are a frivolous indulgence, of entertainment value to me and maybe some others, but not much use in the grand scheme of things. I mean, of course they’re not rocket science or brain surgery! If I’m feeling down about my life in general as I have been lately, I wonder if I should try to apply myself to more “valuable” pursuits to help make the world a better place, but then again, someone could be having a rough enough time in their own lives that the small spot of joy and distraction I can bring might really help them, so then I think that bringing enjoyment to people’s lives is not always as frivolous as it might seem.

    Why am I saying this now? Well, this was brought home again to me last night in an email I received from another complete stranger. This woman from Tennessee told me “I wanted to thank you so much for your very helpful and fun website. There has been lots of death and illness in my family in the past couple of years so for Halloween I volunteered to host the marching band’s party in an effort to cheer my daughter up. If not for your site I would’ve been completely lost.”

    After sharing some of her decorations inspired by my website, she went on to say “It just really turned out great and I have you to thank. Of all the websites yours was definitely the most helpful…Needless to say I’ll be checking back in for the 2004 pics and recipes this time! Anyway, thank you, thank you, thank you!”

    That I could be some inspiration to help cheer her daughter up after their family has had such a hard time lately really does make me feel like this is something worthwhile. Since I’ve heard such copious thanks from Brazil and Tennessee just in the past month, and from South Africa, Australia and the UK before, too, maybe I have more of a positive and far-reaching effect on others than I thought.

    Posted in Parties | Tagged | 2 Comments

    this made my day… :)

    Poor Simone from Brazil who is planning a Harry Potter party for her daughter was left in the lurch when my website went down, taking all my online decoration instructions with it. Before I even had the chance to email her back that I got it working again, she just emailed me this…reactions like this make it all worthwhile, especially after the crappy month I’ve been having… 😀

    Hi Britta,

    I accessed your site!!!!! Thank God!!!!

    I read that the site is from your ADSL, but for me it’s ok. It’s very fast!!.

    I hope that the original site can be online soon.

    Hugs
    Simone
    NOX!

    Posted in Parties, Wizards | Tagged , | Leave a comment

    Successful Mardi Gras

    Whew! Only 17 of us this year, since a lot of my “regulars” weren’t able to make it, but we had fun anyway. I did get my costume on BEFORE any guests arrived (two years in a row for Mardi Gras!) and Kylie the Kitty even made several appearances throughout the party! That was such a first that her presence was copiously photographed and videotaped – haha!

    I could have posted yesterday, but I was trying to get the photos organized and get as much cleaned as possible…all the dishes are done, all decorations are down but not yet put away, my living room is almost back to “normal” which it hasn’t been really since before Halloween…heh!

    My goal is to get the britta.com webpage up today if possible, but definitely before the end of the week…otherwise it’ll get in line behind Halloween 2004 & Year Five at Hogwarts (2003!) projects that are still not up…horrible I know… *sigh*

    Hope you all had a good weekend!

    Posted in Mardi Gras, Parties | Tagged , | Leave a comment

    Mardi Gras progress…

    I had a productive and fun weekend…nice balance!

    Friday night was Shrek 2 and pizza with a couple friends, plus a bit of Queer Eye for the Straight Girl…I’m not sure I’d ever have the guts to propose to a guy!

    Saturday

  • all carpet except both bedrooms upstairs professionally steam cleaned and dried
  • cut up xmas tree (saved trunk in manageable logs for firewood, which required handsawing)
  • 3 buckets of weeds pulled from backyard, including shoulder & back pain from the hula hoe!
  • made double-batch crab triangles & froze
  • made spinach balls & froze
  • grilled creole chicken skewers & froze

    Sunday

  • baked 8 dozen sugar cookies
  • mixed up royal icing
  • fixed heavy copper sun decoration on garage! (stupid gardeners the landlady hired snipped through my hangers while they pruned the creeping fig away from the garage roof…this was a challenge since I no longer have access to a ladder that reaches that high!)
  • put down black plastic in upper beds
  • put 3 bags new bark over black plastic
  • planted two pumpkins (purchased pumkpin shatterd into 6 pcs, guts of one of mine in 3 chunks)
  • spread mulch on top of weeds
  • baked one pumpkin & froze
  • iced sugar cookies base layer
  • hung large mask on wall with backdrop
  • put up tiebacks & drapes in entryway
  • put webcams in final positions (including running ethernet cable along the wall into the kitchen)
  • got out all masks

    Yes, the webcams are now positioned…in the kitchen on the table you can see the 8 dozen sugar cookies iced and drying to be decorated tonight after choir rehearsal, and the big mask I made is on the living room wall…with clean carpet everywhere…hooray! 😉

    The challenge this week is how to get all the party prep done, including my own mask still, when I have Wed & Thurs evenings occupied by our annual work dinners…hmm…wish me luck!

  • Posted in Mardi Gras, Parties | Tagged , | Leave a comment

    webcams working!

    If you were following along with my Halloween prep, you might remember I got VERY frustrated the night before my party when I realized the webcams were broadcasting but not FTPing their image per minute. 🙁 I even had a friend helping me in the last hours before the party and we just could NOT get it working. I suspected some conflict with the OS X update I had installed during the week, and there have been several updates since then.

    Anyway, I hooked up the webcams this morning before work (I couldn’t find the power supply for the ethernet hub last night – doh!), configured them at work, since at least the broadcast was still fine, then tested the FTP…still broken until I methodically went through the same troubleshooting as I swear we did at Halloween…finally success! Hooray!

    Before anyone asks, the cams aren’t even positioned to show anything, so I’m not posting any links…no grand decor yet anyway since I’m getting the carpet cleaned tomorrow morning, then will decorate on Sunday. Perhaps then I might give a preview here… 😉

    Happy Friday everyone!

    Posted in Mardi Gras, Parties | Tagged , | 1 Comment

    A Very Harry Christmas!

    www.jkrowling.com is so slammed right now, that I had to force quit my browser to get my machine to respond at all…go to MuggleNet or TLC for the summary scoop…by tomorrow we should have an official release date for Harry Potter and the Half-Blood Prince!

    Ack – that means I have to set a Year Six at Hogwarts party date as well…the planning has already begun in my head of course…I’m thinking another feat of paper engineering is required for me to create PoA movie-style unfolding Marauders Map invitation…hmmm…

    It’s also only one week until I’m on a plane to England myself (no, nothing HP-related at all!)…yippee! 😀

    Posted in Uncategorized | Tagged , | 3 Comments

    busy busy busy…

    The Choral Project concerts went quite well this weekend! Sunday night was a small but appreciative audience in Hollister, Saturday was about half full of Holy Cross Church in Santa Cruz, but Friday night we packed the place, which means probably 700 people in Saratoga, who even jumped to their feet mid-concert when we finished the Biebl “Ave Maria”…! That was awesome!

    I hosted a post-concert party on Friday night, which was packed since my place is small, but it was a good time, and everyone raved about my food and decor, so that’s all good…my parents even drove all the way from Sac to the concert and even stopped by my party afterwards…their first Britta party, so that meant a lot to me… 🙂

    Unfortunately, my throat started getting a tickle during last night’s concert that has developed overnight into the same cold that has been going around the whole choir, so I’m working from home today to get well. This coming weekend I have three more days of singing gigs, but this time I’m the lead soprano in essentially a quartet of college friends called Cibo Cantabimus, much more exposed than a full choir, so I’ve got to be well by then! I’m also hoping to do more holiday baking this week, but I have to be careful not to infect anyone…hehe…

    Hope your holiday season is going well!

    Posted in Christmas, Parties | Tagged , | Leave a comment