Halloween 2016

 It’s already October, and my Scream Team has been working on Halloween 2015 for months now, but with international travel for vacation and for work, plus the traditional summer Cinema Brittahytta party schedule, it’s been hard to catch up! First I’d like to show you some Halloween fun, starting with our Annual Halloween Shopping Weekend. I can’t believe
  that the little boy who used to go shopping with us is now almost taller than I am! I modeled the adorable pumpkin hat my mom knitted for me, but sadly it’s always too hot to
  actually wear it shopping. I do always take the pumpkin purse she knitted and felted for me on our shopping trip, and it never fails that at least one clerk tries to ring it up for sale! 😉
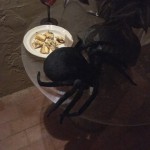
 There are always some fun things to buy just because, like this cool peacock wig and the awesome 3D skeleton shirt! I did find a few Dia de los Muertos things to add to this year’s party, but these days with such elaborate Halloween events that we are planning years in advance, I am usually shopping for the following year or even farther in the future. Halloween 2016 should be the Webmistress hosting Halloween at Castle Brittahytta, so the theme is spiders…can you tell by what I bought? 😉


 This elaborate cat makeup as been making the rounds on the internet lately, so my aunt sent it to me and challenged me to try it myself. For the first Margarita Friday dinner of October, I did a quickie 15-minute version, discovering that I don’t have any fine enough brushes for eyes, let alone whiskers, but it turned out pretty cute for a first try. I didn’t want my entire eyebrow to be a black tail since my other eyebrow was still blonde, so I designed it so when I blinked, my kitty pawed my eyeball as a toy. 😉


 October also means seasonal snacks, and some are hard to resist! Ghoulish Glen and I needed lunch before our Saturday Halloween project marathon this weekend, so we tried the limited-time-only black HA1loween Burger. It’s supposed to have A1 sauce in the bun, but it tasted like a normal Whopper with Cheese to me, even though I don’t think I’ve eaten at Burger King in over a decade. 😉
 Due to design changes and equipment hiccups, we had to make two trips to Home Depot that day in the heat, so on our way back from the second trip, we stopped to split the seasonal Pumpkin Smash Jamba Juice, with real pumpkin puree. However, real pumpkin puree isn’t really that appetizing to drink, even as a milkshake. I finished it frozen after dinner, but neither of us will get it again.
In other news, in August I rushed a Skull Fountain Kit to Hollywood to be in the background set dressing for the Halloween episode of Castle! Keep your eyes peeled in case you spot it on TV in October!
I also just found out that my Eerie Eyeballs are featured as #10 on this fun list of Halloween projects & recipes on BuzzFeed! Woohoo! Hope you’re enjoying your Halloween season! Stay tuned for our Halloween project updates next!
 Halloween 2016 is the return of Castle Brittahytta again, and I never turn down a chance at seeing a castle, especially only an hour from my house! Howden’s Castle originally built in 1927 was relisted this week for $1.3 million, after a $1.6 million price last year didn’t sell. I’d heard of it and
  seen online photos as a weekly vacation rental but never seen it live, so since they were having an open house on Saturday, Ghoulish Glen & I took our chance to see it up close. There are some fabulous photos on the MLS listing including 3D walkthroughs and drone footage, but I took photos of the reality,
  including details odd and interesting, understanding why it hasn’t yet sold. Even if I could afford this price range, I would probably rather build my own vision from scratch with more trees and less close neighbors than retrofit this one.
You can click to enlarge any photo in the gallery below, and read the captions for our frank opinions. 😉
 Here we go with Halloween 2016! Usually there are many Halloween projects in motion all year with nothing ready to display until October, but I’m so happy that this year I have a COMPLETED new project already finished, even before September began! These underlighted test tube racks for your spooky Halloween laboratory will make your test tubes glow, can use any color bulbs you like, and have no power cords to hide!
I invested in around 100 plastic test tubes with matching lids for the Exploring Ectoplasm Essences tasting quiz for Halloween 2014, so of course I want to use them again! Those tubes were intended to be displayed in the round distillers in the Ectoplasm Engine of the Spirit Materializer device, but the Library Laboratory needs a more traditional and authentic way to hold many test tubes, plus we need a better disposal plan for the used tubes. Halloween  guest Elisabeth worked in a college chemistry department and found me an old wooden test tube rack from the trash that was perfect so I thought I’d make more to match from scratch, then I finally stumbled on brand-new ones that matched on Amazon where I could use free credit card points!
 I found these LED battery string lights had the smallest battery packs on Amazon (sure wish I had found them for my Elsa sparkling snowflake cape!), plus the bulbs were inline along thin copper wire that was easy to bend into whatever shape necessary. They sell several colors, but the purple is not UV reactive enough for black light effects.
 My test tubes were a little skinny for these wooden racks, but it’s not enough of a problem for me to rebuy test tubes, since the curved divot in the base still holds them from sliding around too much. If that is a concern for you, you can purchase fatter test tubes to go in your racks, or I have seen some sets of racks that come
  with test tubes in Halloween decor this season. My test tubes still sat in the center of the divots, which is what is important, since that’s where you hide the light. I marked spacing of the centers of the divots from one end on some scratch paper, then turned that over to transfer the marks and then drill from the bottom side. If you have an extra long drill bit, you may be able to drill through the top holes to aim for center without
  measuring, but you can see mine didn’t reach far enough to go all the way through the wood. Make sure you use a drill bit large enough to fit 2-3 of the LEDs into the same hole.
Leave the drilled rack upside-down to add 2-3 bulbs into each hole, sticking up as far as they can without the bulb actually peeking above the wood into the curved divot. Use your fingers to feel if they are poking out at all. I found it was easiest to twist 3 bulbs together along the  wire starting at the battery pack. If you are using the shorter test tube racks, you will have leftover lights, but these copper wire strings are easy to cut off the bulbs you won’t use, and the rest of the string stays lit.
 As you shove the bulbs into the holes, bend the wires as flat as possible against the wood to the side, compact so none peek out past the wood. The wires will not bend flat enough for the flat wood base to sit on the wires without rocking, plus this thin battery pack can tuck under the rack to hide it as long as you add wooden bead feet…however the glow escapes out the bottom too! I was able to use a single
  width of heavy-duty black duct tape that covered the light spill plus neatened the wire mess, but you have to cram the wires tightly together or they will sneak out of the tape edges. You can see in the photo to the right that I have one rack showing the bare wires folded, then one already taped down before adding the wooden bead feet with hot glue.
 The wooden feet only prop up the racks a little, but enough to see the bright white battery pack at the wrong angle, so I made a hinged flap from the same black duct tape that has enough
  sticky spot to stay closed, but the edge of the tape is folded so it’s a handle to lift the battery pack to change the batteries. Make sure to orient the battery pack so the on/off switch is to the end of the rack so you can flip the switch by feel, and don’t tape it upside-down so you can’t access the battery compartment. 😉
I was hoping for UV blacklight effects from some purple/UV LEDs, but I have discovered this summer that it is very tricky to find true UV LEDs for sale to consumers, mostly because no one advertises what the output wavelengths actually are. You can see here that using the purple version of the same battery copper-wire light string didn’t even light up the tonic water that gives a bright blue glow under even a basic compact fluorescent blacklight bulb. Even trying a 12V LED strip with good blacklight reviews didn’t make the test tube blacklight effects  any better. Online research and my own testing revealed that you need the UV range to reach past 365nm for blacklight effects to show, and if it has too much range higher into the visible spectrum, you’ll just get too much purple vs. UV, exactly what happened here. If you look carefully at the very bottom of the tubes, you can see a tiny blue glow from tonic in tube 2 and a slightly green glow from the vitamin B in tube 5, but not enough to bother. What matters the most no matter what color light is how many suspended particles are in the liquid for the light to bounce all the way up the tube, without being too opaque like fruit juices. Here you can see the comparison with purple lights on the left, white lights in the back, and green lights to the right, all using the same test liquids…and our overwhelming winner for Ectoplasm Experiments to match green glowsticks was pale green lemon-lime Gatorade on the far right!
From left to right in each rack to compare:
sour apple mixer = green, glows green
tonic water = clear, should glow light blue but I don’t think there’s enough UV
different vitamin B pill = pink, glows brighter pink in UV
100% vitamin B solution = brown-green, should glow bright yellow-green in UV
tonic water + vitamin B solution = pale brown-green, should glow aqua in UV
lemon-lime Gatorade = doesn’t glow in UV from any vitamin B, but refracts light perfectly!
Since the wooden bead feet match plus the rest of the equipment will be dark, I think I like the racks the pale natural wood color they already are, but when I get the rest of the Library Laboratory arranged, I reserve the right to decide to stain them darker….but for now, onward to other Halloween projects for the Webmistress Hosts a Victorian Halloween at Castle Brittahytta! 😀
 Another finished project! In our first story of the Verdigris Saga told in 2014, the family gravestones were not moved to California when Castle Brittahytta was moved. Since I didn’t need to make new physical gravestones for our display, I took some of my favorite elaborately-carved foam Haunted Headstones from past years and digitally changed the epitaphs to the Verdigris family for the Tasty Tombstone cookies that were one of the clues to match the portraits with the ghosts for the Studying Spirits quiz. Well, since this Halloween we are going back a generation to when the Webmistress lived in the castle in its original location, now we need physical Verdigris gravestones. Ironically I did make the Webmistress’ gravestone for filming Miss Wells in the graveyard, but that’s the only gravestone we do NOT need this year…heh!
 Not only did I not feel like carving all the fancy gravestones from scratch again, and would rather recycle to save storage space, but a couple designs included plastic angels that I could not find again, so I had saved thin foam sheets from previous projects and any good packing material to make plaques over the original epitaphs. That took some artistry to figure out what plaque shapes would look the most integrated with the gravestone designs. Once I had rough-cut the basic panels with my serrated knife, I cleaned up the edges with my hot wire cutter, then most looked even better with the plaque edges beveled. I was very pleased I could cut a smooth enough angled line with that wiggly hot wire for those bevels….whew!
 Of course I insisted that the physical foam gravestones should match the digital cookie art, and it would have been easier to photograph the new epitaphs and make new edible prints, but I was having problems with my edible printer this spring, so while it was not quite completely dead, I quickly printed all the Verdigris edition Tasty Tombstone frosting sheets so they would be ready for baking cookies closer to Halloween. Going backwards this way retrofitting the stones to the image has been extra difficult! I guess it’s a new challenge since I’ve been carving gravestones for so many years now. 😉
 I prepped by printing the cookie epitaphs as large as possible, some requiring multiple sheets of paper trimmed and taped together to fill the gravestone at the proper scale. Usually I free-hand sketch my epitaphs before carving, sometimes using a printed font as a guide for centering and spacing, but this time I wanted
  them as exact a match as possible. I didn’t have any carbon paper left in my stash (do they even sell that anymore at art stores?), so I tried several methods of transferring the epitaphs from paper prints. I used chalk on the back of the paper and scribbling a pencil like carbon paper on the back, but both of those were only moderate success, mostly the imprint of the ball-point pen through the paper into the foam is what helped me carve accurately. I
  saved Dynia’s epitaph for last since that was the most intricate font, so I printed in reverse, copied on a laser toner copier, then tried water spray with a medium iron, moving constantly so as not to melt the foam itself. The coolest setting on my iron wasn’t warm enough, but a couple notches hotter worked much better as long as I had a good mist of water between the foam and the paper. I’ve read online that various solvents might work better for this kind of transfer, even though some solvents might eat away different kinds of foam, but I didn’t have any of the solvents handy and wanted this finished! The best method seemed to be a quick spray of water between the paper and foam, working a small section at
  a time with the iron until you could see the ink through the wet paper, ironing until the paper started to dry again, then just peeking one area to check while leaving the rest of the page in place to keep the exact position.
Between tracing and carving with my woodburning tool on the plugin dimmer switch (see my video series for Haunted Headstones and Carved Stone Walls), it took about an hour per gravestone just for the new epitaphs, so I finished one each evening during the week when it was nice and cool outside on my patio with plenty of  ventilation for the burning foam fumes to dissipate. Once those were complete, I used the Tasty Tombstone artwork as my guide to integrate the cracks between the original gravestones and the new foam plaques.
 I waited until the end to decide how much I would make Ergelise’s stone match her cookie, since I digitally squashed it from the original double-wide stone for the twins from Fall of the House of Usher,
  requiring cutting out the middle and making the sides meet again. Since I was making decent time on this project, I decided the foam plaque in front would help hide the vertical seam, and hopefully glue and surface spackle plus a new horizontal base would help it stand better, since it was always too top-heavy before, especially with the plastic angels sticking out so far. After the spackle dried, I sanded the back by hand as smooth as I could, but since the front recessed
  area was carved into rough lines and spackled to blend those lines together, it didn’t need any sanding.
I had saved some of the inner edges of the Giant Gravestones from Day of the Dead, so I added those as bases to a couple gravestones, cutting a u-shape so that two foam strips nestled around the original gravestone for the best stability. I didn’t glue any of the new foam pieces to the original gravestones until after their basecoat gray was painted so I could get paint all the way into the corners and edges completely. For extra stability and to hold the pieces in place while the glue dried, I used wooden toothpicks at toed-in angles, making sure the toothpicks were recessed and the holes hidden.
 I had seen other home haunters online recommend painting inside the epitaphs first, then rolling gray paint over the flat surface, so I thought I’d try that technique this time around to compare. It does work, and it’s equal brush mashing since you need to get paint into all the crevices of the carving detail whether it’s gray paint or
  darker, but I’m not sure it’s any easier than my original technique of gray basecoat, aging, then accenting with watered-down black paint very last. All my epitaph plaques were too small for a normal paint roller, and I didn’t have a small one, so I carefully used my large brush gently across the surface as dry as possible to avoid getting any gray into the already-painted epitaphs.
 I actually glued the foam panels while they were still wet with gray paint so they would be ready for aging the next day, but I didn’t take photos. Aging foam stone in daylight often ends up too subtle for night lighting, so I have found that it’s easier to do the aging treatment in similar lighting as your final display so you can be sure the effects are dark enough. I used the same black spray paint and spray garden hose technique I’ve been using for 13 years now (?!?), but it’s rather difficult to take a photo of yourself with the hose in one hand and the spray paint can in the other, so you can watch my
  video series for Haunted Headstones and Carved Stone Walls to see the aging technique in action. Basically you are simulating centuries of dirt, dust and rain over and over, until you have the effect you like. Leaning the gravestones at a slight angle to the back helps control the dribbling, but make sure they’re not cocked to one side compared to their final display position.
I was very glad to have all these Up-Graded Gravestones COMPLETED by mid-September, all ready for the front yard display of Castle Brittahytta…but there are still plenty of projects underway for Halloween 2016 so stay tuned!
Castle Brittahytta began as a secret project for Halloween 2011, reprised for the first Verdigris Saga year for Halloween 2012 and again for Halloween 1914 in 2014, so this year is our fourth version of the castle, with improvements added each time. After some strife earlier this September, I think we’re  finally done since we survived the rain this past weekend with lighting intact and only a minor glitch from some giant blustery wind. I still have some last final decorating touches to add, and the front projection show is still being edited, but here is Castle Brittahytta 4.0!
I was hoping for the castle to be up by the end of Labor Day weekend, but as we got the castle walls down from above my garden sheds, one piece of the tall tower was completely missing so needed to be made from scratch to fit, there was a lot of rat chewing damage to  repair and repaint, plus the thin foam we used for the round towers in 2014 got too brittle during two years in outdoor storage to bend into shape again…so we had a lot more work to do! Glen brushed all the walls clean of all the dead leaves and blossoms and general crud, I cut, carved and
  painted the replacement wall, then we both did all the touchup painting, including all the chewed white spots, and lightening the darkest stains to blend with the rest of the walls. Scary Jerry was able to help us hang the ramparts and corner towers on Sunday, but we were still redesigning the round towers and the support for the tall tower. Both of
  them helped me sketch the curve for the new garage door archway, and convinced me just to buy new foam sheets instead of attempting to recycle really old pieces I had…heh!
The round tower spires I made umbrella-style from marine vinyl, wooden dowels and hula hoops rolled up nicely to stand in a corner inside my garden shed, but those hula hoops were  pressed paper and didn’t last the big 2014 storm season. During the year I had found plastic hula hoops the same size (and price!), plus the thin wooden dowels had warped under the weight of the fabric, so I was on the search for additional sturdier spines. Metal rods were $3 each (!) so cost prohibitive, and I tried using some 9 gauge wire which didn’t do much, so I went back and bought 35 wooden dowels 3/8″ diameter. Since the original dowels already met at the top, I placed the new thicker dowels between them, wedge them into the top and taped the bottoms. The tape won’t hold forever, but by pulling them tight over the new columns like a close-fitting hat, they even stayed on the columns during the worst wind we’ve had yet!
 Since part of our plan to reinforce the tall tower was to screw through the square foam spire, I decided to sew a matching marine vinyl cover from the last bit of vinyl I had bought in 2014…whew! I pinned it in place inside out over the foam spire to be sure of the fit, sewed it inside, sponge painted it to match the other aged copper look spires, and it works great!
Having the rectangular white garage door staring me in the face while the rest of the house looks like a castle has been the bane of my existence since 2011. I made a canvas curtain covered in wood gossamer but still was a rectangle, then I tried woodgrain contact paper,  which fell off last-minute in wind & rain, but also was still a boring modern rectangle…so I demanded castle doors this year! Not only would the garage opening get a rear-projection screen (more in a separate post), but a new foam-carved “stone” garage door arch surround was planned all along. I was finally able to cut, carve & paint it the following weekend and it immediately made a huge difference! Even with the white garage door inside, the arch shape of the surround and the dragon sconces and drawbridge chains at the sides made it look so much more like a castle…and just wait until the garage screen shows the portcullis opening to reveal the heavy wood plank door with giant iron hinges!
The wind kept blowing over the round foam towers so many times in 2014 I was a nervous wreck, so I had already planned to make all of the castle as wind-safe as possible, including  internal structure for the round towers. Now that the thin foam walls from 2014 were no longer an option, we completely designed the round towers to use two layers of strong galvanized wire fencing stapled by air compressor to the same plywood bases, then covered the wire fencing in matte finish vinyl fabric that thankfully matched the castle wall basecolor perfectly. I had painstakingly painted a smaller brick
  pattern on the foam towers for 2014, but we realized in the dark they weren’t even noticed, so this year the towers are plain tan, with the breeze pushing the fabric against the rectangular pattern of the wiring inside giving a little brick effect. Even those strong staples didn’t completely hold through two weeks of constant breezes, and after enough staples worked themselves loose, we had a couple towers come off the plywood bases! We took the nail gun back up onto the roof (thankfully the hose is long enough that the air compressor can stay on the ground!), stapled almost every inch,
  and that lasted through wind so strong this past weekend that it blew over the plywood bases…but the towers stayed intact! Now we have added some more sandbags on top of the plywood bases so we think we’ll be good for the rest of the season…famous last words? 😉
") I am being careful about phrasing since as soon as we thought we had the tall tower really solid on a custom-built wood frame over two metal workbenches, plus the old heavy 24″ monitor set up inside the window, not even 24 hours later a huge gust of wind must have blown the top workbench off
I am being careful about phrasing since as soon as we thought we had the tall tower really solid on a custom-built wood frame over two metal workbenches, plus the old heavy 24″ monitor set up inside the window, not even 24 hours later a huge gust of wind must have blown the top workbench off  the roof, since I came home from work to see it backwards on my front lawn, with the other workbench still standing on the roof! The rampart wall and angel’s trumpet tree must have broken the fall and turned it backwards, and all the foam cushioned
  the monitor so it still works fine…whew! Amazingly and thankfully the top tower was salvageable with only some minor repairs, but since the lower walls were anchored to the lower workbench and the frame, they tore apart and had to be rebuilt from scratch…just when I had put the paint sprayer and foam carving tools away of course! So back to buy two MORE foam sheets, use the broken pieces
  as patterns, then cutting, carving, painting & aging them…which couldn’t happen until after Halloween shopping weekend. We not only added one more framing piece across the bottom, but lashed both workbenches together with large zip ties, added sandbags to both levels, AND added a rope tied around my one tall skylight so if it does tip over, it won’t be able to fall off the roof to hurt anyone or anything. Good to know that it didn’t even budge when the wind knocked over all the round columns last weekend, so we might have finally triumphed…? 😉
 I had a late brainstorm to try my baby battery jack o’ lanterns up along the castle walls and in the windows as more forced perspective. They do make the round towers look huge, and they are adorable in the castle windows! Since turning on all those every night will be a pain, plus we have flicker LEDs from last year’s candles,
  and I have a resident electrical engineer at my disposal, we are wiring all 15 baby jack o’ lanterns to AC power so they’re on the roof power circuit. The ones on the walls are finished but we need brighter static LEDs for the faces to show through the windows, so those are still in process. They stayed in place during the wind since we used a pair of bamboo skewers angled into the foam so they have to bend to set the pumpkin on top, giving pressure outwards for a tight fit. I’ve built foam shelves to get the pumpkins in the correct window placement, so those are just waiting for their LEDs to be wired in place. Since
  I’ve already had some feedback that my crawling spiders video show is too scary, hopefully this cuteness might balance the creepiness…? 😉
Glen aimed three warm white lights to hit all the roof towers from the side, which looks great, and our waterproofing succeeded…whew! Scary Jerry came over again as our lighting consultant, and some slow color-changing outdoor LED spotlights aimed from up in the front tree really makes it all pop! It is very nice not to have so many power cables out on the grass, even though I’ll end up with trip hazards anyway once my handmade  pumpkin vines are finished and added. 😉 The Ghostly Guardian is still watching from the tall tower, but this year you can see her gravestone in the foreground, entirely written in old Nordic runes. All the gravestone spotlights and several of the towers are coming from the projector hidden under the garden well at the front corner…but more about that when I can reveal the full front show with original soundtrack written by yours truly!
 All this work looks wonderful, but we are not finished quite yet! I have some garlands on the graveyard fence with hopefully a few more arriving soon, all the gravestones are up on rebar, also not budging in the wind, jack o’ lanterns are almost all in place with extension cords successfully taped against a full day of
  constant rain, giant pumpkins are still being placed since I’m making pumpkin vines for them, a giant spider photo op will be under the front tree along the sidewalk, and I still plan on placing fake spiders on the pumpkins to go with the spiders climbing the castle walls…but at least we have made this much progress by October 18th, with one more full weekend and week before my big party! Click below to view the entire photo gallery for Castle Brittahytta so far…
 Even though getting the outside front show ready has been consuming the majority of my time until now, I’ve been able to crank through several small projects to add to my Victorian Halloween atmosphere, including elegant silver and black cat collars, custom pumpkin vines
  for the graveyard, candle “costumes” and spider jewelry for servingware, candlesticks, and even for the Webmistress to wear herself!
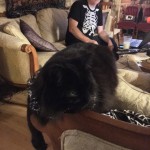
My kitties don’t let me put costumes on them, but they will wear soft collars that stay out of their way. For my first black cat Kylie I found collars on sale at pet stores that were fun, but now since I have three black cats, I’d rather have them match, so I make them myself. The past few years  they’ve had a fun orange pumpkin and black cat pattern, but this year I found some very cool black mesh fabric with silver printed web pattern. Not only did I make myself a scarf just by cutting it (no hem
  required!), but I made kitty collars AND a hair scrunchie for myself. The fabric is very soft and it looks fantastic on my kitties!
Later in September as we were cutting other projects for time, I thought I could add in some homemade pumpkin vines so I could use my papier-mache pumpkins around the graveyard.  Just sitting in the graveyard didn’t make sense, but vines emerging from the grave of The Pumpkin Queen would be perfect! I’ve grown my own pumpkins several times, but fake vines I could put anywhere I wanted for future years to come. Before I drew my own leaf patterns, I did a quick online search and found several, so I
  printed those as large as my paper would allow plus smaller sizes, cut out the templates, then traced around them onto scrap green felt I had in my fabric stash. I was cutting leaves forEVER, then I needed to glue green fabric-covered floral wire to them! All but the smallest leaves needed a curved crosspiece plus the long
  stem, and I left the stems plenty long, since I poked the wire through the sisal rope I was using as the vines, then I could curl the other end of the wire around a brush handle to make the curled baby vines. I also painted the leaf veins the same lighter green as the rope, which
  was very close to the wire color, but since the green felt was so vivid, I also dry brushed the lighter green over the entire leaf. They’re still too bright in the graveyard during daylight, but at night with the orange & color-changing lights, they look ok. I was only able to make three vines from the pumpkin leaves I cut, so I think every year we use these pumpkins, I’ll make another couple vines. Handstitching around the wire would make them rain-safe, and some fabric stiffener might make them even more realistic since they’re pretty floppy right now.
 That’s not the only late brainstorm about pumpkins! We only have the single ghost in the tallest tower this year for story reasons, so that leaves the roof a bit boring and the other castle windows empty. I have 15 small battery jack o’lanterns, so I thought why not put them along the top of the castle walls and in the windows as forced perspective making the castle look taller? Six of
  the baby jackos were super-cheap dollar store purchases so long ago that they were blinking incandescent, not even LEDs, one was another incandescent found at Goodwill this year, then the other eight were
  from Target’s collection the past few years (but sadly Target had no jackos this year of any size!). We could have set them as-is, but that would require turning all the batteries on & off every night on the roof…so since we still had extra flicker LED pigtails already wired from our Halloween 2015 soldering party
 , I asked my resident electrical engineer to wire all the baby jackos to the roof power circuit. It took him a few days but they are now all wired together AND they all flicker brightly enough to see the faces through the gray sheet windows! I absolutely LOVE these!!!
The Webmistress is hosting a Victorian Halloween at Castle Brittahytta this year, so she deserves some new accessories. I’ve been drooling over the Victorian Trading Company  catalog for years, so I finally splurged on this gorgeous spider jewelry and more using a free shipping offer! A pair of spider hair pins that are much larger than I expected, which is great since they should be noticed! The brooch has a couple colors I didn’t expect, and the bracelet is very large and more gold tones than expected, especially since the Webmistress’ color theme is black and silver.
Back in August I was browsing Etsy for a masculine swan pin for the Victorian family father to wear (separate post later, sorry!), and I came across a fabulous silver pocket watch with a giant spider on top! It would be even better on the other web case design, so I messaged the  shop to ask. He was fine making it for me, but when I was ready to order a couple days later, his Etsy shop was down…ack! I was able to contact him, and he was just setting up a new shopify store, so I was his first shopify customer via PayPal. My items arrived last week and I absolutely LOVE them!
 Since I knew chances to use fancy spiders were coming, the past few years I’ve been buying interesting items, even if I didn’t have a concrete plan how to use them…like these “crystal” spiders I’ve
  seen at several stores, even including Dollar Tree this year. I ended up with 4 that didn’t match, but I have four tassels for my Halloween curtains in the living room, so I thought the
  crystal spiders could easily dress up those! I just bent the front legs to hook around the top of the tassel and they’ve stayed all month! This is probably a detail others might
  not notice, but I know it’s there. 🙂
Last Halloween I found a black square tier tray at a discount store that was missing a couple beaded drops, but obviously had potential to add my own spider bling! I also found a black beaded silver candlestick at a thriftstore half-off sale that was also screaming for spiders!  Before Halloween Shopping Weekend I was able to quickly add some spider bling to some thriftstore items to make them more the Webmistress’ Victorian style. It’s a much faster project by already having silver
  spider charms, beading wire, and a bevy of beads in my crafting stash! Now I need more silver spider charms so some are coming from China via Amazon free points, but
  arriving probably too late for me this year, so stay tuned for more spider bling when the Webmistress’ party returns in 2018… 😉
 Speaking of candles, I had converted four pillar LED flicker pillar candles to sit over the spiked sconces years ago, but they are just plain black. I took the same silver web mesh fabric I used for my new kitty collars and taped it around the black pillar candles to make them extra fancy. This makes
  them stand out even more, since the black candles against the dark iron finish of the metal sconces blended in a bit. I used the same removable poster tape that I use to attach my flagstone gossamer to my painted inside walls, so I can remove the web fabric and have plain black candles again for future Halloweens if I have a theme where the web design won’t fit.
 I was gifted a couple gorgeous carved black gothic candelabras, but putting my black candles in them all blended too much together. I found long white taper LED flicker candles at Dollar Tree, but that same black mesh fabric didn’t work on white candles. However, a cheap
  translucent web pattern tablecloth was absolutely perfect! Now not only are these candles “costumed” much more in the Webmistress’ style, but I can remove the tape and have white candles again for other occasions!
 I have several candle lanterns of various sizes, and I had a different plan for them but am running out of time (maybe for 2018?), so I used the same cheap web tablecloth (seriously, I’m still cutting up ONE tablecloth for all these projects so far!) to line the windows of this lantern using clear removable poster tape. It’s just the right opacity for the flicker LED tealight to glow without showing the fake candle inside…perfect!
 I really wanted a fancy spider front door wreath with as much Victorian style as possible, so I bought a bunch of ribbon on clearance from Michaels last year. I also splurged on the albino spider battery light string from Pottery Barn since I expected so much of the wreath would be black so you would have trouble seeing black spiders. I wanted to make this early in the summer, but everything got too busy, so I didn’t start it until 4 days before my party…ack! The large sheer silver net ribbon was wrapped with a black layer to show the pattern, so I had to spray the pressed white foam wreath form before I covered with the silver web ribbon. I used a whole roll of the white spider wired ribbon to make a
  large triple bow wrapped around, plus some thin stripy black & silver looped several times to hang in the middle. Some black and dark purple roses from Dollar Tree added some
  Victorian flavor, then I arranged the albino spider lights before hotgluing almost an entire sandwich bag of bulk plastic spiders! It looks perfect on my front porch between the giant shaking spider in its huge web, web doormat, spiderweb wind chimes, and my black urn floral arrangement. I think this spider wreath might be the definition of Eerie Elegance! 🙂
 My patio archway door that has been in service about a decade now finally got an update! When I splurged on the dragons for the columns, I also found these brass dragon door handles cast from some original in Europe, but they don’t have latches so I coudln’t use them anywhere else in my house…but they fit perfectly on the archway door! I expect this may be another detail others may not notice, but I really like expanding the dragon theme. 🙂
 Back when the sheer purple with web-flocked fabric was available, I bought enough for matching living room curtain panels, pillow covers, a drape for the piano, front door moon window panel, a tiny lampshade cover for the little lamp above my patio fridge, and a big lampshade cover for my floor lamp in the living room. I had another lampshade I covered with Eerie Elegance Beware
  the Brocade but thought I should have all matching webs this year. However, I only have tiny scraps left and haven’t seen that sheer purple web fabric for sale in several years now…but I scrounged through my fabric stash, and I had just barely enough of my original sheer black web lace from the original Webmistress costume from 1999 to piece together a new lampshade cover for the Library Laboratory floor lamp! When
  the light is shining through, you can’t really tell the difference between the purple and the black anyway, so they fit together just fine. All this work was inspired because during Halloween Shopping Weekend this year I found a
  FABULOUS black fringe trim that I could not resist, so there was $50 AFTER coupon, but now I have extra opulent Victorian web lampshades now, worthy of this Webmistress! One even has double layers of purple and black fringe, which I didn’t expect to like, but I think it fits as over-the-top Victorian.
No time left for any more updates since my party is Saturday and I’m taking the next three days as vacation from work! My costume is ready, and the front show is all set with over 10,000 spiders crawling all over the castle and graveyard, but there is still a lot of food to make! Hope everyone enjoys their Halloween weekend and I’ll be back with more updates after it’s all over!
Happy Halloween everyone! Tonight is the last chance to see our 2016 show live while The Webmistress Hosts a Victorian Halloween at Castle Brittahytta. Over 10,000 spiders emerge from the castle doors and crawl over the towers, ramparts and gravestones of Castle Brittahytta to an original musical soundtrack while the Ghostly Guardian watches over the castle as she has done for a thousand years. Here is the video in 4K for your viewing pleasure!
I hope everyone has a fantastic Halloween! My party photos from the weekend will be coming soon, so stay tuned!
We had a good turnout for Halloween night! There was a tiny bit of drizzle around 6pm, but thankfully the weather stayed nice and dry all evening…whew! Based on my candy count, I had 100 trick or treaters, a new personal record! We had good crowds for almost all the showtimes, with only three shows completely unattended, and two of those only because we kept running past 10pm for some friends who were on their way, and a few co-workers even stopped by! I even set up my the camcorder footage of the front porch where I was giggling way too much at our spider scares! After our final show, we zipped over to Scary Jerry’s house to see his Day of the Dead display inside and out so we got a Scream Team photo on our favorite night of the year. 😉 Hope everyone had a Happy Halloween!


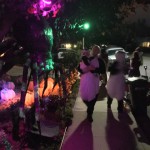


 Whew…another great Halloween party this year! The rain that had been threatening all week drizzled a little in the morning and the afternoon gusts of wind made it difficult for tablecloths, but the weather stayed clear for the party as the Webmistress hosted a Victorian Halloween, with most of the special spider-themed menu as planned, many clever and gorgeous costumes, and even small children loved my Waltz of the Spiders front show and enjoyed posing with and hugging Winnifred the Giant Tree spider, even if the jumping and shaking spiders along the front walkway were a bit scary for them. 😉 I think
  we were 58 adults and 11 kids even though I think I might be missing some of the friends of friends…but from the amount of glassware I washed immediately afterwards and rushed to pick up outside the next morning as I heard the wind and rain starting again, that seems about right! This is definitely an example of the perfect quote for me: “I am thankful for the mess to clean up after a party because it means I have been surrounded by friends.” 🙂
  Thanks to everyone who helped me celebrate my favorite holiday!
Thursday night was opening night for our front show the Waltz of the Spiders at Castle Brittahytta even though we stayed inside working on party food. It was drizzling constantly all evening but thankfully no wind, and everything still worked fine through the  advertised showtimes as some friends & neighbors watched, but despite all our waterproofing efforts
  including investments in specialty outdoor boxes and taping the heck out of every exposed connection, by 11pm the front show circuit was down, and by 2:30am even the pathway electrical for all the jack o lanterns and the front webcam was down. This also meant that Glen couldn’t work on the backyard party lighting that night because it wasn’t safe to work with open power
  circuits in the rain. Thankfully Friday afternoon & evening was clear to get everything out
  front working again by showtime, then Glen did a FANTASTIC job with the backyard lighting! He set up the purple beanbag spider with fun colors, enough lighting for playing the bean bag toss “cornhole” game to the side, and using my new paper lanterns with clamp lights and 100W CFL bulbs, under the canopies it was almost as bright as inside! We are definitely keeping that arrangement for future parties!
 I wish I had been able to take more days off work, since by party week the only completed food were the Spiders of the Sea black rice crab cakes ready in the freezer and all the faces drawn on the Mandarin Jack O’Lanterns, but in the 3 days I did have, I finally caught up on food prep: 6 dozen hand-formed Sourdough Spiders, baked & piped 8 dozen Ginger Web Cookies, made 6 dozen
  Pumpkin Pasties using the filling & pie dough I had prepped earlier, baked 7 dozen Ghoulish Gravestone cookies and Edible Medals for prizes, prepped 4 Slimy Spiders sculpted from cream cheese for green jalapeno jelly, prepped the Spiderweb Brie en Croute, and Glen and I finished his new recipe brainstorm Fal-Awful Arachnids!
I did pipe several dozen royal icing spiders and made cotton candy TWICE for Spooky Spiders in Wispy Webs after discovering my oldest cotton candy machine had finally given up the ghost after 15 years, but the seals on the spice jars were not as airtight as advertised, since  less than 24 hours all 48 bite-size butterscotch Wispy webs inside the jars had already melted from ambient air moisture. *sigh* I made more cotton candy the next day to keep in reserve in plastic bins, plus spun more webs on the bamboo picks, also saved in plastic in hopes of adding to the jars just before party time, but that recipe ended up cut for time, hoping no one noticed it was still listed on the menu board! Thank goodness I only spent free credit card points to buy the 48 spice jars. I thought I had finally solved how to serve cotton candy at a party but I was still foiled again…we’ll see what I can find by 2018 when the Webmistress hosts again…
 Thankfully most of the special spider menu went reasonably well, including the hilarious and tasty Gargantula Cheese Ball, and those will be exclusive to the new Creepy Cuisine recipe collection book from Eerie Elegance, hopefully on sale by summer! However, as I finished the menu chalkboard on Friday night and it almost didn’t all fit, I agreed with Glen when he said “I think that’s too much food!” I usually have too many ideas than I can execute and expect some to be cut for time, which is one reason I wait until the end to write the
  menu chalkboard, but I was as prepared as possible for the make-ahead food, and I was hopeful for the last-minute fresh food. However, as it came down to crunch time with only Glen and me this year and no house-elves arriving early, the fresh fruit & veggies never happened, and the cheese plates, cookie plates, and apple slices with caramel dip barely happened only with gracious help from Keith & Doug when they arrived first.
I did have full my costume on before 7:30pm, but as I directed the last food being set out and let Cyd set up the lab experiment bottles, I insisted on using my new lighted test tube racks  so I quickly poured green Powerade vs. green Gatorade into the test tubes, turned on the lights under the racks, and took some Ectoplasm Experiments photos! Then I finally socialized at my own party! 🙂
We were trying for Ogle the Owls and Ectoplasm Experiments as the party activities, but I knew the mix your own experiment hasn’t gotten much participation since it debuted in 2005, and even though I had quiz sheets ready on the coffeetable for Ogle the Owls, I ran out of time to verify what owls were out! People partied through the entire house, enjoyed the  backyard couch seating areas and small food tables, played my new bean bag toss “cornhole” set, especially the kids, and roamed outside to watch the front show, then as people started trying to leave, I gathered them to the backyard to award the prizes…
We don’t always have Scariest Costumes, but this year the votes went to ghostly Jacob Marley complete with heavy chains and chin bandage (Nicholas), fancy Jack the Ripper with his stylish victim (Sean/Laura), and since I didn’t have a prize for Epic Hair, I gave Juanita a medal for Scariest Hair 😉


The Ultimate Costume category never disappoints! This year three groups went all out!
Star Wars Clan with Kaelyn as Padme, Karin as Leia, Ellie as Rey, Kevin as Kylo Ren, Alex as Obi Wan, and Nathania as Hana Solo

The Barbieris arrived as the Edwardian-era Downtown Abbey Clan

Last but not least was the Ghostbusters Family including Abby & Erin with inflatable proton packs (Annalise & Kira), clueless Kevin (Mike) and a glowing blue ghost (Angie)! I also insisted on taking a photo in the lab with the glowing Ectoplasm Experiments. 😉


People were already leaving and I was requested to show Nola where all the owls really were, so no other prizes were awarded as a group, but I had seen some very clever Creepy Cuisine arrive, so I awarded prizes to those who hadn’t left yet, and have a couple saved Edible Medals for others who won in absentia:
Creepy Cuisine awarded individually: Mari’s Mum’s the Word mummy pizza pockets, Sheila’s Spider Deviled Eggs


Creepy Cuisine in absentia: Robin’s Vampire Donuts, Ashlyn’s Beheaded Cauliflower buffalo style, Kian’s Zombie Balls pizza monkey bread


After the prizes were awarded many of the early-night crowd left as they usually do, while the late-night people stayed to chat, including lighting the gas firepit on the patio for a little  while, but I wasn’t able to join them. Even my traditional overnight guests had to get home for morning commitments this year, so
  all the guests had already left by midnight, very early for my Halloween parties, and no after-party for me to sit down and relax this year! I did get a couple of Sheila’s delicious deviled eggs and a couple cocktails so that was better than many past parties. 😉 I put away the food and did the worst dishes, then pooped out around 3am. It did feel much better to get 6 hours of sleep rather than get up early to make brunch for guests, and we were able to relax on our free day with morning rain. As the sun came out again, Glen took a long nap while I retaped all the power connections in advance of the next sprinkles so we could run our front show again, then we headed out to look at other local Halloween home haunts for a change, which was fun!
The full photo gallery is included below for your viewing pleasure! I was extremely lucky the past few years with fantastic professional photographer Cat as a party guest, but she moved to Texas, so I am extremely thankful this year that Tracia, Sean, Robin, and Keith took photos to add to mine! Hope everyone had a Happy Halloween!
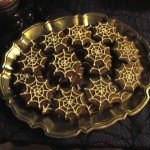
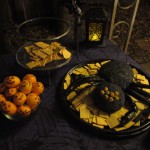
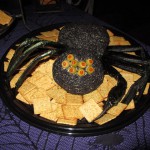
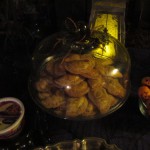
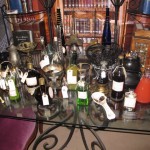
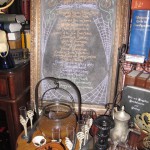
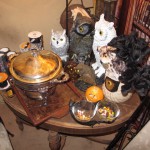
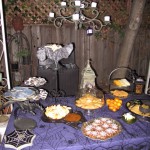


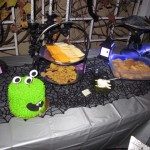
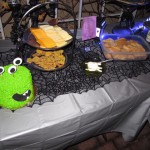


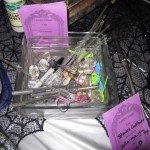
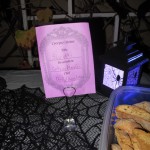
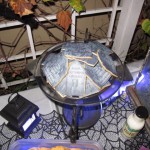
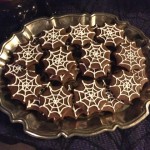
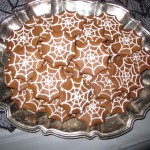

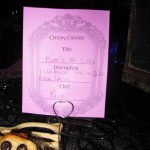
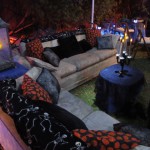


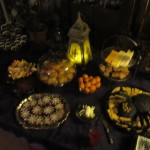
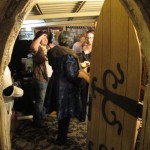
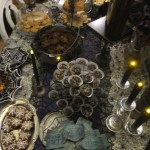

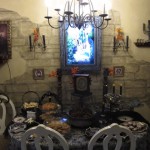


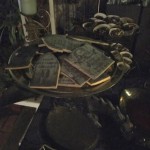


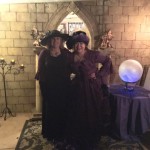
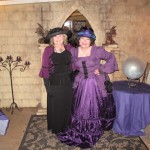
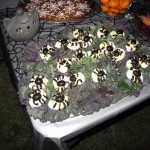


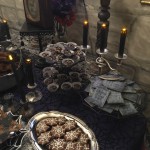


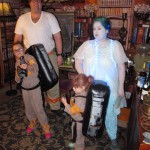


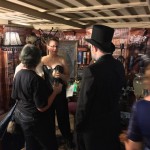

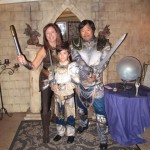
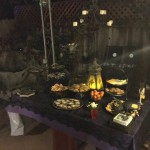


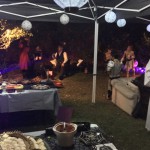


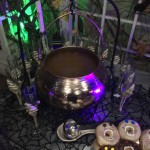

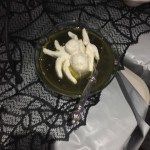


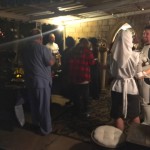
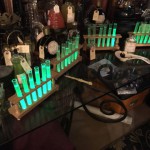

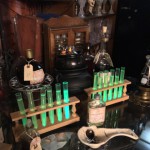
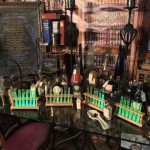
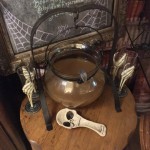
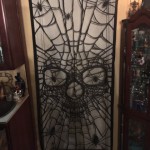


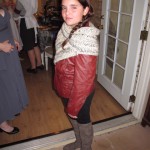


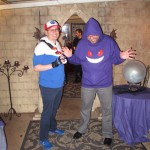
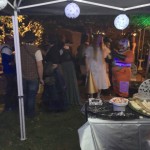


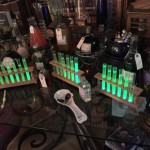


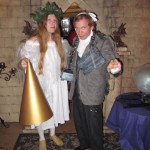
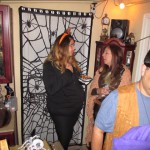


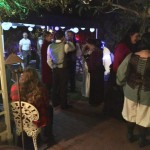

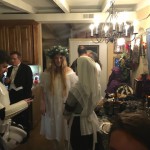

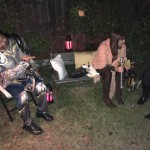


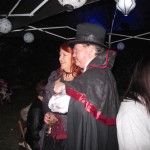


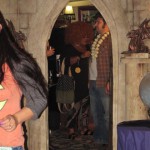


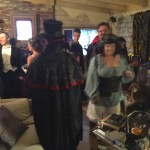
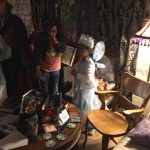


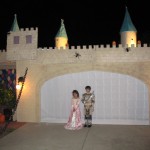


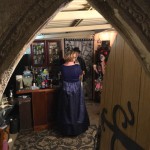
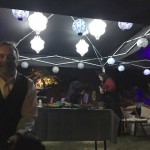


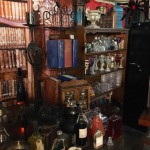

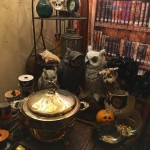


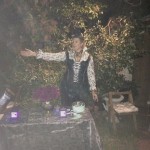


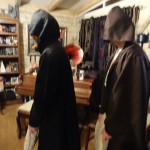
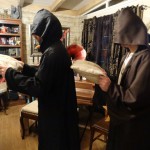
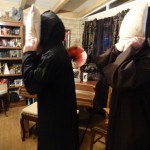


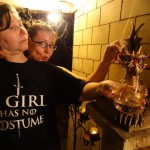

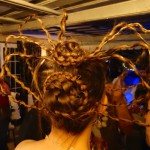


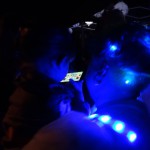


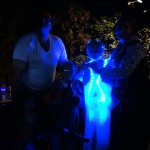


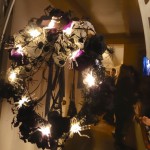


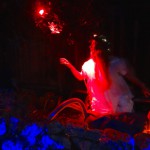

Hope everyone is having a happy holiday season! Since we finally had Castle Brittahytta weather-stable by Halloween, we left it up and decorated it for Christmas, including projected snowfall and dripping icicles!
For 2016, Castle Brittahytta was covered in snow and dripping icicles with lighted trees in every tower window, lighted wreath and garlands, the wishing well was frozen, and even all the dragons had festive hats! As you listen to a cappella carols by Cibo Cantabimus, follow the decorations inside to see how this castle decks the halls…
Castle Brittahytta was originally constructed for Halloween 2016, details here: http://brittablvd.com/blog/halloween/halloween-2016/
For more Christmas decor and recipes, see http://brittablvd.com/blog/tag/christmas-2/
Cibo Cantabimus is Britta Peterson, Stephanie Manansala, Tracia & Doug Barbieri, Jeff Ouye, and Louie Lee, singing together each Christmas since 1990! http://britta.com/music/Cibo/
 Subscribe RSS
