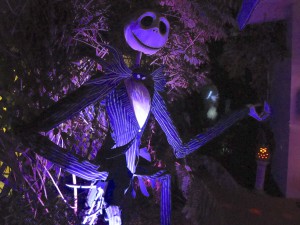
 Our other secret project for Halloween 2013 was our life-size animatronic Jack Skellington who interacted with rear-projected Zero the Ghost Dog. I knew for years that I would build a life-size Jack greeter figure for my front porch for my big Nightmare Before Christmas celebration, but when Glen offered to try adding animatronics, I said YES PLEASE! 😀 Others might think it wise to start small, but even with never having any experience with animatronics, we still took on a very complex project, even more challenging than we expected since Jack’s proportions are so much longer and skinnier than any human!
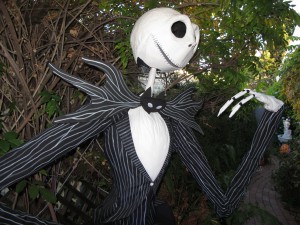 This was a Halloween Scream Team group effort for sure! I made him look like Jack, including body design, angles, head, functioning papier-mâché jaw joints, moveable fingers & clothes, but my Halloween Scream Team was essential in making him come alive. Glen did all the research for servo work, electronics work, infrared trip sensor and did all the movement programming, with Jack accuracy review by me. I wrote the script and barked as Zero, and our Jack voice was Jerry then digitally altered to sound more like Jack. Home-filmed footage of Zero barking & flying in loops was rear-projected at the gate on a screen with his physical carved foam gravestone in front. We were so pleased how it turned out and everyone at the party absolutely loved it!
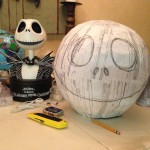 So, how did we begin? Well, of course our backup plan was that Jack could just stand there, so he wouldn’t be completely wasted effort, but since our grand plan was to make him move, we designed him for movement from the beginning. Glen had been researching online since the spring, so by June we had we had a plan of attack and purchased what we hoped would work, including an 8 channel Medusa DMX controller board, Enttec Open DMX USB adapter & cable, and Brookshire visual show automation (VSA) software. While the adjustable spider joints and kit to use with my scrap PVC
 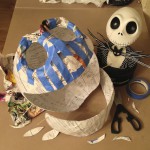 pipe to build his body, and the Triaxial Skull Kit with Jaw were on their way, the first project was his head, including a moving jaw, out of papier-mâché. I found several beach balls and rubber balls, then held them by the front door to pick which size was best. About 3 layers of the stiff paper strips from my decade-old box of bills was sturdy enough to remove the inside ball, and we knew we needed the head as light as possible for servo motor control, but then how to cut the mouth to accommodate the most movement? Obviously a smile since this was a party, and my talking bust DVD case had the best and widest smile of all my Jack collection, so that was my model. We needed the jaw to work with the Triaxial Skull Kit we had purchased even though that was meant for a human skull size and shape, not a giant Jack spherical head!
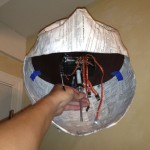 To move Jack’s head, after researching some custom designs we decided to go with a pre-made animatronic skull made by Triaxial Skull Labs and modify it for Jack’s larger head and jaw. The skull kit had all 4 servos mounted to a horizontal plate that was meant to sit right at eye level inside the two pieces of the included plastic human skull. First I cut thin scrap plywood (door panel from my wetbar project) to fit inside the head with a hole in the center to accommodate the servo that was on top of the original plate. A tight fit plus copious hot glue around the edges held the wood plate in place just fine all the way through lots of servo shaking, thank goodness.
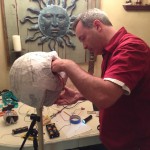 The included rod for the skull kit wasn’t tall enough to escape the bottom of the new head and jaw, so I screwed it into a scrap dowel, then used a boom mic stand and a bunch of tape so we could hold Jack’s head at a good working height. Leaving the eye sockets open was infinitely helpful to adjust placement of the servo mounting plate and even connect test cables through the eyes. I didn’t design the eyes to be hand size holes, but they worked out very well!
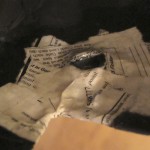 This is a closeup of the reinforced jaw joint I made from papier-mâché. I embedded wooden skewer segments inside the points of the jaw, then made holes inside the head exactly where the skewers needed to be placed so they would swing freely, but those holes weren’t deep enough, and removing the jaw and reinserting it while we were working on the head wore out the sides of the hole. I dug around in my junk drawer until I found two matching plastic plugs of unknown origin that looked like they would work. I glued them into place and built up more papier-mâché around them, and even though there was a little more wiggle than we’d like because the joint hole was wider than the skewer, we had a stable jaw joint that moved freely enough not to strain any servos.
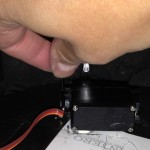 The jaw required a lot of custom work since the servo needed to be mounted as close to the side of the head as possible for best range of movement using the rod. We tried with the jaw servo mounted on the original plate, but the rod wasn’t long enough, so we removed it from the plate and tested a few locations on the larger plate I had installed inside the head, using a quick dab of hot glue on the plate and between the rod end and the jaw as removable adhesive that would hold up to some servo tests to see if the placement would work well enough. The funny thing is that the rod end stayed attached while the servo popped off the plate, but we finally got a good position that would work!
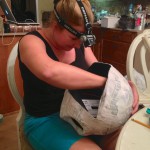 My hands are smaller & I wanted to work on the cool mechanical stuff too, so I volunteered for anchoring the jaw servo, but I needed a headlamp and a small short screwdriver to anchor the jaw servo securely to the large inside plate. We did have the hot glue finally pop off the rod and jaw, but some JB Weld held through all the way through all the events.
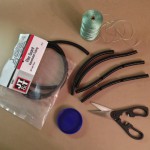 Next were the hands. Glen found this instructable how to make simple robotic hands, so it looked like a good starting point. I had some scrap vinyl tubing from homebrewing I thought might work, and some very strong & non-stretchy plastic twine, but my first attempt was too stiff for a servo to pull, so it became the stationary right hand, and I bought thin electrical conduit to try again. I could only find conduit with the split down the entire length, which was problematic since joints would shift after they were cut. If you try this, definitely look
 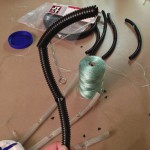 for intact tubing so you don’t have the same problem. I ended up making joint reinforcements out of the same tubing but positioned so the split was reversed, but even using super-glue, some wanted to pop off after all the stress of two multi-hour performances.
The basic idea is that a single string controls each finger as a “ligament,” tied at the top of the finger, but freely moving through the conduit that is notched at the inside joints. Leave enough string length at the palm to pull however you like, manually or by motor. The instructions were for a hand with human proportions so the 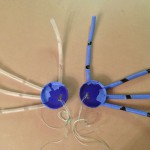 segments didn’t bend, but I was making a life-size Jack, and from all my character models, his hand was large enough to cover his face, so that meant palm size similar to mine, but finger segments twice as long as mine. Since the segments were so long, the string “ligaments” would pull the segment out of shape, so they definitely needed reinforcement, but we were still concerned about too much weight causing strain on the motors, so I only used a single layer of tape then single layer of papier-mâché.
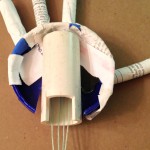 I had a couple large matching plastic lids that were a good size for the palms, but these not only needed to mate with PVC wrist, but also allow the strings to feed smoothly and unobstructed through the PVC and out to the motor to control them. This was the first of the many many custom PVC fittings we cut with my Dremel and/or Glen’s
 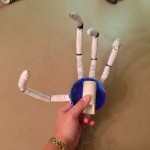 multi-cutter tool! I cut away the bottom of the lid the width of the PVC, cut a thin slot into the PVC so the lid would slide in tightly, then cut away the bottom of the PVC where there was already an opening in the wrist spider joint so the string would come through. Yes, Jack only has 3 fingers and one thumb! 😉
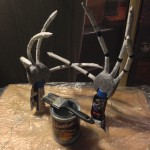 I had read online that 3 coats of marine varnish was usually enough to protect papier-mâché from moisture, but all I found was spar varnish, expensive enough at $50 per gallon, so I carefully sealed only the papier-mâché including the edges, without covering the joints so they would still move freely. Since I tried to use only white paper strips, the final white paint after sealing was an easy single coat. The black conduit didn’t need painting, but the vinyl tubing got some black acrylic paint on its joints to match. I painted over the
  varnish to avoid the glossy shine, since there was no matte varnish available, and even satin still had too much sheen. This is the same technique I used for sealing and painting all the papier-mâché, including Jack’s head and all the pumpkins…I used up a full gallon plus one quart of spar varnish, but none of them got soggy in all the moisture, so it was worth it!
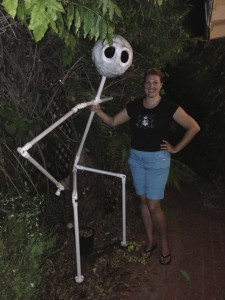
I cut the PVC for Jack’s body so the proportions would be as realistic as possible and for the pose I wanted. We only had 7 feet vertical or he would be blocked by my house eaves too often, so I made him crouching in a classic Jack pose. The Spider Hill PVC feet only allowed perpendicular legs, so his calves were vertical, then his thighs were bent in a crouch, his back leaning forward, right arm jauntily perched on his hip, with the right arm planned to gesture between Zero at the gate and the front door. He was also the perfect size for photo opportunities of course! 🙂
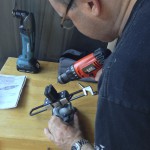 Moving the shoulder, elbow, wrist, and hand required a lot more ingenuity than the head and jaw. Integrating the servos with the spider joints required some creative mechanical design, even drilling screw mounts and horn holes larger. We ended up using some brackets and shafts from ServoCity to fasten the servos to the joints, with lots of precision cutting with the Dremel or multi-
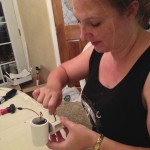 cutter tool. There was lots of PVC dust all over my patio for a couple months!
It took a lot of trial and error to figure out the best ways that would work, often requiring to take things apart and reassemble yet again, which was a pain when it was teeny tiny screws or a small allen wrench requiring 15 minutes of turning. This was my turn to take apart the shoulder joint again after Glen had already done it twice himself. 😉
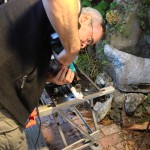 After testing all 4 motors together, we realized that the shoulder was the weakest point, since everything was supported by one metal pin and screw! All these hobby servos are commonly used for human-size figures and skeletons, which have arm segments half the length of Jack’s proportions. Even as light weight (mass) as we made the hand and used extra thin PVC for the segments, the extra torque from the distance the servo was from the weight, was daunting. Torque is force times distance, which explains why we didn’t find anyone else making a moving Jack Skellington this large! Oops…guess the calculations should have been performed before purchase!
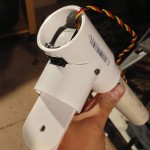 To tackle this issue, I cut a PVC joint into a curved custom shoulder support so the servo could never let the rest of the arm slide backwards, as shown here. However, what made the most difference was that Glen counterbalanced the weight using an elaborate masterpiece of bungee cords so the motors wouldn’t burn out
 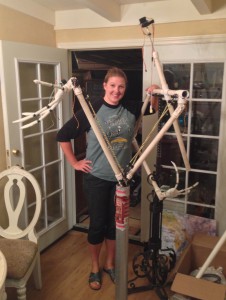 or strip. We stripped one motor while testing the finger movements thinking we could do it with a weaker mini-servo, so we went back to a full size servo the hand worked just fine. The elbow was especially challenging because it was supporting two more motors, joints, and the entire hand, but the bungees relieved just enough weight that it worked great. In the end, Glen was amazed it all held together!
But what was Jack’s programming? Well, I wanted Zero the Ghost Dog as a rear projection at my side gate, like our first projected ghost for Halloween 2011, and the ideal was for Jack to interact with Zero, looking back to talk to him between looking down the pathway at the guests. Using visual sync automation was the key, requiring Windows to run the software (ugh!), and video footage of Zero floating and barking, with audio of Jack’s voice in the same video.
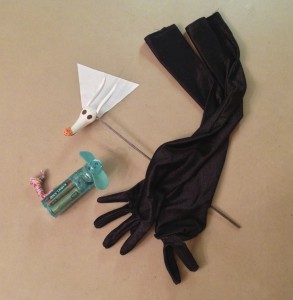 First step was to film Zero! I couldn’t use any footage from the film since there was always something in the way or showing in the background through him that would be hard to assemble together for our use. I even looked online in case anyone else had done some CGI of Zero for fun, but no luck. So, I used an antenna ornament I bought years ago at Disneyland, stuck a black-painted skewer in him, wore a long black glove, used a black background, and a handheld battery fan, then it was a bit tricky to keep everything moving together without getting in my own way for the footage, but I finally got several good takes. In Final Cut Pro I tweaked the gamma an contrast to make the detail fade into black, plus added a little more blue so he would be more ghostly. I was impressed and very thankful this turned out so well on my first try! Here’s a video showing the summary of Zero from filming to final display:
Once the Zero footage was edited, I wrote the script for Jack, and Jerry agreed to be our voice actor. He recorded all Jack’s lines, then I raised his pitch about 5-10% depending on the take so it would sound more like Jack than obviously Jerry. 😉 I recorded my best Zero barks, then I edited the Jack audio and Zero barks into the Zero video footage, isolating Jack on the left channel and Zero on the right channel since we were planning on using separate speakers at each character’s position for even more realism.
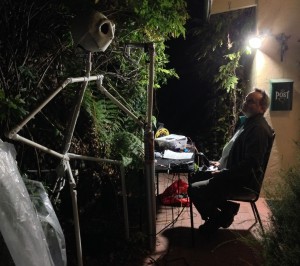 I had the footage ready about a month before Jack was actually ready to program, since we had enough delays with the animatronics that programming didn’t actually begin in earnest until the week before the party! Glen would get a few movements settled, then call me out to check if they looked enough like Jack. The weather had finally started cooling off, so Glen needed my little space heater out at the cardtable on the porch every night for about 4 long evenings of programming…but boy was that worth it! It looked so realistic, especially the wrist and hand moving together!
 To control Jack, Glen’s research uncovered Brookshire’s Visual Show Automation (VSA), a software program commonly used in amateur animatronic displays. This software can synchronize servo movement with audio and video tracks. Using VSA as the starting point, he designed a system based on a DMX interface (using an
 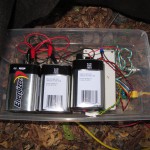 Enttec USB to DMX adapter) which would allow us to place the laptop computer running VSA behind the gate more than 30 feet away from Jack. To control the servos, Glen chose a DMX servo controller board (Medusa DMX) that could control up to eight servos. Along with the power supply, wiring, laptop, and a shoebox, this was the basic
  system we used to control Jack.
Glen found some additional software from MonkeyBasic that made programming the servo movements and running the show even better. MonkeyBasic TrackSkull allowed him to use a joystick to program servo movements which was faster, easier, and more realistic than typing in x-y-z positions into VSA. MonkeyBasic 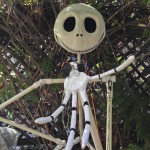 Helmsman allowed him to program several smaller routines that could be combined into a playlist that we could randomize instead of programming and looping one giant routine.
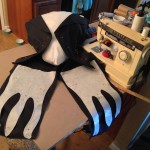 As the programming was being finalized, I finished Jack’s appearance. The head and hands were sealed and painted much earlier, but I knew I would assemble the fabric suit directly on his body, and I didn’t know how large I needed to cut the fabric until all the servos and bungees were finalized, channeled through a series of cup hooks screwed into the PVC to keep them inline with the arm segments and out of the way of his clothing. Since any additional weight was a concern for the servos and bungee support, I used some stiff bubble wrap I had saved to wrap around the electronics first, so the fabric wouldn’t
 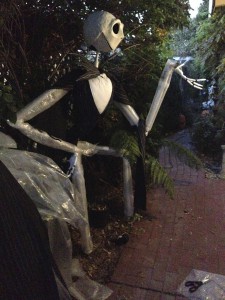 shift and get caught in any electronics or motors. I couldn’t take accurate measurements so I estimated and used the entire amount of fabric I had bought (6 yards wasn’t really enough unfortunately!), so not everwhere on his arms or legs met in back. Good thing there was no way for people to see his back since he was standing in the wisteria and giant fern! 😉
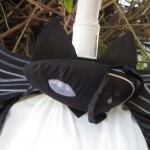 I had purchased a small battery speaker several years ago just in case I ever found a use for it, and it was the perfect size to be the bat’s head in the bat bow tie. Putting a speaker inside the head was a concern for making it too heavy for the servos to move it, so at his neck the positioning was about as perfect as it could be for Jack to be speaking through it. I sewed a slipcover for it that had velcro on the side since we had to keep replacing the batteries, and I left a section of the seam open to plug in the cable.
 One of the things we wanted to do early on was have Jack come alive when people walked up the path to the house. We weren’t sure we would be able to get to that since it was a lower priority effect, but in the last few days Glen was able to put together a simple trip sensor using a $5 Velleman beam sensor kit, a transistor, a relay, and a 50′ cable (picked up for cheap at an electronics flea market) back to the laptop. Every time someone walked through the infrared light beam it
  triggered one of the random VSA routines, most of which started by Jack looking straight at them!
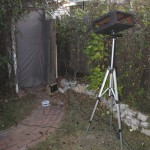
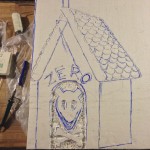
Don’t forget about Zero! My nice, bright Sharp movie-night HD projector was behind the gate in a custom-built  box on a sturdy tripod, at a slight angle to the gray bedsheet screen stapled to the gate arbor structure, so the bulb was hidden from view by the edge of the gate and some plants. Of course I had carved and painted Zero’s doghouse gravestone from foam so that was positioned in front of the gate screen so Zero would appear
  and fade away into his doghouse between sequences. We had to run all our cables through my boxwood hedge which was invisible in the dark but pretty silly looking in daylight. With a mini guitar amp behind the gate accepting the right RCA plug from a stereo splitter cable, and the left extended through the gate down to the Jack bow tie speaker receiving the left RCA plug, it really sounded like Jack and Zero were that far away from each other, even though they were controlled by the same video on a laptop back behind the gate!
After such hard work all summer, we were really thrilled everything worked out so well, and our guests were amazed as they approached the house when Jack and Zero noticed they were coming and turned to start talking to them! Here you can watch a video summary of how we created our animatronic Jack Skellington, including the final display in action!
Now you know how we did it! Hope everyone had as fun a Halloween as we did with all our projects! Next year is back to Castle Brittahytta, so watch for more ghosts to resume haunting… 😉

 Subscribe RSS

Hi? Is it possible I can get you creation of your film that you made for halloween party last 2013? I really love it and I want to try with it. I also want to know what did you do with Jack Skellington to move? I know with that kind of the product. Is it possible I can get information how you made it? By the way, do you sell with it? or giveaway if you are not using anymore? I would appreciated when I recieved it from you. Actually, I was born with no hearing and now, Im using a hearing aid, which help me to hear it. I really love your work! I hope to look forward your message back thru my email again. Here my email address: chanwoo911@gmail.com
Thank you so much!
Best Regard,
Kim
Glad you like my work! This post gives all the specifics how we made Jack move, including links to the parts we bought so you could buy the same ones and build your own Jack. However, if you don’t have any experience with motors or electronics, it would be a very challenging first project. We are using our motors and controllers for different projects this Halloween, so Jack has been dismantled and isn’t for sale…sorry! I’ll email you separately about my singing pumpkin video, but everyone can download my Moon Montage video for free here:
https://www.youtube.com/watch?v=CYZz6OxoVTE
You folks are truly an inspiration! I was sitting here thinking about how one might animated larger objects on a prop using hobby servos. You took it to the extremes! WOW. I hope you don’t mind, I just started a FB page and shared your link. I’ll share it elsewhere too. VERY impressed. The creativity is really something. Thanks for sharing all the “MAGIC” behind this project.
I had one question, don’t you worry about children (or not so smart adults) stripping the servos? There’s still a lot of leverage there. Maybe, that is built into the design and I just didn’t notice it. I’ll have to spend some time on this page. So much stuff going on. A lot to take in at once 😉
Happy Halloween 😉
GrumpkaXmas
Thank you very much and thanks for the share! If you mean if someone comes along and pulls on the arm, Ghoulish Glen says that wouldn’t strip the servo unless it was actuating at the same time. Otherwise the arm would just move. Other parts of the arm might break however. If you read the details in this post, the arms were too long so too heavy for the servos we had, so everything was reinforced with an elaborate system of bungee cords proving counterbalance, which should have helped if anyone did pull on his arm. The wrist was most delicate and not reinforced with bungee cords. We had designed him to be out of the way but with a good default pose for photos we knew everyone would want, and the moving arm stayed about 3-4 feet high. Small kids were too intimidated, and thankfully everyone at my party was respectful of the work that went into creating him, so no one actually touched him.
However, one of the lessons we learned the hard way was NOT to animate large props with servos, even if the props are lightweight. Make them smaller, not larger! 🙂 Good luck with your plans! Happy Haunting!
Hello! I was so thrilled to find your blog. What an inspiration you are! I was a giddy little kid at Christmas …errr…Halloween, reading this! My husband and I recently became new home owners…and new parents all at the same time. Although we find it tough just to remember to water the lawn and it takes weeks to hang a picture…I am still with grandiose ideas for what holidays will be like as our son grows up! And all your parties that you have posted and your halloween decors are exactly where my thoughts run away to. I stumbled upon your blog b/c i was in search of ways to make either slimer or zero appear floating in our home. We have a huge picture window in front of our old home that looks into our living room and a hallway. How fun would it be to have the twins from the shining standing in that hallway or frankenstein come stomping up from that hallway?! okay, wait…no….we dont want to scare off the neighborhood kids. So then i thought…yep…casper, slimer…ZERO…yeh, zero would be so fun….just like the disneyland ride! My search lead to you. Would it be possible to get the video you made? I’d love to project that in our window! I am also hosting a party for some friends and I’ll definitely post credits to you!!
Thank you
Sincerely a fan
Jamie
Hi. I found your blog and am in total amazement of everything! I try to do a theme each year with my decorations and this year is The Nightmare Before Christmas. Do you have your projection of Zero available? I’m trying to locate one for my decorating this year, but have come up with nothing so far! I can’t even find a toy to make the video like you did. Thanks!