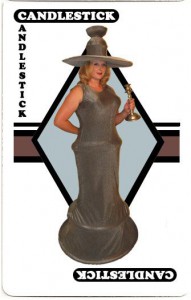
 I’m sure you already saw my costume for the Return of Clue party, but did you figure out how I made it? Here is how to make your own Candlestick costume!
 ![]()
For the first Clue party, I just had to be Mrs. Peacock for the obvious color reasons. I used a bodice I had, plus fabric I had purchased for Britta Skeeter but never used, so I had it on hand as the perfect colors for Mrs. Peacock. That was fun, but I prefer making new costumes than recycling old ones, and I decided against a person just for fun. Last time there was a Rope & two Lead Pipes attending the party, but I thought  maybe it could be fun to try using my height and natural curves to be the Candlestick! Extra bonus is that I had 6 yards of dark sparkly silver spandex I had bought over a decade ago as a possible Invisibility Cloak, so it should be fairly cheap too!
I did a rough sketch based on my own silver candlesticks, and I really loved the hat plus sleeveless column dress idea to de-emphasize my arms. I figured I should be able to use some hula hoops inside casings around the hem, but I didn’t know yet what I could use for the hat. Ideally I wanted it to curve at the edge more like metal than a floppy hat. When I sent the sketch to a couple people asking if they could tell what it was supposed to be, they guessed correctly but suggested less decorative rings, so I continued shopping…
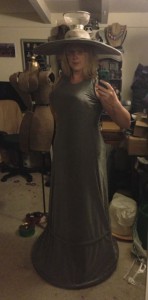 The dollar store had several sizes of paperboard hula hoops, so I bought three different sizes and used two. I decided which ones to use based on how I could fit through doors in my house! I had to untape them to get the pebbles out since I didn’t want to rattle, but the plastic joining plug inside was also a bonus since then I could feed them into the casing later instead of sewing them in permanently. Once the dress was complete, I taped the hula hoops shut inside the dress so they wouldn’t pop open while I walked around. Since I wanted the spandex to stretch outward to the bottom skirt with a few seams as possible, I knew I would need the full width of the fabric at the bottom for the hoops and not as much through the body, but exactly how much was trickier. I had limited fabric, so first I propped my dress form on some boxes (it doesn’t extend as tall as me) so I could fold the fabric over to see how much I had left after the dress height and cut the neck hole to start with. I’ve worked with spandex before for my Seven of Nine jumpsuit, and it’s so hard to fit that I knew it would be easier to suck it up & know I would end up wasting fabric along the sides. To save the largest pieces of fabric possible plus make it easier to sew on the machine, I pinned side seams loosely on the dress form and cut away the large chunks first. After sewing those seams and sewing the back zipper in, I put on the steel-boned corset for closer side fitting, inside out like the photo so I could pin, chalk & sew on the same side, but this is still tricky to do on
  yourself, especially with very stretchy fabric! I was very glad that I could use the dress form to pin the hoops in place, especially for pulling the fabric tightly to create the concave curves between hoops. Even though it was hanging straight until the very last fitting through the legs, I still had issues needing to weight the back bottom hoop by sewing a brass hinge or it would pop up in back, so I think the dressform doesn’t have as much “back” as I do.
 ![]()
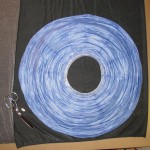
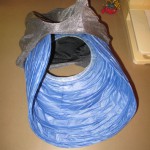 I started working on the hat as soon as I had cut the largest chunk away from the dress form, so at least I knew I had enough for the brim, then I figured I could cover the rest of the hat using the largest side scraps. My mom & I spotted some giant globe paper lanterns for $4 at a party store that were wider than my shoulders and seemed to keep the curve I wanted if kept flat. Nice & cheap! I used that to cut the matching brim fabric, sewing around the outside leaving the head hole to turn inside out and squeeze in the lantern. Unfortunately the weight of the fabric pulled the lantern just enough out of shape it looked more like a floppy hat, so I cut a piece of corrugated cardboard from a scrap box about 1″ smaller radius so the very edge would still curve downwards.
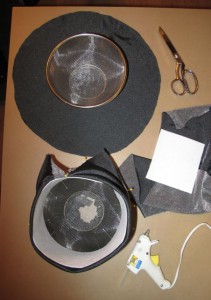 I struggled for a bit trying to figure out what to use for the candle cup for the very top of the hat. Since the spandex shows every imperfection under it, I didn’t think papier-mache would work very well, so I went searching in my garage. I had bought a few mesh bowl strainers from a dollar store a few years ago as possible large dry ice containers for large cauldrons for Halloween and never needed them, but stacked end to end they were a believable candle cup…whew! I was finally out of hat buckram from the Music Man costume this spring, and couldn’t find any at my fabric store, so I got the stiffest iron-on interfacing I could and doubled it for the
  vertical section to meet the bottom bowl. Ironing it to the spandex fabric worked well, then it was a lot of fussy figuring out with hot gluing the interfacing to the bottom bowl, hot gluing the fabric around the outer edge of the bowl, gently pulling it as tightly as possible up to the edge to meet the other bowl. The top bowl I covered with a fabric circle, gathering around the open edge, pulling it tight so no puckers except for inside the bowl, much too tall for anyone to see when I was wearing it.
 ![]()
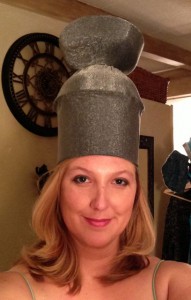
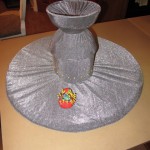 I had left enough fabric unattached so it would be a lining inside, but I just gathered it together. Assembling the top hat pieces together was just hot glue where the bowls met together, then I took a few stitches through where they met, making sure to catch the gathers inside the top bowl and inside the lining. These stitches kept the gathers tight & well inside the top bowl and kept the lining from falling out. Once I knew it fit for sure, I handstitched up the back seam, then copiously pinned it all to the brim.
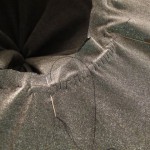 I carefully sewed a whipstitch around the inside making sure it caught the brim and vertical hat portion without visible stitches on the outside, and instead of sitting comfortably on the couch like most of my handstitching, due to the brim I had to sit at my table instead. I left the extra fabric past the whipstitch so there would be no risk of fabric coming loose from the stitches after taking the hat on & off many times.
 Sadly I have thinner hips than fit in any corset properly, so the bottom edge of my corset showed as a line all the way around, breaking the smooth curve I wanted. Even though my “design team” had recommended removing the extra lines and rings, I carefully placed a stuffed ring channel exactly to cover the corset edge, which I think helps the overall design too. The very bottom hula hoop was a hem casing, but the higher hoop plus the hip ring were both scrap fabric sewn as a channel on the inside of the dress. I stuffed the hip ring because it was open in back where it met the zipper, and both hoop channels were open at the side seams so I could put the hoops back in after sewing on the machine. I will tell you that wearing a tightly-laced steel-boned corset while sewing for several hours is not the most comfortable, especially trying to
  bend to pick up any pins that drop on the floor! However it was more convenient when I had to keep trying the dress on, adjusting more, sewing again, repeat, etc. Glad my cats don’t care what weird outfits I wear around my house!
 ![]()
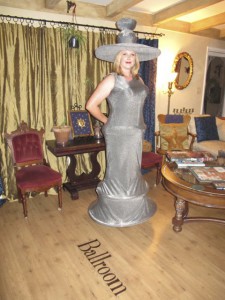
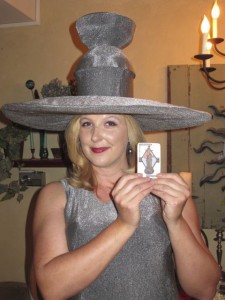
I got the Candlestick costume completed by the Sunday afternoon before the party, so I set up my tripod for some self-portraits so my new costume could be one of the Cluekies! Here is the Candlestick with her matching Cluekie, plus posing in the Ballroom during the actual party. Most people recognized me as the Candlestick right away, so I consider that a success! ![]()

 Subscribe RSS