Halloween 2014

 Our Halloween 2014 preparations are in full swing! We are still mostly in the secret planning stages right now, but since there are some slight design changes for Castle Brittahytta, I decided our Eerie Elegance Scream Team should take a field trip to the castle winery in Napa for research. 🙂
I have walked through many authentic castles in Europe, but my cohorts haven’t had as many chances, and photos can only tell you so much. Looking up at a stone vaulted ceiling, seeing painted wall frescos, giant wooden doors with iron fittings, and even murder holes from down below, are all different experiences when up close and personal.

I had heard about Castello di Amorosa when it opened in 2007, new construction with historic techniques and more Tuscan style than my castle preferences, but I’d never had the chance to visit. We don’t have many real castles in California, and this one was only a 3-hour drive away. Much of the stone is reclaimed from old stone buildings in Italy and Austria, and all the new stone was still imported from quarries in similar locations to blend. This castle has a mixture of tan-reddish stone and ") red brick, which proved to my cohorts that my brick chimney is not out of place for my tan stone Castle Brittahytta. There is even a well in this castle courtyard…sound familiar?
red brick, which proved to my cohorts that my brick chimney is not out of place for my tan stone Castle Brittahytta. There is even a well in this castle courtyard…sound familiar?
 We splurged on the full hour-long guided tour with private group wine tasting at the end, which was worth the time and money, but you should get a reservation in advance since this place was busy even on a rainy blustery weekend. Our tour started in the chapel and continued through the courtyard, where the History Channel was there interviewing the owner for their new show Castle Secrets & Legends, so maybe we’ll be in the far background of the show when it airs? If you spot someone in a long bright teal raincoat, that’s me!
") Next was the Great Hall, with a long grand dining table and gorgeous custom painted wall frescoes, including the owner painted in the main design above the reclaimed carved stone fireplace. The wood beam ceiling was painted and gilded like many authentic castles I have seen…see what I mean about looking up? This was the only room with diamond-pane leaded glass windows
Next was the Great Hall, with a long grand dining table and gorgeous custom painted wall frescoes, including the owner painted in the main design above the reclaimed carved stone fireplace. The wood beam ceiling was painted and gilded like many authentic castles I have seen…see what I mean about looking up? This was the only room with diamond-pane leaded glass windows  since glass was reserved for royalty. The dragon sconces were newly-crafted by blacksmiths and I really liked those. I have to say I was a bit disappointed they weren’t using flicker bulbs though. 😉
 We had a nice view of the vines below and the hills across northern Napa Valley shrouded in rainy mist from the upstairs patio between the main building and the outer “defense” wall
 ") complete with notched crenellations. The cool metal dragon hanging above the door to the patio was reclaimed from somewhere in France…I want one!
complete with notched crenellations. The cool metal dragon hanging above the door to the patio was reclaimed from somewhere in France…I want one!
Since they wanted to be authentic without glass windows in most of the castle, the majority of the tour was inside, through dark arched hallways, with gated ") alcoves storing bottles of wine and small frescoes at the back. They host an expensive Halloween party every year, sending guests through the arched hallways lit only by candles with costumed employees hiding in the alcoves scaring guests, but Ghoulish Glen whispered to us, “But just imagine what WE could do with a place like this!” Most of the mood was great, until it was spoiled by the plastic yellow wet floor signs at the edge of the hallway, or we walked past the modern giant metal fermentation tanks. 😉
alcoves storing bottles of wine and small frescoes at the back. They host an expensive Halloween party every year, sending guests through the arched hallways lit only by candles with costumed employees hiding in the alcoves scaring guests, but Ghoulish Glen whispered to us, “But just imagine what WE could do with a place like this!” Most of the mood was great, until it was spoiled by the plastic yellow wet floor signs at the edge of the hallway, or we walked past the modern giant metal fermentation tanks. 😉
 The armory held 4 authentic suits of armor and various weapons, then it was down the stairs into the torture chamber! The owner had collected a real iron maiden that was actually used centuries ago, a rack, a hanging cage, and other implements of torture. Our tour guide made Ghoulish Glen sit on the spiked chair…ack!
Finally we ended up in one of the private tasting rooms, with low arched ceiling, plenty of bottles of all the varieties ready for purchase, then our super-fast tasting began. Maybe since we were the last tour of the day our guide wanted to get home? Since there were 3 of us, we split one glass between us to taste  all 16 wines. The Pinot Grigio was nice enough, the Pinot Bianco was more unique, and the Gerwurztraminer we all liked, but the others and the reds I wasn’t very impressed. However there were four sweet wines at the end, so I bought Simpatico, a blend of Riesling and Muscat…yum! I got three bottles since then there was a 10% discount, no Pinot Grigio this time. 😉
Unfortunately the front gate was already closed to roam inside the castle on our own after our tour, so we were only able to wander the grounds and take photos. I would recommend a tour earlier in the day so you can explore the castle on your own afterwards, but there is often traffic getting to Napa from the Bay Area, so plan ahead. The emu was hoping for handouts despite the “no feeding or petting” signs, and  the turkey and the peacock were both strutting their stuff for us. I’m not sure who they were trying to impress, since the peahens were ignoring them completely. 😉
 I walked farther down the hill for a better photo of the entire castle, then looked back up towards my car and saw Glen and his flock! The geese were hanging out, perfectly pleased to be near him…until he stood up, then the white geese started pecking at his legs! Fickle feathered friends!
Of course Scary Jerry and I took a bunch of photos of the castle, which you can see in the gallery below, including our visit to my college friend Andy’s family winery, Schweiger Wineyards & Winery. Very tasty creations so I bought wine & port there too! 🙂
All three of us enjoyed our day, and now we are inspired even more for our Halloween plans for this year. Have you started your Halloween plans yet?
Halloween has been in full swing for me for a whole month already, with too many things to say so I don’t know where to start! First I’ll show you what I just sent with the party invitation. Listen with headphones or some good speakers for the full effect…
Does that pique your interest? Plenty of surprises are still in store since there are more secret plans in the works of course, but I will show you what I can safely reveal along the way… 🙂
I also have a new Eerie Elegance product for sale as of September 1st! I have already shipped a handful of orders of my Frightful Skull Fountain kit, and I’m ready for more orders! I didn’t see the plastic potbelly cauldrons at my Spirit Halloween store, but Party City did have both 12″ and 16″ potbelly cauldron sizes for very cheap. Go buy a cauldron, buy my kit on the Eerie Elegance order page or in my Etsy shop, and watch this instruction video, then you’ll be all set with a spooky decorative fountain or ready to serve party punch with your own Frightful Skull Fountain!
Back to party progress… As soon as my summer party season was  over, of course it was full steam towards Halloween! I literally transformed my patio from hosting the final Cinema Brittahytta with 33 people watching The LEGO Movie, to
  Halloween workspace in less than 24 hours! Since then I’ve been so busy getting enough built and ready to film, writing the final trailer script, memorizing my lines, filming my performance, writing music, and editing the teaser trailer above, that I haven’t had time to post Halloween updates yet…so here we go…
 I just got back from my Annual Halloween Shopping Weekend with my friend Tash. I was mostly shopping for next Halloween since I have chosen Day of the Dead as my
  theme for 2015, but there were a few things I found that will be useful this year. We tried a week earlier since the the past few years by the end of September Target didn’t seem have much Halloween stock left, but I can’t say there was that much more available this year. The lone gargoyle was a large griffin but it was cracked with crooked beak so not worth $25 even though Griffin is Tash’s last name. 😉 The same pumpkins were there but the same styles as the past couple years, and I already have duplicates of those in my collection. We were lucky that we hit JoAnn Fabrics Coupon
  Commotion weekend again, so Tash spent $66 but saved over $100, and I spent $120 but saved over $100 myself! Hooray for coupons!
I was cracking up at all the Frozen stuff for this year. Target has no less than 3 styles each of Elsa & Anna dresses, ranging in ages and degrees of fancy, but the Elsa wigs were already  gone. I took photos at JoAnn since the pattern displays were stripped clean of all sizes except the doll patterns. I asked the cutting table employee assisting me how quickly the Frozen patterns sold out, and she said she made sure to buy hers on the Thursday they were set out to get one to make her granddaughter’s costume! They had an
 ") empty pattern box on top of a display wheel with a sign “You Can Be A Winter Princess!” but no snowflake printed sheer fabric that I saw, and I forgot to look for the iridescent crinkly shimmer fabric I used for my snowflake cape that has been sold out since the early spring. I am very glad I made my Elsa dresses when I did!
empty pattern box on top of a display wheel with a sign “You Can Be A Winter Princess!” but no snowflake printed sheer fabric that I saw, and I forgot to look for the iridescent crinkly shimmer fabric I used for my snowflake cape that has been sold out since the early spring. I am very glad I made my Elsa dresses when I did!
 California got almost no rain this past winter so we are in the worst drought season in years, and pumpkins need a lot of water to grow well, so I decided against planting the special
  pumpkin seeds I had bought online, and just planted the last rotting pumpkins I had leftover from last Halloween. Only one spot grew well, and it’s now traveling over 10ft long up the walkway, but there are about five vines in the same drip irrigation point down by the sidewalk. I already harvested two small pumpkins, and there are 5 female blooms along the main vine that I hope will keep growing. I planted some saved sugar pie seeds in another spot
  almost two months after the first planting, so those are doing ok and starting to bloom, but no vines extending yet. Since I still have all the
  plethora of pumpkins I used last year for The Nightmare Before Christmas, I’m just hoping I can put my fake pumpkins in some real vines with leaves.
I already mentioned when we took our castle field trip to Napa that this year is back to the Castle Brittahytta story. The castle itself will have some minor architectural changes to the towers, an improved main entrance with “drawbridge”, and it will acquire last year’s graveyard fence around the front. All six ghosts and seven moving portraits from Halloween 2012 are back with some enhancements, and you will finally find out the full story of how and why Miss Hermione G. Wells is involved!
 You can see from the trailer that lots of the steampunk junk I’ve been collecting for over 2 years now is being used for a giant scientific device created by Miss Hermione G. Wells. The “wood” is 7 layers of paint techniques on foam panels, the “brass”
  straps are gold duct tape, and since the gold plastic pony beads were too shiny and twice as expensive, I have been spray-painting cheap large pony beads and hot-gluing them as rivets over the gold duct tape. I think I’m on roll 5 already of the gold duct tape, but it’s only $5 per roll and I’ve been using coupons.
  I absolutely LOVE how this looks!
Thankfully my Halloween Scream Team has completed several weekends of planning and filming during the summer, and we’re making good progress. Since a lot of these preparations were already underway back in 2012, it’s a matter of finishing them now, but there is still a LOT to do! I wanted to be farther along by now, but my other major project this year has been my grandmother’s video biography project with accompanying book that I have been working  on for several years now, and of course her 100th birthday is immediately after Halloween, so there is no way I can be doing both in October! I was disciplined enough to get major progress completed on her biography before I was allowed any Halloween video editing, but now that has made me behind schedule for Halloween. I do think we will still make it, and it will truly be epic! 🙂
Hope your Halloween plans are going well!
I’ve shipped a few Frightful Skull Fountain Kits already, including one all the way to Australia! Thanks to Horrific Finds for featuring my kit on their Facebook page this week! You also still have time to buy other products from Eerie Elegance for your party or haunt, including Fabric Frames, seven Ghosts for Sale and Tasty Tombstones!
It’s only one month left until Halloween, so I’m sure you will be building your projects soon if you haven’t already started them! Do you have a project that needs to look like wood? Maybe some walls, doors, or perhaps even a giant steampunk device? Watch this new Eerie Elegance video to learn this simple and customizable Painted Woodgrain technique using standard brushes that is very convincing, especially for large scale projects! Don’t forget you can also find other projects & recipes from both books Eerie Elegance and Enhanced Eerie Elegance as episodes on YouTube.
Now back to my own party preparations! I wanted one last cleaning & dusting by my housecleaners first which was this past Friday, so now the stone walls are up inside and more decorating can continue, like the portrait gallery, bathroom, black candles, curtains, pillows and Catoween tapestry. It is much easier to do a little bit of decorating at a time when I need a break from another project, so I’m glad I’m this far along already.
 Castle improvements are underway! The castle walls lasted fine for a 1 year storage period between 2011 & 2012, but my friendly neighborhood rats found that all the crenellations made a good nest even though they were stored in the open on my shed roof. Not too much damage was done, but of course the worst damage was the functional interlocking corners for the corner towers! I’ve tried to stabilize those with extra foam behind the joint, but they’ll probably need to be tied around as well.
  Often the leaves staining the foam gives it a cooler aged patina, but not when the other wall was covering half with a clean line! I needed to buy a whole gallon of paint anyway, so while my sprayer was out, I gave a light coat over the stains to help them blend better across all the walls. The plan is to put up the castle walls next weekend, then hope & pray for no windstorms for the next month! Even with watering less due to the California drought, this summer my
  plants have grown so much in front that I think I will leave them tall to help as an extra windbreak for those castle ramparts. 😉
For Halloween 2012 Castle Brittahytta had some square pyramid copper spires, pretending that the towers under the spires were too short to see past the outer ramparts, but we always really wanted round towers with round spires, so I’ve been working on various plans to make round towers that I can store easier between displays. I have settled on 1/2″ thick insulation foam in 4-foot by 8-foot sheets gently rolled inside of cheap hula  hoops, then into thick foam nesting circles mounted to scrap plywood bases. This way we can shim the plywood on my slanted roof instead of attempting to shim foam to level. The 3/4″ thick foam doesn’t bend this tightly, and the 1/2″ foam is too thin to carve the stone block detail, so after spraying the base coat, I am handpainting the stone seams hoping they will match the carved seams well enough at a distance.
 The new spires are teal marine vinyl sponge-painted with aqua for copper verdigris texture, cut into a 4-foot tall cone, with velcro anchoring the bottom edge around another cheap hula hoop, and more velcro for the main vertical seam. The vinyl is not quite stiff enough for the cone to hang perfectly since the sides sink in a bit like a witch hat,
  so I will be buying some thin wood dowels to be umbrella spines. I will handstitch the wood dowels to the inside of the vinyl, since then all 5 spires should be able to be stored flat between displays. 8 feet of 1″ PVC will be the center post for each tower, mounted into the plywood base, then the spire will hang on top of the post,
  and the post should also help the foam rounds from falling over completely. I’m waiting for the PVC mounting bases to arrive, then we’ll see if we also need some extra bracing, because the center post is so tall with the vinyl spire, wooden dowels & hula hoop hanging from it that it might push the center post off-balance too easily.
 Ghoulish Glen & Scary Jerry have cut, stripped and crimped a bunch of wire and begun wiring to terminal blocks, since there is a lot of VSA animation going on for our props this year.
  It doesn’t look very exciting at this point, but that’s why I can still show it to you. 😉
Not only does our “backstage” area need protection from possible rain, like the 2-hour downpour we finally had last week, but I have an aphid infestation in that tree that I can’t get rid of, so it drips sticky stuff all over everything. I had rigged some clear tarps so my plants would still get light, but  the clamps holding the tarps to the metal roof failed with the weight of the collected rain pooling in the tarp, dumping all the water onto the table at once! Glad the essential electronics were double-protected by a big box! I have sacrificed two fullsize 1.5″ thick foam sheets as a roof so the rain can run to the side, even though I probably need to use some more thick foam for stabilizing the new towers. I also have plastic tarps hanging along the screen to protect against rain since the bookcase wallpaper already hanging in the Library Laboratory. We shall see how this goes, but it all seems to be working for now…
 With my grandmother’s biography and now all these Halloween video projects, I have become a video editing machine, cranking out version after version! I found hints online to get my old Final Cut Pro working properly on Mountain Lion, officially impossible according to Apple, and my new 3TB USB 3.0 drive with my newer laptop is definitely faster than my old FireWire 800 drives and the old laptop, but I’m still pushing the limits by rendering files that are 6 hours long with lots of stacked effects and multiple layers. I’ve even been fighting with attempting to get surround sound encoded, but we’re still not sure if that filetype will work with VSA…this is a lot of work but we are also learning a lot that we can build on for future projects!
 I don’t think I’m revealing too much by saying that I’m working on a couple of illuminated manuscript style books. I had gone to a library sale and bought several large format books,
  but unfortunately they all had too many glossy or color pages mixed in with the older pages for the look I want, plus none were thick enough anyway, so now I am building open books from scratch. There was no way I was going to spend that much on
  parchment paper to actually fill an entire large book, so these books are hollow, with the open facing pages that lay on top. I now have a large format printer that can fit 11″x17″ paper, so I bought some 11″x17″ parchment online, and have sized these books so that each facing page is 11″ wide.
 Lucky for me dark aged teal will be perfect for this book, and I had plenty of linen-style fabric leftover from Elsa’s coronation dress! I hotglued the fabric around the book cover, not worrying about faceplates because the book pages would cover enough, then I drybrushed
  dark brown acrylic paint on all the edges as a thousand years of finger grime and age, then I even took some sandpaper to the edges and corners since fabric books fray over time too. Not sure everyone will notice these details but I like the result!
 I used to have a deckle edge blade for my paper cutter but I couldn’t find it, so I hand ripped strips of parchment paper, using my paper cutter brace as the edge which worked well. The deckle edge is still a clean cut, so I think the torn edges look much more
  realistic anyway, even though it takes a long time! I left one side as a clean cut for best contact with the glue. I hotglued the strips to the cardboard page edges, leaving some space between them but not enough so that anyone would be able to see the supporting cardboard. I have overlapping corners this way, but I don’t
  think anyone will notice that, and they blend in like the pages aren’t all trimmed the same. I really love how this looks!
The first book is now ready to create the open pages, which have already been sketched and scanned to adjust size before I hand paint the final illuminations, and now I can refine my building technique for the second book. I think the second book can be slightly smaller than  this one, but they are so large because too many of my friends couldn’t even read the Tasty Tombstone clues I have had before! So I am making giant books to display larger text, and many ancient keepsake manuscripts like this were indeed that large…but I’m also going to have a tricky time with the calligraphy because none of my pens are thick enough chisel tips for that scale, so I might have to cheat by using a font to print the text, or maybe handletter the size I can then scan & enlarge on the printer. It also makes for a tricky display since this size doesn’t fit well on any of my fancy metal easels! I’ve seen some images online of old books displayed on fancy pillows, so maybe that could work?
Back to work for me…hope all your projects are going well!
Why does 3 weeks seem like so long to go but also not enough time to fit everything we want to do? Here’s this week’s progress…
 I have more baby pumpkins! There are a couple so new I’m not sure if they’ve actually set, even though I attempted to hand-fertilize each one with a paintbrush when I saw them open each morning. One is already as big as my other pumpkins in only a week of growing, and I’ll be watching the others! Maybe I’ll have Thanksgiving pumpkins? 😉
Inside decorating has continued, with switching to the spiderweb curtains, pillows & lampshade, other spooky pillows, and changing the living room tapestry to the Catoween design…more details to come over the next few weeks of course!
 Castle Brittahytta is now up, including the graveyard fence, and the new round towers and spires! Last week I used my last hour of daylight after work each evening to
  handpaint the stone block pattern on one tower before moving on to other projects, so that took almost all week to get all four finished. Of course I had to choose the hottest day of our autumn heat wave here in California! Seriously, it was almost 100F on Saturday, but Ghoulish Glen & I got everything
  done where I needed help, like lifting heavy things to the roof and anchoring the rampart walls to the roof edges. Sunday I had to buy more supplies to finish the spires, then in the afternoon on my own I spent 2 hours stabilizing the main rectangular tower against the wind using scrap poles, foam & a lot of brown twine tied every which way, but ironically the round towers aren’t budging at all now that they are in the nested bases I built. I think it’s because they’re aerodynamic so the wind blows around them vs. a flat sail that catches any breeze. We
  will see how they last, since I won’t be able to take them down until after November 5th this year…
The round towers are working better than expected! I thought they’d blow over too easily, but the plywood bases aren’t even weighted down,  just the nesting circles of 1.5″ thick foam holding the 1/2″ foam in the cylinder shape, with two hula hoops and the spire holding the cylinder in shape along the height. The same wind that was blowing the main tower around so badly wasn’t even making the round towers wiggle, so that’s great news! My original plan was a center post of 1″ thick PVC so the spire would hang from the post, but the PVC mounts came loose from the plywood bases (argh! wasted time screwing those and cutting holes in the foam to fit them!), so I tried setting the spire directly on the top of the tower…voila! More PVC for the steampunk device and building future projects I guess…at least it’s easy to store!
 The reason I can set the spires directly on the towers is because of the wooden dowel umbrella spines I added, so they are not just vinyl cones but have a rigid skeleton. I used Gorilla Tape, extra-sticky duct tape, to attach the dowels on the inside of the vinyl shapes, on my driveway so I could press the best seal
  possible with the adhesive, then the hula hoop had to be right at the bottom edge of the dowels or it wouldn’t hold shape. I tried to skimp on tape since I was running out, but I learned you can only not tape at the very top where the dowels come together at the point, otherwise your fabric will still sag. I used self-adhesive heavyweight exterior double-hook tape (new 3M stuff that is the same interlocking shapes on both sides vs. hook & loop Velcro style)
  in a long length to close the cone, plus in small chunks I placed in advance to attach the hula hoop around the bottom. I started at each dowel, pulled up the extra vinyl and stuck it well, rolled the hoop to the next dowel to anchor that in place, then rolled it to anchor the spots between the dowels, until the whole hula hoop was on. For the overlap, I hung the spire on a PVC post so I could adjust where the long closure tape should meet, plus adjust the last spots for the hula hoop hem. Since it is marine vinyl it should last fine in any rain too.This makes a spire that can stand on its own that also can be taken apart to store flat!
Sadly, I came home from work on Monday to see that four of the spires had collapsed, which threw two of the towers underneath off balance enough to fall over, so the adhesive doesn’t stay stuck to the inside of the marine vinyl for more than 24 hours. One spire just fell off its tower, and one was completely intact on its tower with no problem. This is exactly why I wanted to start the castle early, so there would be time for any necessary tweaks. From seeing how the tape mostly held to the  dowels, with only a couple spots coming loose, but almost all the double-hook tape adhesive had given up around the hula hoops, I am moving to another design thought I had along the way, looking for heavy-duty snaps to close around the hula hoops. These hoops cannot be opened and re-closed otherwise I would just sew a bottom hem like a curtain rod casing. At least I know the design works, just needs to be reinforced, so I’ve already started sewing…which is much trickier with the dowel already in place, plus sewing through adhesive isn’t good for my needle, so I keep breaking thread as I go along. It took a whole hour to get one spire sewed last night, and that doesn’t include the snaps yet. This is going to take a while, but I think they will stay intact once I’m finished. Obviously if you’re going to try making these spires, I recommend sewing scrap fabric inside as channels for the dowels BEFORE inserting the dowels for a much easier sewing task.
 Of course this year the castle is only one of many projects! I’ve added a vinyl gutter to the temporary roof over the backstage area, so if we do get any more rain, all the electronics should be safe. Of course now we probably won’t get any more rain, but it’s better to be safe than sorry! I also have a plan to decorate the gutter to look integrated with the steampunk device…
I have also been continuing with more video editing, making several edits, then rendering while sleeping, at work, or outside doing other projects like this weekend. Still lots more detail  work to finish but I can see the end of the tunnel! All the major renders are done, just some tweaks left plus audio details, so I don’t think I’ll get stuck with any week-long render issues, but I’m still trying to stay as ahead as possible. If all my editing can be completed by two weeks ahead of the party, I will be extremely pleased!
 I got to stick all the LEDs through the foam panel and wire some other lights to the pigtails and
 ") switches…and they even worked! The major wiring project is almost complete so we can rearrange the backstage area into final position, continue with building the rest of the steampunk device, and put away the steampunk junk boxes to rearrange the patio space better. Also, this means that VSA programming will begin very soon, which is excellent since we know we will need as much time as possible to fine tune everything!
switches…and they even worked! The major wiring project is almost complete so we can rearrange the backstage area into final position, continue with building the rest of the steampunk device, and put away the steampunk junk boxes to rearrange the patio space better. Also, this means that VSA programming will begin very soon, which is excellent since we know we will need as much time as possible to fine tune everything!
Until next week!
 I decided to get a GoPro Hero3 camera with waterproof housing for my cliff-jumping and snorkeling on my summer Hawaii trip, so I thought we should also use it for Halloween 2014 somehow…so I thought of incorporating it into a hat for a roving point-of-view video angle! I’ve been calling this the “hatcam” even singing “nana-nana-nana-nana-nana-nana-nana-nana-HATCAM!” but that’s not a very steampunk name, so I have christened it the Photo-Chapeau. I LOVE how this turned out, and it only took a couple hours to make! Ghoulish Glen gets to wear it for this party, but I think I’ll wear it on my brown velvet top hat the next time I get to wear my own steampunk. 😉
 Glen wanted to wear a bowler hat with his outfit, thankfully found cheaply around Halloween costume season. I had a riveted leather belt complete with brass buckle in my steampunk stash from previous thriftstore trips, so I cut off the belt so it would sit buckled properly as a hatband, but still be convertible for other hat sizes in the future. For a perfect fit I had to poke more holes with a metal skewer.
 Several weeks ago I had tackled the teardown of this unidentified solid brass gear box to harvest the gears. We saw this at the electronics flea market this summer, and Glen asked “What is this?” The guy replied, “A dollar.” Still wanting to know what it really was, Glen jokingly commented, “It doesn’t look like a dollar,” then the guy said, “Ok, fifty cents.” Haha! We still don’t know what it is, but for only fifty cents I got a TON of awesome tiny real brass gears!
 Taking it apart was a bit tricky, since there were five main posts anchored with nuts that I was able to crack with my adjustable wrench, but there were a couple connections that I had to bend the metal posts to get them to come out. I ended up with quite a nice pile of tiny gears, but they were all still attached to their posts and I couldn’t figure out how to get them off without damaging the gears, so I worked them into the final design.
 Since I wanted to hide the camera as much as possible, and we would need to take it out to transfer the videos later, plus turn on & off, I thought of sliding it from the top into a close-fitting box, so I went in search in my garage. I couldn’t believe that I had a gold cardboard jewelry box that fits the camera perfectly! Fantastic!
 Since the lens sticks out from the camera, I cut a U-shaped hole so the camera could slide in from the top, then the lens would be cradled by the bottom curve, with the fit as tight as possible. I cut just inside the corners for more stability around the top opening, and by grabbing the bottom of the lens and gently pulling upwards, it comes right out without disturbing anything else. Whew!
 Now to attach the box to the hat. It was easier to work with the two halves of the box separately at this point. I poked holes in the box and fed wire through to the back, wired around the belt, then twisted and folded up to anchor. This way the camera box could be moved to a different hatband in the future.
 I forgot I wanted to paint the hatband before adding the box, so I carefully sponge-painted dark chocolate brown acrylic craft paint (leftover from the Painted Woodgrain project) along the edges of the belt to look like older leather since the belt looked much too new, as you can compare in the photo. This is a small detail but I think it really adds to the overall look.
 I hot-glued the box halves together, added the camera inside to make sure of clearance, then started hot-gluing the gears! I wasn’t quite finished when Glen was leaving, so I made him try it on to make sure it wasn’t too front-heavy. This hat fits tightly on his head so he will be fine, but the same hat on me falls forward to hit the bridge of my nose. 😉
The tricky parts about these gears were the center posts in everything, so I couldn’t glue anything flat, plus sometimes hot glue doesn’t like sticking to metal very well. This led to  redoing several sections, and reinforcing with extra blobs from the back side, but I was really liking the dimensionality with texture on all three sides. Of course I couldn’t add anything over the top since the camera loads that way, but I disguised that by adding
  gears that could overlap the top edge from the front side. I had also purchased some jewelry/scrapbooking findings that were metal gears but a darker finish. I positioned some of the dark metal gears around the design so the dark camera lens would blend in better. Since those gears were flat, I also placed them strategically to give the brass gears extra support. Of course the buckle is in back, for a little counterbalance as well as style.
I am so happy this was such a quick project I could get completely finished among all my other ongoing projects for Halloween 2014! I can’t wait to see the point-of-view footage of my Halloween party on the 25th! 🙂
 First of all, if you’d like a Frightful Skull Fountain Kit, no one has any skeleton hands left in stock now, so I only have one kit left until next year. If you act fast, you can buy lucky number 7!
I’ve had a couple more baby pumpkins appear since last week, hand-fertilizing again with my paintbrush whenever I see them open, but so far the only one that has set is the one that was already growing larger last week, and it is even bigger now with a giant stem that seems like it might grow even more! Maybe I’ll have one orange Halloween pumpkin in prime walkway location, and it’ll be a game who can spot the one real pumpkin with all the fake ones in the vines? 😉
The inside is looking pretty good now! Scary Jerry helped me check the batteries and place all the black LED flicker & real candles everywhere, I got the rest of the portrait gallery up, including the enhanced moving portraits, and the guest bathroom is now all eerily elegant too!
Twelve of the ghosts & portraits received various enhancements since 2012 which required re-editing & re-encoding them all, but at this point the videos are completely finished for all the ghosts, all the portraits, and a new surprise, so that is a huge milestone to be that far along! I’m still cranking through some final video editing since we know a major display will need pre-skewing to keystone them properly, but I am very pleased that is the only video editing left!
 The castle is still getting stabilization enhancements as time goes by, which is the drawback to attempting to set out decor earlier in the month since it has to survive the elements for longer. I love how clear fishing line is invisible, but it is so thin it ends up cutting into the foam so loosens the anchor, so this year I tried some rough brown twine. It seems to be cutting less into the foam, but there is also the drawback that you can see it. For the square towers it’s hidden in stone block seams, but I tied the round towers criss-cross front to back since that’s the direction the wind keeps blowing, and I can see the twine in daylight which is disappointing. At night it will be less visible, but now that we have added the spotlights, the next plan is to paint the visible twine a dark gray or black and see if that makes them invisible at night but not too bad in daylight. For years I have tried to make my Halloween decor look good 24 hours a day, not just at night.
Scary Jerry is our resident lighting expert, and all three of us were involved Saturday night rearranging spotlights for highlighting the towers without having any too brightly lit. I really like our setup, and to make sure everything can be seen from all vantage points, I was on my stepladder pruning in the dark while Scary Jerry stood at the different view points telling me what to prune…haha! It was much more efficient than me having to get down, run over to look, then run back & prune again, which is often what happens. 😉
 As you can see from their absence in the photos, I’m still working on stabilizing the tower spires. Even the square spire was still going wonky in the slightest breeze with the tower pieces already tied down, and I couldn’t figure out how to stabilize the spire better. Scary Jerry had a brilliant idea to use the foam bubble grip you use to prevent throw rugs from slipping, and I had some, so I cut a strip, anchored it with a few toothpicks around the top edge of the tower, and put the spire back in place. Great idea! For the round spires, I decided to try one by opening the hula hoop, sewing a hem casing to fit, threading the hoop through the casing, then taping it back together before attaching the cone closure with the double-hook tape, and I think that will work. That is the one round spire you see in the phtoos already on the roof and it is still intact just fine. It will just be a matter of cutting through the hula hoop tape each time I take them apart for storage, then re-taping when they go back up. Now I still have to finish all the sewing though, and it’s taking about an hour per spire!
 I am very glad I wasn’t finished with the spires yet, since just as of this morning rare 20 mph winds have been blowing all day, even blowing interlocked-corner, tied-down pieces off the roof onto my porch around the corner! I have re-tied everything as tightly as possible three times in three hours already, and taken down the square spire and anchored it with bricks in hopes it won’t go airborne, but as I left for work, the round columns were still working themselves out of their bases and stretching the ties yet again. I hope the ties at least keep the columns on the roof and don’t break anything…and I sure hope this wind stops soon! The extended forecast shows at least 10-14mph through the end of the month, but I have nothing to measure to know how fast the normal breezes have been the past couple weeks when things have been stable enough on the roof. Wish me luck!
 I did get the garage door converted to my wood planks at least! I found a whole bin of matching dark woodgrain contact paper at my local dollar store this spring, but I was afraid using its own adhesive wouldn’t come off the garage door segments to be able to be stored well for the next castle year. I would love to have magnet panels but those are pretty expensive, so I started with some double-stick tape instead, leaving the backing on the contact paper. Since my garage door rolls up, I can only attach the panels at the top unless I cut them, and I was afraid that cutting them might make the edges crunch together as the door panels moved. This was cheap contact paper, so a full roll was only half the height I needed, so I stuck two rolls together, overlapped to keep the backing paper on, then I did the same overlapping between the adhesive and the backing paper to stick all the vertical lengths together in one giant curtain. It was tricky to lift it all by myself to put into position, but I got it done. In the moist night air, edges have been curling, so tape around the edges will be required, but then I can’t open the garage door. The white border around the edge bothered me, and I don’t have enough spare foam to make a “stone” border this year, nor do I want to paint the border to match the house walls, since it looks better white the rest of the year. However, I did have more flagstone gossamer, so I taped that around the white border. It doesn’t match all the tan castle walls in the daylight, but at night it blends okay. At least now my garage door looks much more like it belongs at a castle, especially with my big 6-foot thick plastic rusty chains hanging like the driveway is a drawbridge, and I can still open it, but it’s been getting so
  wrinkled at the edges by opening the door and today’s wind was blowing it every which way, that I taped it all around and decided I just won’t drive my garage-parked Miata until the decor comes down.
Our major setup for this weekend that has continued into the week has been setting up the shed for the Phantom of the Pipes Peppers Ghost illusion. I saved the black-painted frame and screws inside the shed behind the organ, left the black fabric hanging  inside the shed, and marked the floor positions with chalk last time around, so the setup should work out okay. Glen has a receiver & speakers to make the pipe organ louder (sadly it couldn’t be heard very well in 2012), so that has made it a tighter squeeze for equipment in the small space behind the
  organ. That took most of Sunday evening, so Monday we built the frame and got the shrink film taped on, ready to shrink with the hairdryer tonight.
I can’t  show you too much of the other secret steampunk work we’ve been doing anymore since it would give too much away, but I can tell you it’s going well! Ghoulish Glen let Scary Jerry try some wiring too, and it works!
 I’ve also made good progress on both illuminated manuscripts but with still a lot of work left, and have a couple smaller steampunk prop surprises still to finish. However, since I have COMPLETELY FINISHED this fun project in just one day, I have written its own post…the steampunk Photo-Chapeau, otherwise known as the HatCam! See here for the full details and construction photos.
Most of the fruits and veggies can’t be prepared until party week, but I could make these adorable little Mandarin Jack O’ Lanterns! My friend Teje in Norway made these last year so I gave her a  long-distance Creepy Cuisine award (yes, I mailed her a prize!) and was inspired to make some myself! I drew a slightly different face on 74 mandarins, and will display them in two see-through bowls like this wire one. You could use full size oranges but
  the mandarin oranges look more pumpkin shaped and are a better size for finger food. They last several weeks in the fridge, and since you just draw faces on the rinds with a black marker, these can be done plenty ahead of time…and extra bonus that they are a healthy treat!
 I am so relieved that my party baking is DONE! For my ever-popular Pumpkin Pasties, I bake the filling first, from frozen pumpkin puree I roasted myself from last year’s Halloween pumpkins. After the filling is cool, I spoon it into a plastic container, and it saves in the fridge fine for a week or so, ready for whenever I have time to make the pie crust dough, roll and form into pasties. Now 8 dozen Pumpkin Pasties are made but unbaked in the freezer, spaced apart on parchment sheets stacked inside my sheet pans with the plastic lids, ready to transfer to baking sheets on party morning. So glad I figured that out so many years ago! Gone are the
  days of baking pumpkin pasties all night on party eve!
Since the Tasty Tombstones are specific to this year’s plot, there are only 7 designs, so 16 of each means I now have 112 cookies, not quite 10 dozen, so hopefully that will be plenty! Since not as many were eaten last time, I plan to split them into two plates in different areas of the party so they have more exposure.
 The same cookie dough makes the Edible Medals for the contest prizes. I am so thankful I did the artwork, edible printing, and cutting way back in April and May, since that takes a long time! Then I just had to mix up the cookie dough the day before to chill in the fridge, then spend the marathon evening rolling & cutting the dough for hours for both kinds of cookies. After they were cool, I added the ribbons, plenty long to go around even the largest noggins! 😉
 I’ve also been a little frustrated how the sourdough bone breadsticks were more chewy than crispy, so I have tried three different recipes. I need 5 bowls of bone breadsticks so set around different areas of the party, so I figured each bowl could be a different kind, encouraging people to roam for different food. Using the cool metal non-stick bone pan for my sourdough breadsticks made them pretty large and more chewy than crispy, so this year I tried making smaller bone shapes by forming by hand and snipping the ends with kitchen shears. I also tried two other non-sourdough normal yeast recipes, so now there are 258 bone breadsticks safely in the freezer ready to crisp in the oven on party day! You can keep reading below for the three recipes I used, altered for bread machine use.
Next week will be the last pre-party post…sure hope we get everything done in time! 🙂
ACK! Only 4 days until the big event! Overall we are doing well but it is definitely final crunch time! More wind was frustrating Sunday afternoon as I fought with more pieces flying off the roof, so I am not setting out the spires until the last minute. We had some sprinkles on Monday,  enough to make the contact paper garage door cover fall off completely (*sigh*), but gladly very light so I had time to quickly cover everything that might possibly get damaged, but as of now Saturday’s forecast is a 60% chance of morning showers, clearing by the afternoon. Clear later is good news for the party itself, but having rain that morning means that all the tables & chairs in the backyard can’t be set up until after the rain is finished, and I was hoping to set them up Friday night. We will have to go with the flow and hope for the best!
 Due to the rain I was glad we hadn’t set out the plethora of pumpkins quite yet, since that also requires more electrical runs for all the lighted pumpkins, so that is scheduled for tonight instead. No more baby pumpkins set but my one is getting even bigger! No chance of turning orange in 4 days but maybe by Halloween night next week? Otherwise I’ll have a nice big Thanksgiving pumpkin to bake!
 Sunday night we got the new Pumpkin Queen setup working, this year using my full-size Sharp projector firmly mounted under the eaves of my house with a $25 metal projector mount, instead of the UltraProjector that wasn’t bright enough. Ghoulish Glen tested the light spill saying
  “I’m a giant pumpkin” and receiving the stab perfectly! Haha! I’m impressed we can see the ghost even when using camera flash! Now all six ghosts are set up, but final tweaking and decoration is underway, and all seven portraits are working, including their new surprises!
Steampunk construction is still underway, using PVC scraps and joints like LEGOs then painting them “brass” which look great. I am on my EIGHTH roll of gold duct tape as riveting edging, but  boy does it look great and save time! I might be gluing rivets on the last sections down to the wire!
The giant device needs a “speaker” which wouldn’t have existed in 1914, so I made a Victrola-style “metal” cone from scrap tagboard then painted it gold. It really looks like metal now with the perfect curves, and it looks great on the giant device! I’ve even been cutting tagboard coverplates to clean up the edges where the PVC enters the foam.  The main VSA projector is the fancy short-throw BenQ I bought last year for the pumpkin chorus, but our backstage space is so limited that my projector tripod box couldn’t work, so I build a custom tilt shelf that mounts directly on the fence. Even anchored in my old fenceboards, that
  isn’t going anywhere now! VSA programming is still underway too, but there is enough done that looks really fantastic, and a lot of what’s left is copying & pasting sequences from one section to another. I think we will actually make it!
 Scary Jerry did a lovely job setting up my lab table, even “harvesting” some interesting foliage samples around my yard and mystical black cat hair clumps off my floor…brilliant! haha! More will be added since this was just the new glassware from this year plus the alcohol bottles, nothing at all from the big lab equipment box! I guess I need to go through my collection and keep only my
  favorites now, since there’s not much space to actually mix beverages anymore. 😉
Thankfully both manuscripts are on schedule to be done in the next couple days, and I’m very pleased with how they are looking! I even bought some fancy trim for bookmarks, and dressed them up with some of the metal scrapbooking corners I had in my steampunk stash. The other  four spires still need to be sewn, but since I know they take an hour each and that the technique works, I’m getting other projects done first that haven’t been attempted before since they might need reconfiguring.
What’s left to do? A lot of course! One more large-scale drawing is required by hand due to size, and all the steampunk signage is still pending, but I will print them together to maximize the expensive gold label paper, so I want to make sure we’re not missing any labels first. I haven’t designed or printed the three quiz sheets, but they should be quick, since the text is all ready, just a quick layout job, then printing & cutting them. I plan on costume voting by crown noise  again so that saves a little paper and ballot counting time. The final grocery shopping will be in the next couple days, then since no gelatin body parts this year, my food prep will be completely different. I have a lot of fresh fruits and veggies planned, so there will still be a last-minute flurry to get all the food ready Saturday afternoon, and I will be running the oven pretty much all day to bake the 8 dozen Pumpkin Pasties, crisp the 258 Bone Breadsticks, bake the Brie En Croute, and bake the Spicy Bat Wings.
That’s it for now! Good luck if you’re hosting or attending parties this weekend! My next post will be after the party, but I can’t promise exactly when since we’re hitting the road bright and early Monday morning for Halloween at Disneyland! 😀

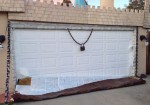
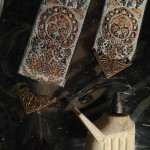

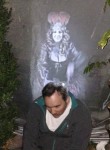


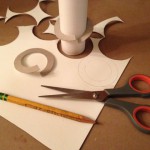
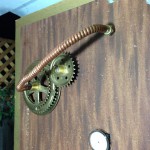
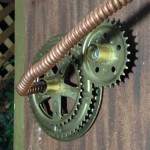

 Sorry for such a delay, but everyone has been super busy, myself as well as my several photographers, so I’ve just barely gathered all the party photos and taken all my catchup photos. I still need to prepare some video to give you the full idea of my decor in a separate post, so my first tale told will be the party experience!
I say “experience” because this year was not just a party. In addition to the 6 ghosts and 7 moving portraits featuring the Verdigris family of Castle Brittahytta, Miss Hermione G. Wells was in the Library Laboratory explaining why she was not in person at her own party and why she needs your help, but that was just the beginning! The main event was an interactive mystery with an intricate plot told in 7 short acts over 2 hours, using two projectors and two VSA controller boards in the giant glowing-green-ectoplasm-powered steampunk device to show the “mad scientist” transmitting from Europe, the dead psychic medium leading the seance from inside an astral gateway vortex, and five ghosts summoned inside the large crystal ball using the energy of all the party guests participating in the seance…and there was even live interaction  with Sir William Crookes and the Glowing Ghostly Guardian! You can get an idea by several photos here, but to understand and appreciate the full show experience, you will need to be patient for the full video I will be posting soon. In the meanwhile, some comments from party guests included “You really out-did yourself!” multiple times, “Loved solving the mystery!” and “Awesome main event! It was like being at a full scale amusement park!”
Of course our most ambitious party yet had to be threatened by the worst Halloween weather I have seen in 21 years! Couldn’t the California drought have continued for just a few more days? The only days it rained were the day of my party and Halloween day…*sigh* Definitely a lesson in worrying about what you can actually control, admittedly not a strength of mine, but also a lesson that my metal patio roof isn’t as watertight as it looks, since really forceful rain can push the overlapping roof pieces apart dumping water onto my normally  dry patio! On Friday the wind was terrorizing me so badly I was literally frantic, and I was asking on Facebook for everyone to pray to anything they believed in for the afternoon to dry out to safely run electronics for my party, so Louie came to the rescue with a couple pop-up canopies for the backyard so we could still use the much-needed space for food tables and seating. Thank you so much, Louie! I think I will now be investing in a couple of those canopies for myself!
By party morning the wind had stopped but it was soaking wet everywhere. I thought I had covered all the electronics enough, but unfortunately two power circuits died overnight and wouldn’t come back just from GFCI reset because a couple power strips got wet from ground splash back, and they controlled all the front  yard & roof lighting plus those ghosts, the patio fridge and all the lab lighting! Ghoulish Glen came over before noon, used my hairdryer to dry out what was the riskiest, and waited for others since the rain had stopped by early afternoon. He had the knowledge & his circuit tester to isolate the bad connections to remove them from the chain. Thankfully the fridge was back running first so the party food was safe, and he had everything running again by party time…hooray!
With all that weather mess and the extra delay of putting up the canopies the night before, plus unable to set the tables early as I hoped, I was way behind on food prep even though I had scaled back my menu this year intentionally! My dear friend Tash, featured each year for Annual Halloween Shopping Weekends, came by herself this year all the way from Truckee, so she arrived at 3pm and said she was my “minion,” tackling anything I asked, no matter how dirty the job! There is no way this party would have happened without her and Ghoulish Glen both helping on party day! Thank you both so much!!!
 With them both helping, I got the last unused steampunk junk stashed in the garage, and barely jumped in the shower at 6pm! The biggest food project that couldn’t be done by others was a plot point, so I got my makeup, wig & most of my costume on by party start time, but no crown or cloak since I was still doing food prep. That ended up working well, since I didn’t match any of the ghosts not in full costume, so I didn’t have to be in character, and I was another part of the
  mystery until my big reveal in full costume in Act 7! The first act of the main show started at 8pm just as advertised, I switched the big TV from the portrait to the patio webcam feed, and I was out watching the audience and the show along with my Scream Team, excited that the guests were intrigued and loving it! Then I was back in the kitchen busy frantically mixing up 6 different flavors of jalapeño jelly green ectoplasm slime test tube shots before they were required at the end of Act 6!
 A few guests were driving to the party in an absolute downpour of rain with wipers on full blast, but thankfully we only had a couple drizzles during the party, and the wind stopped by around 5pm so we could reset all the towers & spires yet again barely in time. After all our bad weather luck causing delays, we pulled it out in the end, all ghosts and portraits worked, the castle stayed intact as needed, and the main event worked, but I didn’t get many photos of my own, so I am very thankful both Tash and Cat did such a great job taking photos! I never would have seen any of the Creepy
  Cuisine if Tash hadn’t been taking food photos! Only 56 of us for this party compared to 80+ last year ended up being a blessing, since that made sure everyone who wanted to could watch the main event, either live on the patio or in the living room on the patio webcam feed on the big TV and speaker feed coming all the way from the back patio. Very glad that all worked, and even all three webcams stayed working all party, at least on the local network!
We had a ton of fantastic costumes despite the weather, too many to post individually, so check out the full gallery below. I am so glad everyone could show their creativity, and that Cat was able to get most of them  documented for posterity! Costume prizes and Creepy Cuisine are traditions, and even though I thought Ogle the Owl must be getting old by now, a longtime guest told me how much she looks forward to it, and several newcomers loved it too! The problem is I have so many owls by now that it was too hard to edit my collection down to 21 on party display, so maybe next time it will be an undisclosed number of owls & see if anyone finds them all? 😉 We
  also had two new contests related to the main show. Studying Spirits was to find the true names of all seven spirits haunting the castle using the portraits and other family heirlooms around the castle, and Exploring Ectoplasm Essences was matching the flavor profiles to which ghost’s ectoplasm collection location. I made Edible Medals again and had extras, so a runner-up was awarded in each category as well, using the loudest cheering for the costume awards. Here are the winners!
Scariest Costume: Kevin S as Silence from Doctor Who, Billy as Skeletor
Most Creative Costume: Lori as R2D2, Comic Suit Kip
Ultimate Costume: Firefly Family, Gangster Family
Supreme Spirit Savant: Keith & Doug
Exceptional Ectoplasm Essence Explorer: Ashlyn, Erica
Outstanding Owl Ogler: Eleanor, Angie, Katie, Mike
Creepy Cuisine: Scary Jerry for Toxic Cupcakes, Tracia for Coffin Cakes, Kevin C in absentia (and Kip because I still had cookies) 😉
 Since the main show ended about 10:20pm, after the awards several people started leaving, but that was the “how did you do it?” question time! There were actually more story questions than technical questions, which surprised us. We admit the story was probably a bit too involved for a party, when sometimes people would end up talking or laughing over plot points, let alone a bit complicated for people imbibing alcohol, so next time we will work on a less intricate mystery….but overall the feedback was
  positive and people liked the story! Go Ghoulish Glen our Ghost Writer! 🙂
The very last people to stay around waited and watched the portraits to see our new surprises for this year. Queen Ergelise left her piano portrait in search of her sister Sarina over the fireplace, and in the hallway Queen Meresinine aka “Merry” sneaked into the  Pumpkin Queen’s portrait to tease her. They must have just barely missed her the first time, since it took over 20 minutes of watching, but they were rewarded! 😉 The full gallery for this post is below, with photos from Tash, myself, and I’ve included some of Cat’s here, but to see all of her fantastic photos, either go to her professional website for the full glory, or go to her Facebook album to see comments along with the photos. 🙂 Thanks to everyone who braved the weather to come celebrate with us!
 I had a record number of overnight guests, and it was a lovely Sunday morning after the storm, so we ate our waffle and baked egg brunch in the backyard after I had only 90 minutes of sleep after doing dishes into the wee hours! I was so exhausted after they left that I took a 3-hour nap, then only had time for a quick peek at my own photos Sunday night while I did laundry and packed, since what do you do when you’ve just pulled off the most ambitious Halloween project in 21 years? You go to DISNEYLAND! 😀 Stay tuned for that amazing trip, then back to more detailed party decor!
If you follow Britta Blvd or Eerie Elegance on Facebook, you’ve been able to see each ghost video as I posted them on YouTube over the past couple months, culminating in this master walkthrough of all the ghosts. I’m still working on more video editing for the rest of the party, but you should watch this video in full before you will be ready to understand the Halloween 2014 Main Event!
Studying Spirits with Miss Hermione G. Wells
…plus separate videos with more details,
one for each of the six spirits haunting Castle Brittahytta:
The Phantom of the Pipes Haunting the Garden Chapel
The Watery Wraith Haunting the Wishing Well
Swashbuckler Sally Haunting the Front Tower
Merry Madam Mead Haunting Her Jar
The Pumpkin Queen Haunting the Castle Garden
The Ghostly Guardian Haunting the Main Castle Tower
Now are you prepared to help Miss Wells? Stay tuned for the Main Event video coming soon!
 Back when I was able to see Haunted Mansion Holiday its first few years, it was an early Christmas overlay that they had up in October and took down in January, with the rest of the park’s Christmas decor and nightly snowfall already going by mid-November, which is when we usually had time to do a quick weekend trip. I guess Haunted Mansion Holiday was popular enough for Disneyland to expand into special Halloween events in more recent years. My dear friend Tash of Annual Halloween Shopping Weekend fame has been able to go several years now with her kids to the Mickey’s Halloween Party nights, so I have heard a lot about how fun it is, and it is the ONLY time at Disneyland when adults are allowed to be in costume. Since my Halloween parties are always the Saturday before Halloween, sometimes Halloween night is immediately after my party, and as the calendar cycles
  through the years, sometimes I have a whole week until Halloween night. Since this year I finally had the perfect Halloween costumes to wear at Disneyland, I asked if my Scream Team would take a quick mid-week trip with me to see Haunted Mansion Holiday together and I could wear both my Elsa costumes. Sadly Scary Jerry couldn’t join us but Ghoulish Glen and I had a great time!
The full trip is in the Travels section of BrittaDotCom, so you can read about the whole trip and see more photos of the special Halloween fireworks show with Zero the Ghost Dog flying around, decorations, and Haunted Mansion Holiday by taking these links, but I’ve included the best Elsa photos in the gallery here below, including loving being mobbed for photos, and some fun ones of Elsa riding in a Doombuggy adoring the ice angels and the snowy graveyard inside Haunted Mansion Holiday…two favorite worlds colliding! 😀


Halloween at Disneyland – Day 1
Halloween at Disneyland – Day 2
Halloween at Disneyland – Day 3
Halloween at Disneyland – Day 4

To summon the spirits in the séance led by the Webmistress via the Spirit Materializer built by Miss Hermione G. Wells, the party guests needed to identify the ghosts haunting the castle by using anything they could find, including family portraits, two “ancient” illuminated manuscript books, and some other clues…even the Tasty Tombstone cookies! Here are all the ways you could find the true names of each of the seven spirits…
Halloween 2014 – Verdigris Portraits, Family Heirlooms and Other Clues
I didn’t add subtitles to this video, but I have included the entire script below if you’d like to read along:
Hopefully you have already seen how for Halloween 1914, six spirits were already haunting Castle Brittahytta, so the current owner Miss Hermione G. Wells was attempting to hold a special séance with her friends to discover how to send the spirits away to rest in peace. However, since the Webmistress was summoned from the beyond by the ectoplasm-powered Spirit Materializer device, technically there were seven spirits that needed to be identified by their full true names to win the Supreme Spirit Savant award for the Studying Spirits party quiz.
The Tasty Tombstone cookies included all seven names, which was a good start, but it wasn’t obvious which gravestone went with which ghost. Four of the spirits were easy to identify, since their portraits had their names engraved on the frames in English. Between posing and playing her beloved piano, Queen Ergelise every so often went looking for her sister, Princess Sarina, who would rather have been back on her ship commanding her crew in the Verdigris navy. Wise Queen Sova gave advice to people passing by, hushing her pet owls when they hooted, and Queen Merry couldn’t resist her tasty homebrewed mead or wine, either in her portrait or as a spirit haunting a jar sitting above two books she had written as Meresinine Verdigris: “Using Spirits to Elevate the Spirit: Better Poetry Through Mead” and “Merryment in a Bottle: Fermenting Grapes for Fun and Profit.”
Most guests found those four portraits easy to match visually to their respective ghosts, playing the pipe organ, sword fighting in the tower, drowning in the wishing well, and giggling in the jar. However, not only was the Pumpkin Queen teased behind her back by tipsy Queen Merry, but her portrait had no nameplate at all. Luckily not only was there a Tasty Tombstone cookie naming Queen Dynia of Verdigris, but by the living room window there was a table decorated with pumpkins that displayed an ancient illuminated manuscript telling the tale of why Queen Dynia was called The Pumpkin Queen. If the handwritten blackletter script was too difficult to read, there was even an antique magnifying glass handy!
The last two spirits were intentionally much trickier, otherwise everyone would be a winner! The First Queen’s portrait nameplate and her Tasty Tombstone cookie were both engraved in ancient Nordic runes, but Wise Queen Sova’s cookie epitaph was a “Rosetta stone” that translated runes into English. The large illuminated manuscript below the portrait had Old English handlettered script in the caption under the painting that obviously matched the portrait with her holding the same spear and shield, and with reddish-blonde hair under the same pointed crown. Everyone should have seen this book because Miss Wells told them in the Main Event to go read the full Verdreki Oath. The iconic five-pointed crown and specific spear shape were able to be seen even from a far distance, so for those who persevered enough, the Ghostly Guardian reciting the ancient Oath high up in the Main Tower was identified as Brittahilde Verdreki, the First Queen of Verdigris.
But what was the true name of the seventh spirit? Her portrait nameplate only said The Webmistress of the Dark. If you had kept track of all seven Tasty Tombstone cookies, there was only one left you hadn’t already identified, plus the Main Event mentioned Miss Wells had to be at the site of the gravestone of the Webmistress to make the Spirit Materializer function, and you could see the specific gravestone shape behind Miss Wells that could be matched to that Tasty Tombstone cookie shape, so either way you could read the full name on the cookie. However, there was also an even easier major clue at eye level in the diagram that explained how the Spirit Materializer worked, with a sketch of the gravestone’s distinctive shape, and showing the full name “Lady Mnemosyne Brittahilde, Viscountess of Verdigris.”
That’s all the clues! Would you have found all of them? We sure had fun designing the mystery of The Story of Seven Spirits! For more details about Halloween 2014, please see all the other videos and see the Halloween section on www.BrittaBlvd.com. Thank you for watching!
I am very pleased to announce TWO Halloween videos today! Finally you can experience what it was like to attend our grandest Halloween extravaganza yet! The Main Event is 46 minutes long so set aside some time to watch, but I promise it will be worth it! 🙂 I should have counted my editing time, since with seven separate camera angles, synchronizing three audio tracks, and adding other highlighted content together to tell the whole party story, it feels like I spent almost as many hours of video editing documenting everything as I did to create all the portraits, ghosts, and main event content for the party! Hope you enjoy watching!
Enjoy the perspective of a party guest at Halloween 1914 hosted by Miss Hermione G. Wells as you are immersed in the interactive mystery told in 7 short acts over 2 hours, with a giant glowing-green-ectoplasm-powered steampunk device showing the “mad scientist” transmitting from Europe, the dead psychic medium leading the séance from inside an astral gateway vortex, and five ghosts summoned inside the large crystal ball using the positive mental energy of all the party guests participating in the séance…and there was even live interaction with Sir William Crookes and the Glowing Ghostly Guardian!
Please watch the Main Event first so you understand everything, then you may continue with your bonus video today that reveals all the clues to solve the Studying Spirits quiz!
Halloween 2014 – Verdigris Portraits, Family Heirlooms and Other Clues
To summon the spirits in the séance led by the Webmistress via the Spirit Materializer built by Miss Hermione G. Wells, the party guests needed to identify the ghosts haunting the castle by using anything they could find, including family portraits, two “ancient” illuminated manuscript books, and some other clues…even the Tasty Tombstone cookies! Here are all the ways you could find the true names of each of the seven spirits…
(If you would like to read the full script about the clues, please click here.)
Sir William Crookes and GoPro Photo-Chapeau Operator: Glen Simon
Glowing Ghostly Guardian and the entire Verdigris family: Britta Peterson
Produced & Edited by Britta Peterson
Huge thanks to my Halloween Scream Team, Ghoulish Glen and Scary Jerry, for all their help to make this happen, and to party photographers Glen, Jerry, Tash & Cat!
Don’t forget these other videos from Halloween 2014:
Halloween 2014 – Studying Spirits with Miss Hermione G. Wells
The Watery Wraith Haunting the Wishing Well
Swashbuckler Sally Haunting the Front Tower
The Ghostly Guardian Haunting the Main Castle Tower
The Pumpkin Queen Haunting the Castle Garden
You’ve probably realized by now that so much work went into Halloween 2014 that I have to split up the making-of videos into more digestible chunks! Coming up in a few weeks will be the Electronics & Equipment technology and prop-building video, including all the VSA control programming for the Spirit Materializer, but today here is the first behind-the-scenes video about all the writing, filming, editing & effects we did while Creating the Content for Castle Brittahytta…even including a few outtakes!
Creating the content for Halloween 2014 took over two years of writing, prop building, filming & editing with both digital effects & practical in-camera effects, with a few fun outtakes along the way! Watch how we created the characters, filmed the ghosts & moving portraits, filmed Miss Wells and the Webmistress talking to each other inside the Spirit Materializer, filmed the crystal ball appearances, produced the teaser trailer with original music, edited & added effects, and skewed everything for final display as the Main Event interactive mystery at the party!
Don’t forget these other videos from Halloween 2014, and stay tuned for more behind-the-scenes in Halloween 2014 – Electronics & Equipment coming soon!
Halloween 2014 Main Event – The Spirit Materializer
Halloween 2014 – Studying Spirits with Miss Hermione G. Wells
Halloween 2014 – Verdigris Portraits, Family Heirlooms and Other Clues
Creating the content for Halloween 2014 took over two years, and even longer when you consider the majority of the costumes were created many years before everything solidified into one grand idea! The Story of Seven Spirits is just the beginning of the Verdigris Saga spanning a thousand years into the past, even before Castle Brittahytta was originally built in Europe, so there will be plenty more surprises in store for future Halloweens!
After years of being on my Halloween list, finally a single projected ghost appeared for Halloween 2011 with Ghoulish Glen’s assistance, so of course I wanted even more ghosts next! However multiple ghosts would be kept as a secret project in case it didn’t work out so no other actors were allowed, and we knew from experience that recycling footage just doesn’t work well, so that means they all had to be filmed new. While standing in line in Orlando at the Wizarding World of Harry Potter and Haunted Mansion at DisneyWorld in March 2012, I thought to save myself some sewing work, I could take some of my previous costumes and wigs and put them into rough chronological order as members of the same minor European royal family, which would explain why they all looked alike. This genealogy chart ended with my steampunk inventor character, Miss Hermione G. Wells, as the mysterious missing heiress from some 18th-century intrigue causing her royal ancestor to end up in America, so that tied in with my original Halloween 2009 story of how Castle Brittahytta was built in California. The party game idea would be to match the ghost to the portrait, with a couple harder-to-find clues, but I had no real party plot yet. I provided my spreadsheet of character sketches & costumes to Ghost Writer Glen, by April we had named almost everyone in the Verdigris family, and Glen had already started fleshing out my character sketches into fabulous stories that will take many years to tell!
All six ghosts were filmed in 2012 against a black gossamer backdrop, either hanging from the movie screen trellis in my backyard for several including the Pumpkin Queen, draped over the pipe organ in position inside the shed for the Phantom of the Pipes, or weighted down in the bottom of my parents’ swimming pool for the Watery Wraith. After filming, all the ghost video was heavily-altered in post-processing by boosting the brightness, desaturating the colors, boosting the blue to maximum, and masking around the subject to absolute black. Our first ghost filmed was Merry Madam Mead, who was a little washed out because her dark hair and dark dress blended too much with the black backdrop, so brightening her levels also lightened the background. We hadn’t figured out yet that two sidelights aimed on the subject with shades to avoid any light spill on the backdrop was the best technique that worked well for the rest of the ghosts, even jumping around sword fighting an imaginary foe as Swashbuckler Sally. We learned through trial and error that dark wig hair, dark hats and metal crowns could be temporarily lightened with talcum powder, which helped me separate the subject from the darker background during editing. The different projectors and screens used in the final illusions also altered the ghosts’ final appearances. More details about the execution of each ghost are available on BrittaBlvd.com.
The seven moving portraits required planning with the ghost filming, since many made sense to film while I was in the same costume, wig and makeup. It was easier to control the set lighting in front of my large living room window by waiting until after dusk. We intentionally made the portrait subjects sit still for quite awhile, trying their best to behave, with only minor movements like eyes blinking, looking around, adjusting their hair and clothing to proper portrait appearance, candles flickering, crystal ball changing color, and leaves rustling in the breeze, so they would only attract attention on second glance. Since it’s much easier to loop a static background, all of the portrait subjects left the frame at least once in their sequences, and most had several clips linked together in the long loop, so they left several times. Everyone leaving at the same time would spoil the illusion, so all the clip timings were different on purpose. Each character had at least one action specific to her character, like Ergelise turning to play her piano, Sova shushing her hooting pet owls, Sarina brandishing her sword, the Pumpkin Queen tending to her garden, the Webmistress gazing into her crystal ball, and the First Queen greeting people at the entrance. However, we did come up with “easter eggs” in case someone happened to be walking by at the right time, many of which are clues to the larger story, with some that won’t make sense until years from now. Each set was also specific to each character, with props and poses authentic to each era. All seven portraits were originally filmed in 2012, but we did add some surprises for 2014.
Not only did the Main Event need a giant custom-built steampunk device full of electronics as its stage display, but even the video content of Miss Hermione G. Wells summoning the Webmistress through the Spirit Materializer required a LOT of special effects, both practical and digital!
The footage of Miss Wells was all in-camera practical effects except for the static, the color and the audio. We had left the movie screen hanging in my backyard long past summer season in hopes of more room to film outside like we had been filming the ghosts, but by the time the script was finally ready to film, it started raining, so we had to bring the whole setup into my cozy living room instead! We hung the screen from my ceiling beams in front of the same window that was the backdrop for most of the portraits, aimed the short-throw Epson projector at the screen from around the corner by the piano to show a looping video of real thunder and lightning, set up the carved gravestone and the rest of the set, where I sat on my hard floor, reading my script in front of a fan blowing my hair for the stormy weather, fading my own lighting up & down per stage direction in the script, playing with imaginary knobs, and trying to read all the technobabble that had only been delivered as a final script hours earlier that same day. I had two large metal stakes with looped wire that I stabbed into the dirt in a pumpkin pot brought in from the garden, and the lever was an old bottle-capper from my grandfather’s basement anchored to Glen’s portable workbench to stay stable as I cranked it at the beginning of each scene. There was a real albeit empty bucket I tossed for the “dihydrogen monoxide coolant,” and whacking Glen’s grandfather’s old pipe wrench against the workbench leg is what finally “Fonzied” the device into working the last time for the finale in Act 7. Writer, director & cinematographer Ghoulish Glen had an electronic pop flash that he timed for the first equipment failure, and throughout filming, he flashed his still camera as extra lightning flashes, which captured the only behind-the-scenes action photos we have of this session!
There was a lot of size adjustment and skewing for projection angle at the very end, but otherwise the digital effects were minor for Miss Wells. I easily found a loop of analog video static online to intersperse along the way. Using either black & white or sepia filters ended up removing all our lovely glowing clouds in the background, but desaturating the color gave the vintage look we wanted while keeping our thunderclouds. Glen was emphatic about filtering the audio to sound like early-20th century short-wave radio, but the party audience found it difficult to understand, and most of them had no idea it was authentically vintage.
In contrast, the ghostly Webmistress was almost all digital effects. Even though we paid close attention to details of her appearance that affected the story, and I did my best old age makeup so I wouldn’t look exactly the same as Miss Wells, since the Webmistress would be standing in the vortex, we needed the full frame, so the camera couldn’t be close enough to register the old age makeup or all the costume details, like the dew detail on the spiderweb dress, the spider earrings, or the inherited Verdigris family necklace and official seal ring.
We had been filming ghosts against black backdrops all summer, but the Webmistress was our first green screen subject. Unfortunately since we needed to film her almost full body in the frame, we didn’t have enough green extending onto the floor to put enough distance between the subject and background to light the background separately, plus in that location we couldn’t stretch the green screen to remove all the draping shadows. Even with cropping the video as tightly as possible first, then fading opacity to make her more ghostlike, all of these issues made keying out the green more difficult, so having a green ectoplasm-powered vortex required by the writer was a blessing. Adding some echo and reverb sounded otherworldly and like she was coming through a tunnel. We found a YouTube vortex that I was able to tweak to the ectoplasmic green we liked, plus reverse and repeat to loop seamlessly over and over for the 4 hours of footage we needed, since the vortex was spinning for the entire party, even between scenes, before and after.
Timing was a challenge, since I was talking to myself! We tried our best to speak the opposite lines mentally to wait long enough before my cue, and it mostly worked pretty well, especially considering this was our first time ever attempting anything like this! The static was our secret weapon for Miss Wells, since I could stretch out her pauses with a couple well-placed bursts of static, but the Webmistress pauses had to be sped up or slowed down to match the dialog with Miss Wells. Even how the characters looked at each other, at the audience, or at the crystal ball worked out just right…thank goodness!
All that content was filmed in 2012, but the Main Event wasn’t filmed until too close to the party for all the editing and rendering necessary, so the six ghosts and seven portraits were a grand success for Halloween 2012, but the Main Event was postponed until 2014. Since we had so much already filmed, we thought we could add some enhancements to the original plan, like a separate micro laser projector for the crystal ball, which also required newly-filmed footage, touching up our first washed-out ghost, redoing one portrait for story developments, and adding two green screen surprises for some portraits to interact. Five ghosts were filmed for their crystal ball appearances including Sarina and the Pumpkin Queen, Sova also had a new portrait, Merry also had a new ghost and a green screen surprise, and Ergelise also had her own green screen surprise. This became a two-day filming schedule with costume changes and backdrop changes from green screen to black behind the ghost and the crystal ball.
The crystal ball sequences were relatively easy to film, since I stayed seated and could read my lines with a cue card on the camera tripod, biding my time looking around like I was actually inside an orb taking in my surroundings, until it was time to perform the one essential phrase for each ghost. My Halloween Scream Team did have excellent ideas how to distinguish the performances to be different people, like more militaristic movement and speech for swashbuckling Princess Sarina. I had already edited the Main Event for dialog timing, so I used those videos on my iPad in my lap, with one headphone earbud to listen for my cue, hiding the headphone cord behind my back and through whatever wig I was wearing for that character. We made sure to powder the dark wig for Merry and Sarina, plus powder Sarina’s hat, and only sidelight the subject, which worked well against the unlit black backdrop when adding the ghostly digital effects, like lightening and desaturating, adding a bloom flare, and feathering a circle around the subject. I got lucky and found a clouds generator filter that looked just like a crystal ball tuning in.
Knowing that how much trouble I had keying out the Webmistress green screen was due to distance and lighting, I thought of rotating our living room soundstage so the one tall wall I have could be the green screen, stapled across to stretch out as many wrinkles as possible. Since we wouldn’t show any feet, we had the whole length of the living room to place the subject, using separate lights for the background and for the subject. This made the green screen keying so easy for both Ergelise and Merry that I swear it was like magic!
[Click for the complete portrait of Princess Sarina]
It was a little tricky to coordinate the timing between portraits so they wouldn’t be in two places at once, but I solved that by stretching out some of the blank times when the subject was not on screen. I still haven’t delved into actual animation effects quite yet, but I was able to fade in Merry drawing a jack o’lantern face on the Pumpkin Queen’s skirt well enough for the joke to work!
[Click for the complete portrait of Queen Dynia]
Queen Sova had recent story developments that required new filming this year, so we remembered to take more behind the scenes photos, mostly courtesy of Scary Jerry, since Ghoulish Glen was busy playing director and cinematographer again. Those are sadly very uncomfortable violet contact lenses and a LOT of makeup to make me look albino without looking clownlike, plus a more realistic wig than the 2012 Sova.
We tried a different color palette in hopes of highlighting the violet eyes, but the digital photo frame was so small that it was still hard to see her eyes very well. If you looked closely you could tell something was different than all the other queens, and you could see her owl necklace, along with her seven pet owls in the portrait, and three owls carved into her frame. The extra dramatic lighting was to highlight the contrast between the shadows and the light, which echoed some of the advice she gave to passers-by.
[Click for the complete portrait of Wise Queen Sova]
But wait…there is STILL more filming! We had learned from previous experience that my party guests either are not interested in reading explanations, or they are not bringing their reading glasses to my parties, so we decided against a letter from Miss Wells, and decided to film a video loop of her explaining why she was not in person at her own party and why she needs their help. Since I have my family’s old film projector from the 1940s, my plan was to set up one of my small projectors hidden to look like the old film projector was showing the loop, and because it would show in the Library Laboratory, the backdrop behind Miss Wells should be the Spirit Materializer from out on the patio. The timing for this was tight, since we couldn’t film it until the Spirit Materializer was built enough to be a backdrop. We liked an in-between old film look, not quite black & white but not quite sepia, then I was lucky to find a Final Cut Pro filter called “Bad Film” with adjustable parameters like jitter, shake, focus, hairs, dust & scratches! Adding an old film countdown I found on YouTube to the front and about a minute of blank film deadtime at the end made a perfect loop.
[Watch the full Greetings from Miss Hermione G. Wells here]
After I had dressed up in old age makeup again to read the séance lines by candlelight, the Miss Wells intro was in the can, and Scary Jerry had recorded his best “in a world…” Mr. Trailer Man voice, I had enough footage to produce the party teaser trailer, but I only had a week to edit it all together before my invitation deadline of 6 weeks before the party. I took the special Webmistress candle footage, some Webmistress vortex footage, the Miss Wells intro, footage of all the ghosts, a couple moving portraits, Castle Brittahytta from 2012 with some real lightning video added over the towers, a couple closeups of the Spirit Materializer equipment in process, and some staged Miss Wells travel photos as exposition, and arranged everything timed along with Jerry’s narration and original music I wrote. My Halloween Scream Team is a very critical audience, so we had a few rounds of fine tuning, including last-minute rewriting and arranging the Verdigris theme for 10 straight hours to be more “soundtracky” for trailer use. I am very glad all three of us loved how it turned out, and the overly dramatic ending still makes me laugh every time. 🙂
[Watch the full teaser trailer for Halloween 2014 here]
Even though the Miss Wells intro footage was edited before the trailer, I still needed to finalize the projection setup so it would look like my family’s old 1940s film projector was showing the loop in the Library Laboratory. I tried several locations, but the best place to hide a compact UltraProjector ended up being attached to the easel behind the menu chalkboard with the projector upside-down and at an angle to the whiteboard screen across the table with no keystone adjustments available on the projector itself…so the video skewing began. It took 7 attempts of skewing footage, loading onto the onboard flash memory on the projector and aiming at the board before I got it good enough, and you can tell by the cross in the countdown that horizontally it was still a little too spread due to the screen angle. At least the Miss Wells intro was all set to show at the party!
[Click for all of Studying Spirits with Miss Hermione G. Wells]
The video skewing for the Main Event was much more challenging! First of all, I “flattened” each track for each screen so all their separate clips and video effects wouldn’t have to be skewed separately for each clip. I did this by copying only those clips into a new sequence, exporting as uncompressed DV, then importing back in as a new 4-hour clip. We had designed the Spirit Materializer so both displays could be rear-projected from the same short-throw projector in our backstage area, but that meant the projector beam had to be aimed between screens at the corner of an obtuse angle, with each stretched gray-microfiber-sheet screen angling away from the projector. I’m sure there should be some mathematical way to calculate the exact angles and what video compensation angles are needed, but after my skewing frustrations with the Front Show projections for Halloween 2013, I just took some example photos from behind to see where the footage was landing compared to where the screen edges were, and kept working trial and error on a 20-second clip to avoid long render times. This was extra challenging because the angles stretched the footage so much horizontally they were too far apart from each other, so I had to go back to the original clips to scoot the Webmistress over in the frame so there would be enough visual area to skew so drastically! Finally attempt number 10 was the magic number, and it looked so fantastic inside the Spirit Materializer that I literally squealed with glee!
All that was just the content we created for Halloween 2014, not HOW we displayed it, which required a lot of various technology explained in the Electronics & Equipment video up next. Thank you for watching, and Happy Haunting!

 Subscribe RSS
