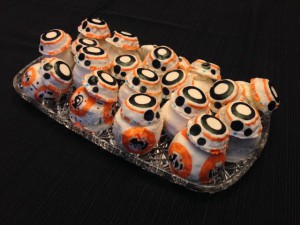
 Scary Jerry’s annual Oscar party is usually near his birthday, so instead of anything spooky, it’s a better party fit to use an Oscar movie theme. It took me a while this year to decide on a good idea, but I finally thought of spherical carrot cake cupcakes decorated like BB-8! Star Wars was nominated for music, sound mixing & visual effects Oscars, BB-8 was Jerry’s favorite part of the new movie, AND BB-8 is ORANGE, Jerry’s favorite color! Making them as cupcakes would let people eat them without ruining the overall design like cutting into a cake…but little did I know this idea
  would give me so many problems! After two days of strife with construction and decoration, I have decided NO MORE 3D CUPCAKES! In the final minutes of finding a serving plate, I thought they turned out barely acceptable to serve, but Glen said “clearly your idea of failure is different than mine” which made me laugh in relief! Birthday Boy Jerry (BB-J?) loved them, especially the moist, rich carrot cake, but here are the full instructions so you know what NOT to try yourself!
 ![]()
I have seen plenty of cake pop ideas online, but I’ve never made any myself since there were so many out there already. I was hoping I could use the same theory but make spherical cupcakes that we could hold and eat without cupcake papers. I didn’t find any fully 3D BB-8 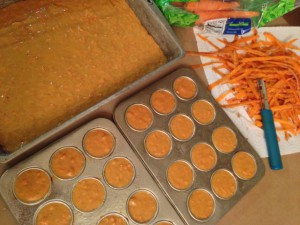 cupcakes online, just various topper ideas, tiny cake pops, and plenty of flat or 3D single droid cakes of course. Perhaps that should have given me a clue that I should not have tried making my own cupcake-size cake balls, but that’s never stopped me before…
 ![]()
I started with my mom’s carrot cake recipe from scratch, even grating my own carrots. I didn’t add nuts since I thought that would make the cake balls more difficult consistency to make smooth, especially for the tiny heads. I could have tried rolling smaller balls for the heads then cut them in half, but I thought my mini muffin tins should be a good enough 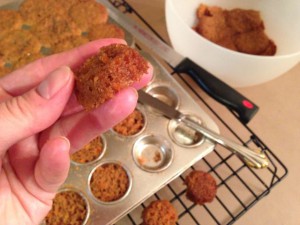 shape. I filled them to the top to be sure I had plenty of cake to trim, then the mini cupcakes were done in about 25 minutes, while the full 9″x13″ pan kept baking until a toothpick in the center came out clean.
While the cake cooled, I made the basic cream cheese frosting to glue the cake crumbs together. Of course you can use any frosting as the glue, but Jerry’s favorite cake flavor is carrot cake with cream cheese frosting, so that was my way of making sure both his favorite 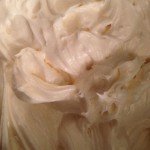 flavors were included. Now I wonder if using royal icing might have kept the cake balls in better shape, or would they end up too crunchy…or never drying at all because of the moisture in the cake? That will be an experiment to try with scraps another time…
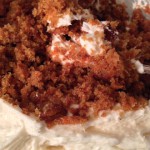 After the cake was completely cool, I crumbled the large cake with the mini cupcake trimmings in a large bowl until they were all fine crumbs, then I stirred in cream cheese frosting until it seemed it would hold together in molded shapes. This was only about half the batch of frosting, so I popped the leftovers in the fridge to use later.
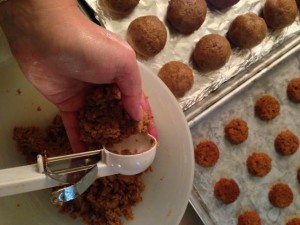 Immediately after mixing the crumbs with the frosting it was too goopy to form, so I chilled it for a couple hours before attempting any shapes. It probably would have been easier even colder since it would have been stiffer, but I was able to form into 22 balls that looked the correct size for the mini cupcake heads. I put them in the fridge to chill solid…while I finished the other edible art project I was doing the same week.
 ![]()
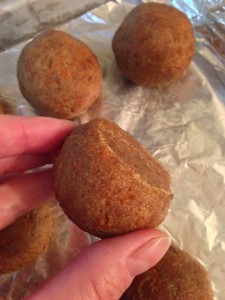 Even though the cake balls chilled fairly hard after a full day in the fridge, they had all flattened significantly on the bottom, so needed rerolling to get back into shape. Cake pops avoid this problem because they are rolled onto sticks and don’t rest anywhere to flatten. I was hoping to use candy melts to coat the cake balls, just like cake pops, since the candy melts harden pretty quickly, and should be a sturdy enough coating to handle and decorate. Well I have no photos since this was such a disaster! I could only get my candy melts to be a spreadable consistency, since heating any longer trying to get them more liquid only burned them to crusty chunks…and when I tried to use that spreadable consistency, dipping the cake balls just sucked them into the depths of the candy melts, unable to get them out! Obviously the cake pop sticks glued in with candy melts while chilling would help this issue, but I think
 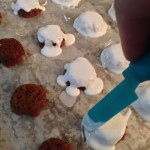 the cake balls being larger might have still failed with glued-in sticks….so I already had to move to Plan B…
I was able to rescue the test cake ball by digging it out from the depths, letting it cool, peeling off the hardened candy coating, and rerolling and chilling again, then I tried royal icing. I knew that full-strength royal icing leaves spreading patterns and I wanted these as 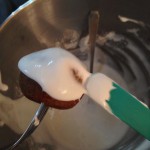 smooth a surface as possible, so I tried flood coat royal icing to pour over the cake balls. Well, that worked reasonably okay for the chilled mini cupcake heads since they intentionally had a flat side, but the cake balls were still a problem. While I was making the royal icing, I popped the cake
 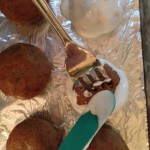 balls in the freezer to get them as hard as possible, then could use a long dinner fork since the curve and multiple tines kept the cake ball on better than any sticks or skewers I tried. I could only dip halfway into the royal icing or the icing would suck the cake ball into the depths and pull it off the fork, but once I got the
 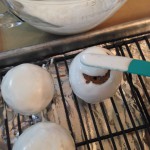 hang of the halfway dip, quick spreading around the equator holding the fork vertical as the icing dripped down, then carefully removing the fork while placing the covered ball on the tray, that worked pretty well. I noticed that the cake balls would warm up too quickly and want to fall apart while still on the fork, so it worked better to take out only 4 from the freezer, ice those, then take the next 4 out of the freezer. By the time I was done covering the cake balls, the icing had set enough around the heads that I could trim the edges cleaner, then I let everything dry.
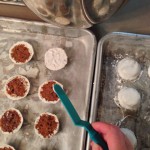 I have worked with enough royal icing that I knew I had to wait at least 6 hours before attempting to move them. Since I had finished the flood coats by around 4pm, I checked them at 11pm. The heads thankfully worked ok, very few cracks, and I was able to spread full-strength royal icing on the flat bottoms just fine. However, even resting on racks, the cake balls had
 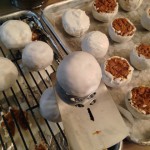 softened while they warmed and the royal icing had dripped through the racks, so removing them from the racks required a metal spatula and left an open wound flat section, but at least the flood coat was holding the shape so far, even though it was very fragile. I still think that letting them dry on flat sheets might have broken off more of the side icing, so either way wasn’t as cooperative as I hoped. It was
 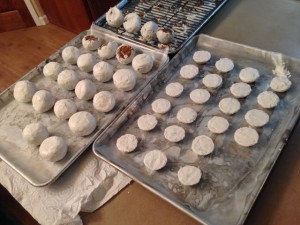 an exercise in frustration holding the cake balls with as light touch as possible, spreading full-strength royal icing very gently on the open wounds to build up the rest of the sphere shape, plus using a dry clean finger to smooth the royal icing down the already-iced sides to blend in like drywall spackle. As soon as I would get one almost finished, a new hairline crack would develop, needing more spackle, and with more handling was more risk of more cracks…ack! By midnight I had done what I could, and several cake balls were too mangled and too cracked to repair, but I still had 14 cake balls I hoped would set firm enough overnight…
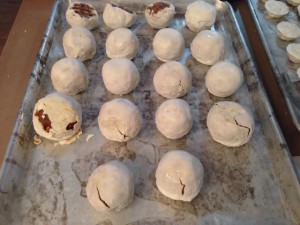 I had piled such a thick coat of royal icing to build up the flat wounds that I knew waiting as long as possible would be the best luck for them to dry enough to decorate, so I waited 11 hours before attempting to move them. They were barely set enough to flip over, but 4 had already cracked under their own weight again and one had glued itself to the wax paper, causing large holes when removing it. I had just enough full-strength royal icing left to spackle some of the cracks, then left them to dry while I started decorating the ones that seemed set enough…
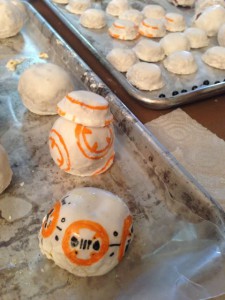 Well, I *thought* they were set enough, but as soon as I handled them long enough to draw the orange wheels in the correct formation, they were squishing out of shape and risking cracks again. I decided to stop to let the balls dry even longer while I started drawing on the mini cupcake heads. Even though the heads were so much smaller than the bodies, the flat sections
 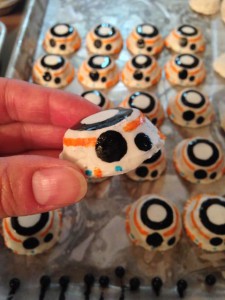 of the heads that had just been iced that morning were still not quite set, so I’m sure glad I didn’t need to draw on the bottoms, and that they didn’t glue themselves to the wax paper! I didn’t have a gray food pen, so I used black instead, but when I got the main colors on, especially the two “eyes” in front, they were looking pretty darn adorable…at least SOMETHING was working on this project!
 ![]()
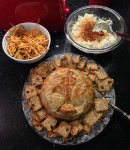 I was also bringing a pastry Brie to the Oscar party, so I took a break to prepare and bake that to let the cake balls set as long as possible. I didn’t even realize that Brie Larson was a nominee, so I just made the Oscar statuette on the Brie, with egg yolk wash on just the statuette to highlight it from the rest of the pastry. Here it is at the party next to Glen’s Martian Potato Salad.
 ![]()
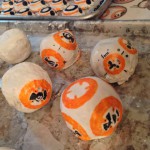 Since all the heads were finished before the pastry Brie, I continued decorating the bodies as long as I could, but I had to stop to get myself ready by 4pm, so I only got 4 done. I had thought I would transport these in a cupcake tray, but they were too tight a fit to get
 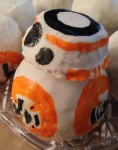 them back out again, so I frantically looked for a display plate. Luckily this rectangular faux crystal plate fit the perfect number of finished cupcakes I had, with the four decorated ones in front! Once all the heads were glued in place with more cream cheese frosting, and the extra heads were balanced between and in back, you almost couldn’t tell the
 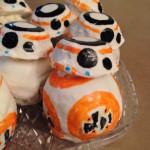 other bodies were “naked”…whew!
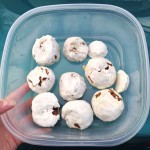 Thankfully with good foil covers holding everything in place and only driving about a mile on local streets, both the cupcakes and the Brie arrived safely to the party! I also brought the decorating rejects in a separate container since they were just as tasty as the pretty ones. Glen gladly took those home!
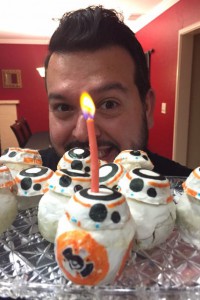
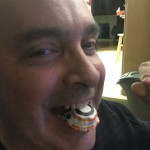
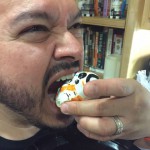
I had brought an orange candle with orange flame for Birthday Boy Jerry (BB-J!) to blow out his candles, but Glen grabbed the best BB-8 off the plate before we could sing to BB-J! At least I got some fun photos proving these BB-8s were indeed edible. ![]()


Even after all the decorating disasters, the recipes were tasty enough to use again! Click to keep reading for all the recipes used for the BB-8 Carrot Cake Cupcakes!
–
For the cake I used my mom’s carrot cake recipe, without nuts, but with brown sugar instead of white, and about 1/4 cup butter replacing some of the oil. The mini cupcakes were ready in about 25 minutes, and I kept baking the 9″x13″ cake until a toothpick came out clean from the middle.
Carrot Cake
1 1/2 cups salad oil (I replaced 1/4 cup with room-temperature butter)
2 cups sugar (I used brown sugar)
4 eggs
1 tsp salt
2 tsp baking powder
2 tsp baking soda
2 cups flour
2 tsp cinnamon
3 cups grated carrots
(1 cup chopped nuts)
Blend oil and sugar. Add eggs one at a time, beating after each egg. Add remaining ingredients and flour. Add carrots and chopped nuts. Mix well. Bake at 300F degrees for 30 to 40 minutes, until toothpick in center comes out clean. Makes 3 layers or one large 13″ by 9″ pan.
–
I used basic Cream Cheese Frosting to glue the cake crumbs together before rolling into balls, but half this recipe would have been plenty for the full carrot cake recipe.
Cream Cheese Frosting
1/2 cup butter (1 stick)
8 oz cream cheese (1 brick)
4 cups powdered sugar
2 tsp vanilla
Soften both the butter & cream cheese to room temperature. Mix the butter & cream cheese together until smooth, add vanilla, then mix in powdered sugar, in portions to avoid sugar flying everywhere. Beat until frosting is smooth.
–
I used royal icing for the outer covering, even though I wouldn’t recommend it for this purpose. To make a flood coat of royal icing, either stop beating it before it gets all the way stiff, or thin full-strength royal icing with water or corn syrup until the consistency just barely pours freely. Flood coat royal icing works great on flat baked cookies since it dries perfectly smooth for later drawing, painting or more layers of dimensional icing, like my Mardi Gras Mask Cookies.
Royal Icing
(featured inside the book Eerie Elegance)
Makes enough to ice 5-6 dozen sugar cookies.
16 oz powdered sugar (icing sugar)
3 egg whites
1/2 tsp cream of tartar
Beat until peaks firmly hold their shape, and the more you beat it, the firmer it gets. This hardens when exposed to air, but dissolves in water, so keep a moist towel over the bowl while working with it. Use a tight-fitting plastic container to store in the refrigerator for a couple weeks, but the egg whites begin to separate from the sugar any longer than that.

 Subscribe RSS