Halloween 2013

I know I’m still behind on documenting Halloween 2012, but since not only have I released new Eerie Elegance products two months in a row, but we’ve already started projects for this year, I might as well show you some progress so far!
The Eerie Elegance blog & Facebook page already announced the newest DVD “Enhanced Eerie Elegance: 13 Studies in Spooky Style” on June 13th, with several copies already sold the first month. As of July 13th, six new ghosts are now for sale, bringing the total ghost video downloads up to seven! I’m not sure there will be any more new products announced for 2013, but you never know… 🙂
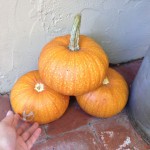
Facebook followers have already seen my progress growing pumpkins this year. Since I bought some seeds in addition to saving rotting pumpkins from last year, and planted a bunch in the ground out front with new drip irrigation starting in late March and staggering new plantings every couple weeks, they are not only healthier plants than last year’s pots, but I even have 5 pumpkins growing already! Two Dill’s Atlantic Giants are about 6-8″ in diameter, and three Sugar Pies are vivid stripy green and growing past 8″ since they got a head start by a couple weeks. I 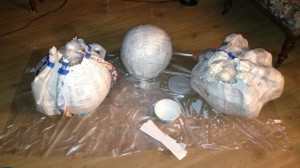 wonder how big the Giants will actually get? The plants along the pathway are the last plantings so are the smallest, but vines are starting with male blooms already. Two of those plants are also Giants, so I’m crossing my fingers for some fun natural decorations for this fall!
 I wasn’t able to start any papier-mache until last week, but already good progress is underway. I found several sizes of beach balls for super-cheap at discount party stores or dollar stores, and the largest balls are the big bouncy balls from Target. One of these will be Jack Skellington’s head, but the others will be some of the plethora of pumpkins that will decorate my front yard.
 In case you haven’t heard yet, for over 5 years now I have been planning for 2013 to be my special Nightmare Before Christmas 20th anniversary party, requiring costumes to be anything in the entire Tim Burton universe. Extra bonus is that it is my own 20th Halloween party in a row, so it will also feature some “best of” highlights from my 20 years of Halloween projects & recipes. Since I have a TON of Nightmare Before Christmas wearables, I’ve decided to wear what won’t get ruined (sequined Jack tank not for messy projects!) while doing Nightmare projects this year…like my 10th anniversary shirt that originally was heather gray, but I overdyed it teal so no one else has this exact same shirt! Bwahahaha! 😉
 In addition to my ghost writer who has helped the past 2 years, I now also have Scary Jerry of MyScaryHalloween.com joining in the fun! This past weekend was his first ever papier-mache helping start more pumpkins while I reassembled others, and designed & added stems, and we watched good ghost flick The Awakening while we worked. Projects are so much more fun with more people!

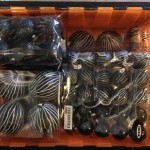
2 full hours of papier-mache is a lot of bending & shoulder lifting, so we took a break to start using white paint pens to pinstripe black ornaments like Jack’s suit. I have been buying Christmas & Halloween clearance specifically for this Nightmare party for over 5 years, so I have quite a collection of black ornaments to use. Some will stay solid black, especially the sparkly black ones, and I have a lot of orange & bronze ornaments, and even black pine garlands, with black & white paper ribbon on its way, but I think the pinstriped ornaments give a very specific Nightmare flair!
There is a lot of other work with all three of us that has been going on since about March, but we’re keeping some major projects secret…not only for a more exciting reveal, but also in case they don’t actually happen as planned! 😉
Hope your Halloween plans are going well so far, or at least you are enjoying your summer!
 It’s been a very busy summer, working on Halloween between Cinema Brittahytta movie nights, and visiting my grandmother in Seattle, but now it’s back to all Halloween until November 1st!
 Since my last update, I have harvested the 3 sugar pie pumpkins since they were already falling off the stems, and since they already started getting soft, I quickly roasted them and froze the puree so I could use them in my Halloween baking. I saved all the seeds to plant next year, since that was a good hardy crop! However the Dill’s Atlantic Giants must not like my yard or conditions, since about 6
  have set and grown to about 8″-10″ diameter, but then the rinds never harden and they rot on the vine. They are still blooming so more keep setting, but I’ve already given up hoping to get any of those by Halloween. From the seeds I bought with free Amazon points, I still have some blue Jarrahdale and white Lumina seeds I’d like to try next year when the Pumpkin Queen’s patch is needed again.
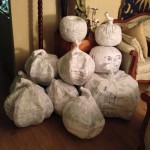 All the pinstriping on the black ornaments was finished back in August thanks to Scary Jerry! He’s helped with a lot of the papier-mache too, but I’ve designed all the pumpkin shapes myself. I just finished the final paper coat on all 13 large pumpkins that still need to be sealed and painted, then I will be purchasing some fresh ones, plus adding to my collection of plastic pumpkins to get up
 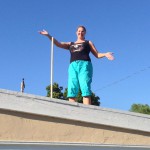 to the number we need. When I said a plethora of pumpkins, I wasn’t kidding. There will be 9 just above my garage roofline, among other places! Jerry & I were able to build the base for the spikes those 9 pumpkins will be impaled, using scrap planks and scrap 3/4″ PVC, but with purchased flange bases shimmed to the 1:10 pitch of my roofline.
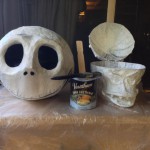 It will come as no surprise that I want a life-size Jack Skellington at my party! However, I am saving some surprises to reveal during the party, so I can’t show you everything. I can show you that his head is now almost finished, including 3 coats of spar varnish to protect against moisture dissolving the papier-mache, plus paint over the varnish to avoid the shine.
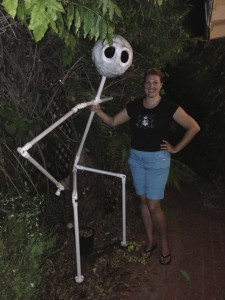
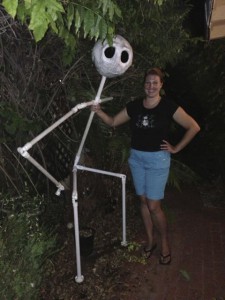 Here you can see how Jack will be standing opposite my front door just off my porch. He is crouching down to fit under the wisteria and my roofline, but I think we have the scale of his limbs pretty good. We are definitely expecting people to want to take photos with him, just like me! 😉
These are Jack’s hands, in scale with his arms and face. These are made from two different structures since we learned the first material wouldn’t work as well, so it was remade into his left hand cocked at his hip. After the tubing was cut and notched, I 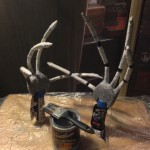 added a single layer of paper strips so the finger bones wouldn’t bend with the tubing, then sealed with varnish and painted white like his head. There has been a LOT more work happening, but that’s all the progress I can show you so far. Once I get him dressed I’ll be able to show you again. 😉
 My Sally costume is almost done! Since I’m using the same shoes, socks, wig & tights as 19 years ago, it should have been done much earlier, but I have been slammed with the secret projects that have been taking a really long time to troubleshoot. Since my yarn wig was only a loop of elastic band, and that elastic had pooped
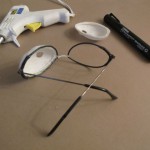
 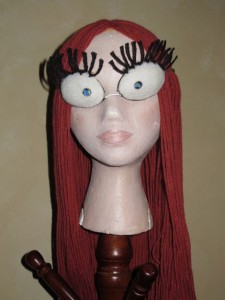 out to overstretched anyway, back around May I handstitched it all to a wig cap to improve it. In June I took the original felt eyes I shaped around eggs and mounted them on the wire frame I used in my 1997 Sally reprise, then added the temple pieces of some lenseless sunglasses I had saved. I also added black yarn eyelashes and used fabric stiffener to keep them the correct shape. Now I have perfect Sally eyes that I can easily remove when I actually need to see!
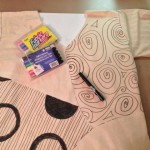 I still do have enough of my Blythe Spirit pale blue pancake base for my face and neck, but there was no way I would be able to keep makeup on my arms and hands with all the hostessing duties I do these days, so I searched long enough to find opera length pale blue matte stretch satin gloves that actually do reach almost to my armpits! Extra bonus since I was able to use free Amazon points too! I was hoping to handstitch yarn for 3D effect, but since the gloves are so stretchy, I don’t think that will work,
  so I just drew the stitches with a permanent marker, just like the tights. I’m hoping to find some fake black fingernails during Halloween Shopping Weekend that I can just hotglue to be easier and more realistic shape, otherwise I’ll use black nail polish directly on the gloves.
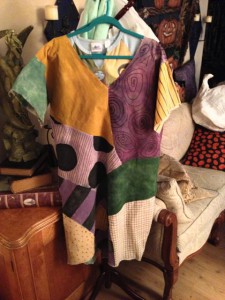
I had to make a new dress since I have changed shape in the past 19 years, mostly in the chestal area, so this time I sewed an unbleached muslin sheath dress with added pockets (no, not the pocket she uses in the movie, but hidden seam pockets at each hip), then I handpainted all the designs as movie-accurate as I could, using textile medium added to a hand-mixed acrylic paint palette. You can’t see every view on her back in full lighting in the movie, so I had to take some liberties, some of which were inspired by more vividly-colored products like my Disney pins, shirts, and other collectibles. I am really quite pleased with the handpainted texture since I think it better represents the handmade stop-animation feel of the original Sally. I still need to handstitch the black yarn on all the “seams” for the 3D texture I want, then my costume is ALL DONE, maybe even before October begins!
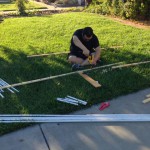 After years of wanting one but not wanting to store it, let alone the expense and work, I finally have a real need for a proper graveyard fence this year. Of course I had saved my original graveyard fence from Halloween 2003, so I thought it would be fun to use that as the design for a
 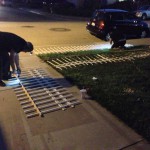 3-foot high fence. Since we could screw the plastic edging in two places to each PVC post, we only needed to drill the bottom 1×2 as the cross-brace. This was a bunch of busy work, not difficult, and the most expensive part
  was the rebar I bought to pound into my grass so the fence posts can slide over the rebar to be stable. Next will be foam spikes on the top of each post, then I will spray everything black with my handy compact sprayer in a couple weeks.
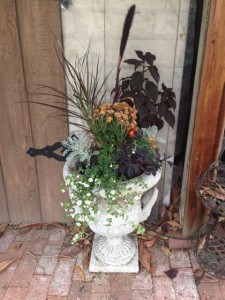 Since I have been making the rounds of hardware & home improvement stores almost every weekend for other projects, I couldn’t resist buying cool spooky plants when I saw them. Finally I found my dark purple ornamental millet again, this time in 1 gallon pots for only $6 each, vs. the 5 gallon pot for $25 I found a couple years ago. Each pot was badly rootbound and contained three plants in each, so I split them apart for several urns, plus planted two in the ground already, since mine died in the winter last time, probably from too much water in the pots.
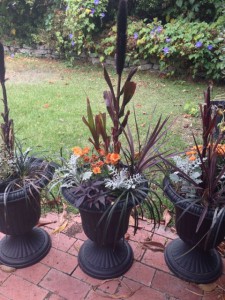 I was also able to split my pots of black mondo grass that have been doing so well in my window box. They were running out of space too, so I cut the entire outer layer away and split into the 4 black urns. My big dusty miller bush out front is starting to poop out, so I got some small 6-packs of starter for the pots now, and I can plant them in the ground after Halloween to keep my ghostly greenery supply going. Some red grass, purple sweet potato vine, and orange mums fill out the rest of the displays. So far the urns have lasted over a week in the sprinkler spray and drip irrigation, so hopefully they will stay looking nice through Halloween night!
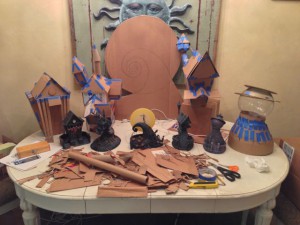 Another major project is my gingerbread Halloweentown! I won’t start baking until 2 weeks before the party, but I knew if I didn’t design it ahead of time, there’s no way I could execute with everything else last-minute that always ends up happening. I used my lighted collectible Halloweentown as models, then created mockups out of cardboard for each building at larger scale so they are easier to add details. The plan is to bake gingerbread around a glass bowl vase I have for the lab observatory “bubble,” and I hope that I will be able to pull sugar into the curly mountain. I’m not sure if I will make figures yet, since those are really tricky to make freestanding without cheating and adding internal structure, especially for Jack, so I’m ok if I do not have any Halloweentown residents as edible art this time. I have saved the battery tealight fondant jack o’lanterns that I made for the Ghoulish Gingerbread Haunted House from 2011, so that might be enough to decorate around the curly mountain graveyard pumpkin patch. I’ll use new Tasty Tombstone cookies in the curly mountain graveyard too. Hopefully this will be arranged on the dining room table inside on carved foam levels that I can cover with frosting and cookie crumb “dirt,” then there will still be room for some food plates in front as well. I’m not completely sure of all the setup yet.
I can’t believe I used to not even start major Halloween projects until October began! I remember I built my pipe organ the weekend before my party only five years ago…boy has this grown by leaps and bounds in only a few recent years! Hope your Halloween plans are going well!
 A full week ago was another successful Halloween Shopping Weekend! I love that even with both our lives getting busier every year, my childhood friend Tash and I can still make time to meet in Roseville for our Annual Halloween Shopping weekend! Roseville has superstores of Michaels & JoAnn, and Halloween City in addition to Spirit, plus a great Goodwill, Dollar Tree, and killer 99cent store that rarely disappoint. We
 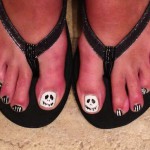 start with a pho lunch, keep shopping until we stop for dinner at Strings, then hit Target after dinner, often closing down the store, then the next day we hit the rest of the stores on our lists. Not only do we wear fun spooky clothes, but this year I was inspired by the viral Jack Skellington manicure to do my own Skellingtoes! haha…
 By the last store visit on Sunday, my new SUV looked like this! You can’t even see everything that was behind or inside the giant cauldron, but it cracked me up that one pumpkin never fell out after settling into that precarious perch. I did reorganize a lot and consolidated enough room to fit all the cornstalks my dad grew for me bundled inside a tarp that sat over the seats up to the front passenger window. Thanks again Dad!
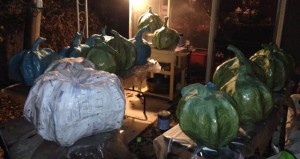 This year I have added these to my plethora of pumpkins:
10 more uncarved plastic pumpkins (cheapest were Home Depot & Target)
15 carved plastic pumpkins
13 large papier-mache pumpkins
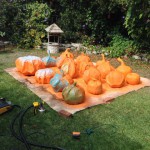 I still need to get out my previous pumpkins from the shed to see what my grand totals are, then I will still need to buy fresh pumpkins to bring my count high enough! I am finally done with papier-mache (hooray!) so during last week I used over a gallon of marine/spar varnish for all 6 sealing coats (3 top & 3 bottom) on all 13 pumpkins, then on the weekend we sprayed the orange basecoat on all of them! Now for the hand-painted shading to make them more realistic…
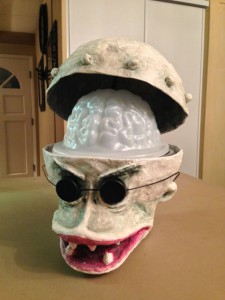 Speaking of hand-painting, Dr. Finkelstein is all finished! It was a bit tricky to paint inside his mouth, but I do like how he turned out. He was also sealed 3 full coats with the marine/spar varnish, and he survived standing water inside his head during a freak torrential downpour a couple weeks ago, so that varnish does work! Since even semi-gloss/satin is too shiny, I’m using acrylic paints over the varnish, and that brings the finish back to matte, much better for the original pale skin texture for the Doctor. I propped it up here so you can see his rivets from the front angle, but his head will be fully open at 90 degrees with a plastic tray inside, ready to serve my classic recipe the Bizarre Brain Pate. Yum!
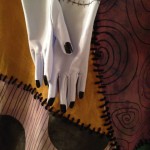 Sally’s gloves are finished with black plastic nails, and her dress has the handstitching still underway and taking forever. I can only do about an hour at a time since my finger loses grip to pull the thick needle through multiple layers of fabric. It should still be done this week at the latest. I will be very glad to have it finished during the first full week of October!
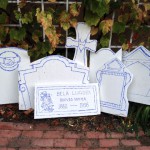 8 new gravestones were carved and painted this weekend, but I can’t show you epitaphs because they will be a new quiz for this year. I can show you this one, since it will be the obvious one. I
 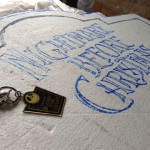 used my vintage keychain to duplicate the Nightmare Before Christmas logo to use for the 20th anniversary gravestone. When the movie came out, this was the ONLY item the Disney store had at all! It has yellowed over the past twenty years, but it’s nice sturdy metal with enamel design, so I’m sure it will last another twenty! This
  was the first time I could use my nifty sprayer on gravestones, and actually Jerry painted them for me, getting his chance to try my sprayer…it goes so much faster especially in all the carvings! Now I can use the garden hose with black spray paint aging technique, then hand-paint the detail in the carvings where necessary. I need to finish these soon so I can photograph them to be a new set of Tasty Tombstone cookies!
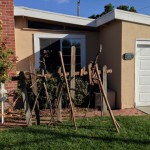 Outside building has begun! Rotting fence boards scavenged from my parents’ spring house projects plus tons of branches collected from neighborhood spring cleaning are transforming my yard. They’re not finished yet, but can you guess what these will be?
Scary Jerry has an amazing Halloween village collection for which he designs custom carved and painted foam base structures to arrange all the buildings and accessories…so of course I asked for his expert assistance carving the foam base for under my gingerbread Halloween Town! All this foam will be covered in foil, the light strings will poke through the foil, then covered with buttercream frosting, and some 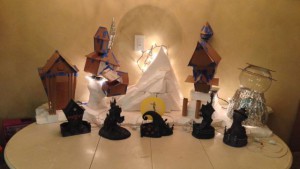 chocolate cookie crumb dirt here and there, plus chocolate rocks. To save me some strife, I have bought 3 buckets of Duff Goldman chocolate frosting from Michaels using coupons plus a bunch of black & blue decorating spray to cover all this terrain. I will be mixing my own royal icing for all the gingerbread though. The moon you can see in the photo is a glass table topper that is wegded into a thin slot in the foam mountain base. This is such a tight slot that it is holding the glass just fine. Once the glass is cleaned, covered in white fondant everywhere it’s exposed, then hand painted with pale yellow shading, I think the lights behind the glass will make it glow like the real moon…here’s hoping!
As for general party prep status, I was freaking out a few weeks ago because there were no projects actually completed yet, then finally feeling better last week that so many items are at long last being marked DONE on my list…but there is still so much to do, and some really major things are still so up in the air, that now I’m wavering back and forth from optimistic to freaking out…I sure hope enough is successful that I feel accomplished this year! At least I’m sure we will all have a fun party no matter what!
 Another exhausting weekend of party prep with the Scream Team, plus all week before that on my own every evening…whew! I now have 87 Brittle Bone Breadsticks underbaked in the freezer, ready for finish baking the day of the party, and my costume is now ALL DONE…hooray! Inside decorating is looking great, even though decking the halls still seems like Christmas even with black pine garland and orange lights. 😉 All the spooky wall art is up, but the black LED flicker candles still need to be set out. My dead Christmas tree from 2 years ago was still hanging on to its needles, but I finally got them off enough to bring it inside as a skeleton of a tree. Last year’s tree is clinging to its needles so I will use it outside as another tree to decorate. Scary Jerry put the lights on the inside tree and started hanging ornaments yesterday, but there are plenty more I’ve collected over the past several years on Christmas clearance and Disney Store online deals. Jerry has taken “homework” of present wrapping with him for this week to use all the fun ribbons, wrapping paper, and tablecloths as wrapping paper over empty boxes of various sizes, so under the tree will
  look festive too. I hope there is still time to make the spiderweb snowflakes I designed, but that might get cut for time in favor of larger & more important projects…crossing my fingers!
When I was at Home Depot yet again for more project supplies and 2 for 1 mums for my potted urns, I found a new favorite spooky plant: Lion’s Tail! These blooms are sooo cool cut for Halloween displays, and it’s a drought-tolerant plant that will hopefully do well on drip-irrigation in my side yard and get larger. Here’s hoping!
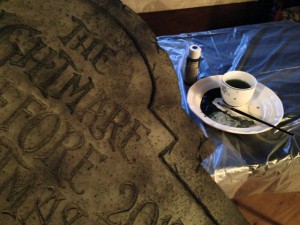 All 8 new gravestones are nicely aged and fully complete, including photos for new Tasty Tombstone cookies and a new quiz. I did the garden hose & spray paint aging one evening, then hand painted accent details over two evenings while watching the first 2013 Halloween Wars and the first episode of American Horror Story: Coven. 😉 I love how the aging technique makes the foam look just like real stone! In this photo you can see how the aging technique alone doesn’t bring out the carving detail quite enough, which is why I hand paint where necessary with watered down black paint. You can always go over again to add darker coloring, but if you start with too dark, it’s too cartoony and you might as well have just written the lettering with a Sharpie pen instead of carving. You can watch this process in action in the Tombstone Trilogy on the first DVD “Eerie Elegance: 13 Fabulous Frights” or watch the Eerie Elegance episodes available online.
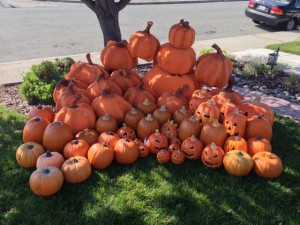 All the hand painting on 13 pumpkins is almost done! There are 2 here in the pumpkin pile that have not yet been handpainted…can you spot them? I told the Scream Team that it looks like a lot of pumpkins all assembled together, but I was afraid when I spread them out around the yard they wouldn’t look like enough…but I was told they look like even more by Sunday evening when most were in final position, so that’s excellent. 🙂 Now to buy the fresh pumpkins to add to this pile!
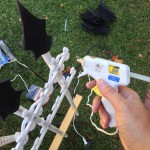 Saturday after dinner after a long building workday, Ghoulish Glen and I cut and glued 152 foam spikes for the 76 fence posts, while watching the pilot of Game of Thrones and the Dark Shadows movie he hadn’t seen. 😉 This technique is from Stolloween which I saw from Jerry’s blog last season. Brilliant idea to make menacing looking spikes that are completely safe, just like a rubber knife! The spikes had to be
 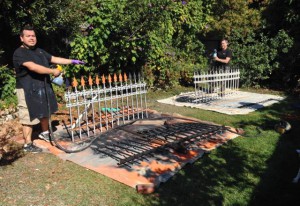 glued together first so they could slip over the top of the post, then hot-glued in final position. Some of the seams popped open during painting so we need to touch up, but they look fantastic!
Both guys started painting on Sunday while I finished gluing the seams on the rest of the spikes, then I kept gluing the spikes on the posts while they were painting the fence panels that were already glued. I thought I had more of my oops paint than only 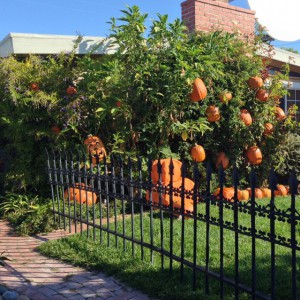 half a gallon, so we ran out of paint by 4pm…ack! I ran to the store and bought a new whole gallon of flat black, so that was plenty to finish, but then our sunshine left before the last coats went on, so we decided they could dry just as well in final position, then I could touch up with a can of black spray paint where necessary. We had gotten the first two panels up before I ran to buy more paint, and when I drove back and saw this view of the bright orange pumpkins nestled among the lush green foliage peeking through the elegantly spooky black fencing, I beamed from ear to ear! 😀
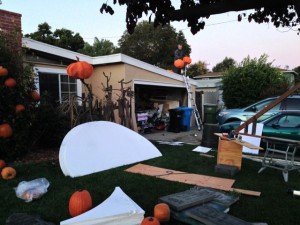 Outside building is almost done! Over 2 days it went from gigantic mess spread out all over the front yard with painting tarps all over my backyard to almost party-ready! I will let you guess how this will all work together since I’m still saving several surprises. 😉 We used enough of my branch collection since the spring that the rest are now in the yard waste can or cut up for firepit use. The gravestones won’t be placed until next weekend when I have all the fresh pumpkins going into position with them.
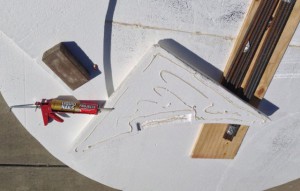 Yes, that is a giant moon you spotted! A bit difficult to hide, so I’ll show you the funny story, but still won’t tell you everything. 😉 I have wanted a moon as part of this decor for several years, but I know that foam catches the breeze much too easily, and a large sheet of foam with a seam would be even trickier. Between my three ideas and Ghoulish Glen brainstorming at Home Depot Saturday morning, by Saturday evening we had a plan we thought had the best chance of working, including the wood frame built and ready to paint, but I needed some really good adhesive for the foam. I bought the adhesive Sunday morning and got everything glued together in my driveway before the rest of the Scream Team arrived. This is two 4x8ft sheets of insulation foam 1.5″ thick,
  cut into half circles, the seam glued from the back down the length, a scrap of plywood perpendicular to the seam, then the corner scraps of the same foam sheets glued around the edges to help reinforce the foam from snapping off in any wind. I even notched the foam to fit snugly around the plywood edges and glued those down with weights to give it the best chance, then Glen went over everything later from all angles with the pin nailer in hopes of acting like hooks in the foam.
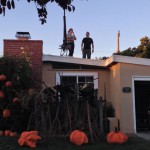
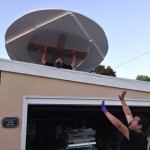 We had painted the angled wood frame on Sunday afternoon, and I wanted as long as possible for the adhesive to set before we attempted moving the moon, but I didn’t want to run out of daylight, so we started around 6pm to get it up to the roof. We used Glen’s Workmate portable workbench as a base, firmly anchored the angled wood frame in the vise of the workbench, then we passed the moon up to Glen on his
 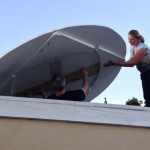 back on the roof…haha! He held that position until I got up to help him, and then we figured out quickly that we would need Jerry up there so we could each hold a side of the moon while Glen could screw the bracket onto the top of the frame. Even though Jerry
  was worried, he thankfully screwed up his courage and helped us…thank you SOOO much! We absolutely could not have hung the moon without Jerry’s help! I did notice the ladder angle was pretty steep, so I repositioned it so it was more like stairs, and we got Jerry down safe & sound.
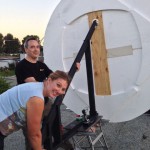 After we got the moon in position, we were still worried that if we did get a gust of wind and the foam did not snap off, it might act as a sail and send the whole structure off the roof into my
 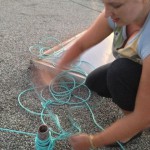 yard…so in addition to using Glen’s exercise dumbbell he had brought before for other testing, I got my strongest rope (yes it happens to be aqua!) and we lashed through the corner of the wood frame around both drain vent pipes on my roof. The foam might still snap off if we get a strong wind, but so far it seems pretty darn stable, so it just might work!
There is still so much more to do, especially the secret projects I can’t reveal. 😉 Jack still needs clothes, more front yard props still need finishing but are at least in process. The patios have been messy work areas still, thank goodness I can spread out there, but now I think we are done enough with major building and painting that I can clean those up this week, arrange furniture, then decorate there. Jack’s laboratory might be a bit tricky so I want some time to see what works best. I will leave you with my front door wreath made from 95% clearance black pine wreath & garland, plastic battery 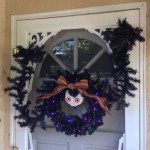 eyes I’ve had for probably over a decade, purple battery lights from Ikea and fun wire ribbon from Hobby Lobby. It’s harder to tell in the photo, but the hands at the top of the door are reaching out, but anchored to the door at the wrists so it’s safe and won’t get tangled in anyone’s costume as they open the door all night. All it needs now is some teeth, and I just splurged on some pumpkin teeth from Spirit that should look great!
That’s all from me until next time, but there’s probably only time for one more party prep progress update before my party! Hope your Halloween season is fun so far!
Boy is it crunch time! This was the last Halloween Scream Team work weekend before the party! It’s definitely a marathon this year going into the last push this week, so we’re trying to make sure we all get enough rest so we can make it to the finish healthy enough to enjoy it!
One thing I haven’t mentioned yet here is that to celebrate my Twenty Halloweens, I’m collecting for Trick or Treat for UNICEF, in cash at my party and trick or treaters Halloween night, but also via PayPal if you’d like to help celebrate! I will take everything collected by November 5th and send the total to UNICEF. I hope we can be festive for a great cause, since UNICEF’s Trick or Treat program has been running since 1950, and the U.S. Fund for UNICEF spends 90.4 cents of every dollar they receive on programs that help children. Only 6.7 cents goes to fundraising, and 2.9 cents to administration. So 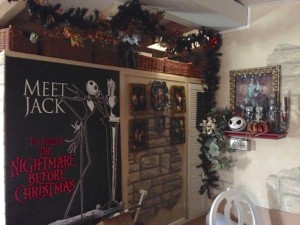 many other charities have so much money go to marketing and administration, but UNICEF sends most to the children who need help.
I have taken my Nightmare Before Christmas collectibles (except shirts, pajamas & slippers!) and distributed them around the house on shelves, bookcases and things, so that should be fun for people to discover during the party. Here you can see the only spot large enough to hang my giant bus poster from the original movie release is covering my hall closet doors! You can also see some of the black pine garland with extra fun decor over the archway.
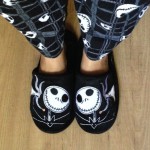 Speaking of slippers, I bought these probably 10 years ago at Disneyland, but have been saving them in my closet so I wouldn’t ruin them. I decided that wearing them these couple weeks they should survive, and it’s the perfect time to enjoy them. Nice that it’s finally cool enough at nights to enjoy my flannel Jack pajamas too. 🙂
 All the food I can do in advance is done until I start gelatin body parts on Thursday evening so I can paint them late Friday. The Brie en croute and other cheeses will be tackled on Friday, and fresh fruit and veggies aren’t until the day of the party.
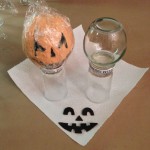
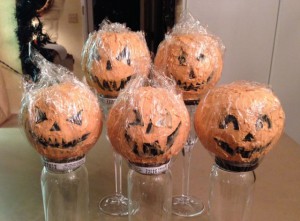 I’ve taken a previous winning Creepy Cuisine entry and turned it into small Glowing Jack O’Lantern Cheese Balls to surround the gingerbread village and make all the food tables festive. The Creepy Cuisine winner used hard cheese for the face inserts so it would be thick enough for a wide cheese wall before the glass. The cheese has a tendency to crack for more intricate designs, so I decided to try using some of the fun foam scraps, washed thoroughly first of course. The foam is thin, so you can’t have as thick of a cheese wall, but I compensated by adding extra cheese to the sides and back. After the cheese has set solid in the fridge, you need to scrape any cheese edges away from over the foam and peel carefully, but it works great! Using the same technique over a larger glass bowl (that first needs to be baking support for Dr F’s lab building), I will make a big plain cream cheese glowing Jack Skellington head that will be in his laboratory. 🙂
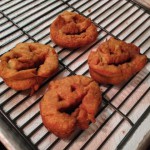 Thanks to Scary Jerry manning the deep fryer while I prepped them, we blasted through 9 dozen Donut be Scared Peekaboo Pumpkins on Friday night so they’re in the freezer for reheating day of the party. However if you get too much flour in the folds when re-rolling the dough, your pumpkins can explode like these! Nice to have snacks for all three of us, especially while smelling them the whole time we were making them!
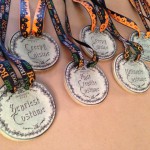
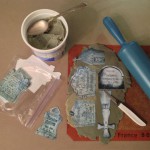 The new Tasty Tombstones & Edible Medals are baked, also using the plastic trophies with updated labels. One new quiz sheet is ready to print, with Haunted Headstones and Ogle the Owls, plus a secret extra bonus question. 😉
 This year’s Spooky Music Quiz is all ready to go, including clips that include what number they are so I don’t have to yell. Why didn’t I think of that before?!? The AirPlay Remote app is working with my master iTunes on my MacMini and whole house speakers, so I can control volume, stop & start playlists on my iPhone, and I even added conductive thread to a couple fingers on my Sally gloves so I can use the touchscreen in costume! This means I can run the quiz from the backyard where there is more space, and everyone can play anywhere in the house or yard, as long as there is enough light to see the quiz sheets. 😉
 My third webcam arrived on Friday, and I got it working on my internal LAN by IP + port, but can’t get the Mac Mini server to allow connections through it using DNS so it’s not reachable from outside yet. If I can’t figure that out this week, at least it can be image captures during the party showing Sally’s Potions and a bit of the backyard tables and chairs. Whatever is working by then will be live during the party at camera.britta.com, but fair warning my Comcast internet service has been nigh unusable many evenings this week, so I can’t guarantee they will be accessible during the party…sorry!
Jack’s clothes are well underway and looking quite dapper! We need the clothes to be removable for the last few days, so the plan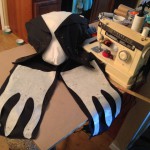 is all seams to velcro in back. I’ve made a big white pillow as his torso, stuffed with 16 years of batting remnants after making baby blankets for friends, cut the arms and legs as long rectangles so they can be pinstriped before sewing, then fitted his jacket with tails to the torso pillow. I need to find a button in my stash, and only the arms have been pinstriped by Jerry so far since the paint pens were running out so I have a lot more painting to do, but the jacket is completely sewn except the arms, including interfacing on his squiggly coattails so you can actually see their shape hanging behind him.
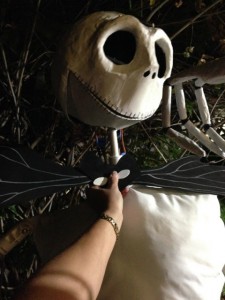
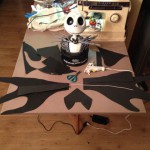 I am loving Jack’s batwing bowtie. For the costume version, I used black fabric and wire, but after using the fun foam for all the graveyard fence spikes, I thought that might work better to support itself. It still needed wire reinforcement from the back side, so I hotglued some stiff electrical wire from my stash between a scrap foam layer, but this looks awesome on him!
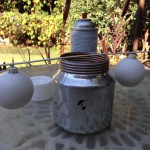 I had sewed most of the snake last month, but due to other projects I didn’t get to sew the head until Saturday, then I dye both sections yellow but alas it wasn’t the bright yellow-gold I wanted. I couldn’t find matching balls the right size, so I sacrificed 2 of my gold shatterproof Christmas
 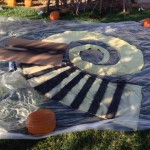 ornaments and painted them white. Sunday afternoon I spray-painted black stripes using scrap cardboard as masking along the way, then filled between with a brighter yellow spray paint. Jerry stuffed the entire snake with all the bubble wrap, packing peanuts, and newspaper I had, not an easy task since the
 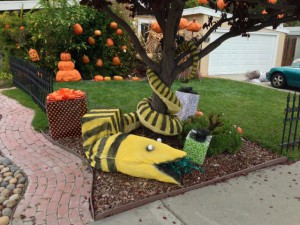 tail is sooo long! This is almost exactly what my vision was, how he curls around the tree perfectly, he is already digesting one of the presents, and has almost finished chomping a whole tree!
The lighted present boxes had also been started a couple months ago, but finally finished this weekend. I had cut acrylic sheets & clear corner protectors to the right 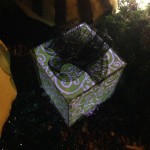 sizes a while ago, and prepped interfacing to diffuse the lights inside. There was enough wrapping paper
 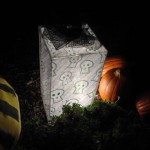 left that looked good so I only drew one design from scratch. The black bows are large mesh ribbon doubled over, and the orange bow on the biggest present is all fun foam so it will keep it’s shape. I really love all the color variety out front! Snakey needs a spotlight, and I
 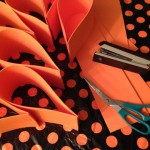 need a smaller light for the tall skinny present since I like the soft glow of the small green one better, so I’ll be shopping for more lights tonight. Glad I have a couple more evenings to try out more lighting design!
Patio decorating has begun but still has a way to go. I have rearranged the couch and table for Sally’s Potions in Dr. Finkelstein’s lab on the outer patio, but that table still has a couple final projects in process before it can become food display for the gelatin body parts and other classic “experiments.” Jerry decorated my other tree on Sunday, and it looks great with its natural orange needles! I switched the skull fountain into a 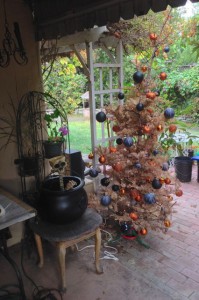 new watertight cauldron so no leaks this year. The bar area is well underway turning into Jack’s Library Laboratory, with a new Laboratory Libations sheet to mix your own experiment, but the Christmas experiments in process still need to be set out along with the potion bottles, glassware, and there are a bunch of Halloween storage boxes still out there for now.
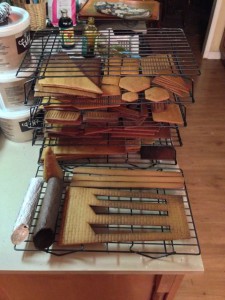 Last night I started baking the gingerbread Halloween Town in hopes I’m done by Friday, since there is other food prep starting Thursday night! I’m a few hours behind since the dough was fighting me until I figured out to only make a quarter of a batch so I could roll while still hot. I’m trying to embed textures in the gingerbread so I can paint instead of icing everything, but that is only working intermittently. My structural gingerbread recipe includes soda which makes it puff, so tonight I’ll try a batch with no leavening at all to see if the textures stay better during baking. We did get the tablecloths under the foam base Sunday night since I don’t plan on moving the base after decorating it all. I hope to put all the final decorating touches on the rest of my house during the downtime during baking or waiting for pieces to dry or set, and have Halloween Town fully photographed so we can demolish and consume it before people leave the party!
I wish I could have taken the whole week off work, but I am taking Wednesday through the rest of the week off. All that “extra” time will be finishing the gingerbread I’m sure! There are still some major secret projects underway we’re hoping will make it in time, so Ghoulish Glen will still be working on those every night this week!
See you after the party…woohoo!
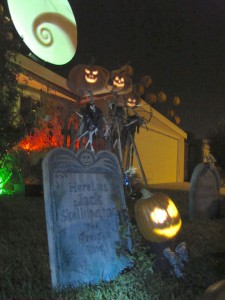 I am over the moon that last Saturday night was a very successful 20th Halloween party! I know we had over 70 people including kids & babes in arms, but we might have actually broken the 80 mark, and STILL had food left over! I couldn’t keep up with all the costume photos, so I am extremely thankful to fantastic photographer Cat Rodery for all the fabulous photos she took with her professional equipment! You can view the full resolution versions in all their spectacular glory on Cat’s website, but by viewing the album on her professional Facebook page you can see all the fun comments so far. 🙂
First of all, thank you to the party guests and trick or treaters who donated to my Eerie Elegance Trick or Treat for UNICEF Fund since we raised $115 for a good cause! There is still time to donate via PayPal until November 5th if you’d like to join us!
Eleventh hour chaos with two major secret projects (to be fully covered in separate posts later) led to gingerbread assembly of the Halloween Town village not even started by late Friday night, so I decided just Spiral Hill with the glowing moon, glowing pumpkins and new Tim Burton-specific Tasty Tombstones should still be an impressive centerpiece. It still took me probably 5 hours and 3 big buckets of Duff Goldman 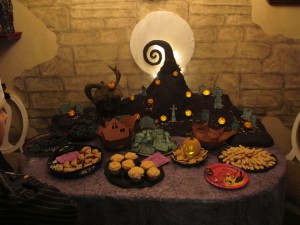 chocolate fudge frosting to cover it all! Since the two halves of the observatory worked as bowls, I served the gingerbread pieces as Deconstructed Halloween Town. The way the gingerbread was bending through the night from ambient moisture, it might not have survived assembly anyway. Otherwise I only had minor details from my wishlist that didn’t happen, like the spiderweb snowflakes, food signs saying
 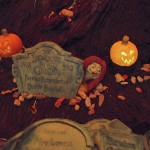 how long I’ve been making them (Eerie Eyeballs since 1994, etc), the Winners Wall, and carving any fruit or veggies into fun faces, which often is cut for time anyway. For so many ideas I’ve been saving for years now, plus having added those major projects and displays just this year, I am quite pleased at how much we were able to do!
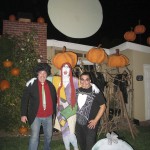 Of course the only reason we could do so much were the Halloween Scream Team plus my house-elves on Saturday afternoon, Kathy and my mom, also first-time Halloween party guests! My house-elves blasted through the list I printed for them in the two hours before the party, which was all the fresh fruit, veggies, Violent Vertebrae, cheese & bat wings, even including Kathy painting the eyeballs for me! That was the first time anyone else has
 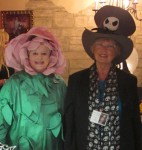 ever painted eyeballs for my party, but since she uses the techniques in my Enhanced Eerie Elegance book and Easier Eerie Eyeballs video, she did a great job!
My last major decor project in the afternoon was getting the stripey bows and autumn ferns arranged in the graveyard, then I was in full makeup and most of my costume by 5pm but no wig, gloves or eyes, and wearing my teal skeleton apron so I could keep working on all the final setup. Glen made all the tables and chairs look  nice, batteries into lights and small jack o’lanterns, and hauled 6 big bags of ice for the big cauldron and party reserves in the garage sink, while I put final touches on all the decor. At 6pm, we got the main projection working and aimed properly, all battery lights turned on, turned on the Jack and Zero setup, I turned on the Sally projection in my bedroom, then I
  thoroughly sprayed Glen’s black wig into Tim Burton messy style, touched up my makeup a little, then had my wig on by 7:20pm! Jen & John helped fill the punch bowls when they arrived, and my last projects as other guests were arriving was to change the arbor bench to an impromptu food table, and finally arranging Jack’s lab to show off all his experiments…whew!
 By 8:30pm the party was already full of people as I got the bat wings out of the oven, then it was party time for me! I passed out the Haunted Headstones and Ogle the Owls quizzes for everyone to do at their leisure. I got whatever photos I could, but there was so much going on that Cat was a true lifesaver with her attention to getting good photos of decor AND people! By 9:30,
 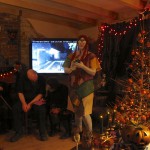 people were starting to talk about leaving, so I hurried to start the Spooky Music Quiz. I had planned the quiz to be run from outside, but enough people were in the living room that I stayed there mostly anyway, going out back to adjust the volume using my iPhone though the conductive thread I had added to my costume gloves. It was very nice that I had finally thought to record the number in front of the audio clip so I didn’t have to yell this time. 🙂 After we were done, I ushered everyone out to the backyard so we could grade the quizzes and vote for costume and Creepy Cuisine prizes. I really like the interactive group voting instead of the paper ballots I did for years, so this is the new tradition….and here are the winners!
 We had a tie for 100% on the Spooky Music Quiz, which was various unique covers of the Nightmare Before Christmas soundtrack you had to put in the order you heard them played. I was very glad I made both Edible Medals and little trophies, so I had plenty of prizes! Here Jessica is awarded the Edible Medal for Spooky Music Quiz.
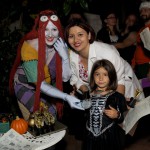 Nathania not only tied for Spooky Music Quiz, but also was Outstanding Owl Ogler and Haunted Headstones Hero!
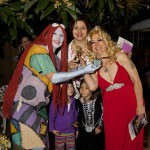 Nathania & Kaye tied for Haunted Headstones Hero, but Nathania got the bonus question of which Singing Scarecrow was which member of the Halloween Scream Team!
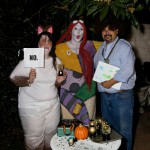 After the quizzes were awarded, it was onward to costume voting by crowd cheers and applause. Scariest Costume was a tie between Grumpy Cat Jen & Bob Ross John…the Edible Medal almost didn’t fit over that epic hair! 😉
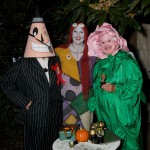 Most Original Costume went to Mayor Doug and Talking Rose Kathy, both excellent costumes! Boy was I glad I had double prizes to award!
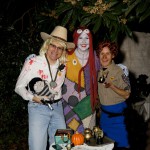 Ultimate Costume went to Galt & Lyle’s Retrospective of Twenty Halloweens! They put together pieces from costumes from all sorts of costume parties I have hosted. Brilliant idea!
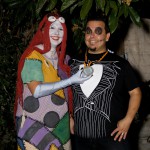 The first Creepy Cuisine award went to Scary Jerry for so many delicious entries like pumpkin cupcakes & meat pies!
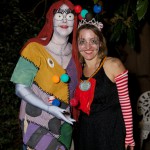 Several more were voted in absentia like Robert & Maureen’s Mummy Fruitcake and Kevin C’s coffin smoked potatoes, but I couldn’t award them prizes when they had already left…darn! Glad Rozanne the Pin Cushion Queen was still around to accept a prize for her Finger Meat Pies! Not bad for a first-time attendee! 🙂
Since I had strongly encouraged costumes from anything in the Tim Burton universe, we had a lot of duplication, especially from Alice in Wonderland, but boy were they all fantastic costumes and so much creativity in interpretation, like Baby Alice Kira was wearing White Rabbit slippers while her mom Angie was the teal Cheshire Cat! The only group we didn’t get was all 3 Tim Burton’s together. 😉 Cat herded everyone together for some fabulous group photos…and I didn’t realize until someone else pointed out that the Nightmare Crew photo has THIRTEEN people…how perfect!
Barrel Obie, Shock Marcie & Lock Steve demonstrate effective minimalist costumes! 😉

There were so many Mad Hatters they had their own tea party!

Tim Burton Craig & Tim Burton Glen Directing the Outside Display

At least we caught two of the Tim Burtons in action “directing” the outside display (Craig & Glen)! For the other Tim Burton movies, we had a Pee-Wee Herman (Marco), Sweeney Todd & Mrs. Lovett (Nicholas & Elisabeth), a few from Dark Shadows (Nathania, Kaye & Jeff), a Corpse Bride (Mary Jo), and of course Cat’s own costume was so absolutely perfect for her since Lydia Deetz from Beetlejuice also carried around a giant camera. Cat was so dedicated to her costume authenticity she brought her other big camera to hold while her best camera could take a photo of her! 😀
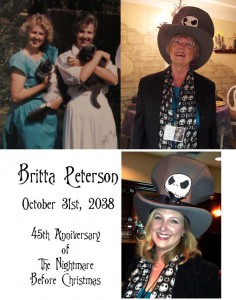 My mom isn’t really enthused about costumes these days, even though when I was young I remember she & my dad going to adult Halloween parties without me as a Rubik’s Cube, outhouse, and other creative things. When I heard she was coming to this party, I thought of how we look so much alike, and thought an easy costume for her would be to wear my giant Nightmare top hat with Jack scarf, duplicating this photo of me, and saying she was Britta from 25 years in the future! She found a great old photo of her at my current age and had a name tag showing the photo of me in the same outfit she was
 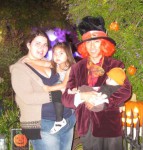 wearing. She didn’t win a prize but people got a kick out of it! 🙂
I don’t know where Jeff & Audene were for the costume voting, since I really think they should have won Most Original Costume. The concept was brilliant: Little Julianna was the Danny Elfman Music Fairy, and Jeff as Johnny Depp could change between movies by changing just a few accessories! I saw the Mad Hatter in the tea party group, Willy Wonka inside for a while, and Barnabas Collins towards the end, and I don’t know if I missed any others! His vampire cape was the one I made him in 1994 when I made my first Sally costume, so it was also a celebration of Twenty Halloweens!

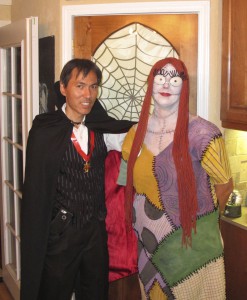
As the party was winding down, we ended up in the Undead Room watching the slideshows and videos of all of my 19 past Halloween parties, having fun reminiscing and laughing. When the bleeding heart came on one video, we decided we should sever and serve this year’s! Thanks to Eileen for catching it on video! You can see the little Danny Elfman Music Fairy being indoctrinated into Halloween spirit by helping catch the blood stream in the goblet! 😉
Now let me take you on a tour of the decorations. As you approach the house, you see three Singing Scarecrows, the Pumpkin Chorus in the graveyard of 13 all Tim Burton character gravestones, Jack in the Box peeking out, Snakey chomping the presents & Christmas tree in front, and the 8-foot moon screen above it all. They all sing This Is Halloween from the Nightmare Before Christmas movie of course!
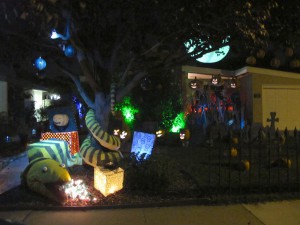 This was a huge amount of work by the entire Scream Team, not only Snakey and the lighted present boxes and new gravestones, but making larger papier-mache pumpkins than I could buy, filming our own faces made up as black & white jack o’lantern faces and lip-syncing to the song many many times, lots & lots of video editing by me, and the final evening it was still touch & go getting placement correct plus a final render that was finally party-ready at 6:30am! Full details will be forthcoming in another post of course. To give you an idea of the full experience, here is a walkthrough from the front sidewalk around the tree and up the walkway to the front door…
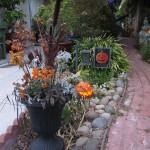 As you come up the walkway towards the door past more jack o’lanterns and black urns filled with gorgeous Ghostly Greenery, Jack Skellington turns and starts talking and gesturing to you and to Zero the Ghost Dog back at the gate. I made our life-size animatronic look like Jack, including body design, angles, head, functioning papier-mache jaw joints, moveable fingers & clothes, but my
 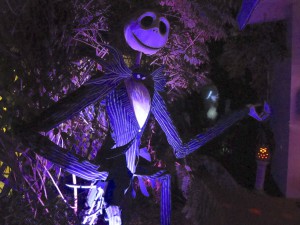 Halloween Scream Team was essential in making him come alive. Glen did all the research for servo work, electronics work, infrared trip sensor, and did all the movement programming, with Jack accuracy review by me. I wrote the script and barked as Zero, and our Jack voice was Jerry then digitally altered to sound more like Jack. Home-filmed footage of Zero barking & flying in loops was rear-projected at the gate on a screen with his physical carved foam gravestone in front. We were so pleased how it turned out and everyone at the party absolutely loved it! A Halloween Scream Team group effort for sure! More details of the trial & tribulations of this setup will be in a later post.
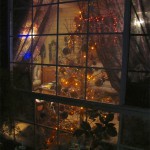 Next you see the Halloween tree through the spiderweb lace curtains, then enter to see the Undead Room in all its festive decor, with the Catoween tapestry, spooky pillows, black pine garland decking all the halls, orange lights, gargoyles covering the piano, and even colorful wrapped presents under the tree.
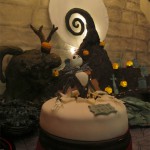 Continuing into the dining area, you see the edible Spiral Hill from the movie with glowing moon of fondant over glass tabletop, glowing sculpted pumpkins and shortbread Tasty Tombstones of all new designs I carved in foam this year for the pumpkin graveyard.
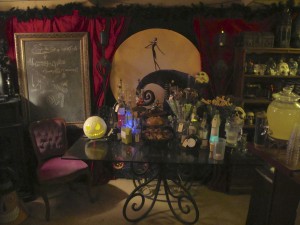 As you follow all the partying people, you enter Jack’s Library Laboratory, with bookcases at either end, and luscious red silk curtains framing the view out the “window” of Spiral Hill, where Jack is wandering, taking a break from performing his chalkboard calculations and Christmas experiments on his lab table, such as boiling ornaments, dissecting a teddy bear, and attempting Christmas candy that turned spooky. Even his purple tufted velvet chair is still ready to continue his experiments. The brie
 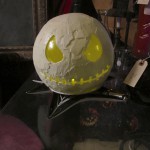 en croute was Jack’s face this year, and I covered a glass bowl vase with cream cheese to make a glowing Jack Skellington Cheese Ball. Yes, I saved that big moon main section of the movie theatre standee for 20 years since I was working at the theatre during the original movie release! It made a great “view” since we could see the glowing foreground pumpkin graveyard through the glass tabletop.
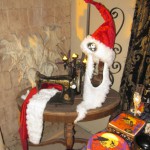 Through the archway door and stone columns, my outer patio was another food table with two punch bowls, skeleton hand goblets, and a projection of Sally mixing potions from the movie on my bedroom sliding glass door. Here is video of Sally’s Potions area, with Frog’s Breath Punch, Dr. Finkelstein’s Bizarre Brain Pate, the Frightful Skull Fountain, Sally’s Sewing Corner, a Halloween tree, and Sally mixing
 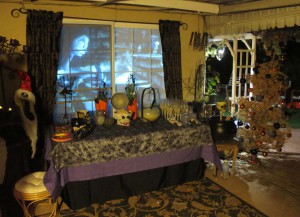 potions in the window. I saved my real trees from both past Christmases out in my yard, but all the needles still clung strongly to last year’s tree, so I thought it looked nice with orange needles and we had enough ornaments to decorate both trees. Sally’s sewing corner was an antique sewing machine on the corner table, with scrap red velveteen and white fur like she was sewing the rest of Jack’s Santa outfit, since the hat with beard was already finished on the stand.
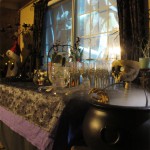 Frog’s Breath Punch is my Bubbling Witches’ Brew recipe in a new glass cauldron with dry ice. You can also spy Dr. Finkelstein’s Bizarre Brain Pate and Sally mixing potions in the window. You probably already saw the construction of Dr. Finkelstein from the party progress posts. I considered this a minor detail but several people were very impressed how movie-accurate he looked and that the concept was so perfect for my classic brain recipe. 🙂
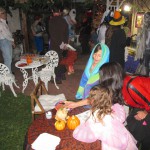 When I put out chairs on the back lawn in previous years no one seemed to use them, but this year Jerry suggested small tables with chairs. This worked very well and will be a new tradition too! Since I actually had my two small round tables free, plus the half-cardtable we’d been using all summer as a work
 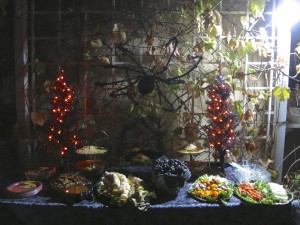 table, I got out all the extra chairs and set them up with a food table under the movie screen trellis, moving all the other yard furniture and the wishing well to discourage anyone wandering into the projection area towards the fence and gate. I hadn’t planned to use my giant web or any big spiders, but when I got the food table set up, the trellis
 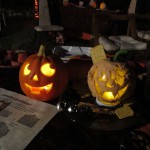 was practically screaming for it! 😉 The 4 prelit short Halloween trees I got on clearance last year decorated the food table and the cardtable, and each table got a small battery jack o’lantern, plus a Glowing Jack O’Lantern Cheese Ball. Huge thanks to Glen for getting all the chair cushions on, tablecloths on and batteries working for this to look great when guests arrived!
Halloween night I only got about 85 trick or treaters, but a few groups were so enthusiastic, videoing everything and pointing out details to each other, that gave them a guided tour of the inside decor as well. My 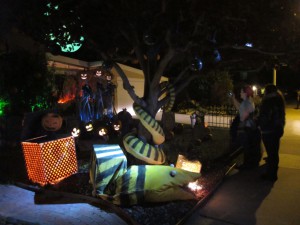 favorite of those enthusiastic groups was a family with their little boy about 5 years old who just came back from Disneyland and has been watching the Nightmare Before Christmas on constant rotation the past few weeks. He was so amazed by talking Jack, the singing pumpkins, and everything that it was a real joy to see! He even answered Jack a couple times, and kept excitedly pointing all the details out to everyone. I couldn’t resist taking a few snaps of my new “fans” watching the front show. 😉 We took the moon screen down on Halloween night around 11:45pm, and I took the gravestones and all electrical in the night of Nov 1st so I could finally turn my yard irrigation back on. I need some time to saw apart all the scarecrow branches and spooky fence (we pin-nailed them really well!), and all the pumpkins are still up for a while until I figure out where I can store them all.
My gallery of over 200 photos is included in this post below (a few are crops from Cat’s collection), and don’t forget to look at Cat’s 200+ photos on her main website, or her professional Facebook page too! Plenty of party photos for you people to peruse while I keep working on the big how-to posts for the secret projects of Jack and Zero plus the Singing Scarecrows and Pumpkin Chorus! Hope everyone’s Halloween was as fun as mine!
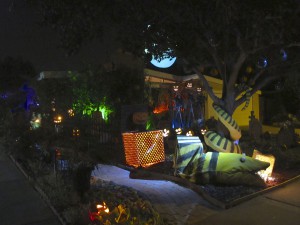 The Pumpkin Chorus show in the front yard was a LOT of work for the entire Halloween Scream Team! Not only decor projects I already showed during the summer, like Snakey coiled around the tree, the lighted present boxes, building scarecrows and an old fence from scrap wood and branches, a new “iron” graveyard fence, carving and painting 8 new gravestones, and making, sealing, and painting 15 papier-mache pumpkins larger than I could buy, but also filming ourselves made up as black & white jack o’lantern faces and lip-syncing to the song many many times, lots & lots of video editing by me, then the final evening it was still touch & go getting placement correct plus a final render that was finally party-ready at 6:30am! Since this was one of this year’s secret projects, now I can reveal how we did it…
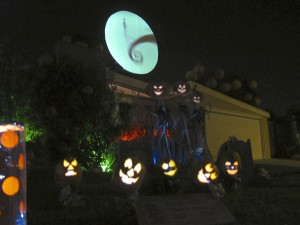 Glen had been surfing YouTube over New Years and found one guy who did whole-house projection from his front yard with a super-short-throw projector, plus another guy who filmed himself in makeup to make a few singing pumpkins. Since I had already wanted as many glowing jack o’lanterns as possible in the front yard anyway for Nightmare Before Christmas, our new vision was like the Tiki Room at Disneyland, so at first it would look like the pumpkin faces were just glowing like the carved plastic ones, but then they would surprise you by waking up and singing.
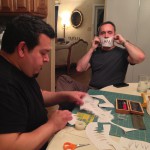 The basic technique is demonstrated in this video where we saw it originally: draw black “holes” of a jack o’lantern face on a white face and cover the rest of your head with a tight-fitting white t-shirt so it blends with the white makeup. Try to cover any natural holes like nostrils in your “carved” design otherwise you will see them too. Keep your eyes closed or you’ll see eyelids move and reveal white eyes inside the black eye designs, so you’d better know your lyrics by heart! White teeth will show inside your black mouth design too, so try to lip-sync with your lips over your teeth. Yes, too many things to remember and it got tricky, so thankfully many
  pumpkin mouth shapes are forgiving as long as you do “ma ma-ma ma” at least in time to the words. We played the song during filming, and I kept the audio in each pumpkin face track until the final edits, since that was very helpful to line everything up together for timing between the different pumpkin takes.
 We had four filming sessions over the summer trying out different face designs, since we wanted to have as many pumpkins singing as possible. We did try some paper and foam cutout mouths, but it was too difficult to prevent hard lines around the edges, plus they didn’t move very well with our own mouths. We got better over time of course, both at designs that moved the best with our own eyebrows and mouths, keeping our eyes closed and hiding our teeth, and makeup application. I’ve had plenty of makeup fun for stage and costumes over the years, and Jerry was a theatre major in
  college, so he had his own kit, but this was Glen’s first full-face makeup ever. 😉 The trickiest was getting the sides of our faces to not have sharp shadow lines too close to the moving facial features to mask out. Soft shadows would usually fade away when I adjusted the contrast and gamma settings in Final Cut Pro, but I spent countless hours with an 8-point garbage mask & keyframes masking out my own temples since my eyes are so close to the sides of my face! Argh!
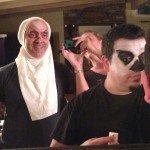
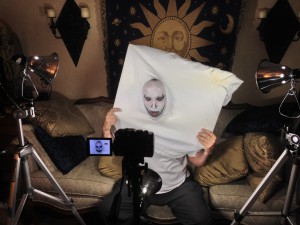 For the white “wimple” (anyone else thinking of the Sound of Music nuns, or is that only me who played Maria in 6th grade? haha!) we finally discovered that white fabric bandage tape over the fabric seam and my skin gave the least line around my face, but we had to be careful there was no makeup where the tape needed to stick, plus the tape
 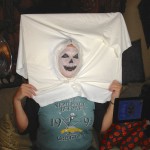 couldn’t be too close to moving features either. Use very bright light close to wash out any shadows in your white areas, since as long as they aren’t too dark or too high contrast compared to
 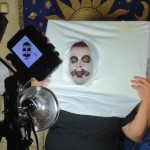 the rest, they should wash out when you tweak it in post-production. We found the best lighting arrangement was two sidelights and one directly in front clamped to the camera tripod.
After the filming is done, it’s all video editing. Since the original is black features on white, you need to invert so it is white features on a completely 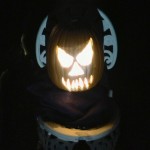 black background. I tweaked the gamma and the contrast until I got the cleanest edges I could, still not as clean as CGI but the fluid organic movement was worth it, then anything extraneous like face edge lines I masked out using an 8-point garbage mask, traveling during movement using keyframes as necessary. We ran a quick close-range test after a summer movie night and it worked well! I also had to re-center almost every take using traveling keyframes to keep them on center since the pumpkin “screen” for each couldn’t move around and they were only so large. Why is it so hard to hold your head still and in position while lip-syncing for 4 minutes? 😉
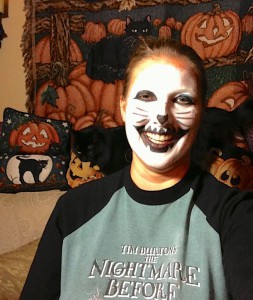 We analyzed the original video for what style of facial features worked better than others, plus learned even more from trial and error. Faces that only have the mouth move are not as noticeable especially at a distance, so my naturally expressive “eyebrow acting” became the standard. Jerry couldn’t believe how I could move mine so much and said I must have double-jointed eyebrows. Haha! In the last session, when I had already started decorating inside, Glen thought I should try a cat face jack o’lantern, so we thought it would be a funny photo with the Catoween tapestry in the background…then right as the shutter was going, Ebony jumped up on the back of the couch behind me!
The Moon Screen was separate footage, some clips from the movie like Jack and Zero on Spiral Hill, with the rest from handheld video I shot inside Haunted Mansion Holiday last November. Combining them was tricky in itself because I was often moving when the video was being filmed, plus none of 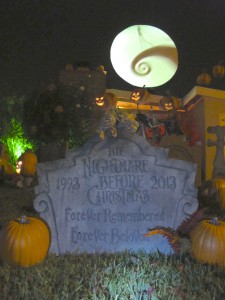 them matched in size or even color. The coffin sleigh with skeleton reindeer is only about 6″ wide and you’re on the moving track pretty fast right past it! I put them all together in one sequence, adjusted scale sizes and skewed to as round as possible, then I tweaked the colors so the wide variety of pale yellow shades met in the middle. Dissolve transitions between them also helped of course, then it was the same blank moon at the beginning and end for a clean loop. I only had so much possible footage so this loop wasn’t timed to the song, just repeated on its own timing, including in the dead time when the song wasn’t playing. That worked well since there was still something impressive going on when the pumpkins were just glowing, then when the song started it was an extra surprise when the pumpkins started singing. I have posted this Moon Montage video by itself with no watermark or credits if anyone else would like to use a Nightmare-Before-Christmas-inspired moon view for their Halloween displays!
That was already countless hours of computer work all summer, but I couldn’t finalize the video editing for projection until I knew how to skew and position everything in the front yard. Using 30% of the entire 2013 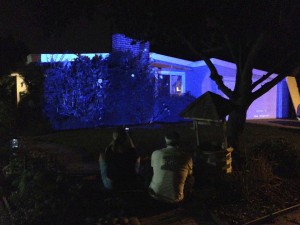 budget, in the spring I had bought a new super-short throw theatrical projector that was able to cover my whole house from my short front yard. Straight on would have been better performance but my yard is too shallow, so I put it under the front tree so it hit the house at an angle. The angle was so extreme that projector keystoning compensation couldn’t help, and images were enlarged toward the garage because they were almost twice as far away from the projector as the main house. We tested during the summer to get the correct positioning before I built the custom projector box from scrap plywood & hinges, but we couldn’t adjust all the pumpkin face placement or the moon until all that was built, stabilized, and in final position.
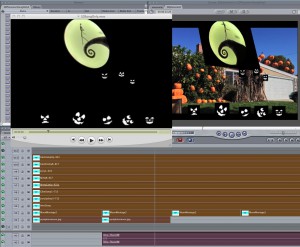 By mid-October I finally had all the pumpkin faces edited and timed together with a full minute buffer of dead time before the 4-minute song, which was a bit time-consuming to flip footage back and forth for each pumpkin to have a full minute of frozen face with seamless transitions at each flip. As soon as we got all the pumpkins and the moon screen in place, I took a photo in daylight from as close as I could get to the projector angle, but since the projector is a wider range than any camera lens, my iPhone did a better job than my Canon G-11, but it still wasn’t perfect. We knew that would only be rough placement anyway, and we would need to keep adjusting after projecting several times, but I spent several hours trying to place the faces and the moon in the same sequence in the right places, and skewing the moon so it would be round after projecting at such an angle, and all of that work took quite a while to render. Sure glad I have two computers so I can be patient and use the other laptop during rendering times!
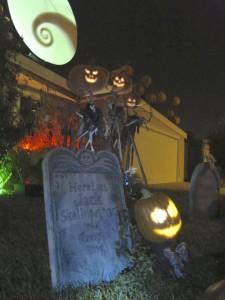 With everything else going on the final week before the party and video render times taking so long for multiple layers, final placement was a rush on Friday night, using a 1 second clip of the main sequence that would render in only 20 minutes so I could keep copying it to a USB stick and run it out to the front yard computer connected to the projector to see how good I guessed. After doing that for several hours, at 2am I finally got the placement spot-on, screen-shot all the specific placement numbers to copy into each track on the full song sequence, then 8 pumpkin faces and one moon, scaled, positioned & skewed was finally rendered and exported by 6:30am the day of the party…whew!
Here’s a video showing highlights of the entire editing process, what the footage looks like, and how it appears in the final display:
 Having the moon screen a full 8 feet across was ambitious, but it was sure impressive from even down the street! I had posted before how we built and set up the moon, but now you know why we went through all that craziness. 🙂 Once people got closer
 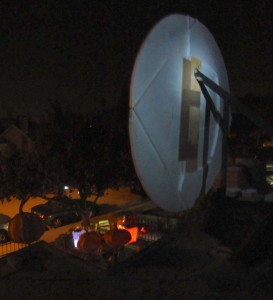 to the house, they saw the pumpkins singing too, and the stationary decor like Snakey and the lighted presents not only gave whimsical foreground interest, but it hid the projector of course. If you don’t recognize it, there is a scene in the movie with the striped snake eating a tinsel Christmas tree after already eating a present box, so that was perfect around the front tree and to hide the projector! The Jack in the Box even hid the projector beam from the walkway when leaving the house, and we had
  so many people ask where we were hiding the projector that we considered that a great success!
The graveyard fence was to discourage people from standing in the projection area and blocking the view, but during my party people went in 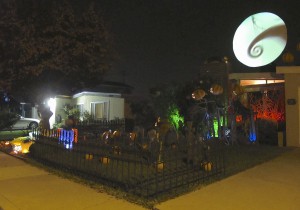 anyway. For the group photos it worked well since they were supervised so we could fix anything like tripping over cables right away. Thankfully the fence did its job for trick or treaters since none of them wandered into the grass…perfect! Did you notice that the graveyard fence looks fancy enough to surround a castle too? 😉
Here’s the full Halloween 2013 Front Show again to remind you how it looked in person…then stay tuned since next I get to tell you the secrets of how we created our animatronic Jack Skellington and Zero the Ghost Dog!
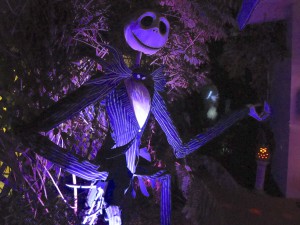 Our other secret project for Halloween 2013 was our life-size animatronic Jack Skellington who interacted with rear-projected Zero the Ghost Dog. I knew for years that I would build a life-size Jack greeter figure for my front porch for my big Nightmare Before Christmas celebration, but when Glen offered to try adding animatronics, I said YES PLEASE! 😀 Others might think it wise to start small, but even with never having any experience with animatronics, we still took on a very complex project, even more challenging than we expected since Jack’s proportions are so much longer and skinnier than any human!
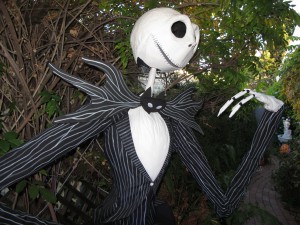 This was a Halloween Scream Team group effort for sure! I made him look like Jack, including body design, angles, head, functioning papier-mâché jaw joints, moveable fingers & clothes, but my Halloween Scream Team was essential in making him come alive. Glen did all the research for servo work, electronics work, infrared trip sensor and did all the movement programming, with Jack accuracy review by me. I wrote the script and barked as Zero, and our Jack voice was Jerry then digitally altered to sound more like Jack. Home-filmed footage of Zero barking & flying in loops was rear-projected at the gate on a screen with his physical carved foam gravestone in front. We were so pleased how it turned out and everyone at the party absolutely loved it!
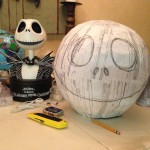 So, how did we begin? Well, of course our backup plan was that Jack could just stand there, so he wouldn’t be completely wasted effort, but since our grand plan was to make him move, we designed him for movement from the beginning. Glen had been researching online since the spring, so by June we had we had a plan of attack and purchased what we hoped would work, including an 8 channel Medusa DMX controller board, Enttec Open DMX USB adapter & cable, and Brookshire visual show automation (VSA) software. While the adjustable spider joints and kit to use with my scrap PVC
 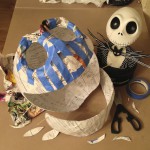 pipe to build his body, and the Triaxial Skull Kit with Jaw were on their way, the first project was his head, including a moving jaw, out of papier-mâché. I found several beach balls and rubber balls, then held them by the front door to pick which size was best. About 3 layers of the stiff paper strips from my decade-old box of bills was sturdy enough to remove the inside ball, and we knew we needed the head as light as possible for servo motor control, but then how to cut the mouth to accommodate the most movement? Obviously a smile since this was a party, and my talking bust DVD case had the best and widest smile of all my Jack collection, so that was my model. We needed the jaw to work with the Triaxial Skull Kit we had purchased even though that was meant for a human skull size and shape, not a giant Jack spherical head!
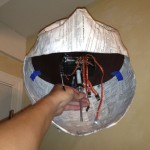 To move Jack’s head, after researching some custom designs we decided to go with a pre-made animatronic skull made by Triaxial Skull Labs and modify it for Jack’s larger head and jaw. The skull kit had all 4 servos mounted to a horizontal plate that was meant to sit right at eye level inside the two pieces of the included plastic human skull. First I cut thin scrap plywood (door panel from my wetbar project) to fit inside the head with a hole in the center to accommodate the servo that was on top of the original plate. A tight fit plus copious hot glue around the edges held the wood plate in place just fine all the way through lots of servo shaking, thank goodness.
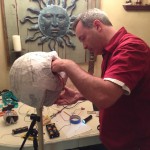 The included rod for the skull kit wasn’t tall enough to escape the bottom of the new head and jaw, so I screwed it into a scrap dowel, then used a boom mic stand and a bunch of tape so we could hold Jack’s head at a good working height. Leaving the eye sockets open was infinitely helpful to adjust placement of the servo mounting plate and even connect test cables through the eyes. I didn’t design the eyes to be hand size holes, but they worked out very well!
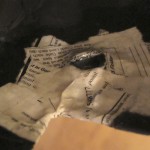 This is a closeup of the reinforced jaw joint I made from papier-mâché. I embedded wooden skewer segments inside the points of the jaw, then made holes inside the head exactly where the skewers needed to be placed so they would swing freely, but those holes weren’t deep enough, and removing the jaw and reinserting it while we were working on the head wore out the sides of the hole. I dug around in my junk drawer until I found two matching plastic plugs of unknown origin that looked like they would work. I glued them into place and built up more papier-mâché around them, and even though there was a little more wiggle than we’d like because the joint hole was wider than the skewer, we had a stable jaw joint that moved freely enough not to strain any servos.
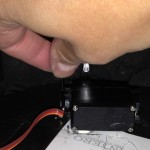 The jaw required a lot of custom work since the servo needed to be mounted as close to the side of the head as possible for best range of movement using the rod. We tried with the jaw servo mounted on the original plate, but the rod wasn’t long enough, so we removed it from the plate and tested a few locations on the larger plate I had installed inside the head, using a quick dab of hot glue on the plate and between the rod end and the jaw as removable adhesive that would hold up to some servo tests to see if the placement would work well enough. The funny thing is that the rod end stayed attached while the servo popped off the plate, but we finally got a good position that would work!
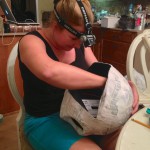 My hands are smaller & I wanted to work on the cool mechanical stuff too, so I volunteered for anchoring the jaw servo, but I needed a headlamp and a small short screwdriver to anchor the jaw servo securely to the large inside plate. We did have the hot glue finally pop off the rod and jaw, but some JB Weld held through all the way through all the events.
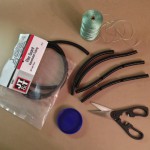 Next were the hands. Glen found this instructable how to make simple robotic hands, so it looked like a good starting point. I had some scrap vinyl tubing from homebrewing I thought might work, and some very strong & non-stretchy plastic twine, but my first attempt was too stiff for a servo to pull, so it became the stationary right hand, and I bought thin electrical conduit to try again. I could only find conduit with the split down the entire length, which was problematic since joints would shift after they were cut. If you try this, definitely look
 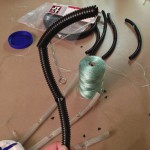 for intact tubing so you don’t have the same problem. I ended up making joint reinforcements out of the same tubing but positioned so the split was reversed, but even using super-glue, some wanted to pop off after all the stress of two multi-hour performances.
The basic idea is that a single string controls each finger as a “ligament,” tied at the top of the finger, but freely moving through the conduit that is notched at the inside joints. Leave enough string length at the palm to pull however you like, manually or by motor. The instructions were for a hand with human proportions so the 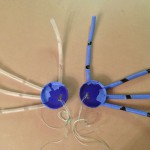 segments didn’t bend, but I was making a life-size Jack, and from all my character models, his hand was large enough to cover his face, so that meant palm size similar to mine, but finger segments twice as long as mine. Since the segments were so long, the string “ligaments” would pull the segment out of shape, so they definitely needed reinforcement, but we were still concerned about too much weight causing strain on the motors, so I only used a single layer of tape then single layer of papier-mâché.
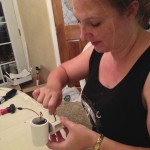
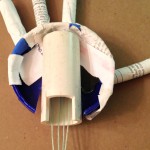 I had a couple large matching plastic lids that were a good size for the palms, but these not only needed to mate with PVC wrist, but also allow the strings to feed smoothly and unobstructed through the PVC and out to the motor to control them. This was the first of the many many custom PVC fittings we cut with my Dremel and/or Glen’s
 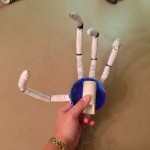 multi-cutter tool! I cut away the bottom of the lid the width of the PVC, cut a thin slot into the PVC so the lid would slide in tightly, then cut away the bottom of the PVC where there was already an opening in the wrist spider joint so the string would come through. Yes, Jack only has 3 fingers and one thumb! 😉
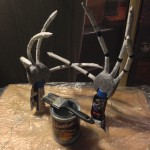 I had read online that 3 coats of marine varnish was usually enough to protect papier-mâché from moisture, but all I found was spar varnish, expensive enough at $50 per gallon, so I carefully sealed only the papier-mâché including the edges, without covering the joints so they would still move freely. Since I tried to use only white paper strips, the final white paint after sealing was an easy single coat. The black conduit didn’t need painting, but the vinyl tubing got some black acrylic paint on its joints to match. I painted over the
  varnish to avoid the glossy shine, since there was no matte varnish available, and even satin still had too much sheen. This is the same technique I used for sealing and painting all the papier-mâché, including Jack’s head and all the pumpkins…I used up a full gallon plus one quart of spar varnish, but none of them got soggy in all the moisture, so it was worth it!
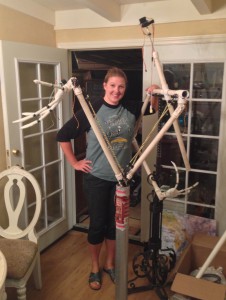
I cut the PVC for Jack’s body so the proportions would be as realistic as possible and for the pose I wanted. We only had 7 feet vertical or he would be blocked by my house eaves too often, so I made him crouching in a classic Jack pose. The Spider Hill PVC feet only allowed perpendicular legs, so his calves were vertical, then his thighs were bent in a crouch, his back leaning forward, right arm jauntily perched on his hip, with the right arm planned to gesture between Zero at the gate and the front door. He was also the perfect size for photo opportunities of course! 🙂
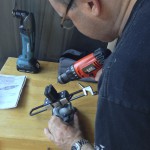 Moving the shoulder, elbow, wrist, and hand required a lot more ingenuity than the head and jaw. Integrating the servos with the spider joints required some creative mechanical design, even drilling screw mounts and horn holes larger. We ended up using some brackets and shafts from ServoCity to fasten the servos to the joints, with lots of precision cutting with the Dremel or multi-
 cutter tool. There was lots of PVC dust all over my patio for a couple months!
It took a lot of trial and error to figure out the best ways that would work, often requiring to take things apart and reassemble yet again, which was a pain when it was teeny tiny screws or a small allen wrench requiring 15 minutes of turning. This was my turn to take apart the shoulder joint again after Glen had already done it twice himself. 😉
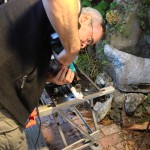 After testing all 4 motors together, we realized that the shoulder was the weakest point, since everything was supported by one metal pin and screw! All these hobby servos are commonly used for human-size figures and skeletons, which have arm segments half the length of Jack’s proportions. Even as light weight (mass) as we made the hand and used extra thin PVC for the segments, the extra torque from the distance the servo was from the weight, was daunting. Torque is force times distance, which explains why we didn’t find anyone else making a moving Jack Skellington this large! Oops…guess the calculations should have been performed before purchase!
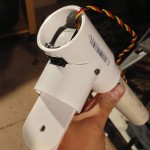 To tackle this issue, I cut a PVC joint into a curved custom shoulder support so the servo could never let the rest of the arm slide backwards, as shown here. However, what made the most difference was that Glen counterbalanced the weight using an elaborate masterpiece of bungee cords so the motors wouldn’t burn out
  or strip. We stripped one motor while testing the finger movements thinking we could do it with a weaker mini-servo, so we went back to a full size servo the hand worked just fine. The elbow was especially challenging because it was supporting two more motors, joints, and the entire hand, but the bungees relieved just enough weight that it worked great. In the end, Glen was amazed it all held together!
But what was Jack’s programming? Well, I wanted Zero the Ghost Dog as a rear projection at my side gate, like our first projected ghost for Halloween 2011, and the ideal was for Jack to interact with Zero, looking back to talk to him between looking down the pathway at the guests. Using visual sync automation was the key, requiring Windows to run the software (ugh!), and video footage of Zero floating and barking, with audio of Jack’s voice in the same video.
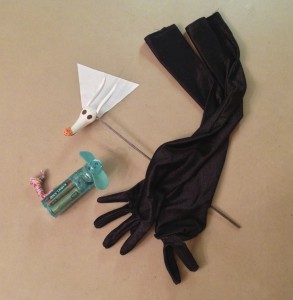 First step was to film Zero! I couldn’t use any footage from the film since there was always something in the way or showing in the background through him that would be hard to assemble together for our use. I even looked online in case anyone else had done some CGI of Zero for fun, but no luck. So, I used an antenna ornament I bought years ago at Disneyland, stuck a black-painted skewer in him, wore a long black glove, used a black background, and a handheld battery fan, then it was a bit tricky to keep everything moving together without getting in my own way for the footage, but I finally got several good takes. In Final Cut Pro I tweaked the gamma an contrast to make the detail fade into black, plus added a little more blue so he would be more ghostly. I was impressed and very thankful this turned out so well on my first try! Here’s a video showing the summary of Zero from filming to final display:
Once the Zero footage was edited, I wrote the script for Jack, and Jerry agreed to be our voice actor. He recorded all Jack’s lines, then I raised his pitch about 5-10% depending on the take so it would sound more like Jack than obviously Jerry. 😉 I recorded my best Zero barks, then I edited the Jack audio and Zero barks into the Zero video footage, isolating Jack on the left channel and Zero on the right channel since we were planning on using separate speakers at each character’s position for even more realism.
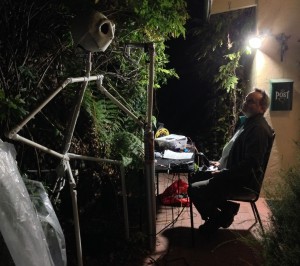 I had the footage ready about a month before Jack was actually ready to program, since we had enough delays with the animatronics that programming didn’t actually begin in earnest until the week before the party! Glen would get a few movements settled, then call me out to check if they looked enough like Jack. The weather had finally started cooling off, so Glen needed my little space heater out at the cardtable on the porch every night for about 4 long evenings of programming…but boy was that worth it! It looked so realistic, especially the wrist and hand moving together!
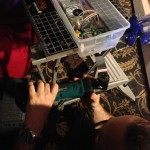 To control Jack, Glen’s research uncovered Brookshire’s Visual Show Automation (VSA), a software program commonly used in amateur animatronic displays. This software can synchronize servo movement with audio and video tracks. Using VSA as the starting point, he designed a system based on a DMX interface (using an
 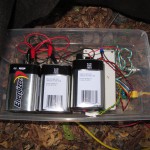 Enttec USB to DMX adapter) which would allow us to place the laptop computer running VSA behind the gate more than 30 feet away from Jack. To control the servos, Glen chose a DMX servo controller board (Medusa DMX) that could control up to eight servos. Along with the power supply, wiring, laptop, and a shoebox, this was the basic
 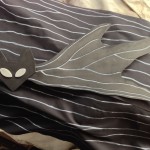 system we used to control Jack.
Glen found some additional software from MonkeyBasic that made programming the servo movements and running the show even better. MonkeyBasic TrackSkull allowed him to use a joystick to program servo movements which was faster, easier, and more realistic than typing in x-y-z positions into VSA. MonkeyBasic 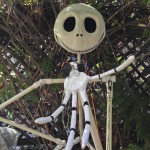 Helmsman allowed him to program several smaller routines that could be combined into a playlist that we could randomize instead of programming and looping one giant routine.
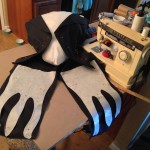 As the programming was being finalized, I finished Jack’s appearance. The head and hands were sealed and painted much earlier, but I knew I would assemble the fabric suit directly on his body, and I didn’t know how large I needed to cut the fabric until all the servos and bungees were finalized, channeled through a series of cup hooks screwed into the PVC to keep them inline with the arm segments and out of the way of his clothing. Since any additional weight was a concern for the servos and bungee support, I used some stiff bubble wrap I had saved to wrap around the electronics first, so the fabric wouldn’t
 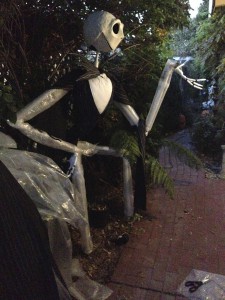 shift and get caught in any electronics or motors. I couldn’t take accurate measurements so I estimated and used the entire amount of fabric I had bought (6 yards wasn’t really enough unfortunately!), so not everwhere on his arms or legs met in back. Good thing there was no way for people to see his back since he was standing in the wisteria and giant fern! 😉
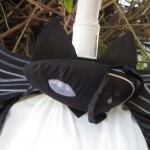 I had purchased a small battery speaker several years ago just in case I ever found a use for it, and it was the perfect size to be the bat’s head in the bat bow tie. Putting a speaker inside the head was a concern for making it too heavy for the servos to move it, so at his neck the positioning was about as perfect as it could be for Jack to be speaking through it. I sewed a slipcover for it that had velcro on the side since we had to keep replacing the batteries, and I left a section of the seam open to plug in the cable.
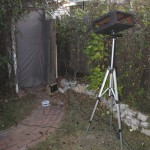 One of the things we wanted to do early on was have Jack come alive when people walked up the path to the house. We weren’t sure we would be able to get to that since it was a lower priority effect, but in the last few days Glen was able to put together a simple trip sensor using a $5 Velleman beam sensor kit, a transistor, a relay, and a 50′ cable (picked up for cheap at an electronics flea market) back to the laptop. Every time someone walked through the infrared light beam it
 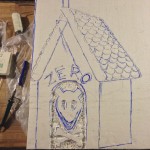 triggered one of the random VSA routines, most of which started by Jack looking straight at them!
Don’t forget about Zero! My nice, bright Sharp movie-night HD projector was behind the gate in a custom-built  box on a sturdy tripod, at a slight angle to the gray bedsheet screen stapled to the gate arbor structure, so the bulb was hidden from view by the edge of the gate and some plants. Of course I had carved and painted Zero’s doghouse gravestone from foam so that was positioned in front of the gate screen so Zero would appear
 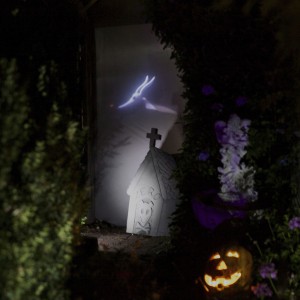 and fade away into his doghouse between sequences. We had to run all our cables through my boxwood hedge which was invisible in the dark but pretty silly looking in daylight. With a mini guitar amp behind the gate accepting the right RCA plug from a stereo splitter cable, and the left extended through the gate down to the Jack bow tie speaker receiving the left RCA plug, it really sounded like Jack and Zero were that far away from each other, even though they were controlled by the same video on a laptop back behind the gate!
After such hard work all summer, we were really thrilled everything worked out so well, and our guests were amazed as they approached the house when Jack and Zero noticed they were coming and turned to start talking to them! Here you can watch a video summary of how we created our animatronic Jack Skellington, including the final display in action!
Now you know how we did it! Hope everyone had as fun a Halloween as we did with all our projects! Next year is back to Castle Brittahytta, so watch for more ghosts to resume haunting… 😉
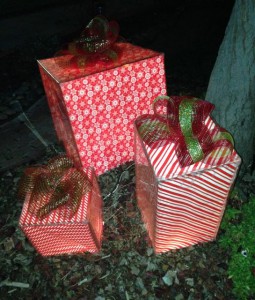 For several years I have wanted glowing lighted presents for Christmas yard decorations, but all I found for sale were ones you could see the points of light inside them, and they weren’t big enough anyway. I decided I would make some for my big Nightmare Before Christmas Halloween party, then change the colors and designs to keep using them each Christmas. I had intended to show the construction during my Halloween party prep progress, but since I finished them so late, I never got all the in process photos. Now that they’re ready for Christmas, here’s how to make your own!
I knew I wanted to change my designs easily from Halloween to Christmas, then probably different Christmas designs over time, so I bought thin clear acrylic panels to cover the paper inside from moisture. I also bought clear 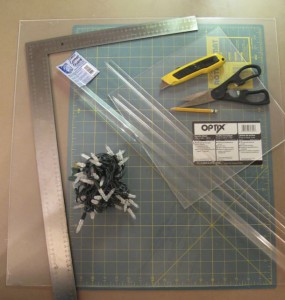 plastic corner protectors to reinforce the sides and top, plus ensure no rain would get inside in winter, but I’m not sure these are as necessary as I thought. They are definitely more stable with the corners, but by using clear strong packing tape for the vertical corners, then you’ll be able to flatten them easier for storage. I would still use the corner pieces around the edge of the top for rain protection though. My supplies were about $100 for 3 present boxes, and I designed my 3 boxes for the most efficient use of my 24″x48″ acrylic panels, getting a 24″ cube, a 12″ cube, and a tall one 12″x12″ but 24″ high. I used my metal ruler as a straightedge and cut with a box cutter until I was able to snap the cut over the edge of my work surface. They do sell acrylic cutting tools where they sell the panels, but I looked and it was just a skinny box cutter anyway. 😉
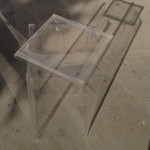 To assemble the boxes, I used clear shipping tape that was wider than the corner pieces, so one length of tape stuck to both sides and made a good seal. I attached the top corners to the top pieces to act like a roof against any winter rain, but I
 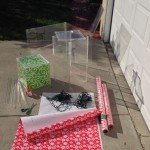 didn’t tape the top to the sides. Make sure you tape the top together after all the sides are in place and standing square, since you might need to adjust how you tape the corners together to fit over the top because the corners stick out from the acrylic sides. I reinforced the top corners with tape after it was in place for a nice tight fit, but I liked the cool angular offset shadows in this photo. 😉
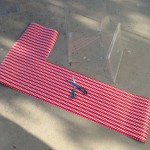 You don’t need a bottom panel, just 4 sides and the top, and that’s the same shape you need the decorative paper. You don’t need to leave the top attached, but you might want to cut it in this shape first so it looks like it attaches to the sides like real wrapping paper would. Depending on how thin your wrapping paper is, you might want to add another layer to help diffuse the lights. If you have nice heavy wrapping paper, it will probably work on its own. Foil will block too much light so don’t bother with that. I inherited a giant roll of
 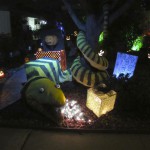 white interfacing for sewing, so I used that for my diffusing layer. For Christmas, since some interfacing was already cut, I taped the wrapping paper for the largest present onto the interfacing, but the other two presents are just paper, and I’m not sure you can tell the difference. The extra body does help the vertical sections stay flatter, but what makes the most difference is the distance between the light source and the box sides.
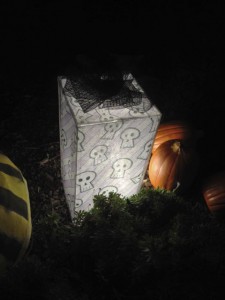 I also tried drawing a Halloween design directly on the interfacing, but my water-based markers never dried, and the interfacing web structure collected moisture and made the design bleed over time. I might try some permanent markers on the interfacing in the future, but for Christmas I stuck with wrapping papers I liked. Also, fair warning, that the tall present is the only one that ever fell over in the wind, so you might want to stick to shapes with a lower center of gravity. 😉
As for lights, I tried a clamp light but that was much too bright and too directional, so I stuck to a clump of string lights, no more than 50 lights or it will give you a hot spot. The best glow is placing the clump of lights in the center bottom of the present, right on the ground since the plastic box 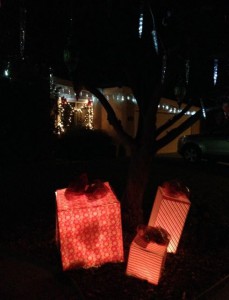 should protect it from the elements. LEDs give better color but all my Christmas ones are old light strings from my stash. Mixing LEDs and incandescent will give a color cast that will be noticeable.
If you are hiding something inside your present, like a Jack in the Box or a projector box, try to have at least 2″ between any light bulbs and your acrylic sides, otherwise you will have hot spots glowing more brightly where the bulbs are too close. I used a staple gun to attach the light string to the interior wood box, carefully of course so you don’t staple through any wires. Working the bulbs so they lie flat against the interior box will often buy you just enough extra distance to avoid too many bright spots.
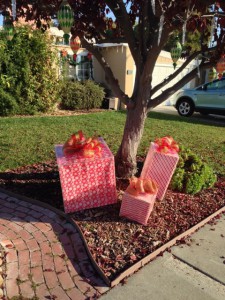 The past few years mesh ribbon has become more popular, so I thought that might work to see the presents underneath. For Halloween it was no problem since I used black mesh bows anyway, but even the red & green mesh bows for Christmas look black in silhouette at night. I try to make my displays look nice in daylight as well as at night, so at least the bows look good during the daytime. I would love to use some fiber optic fabric for the bows to glow themselves, but that’s still much too expensive and delicate technology to leave exposed to winter rain and cold! I’ll let you know if by next Christmas I’ve figured out a better glowing ribbon solution. 🙂