Cinema Brittahytta

 
“Cinema Brittahytta” is my backyard movie theatre, with an 8-foot wide movie screen, HD projector and big speakers! It’s a nice casual evening with potluck barbecue and open patio bar, firepits to keep us warm, and everyone has fun. Friends bring their own chairs & blankets for the lawn, or borrow from my stash of cozy fleece shirts, blankets, chairs & beanbags. These movie nights are a lot of fun, especially when I get creative with some small-scale decorating and a fun recipe or two tailored to the movie.

The most recent events are here at the top, then you can keep reading for previous events…

The Greatest Showman Singalong!

I was lucky enough to see Hugh Jackman singing & dancing live in his one-man show in San Francisco several years ago, so I knew he was much more entertaining than his Les Miz performance. When I saw the trailer for The Greatest Showman, I knew I’d want to see it, but I had no idea that Glen would buy the soundtrack the day after we saw it in the theatre, nor that it would be our driving soundtrack over & over for the next couple months! We had heard from plenty of friends that we were not the only ones singing along, so I decided this would be my birthday movie for Cinema Brittahytta this summer. We actually had more guests who had NOT yet seen it than repeat viewers, so only some of us sang, but all 24 of us really enjoyed the evening, with Rock Band as the sun was setting, our menu of circus food and clever song-title puns, special s’mores, and even birthday cake!

My first menu thought was for circus food, and I already had my reusable plastic Cinema Brittahytta popcorn boxes, so a bag of roasted peanuts in the shell with a bunch of cute vintage paper bags were an easy Amazon purchase. Since there weren’t animals in the movie until the very end, I didn’t use the animal crackers or cookies, but Keith & Doug brought the pink & white frosted classics to share!

Since we hadn’t had grilled pizzas yet this summer, I called them Three Ring Circus Pizzas, leaving them in circles…the first time since the first summer Forbidden Planet Pizzas that I did NOT make the dough into a special shape. πŸ˜‰ Glen came up with Sideshow Salad for the fruit salad, and Eileen brought some clever & tasty Mini Corn Dog Muffins with slices of hot dog baked into the muffins, then that was the end of the circus menu.

Trying to brainstorm food puns for the song titles started with “This Is Me-at” for the sausages, which still cracks me up! I found a movie poster of the Bearded Lady leading her crew, so that became my menu sign…heehee! I always have a plate of cheese slices, and I could eat cheese all day every day, so that became “Never Enough (Cheese)”…which was enjoyed enough that the next day I heard that Julianna was singing β€œNever enough cheese…” complete with various cheese verses…hahaha! I made a circus tent cheese mosaic, then set the other slices normally on a tray to the side, since no one wanted to mess up the design. I guess two trays of cheese enforced that there truly was “never enough?” πŸ˜‰

I had tried creating a custom cocktail for A Million Dreams with “the brightest colors fill my head” but was stuck trying to make it non-alcoholic for all the kids coming…then I thought of how I have countless bar mixing options, so that became “A Million Drinks: Help yourself to anything at the bar!” πŸ˜€ However my favorite menu sign was The Greatest Snow Cone, since I tweaked the logo lettering so it matched perfectly and actually added a snow cone into Mr. Barnum’s hand for the menu sign. We had enough kids the right ages that we went through all the pucks I had frozen, so I guess I should have made more in advance this time!

Last but not least was Rewrite the S’mores, our special s’mores for this movie! Obviously “rewriting” the s’mores would be making them different in some way, so I used a red food coloring pen to add stripes onto purchased marshmallows, and Glen found red & white swirl Hershey kisses on sale after Independence Day. We set the striped marshmallows over Hershey bars on purchased graham crackers, then added a striped kiss on top to be little circus tents!

My college friend Stephanie brought her whole family from Davis for their first ever Cinema Brittahytta, so they arrived first and helped assemble the s’mores. Keith & Doug brought some friends this time, and Wendy & Diana spent half the party playing on the floor with Midnight! Thankfully Midnight was still our social kitty at his second big party, letting Cyd cuddle him on the couch with Elias, and playing with everyone willing. Since the patio screen door now randomly opens on its own, we had to shut the french doors all evening, and when no one was inside, Midnight sat at the door, looking out at the patio people wistfully like he wanted to join the party!

Usually people bring an assortment of food to round out our potluck, but this time it was almost all sweets! Stephanie brought cupcakes, and Jen brought a dozen fancy Psycho Donuts that were scarfed quickly – glad I got the chocolate mint “Girl Scout” donut! Keith & Doug brought cookies & a candy-coated puppy chow snack mix, and their friends brought a big batch of popcorn. Jerry stopped by with his fantastic chocolate fudge cake while Glen was out picking up the teal cake he had ordered already! We saved the Jerry cake for ourselves later, and since Keith & Doug had just given me the Hallmark Christmas ornament of Elsa, we put her on the matching teal sparkly cake for me to blow out my candles after the movie!

Since Stephanie’s family was staying the night, we had a built-in after-party for s’mores…hooray! Glen had fun throwing our new flame colors into the fire, and it was tricky to take photos, but some of them burned teal! Jeff’s family also stayed through s’mores and back inside, having a ball playing with Midnight while the clock approached midnight…when I sang Jeff his Happy Birthday song as his birthday began on July 29th!

Thanks to everyone for such a fabulous evening! You can click below to see all the fun photos if you like! We still have one more movie before this summer is over, so stay tuned!

(more…)

Posted in Cinema Brittahytta, Edible Art, Outdoors, Parties, Recipes | Tagged , , , , , , , , , , , , , | Leave a comment

The Incrediburgers and more!

On the ninth a cozy crew of nine started our summer movie season by catching up with The Incredibles before their long-awaited sequel arrived in theatres! We had a whole family of Incrediburgers on the grill including little Jack-Jack Sliders, Dash Dip, Incredi-Cheeses & Crackers, Make Your Own Frozone Cones, and a Super-Sized Fruit Parr-Fait! My own Mr. Incredible manned the grill, the new cupholder yard stakes were a hit, and my Movie Marquee was back outside showing a new reel of posters for this summer season of Cinema Brittahytta!

With working on all the wedding projects for so long, I haven’t had much chance to create edible art lately, so I really enjoyed making the fun food for this movie! The first was fairly simple, just sketching, cutting & drawing a stencil the correct size to sprinkle Hungarian paprika over an oval bowl of Dash Dip = spicy for super-speed! We bought the jalapeno dip mix at a local street festival, but I couldn’t even eat it since it was too spicy for my wimpy palate! Glen loved it but only a couple guests could handle it, so he will have a lot of leftovers to enjoy. πŸ˜‰

I was quite proud of the next edible art since it was tricky to execute such curves and tapers in a fruit mosaic, especially vertical to show up the side of my large trifle bowl. I propped the bowl at low angle so it was mostly flat, then used the DVD case as a model for the same oval “i” logo, careful to flip it upside-down and backwards for the direction I was working. You might think this would be easy, but the fruit needs to be chopped fairly fine for curves and tapers, and it works best with the cut side toward the glass so each fruit shape sticks in place instead of rolling around like berries do. I never expected to say “I need smaller blueberries for better image resolution…” haha! You also need to be careful which kinds of fruit yields juice that still stain your other fruits, plus if any fruits might oxidize and turn brown. Cut strawberries are the worst culprit since their juice drips everywhere and stains everything red, so I filled in around the logo with red raspberries first before fading into cut strawberries, and I made sure not to place any strawberries at the top edge or red juice would stain the pineapple “i”. I also used apricots for the orange areas since peaches bruise and brown so easily. Once your design is complete, you must tightly pack fruit behind it, filling in from the bottom up, so when you turn the bowl upright, your image along the glass stays intact. Make sure you don’t backfill with any cut fruit that will stain until you have enough fruit buffer next to your image, then you can fill with a mix of fruit. Having the fruit already mixed at the top toward the back means people can scoop to serve themselves while leaving the design intact. Since I called this my Super-Sized Fruit Parr-Fait, and parfaits are layered with whipped cream or custard, I quickly squirted whipped cream on top and garnished with some last fruit pieces. My guests were definitely impressed, but this fruit salad was so large that this also means we have a LOT leftover to eat! πŸ˜‰

Since the rest of the menu was just clever names with signs, I had time for a stretch goal of Incredi-Cheeses & Crackers, using the “i” logo again, this time using gouda & cheddar, with black grapes to fill in the oval. Since I was using a black tray I could have left the oval empty, but I liked the idea of cheese & grapes together. To have more cheese for snacking, I added rows around the oval. A cheese mosaic is such an obvious and simple idea that now it’s hard to believe my very first one was only the BB-Ate Cheese Plate 2 years ago for The S’mores Awaken! I’ll definitely be doing this more often as long as I have a fun concept.

My first food idea for the Incredibles was a whole family of Incrediburgers, inspired by A&W’s Papa burger & mama burgers. I painstakingly altered some clip art to replace the names over the family figures, and made a fun sign explaining them: MR. INCREDIBLE super-sized burger with everything on it – ELASTIGIRL lean teriyaki chicken with stretchy cheese – VIOLET add a purple forcefield of sliced onion rings – DASH add spicy Dash Dip for super-speed …or try one of the JACK-JACK Sliders, each with a different surprise!

We bought full-size burger patties that my own Mr. Incredible grilled for us, and he made his own teriyaki marinade from scratch for the Elastigirl chicken breasts. I love the King’s Hawaiian rolls which are the perfect size as slider buns, so I stole two full-size burger patties to split into quarters to fit on the rolls. I love blue cheese inside burgers, so that was two sliders, grated mozzerella in two more, a 4-cheese blend in two more, and minced onion The Elastigirl chicken burgerflakes inside the last two. The only trick was finding which one you wanted after they were grilled, but I guessed correctly and enjoyed a blue cheese! All the sliders and chicken breasts were scarfed, along with all but one burger, so we were very glad they were a hit!

I keep wondering if the Make Your Own Snow Cone will get old one year, but it hasn’t happened yet, so this time it was Make Your Own Frozone Cone, with an extra Elsa joke for those with sharp eyes…not my artwork, but found as an online poster mashup that cracked me up! Ellie made a couple since she is the resident expert snow cone maker, but none of the adults had any this time around.

I had Super-Ade lemonade on the menu, but the custom cocktail was orange, white & black as the Syndrome…”Pour peach syrup into a cocktail glass, then fill with white cherry energy drink until almost full. Carefully pour black vodka so it layers on top of the soda. For a Buddy Pine mocktail, eliminate the evil vodka, and you’re in happy times before the superfan became a villain.” We did have a couple people enjoy the mocktail pre-villain version, and all the glowing martini glasses fit perfectly in the cupholder yard stakes that made their summer debut! Thanks to Glen for a great Christmas present!

Everyone enjoyed the movie, but no one stayed for s’mores this time. I had suspected that might happen so I didn’t make special s’mores this time, but I did have normal s’mores fixings all ready just in case anyone surprised me. Glad we had a successful season premiere for Cinema Brittahytta! You can see more photos below, and stay tuned for two more movies this summer…

(more…)

Posted in Cinema Brittahytta, Edible Art, Outdoors, Parties, Recipes | Tagged , , , , , , , , , | Leave a comment

Girl Ghostbusters

Our Cinema Brittahytta summer season finale for 2017 was the new girl Ghostbusters movie from 2016, even with extra girls all the way from Canada helping me with party prep! 21 of us enjoyed great weather and a fun movie with custom cocktails and Ghostbusters Grub including Grilled Ghostbusters (Pizzas), Cheeses of the Conductors of the Metaphysical Examination, Frightful Fruit, and Slimy S’mores!

When I showed the original Ghostbusters a few summers ago, I made my own plates like the original powder blue t-shirts from the finale of the movie. Since they still haven’t made any Ghostbusters logo party plates that I can find, I made my own again using the same color. I had them all printed in advance so Shannon could cut them out then Carmella could stick one in the center of each plate, with a little help from Mark too. They all did a great job!

I decided another cheese mosaic would be fun as a large Ghostbusters logo on my big round tray. The orange cheddar cheese was close enough to red for the NO line and circle, and I used a black food coloring pen for the final ghost face and hand details. I trimmed the cheese slices to shape for the finer details of the ghost, but I just overlapped the slices to make the curves for the outside circle…and like the girl Ghostbusters original team name, we called this “Cheeses of the Conductors of the Metaphysical Examination”…haha!

By now I’ve made personal pizza crusts using my whole wheat sourdough pizza dough recipe in almost every shape imaginable: Lego bricks, Star Trek Chevrons several times, Baymax faces, Day of the Dead skulls, and Frozen snowflakes, but making the pizza shapes for Grilled Ghostbusters was the trickiest yet! Thankfully the shape is mostly a circle with only a little bit of the head and both hands sticking past the edges, and I was able to sketch the details with a knife without cutting all the way through so the logo was recognizable.

The dough is pliable enough that it’s fairly easy to form into any shape you like, then parbake on silicone sheets for 2-3 minutes to set the shape. Store in gallon zip bags with wax paper between crusts, and refrigerate for about 3 days or so, but if you are storing for longer, freeze instead.

We used standard pizza toppings and set them on the table by the grill, but I found 4 plastic Ghostbusters cups last year on Halloween clearance, so we used those to hold the grated cheese for the pizzas, and we used the new tiny tongs Glen got me for my birthday. πŸ™‚

Obviously the etched design in the pizza crust was covered by the sauce and toppings, but I was determined to make a recognizable Grilled Ghostbuster. I carefully used crumbled goat cheese for the ghost, over red sauce, and I think it turned out pretty good…hooray!

I had a ton of frozen snow cone pucks ready in the freezer but it wasn’t hot enough or people just weren’t enthused for the Ecto Cones…darn! They did enjoy the custom cocktails since I made them glow either with glowing glasses or glowing ice cubes. None of these LEDs give off enough UV light to make tonic glow, so I just relied on the opacity of the pineapple juice to bounce the light up into the glass. For the fun effects drinks, I always try to make a non-alcoholic version as the base so kids & teetotalers can join the fun, then adults can spike their own if they wish. Little Ellie sure seems to appreciate following the instructions on the recipe cards, since she mixed this Glowing Ghost herself! I enjoyed an Electrified Ectoplasm with blue underlight to match the onscreen ghosts as we watched…I love having glowing glasses & glowing ice cubes since you don’t lose your drink in the dark!

Glowing Ghost

1 part vodka (optional)
1 part blue raspberry syrup
1 part pineapple juice
fill with club soda or lemon-lime soda

Pour ingredients in order into a rocks glass. Add a glowing ice cube set to blue, or use a glowing glass.

Electrified Ectoplasm

1 part vodka (optional)
1 part sour apple syrup
1 part pineapple juice
fill with club soda or lemon-lime soda

Pour ingredients in order into a rocks glass. Add a glowing ice cube set to green, or use a glowing glass.

Cinema Kettle Corn & Frightful Fruit were old summer menu classics renamed for the movie, but the Slimy S’mores were my new concept. I loved making my elaborate Stay Puft S’mores for the original Ghostbusters, but there was no Stay Puft monster in this movie, plus I didn’t want to repeat everything I had done…so I thought of using green candy melts and luster dust as slime over normal chocolate bars, so that it looked like I had set up for normal s’mores, but then some ghost slimed them all!

Of course I didn’t find the perfect slime green color candy melts, the darker green was too Christmasy and the lime green was too pale, so I combined two colors for my vision of slime green as they were melting. About half of each color matched my memory of Slimer. πŸ˜‰

I thought it would be easy to throw some splats of candy melts onto the Hershey squares, but they looked too neat & tidy! I had to pipe squiggles to get the “slime” to dribble over the edges of the chocolate squares, then fill in the middle, but I didn’t want them to spread too far, since the squares would sit on graham crackers for display.

After the green candy melts had set solid, I used a large brush to add some lime green luster dust to make them look more shiny & slimy. Piping gel might have looked more slick but that doesn’t dry and I wasn’t sure of the texture. The luster dust gave a very subtle sheen when the light was right.

Lyle had graciously volunteered to bring homemade marshmallows, so those were cut as rectangles to fit perfectly between the “slimy” chocolates and graham cracker squares. Nathania surprised Kael with a birthday cake as we all sang to him, so roasting marshmallows went by the wayside this time, but I still insisted that Shannon in her special shirt show off a Slimy S’more for successors to see! πŸ™‚


More photos are at the link below if you’d like to see! Thanks to everyone who joined us for another fun summer season of Cinema Brittahytta!


(more…)

Posted in Cinema Brittahytta, Edible Art, Outdoors, Parties, Recipes | Tagged , , , , , , , , , , , , | Leave a comment

A Star Trek Beyond Birthday

Star Trek Movie Night MenuWe had the smallest group since 2010 and it was roasting hot, but we still had a fun movie night for Star Trek Beyond, and Glen surprised me with an early birthday cheesecake! Thanks to the 7 die-hard movie-goers who celebrated with me and enjoyed Ice Trek Cocktails, Starfleetza Pizzas and S’more Trek not only with custom chocolates and homemade marshmallows, but even matching chevron graham crackers!

Trekkie CoupleI wore my classic Trek miniskirt uniform for 50 Years of Trek last year, but costumes are nowhere near as fun when it’s over 100F, so this year it was t-shirts and hair up for comfort! Glen fit my early-90s convention era Starfleet Academy shirt, and I wore my even older handpainted Spock tee with film camera tripod earrings in honor of movie night…I’ve enjoyed my Spock tee for about thirty years already, but I will sure be sad when it finally disintegrates, since it already has one small hole right in front!

Homemade Trek Chevron Cookie CuttersI have made several styles of Star Trek S’mores over the years, from 2010 for Star Trek II on National S’mores Day and Free Enterprise in two different styles using a homemade silicone mold and custom-bent cookie cutter, to 2013 for Into Darkness where I used marshmallow creme sandwiched between matching chevrons, to last year when I made matching chocolate and marshmallows, but ran out of time for matching graham crackers. Since I now finally have three chevron shapes in nesting sizes, I was determined to customize all three ingredients for S’more Trek!

Making Homemade MarshmallowsHomemade marshmallows make the most mess, so they were first! I used Alton Brown’s marshmallow recipe again, but for some reason I’m always almost out of corn syrup, so I add honey to make Spreading homemade marshmallows into the prepared sheet panup the difference, which gives them a nice flavor. You definitely need a stand mixer for this recipe! While it’s mixing, prepare a sheet pan with wax paper dusted thoroughly with powdered sugar so it’s ready when you need to work quickly.

Once the marshmallows have finally fluffed to the top of the bowl, spread quickly into your prepared sheet pan. Anywhere not liberally dusted with powdered sugar will glue permanently, so fair warning! I can never get the top surface perfectly flat, so I do the best I can while spreading them into the pan, then I use a greased sheet of wax paper to burnish the Smoothing the surface of the homemade marshmallowssurface by rubbing in circles with my hands. Again, be very careful, since if there is any plain wax paper that touches the marshmallows, it will stick forever! Let the marshmallows set overnight before cutting.

Cutting Chocolate Chevrons for S'more TrekWhile you’re waiting for the marshmallows to set, you can cut your chocolate! I had made chocolate chevron molds before that were intentionally the thickness of a Hershey bar, but they were sized for the classic movie Trek belt buckles, which was a small serving of chocolate. I had leftover modeling chocolate that hadn’t been eaten as previous Tray of finished Chocolate Chevrons for Trek S'moress’mores, so I remelted it in the microwave, spread it for thicker chocolates, then used the medium chevron cutter to cut as many chocolate chevrons as I could. If the chocolate is too soft, the cuts reseal themselves too quickly, but if the chocolate has hardened too much, it will crack as you push the cutter in, so try to find the sweet spot. Refrigerate the chocolate chevrons if it’s summertime, but don’t freeze chocolate.

Custom chevron homemade graham crackersNext were the custom chevron graham crackers! I’ve been using this vegan graham cracker recipe for years, and it’s always super-tasty with no special ingredients required to purchase. It is a very crumbly dough, and whole wheat flour doesn’t absorb water as well as white flour, so have some water handy to knead in when it gets too dry. It doesn’t roll into sheets very well, so I pat the dough together as much as I can to prevent holes, then use my rolling pin to smooth out the top surface, leaving the dough a good 1/4″ thickness so the graham crackers don’t crumble apart. Cut the shapes on a silicone mat so you can pull away the extra dough instead of transporting the finished shapes, since they are too fragile until after baking. Store just like cookies in an airtight tin for up to two weeks.

Cutting marshmallow chevronsAfter the marshmallows have set overnight, it’s time to cut them! Keep a bowl of water handy for dipping your cutter, or else it gets sticky too quickly. You can dust the cut edges with powdered sugar for plain designs, but I thought that my pearlized sugar in command gold, sciences blue and services red would be the perfect pop of color! Since the cutter pushes the marshmallow at the edges of the design, leave space when cutting the next marshmallow, otherwise you’ll have an oddly-shaped edge. As soon as I cut the marshmallow slab with the chevron cutter, I gently removed the marshmallow chevron from the cutter, dipped all the cut edges into a bowl of the colored sugar, then set aside, making sure I had an even number of colors for variety.

Completed platter of S'more TrekIf not serving immediately store your marshmallows in an airtight tin or bag so they don’t harden. When ready to assemble your S’more Trek, stack the chocolate and marshmallow chevrons on the matching graham crackers for display. For eating, remove the marshmallow from the stack to roast on a stick over the fire, then smush the melted marshmallow between the chocolate and graham cracker chevrons. Yum!

Chevron CheeseSince I always have an assorted cheese plate and the smallest chevron cutter fit the slices, it was easy to make a plate of Chevron Cheeses! Since there was more white cheese than orange, I made gold chevrons like Classic Trek shirt emblems. I had a few white stars leftover from the 4th of July, so I added those around the center.

Starfleetza Pizza crusts ready to grill!Grilling pizzas is popular for my movie nights since you can completely customize your own pizza! Starfleetza Pizzas are the perfect name (courtesy of my friend Eileen several years ago), and the chevron shape is not only fairly easy to form from pizza dough, but it also holds toppings well. I made the crusts from scratch using my bread machine with the same whole wheat sourdough recipe I’ve been using for years now. The dough is pliable enough that it’s fairly easy to form into any shape you like, then parbake on silicone sheets for 2-3 minutes to set the shape. Store in gallon zip bags with wax paper between crusts, and refrigerate for about 3 days or so, but if you are storing for longer, freeze instead.

Ice Trek CocktailsAs for the rest of the menu, Federation Fruit Salad was just my normal summer fruit salad with a fun name, and I recycled the Ice Trek Cocktails from last summer since they were tasty, using hard raspberry cider, raspberry syrup and vodka for The Redshirt instead of premixed margaritas and extra tequila, but I made more elaborate recipe cards for them.

Starfleetza with Chevron CheeseWe grilled some watermelon along with our pizzas, and I added a Chevron Cheese in the middle of my pizza to highlight the matching shapes. Everyone had a good time watching some funny Star Trek comedy sketches before the trailers and the main feature.

Small audience but still fun!Partying People on the PatioStarfleet Academy Glen

Surprise Early Birthday Cake!After the movie, Glen brought out a cheesecake with candles and everyone sang Happy Birthday to me! I was completely surprised! Glen was sneaky and used his car running in the driveway as the refrigerator for the Surprise Early Birthday Cake!cheesecake, otherwise I would have seen it for sure! See how the candle in front is shorter? He said “It was a small cake, not much room for candles, so I used the natural logarithm of Britta’s age = 3.8 candles, knowing how Britta appreciates geek humor.” Hahahaha…love it!

You can click below to read the full Ice Trek Cocktail recipes and see the rest of the photos…and stay tuned for the summer season finale of Cinema Brittahytta!

(more…)

Posted in Cinema Brittahytta, Parties | Tagged , , , , , , , , | Leave a comment

Fantastic Beasts and Where to Find Them

Gladrags robe with Candied Bacon Wands, Deviled Occamy Eggs, Niffler Bait and strudel!22 of us including 3 kids enjoyed a lovely evening at Cinema Brittahytta the same day I also got Owl Post from Hogsmeade, which was perfect since we watched Fantastic Beasts and Where to Find Them! The youngest witches enjoyed some Frozen Potions, we all enjoyed Frozen Butterbeer, Thunderbird and Swooping Evil custom cocktails, Candied Bacon Wands, teal and silver Deviled Occamy Eggs, and British “Banger” sausages on the grill, Nathania dressed in Queenie’s coat brought tasty homemade strudel, I wore a fancy new brocade robe worthy of Gladrags, and Glen must be part Niffler since he scarfed a whole pile of chocolate coins during the movie! πŸ˜‰
Fantastic Beasts Food Table with dragons galore
I had fun with the simple menu, and I had made menu cards to set by each dish, but I didn’t get the chalkboard updated this time. I did get out my copper dragon sculpture and used my two matching dragon plate stands on the table, since dragons definitely count as fantastic beasts!

Deviled Occamy EggsAs soon as I saw the movie last November, I wanted an Occamy winged serpent since they are such gorgeous colors of blues and greens! Since their eggs are pure silver, I thought why not try making deviled eggs using silver food spray, since tinting the yellow egg yolks to a bright teal should be an easy food coloring task. I found a dramatic image online of an Occamy and created a menu description, pointing out we were only eating unfertilized eggs.

Deviled Occamy Eggs

The Occamy is a plumed, two-legged serpentine-bodied creature with wings that may reach up to fifteen feet in height. It is extremely protective of its eggs, which are made of the most pure and soft silver. The unfertilized eggs are especially tasty when cooked.

Spraying edible silver on the backs of cooked egg whitesTo make Deviled Occamy Eggs, split hard boiled eggs in half lengthwise, and pop out the yolks into a mixing bowl. Clean and dry the egg whites and use food decorating spray to coat with silver. Don’t spray too much or it will run off Spraying edible silver on the fronts of cooked egg whitesthe egg and leave spots. I sprayed the backs of the eggs first, let them dry while I made the yolk mixture, then turned the egg whites over and sprayed the tops. The silver does come off on your fingers when moving them, so be careful when placing on your serving plate. The edible silver spray doesn’t come all the way off the eggs, but it wipes easily off skin.

Tinting the egg yolk mixture tealFor the yolk mixture you can use your favorite deviled egg recipe plus enough blue food coloring to make the yellow yolks teal. I used greek yogurt, mayo and some truffle salt to taste, which were delicious! I used my stand mixer to get the yolk mixture as Truffle salt, mayo & greek yogurt added to cooked egg yolkssmooth and creamy as possible, then I used a piping bag with a large star tip to pipe the team yolk mixture into the silver egg whites. I used a clear plastic deviled egg tray to show off the silver, and they looked great in place on a gold platter on one of my dragon stands!

Candied Bacon WandsAll the Candied Bacon Wands were scarfed by all my guests since they were so tasty! They would probably work better with thinner breadsticks, but no one complained. πŸ˜‰ I used the Candied Bacon Wands were tasty!matching gold platter to the Occamy eggs on the other dragon stand, since the Candied Bacon Wands would sag bend too much if placed standing display more like magic wands.

Wrapping breadstick wands in baconDepending how thick your bacon slices are compared to the length of your breadsticks, you might need to wrap two slices on one breadstick. My second package of bacon were slightly wider slices, and since the bacon will stretch a little while wrapping, I was able to use a single slice down the length of the breadstick. I did notice during baking that the bacon grease soaked into the breadsticks, making them soggy before the oven time finally made Candying Bacon Wands by sprinkling brown sugar before bakingeverything crisp, and depending how crisp the bacon was, they tended to bend a little even after cooling. Pretzel rods are thicker and shorter than the long thin breadsticks so they might not get as soggy, but pretzels are already so salty that they might be too much with the salty bacon.

Gently turn the wands over and sprinkle the other side with brown sugar to continue baking until the bacon is crispAfter wrapping each breadstick with bacon, place the loose ends down on a baking rack over a baking sheet so the grease can drain away while baking. Sprinkle brown sugar along each wand, bake for about 15 minutes, gently turn them over and sprinkle more sugar on the other side. This is when they are soggy, so be careful you don’t break any breadsticks while you are turning them. Bake until the bacon is crisp on both sides, turning over again as necessary. Cool completely then serve and enjoy!

I never knew Glen was a Niffler!The easiest food to “make” were the Niffler Bait Chocolate Coins…just buy some foil-wrapped chocolate coins and set them in a big pile, preferably on a matching gold platter! The Niffler pretty much stole the movie with his adorable antics, but Glen stole all the Niffler Bait to eat while watching! haha…

Niffler Bait Chocolate CoinsNiffler Bait Chocolate Coins

A Niffler is a creature with a long snout and a coat of black, fluffy fur. They are attracted to shiny things, which make them wonderful for locating treasure, but this also means that they could wreak havoc indoors. Nifflers have a pouch on their bellies which holds far more than at first seems possible. Nifflers are gentle by nature and could even be affectionate towards their owners. However, they could destroy belongings looking for sparkly objects, and for that reason it is inadvisable to keep them as a house pet.

Queenie made a strudel!Nathania came as Queenie, complete with reproduction costume coat, and of course “you like strudel, dontcha honey?” It was extremely tasty with unsurprisingly no leftovers!

Fantastic Fried Beasts from JerryJerry hadn’t seen the movie yet, so he even found the fancy movie font for his sign and brought Fantastic Fried Beasts! The tasty fried chicken was scarfed down, but after watching the movie he felt a little guilty that the movie creatures were friends, not food. πŸ˜‰

Custom CocktailsI couldn’t resist creating custom cocktails inspired by a couple of the Fantastic Beasts from the movie. I took inspiration from a Dark & Stormy plus the iridescent feathers and shimmery liqueur for the Thunderbird, and layered green and blue for the Swooping Evil, and both were quite tasty if I do say so myself! The shimmery liqueur is almost sickly sweet but the chai tea syrup and dark rum balance it well.

The Thunderbird

The Thunderbird is a large, avian creature native to North America, and most commonly found in Arizona in the southwestern United States. They possess multiple and powerful wings which are known to change Shimmery Thunderbird cocktailcolors as they summons storms, with iridescent feathers shifting from various shades of gold, to electrifying blue, to grey and silver, to white, and even to deep navy. A close relative of the Phoenix, the Thunderbird can create storms as it flies and is highly sensitive to danger.

ginger ale
chai tea syrup
blackstrap rum
Viniq shimmery liqueur

Pour equal parts ginger ale, chai tea syrup, and blackstrap rum over ice, then top with Viniq shimmery liqueur. Watch the swirling storm clouds brewing in your glass, sparkling with the magical powers of the Thunderbird.


Layered green & blue Swooping Evil cocktailThe Swooping Evil

The Swooping Evil is a blue-and-green winged magical creature that ooks like a cross between a reptile and an extremely large butterfly. It can be quite dangerous, as it can feed on people’s brains, but also able to deflect at least some spells by flying into their path. It secretes venom that, when properly diluted, can be used to erase bad memories.

ginger ale
blue curacao
green apple syrup

Fill a martini glass half-full of ginger ale. Add blue curacao until the ginger ale all turns blue. Gently pour the green apple syrup along the edge of the glass so it layers under the blue. Sip carefully since too much Swooping Evil venom can erase memories!

We enjoyed chatting, eating & drinking until it was dark enough for trailers, and a couple people had never seen the movie before but really liked it…hooray!

Fun Food for Fantastic Beasts Silver lips and fingers from Occamy eggs! Frozen Potions Classic Cinema Brittahytta Shot

Hope you are enjoying your summer too! Two more movies this summer still to come so stay tuned…

(more…)

Posted in Cinema Brittahytta, Parties | Tagged , , , , , , , , , , , , , , , , | Leave a comment

Young Frankenstein for 10 Years of Cinema Brittahytta!

Igor & Inga with Fancy FrankWe opened our 10th summer backyard movie season with the first movie ever shown at Cinema Brittahytta…Young Frankenstein! Most of us had seen it before, but little Ellie had a ball viewing it for her first time, at the same age I first saw it! 14 adults & 3 kids made for a great celebration, enjoying the special themed menu, our Fancy Frank standing tall ready for Puttin’ on the Ritz, cloaked Glen with hunchback as Igor, yours truly in my lab coat as Inga, my new theatre trailer, and my new lighted movie marquee!

I first started showing backyard movies 10 summers ago, and I kept improving the experience over time with an 8-foot screen, better projector, and nice speakers. I didn’t edit my theatre policy trailer until a few years in, a very basic Star-Wars-style rolling credits into the distance over a basic starfield with my logo, but I thought it would be a nice 10th anniversary celebration to edit a new theatre policy trailer. I used the same soundtrack of audio clips from some of my favorite movies and my same hand-drawn logo, and the same text for the credits thanking everyone who contributed to Cinema Brittahytta, but I added teal theatre curtains opening to an aqua nebula moving starfield, and I added a little basic 3D to the logo spinning in from a distance at the end. Maybe for the 20th anniversary I’ll have finally learned real motion graphics? πŸ˜‰

New Movie Marquee in the backyard!The other new feature for my home theatre is a digital lighted movie marquee! I had purchased several 32″ flatscreen TVs for previous Halloween use, and I didn’t have a use for them the rest of the year, so I thought why not build a frame and load a slideshow/video on a USB stick and use one of the TVs as a digital poster frame movie marquee! Since the TV isn’t balanced to hang vertically without a wall behind it, I had to mount it on the back fence, where I happen to have a bare spot for a few years until a new tree grows. Full construction instructions will be coming soon in a separate post, including lessons learned how to improve my next attempt, but I think it works really well!

Mixing a Walk This Way cocktailWhen guests arrived for Young Frankenstein, we started with two custom cocktails as is now my summer tradition. Here some brave souls are using my Young Frankenstein the Musical shot glass to mix a Walk This Way cocktail, which was quite tasty and popular, so it might return in another disguise for a different movie someday! This “Walk This Way” cocktail is as dark as Igor’s cloak. Once you Walk This Way enough, you too will say, “What hump?” Pour equal parts blackstrap rum, chai tea syrup, lemon-lime soda over ice into a rocks glass. Stir to combine, and enjoy!

Partying people on the patioFor flavor variety I also created The Frau BlΓΌcher: This straitlaced black & “white” cocktail is why the horses rear in fear every time they hear the name of Frau BlΓΌcher! *whinny!* Pour two parts lemon-lime soda into a martini glass. Gently layer one part black vodka over the top. Enjoy the black and “white” layers, but stir before enjoying a sip. Some of the partying people on the patio were partaking in that one. πŸ˜‰

Young Frankenstein 2017 MenuHere is the full menu for Young Frankenstein, listing the two custom cocktails Walk This Way and The Frau BlΓΌcher, then Abby Normal Brain Pate and Assorted Cheeses for Puttin’ on the Ritz, Franken-Fruit Salad, Rollz in Zee Hay, and Franks-In-Steins! Can you spot the small foam Abby Normal brain that was a souvenir from the touring musical? πŸ˜‰ The Abby Normal Brain Pate is the same Halloween recipe I’ve been making for years, still as delicious as ever with cream of mushroom soup, cream cheese, shrimp & creole seasoning, Authentic Ritz crackers for Puttin' on the Ritzthen my traditional cheese slices were there too, both ready for Puttin’ on the Ritz on a plate with the logo added front and center so everyone would realize they were the authentic brand crackers!

Franken-Fruit SaladFranken-Fruit Salad was just my normal summer fresh fruit salad renamed for the occasion, but our Rollz in Zee Hay really cracked me up, since they are Rollz in Zee Haydeep-fried eggrolls that are supposedly so addicting they are locally called “crack”…haha! I bought some canned fried onion strings for the bed of “hay” under the egg rolls, and voila! Rollz in Zee Hay! They are very tasty so there weren’t many leftovers. πŸ˜‰

Franks In SteinsSometimes a clever name creates a recipe you can’t resist. These are basically pigs in blankets, a vintage classic appetizer, but by forming the dough differently and adding a pretzel handle, you have little Franks-In-Steins! These will appear again for our Haunted Hollywood Halloween this coming October, as well as in my new Eerie Elegance Eats cookbook!

Partying PeopleIt was a lovely evening, not too hot and not too chilly, so we didn’t use the firepits, and we have a new projector arrangement that allows for even more seating space! The original Cinema Brittahytta projector had developed some sparkles at the Young Frankenstein 2017 audienceedges by the end of last summer, not bad for a 9 year run, but since now I have so many other projectors for Halloween illusions, one of the newer short throw projectors was perfect nice and close to the screen, so less trip hazard of power & HDMI cables through the grass, plus more people can sit in the center for an even better view!

You can see a few more photos of our 10th anniversary summer season premiere in the gallery below. Stay tuned for a couple more movies this summer, starting with a trip back to the Wizarding World for Fantastic Beasts and Where to Find Them…

(more…)

Posted in Cinema Brittahytta, Parties | Tagged , , , , , , , , | Leave a comment

Beauty & the Beast Bookookies

Britta and her Beauty & the Beast BookookiesFrom November 2010 to September 2011 I was buying new hardware and setting up the new BrittaBlvd.com site, so there is a large gap for all my Cinema Brittahytta summer movies that year! Since the new Beauty & the Beast live action remake is almost here, it seemed a good time to catch up with details about when I showed the original Best-Picture nominated animated masterpiece in June 2011, especially my Beauty & the Beast Bookookies!

Closeup of the Beauty & the Beast BookookiesMy Beauty & the Beast movie night was when I originally had the concept of Bookookies that later appeared as my Caroling Cookies for Christmas. My inspiration was the opening story told along with gorgeous stained glass panels, so I transcribed the relevant phrases from the movie and sketched my own smaller versions of the matching stained glass images that could stand the limits of piping and food-coloring pen resolution. That determined the size of each large cookie.

Custom cookie cutters in processI could have cut the sugar cookie dough with a knife around a cardboard template, but I decided to make it easier on myself and make a custom cookie cutter out of copper pipe strap tape bent into shape then joined at the overlap using self-adhesive metal flashing tape. The holes in the copper strap make it a little tricky to Custom Bookookie cutter worked great!clean if your dough is too tall, but that usually isn’t a problem for me. These need to be handwashed of course, but I’ve made lots of custom cookie cutters this way over the years, including life-size Mardi Gras Mask Cookies!

Flood coat of royal icing as smooth as possibleAfter the cookies were baked and cooled completely, I spread a flood coat of white royal icing that dried overnight so the books would be as smooth as possible for drawing and lettering such details. I didn’t get my first edible printer until October 2011, so these original Bookookies were all hand-drawn and hand-lettered, sadly messier than I hoped since I was trying to make the book page curve without any guidelines to spoil my nice smooth white royal icing surface. I drew all the black stained Piping black royal icing between the color blocks of the stained glass designsglass lead lines and lettering with a food coloring pen first, then I went over the color block outlines with a thin bead of black royal icing, which also needed to dry overnight before I could continue.

Once the black royal icing was dry, I used the small tubes of gel frosting plus custom-tinted Adding the stained glass gel frostings and final edge details to the Beauty & the Beast Bookookiesclear piping gel to have a full assortment of colors for the stained glass effect. I waited until after all the gel was finished before using food coloring pens to draw the page edges and the purple book cover edge. Even though the gel tubes were small, I still needed to use toothpicks to get into the corners and the fine detail areas! You also cannot spread the gel around too much across any black lines or it will re-moisten the black food pen and smear black into the gel. The other drawback is the gel frostings never dry, so you cannot stack these cookies for storage or they will stick together and ruin the Patio table display for Beauty & the Beast, including my brass candlestick, a small clock, teacup and teapot as you-know-whodesigns. However they did give a beautiful effect, enough that my friends lectured me on making edible art that is too much work so they felt too guilty eating them! πŸ˜‰

I also decorated my patio table using my brass candleabra, a small clock, teacup and teapot Glass cloche over a real red rose from my garden that happened to drop petals during the partyas you-know-who, a glass cloche over real red rose from my garden, that happened to drop a perfect amount of petals during the party, plus I displayed some Disney collectibles and my Disneyland photo with the Beast by the Cinema Brittahytta movie clapboard sign.

Disney collectibles and my Beast photo by the clapboard sign

It was a fun night with a simple backyard barbeque menu, 10 adults, one kid and one dog. We had at least one viewer who had never seen the movie before, and he enjoyed it enough that we have reserved seats for opening night of the new movie version this week!


Click below to view all the photos of the party, including closeups of all six designs of the Beauty & the Beast Bookookies!

 
(more…)

Posted in Cinema Brittahytta, Edible Art, Parties | Tagged , , , , , , , | Leave a comment

The S’mores Awaken

B-Rey-Ta and BB-8It was the most anticipated movie of 2015, and even though everyone most likely saw it already, 18 of us enjoyed watching Rey, Finn, BB-8, Han & Leia in The Force Awakens as our last summer backyard movie! The S’mores Awakened the fun food, including Starkiller Cocktails, Frozen Lightsabers, and my carefully-arranged BB-8 Cheese Plate, and I even pulled together a quick Rey outfit to go with the purple lightsaber I built at DisneyWorld!

B-Rey-ta from The Force AwakensSince my heart has always belonged to Star Trek, I have never dressed up as anything Star Wars ever before, but since the votes landed with The Force Awakens for our Cinema Brittahytta summer season finale, I figured I could quickly throw together a Rey outfit for fun. I know my lightsaber is the wrong color, but I built my own at DisneyWorld and I liked purple best since there was no aqua or teal blade. πŸ˜‰ The hair was perfect for a hot summer day, and we mimicked some poster poses pretty well! For the full details how I assembled the outfit, see my separate costume post here.

Menu & Cocktail CardsI got lucky and was able to brainstorm plenty of fun menu and cocktail ideas for this theme, like Frozen Lightsabers, Millenium Fal-cones (Make Your Own Snow Cone), Jakku Sunset, Starkiller Cocktail with Glowing Lightsaber Stirrers (“an elegant stirrer…for a more civilized age”), Kylo Ren Kettle Corn, and Finn’s Fresh Fruit Salad. I grabbed images from online and designed menu and cocktail cards with the free Star Jedi font, which looked pretty good!

Menu chalkboard with The S'mores Awaken, BB-8 Cheese Plate & Finn's Fresh Fruit SaladI wrote out the menu chalkboard in the same classic Star Wars font, starting with “A long time ago in a galaxy far, far away…” in the blue font from the opening credits, listing the menu in the classic Star Wars font, ending with The S’mores Awaken – Light Side or Dark Side?

Due to lack of s’mores consumption this year, I have been attempting to recycling homemade marshmallows all summer! What started as the Trek chevrons for 50 Years of Star Trek were cut into small stars and rolled in blue & red sugar for Star Spangled S’mores for the 4th of July Fireworks & Fun, then to transform them into The S’mores Awaken I used the white stars with The S'mores Awaken - Light Side or Dark Sidenormal milk chocolate bars as the Star S’mores Light Side vs. black modeling chocolate slabs and black stars for the Dark Side…heehee! Thankfully I still hada stash of black modeling chocolate I could soften and roll just fine, and painting the marshmallow stars with black food coloring went fairly quickly.

Robin says, “May the S’mores be with you!”

Cutting lightsabers from cardstock for popsiclesFrozen Lightsabers aren’t an original idea, but I still had a ton of single popsicles from a kind donation in July, so I figured why not use them? I found a nice graphic of whose lightsaber is whose and enlarged them to cover the popsicle stick and as wide as the popsicle. I printed onto cardstock, cut them out, then prepped with double-stick tape, since I couldn’t assemble these Ellie enjoys her Frozen Lightsaberuntil people arrived or they would melt! I arranged them popsicle down in clean ice in a big bowl, and Ellie & I enjoyed ours, but I’m afraid most of them melted before others had their chance.

Millenium Fal-Cones ready and waiting to make your own snow cone!Millenium Fal-cones Make Your Own Snow Cones were all set up and ready to go on the kid-height table by the waterfall, but since Ellie has been making them all summer, they weren’t used until later in the evening….when E & V suckered their dad into shaving the ice for them…lucky kids! πŸ˜‰

Millenium Fal-Cones shaved by dad! Millenium Fal-Cones shaved by dad! Millenium Fal-Cones shaved by dad!

Beware the menacing red Sith glow in the Kylo Ren Kettle Corn! 
Some of the fun food was just renamed. Finn’s Fresh Fruit Salad was a new name for one of my favorite summer staples. I can always enjoy leftover fresh fruit salad! The Kylo Ren Kettle Corn was our normal kettle corn in the Cinema Brittahytta popcorn boxes but with a menacing red Sith glow from the depths! I do love my little submersible LED puck lights adding a little glow almost anywhere!


Creating Glowing Lightsaber StirrersI have been using glowstick bracelets as drink stirrers for years now, so of course they were natural Glowing Lightsaber Stirrers “an elegant stirrer…for a more civilized age” just by printing smaller versions of the same Frozen Lightsabers images onto cardstock, cutting them out, then using thinner double-stick Glowing Lightsaber Stirrers tape to add to the ends of the unwrapped glowsticks. I left them uncracked until the party (except for the proof of concept test) so they would be ready for my custom cantina cocktails!

I designed two themed cocktails that could both be made as mocktails for others and that could use the Glowing Lightsaber Stirrers. The Jakku Sunset was inspired by a Tequila Sunrise but with pineapple juice and gold rum for a more exotic feel. The Starkiller Cocktail was a color story using my knowledge that the black vodka layers nicely over full-Kevin plots using his Starkiller Cocktail...beware!sugar blue raspberry mixer…and the bright red maraschino cherry looked like the eye of the beam! We used my LED glasses to make them glow, I still had star ice cubes from Fireworks & Fun that gave that extra Bartender B-Rey-Ta with her custom cantina cocktailsfinishing touch floating on top against the black vodka, and Kevin sure looks like he was plotting for the First Order and the Knights of Ren as he sipped his!

I do believe that of all this fun food, I am most proud of my BB-8 Cheese Plate, not only for the rhyme and the mosaic-style execution, but that I didn’t see any other BB-8 Cheese Plates online! You might have seen my carrot cupcake fail from earlier this year, so there was no way I was going to go through that Creating my BB-8 Cheese Platemess again…but I always have sliced cheese for parties anyway, so this was the perfect answer! BB-8 is already orange and white, classic cheese colors, so I only needed to paint some black food coloring accents and it looked great! When Ellie walked in and saw it, her jaw dropped to the floor and she couldn’t wait to eat him! Robin & Nathania were also jumping at the chance to make him BB-Ate…haha!

Had to take this photo! ;)We could have started the movie earlier since it was dark early enough, but there were still some on their way, so we finally started at the normal 9pm summer movie time…and I couldn’t resist taking the iconic shot of the words scrolling into the starfield! 18 of us was a nice full house for our summer season finale…and we did have two kids Lightsaber fight!who brought their own lightsabers to duel with Rey! No fair that E had TWO red lightsabers…those Sith are sneaky! πŸ˜‰

I sure had a blast that so many of my friends could enjoy summer backyard movies with me again. Hope everyone enjoyed their summers too! Stay tuned for next year’s 10th anniversary season of Cinema Brittahytta with special surprises in store!

Lightsaber fight! Lightsaber fight!

Posted in Cinema Brittahytta, Edible Art, Parties | Tagged , , , , , , , , , , , | Leave a comment

Rey from The Force Awakens

B-Rey-ta from The Force AwakensSince my heart has always belonged to Star Trek, I have never dressed up as anything Star Wars ever before, but since the votes landed with The Force Awakens for our Cinema Brittahytta summer season finale, I figured I could quickly throw together a Rey outfit for fun. I know my lightsaber is the wrong color, but I built my own at DisneyWorld and I liked purple best since there was no aqua or teal blade. πŸ˜‰ The hair was perfect for a hot summer day, and we mimicked some poster poses pretty well!

Rey & BB-8Star Wars heroines always have unique hair! Rey has essentially three ponytails that aren’t pulled all the way through, so they stay in floppy loops. I don’t have very thick hair, and what I have is fine and currently layered, so even with brand-new elastics and Rey Full Outfitstarting with gel added to fully wet hair, I had trouble with my loops slipping out of the ponytails, especially at my neck. I always get so warm during summer movie nights that this hairstyle was a nice treat!

Rey is a scavenger so it was appropriate for me to scavenge her outfit from what I already had in my closets and craft supplies! I have new khaki hiking pants that tie at the knee which were perfect so that was easy. I didn’t have a cap-sleeve ivory Chopping a competitor swag tee into Rey's tunictunic, so I cut a competitor swag tee I had never worn and left it unhemmed. My mom had given me some fur-lined black boots that were the perfect look, so glad I kept them!

Cutting leather jacket scraps into Rey's double-beltI found some leather scraps in my steampunk stash so I was able to hack together Rey’s double-belt that stayed anchored with safety pins. My wrist cuff was an old brown belt also from my steampunk stash wrapped around my wrist then buckled.

Before I found my gothic wrought-iron Castle Modern bed, I had a garden arch as a headboard with some faux floral draping over some long loose-weave muslin I had dyed a pale periwinkle to blend with my darker periwinkle sheet set. I have kept the muslin of course, and not only did I know exactly where it was, but there were two matching fabric scraps the perfect length for the arm wraps! Since I’m taller than Rey, I was concerned I might not have enough muslin to drape front and back properly, but it was so long I actually had to pin it shorter!

B-Rey-ta from The Force Awakens Rey Poster

B-Rey-Ta and BB-8I had to have the lightsaber light my face while holding my BB-8 Cheese Plate, and we even had a lightsaber battle after the movie…no fair that E had TWO red lightsabers…those Sith are sneaky! πŸ˜‰ For the full story of our Cinema Brittahytta summer season finale, you can click here

Lightsaber fight! Lightsaber fight! Lightsaber fight!

Posted in Cinema Brittahytta, Costumes, Parties | Tagged , , , , , , , , , | Leave a comment

Hogwarts Fun to Prepare for the Cursed Child

7th year Hogwarts student Britta show the new recipes Golden Snitches and Chocolate Frog S'mores to Prepare for the Cursed Child

Back in 2011 I thought I was retired from Hogwarts parties because the last movie was being released…then lo & behold, in 2016 not only was a new Wizarding World movie “Fantastic Beasts and Where to Find Them” due in November, but a new Harry Potter story in July! It is only 320 pages since it is the script of the stage play in London only, but since Harry Potter and the Cursed Child picks up 19 years after the Battle of Hogwarts, this was the perfect occasion for 16 of us to enjoy some Hogwarts-style summer Cinema Brittahytta fun and watch the final movie with the 19 years later epilogue to Prepare for the Cursed Child!

Full Hogwarts chalkboard menu with Chocolate Frog S'mores and Golden SnitchesI got out my Potter paraphernalia from storage, including collectibles like Honeydukes candies, my interactive wand, the Hogwarts crest tapestry, and the Mirror of Erised, plus my homemade decor like my spellbooks, Horcruxes, ballpoint feather quills and homemade leather Sorting Hat, I set out the Ogle the Owls contest with prizes, and I wore my homemade Hogwarts student uniform from 2003 with robe but no gray house sweater since it was too warm. I brought back classic recipes like mini Cauldron Cakes, Butterbeer Light, Frozen Butterbeer, and Polyjuice Potion Punch (aka Bubbling Witches’ Brew), Herbology Fruit Salad, included my two summer staples Four Bean Salad and Cheeses & Crackers, plus I added two fun new recipes: the Golden Snitch corn muffins, and custom Chocolate Frog S’mores! Ellie and I even had an intense wizard duel, and an early birthday present “magically” appeared as I cast Wingardium Leviosa!

Elias pulls a Butterbeer LightI still had some unopened diet cream soda in my stash, so a whole 2 liter bottle plus 1 1/7th cups of sugar-free Torani English Toffee syrup made a spigot jar of Butterbeer Light with “all the alcohol & calories charmed away!” Elias claimed one of my four Butterbeer mugs from Orlando and pulled himself a pint or so. πŸ˜‰ I also had some flat leftover non-alcoholic sugar butterbeer that was perfect to freeze into pucks for my ice shaver, but it took a full 24 hours to freeze because of all the sugar. Beware that if you try to freeze the original alcohol version it might never freeze solid! Since I wanted the ice The Sorting Hat enjoys a Butterbeer Lightshaver available as Frozen Potions Class, I shaved all eight butterbeer pucks right before the party, and stashed the Frozen Butterbeer in a covered bowl in the freezer to scoop into cups or mugs during the evening. I was even lucky to have some left and still fluffy when I started reading my copy of the Cursed Child book the following weekend!

Hogwarts Student Ellie with some disgustingly foamy Polyjuice Potion punchSeveral other kids were expected but only two attended, so there was too much other fun like Ogle the Owls to do the Frozen Potions Class Ellie added some more potion ingredients to her Polyuice Potion Punch...would it yield unexpected results?!?with the snow cone machine. I did have some potion bottles set up plus my foamy Polyjuice Potion Punch, also known as Bubbling Witches’ Brew in my book Enhanced Eerie Elegance and in my video series on YouTube. Ellie added some more potion ingredients to Disgustingly foamy but extremely tasty Polyjuice Potion Punchher Polyuice Potion Punch…would it yield unexpected results?!? All I noticed was lots of energy into the evening for an intense wizard duel AFTER the long movie! πŸ˜‰

"I open at the close...and I'm quite tasty!"I had scanned & printed edible Golden Snitch wings back in 2012 to add to a gilded modeling chocolate orb for the Hogwarts student cake for Piper’s Potter Party, and I always planned to make a batch of cupcakes to demonstrate possibilities and post the wafer paper sheets for sale on Etsy, but I never got around to it. Here was the perfect Same vegan corn muffins as Luscious Little Lionsopportunity, but I already had SO many sweets on my menu, I tried to think of something savory. Voila! The tasty vegan corn muffins that have appeared at two previous movie nights as Luscious Little Lions should be perfect! Cutting a thin slit to insert the cut wafer paper Golden Snitch wings I only had white whole wheat flour and not even a milk alternative, plus I used my shallower mini muffin pans, so they ended up a little drier than usual, but they still looked perfect once the wafer paper wings Completed Golden Snitch corn muffinswere carefully tucked into small knife slits in the crumbly cornbread! I couldn’t believe that I didn’t even think about Harry’s winning Quidditch catch in his mouth before we took photos! “I open at the close…and I’m quite tasty too!” πŸ˜‰


Cutting around custom-printed Chocoloate Frog Card frosting sheets on homemade marshmallows
I didn’t have my edible printer until after I “retired” from my Hogwarts parties, and I had so much fun using the papercraft projects I had designed for my parties as edibles for Piper’s Potter Party, I wanted to try something new! I had already made Chocolate Frog cards & boxes as cookies, and s’mores are my summer special dessert, so Chocolate Frog S’mores were born! I didn’t have time to create new card designs, so I used the fun photos of my friends that were the original test batch years ago, including Dobby & Nearly Headless Nick from my Year 7 at Hogwarts party in 2007, Captain Glen, and myself as a couple different characters, printed them on frosting sheets in my edible printer, cut out all the cards, mixed up some homemade marshmallows (only 2/3rds of a batch this time but the same recipe as 50 Years of Star Trek), smoothed out the marshmallows as best I could, then gently set the cut frosting sheets on the sticky surface of the fresh Cutting the perfect size homemade vegan graham crackers for the Chocolate Frog marshmallow cardsmarshmallows while they set overnight. I crammed them closely together with just enough room to cut between them, and I was lucky my small metal spatula server was the perfect size, since my rolling pastry cutter would have overshot too much!

While I was waiting for the marshmallows to set, I baked my now-traditional vegan graham crackers, using the frosting sheet backing papers to cut the graham crackers into pentagons that were exactly large enough around the marshmallow cards to show. I didn’t bother making matching top crackers this time since I was already rushed for this party from too much July chaos.
Painting eyes on the custom-molded Chocolate FrogsOf course the chocolate was the frogs! I insisted on a realistic frog mold for my papercraft boxes and used the cutesy version for my Peppermint Toads, but the realistic frogs are quite small, so I thought the cutesy frogs would be a better amount of chocolate for the s’mores. It took a couple times of spooning melted Ghirardelli 60% cacao baking chips in my two molds to get enough frogs, then since now I have nifty Completed Chocolate Frog S'moresChoco-White edible paint, I added googly eyes to all the frogs…heehee!

The marshmallow cards sat on the matching graham crackers, but setting the chocolate frogs on the marshmallows completely covered all the fun people details, so I set the frogs in a separate footed dish in the center of the large tray so everyone could take a frog with their s’more.Why did everyone choose Dobby to roast?!?

With all the choices of cards, I’m not sure why everyone chose Dobby to roast?!? Poor Dobby! The frosting sheets don’t roast like the marshmallows do, Ben enjoys is roasted Chocolate Frog S'morehomemade marshmallows melt easier than storebought, and the lack of top graham cracker caused logistical issues, but Ben still enjoyed his Chocolate Frog S’more!

As we were enjoying the evening chatting, eating, and some playing Pokemon Go, since I had my wand out, Glen asked me what the levitation spell was. “Wingardium Leviosa” I replied. He said, “You Glen flies the USS Enterprise 1701-A drone right at me!have to do the right wand motion,” so I did my swish & flick. Then he said, “Now do it to the couch”…I did, and magically the USS Enterprise NCC-1701-A floated up into the sky!!! I had seen earlier this year that there was a 50th anniversary drone due in July, and he found it for my birthday! All the crashing was extra hilarious after seeing Star Trek Beyond the night before. Glen demonstrated his newly-practiced drone flying skills all around the backyard, Elias had fun catching it with a bean bag when it fell, and I got a couple fantastic photos and The USS Enterprise 1701-A drone complete with birthday bow on the bow! ;)funny videos! My first attempts flying inside after my first lessons were pretty bad, so I will need more practice for sure! Thank you so much, Glen!

Here are some videos of the 50th anniversary USS Enterprise NCC-1701-A drone in flight! Glen demonstrated his newly-practiced drone flying skills all around the backyard!


Frozen Butterbeer with my Hogwarts dinner!After the movie was finished, no one had any Butterbeer Floats, but some more Frozen Butterbeer was enjoyed, and several were toasting their Chocolate Frog S’mores over the fire pit. Outstanding Owl Ogler Ellie winning her prize from the treasure chestEllie wanted a prize so I told her she at least had to try to find some of the owls! She found quite a few, so I awarded her Outstanding Owl Ogler with her selection from the treasure chest! Not too long after, she challenged me to a wizard duel, which was quite a battle! Thanks to Glen for capturing all the intense wand action! πŸ˜‰


Wizard Duel: Ellie vs. Britta Wizard Duel: Ellie vs. Britta Wizard Duel: Ellie vs. Britta

After such a fun party plus the refresher of watching the movie, I was definitely Prepared for the Cursed Child! You can see how much fun everyone had by clicking to view the rest of the photo gallery…and there’s one more movie before this summer season is over, so stay tuned!

(more…)

Posted in Cinema Brittahytta, Edible Art, Parties, Recipes, Wizards | Tagged , , , , , , , , , , , , | Leave a comment

Cinema Brittahytta Season Premiere – 50 Years of Star Trek

Lt. Peterson to Enterprise...let's celebrate 50 Years of Star Trek!This weekend 18 of us celebrated 50 Years of Star Trek as the Cinema Brittahytta Season Premiere…as Jen said in her RSVP, “Yay, it’s officially summer!” Since it was so hot, I wore my Classic Trek lieutenant’s uniform I made 15 years ago, complete with vintage boots, and we enjoyed Redshirt cocktails and grilling Starfleetza Pizzas, but no one melted any of my homemade marshmallows of the 50 S’more Trek special s’mores I made, one for each year…darn!

Personal Trek Fun and ToysThere is so much great Trek to watch that it is hard to choose only one to watch to celebrate all 50 years, but for the sake of the next movie “Star Trek Beyond” opening in July, I chose to watch the 2009 reboot with Spock Prime and the new cast. Many of us had forgotten what an entertaining movie it is, and we were thankful we could still enjoy Leonard Nimoy and Anton Yelchin on screen even though they are no longer with us.

This was rushed decorating, since I only had 4 days after returning from a 2-week vacation in Spain seeing 26 castles in 10 days, so I only put up a few posters, got out all my Trek uniforms, and arranged all the Trek toys, collectibles, and photos I could easily find. I didn’t get the table Some of my Trek costumes and tshirts on displayarranged until after the first guests arrived, but then it looked great! I especially love how so many eras of my life have fun Trek photos to make me smile!

Special Trek slideshow then trailers before the movieI was able to throw together a quick slideshow of all the movie posters, some blooper shots from several TV shows & movies, plus my personal Trek fun since 1991 that included several friends who were in attendance. Little Julianna found me to tell me excitedly that she saw me on TV, and it was pretty funny to tell her to watch for her dad Jeff and Uncle Louie on TV too!

Sheila got into the Trek spirit by wearing the Spock shirt I painted in highschool!I have even more Trek tshirts in storage, but I got out the shirts I could easily find to be available for anyone to wear if they wanted, so Sheila got into the Trek spirit by wearing the Spock shirt I painted in highschool! Classic Trek style soft-focus courtesy of my smeary lens…we’ll call it an intentional effect! πŸ˜‰

Partying People on the PatioThankfully the sun was behind the trees by the time people started arriving, so even with fans running on the screened patio, outside was much cooler. I was running around so much that my face never cooled down until after dark!

50 Years of Star Trek menu with S'more TrekHere’s the menu for the evening, with some of the quickest chalkboard art I’ve ever done right before guests arrived…it turned out much better than I expected. πŸ˜‰

50 Years of Star Trek Menu: Ice Trek Cocktails with custom ice cubes from Classic Trek and The Next Generation! More details about Romulan Ale, The Redshirt, and the Vulcan Death Grip below. Starfleetzas – Grill Your Own Pizza, Chevron Cheeses, Federation Fruit Salad, Commbadge Chocolates, using NextGen commbadge molds I made in 2002, then hand-gilded with gold and silver luster dust, and finally S’more Trek, a full tray of 50 special s’mores, one for each year!

Ice Trek Cocktails on the barI knew I wanted to make a cocktail called The Redshirt, but it wouldn’t be Trek without some vivid blue Romulan Ale, then I added something green to be the Vulcan Death Grip. Yes, those are Trek shot glasses from my collection! The complete cocktail recipes are at Glen was brave enough to add more tequila to his Redshirt cocktail!the bottom of this post if you can’t read the cards in the photo. Only Glen was brave enough to add even more tequila to the already-mixed berry margaritas, but thankfully he survived the traditional redshirt fate! πŸ˜‰

Classic Trek Chevron Ice Cubes for Ice Trek CocktailsBefore I left on vacation, I made several rounds of ice cubes using the custom silicone molds I had made years before, the Classic Trek chevron I made to fit custom s’mores several summers ago, and the Next Generation commbadge mold I made for the first Trek Mystery party in 2002. After I had enough ice cubes, I started molding chocolates, just melting my trusty 60% Ghirardelli baking chips and chilling in the fridge until set. I also made 30 Trek chevron Starfleetza pizza crusts before the trip, safely stashing them in the freezer, then I was on my way to Spain…

Pouring melted chocolate into the custom Trek chevron silicone molds Pouring melted chocolate into the custom NextGen commbadge silicone molds Unmolded Trek chocolates, ready for decoration Barely baking the Starfleetza crusts to keep their shape 

When I got home, there was still all the luster dust to paint on the chocolates, plus decorating and making other food! It was only a couple hours to add the gold to the Classic Trek chevrons, but it took a couple evenings to finish all the gold and silver on the Commbadge Chocolates. Too bad I didn’t see anyone eating them, but at least they looked great…ready for Captain Picard to tap and say “Picard to Enterprise!”

Painting gold luster dust onto the Classic Trek Chevron Chocolates Painting both gold and silver luster dust onto the Commbadge Chocolates Finally finished gilding all the chocolates! Completed Commbadge Chocolates 

I had a new idea this year to make my Violent Vertebrae rollups into Trek chevron shape as Reboot Rollups. The lavash bread doesn’t bend into points very well so the shape is only Reboot Rollups for 50 Years of Star Trekapproximate, but they worked pretty well. Spread the jalapeno artichoke dip on the lavash bread, taking out any large chunks, roll up inside foil, but instead of leaving as a round roll, squash lengthwise into a point on one side, with the two legs of the off-center chevron on the other side. Freeze overnight in this roll shape so they are nice and solid. Remove from the freezer and use a serrated knife to gently saw slices away from the roll while keeping the chevron shape. Arrange on a tray while they are still frozen for easier handling, then cover and let thaw completely in the fridge before serving.

Spreading the artichoke dip onto lavash bread for Reboot Rollups Forming the rolled log of lavash bread and artichoke dip into the Trek chevron shape Forming the rolled log of lavash bread and artichoke dip into the Trek chevron shape Cutting the chevron shapes away from the frozen rollup log 

Bending custom cookie cutters for Star TrekThe whole reason I finally bought a stand mixer was to make my own marshmallows several summers ago….but the cookie cutter I had custom-bent into the chevron shape back then had disappeared since it had been Cutting Star Trek Chevron Cheesesborrowed! To cut marshmallows you need a solid tall metal edge, not my copper tape I use for other custom cookie cutters, so thankfully I had another simple oval in my stash to bend a new Trek chevron. While I was at it, I made a smaller chevron a better size for custom Chevron Cheeses, which worked great!

Mixing the thin ribbon of boiling sugar syrup into the bloomed gelatinFinally, with the new cutter ready, and the pans prepped with wax paper, non-stick spray and lots of powdered sugar, I was ready to make the marshmallows! This time I used Alton Brown’s marshmallow recipe (full recipe at the bottom of this post), but I added some honey since I was at the tail end of my corn syrup. This added a nice extra flavor without affecting Marshmallows almost to maximum fluffthe sugar crystallization. After the thin ribbon of boiling sugar syrup was finally mixed into the gelatin and completely fluffed up stiff, it was ready to spread into the pans to set. I wanted to make 50 special s’mores, one for each year, so I filled one sheet plus almost half of the other, only Homemade marshmallows spread and dustedabout 1″ tall. I sprinkled more powdered sugar over the top then patted the surface with another sheet of wax paper to smooth the top flatter, then let them set overnight. The next evening I Flipping over the marshmallow slabflipped over the entire slab of marshmallow onto a freshly dusted sheet of wax paper, then using a dish of water to keep the cutter from getting too sticky, I was barely able to get 50 chevrons cut, but there are cutting scraps of course. Maybe I can save them for winter to cut up for hot chocolate, but it’s Cutting marshmallows is sticky stuff!too hot right now to enjoy them that way! As each was cut I dusted the reverse side with more powdered sugar and set them on another wax paper lined tray. I kept the cut marshmallows covered one Closeup of S'more Trekmore day until I assembled with my gilded Trek chevron chocolates and the purchased graham crackers into a full platter of S’more Trek!

I blew it and only took before photos of the Starfleetza pizzas in action, not any of the ones everyone made for dinner! Big thanks to Sheila for bringing a cheddar jack cheese mix to add to my mozzarella, plus setting out all the pizza toppings in my custom-melted space-age dishes I saved from the 2002 Trek Mystery party. πŸ˜‰ Starfleetza Pizza Crusts ready with the USS Enterprise pizza cutter!Of course even though I made the crusts small enough they didn’t really need cutting, I had to get out the USS Starfleetza Pizzas ready to grill!Enterprise pizza cutter I got as a Christmas gift a few years ago! Heehee… It did make for an awesome photo in front of the perfectly positioned pile of pizza crusts!

As is usually the case with my movie nights, I am finally assembling my own dinner as the trailers are running, then I get to sit down in the cool night air and enjoy my dinner on my lap in front of the big screen. When I realized I didn’t have any finished Lt. Peterson's dinner: Starfleetza grilled pizza, Reboot Rollup, Federation Fruit Salad, Chevron Cheese, Commbadge Chocolate, and S'more Trek!Starfleetza pizza photos, I decided to take a photo of my dinner plate in front of my 25th anniversary Trek print with Kirk and Picard…then saw my own reflection too!

Keep reading for the full photo gallery plus complete recipes for the Ice Trek cocktails and the homemade marshmallows…and stay tuned for two more movies this summer!


(more…)

Posted in Cinema Brittahytta, Edible Art, Outdoors, Parties, Recipes | Tagged , , , , , , , , , , | Leave a comment

Cinema Brittahytta Season Finale – The Book of Life

Your festive hostess modeling the skull platter of Dia de los S'MuertosHow did the summer go by so quickly? The end of August was already the Cinema Brittahytta season finale, so I showed The Book of Life for everyone to come get a head start on Halloween by watching a gorgeously-animated original story about Mexican traditional Dia de los Muertos celebrations! We were a group of lucky number 13, a cozy group to close out the summer. I tested a possible new recipe for this Halloween, prepped custom crusts for Savory Skull Pizzas, cut Calaveras Cheese & Crackers, and hand-painted mini chocolate skulls for Dia de los S’Muertos!

Celebration Snow Cones all readyI still had plenty of syrups and frozen pucks for my snow cone machine but no one partook this time. A couple people did try the custom cocktails I designed. Xibalba’s Wager mimicked his colors using black vodka over bright green sour apple mixer in a green-rimmed glass. La Muerte’s Faith used yellow sugar on the rim for all her marigolds, red raspberry syrup for her red dress, and black vodka for her long luscious locks of hair.

Custom Cocktails ready to mix your ownXibalba’s Wager

bright green sugar
1 part green sour apple mixer
1 part lemon-lime soda
1 part black vodka

Moisten the edge of the glass and rim with bright green sugar. Pour the sour apple mixer into the glass, then the lemon-lime soda. Gently pour the black vodka down the side of the glass so it layers on top. Sip and watch your devious plans unfold!

Custom Cocktails: La Muerte's Faith vs. Xibalba's WagerLa Muerte’s Faith

bright yellow sugar
1 part raspberry syrup
1 part lemon-lime soda
1 part black vodka

Moisten the edge of the glass and rim with bright yellow sugar. Pour the red raspberry syrup into the glass, then the lemon-lime soda. Gently pour the black vodka down the side of the glass so it layers on top. Sip and watch your faith in human nature triumph again!

Calavera Cheese & CrackersCalavera Cheese & Crackers took some time to make but was relatively easy since I used my small skull cutter from my Halloween supplies. You have to be careful what kind of cheese you use, since the skulls are so small, they break very easily coming out of the cutter. I found that sliced Swiss cheese was best, but you have to work around the holes already in the cheese. πŸ˜‰

Chili Lime Corn Cups are on my list to develop for my Halloween party menu this year, so First attempt at Chili Lime Corn CupsI tried this recipe from Scary Jerry and spooned it into purchased tortilla chip cups just before serving and set them on one of my festive skull trays. Even though I didn’t include the fresh jalapeΓ±o at all and only a little chipotle, it was sadly still too spicy for me to eat. About half was eaten at the party, but to finish the leftovers I added chunk chicken AND Greek yogurt before I could eat it comfortably…so I am still working on a Halloween recipe. πŸ˜‰

Skull Pizza CrustsYou’ve probably seen me make several custom pizza crust shapes by now, so I don’t think anyone would be surprised that this time I formed the crusts into skull shapes! I even provided white Alfredo sauce on the pizza table for those who wanted to decorate their Savory Skull Pizza as a sugar skull. πŸ™‚

Robin's Skull Pizza Jerry's Skull Pizza Closeup of Jerry's Skull Pizza Ellie's Skull Pizza

Push mold skulls from emelted modeling chocolateThe most prep time for this party was painting the chocolate skulls for Dia de los S’Muertos. I STILL had leftover modeling chocolate stars from previous s’mores this summer, so I remelted those and Unmolding the chilled chocolate skullsused my skull ice cube trays as push molds. After the chocolate set solid in the fridge, it was so warm that I couldn’t leave any out of the fridge except the one I was actively painting, so I kept transferring the freshly-painted Painting the chocolate skulls with Choco-Whiteskull back into the fridge as I got the next one out to paint. I used my finest food brush Dia de los S'Muertoswith the Choco-White food color that sticks to chocolate perfectly, and no two skulls were the exact same design. I set them on top of giant marshmallows that I had cut lengthwise, and they were ready to enjoy!

Mary Jo brought her famous New Mexico style green chili egg casserole, which was a little too hot for me this time, but everyone else enjoyed it. I got out a few items I had already Festive patio food table & menu chalkboardpurchased for this Halloween for a little bit of decor, like the skull cutouts, the hanging skull sign, the skull platters, and the lace fan. I even decorated the menu chalkboard with curly vines and a sugar skull. Since the pizza table was on the patio, the love seat was out on the grass again, this time enjoyed by Keith & Doug.

By August the sun is setting earlier but everyone is still eating and chatting instead of settling down for the movie, so it was the perfect timing for s’mores! Finally I had no leftover s’mores…woohoo!

Skeleton Ellie chomps a chocolate skull Charles helps Ellie and Benjamin roast their marshmallows for Dia de los S'Muertos one of many Dia de los S'Muertos on a nicely roasted marshmallow Nathania roasts her marshmallow

Last outside movie night of 2015! Thanks for another fun summer!We all enjoyed the movie, repeat viewers and newbies alike! You can see the full photo gallery if you click below. I had to leave for a work trip to Brazil only 9 hours later, so it was a huge blessing that everyone was kind enough to help bring everything inside and even take down the movie screen. Many hands do make light work! I’m always sad when summer party season is over, but that means Halloween is up next! πŸ˜€

(more…)

Posted in Cinema Brittahytta, Edible Art, Outdoors, Parties | Tagged , , , , , , , , | Leave a comment

The Hills are Alive with a Birthday Cinema Brittahytta!

Birthday Girl with The S'mores of MusicMy summer movie nights are good chances to view old favorites again, and 2015 is the 50th anniversary of a true classic…The Sound of Music! I invited my friends to sing along to help me celebrate my birthday weekend with a menu including A Few of My Favorite Things! 15 of us including 3 kids enjoyed Jerry’s delicious chocolate birthday cake with a crazy singing lotus candle, but since the movie was so long, no one ate any of The S’mores of Music I made…darn!

Teal Girls Unite!I didn’t have many decor ideas, so to go along with A Few of My Favorite Things, I used teal and aqua plates, napkins, and clothes. Ellie and Robin also wore teal in honor of my birthday, so we had to take a teal-girls photo! πŸ˜‰

Iced Tea (a drink with jam & bread)It’s too hot in the summer for a proper cup of hot tea, so in the spigot jar I had Iced Tea (a drink with jam & bread). A few adults tried the special Edelweiss Cocktail. Cyd wasn’t able to attend but she helped design this custom cocktail using a sugar cube as the snowy Alpen peak in the bottom of the glass. Elderflowers are similar to edelweiss so I used St Germaine liqueur and it Elderflower liqueur Edelweiss Cocktails in several glass styleswas tasty. I found some drawings of edelweiss for the recipe card:

Edelweiss Cocktail

Edelweiss, Edelweiss, Every morning you greet me,
Small and white, clean and bright, You look happy to meet me.
Blossom of snow may you bloom and grow, Bloom and grow forever,
Edelweiss, Edelweiss, Bless my homeland forever.

1 part chilled vodka
1 part St Germaine elderflower liqueur
2 parts lemon-lime soda

Rim the glass with white sugar snow. Set two sugar cubes in the glass. Pour in the vodka, then the St Germaine, then top with lemon lime soda. The bubbles should mix the drink without disturbing the sugar cubes so your drink will be clean and bright. After several minutes, the cubes will turn into mountains like the Alps!

The Hills are Alive with the Smell of SausagesSausages are very Austrian and a summer BBQ staple for me, so I called them “The Hills are Alive with the Smell of Sausages” to be funny. I make several summer menu items all the time because I love the leftovers, so those and the last of my homemade ice cream from the 4th of July were A Few of My Favorite Things, plus my special request for Jerry’s fantastic chocolate cake!

Cutting wafer paper sheet music to fit marshmallows for The S'mores of MusicThe special s’mores this time were The S’mores of Music! The chocolate stars and graham crackers stored fine as leftovers from Fireworks & Fun, so I printed out some pages of sheet music from Do Re Mi and My Favorite Things onto edible wafer paper. Even after shrinking the music Can you read the songs on The S'mores of Music? :)smaller and using the giant marshmallows, only a short phrase would fit, so I cut them freeform by hand to make sure it was a recognizable musical The S'mores of Musicphrase on each marshmallow. That left a lot of music scraps, so I’m glad I used the much cheaper wafer paper than the expensive frosting sheets that I’ve used on marshmallows before! If you look closely you can see do, re, la, ti, and a few favorite things on the finished s’mores. πŸ™‚

Partying people Partying people Partying people Partying people
Birthday girl with the crazy lotus candleWe enjoyed chatting, grilling and eating, then I showed 15 minutes of special pre-movie “vintage” entertainment before we used one of my silly lotus candles for my birthday cake. We had tried one of these candles for Cyd’s 60s cocktail party birthday but it never sang until 5 hours later. This one sang but Birthday girl cutting the delicious chocolate cakeonly turned very slowly. We were all listening to the candle instead of singing, until Robin tried to sing matching the squealing high pitch of the candle…haha! Jerry’s chocolate cake was delicious with my homemade vanilla custard ice cream!

Fantastic quality widescreen on the Blu-ray edition!This movie is so long that it even has its own intermission, but the die-hards made it through the whole thing! The film transfer looks fabulous, and so many of us had Ready for the movie!never seen the true widescreen version, which really makes a difference. Several of us sang along of course!

Last but not least, here is the special pre-movie “vintage” entertainment I showed on my big screen…highlights from my performance as Maria in our 6th grade class production of The Sound of Music! I had no idea how to do anything but belt out the notes since I wasn’t quite 12 yet, and everyone on stage is my age except for little Gretl. Even though we trimmed the show down, I still had 14 costume changes, and was often wearing double costumes in the Sacramento summer heat. As you forgive the brand-new consumer VHS recorder technology of 1983, watch for my wimple wardrobe malfunction, my Do Re Mi flub, and my intense “acting”…enjoy!

The full photo gallery is included below…and stay tuned next month for The Book of Life!

(more…)

Posted in Cinema Brittahytta, Edible Art, Outdoors, Parties | Tagged , , , , , , , , , | Leave a comment

Cinema Brittahytta – Big Hero 6

Big Hero 6 Menu with Special S'moresFamilies with kids understandably often have to change plans on a dime, so instead of the 16 expected, we just had a cozy crew of 8 this weekend for Big Hero 6 at Cinema Brittahytta, thoroughly enjoying our grilled pizzas, snow cones & special s’mores! An hour after everyone else left, 4 more special guests stopped by and made a little Ouye After-Party with more s’mores, kettle corn & fruit salad. πŸ™‚

In the invitation I asked everyone to “bring your favorite San Fransokyo-inspired topping to recharge your batteries with grilled Personal Healthcare Companion Pizzas!” so obviously I had fun naming the menu, with representation of all major characters! I think my favorite name is Fred Zilla Fruit Patio food tableSalad…say it five times fast? πŸ˜‰ I grabbed images online & made menu cards to make sure everyone understood the names, and I wrote them all our for the menu chalkboard, including drawing Baymax waving at the bottom. I didn’t make cards for Microbots Manchego with Quince, Callaghan Cheeses, or Krei Crackers, and the snow cones & pizzas were outside, but can you spot the signs for Hiro-Cane Cocktails, Honey Lemon-Ade, Wasabi Peas, Fred Zilla Fruit Salad, and Big Hero Smores?

Personal Healthcare Companion Pizzas cardSince the pizza table is outside and often has more of a breeze, I wanted to make the Baymax card stand up vertically for the Personal Healthcare Companion pizzas. I printed it full page onto cardstock, folded the bottom back across the bottom of the image, cut in along the bottom to fold the sides backwards, cut along the shoulders for shape, then folded the top down to stabilize Hiro’s head better. I used thin double-stick tape, then cut around Hiro’s hair so all the edges matched. After the shoulders were trimmed, bending the sides backwards met behind Baymax’s neck, so a little tape there held it perfectly. It looked better leaning back at a slight angle, so I kept trimming the folds where the sides met the bottom until I had the angle I wanted. This stood up pretty well on its own, but a breeze could knock it over, so I also used normal tape to stick the bottom flap to the vinyl tablecloth. Thankfully it stayed standing during the entire party!

Standup Baymax Card 1 Standup Baymax Card 2 Standup Baymax Card 3 Standup Baymax Card 4

Quick & Easy Baymax Paper PlatesI only had 11 plates left of my heavy-duty paper plates, so I quickly made them into Baymax plates for the pizza table out by the grill, and red square plates leftover from Lego movie night last year for the inside food table.

Assembling Hiro Toothpick FlagsSince I decided on Hiro-Cane Cocktails that ideally should have an orange slice & cherry garnish, and I had images of Hiro in his normal clothes and his super-suit, I thought of making toothpick flags, one side for each Hiro. I printed these on a single Assembling the Hiro-Cane Cocktail garnishes with the Hiro toothpick flagssheet of normal paper, cut them out, then used double-stick clear tape so it would stick to itself as well as around the toothpick. These came out perfectly and were so quick to Hiro Toothpick Flag Garnishesmake! After I sliced a couple oranges and notched them into half-moons, I was able to stick the toothpick through the cherry and into the top of the orange rind, and they sat in my glass holder just right!

I had designed the cocktail so it would still look cool without any alcohol in case any of the kids wanted to try it. Here is what the card said for the Hiro Cane Cocktails:

Hiro-Cane CocktailsHiro-Cane Cocktails

This tasty concoction is inspired by the classic Hurricane cocktail and our hero Hiro Hamada. Enjoy it as just a fruity mocktail or level-up to full knockout power by adding a boost of rum!

3 oz pineapple orange juice
1 oz sugar-free red raspberry syrup
1 1/2 oz dark rum

Pour the juice into a glass over ice. Gently pour the red raspberry syrup on the top edge to not mix into the juice. Carefully float the rum on top of the syrup and appreciate the layers as pretty as a sunset over San Fransokyo. Stir to mix well before sipping responsibly, since you might be called to action anytime as a member of Team Big Hero 6!

Personal Healthcare Companion Pizza crust, ready for the grillGrilled pizzas have been a big summer hit for several years now, so I thought round crusts with Baymax’s face would be perfect as Personal Healthcare Companion Pizzas. I made the same homemade whole wheat sourdough pizza dough I’ve been making for years, formed into circles, then before baking I used a small rectangular spatula and a round tea infuser to press the eyes into the unbaked dough. I Personal Healthcare Companion Pizza Tableonly bake these 3 minutes on a side so the shape is set but they don’t overcook on the grill. I also make these a week or two ahead and freeze them in bags with wax paper between them. If you have leftovers, they last in the freezer Pizzas on the grill - can you spot Baymax?quite a while, which is great since I love these pizzas…perfect for a small dinner!

I set out pizza topping basics, red sauce, habanero sauce, mozzarella cheese, goat cheese, real pepperoni & turkey pepperoni, crumbled bacon, sliced olives, artichoke hearts, fresh sliced tomatoes and sun-dried tomatoes, so people could load their crust how they liked, then set them on the hot grill off to the side. Can you spot my Baymax face pizza with pepperoni eyes? πŸ˜‰

Dino & Little Go-Go Harley make Go-Go Snow ConesFor sweets we had Go-Go Snow Cones and Big Hero S’mores! The snow cones were more popular as an Drawing Baymax's face on marshmallows with my black food penappetizer, with my hand-crank ice shaver and several different syrups and juices, cone cups and spoon straws. Little Harley even came dressed as Go-Go, which was adorable!

How can an entire box of graham crackers have the middle pack completely broken?!?For the Big Hero S’mores, of course the obvious design was Baymax’s face on the round marshmallow. I cut the gigantic marshmallows in half to make a shorter disc shape, setting the sticky side down on wax paper, then drew the faces with my Finished Big Hero S'moresblack food coloring pen. Except for my brand-new box of graham crackers having the entire MIDDLE package broken and mostly unusable for pretty rectangles, the s’mores were an easy assembly of Hershey bar squares on the graham crackers, then placing the marshamallow faces on top…voila Big Hero S’mores!

Eileen is always clever, so she brought Go-Go Vegan Truffles, complete with hand-lettered sign in the Big Hero 6 font, plus some really tasty sushi!

We ran out of time beforehand, and the firepit had gone out while we were watching the movie, so we used the still-hot grill coals for marshmallow roasting. Here are our resident roasting experts demonstrating the Baymax Fist Bump: Balalalala! πŸ™‚

Roasting Baymax Doing the Baymax Fist Bump Balalalala! :) Big Hero S'more

This was the first movie night ever to have sprinkles of rain! It made for an absolutely gorgeous pink sunset, with even a rainbow! I’d never seen a rainbow at sunset before, and it was pink! Since Dino & Harley were the first to arrive, they claimed the garden couch!

Sunset Rainbow! Chilling on the garden couch But it never rains on movie night?!? Thankfully just a few tiny sprinkles...whew! Ready for the show!

An hour after everyone else had left, Jeff texted me asking if they could still come by. They had two different votes what to do that Saturday, one for fishing and one for movie night, so Jeff thought they could do both with fishing first. Well, the fishing was several hours away, and poor Julianna was really sad they missed movie night, so we used the last glowing embers of the grill to roast more marshmallows, they enjoyed fruit salad, and even the rest of the kettle corn. Nice fun little after-party! πŸ™‚

Ouye After Party Roasting over the last of the coals, an hour after everyone else left. Yummy! Ouye After Party

Two movies down, with two more to go before this summer is over!

Posted in Cinema Brittahytta, Edible Art, Outdoors, Parties | Tagged , , , , , , , , | Leave a comment

Cinema Brittahytta Season Premiere – Paddington!

Ren, Joe, Paddington, Britta & MikeWe had a fun crowd of 13 lucky viewers for Paddington, the season premiere of Cinema Brittahytta! Mike, Ren & Joe won the longest distance movie night attendance awards from the UK and Massachusetts, but Jeff & Louie won the oldest friends awards from 1990…ack!

The 2014 live-action movie Paddington got short shrift getting shoved out of the Christmas season here in the US, but it captures the goofy but sweet flavor of the classic books about Paddington Bear, who has always been a well-meaning klutz who often misunderstands his new world after moving from Darkest Peru to London. The movie includes a Paddington Menubunch of British self-deprecating humor that modern audiences will appreciate, and some just plain gorgeous cinematic storytelling moments, with fun references and a great message for kids of all ages.

My summer season premiere is often a little chaotic with getting the yard ready, reconnecting equipment, changing projector settings, so I don’t usually kill myself with the menu. The main themed food was Marmalade Sandwiches “in hat for emergencies” of course! I luckily had been given some homemade three-citrus marmalade by Nathania, so I spread that on my homemade whole wheat sourdough bread, and displayed them in a glass bowl inside an oversized hat I made Paddington's favorite Marmalade Sandwiches, in hat for emergenciesfrom scrap red felt.

While I was making the giant hat for the sandwiches, I made a smaller hat for the lemonade jar. I also Dressed-up lemonade jarmade a replacement red hat for the Paddington Bear my mom had made me when I was still in single-digit ages, since back in that era, Paddington had a yellow hat so that’s what she made for me. Of course I also displayed the tiny Paddington Bear I bought on my first visit to Paddington Station back in 1996.

From Darkest Peru custom cocktailEven with a basic menu, I usually can figure out a creative custom cocktail that goes with the theme, so this time we tasted From Darkest Peru, using Black Seal dark rum, unsweetened 100% blueberry juice, and ginger ale. I designed a little card with Paddington holding a serving tray, saying “Our friend Paddington Bear doesn’t often drink cocktails, but perhaps his dear Aunt Lucy would enjoy this creation inspired by their origins From Darkest Peru.” It was super tasty and super dark, barely allowing the glowing ice cubes to shine through!

British Style Bangers!I had already purchased some fancy sausages for the grill, which is a summer standard, but when I saw these “British Style Bangers” for sale, I had to get them! I made sure to keep these in their original packaging for everyone to appreciate before putting them on the grill. Mike is British, and he got a big laugh seeing these, trying to figure out what made them so British compared to other sausages! They were tasty though. πŸ™‚

Jerry brought Bear Claws! haha!Jerry had the clever idea to bring Bear Claw pastries, and they were delicious as our dessert, after the grilled sweet potato salad, fruit salad, and five-bean salad that are also summer staples for me.

We finally got settled out in the yard after dark, so the movie began! Everyone enjoyed it, from kids to adults, and when Paddington finally acquired his traditional blue duffle coat, an icon was born again on the big screen. πŸ™‚


An icon is born again on the big screen Cinema Brittahytta Season Premiere Audience

Stay tuned for next month’s movie…the Academy-Award-winning Big Hero 6!

Posted in Cinema Brittahytta, Parties | Tagged , , , , , , | Leave a comment

Everything is AWESOME!

Everything is Awesome!The Cinema Brittahytta summer season finale this year was The LEGO Movie, so of course Everything was AWESOME! I always love celebrating creativity, so this was the perfect chance! I think we set a new Cinema Brittahytta summer record with 33 of us for LEGO Movie last night, including 2 babies & 6 kids! A few of us played LEGO Rock Band and grilled our personally-constructed Master Builder Pizzas until it was dark enough to watch the Simpsons LEGO episode, then laughter was everywhere during The LEGO Movie in 3D with old-school red/blue 3D glasses!

Clapboard with Candy Bricks Spelling LEGO
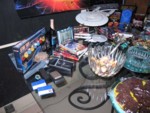
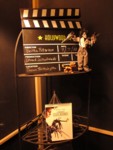
Except for one tiny Harry Potter collector set, I actually don’t own any LEGOs anymore, and my mom recently donated our family stash without asking me first (waah!), so I had none for decorations. I did find stackable interlocking candy blocks online so I bought those and built the LEGO letters for display, but they were pastel chalky colors like Sweet Tarts. I even searched in case there were cute LEGO plates and napkins I could buy. Alas, I didn’t find any that I liked enough, but I did see a ton of adorable party plate and napkin ideas, so I used those as inspiration to construct my own.

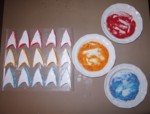
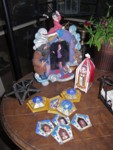
A white paint pen, and red and black permanent markers were enough to draw 24 different LEGO faces on cheap yellow paper cups. I used the LEGO Movie trailer I had downloaded last summer, pausing at different faces I liked and sketching them freehand. Hand drawn LEGO cups - every one is different!Can you find Emmett and Wyldstyle? πŸ˜‰ I also saw square yellow plates turned into the faces online, but I liked the round cups idea better because they looked more like the round LEGO minifig heads, plus food would cover up the faces on plates. On cups we can not only keep appreciating the faces, but they also function as cup identification!

Custom LEGO paper plates using food ink printer on transparent labels
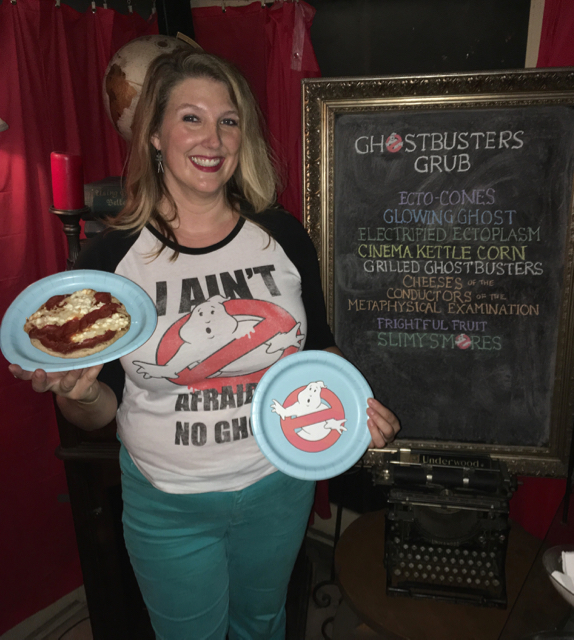
At my local dollar store, I found square paper plates in bright primary colors, so I made those into 2×2 LEGO bricks by printing the LEGO logo circles with my food coloring printer onto transparent label paper. I knew from the Ghostbusters plates that the food coloring ink could still run if too much moisture got on the labels, but since it was only food coloring, no harm done to our food. You could also use a black food coloring pen and draw them all freehand, but that takes a while, plus you wouldn’t be able to run an embossing filter to make them look 3D.

Britta as Wyldstyle!
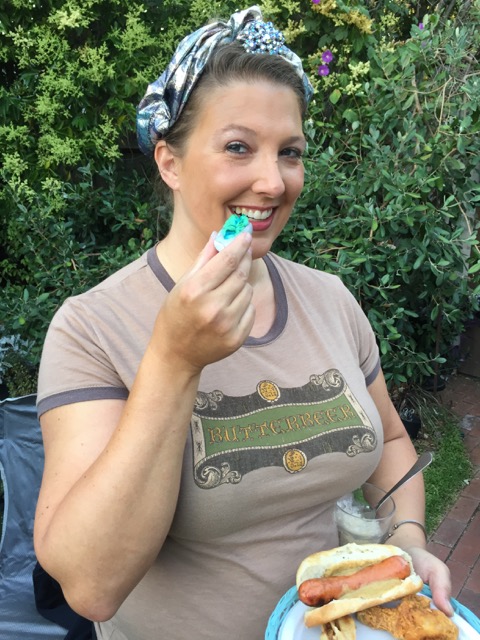
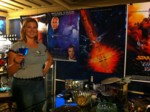
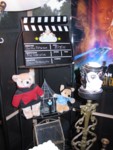
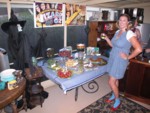
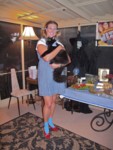
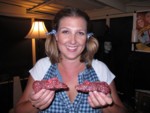
I already had vivid red and bright teal clip-in hair extensions, and since I also have a black hoodie, I decided I could be Wyldstyle for the evening! I know it wasn’t the exact shades of turquoise & hot pink, but pretty close for stuff I already had on hand. I used some teal duct tape that matched my hair extensions to make the WS line artwork on the hoodie, curled and poofed up my ponytail with volumizing powder, used 2 cans of black hairspray, added the red & teal streaks in front of my hair, and added heavy black eyeliner and bright red lipstick, with a couple freckles drawn on each cheek too. Everyone assumed I was wearing a wig! haha…There was so much hairspray, it felt like a wig, or that I had curlers in my hair! I was very glad it all washed out before bed, but it did take two full shampoos, and gray splatters all over my shower that needed rinsing. πŸ˜‰

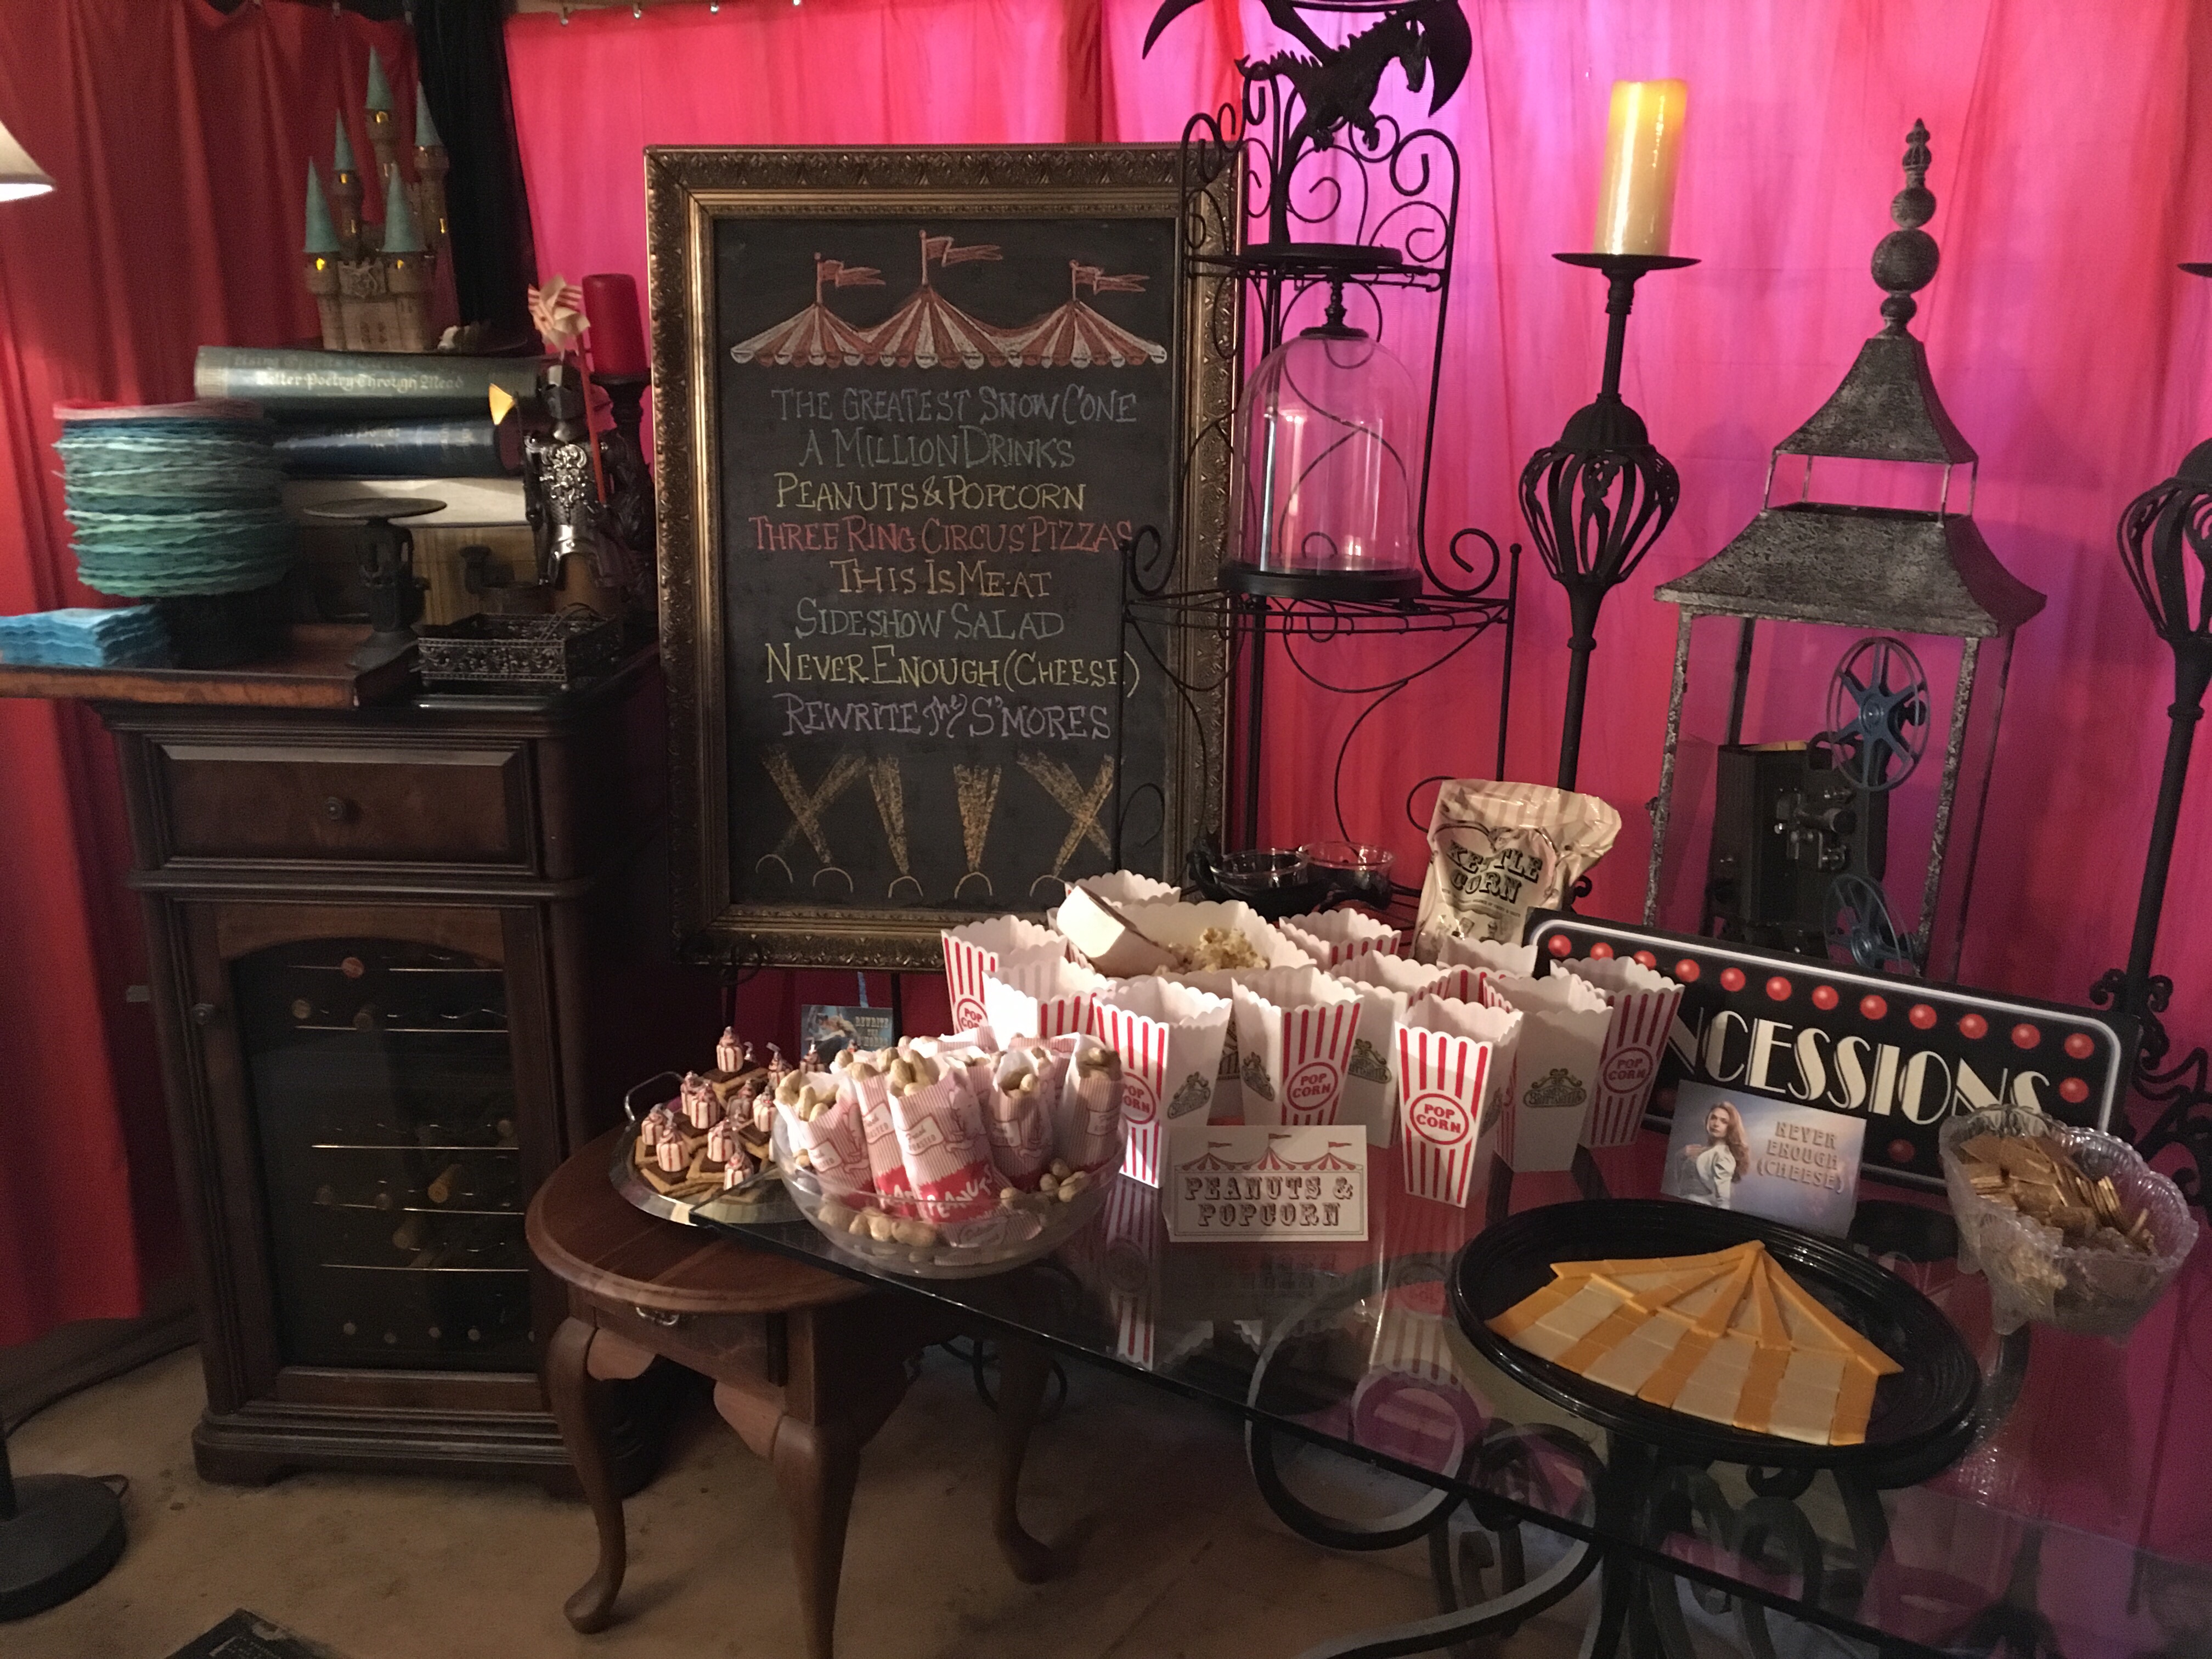
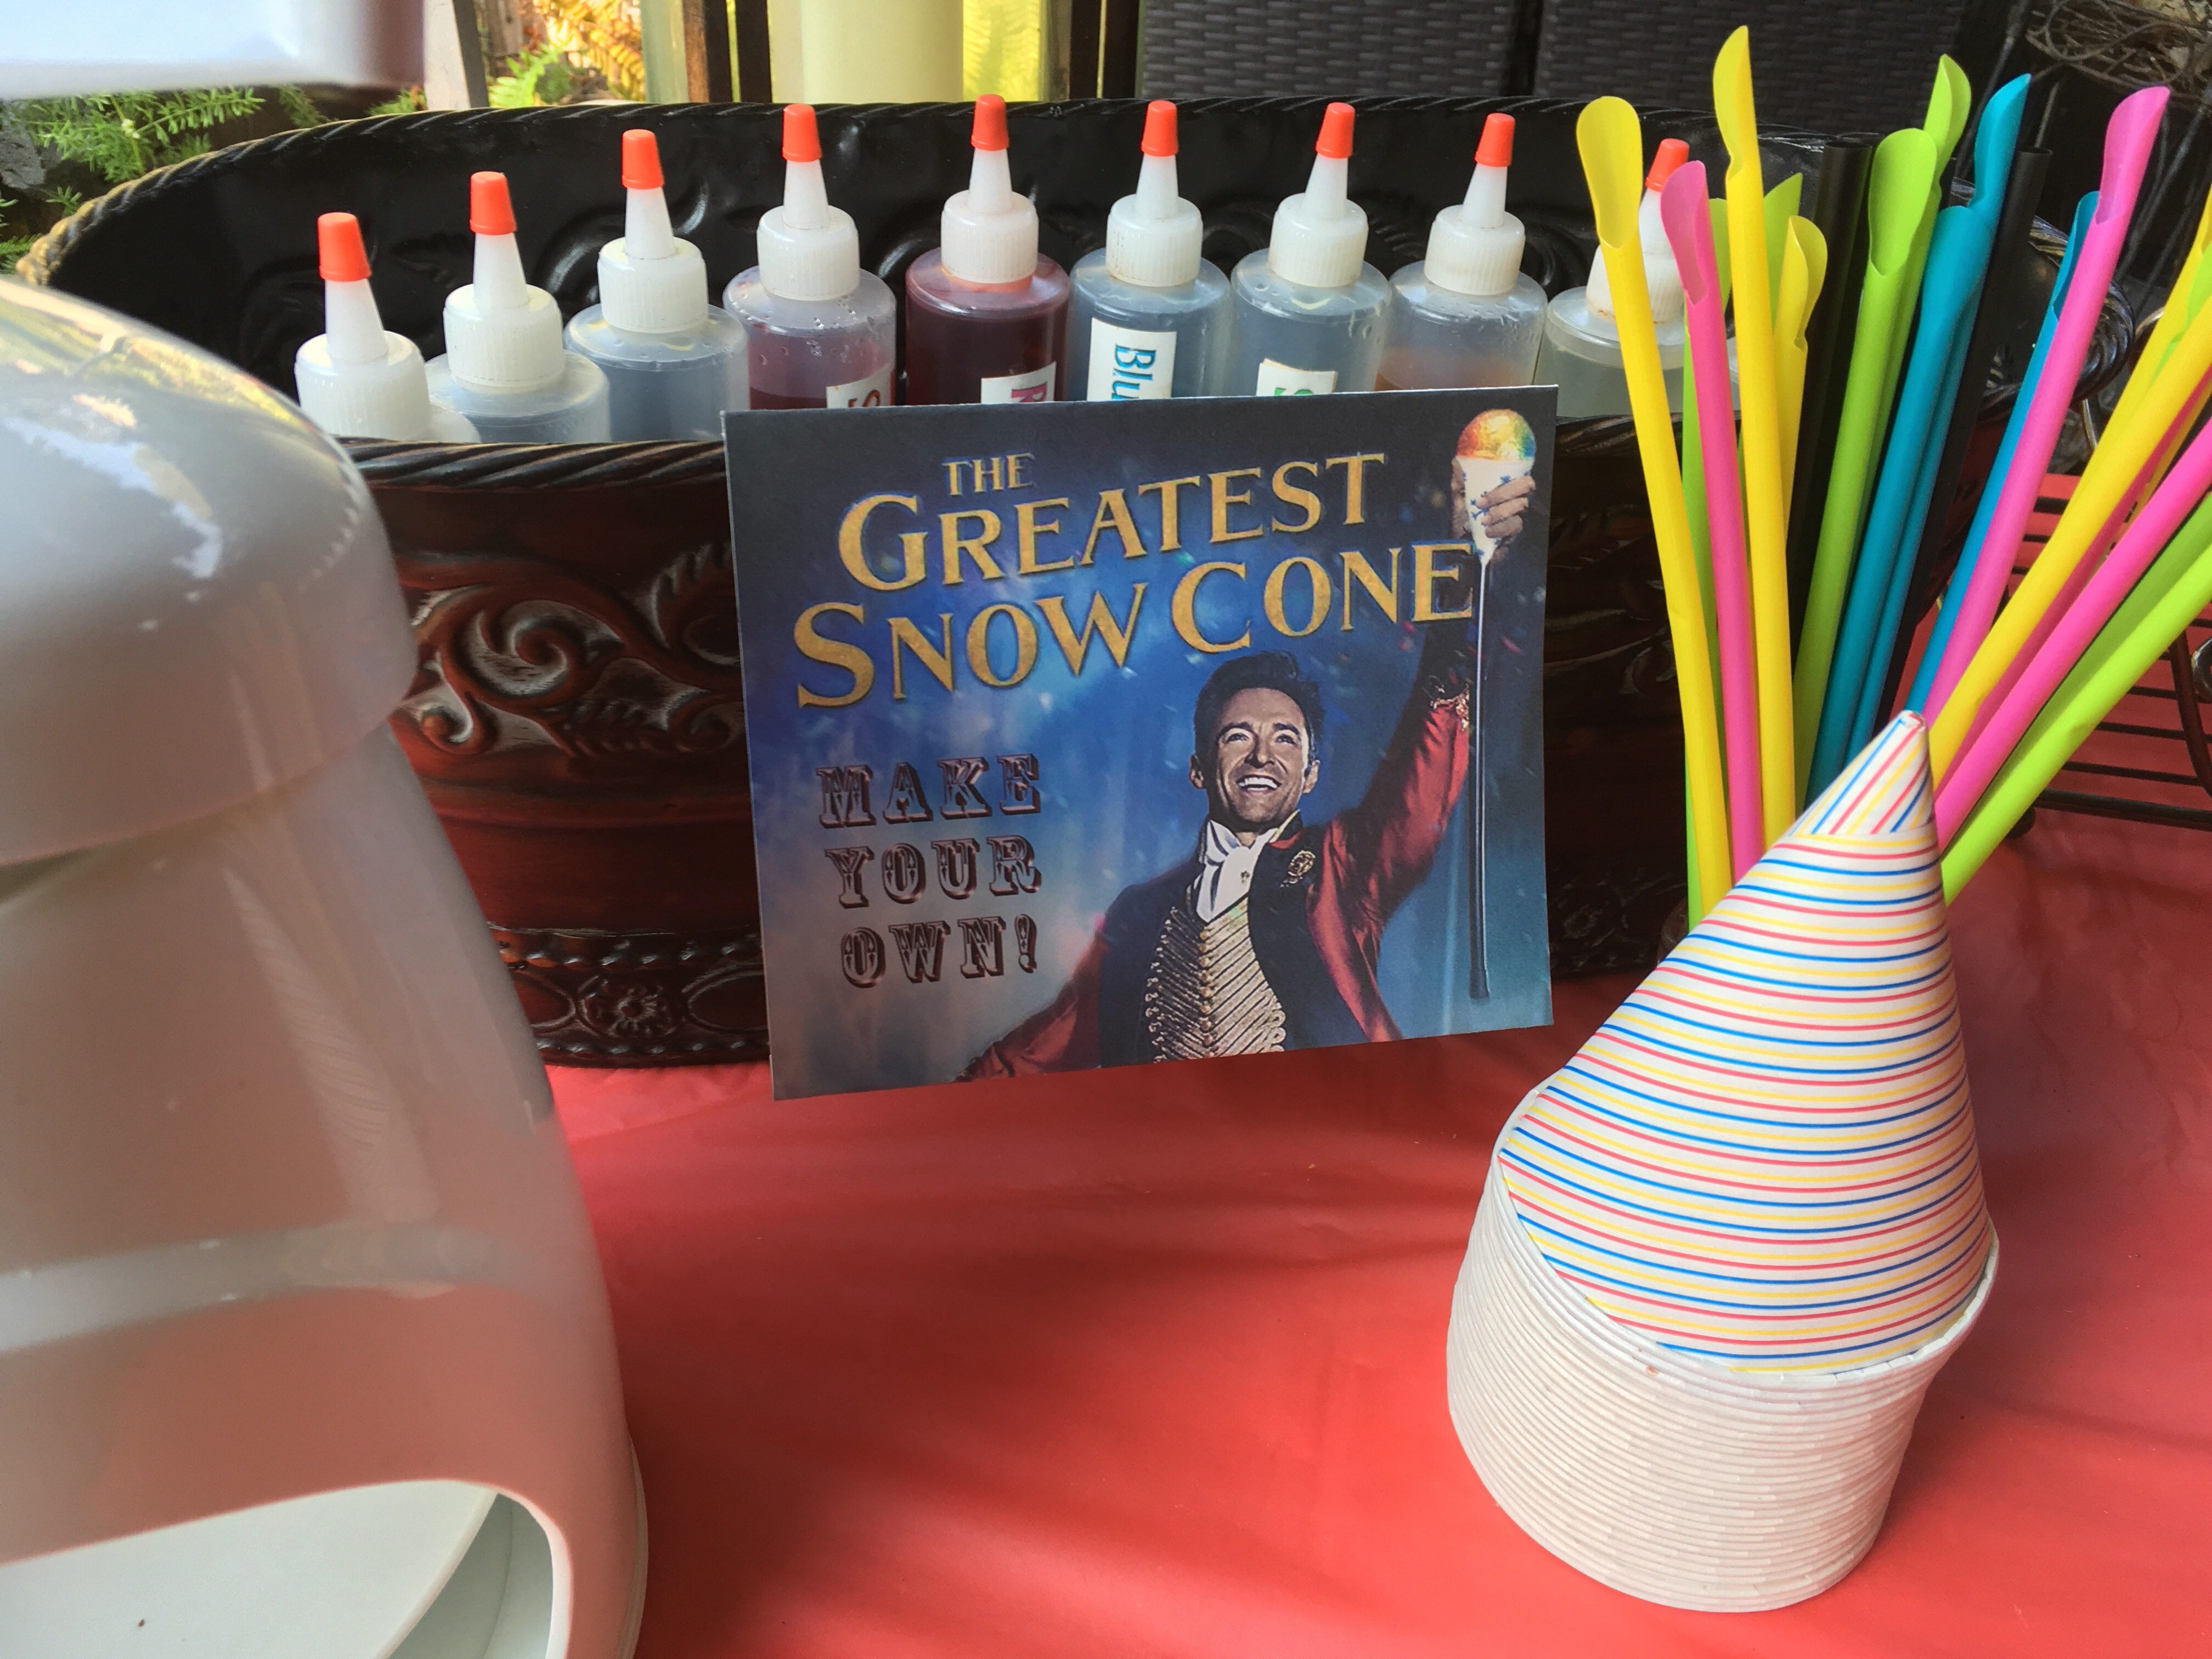
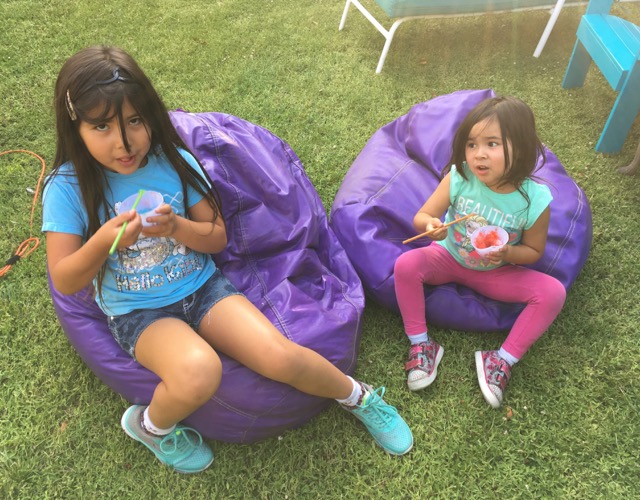
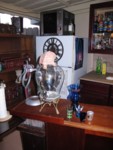
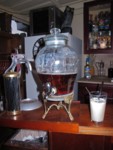
Since LEGO is all about building your own creations, of course we built our own food! There were supposed to be at least a few kids coming, and I still had plenty of frozen pucks for the snow cone machine, so I was prepared to build our own Princess Unikitty Cloud Cuckoo Land Snow Cones with lots of rainbow colors from all the flavored syrups. Closeup of Construction Cheese & CrackersThis is great to entertain the kids since they have to turn the crank to grind their own snow! But the first kid to arrive was already when pizzas were being built, and the next kid wasn’t feeling well, so no snow cones this time…darn!

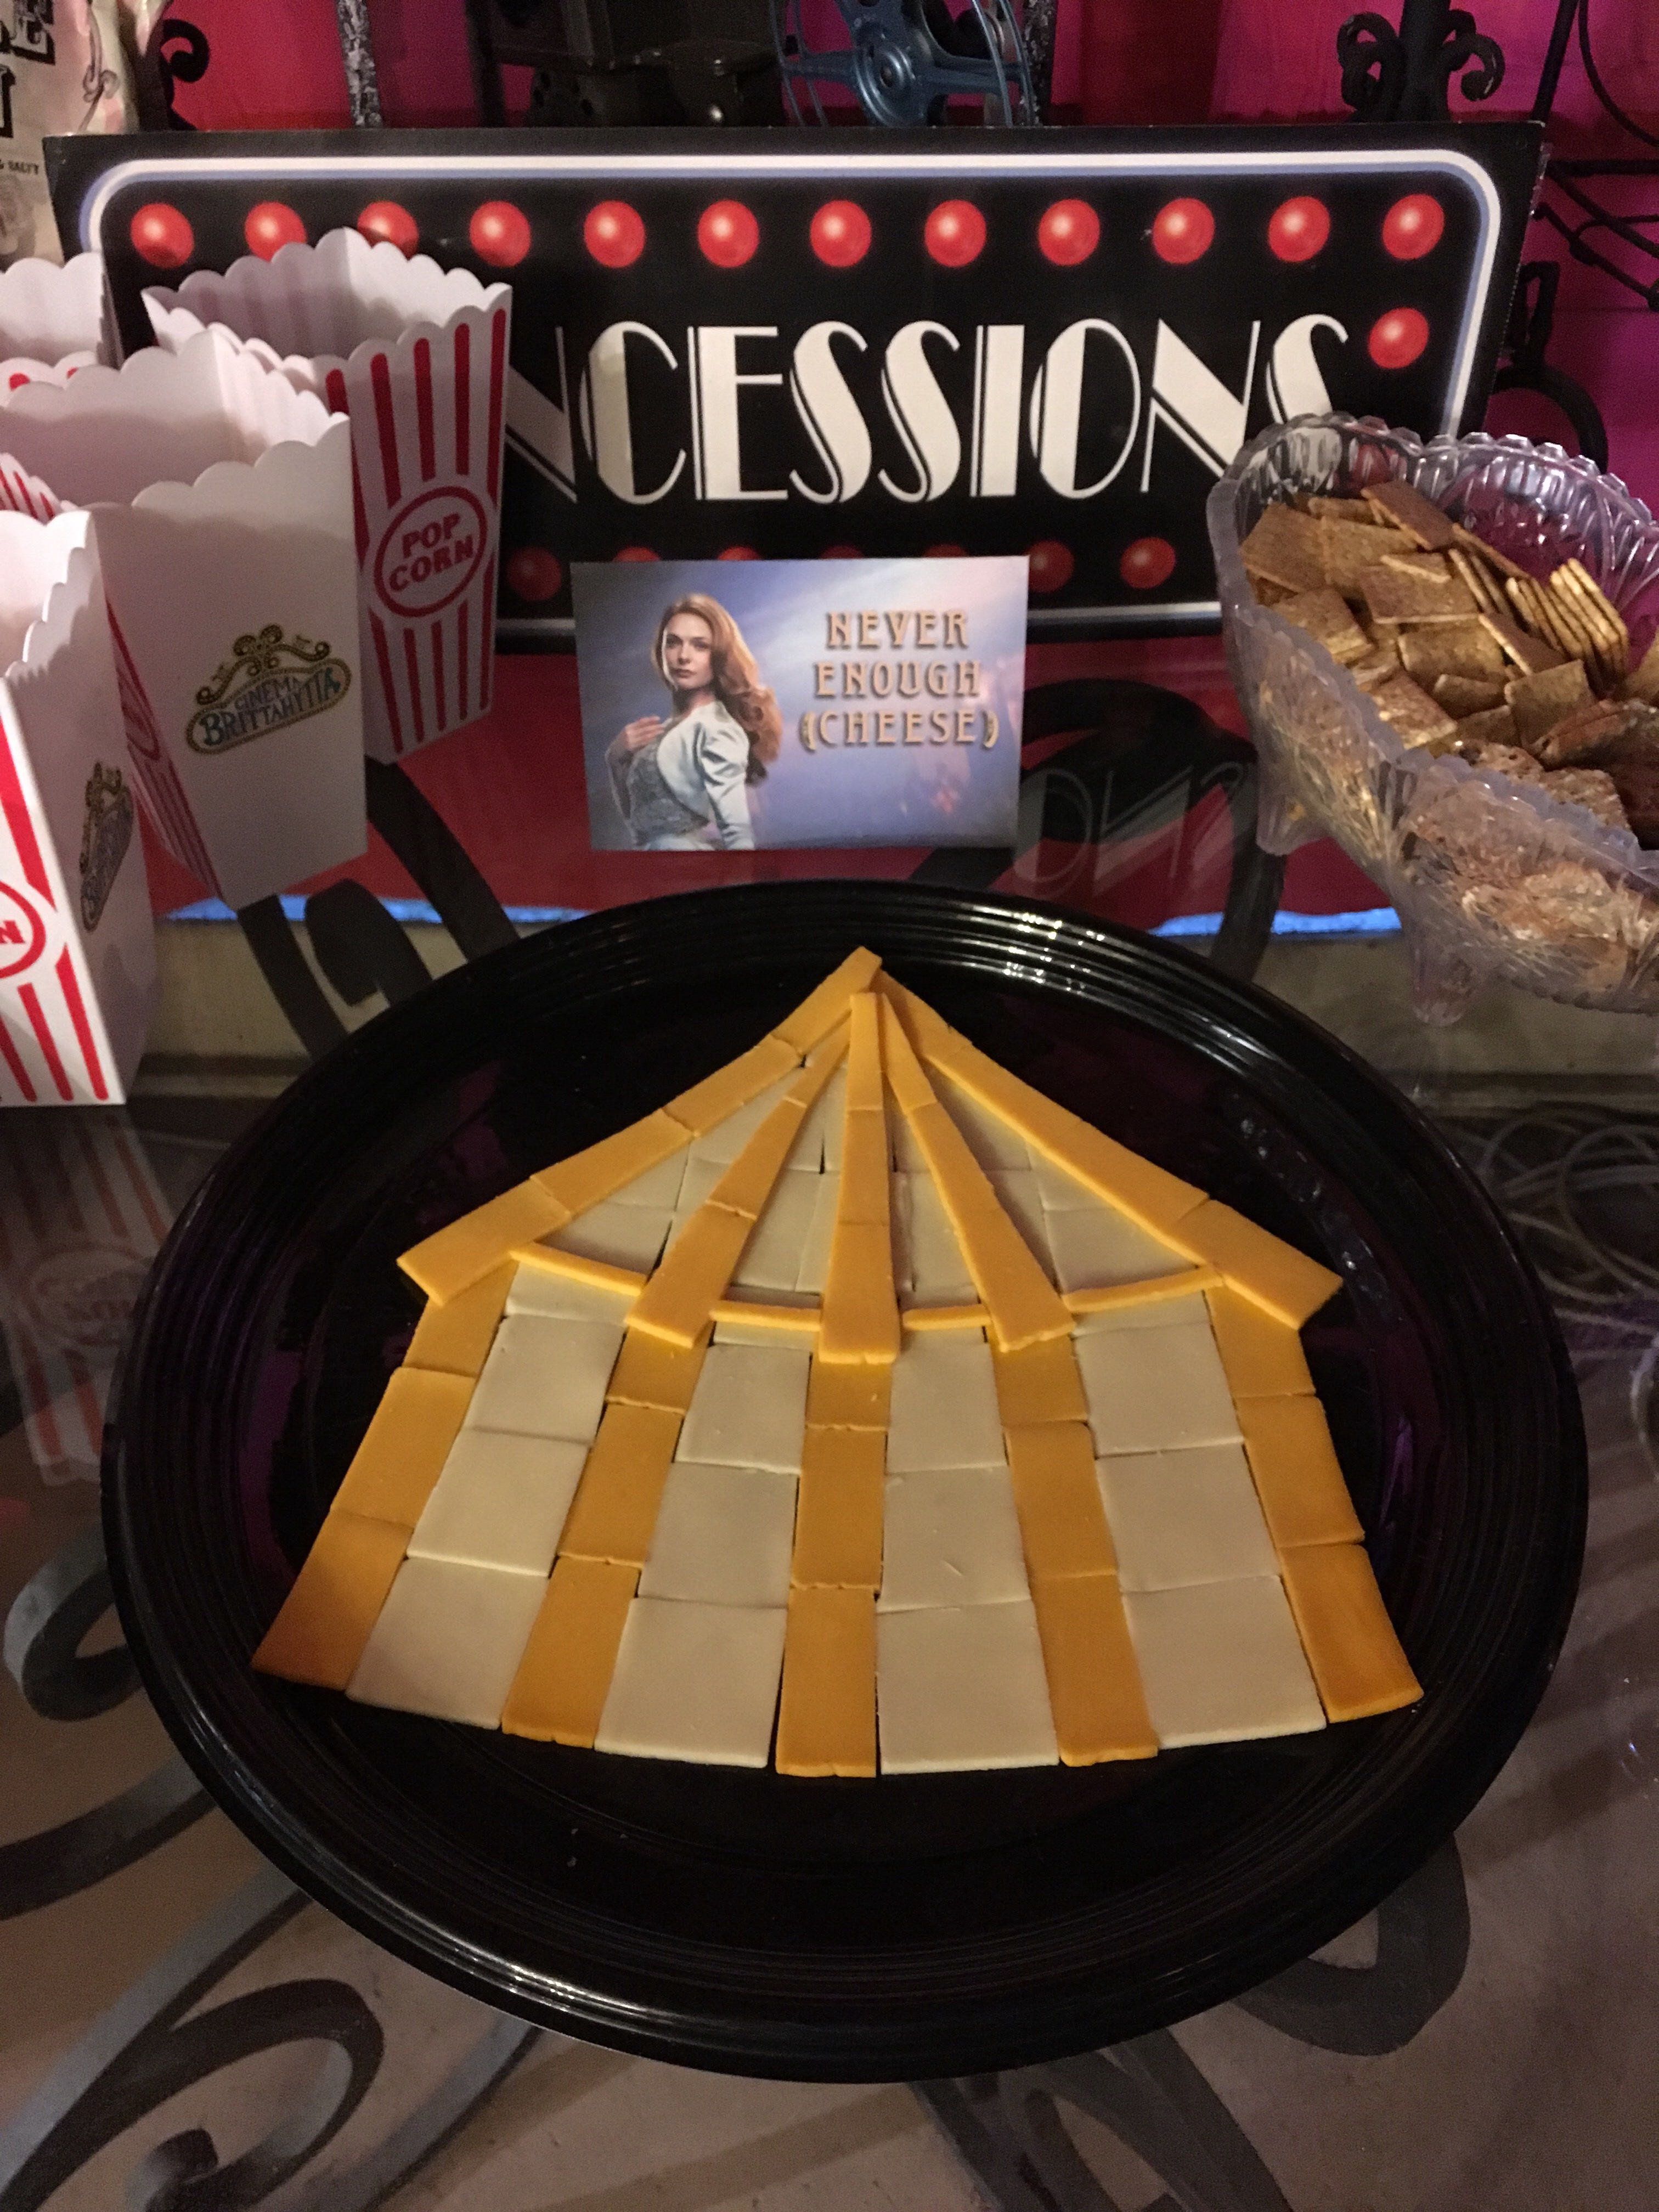
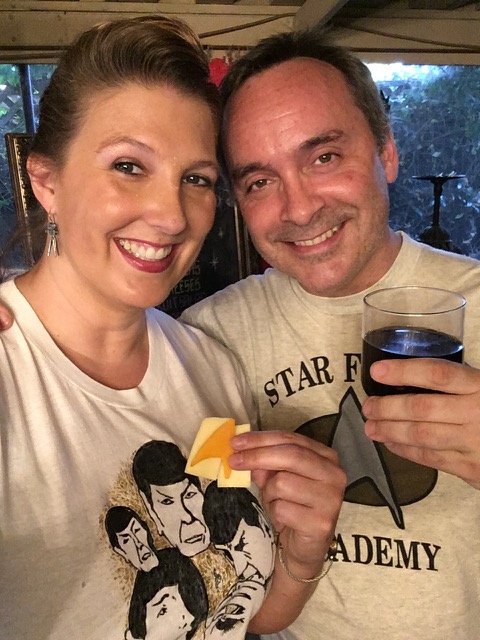
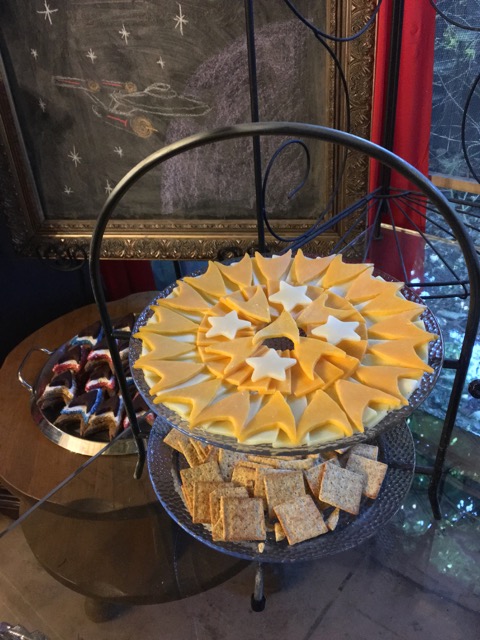
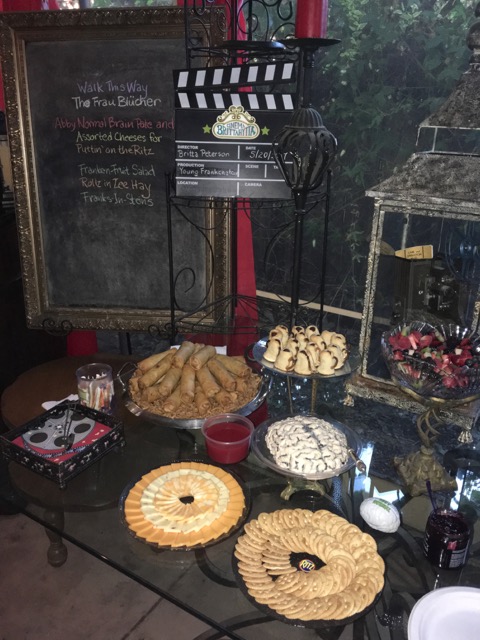
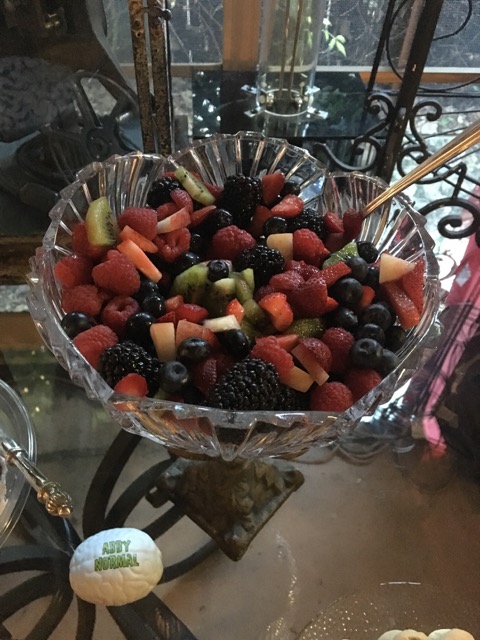
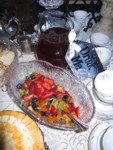
I always provide cheese slices with crackers, but this time I added pips to a few slices by cutting them out with with a drinking straw to look like LEGO bricks and called them Construction Cheese & Crackers! My standard summer party food was also renamed in theme as Kragle Corn (sticky kettle corn), Wyldstyle Fruit Salad (for her colorful stripes), Awesome Sweet Potato Salad (because everyone always loves it), and Bricksburg Bean Salad.

"Where Are My Pants?" Cocktails
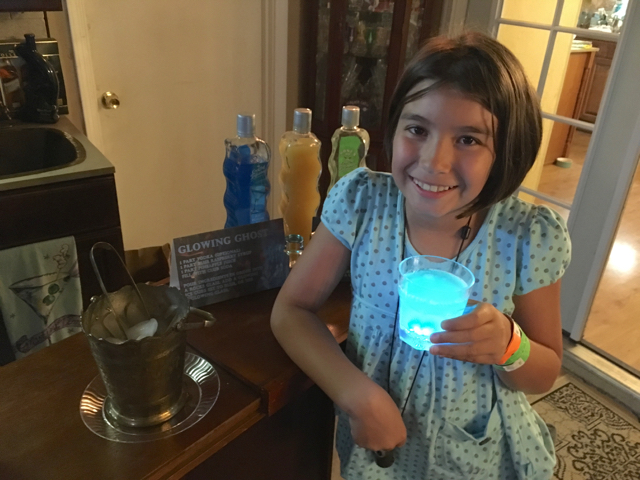
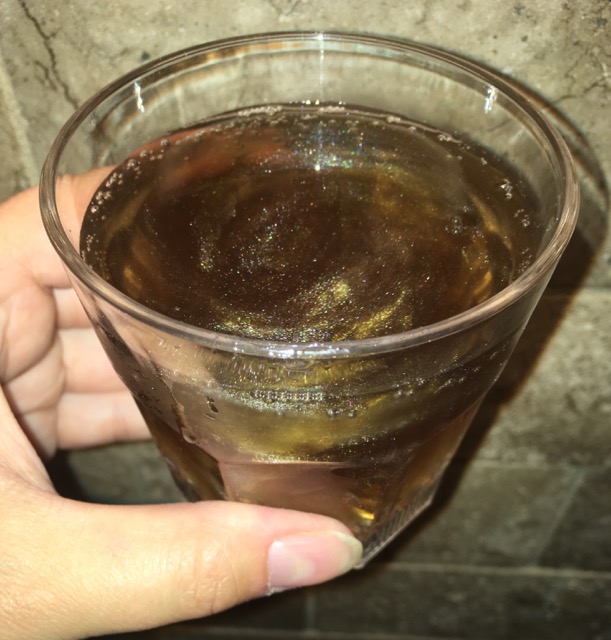
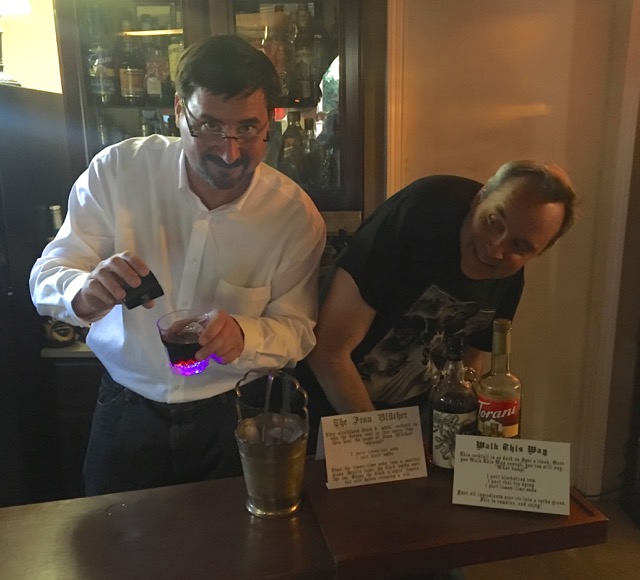
I laughed when I thought of the custom cocktail for this party…“Where Are My Pants?!?” Hahaha! That is the name of the goofy TV sitcom advertised all over Bricksburg, so I thought if you drank too many of these, you might also be saying the show’s tagline, “Honey, where are my pants?!?” heehee! It is still pretty layered LEGO colors by omitting the vodka, so safe for kids to enjoy as well. We discovered on the 4th of July that the sugar-free Torani red raspberry syrup blends into the Rose’s brand sugar Blue Raspberry mixer, but if you have the full sugar red raspberry syrup, it sinks under the Blue Raspberry mixer.

Nicely-layered "Where Are My Pants?" Cocktail“Where Are My Pants?”

1 oz Blue Raspberry mixer (Rose’s brand)
1 oz raspberry syrup (Torani brand)
2 oz yellow lemonade
1 oz 100-proof vodka (chilled)

Pour the lemonade into the glass until about half full, adding vodka if desired. Carefully pour the Blue Raspberry mixer down the side of the glass so it settles at the bottom in a blue layer under the lemonade. Gently pour the red raspberry syrup the same way so it settles at the bottom in a red layer under the blue. Garnish and chill with some colorful LEGO brick ice cubes. Appreciate the colorful layered construction worthy of a Master Builder, but stir the layers before drinking for best flavor. Beware that if you drink too many of the vodka version, you might also end up saying, “Honey, where are my pants?!?”

LEGO brick pizza crusts for Master Builder Pizzas
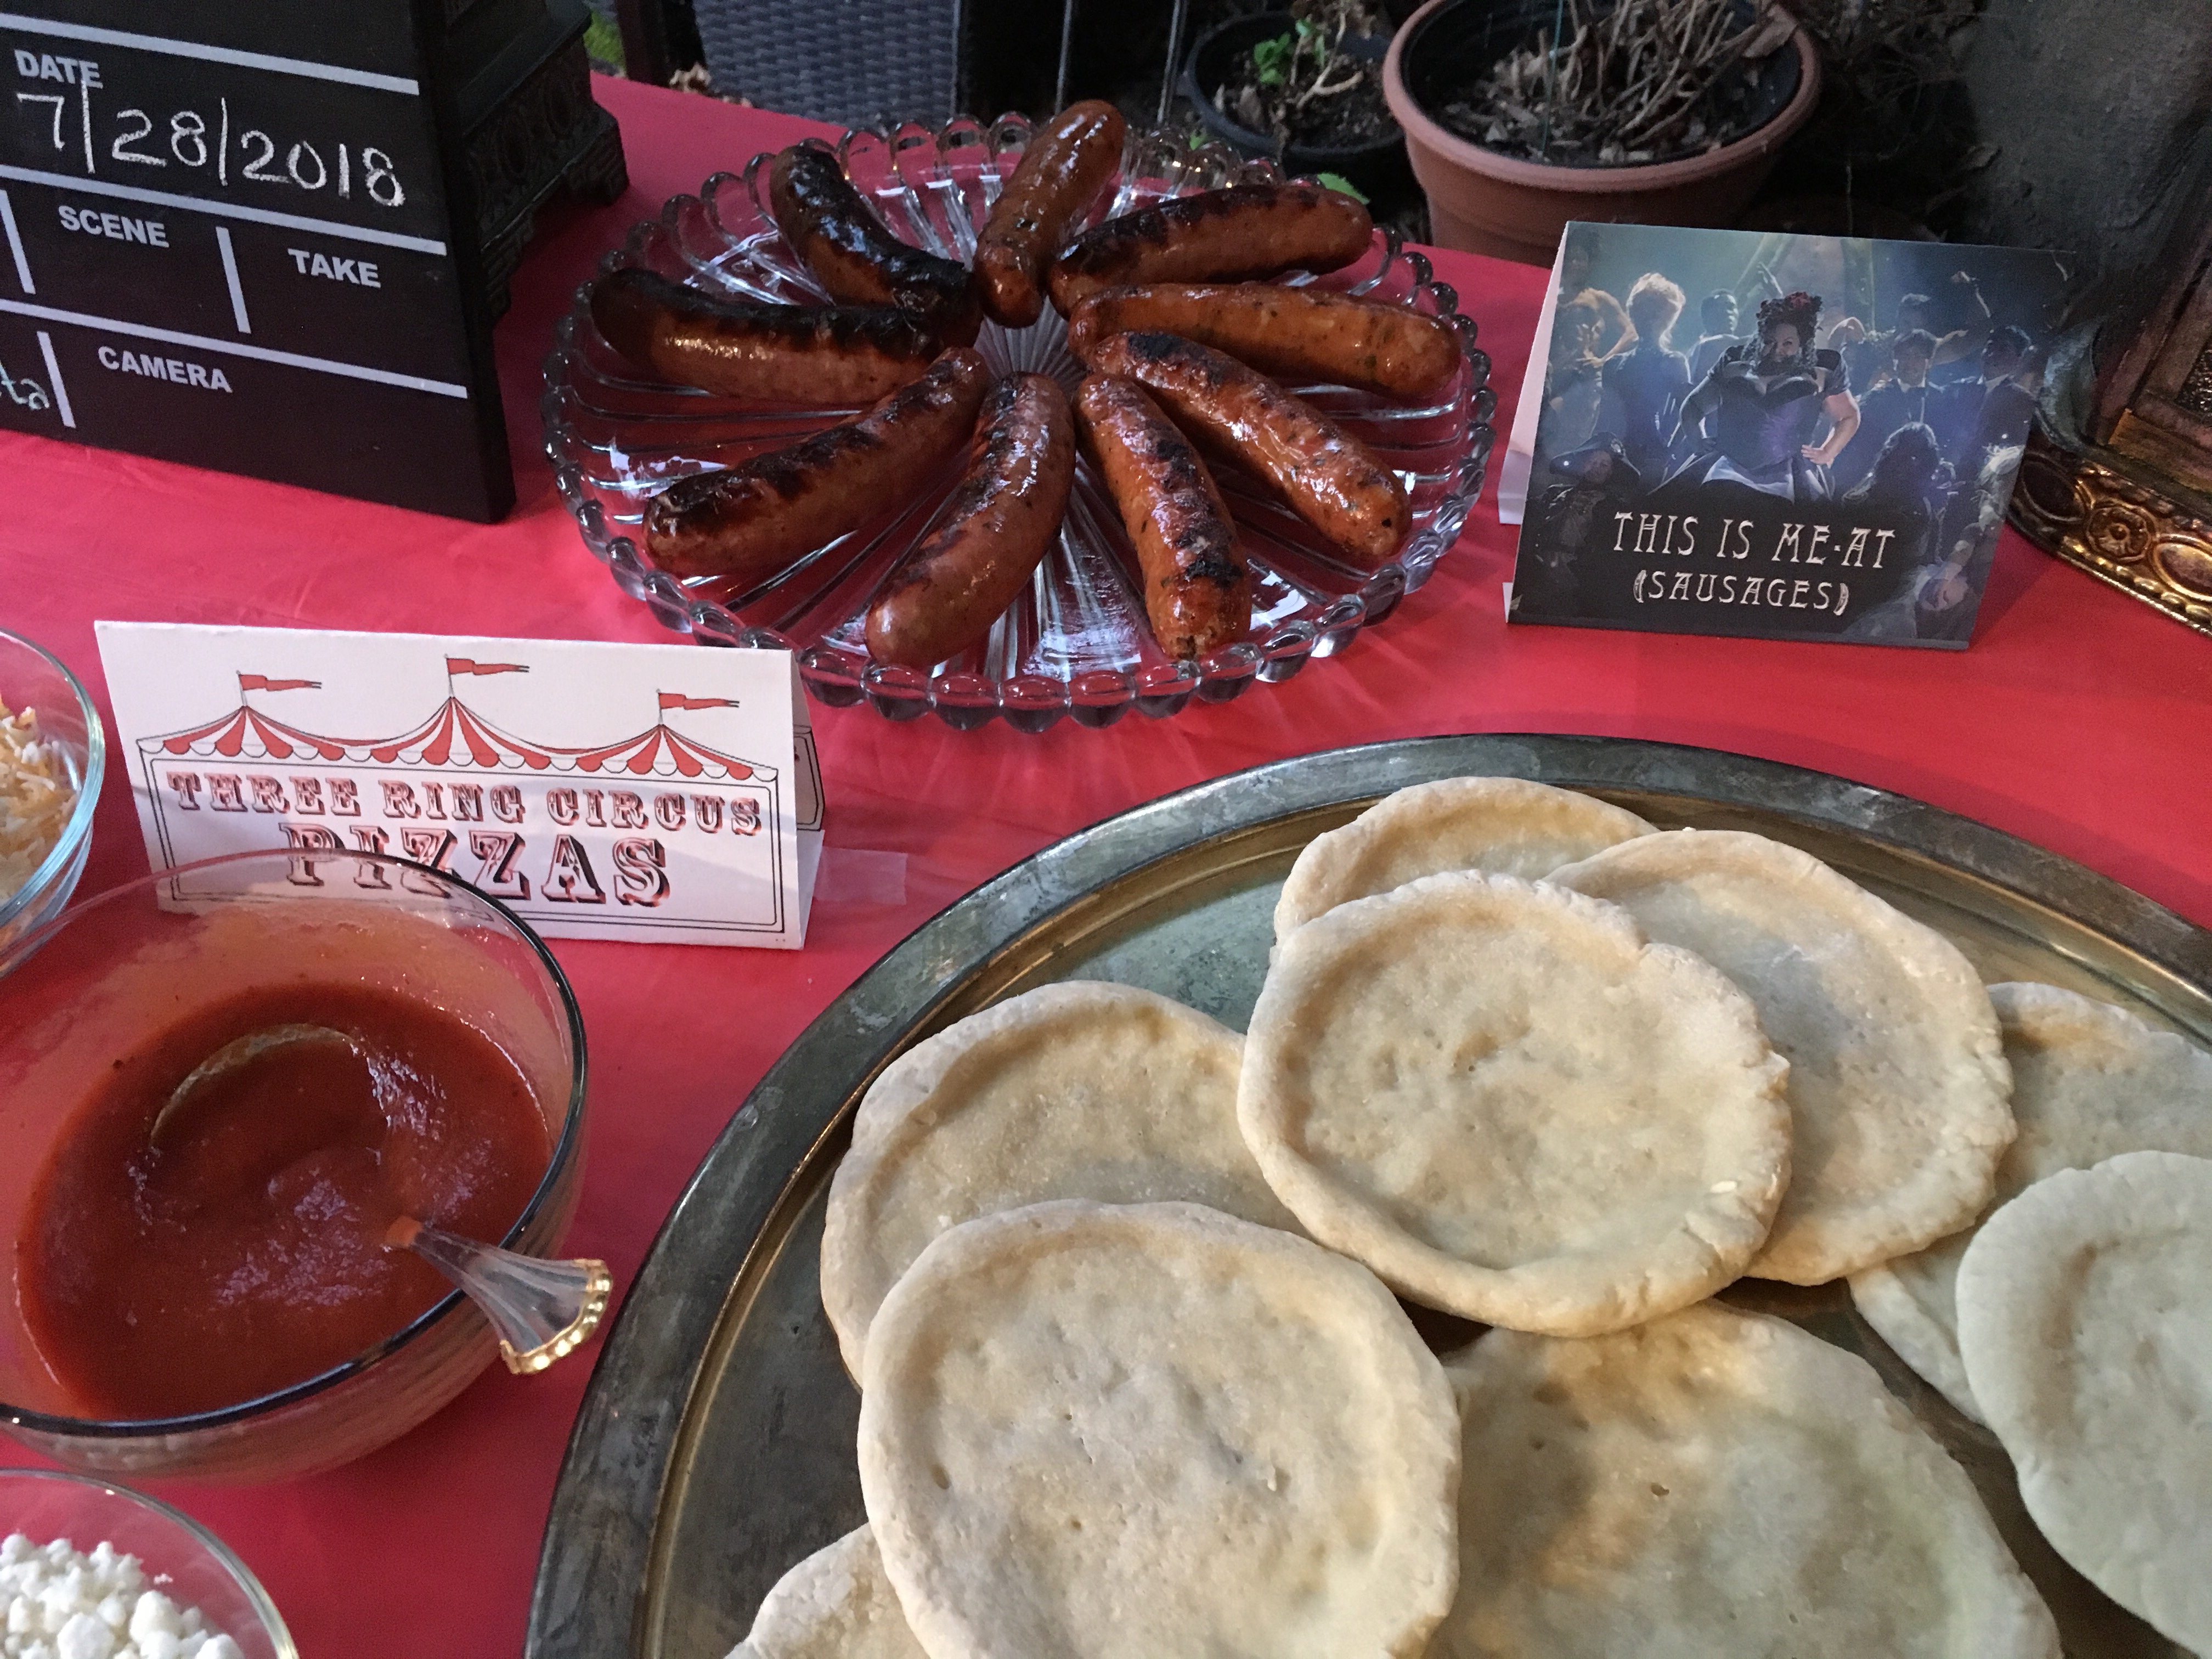
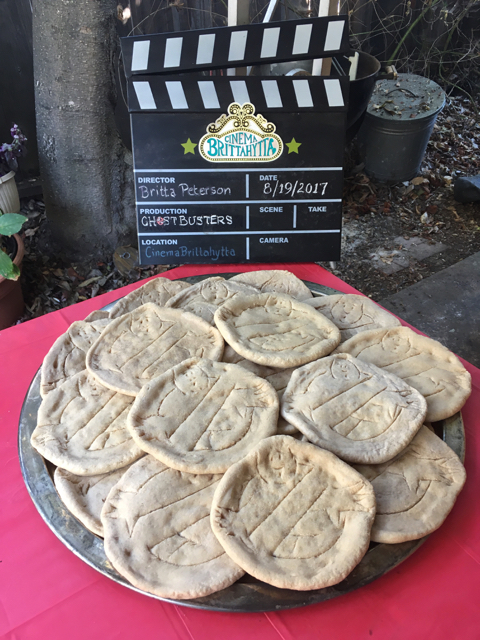
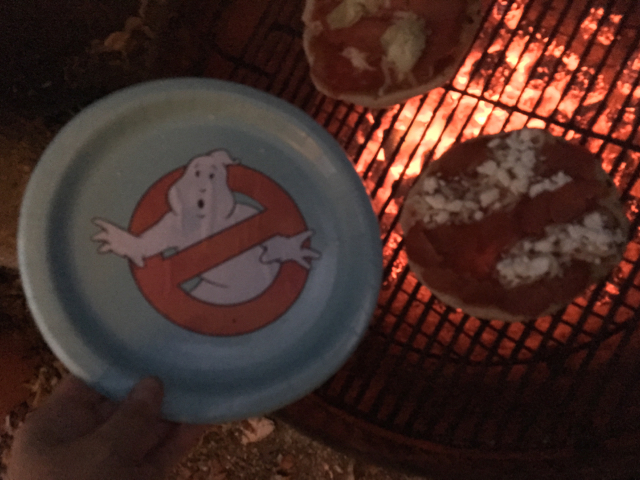
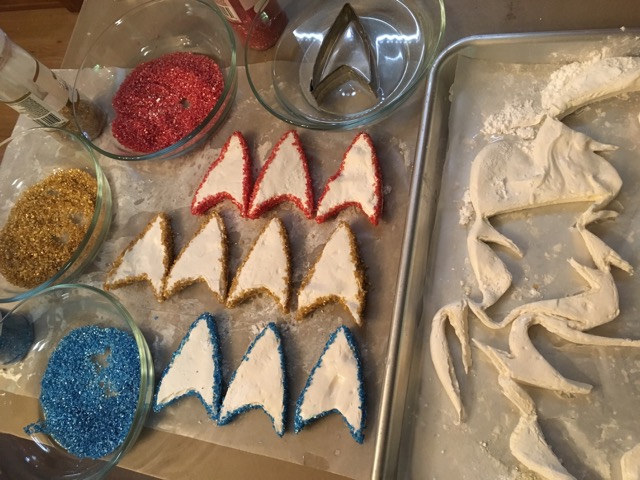
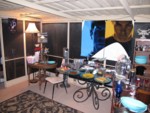
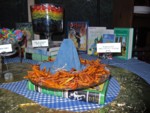
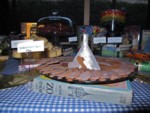
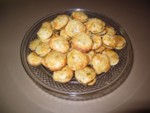
Master Builder Pizzas was a no-brainer, and I made the sourdough whole wheat pizza crusts into squares this time, gently using a round cutter to make the 2×2 pip imprint in the dough before baking just long enough to set the shape, even though it would be covered by pizza toppings before eating. They were cute sitting in the blue bowl on the pizza table and everyone noticed Cutting cheese pips for the LEGO mozzarella sliceswhat they were! I did the same with rectangular cheese slices, using a metal piping coupler that was the perfect size to cut pips. I made the mozzarella as 2×4 but the cheddar was pre-sliced in squares, which gave some nice variety. I left the other toppings normal…it’s hard to change pepperoni, sun-dried tomatoes, olives, mushrooms & artichoke hearts into rectangular shapes! πŸ˜‰


Mozzarella LEGOs for Master Builder Pizzas Cheddar LEGOs for Master Builder Pizzas Pizza table all prepped!
Anna's LEGO pizza before grilling My own Master Builder Pizza on the grill Craig's Master Builder Pizza and Minifig Cup

S'mores of the Special with molded chocolate bricks and rectangular homemade marshmallows
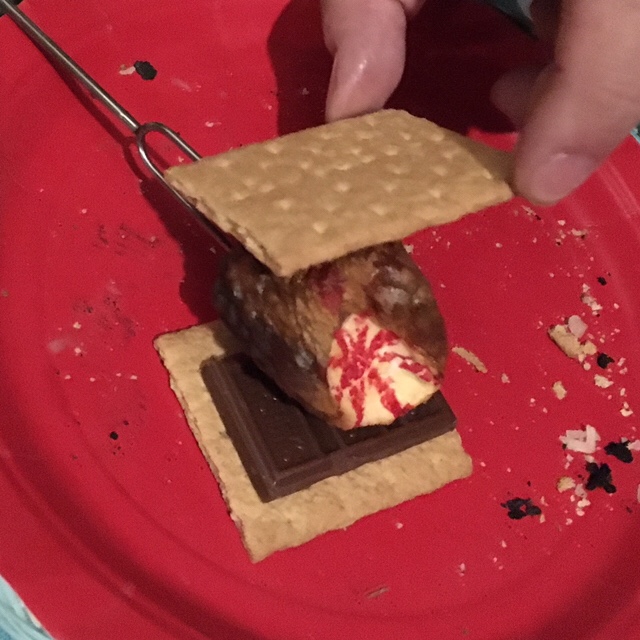
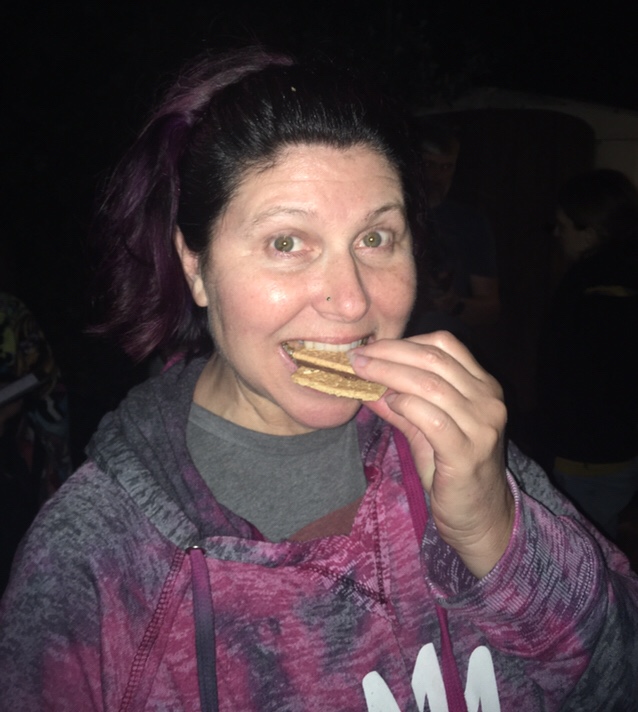
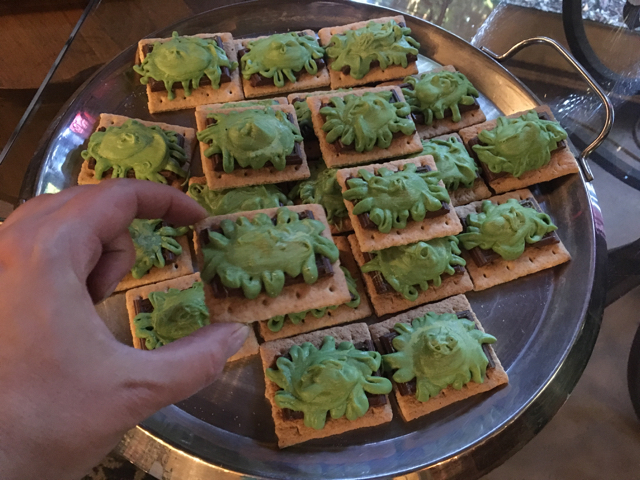
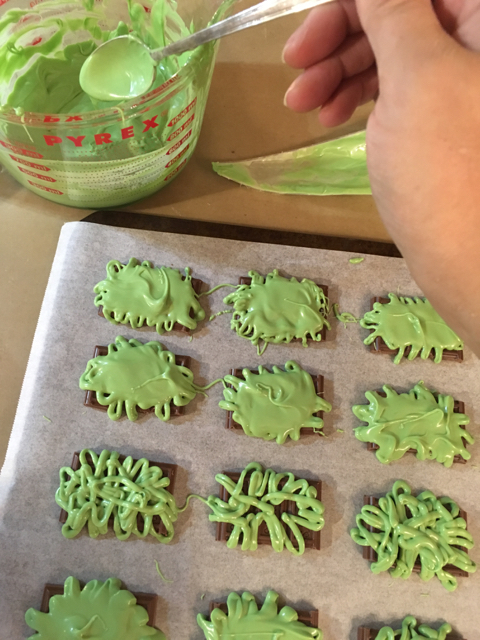
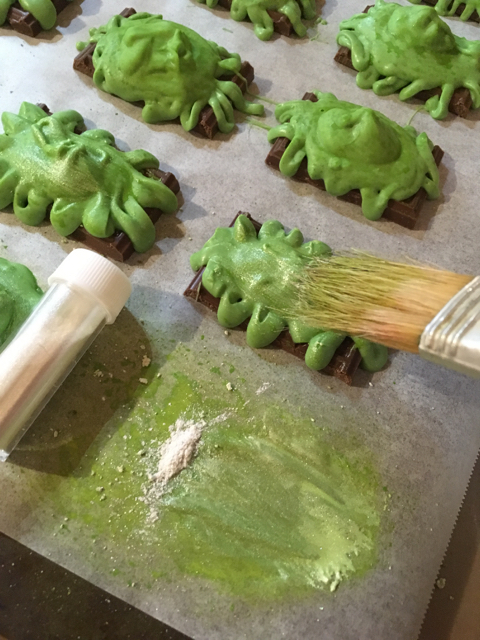
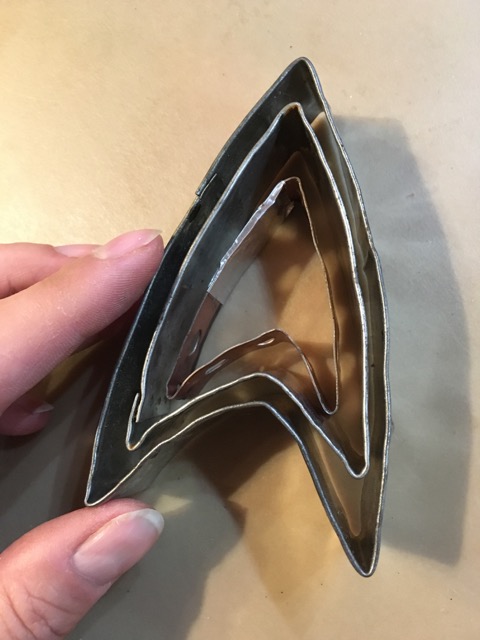
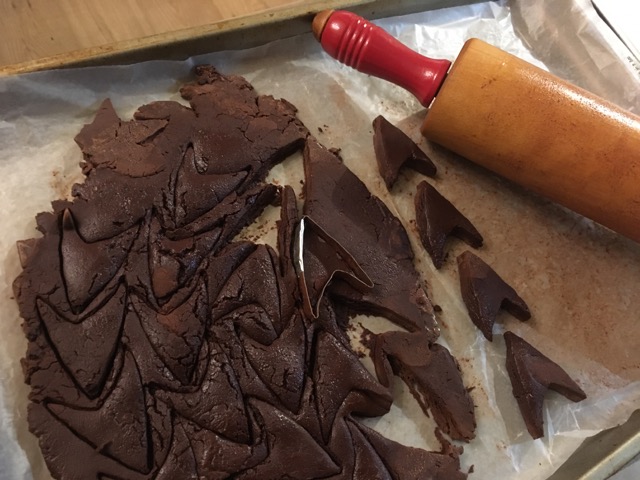
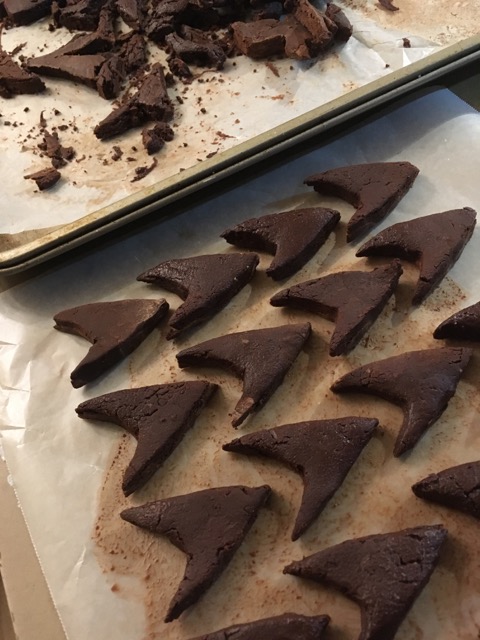
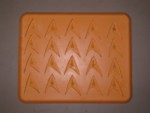
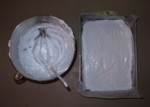
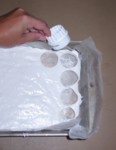
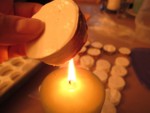
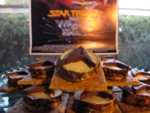
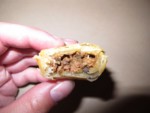
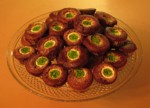
Since this was the last celebration of the summer, of course we had to have more s’mores! I had borrowed a brick silicone mold from a friend, so I used that to make ice cubes, using food coloring to make bright colors without affecting drink flavors, as well as the milk chocolate bricks for the s’mores. Each individual chocolate brick fit perfectly on the S'mores of the Special Gooey Goodnesssmallest section of a regular graham cracker as a mini s’more, and Galt & Lyle offered to bring homemade marshmallow rectangles, so we were all set to build our S’mores of the Special!

Galt Scarfing a S'more of the Special
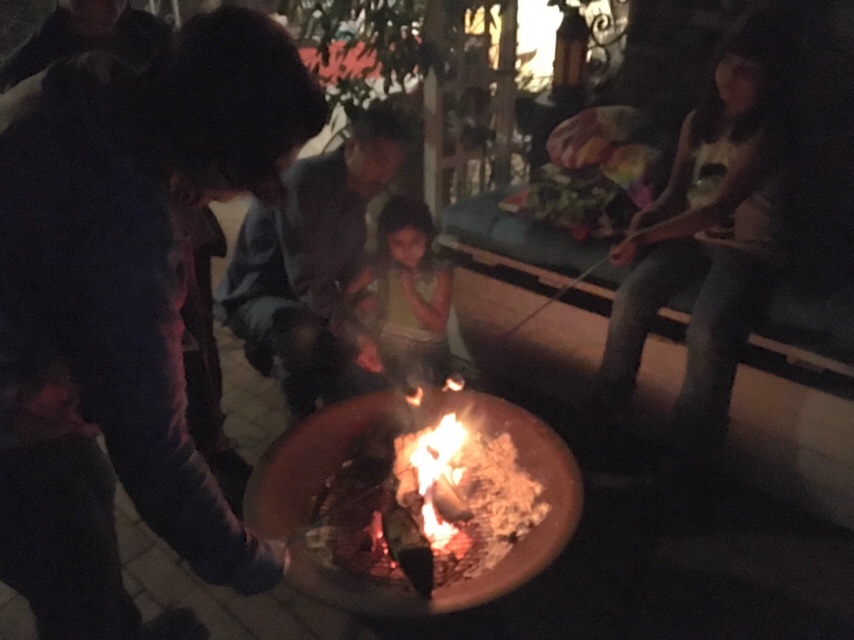
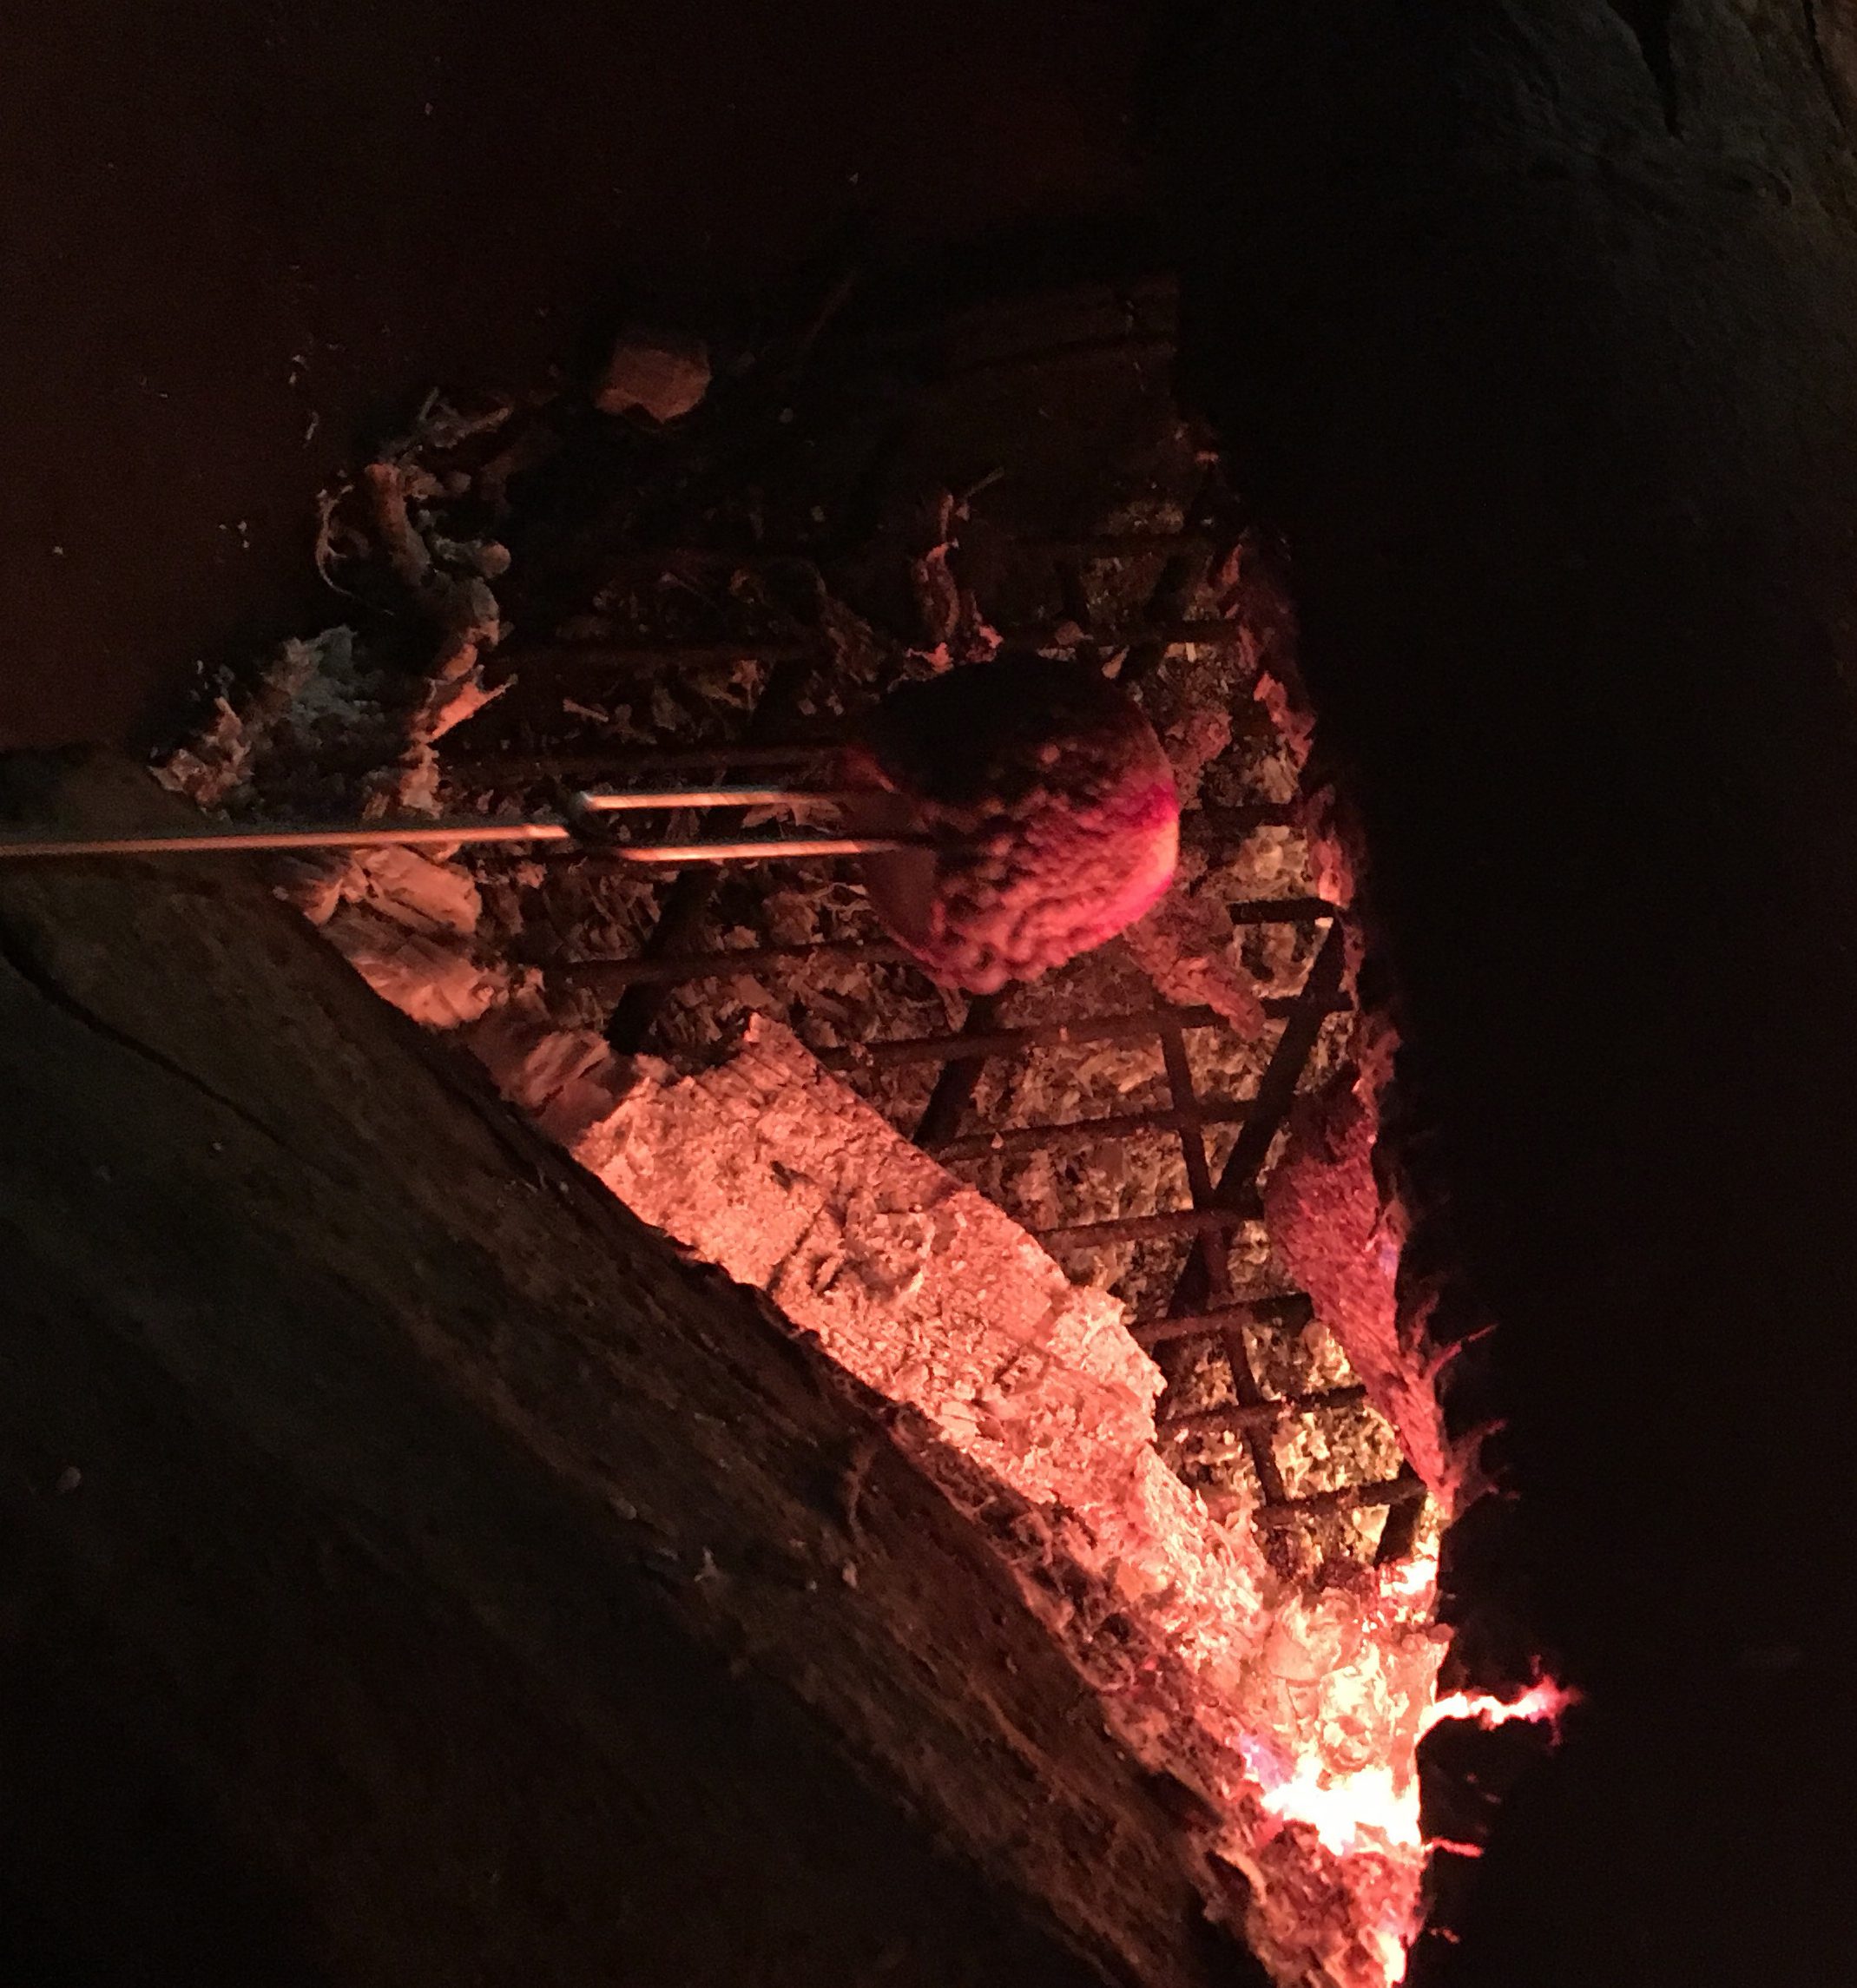
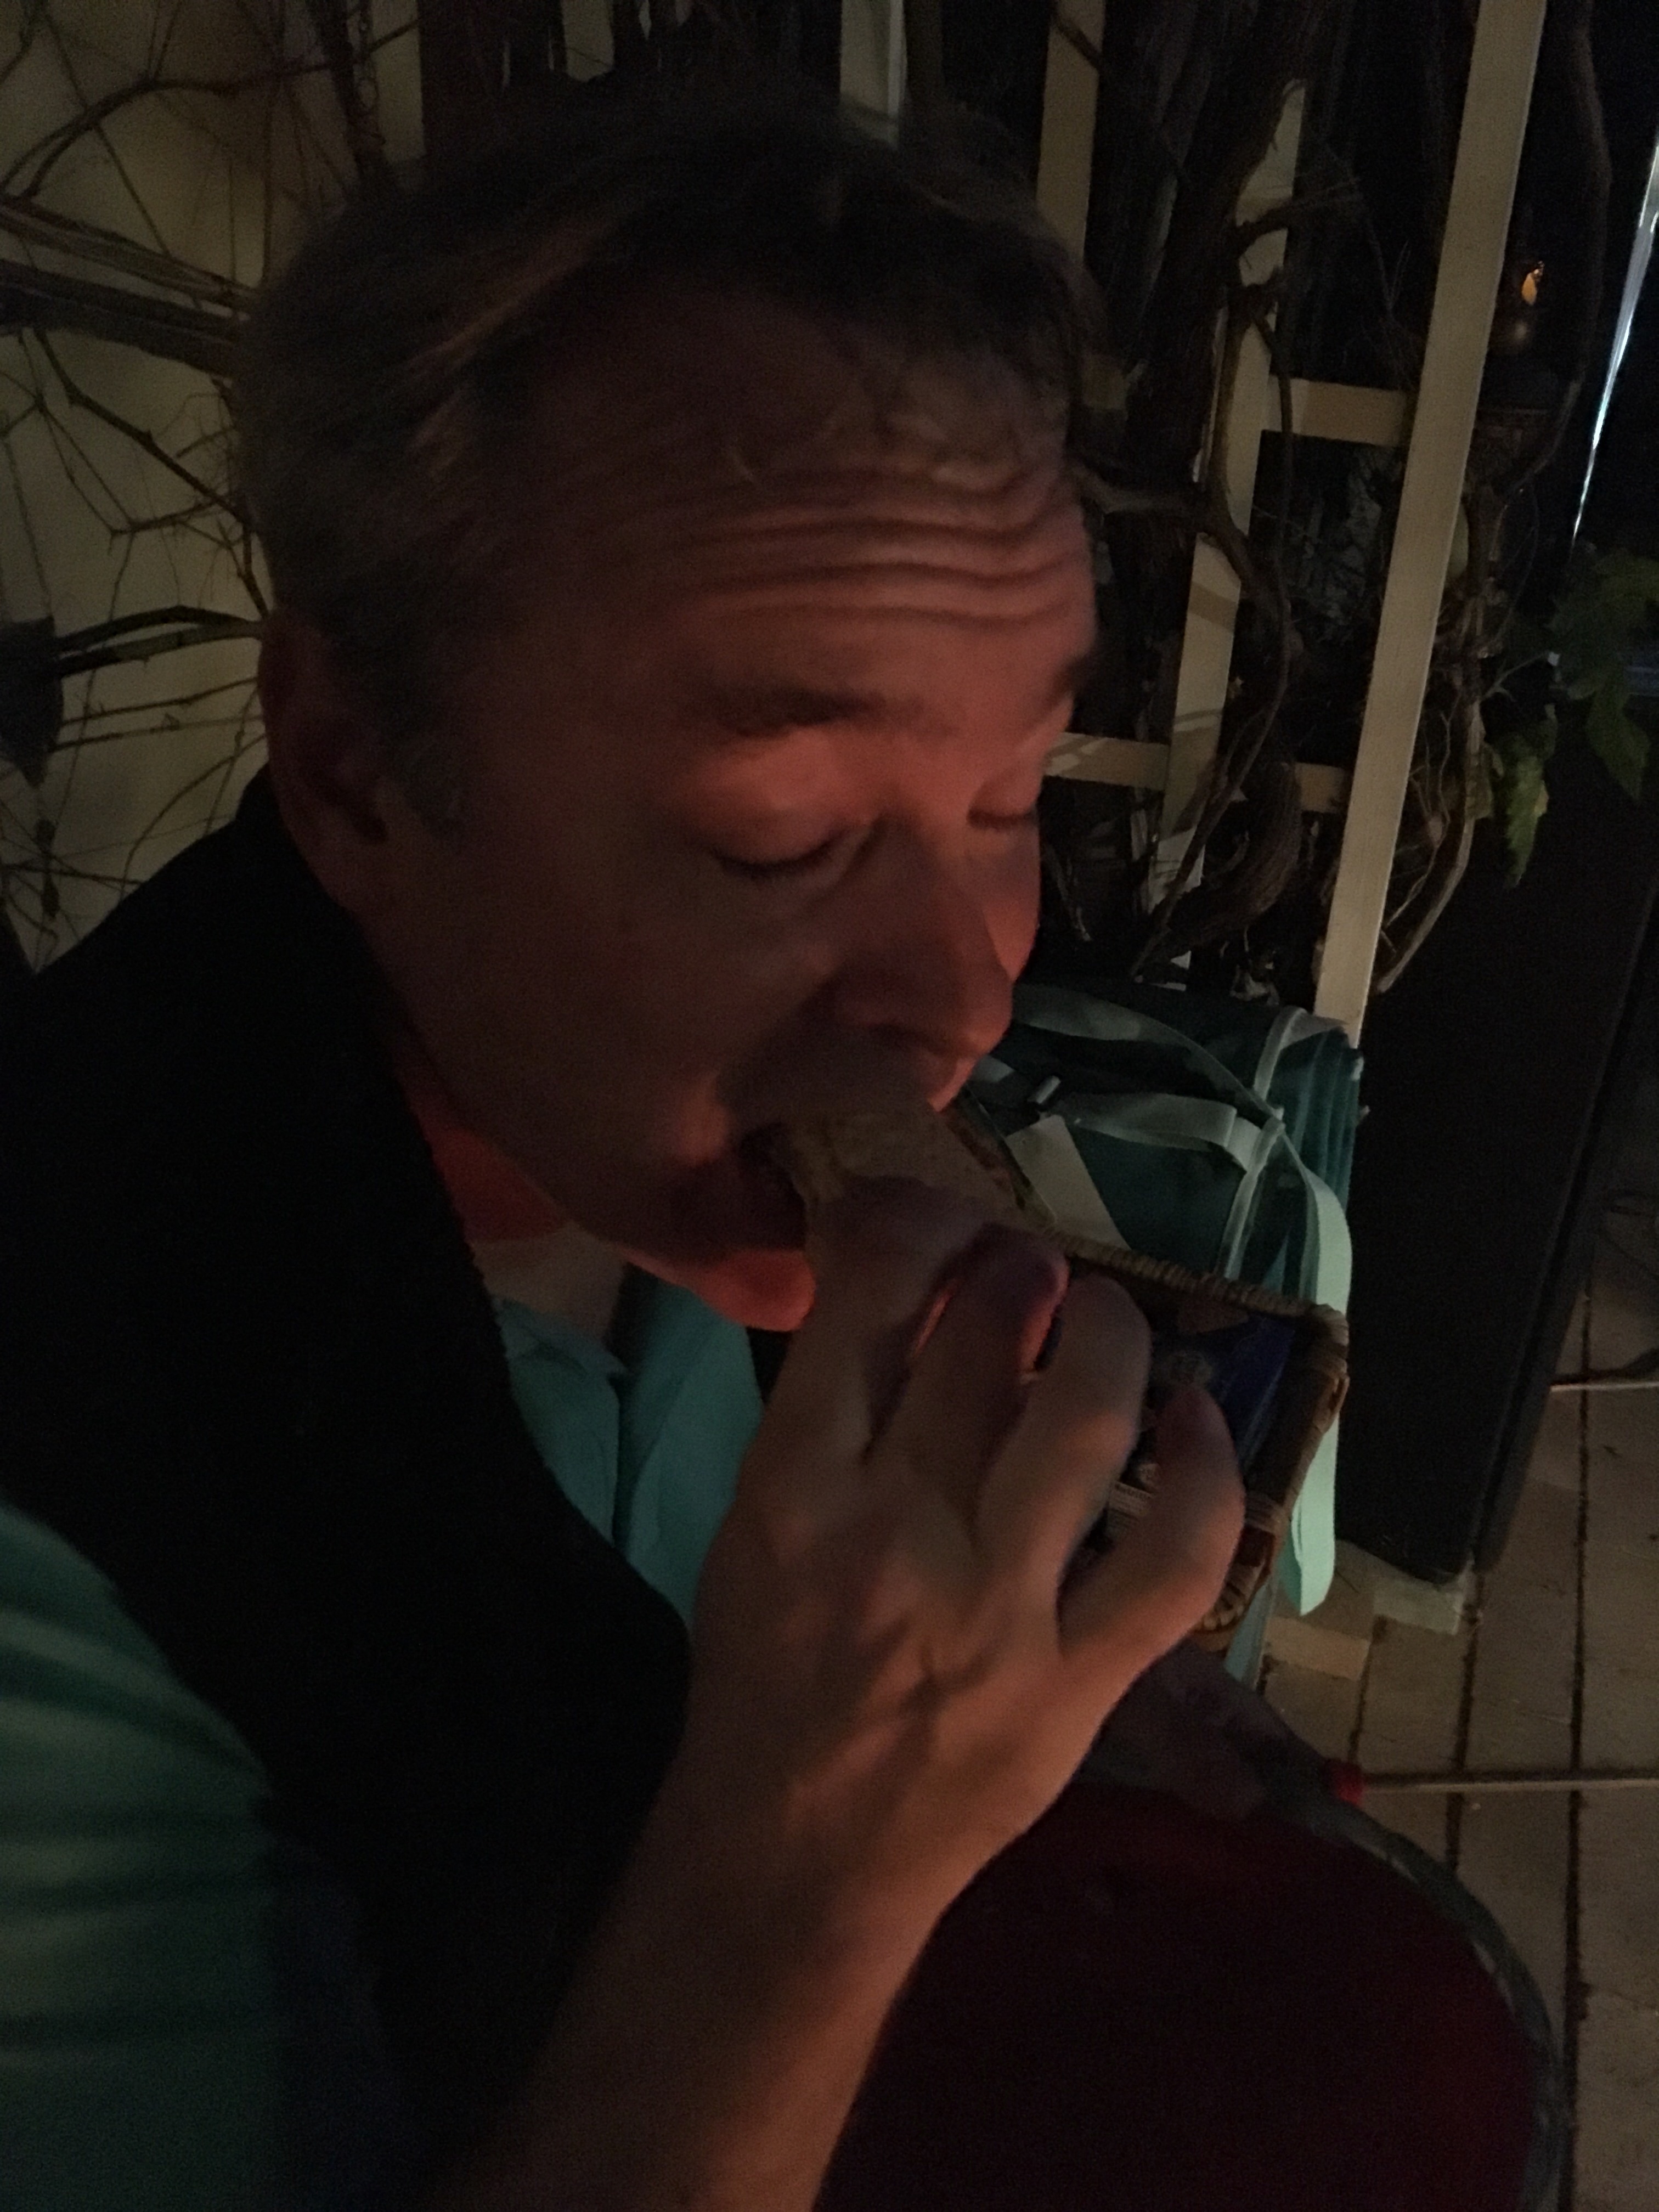
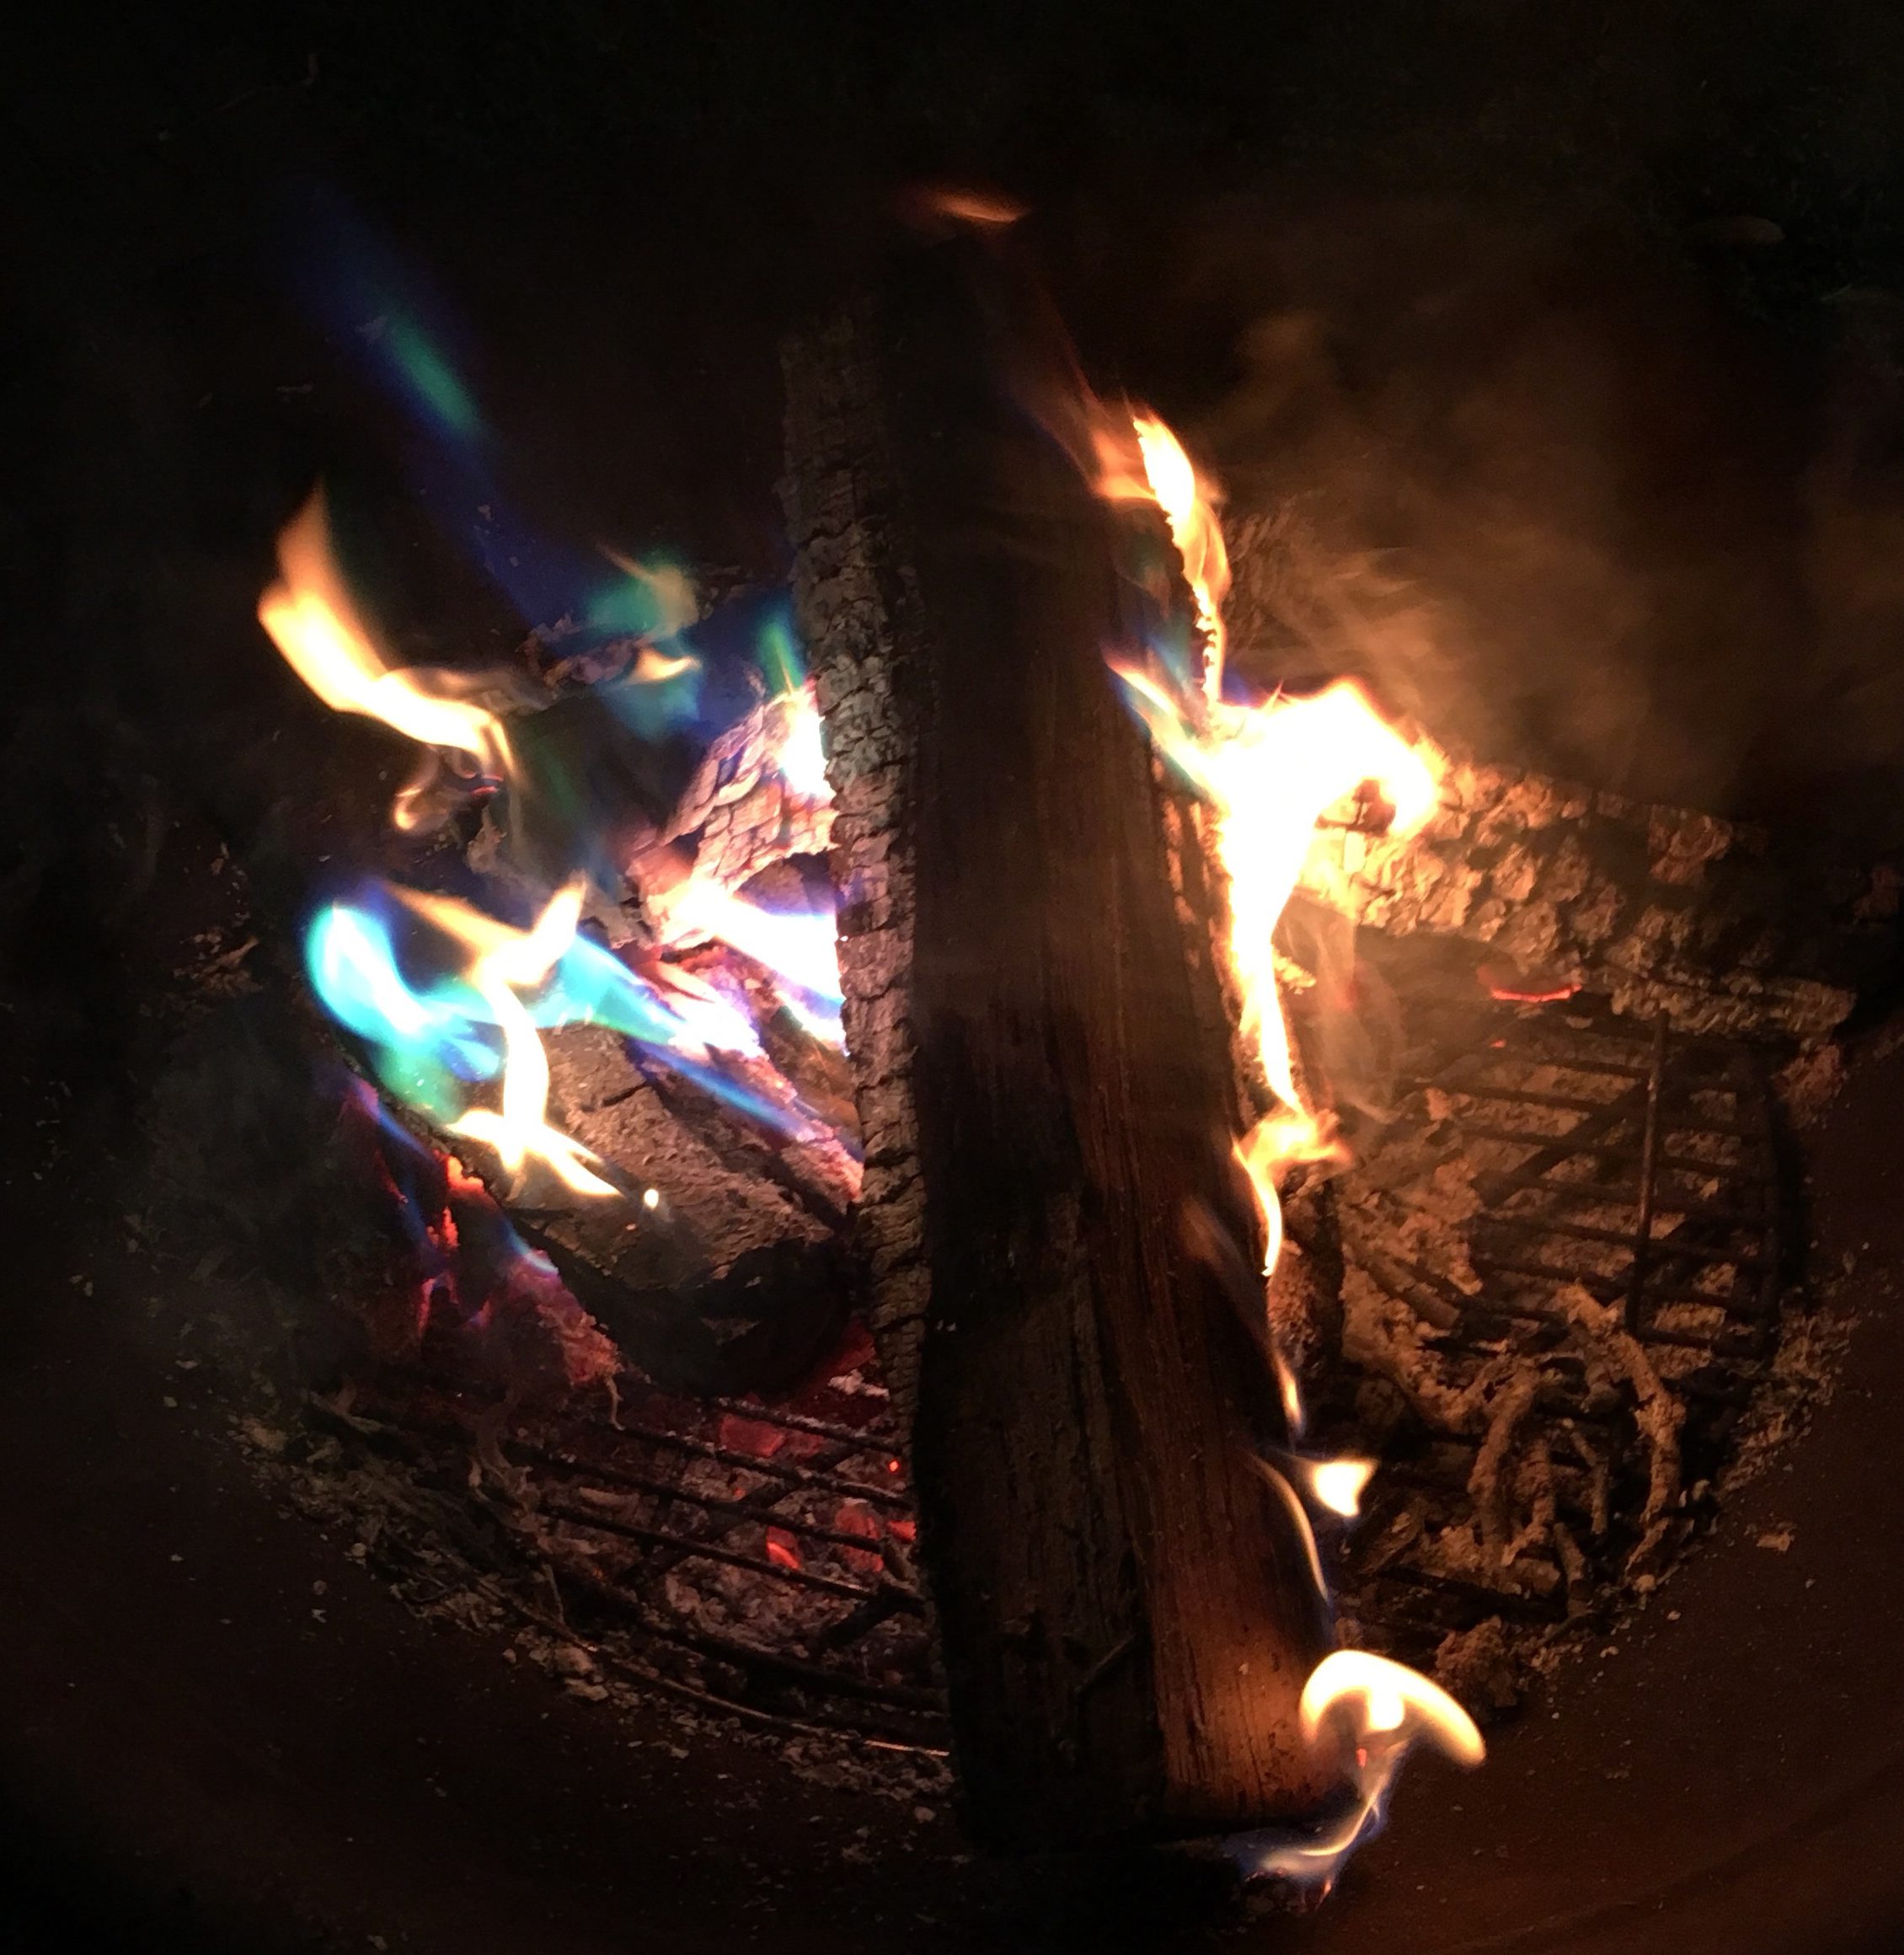
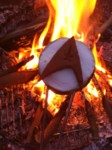
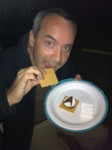
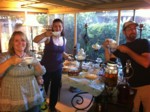
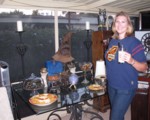
Cyd the self-proclaimed pyromaniac enjoyed getting the grill started, and she & Mike helped me set out all the toppings, so pizzas were already underway before the majority of people arrived. Lyle started the firepit for me to get the marshmallows roasting, and I caught Galt scarfing a S’more of the Special!

LEGO Brick Melon Salad by Sean & Laura
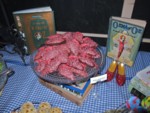
Sean & Laura earned huge geek points by bringing their LEGO Brick Melon Salad! They cut various melons into matching rectangles, then they used a drinking straw to cut the pips, then stuck them back in only halfway. Excellent effect!

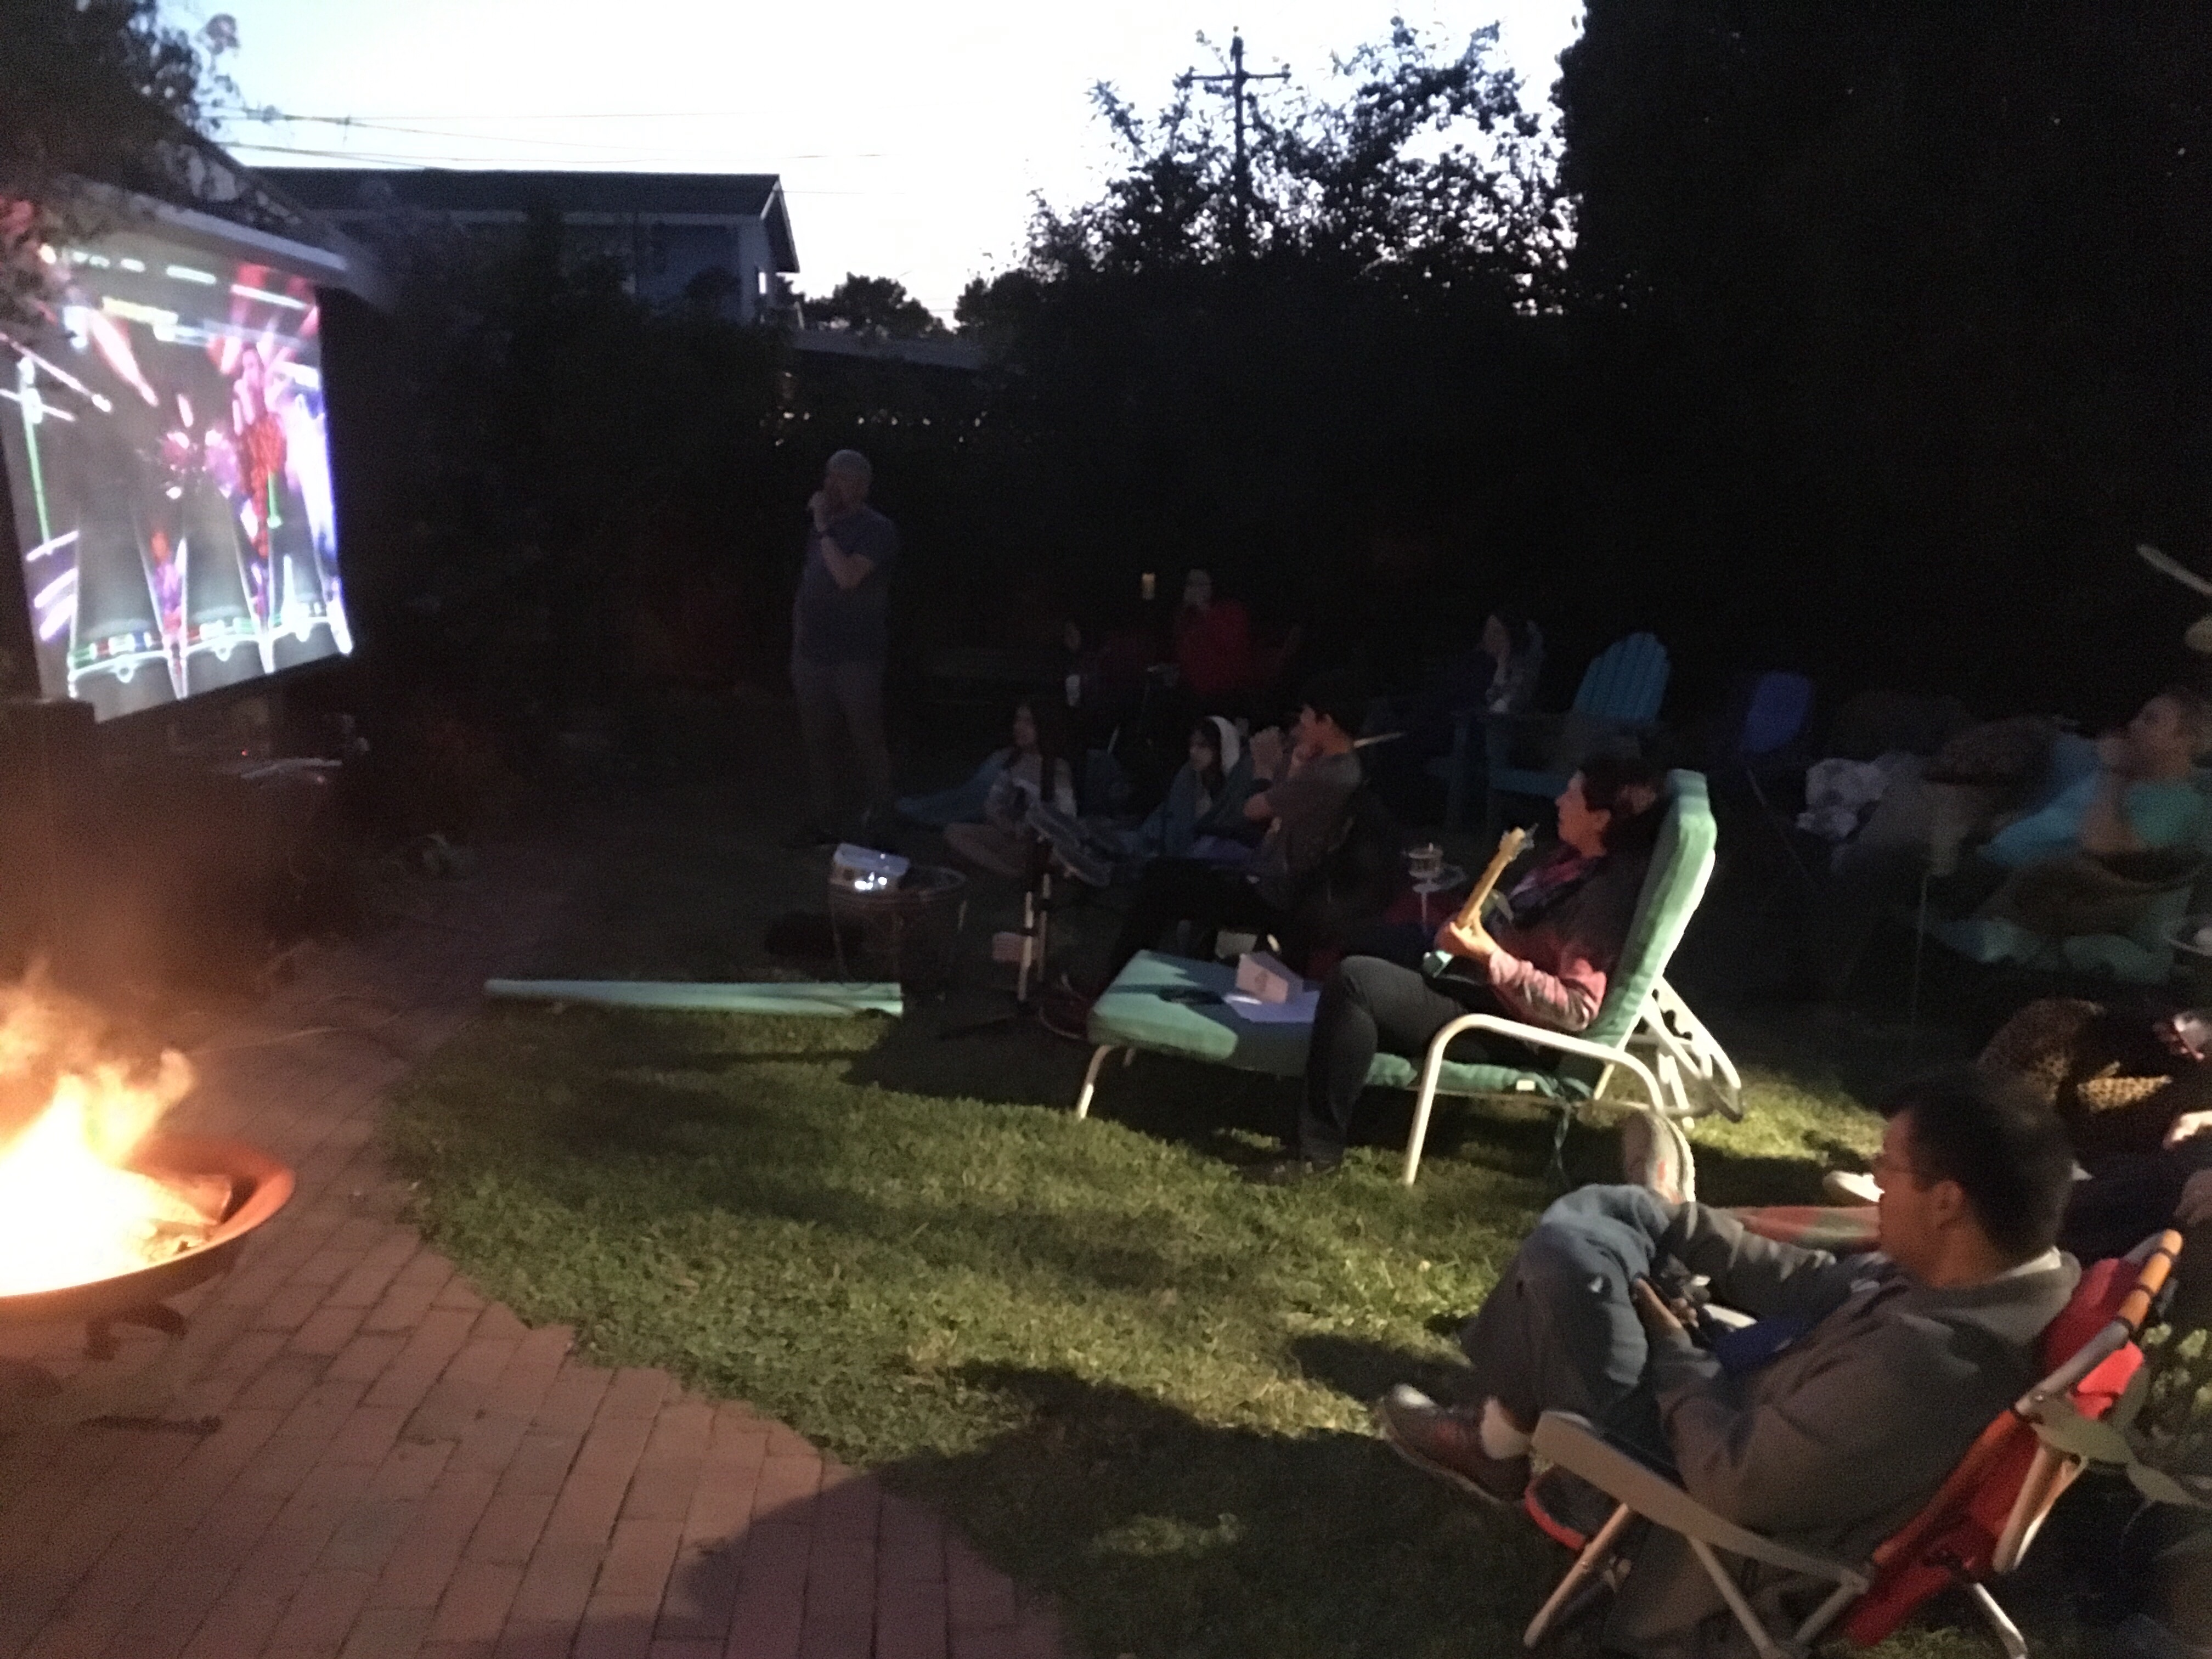
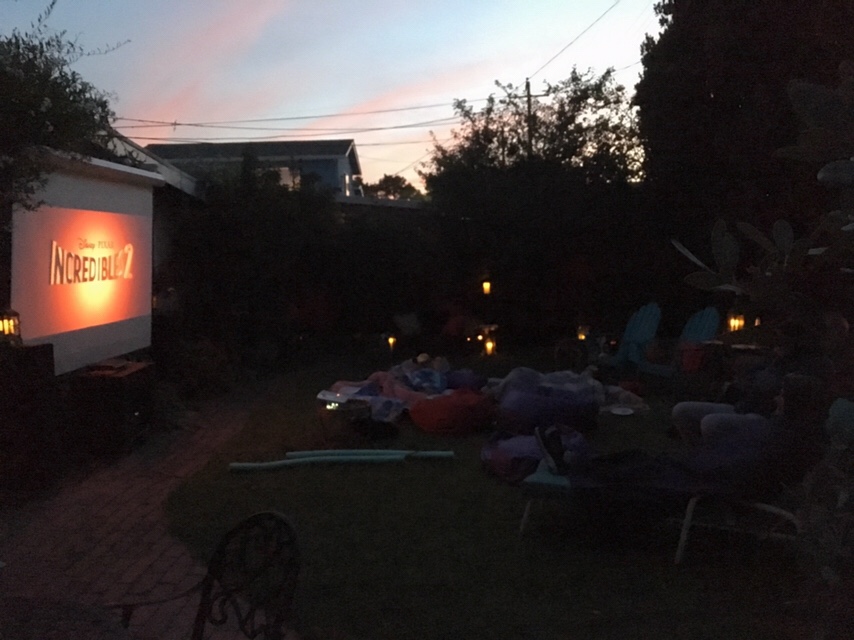
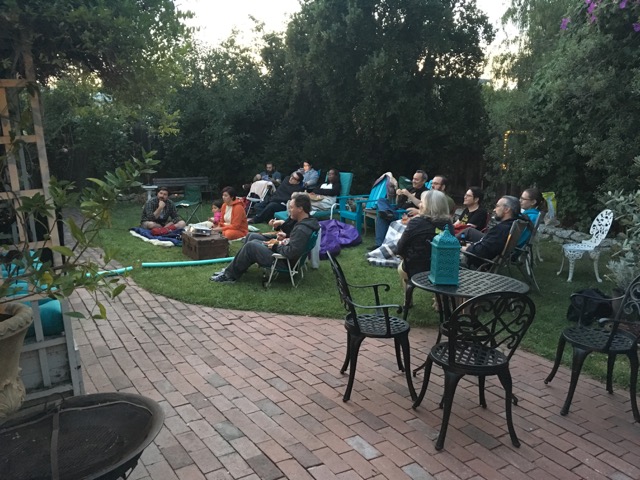
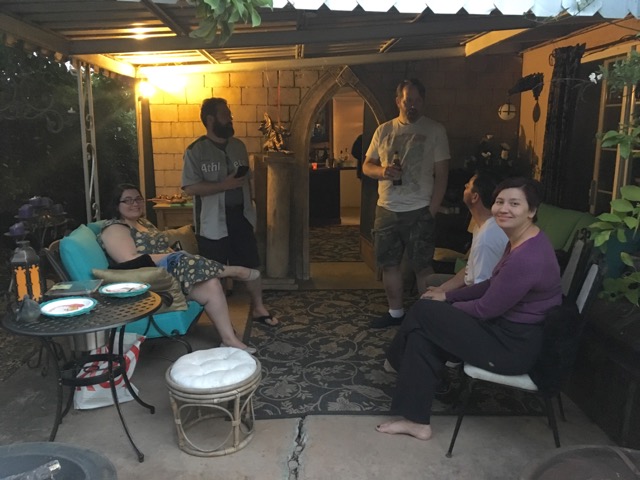
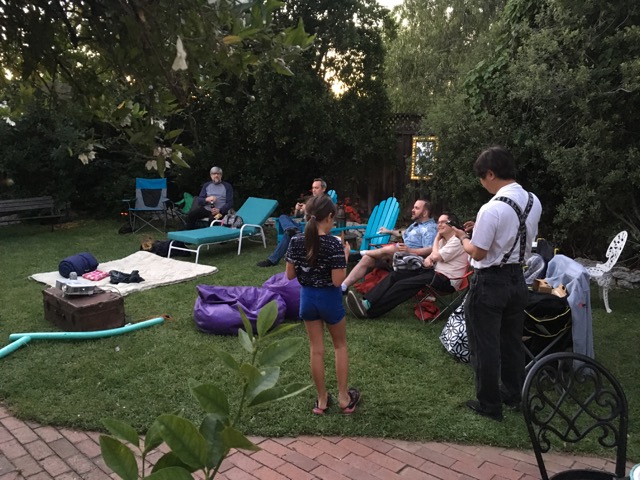
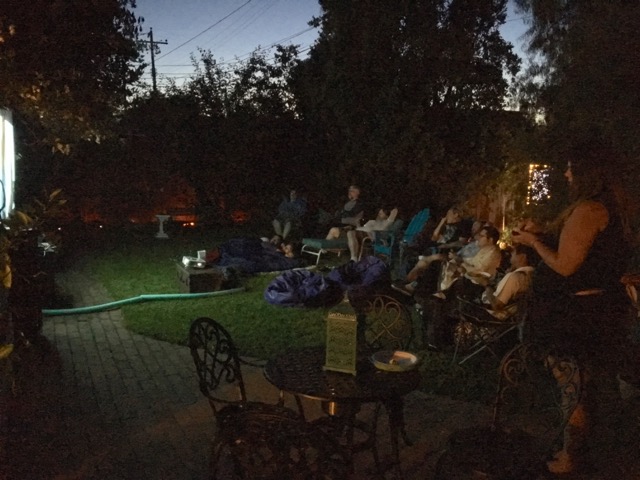
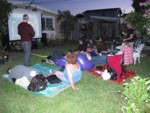
We can’t see the screen properly until the sun goes down completely, but we can see well enough to play Rock Band about an hour earlier, so a few played LEGO Rock Band this time, and with the LEGO band on the screen, it was fun to watch for the rest of the crowd who wasn’t playing. By the end of August it is dark enough for good projection by LEGO Rock Band8:30, but everyone is used to the rest of the summer needing to wait another hour, so we never get started as early as we could. As long as that means everyone is enjoying themselves, it’s all good…or should I say AWESOME? πŸ˜‰

Instead of 15-20 minutes of movie trailers before the feature presentation, since The Simpsons had a special LEGO episode this spring, I thought the 20-minute episode would be perfect! It was a great episode with a good message, and not too far out like Big crowd for LEGO Rock Bandthe Simpsons can often be, so I felt it was appropriate even for the littler kids in our group. This was finally my chance to make my own pizza and mix my own cocktail to be ready for the movie, so I wasn’t out watching with everyone, but I heard lots of big laughs from the LEGO Simpsons audience, so I’m glad they enjoyed the LEGO Simpsons!

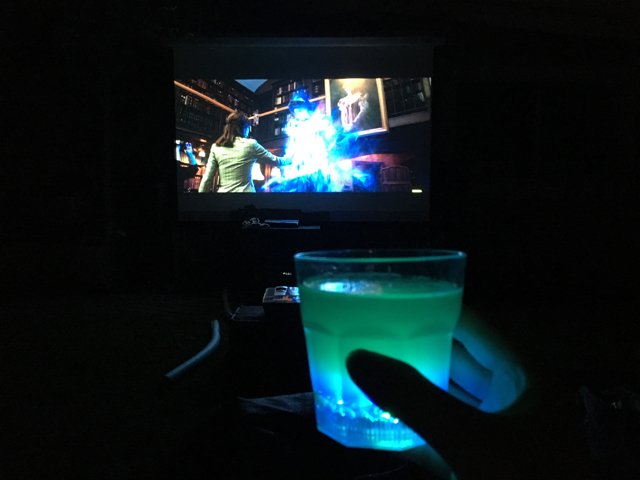
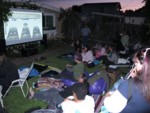
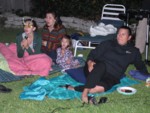
Then it was time for the main feature…in 3D! You have to spend in the 5-digits or use two identical projectors and crazy DIY setups for passive 3D projection, or one of my projectors can do active 3D with special glasses that cost $100 each, so there’s no way I LEGO Movie in 3D with old-school red/blue paper glasses!could afford to do that for a crowd. However the Bino freeware app can take a 3D version of the movie, display it split-screen right-left or top-bottom for passive-3D-capable TVs, convert it to red/blue or green/magenta 3D, or show it in normal 2D. I bought the old-school red/blue paper glasses in bulk online and figured we could try watching in 3D, then if there were too many complaints, I could quickly switch to 2D on the fly. There is a color shift even though the software is attempting to compensate for the red/blue split, so I don’t think I would do this for more impressive effects in a live-action movie, but it worked fine for LEGO Movie, and I got a great photo with everyone wearing their 3D glasses! We had several people who hadn’t seen the movie before, and I heard huge laughs coming from all of them…truly Everything is Awesome! πŸ˜€

You can enjoy even more photos in the gallery below. Thanks to everyone for another fantastically fun summer! Until next season! πŸ™‚

(more…)

Posted in Cinema Brittahytta, Edible Art, Parties | Tagged , , , , , , , , , , , , , , | Leave a comment

Stay Puft S’mores

Stay Puft S'mores Finally Finished!Of course as soon as I decided to show Ghostbusters in my summer movie series, I immediately thought of Stay Puft S’mores! Since each s’more would be an individual serving, I knew making the entire marshmallow man in such a tiny scale would not only be hard to see, but it would be a LOT of work to make enough to serve a crowd! I thought just the heads would work, and the giant marshmallows I had found last year were the perfect size.

Cutting Stay Puft Frosting SheetsSince the STAY PUFT writing on the hatband would be too small to pipe anyway, I decided to design a printed frosting sheet for the hatbands. I also printed the blue sailor collars with the white border so the blues would match, and since there was still some room on the sheet, I printed the red scarves and tassels too. The sailor collars were sized to fit a normal purchased graham cracker square so they could hang over the chocolate layer angled for the points to hang on the flat sides of the graham cracker. Stay Puft TeaserIt is a little tricky to cut strips so thin from the frosting sheets, since the strips want to separate from the backing and curl up, so it works best to leave as large a chunk as possible in your hand, and cut away each strip as you go, even the white space. I got enough frosting sheet pieces cut Stay Puft Proof of Concept Successout, then I started cutting some marshmallows to see what proportions looked best. When I had a successful hat, I grinned from ear to ear and posted as a teaser on the Britta Blvd Facebook page and Twitter! The initial full proof of concept model didn’t include the chocolate layer, but it looked perfect…hooray!

Cutting the Giant MarshmallowsThe proportions were just right that cutting a slice a quarter of the way through the marshmallow created the hat and the head, each with a conveniently sticky side for assembly. I worked with wax paper and kept the sticky side down for the heads for later sticking to the collars on the day of the party. The hats needed a little coaxing back into shape after cutting, but pulling the edges of the sticky side out back into a circle shape, then letting them sit open to the air a bit helped.

Curving the hatbands and sticking on the marshmallowsDon’t let them dry out all the way though, since you need some stickiness to get the hatbands in place! Keep the backing on the hatband strip as long as you can because the thin frosting sheet strip is fragile. When you are ready to add a hatband to a marshmallow, separate the strip from the backing, loop it around into a circle that looks the right size with the marshmallow hat, then gently press the hatband into the marshmallow so it sticks in place. There should be some overlap of the hatband, Reinforcing the hat bands with royal icingwhich helps it stay in place and support itself.

I did try cutting a section of marshmallow to support inside the hatband, but it prevented the hat from sitting properly on the head at the correct jaunty angle. I already knew that royal icing works well with frosting sheets, so I covered the inside of each hatband with a good coat of royal icing, using a piping tip for accuracy. Make sure to get the royal icing all the way to the top, since otherwise the weight of the marshmallow can collapse the hatband during assembly. Yes, I just said the Drawing the faces with food coloring pens“weight of the marshmallow”…never thought I’d say that!

As I was developing the design, I thought others might want to make their own Stay Puft S’mores, so I was trying to make it as easy as possible. I tried some wafer paper and frosting sheet scraps stuck to the side of the Benign happy faces vs. angry Gozer facesmarshmallow for the faces, but you could see the edges and it affected the marshmallow texture, so I decided just to draw all the faces by hand with my food coloring pens. I chose the original happy face and the angry Gozer face and drew a dozen of each, giggling to myself during each face…hahaha!

Gluing the hats with royal icingWith the faces still sticky-side down on wax paper, I packed them into airtight tins so the marshmallows wouldn’t dry out, but I left the hats in the open air so the royal icing could dry. The next evening after all the royal icing was dry inside the hatbands, I used the same royal icing and piping bag to attach the hats to the heads. To get the correct jaunty angle, Standing at attention leaning on each other to dryI set the first row of heads with the hats leaning against the tin, then each row leaned against the previous row. The bottom edge of the hat could sit on the top of the head on the previous row, and that happened to be the perfect angle. I really laughed at my little parade of Stay Puft marshmallow sailors! They are all standing at attention, but some of them are pretty upset about it! πŸ˜‰

You could use the red tassels and scarves from the frosting sheet and be almost done already, but I wanted a more 3D look, especially so the backs of the tassels would also be red, so I bought some red edible clay. I could have made my own batch of marshmallow fondant, but for such a small amount I didn’t feel like fighting to get the vivid red color I wanted, and this pouch was $5 before the 40% coupon I used, so a Sculpting the tassels and scarves from red edible claygood deal. It rolled out easily but still stayed firmer for sculpting than rolled fondant does, so it was a good choice. I cut the straight strips for the tassels with my pizza cutter, then I cut more strips for the scarves. One strip was cut to taper at each end, the other didn’t matter, then a shorter strip looped around the two in the middle to create the knot. I bent the strips to make the cloth folds and made sure Two dozen edible scarvesto squish the back of the knot so it would all hold together. Take heed, since the flatter and smaller these are the easier your assembly will be! Mine kept creeping larger which made them thicker, and those were the scarves that caused problems later. πŸ˜‰

Gluing the tassels with royal icingThat was the end of another evening’s work, since everything had to dry again before I could move forward. The next evening the royal icing hats had set fine, so I could transfer them on the wax paper into the tins so they could still support each other. I used the same white royal icing to glue the tassels to the center of each hat, bending the tassel slightly to encourage it to hang straight down. I wanted the tassels to hang towards the front anyway, which worked well since they could be attached while the ranks of heads were still supporting each other.

Tassels drying after gluing in placeAs the tassels were drying, I mixed some of the royal icing as blue as possible to match the hatbands and collars for the top button…but I soon realized that the hat angle was too steep and the royal icing wanted to droop! Since they were already inside tins, I propped up one side of the tin from underneath so the hat tops were vertical, piped all the blue buttons, then let them all dry with the tins propped up. I guess I should have Final assembly requiring royal icing glue under the scarvestaken a photo of that too, since it looked pretty silly. πŸ˜‰

After the blue buttons were dry, the lids went on the tins to keep the marshmallows soft until party day, when assembly began! Even though I had broken all the graham crackers and chocolate into the correct shapes beforehand, it took longer than I expected since the 3D edible clay scarves wouldn’t stay in place on the graham crackers without a dab of royal icing glue first. Once I got all those stuck in place, I was able to remove the sailor collars from their backing sheets, drape them over the chocolate and the scarf, then stick the marshmallow head firmly onto the collar.

Birthday Girl with Two Dozen Stay Puft S'moresI was finishing the last assembly as the first four people arrived, and as soon as I was done and reaching for my camera, two of them scooped me by starting to take photos with their iPhones before I could! haha…Of course I also requested a photo with my creations in all my Ghostbusters decor on the patio. Everyone loved them, and yes, we did cross the streams to roast Mr. Stay Puft and chomp him as Stay Puft S’mores!

Torching Mr. Stay Puft We almost got him! Toasty Mr. Stay Puft! Chomping a Stay Puft S'more

Posted in Cinema Brittahytta, Edible Art, Parties | Tagged , , , , , | Leave a comment

Slimer Shots

Slimer Shots on the barMy scientist friend Amy had sent me the strawberry daiquiri DNA cocktail video a while ago, thinking I might want to use it for Halloween or some other crazy party. I had already decided to show Ghostbusters during my summer movies, so I thought of using kiwi as green ectoplasm Slimer Shots!

Amy works in labs and is a plant scientist, so she helped me figure out what to search for to find out if kiwis would even work with this process. Strawberries are perfect since they are octoploidy, with 8 copies of chromosomes, so there is plenty of DNA to extract. We found that kiwis are hexaploidy, so not quite as much DNA as strawberries, but it should still be enough to see Chopped Fresh Kiwi in Freezer Zip Bagthe DNA strands come out into solution. Since pineapple juice is already in the recipes along with rum, I thought kiwi would taste great with that combination, so full steam ahead!

So my ingredients would still be fresh, I didn’t actually start testing until the week of my movie night party, and when I was looking for the exact ingredients, I found that you can’t use canned pineapple juice or even pasteurized fresh juice, since the heat treatments have already deactivated the bromelain required for DNA extraction. The video just Hand-crushing the thawed frozen kiwi with frozen pineapple concentrate said “fresh pineapple juice” but didn’t explain why, but I found this detailed Instructable that used frozen pineapple juice concentrate, and had proportions to prepare more than just one cocktail at a time. I only looked at two major grocery stores, but I only found a pineapple orange blend, so I used twice as much to my 2 cups of chopped kiwi, hoping there would still be enough bromelain in total.

I peeled and chopped my kiwi into quarter-slices, then froze them overnight flat in a zip freezer bag. The Instructable warned against using a blender because you might chop up the DNA too much for long strands to be visible in solution. I added 1/2 cup of frozen pineapple-orange concentrate into my bag of frozen kiwi, let it thaw at room Straining the chunkstemperature (while I worked on more Stay Puft S’more details!), then smushed all the kiwi by hand inside the bag until I had close to a puree.

Next I used a fine mesh strainer and several passes with a spoon to get as much of the puree away from the seeds and thicker chunks, which took a while. I didn’t have quite 2 cups of final kiwi-pineapple-orange puree, more After lots of spoon squishing through the strainer!like 1.5 cups, but since you only use a couple tablespoons (50 ml) for each shot anyway, I figured that should last for quite a few cocktails. It was a lovely slime green color too!

Now it was time to test! I have an extensive shot glass collection, so I chose a couple Jack Skellingtons for testing. You need high-proof alcohol to extract DNA, recommended 80 proof or higher, and I had some Absolut 100 I had Absolut 100 vs. Bacardi 151never found a use for yet, so I decided to try that and compare results to the recommended Bacardi 151. I chilled the alcohols in the freezer, and refrigerated the purees (while I worked on more Stay Puft S’more details again!), then when everything was nice and cold, I ran my test.

I poured the chilled alcohol gently into the shot glass already filled halfway with kiwi-pineapple-orange puree, careful not to mix it into the puree, then I watched and waited. Bacardi 151 crowned the winner!It does take about 15 minutes for maximum DNA extraction, but I definitely saw fluffy, cloudy strands appearing in the clear layer! There were definitely more strands and they appeared more quickly in the Bacardi 151 test on the right side, so I still have my Absolut 100 waiting for a good recipe someday. πŸ˜‰ The winner got the festive umbrella pick to scoop up the DNA. I love using science in my kitchen! πŸ™‚

So, I can handle strong drinks, but even I could not sip the Bacardi-kiwi shot, even after it was stirred together! I filled the rest of the glass with lemon-lime soda and stirred well, then that was a tasty drink and nice to sip. Hooray!

Party Slimer Shots CloseupNow that I had a successful test and a whole bunch of prepared kiwi slime, I poured it into two small fancy serving pitchers, then there was just enough left to prepare 4 shot glasses. I covered them all with plastic wrap and stashed them in the party fridge, with the whole bottle of Bacardi 151 in the party freezer. I printed up a recipe card for the bar, complete with Slimer himself, got out a bunch of my tall shot glasses from my collection in the lighted corner cabinet, and Slimer Shots were all ready for the party!

Picking up the DNA with an umbrellaAfter we had already shared a bottle of tasty Riesling, the first round of guests were game to try some Slimer Shots! We definitely saw slime, and topping off with lemon-lime soda and stirring well resulted in a tasty tropical cocktail, with a festive umbrella pick to collect the slime. When my fellow tech-geek friends pull out their iPhones to take multiple photos, I know I succeeded! πŸ˜‰

Below is the full recipe I used, plus the instructions from the recipe card for serving. I hope you enjoy your Slimer Shot DNA Cocktails!


2 cups peeled and chopped fresh kiwi
1/2 cup frozen pineapple-orange concentrate
Bacardi 151 chilled in the freezer
each cocktail = approx 2 Tbsp/50ml chilled prepared puree + 2 tsp/10 ml ice-cold Bacardi 151

Slimer Shots

fresh kiwi puree mixed with frozen pineapple juice
ice-cold Bacardi 151
lemon lime soda

Pour the chilled kiwi-pineapple puree into a tall shooter glass no more than half full. Gently add no more than 1 inch of ice-cold Bacardi 151 on top. Swirl a little to encourage the extraction. Over 15 minutes you will see fluffy DNA strands appearing in the clear layer that you can pull out with an umbrella pick to inspect the slime. After the extraction is complete, fill to the top with lemon lime soda, stir, and enjoy your Slimer Shot!

Posted in Cinema Brittahytta, Parties, Recipes | Tagged , , , , , , , , , , , , | Leave a comment

Who Ya Gonna Call?

Birthday Girl with Stay Puft S'mores and Ghostbusters DecorGHOSTBUSTERS of course! Not only is it the 30th anniversary this year, but there is a tie-in to the Halloween plot, so perfect for my birthday movie night! I have loved Ghostbusters from the beginning. I wanted to see this movie so badly I went on opening day BY MYSELF on the last day of school when I was 12. Going to a theatrical release all by myself is unheard of even to this day, so that shows how excited I was to see a movie that featured Zener cards with parapsychological research, let alone ghosts and science! Plus it looked really funny. πŸ™‚

Hole in Vintage Tee - sadness!I bought a poster, since this had come out long before my movie theatre employment days, but I still have the logo tee I had made 30 years ago! I wanted it immediately after the movie and there wasn’t merchandise yet so I went to the screen printing shop in Sunrise Mall and had my own printed on the same powder blue I saw in the crowds at the end of the movie. Well, I have changed shape a bit since I was 12, so it’s much tighter to wear, and even sadder, the cotton wore a hole right on the chest! Guess it would just be a decoration this time…and I was glad I had acquired a new Ghostbusters shirt last Halloween I could wear instead.

Custom Ghostbusters Paper PlatesI didn’t find any Ghostbusters plates online, so I decided to make my own. I found plain paper plates very close to the same powder blue as the shirt, then I printed the No-Ghosts logo onto my water-resistant label paper but using my food ink printer. The water-resistant label paper works great with ink-jet inks, and I use it all the time for any bottle labels, but the food coloring inks don’t lock in the same way. First I cut the interior holes with a craft knife, then I cut out the rest, then centered each one on a plate. I thought 24 should be enough and I had extra plain blue plates if necessary. The plates worked great even though any moist food did make the design run, but at least it was food coloring so no harm done!
Stay Puft S'more Proof of Concept Success
My main creative menu items required some proof of concept testing in advance. Of course as soon as I planned to show Ghostbusters in the summer, I immediately thought of Stay Puft S’mores! You can read the full details of design, development and creation in a separate post, but here’s the first successful proof of concept Stay Puft S’more! Heehee…

Slimer Shot TestingThe other testing was inspired by the DNA cocktail strawberry daiquiri that’s been going around the internet lately. I thought using kiwi instead of strawberry would give a nice green slime effect perfect for Slimer the Ghost, so we could have Slimer Shots! Full testing and preparations are in a separate post, but Bacardi 151 did work better than Absolut 100, so I went ahead with the rum version with the bottle in the freezer, and the kiwi-pineapple slime all ready in the fridge, since you need everything chilled for the best DNA extraction. Yay, science!

Stay Puft S'mores Finally Finished!I was trying my best to have everything ready in advance, and I did pretty well, even while melting in the 100F heat with no air conditioning in my house, but the final assembly of the Stay Puft S’mores took longer than I expected, so I was finishing those in the kitchen when the first guests arrived. By the time I Birthday Girl with Two Dozen Stay Puft S'moresfinished, Ben & Lyle were taking photos even before I could get out my own camera! They loved them and so did I! There were benign happy faces as well as the angry Gozer faces, which made me laugh even more. πŸ™‚ I insisted on some photos of me holding the Stay Puft S’mores in my No-Ghosts shirt by my Ghostbusters decor before I melted even more, then we were ready to party!

Slimer Shots at the BarWe did a couple Slimer Shots next, and those were also a hit! It does take about 15 minutes for maximum DNA extraction, and since kiwi is only hexaploidy where strawberries are octoploidy, there isn’t as much DNA in the first place, but we definitely saw slime, and topping off with lemon-lime soda and stirring well resulted in a tasty tropical cocktail, with a festive umbrella pick to collect the slime. πŸ˜‰

Ghostbusters DecorYes, I bought the soundtrack album on VINYL 30 years ago, displayed here as decor under the movie poster, along with a summary storybook complete with photos. I even tried a tiny No-Ghosts logo in chalk on the clapboard, but that was Drawing the No-Ghosts O so small in chalk is tricky!trickier than I thought!

Below is the full Ghostbusters menu you can see on the chalkboard, mostly mundane summer staples with silly themed names. Thanks to Jerry for a couple fun names when I got stuck, especially for his delicious chocolate cake he made!

Tee, plates, s'mores & menu chalkboardCinema Brittahytta Kettle Corn
Blueberry Blast Hard Cider
Slimer Shots
Keymaster Cheeses & Crackers
Egon’s Sweet Potato Salad
Gozer’s Green Salad
Zuul’s Frightening Fruit Salad
I Ain’t ‘Fraid of No Bean Salad
Proton Packed Sausages
Chocolate Crossed Dreams Cake
Stay Puft S’mores

We grilled the sweet potato salad & sausages, and the boys were grinding their own snow cones again, but I slacked taking photos since I was running around trying to talk to everyone. There was a lull when we thought it would be a smaller crowd, then about 8:30 all of a sudden there were twice as many people! One of the boys asked if he could light the fire pit for s’mores, so I did get a couple really good photos of an angry Mr. Stay Puft being torched, smushed and chomped, then my iPhone said it was too full for any more photos! Doh!

Torching Mr. Stay Puft We almost got him! Mr. Stay Puft almost defeated... Mr. Stay Puft chomped and defeated once and for all!

No-Ghosts plate full of food, ready for the feature presentation to begin!
We started the movie just as I finally filled a plate to eat, with a tall glass of my blueberry homebrew cider, which was a hit again, but I don’t think we used up the whole 2 quart growler I mixed up that afternoon. Glad they enjoyed it, since it doesn’t last! I still didn’t cool off in the nice night air during the movie since I was directly in the path of all the hot air venting from the projector….darn! At least everyone else cooled down!

Happy Birthday to Britta!
We waited until after the movie for my birthday cake, an absolutely delicious dense chocolate cake with fudge frosting made by Jerry. Everyone sang but they got started slowly and dragged even slower, so several people joked that it was a dirge! haha…We used the last of the No-Ghosts plates for the cake, which didn’t smear the designs at all. Victor had brought a bottle of 14-year old Mead of Poetry, so we shared tastes with everyone, then some people hung around past midnight chatting this time! What a fun birthday movie night! Thanks to everyone who was able to come enjoy a true classic!


Angry Stay Puft S'more with Ghostbusters Decor Surviving Stay Puft S'mores

Posted in Cinema Brittahytta, Outdoors, Parties | Tagged , , , , , , , , , | 1 Comment

Fashioning Food & Festivities for Frozen

My Cinema Brittahytta Frozen Sing Along party was a lot of fun, but it was also a lot of work fashioning such festivities! I was able to get everything done in time because my parents and I already had acquired lots of Christmas snowflake supplies over years of collecting, plus I spread out my projects and food preparations the whole month leading up to the party. Of course my Elsa the Snow Queen costume was finished a couple months before, thank goodness! I’m so glad I planned this well, because then I was able to enjoy my out-of-town guests and have a great time at my own party!

Hexagonal Pizza Crusts for Grilled Snowflake PizzasFirst up were the pizza crusts since they stay fine in the freezer for several weeks. I know they last that long because I love eating a pizza for dinner if there are any party leftovers. πŸ™‚ I used the same whole wheat sourdough pizza dough recipe I’ve been using for a couple summers now, since it is always a hit. Since my plan was Grilled Snowflake Pizzas, I made hexagonal whole wheat sourdough pizza crusts so everyone could arrange their toppings to make their own pizzas as unique as individual snowflakes!

Cutting Sliced Mozzarella into SnowflakesI have a whole collection of modular make your own snowflake cutters from long before I became a Frozen fan, so in addition to using them for the Frozen Fractal cookies, I used the same cutters on two packages of sliced Mozzarella Snowflakes for Grilled Pizzasmozzarella so we could add various white snowflake shapes on top of our pizzas. I ended up with two full plates of stunning snowflakes, even the tiny stars that were cut out of the middles. The tiny stars were very popular with the tiny kids!

Snowflake labels as stencils with aqua glitter spray paintNone of the plates and napkins I found for sale fit my vision, so I decorated clear lightweight plastic disposable cups and plates with my own snowflake designs and aqua spray glitter. For the plates, I used removable label Finished Icy Snowflake Platepaper in my new cutting machine to cut more of the same snowflakes designs I had used for Elsa’s Sparkling Snowflake Cape, stuck the snowflake labels to the back of the plates as stencils, then used aqua glitter spray paint to give a sparkling coat of ice. Since this was only on the back of the plate, there’s no risk to the glitter getting into any food. I was able to resuse the same labels several times before they got so much glitter on them that they started curling upwards instead of sticking to the plates. I think about 4 pages of labels were enough for all 20 plates, but I did go through 3 cans of spray glitter, which was the largest expense. I used coupons on each can, but they were still $5 each and only small cans. One tip is that the glitter clogs the spray nozzle, so try to use up a Handpainted white snowflakes on plastic cupswhole can in one session, or you might end up wasting the rest!

For the cups, I used a white paint pen to draw assorted snowflakes by hand, lower than anyone’s lip would touch the cup just to be safe. After all those were dry, I used the last of the aqua spray glitter Finished Icy Snowflake Cupscarefully pointed away from the lip of the cup to spray only the bottom edge, using short sprays so the glitter would fade from clear to more aqua at the bottom.

I really love how these turned out! So elegant and just like Elsa’s ice creations in the movie! They were technically disposable, but since the plates were fairly sturdy plastic and none of the cups had cracked, I carefully washed them all by hand afterwards so I can use them again someday. I did spend about $35 on the full set of 20 plates and 20 cups, so nice to be able to keep them. πŸ™‚

Glowing Food Table (by Debi)Lucky for me that my parents have a bunch of snowflake lights and giant plastic snowflakes for Christmas, so I borrowed those, and they made a huge impact! Even the small snowflake lights I taped to my tier trays, and it was so festive for an evening party. The larger snowflake lights had a subtle twinkle effect, not blinking enough to be annoying, but just a twinkle, which was Olaf and Elsaperfect. I used 4 strings around the outer patio and across the grape arbor bench which looked lovely over the firepit, one string across the french doors from the kitchen entering the patio, and another string over the food table across the posters. Some people did notice Snowflake Lights on the Patiosthat I placed the snowflake lights very carefully compared to the posters…one is in Elsa’s hand!

I love snowflakes for Christmas as well, so in addition to the cookie cutters for the Frozen Fractal cookies, cheese and pastry, I also have various snowflake silicone molds. I used one of the molds for decorative ice cubes but forgot to take any photos of them…oops! I wasn’t originally planning on s’mores since we already had “Do You Wanna Build a Snow Cone?”Pouring chocolate snowflakes for Love is an Open S'more to make, but as soon as I thought of “Love is an Open S’More” I could not resist! The less intricate snowflake silicone mold was the perfect size to sit on a standard graham cracker square, and also the smallest Frozen Fractal cookies fit on top perfectly! I have made custom s’mores Love is an Open S'Moreseveral times before, and I love my semi-sweet Ghirardelli, but s’mores just need the Hershey’s milk chocolate flavor to be proper s’mores. Two bags of Hershey’s milk chocolate chips melted in the microwave were plenty to make 18 chocolate snowflakes. The molds were deep and intended for Tash demonstrates how Love is an Open S'morebaking, not candy, so it was tricky to judge how thick to make the chocolate so I could remove it from the mold intact but not to be too thick for a s’more. Two spoonfuls ended up as too thick, so one spoonful of melted chocolate spread around into all the corners was just thick enough to remove from the mold, and only slightly thicker than a Hershey’s bar…perfect! They were set up as open s’mores on the plate, then you needed enough love to warm up your marshmallow to melt the β€œfrozen” chocolate. Good enough story? It didn’t matter since they were s’mores! Delicious!

Cheese Snowflakes on the Cheese TrayI was on-schedule enough that the night before the party I had time to cut more cheese slices into snowflakes for the cheese tray. I used the normal rectangles for most of the tray, and I only had one snowflake cutter that fit inside the precut cheese slices, so I cut those out and arrange them on top over the cheddar so they would stand out. I love adding little details like this!

I realized while making the Brrrie in Pastry that I don’t think I have it as searchable recipe instructions. I think I can get some better photos from the beginning for the upcoming Patriotic Pastry Brie, but here are the basics. I purchase the baby Brie rounds and frozen puff pastry sheets. Thaw the puff pastry in the fridge for a few hours, unfold one Placing the Brie on the filling and puff pastrysheet, pinch the folds back together, then roll in all directions to stretch out the sheet. I use a large silicone mat so I don’t need any flour. I would recommend parchment paper if you don’t have a silicone mat. Keep flipping the pastry over between rolling it out or it will get too thin to lift off your rolling surface. Use the cardboard the Brie came in to gently mark the dough in the center. This is where to spread your fillings, and so you know you have rolled your sheet large enough. I used apricot preserves with dried cranberries for years, but after I started making my spiced loquat preserves from my own fruit tree in 2006, that became the hands-down favorite filling!

You can spread the filling to bake only on top of the Brie, or have it come down the sides a little. If the filling comes down the sides, you have a greater risk of developing leaks in the pastry, so fair warning. After spreading the filling, do not wait too long before putting the Brie round in place, since the pastry can start getting soggy and refuse to release from your rolling surface. Fold the pastry around the Brie, starting with the flat sides since they are the shortest. Trim the corners and fold them also to the center. This side doesn’t need to be pretty since it will be hidden, but you want to secure all the pastry so there are no holes, so pinch everything together well. Immediately pull the entire Brie in pastry gently off the rolling surface and set on Brrrie in Pastry ready to bakegreased foil on a cookie sheet, with the pinched pastry ends on the bottom. If you wait too long to flip it onto the cookie sheet, you will also have problems with the weight of the Brie squishing the pastry too thin.

Now you can roll out the corners you trimmed away and cut out whatever decorations you would like on the top. For this Brie I used snowflakes of course! If you work quickly, you should be able to stick the pastry decorations on the Brie just as raw dough, but if it takes longer to construct your design, you might need milk or egg wash as glue. I use a piece of foil large enough I can pinch it sealed as a tent and keep in the fridge overnight before Brrrie in Pastry and Little Baby Unicornsbaking just before the party. If you are saving it overnight, it is better to add the final milk or egg wash just before baking so it doesn’t get gummy. However, if you don’t use any sort of protein wash at all, it won’t brown very well. Bake in the oven at 400F for at least 15 minutes, maybe longer, but keep checking. Once it has browned and no spots are doughy anymore, remove from the oven. Let it cool several minutes, then pull away the foil to set carefully on a serving plate. If you set it out too quickly, your guests could burn their mouths! Since the Brrrie in Pastry is extremely decadent, add something healthy nearby like a plate of baby carrots as Little Baby Unicorns. πŸ˜‰

Except for the plates and cups, most of the food styling and decorations were very inexpensive since I was reusing what I had or borrowing from my parents. I did splurge to Olaf standee as purchasedbuy two posters and the lifesize Olaf standee, but the diecuts around Olaf left too much white cardboard around his arm and his twig hair for my taste. I knew that was for stability because those areas were too skinny and easy to break, but I decided to try cutting them out and reinforcing them from the back. I used an extra layer of scrap cardboard behind Olaf standee after trimming and reinforcing his twigshis arm, but the twigs were too skinny for that. Since I was using hot glue to anchor the scrap cardboard to his arm, I tried building up layers of hot glue on the back of the twigs and the arm, letting each layer cool and harden before adding another. Not only did this reinforce the twigs pretty well, but they could also now even bend without creasing! Kids were Olaf and Three Elsas with Ice Hands! (by Natasha)even able to hold Olaf’s hand for photos. πŸ™‚

I was very thankful that had finished all the final food prep the night before, and all the last dirty work to get the yard all arranged was done early enough for me to shower and cool down enough for all my Elsa makeup before my special guests arrived from a 5-hour drive! My dear friend Natasha brought her two daughters to their first Britta party, and Excited sisters!they were so excited! I had turned all the snowflake lights on already, so as they walked in their first view was of the twinkling snowflakes, Frozen posters, and the food table…and they gasped & hugged each other! Violet helping so well!I’m so glad they had such a fabulous time!

I had set aside safe ways they could help, like setting the crackers on the plates, putting the water bottles in the ice bowl, and stirring the fruit salad, but we ran out of tasks they were so helpful! They even each helped me put on one Elsa ice shoe…haha! We were all in our Elsa costumes and I was putting the last final touches on all the food displays when our next guests arrived…whew! This doesn’t always happen for my parties, especially for the crazy time that is Halloween, so I told Kevin how proud I was that everything was set out and our costumes were on before the party started…and he said we should go out and buy lottery tickets…haha!

Hope you can use these tips to create your own Frozen festivities! Don’t miss the full Frozen Sing Along party, including an adorable sing along video of Let It Go Live!

#Frozen #Elsa #Olaf #Fractals #recipes #snowflakes #snow #costumes #parties

Posted in Cinema Brittahytta, Outdoors, Parties, Recipes | Tagged , , , , , , , , , , , , , | 2 Comments

Frozen Fractals Sugared Snowflakes

Sugared SnowflakeEver since my mom bought me a fun set of modular mix and match to design your own snowflake cookie cutters, I have had great fun making these Sugared Snowflakes at Christmas time, even though the intricate piping can take quite a while. This is the first time I have made them in the summer, but showing the new Disney classic Frozen for Cinema Brittahytta was the perfect chance! They worked great as garnishes for our s’mores, as well as to munch on their own!

Assorted Snowflake Cookie CuttersThis is my trusty family sugar cookie recipe that doesn’t spread while baking so the intricate shapes stay the way you cut them. I roll out the dough onto a silicone baking sheet, then cut the snowflake shapes with baking space between them, then pull away the extra dough. This way you never have to move the delicate snowflake shapes until after they are baked. Parchment paper also works if you haven’t invested in silicone baking sheets.

Royal icing attempt from vegan egg replacer was too paleFor Frozen, I used vegan egg replacer and Nucoa non-dairy margarine so the cookies would be vegan, but the royal icing was from real eggs. I figured if anyone had a problem with the eggs, there wasn’t so much frosting so it could be picked off the cookie. I did try using the vegan egg replacer to make vegan royal icing one Christmas, but it stayed very thin, so it didn’t work very well for intricate piping, and it was a bit watery-looking, not the nice bright white of traditional royal icing. You can see the difference in this photo here.

Crushing candy glass into chunky crystalsFor Christmas, I like the pure white crystal snow and ice look. You can use normal granulated sugar, but it is so fine it doesn’t show much texture. I prefer using the chunky decorating sugar completely over the royal icing so it looks more icy. One year I had leftover homemade hard candy Chunky Crystals on Sugared Snowflakesglass, so I crushed that myself for super big shards of ice on my snowflake cookies! Nice crunchy candy crystals on the crispy cookies!

For my Frozen movie night I wanted the look to be not Christmasy at all, so I got out my purple, green and blue decorating sugars so the snowflakes would be Elsa colors, much more fitting for a summer party. I only used a light Frozen Fractalsdusting of the colors or they didn’t look as delicate anymore. Since I was mixing the colors anyway, I picked up the extra from the cookie sheet and kept sprinkling on the next cookies. I love how these look, especially with the snowflake lights around the tier tray!

For the Frozen Sing Along I didn’t make the giant batch I usually make for multiple Christmas parties as well as gifts, so I only made three snowflake styles, and Glowing Frozen Fractalsthe most were the smallest size, since those work as a garnish on a glass rim or snow cone cup, and they were even stacked on top of each “Love is an Open S’more.” πŸ™‚

Here is my Foolproof Sugar Cookie recipe I use for the Sugared Snowflakes, featured for years from the very beginning on my Halloween Recipes page, and included in my first book, Eerie Elegance. As long as I use non-dairy margarine and vegan egg replacer, I never need to add milk or water, but that could also depend on your local weather or how much moisture you get from your eggs. I make my dough in my stand mixer, the full batch just fits the large glass bowl, then I put it into two quart-size airtight plastic containers to chill in the fridge until I bake the cookies. The unbaked dough can last in the fridge for several weeks, through the entire Christmas season to keep baking more cookies whenever you need to!

Love is an Open S'MoreFoolproof Sugar Cookies
(featured inside the book Eerie Elegance)

2 cups margarine or butter
2 1/4 cups sugar
3 eggs (or vegan egg replacer)
1 1/2 tsp vanilla
6 cups flour
3/4 tsp salt
4 Tbsp milk (can use water – only if moisture is needed)

Divide dough in half. Only add milk or water if the dough is too dry to hold together. Chill at least 1 hour. Roll out half of dough 1/8 to 1/4 inch thick. Place on a greased cookie sheet and bake at 375F/190C for 12 minutes. These can be frosted. Makes about 5-6 dozen standard-sized cookie cutter shapes.

You can keep reading for more photo inspiration for different snowflake shapes and various patterns to ice them. Hope you enjoy making your own Frozen Fractals Sugared Snowflakes!

#Frozen #Elsa #Olaf #Fractals #recipes #snowflakes

(more…)

Posted in Christmas, Cinema Brittahytta, Edible Art, Parties, Recipes | Tagged , , , , , , , , , | Leave a comment

Queen Elsa at the Cinema Brittahytta Frozen Sing Along

Olaf and Four Elsas with Ice Hands! (by Natasha)Oh, I have been looking forward to this party for months, and my Cinema Brittahytta Frozen Sing Along was a grand success! 24 of us had an icy blast, including 1 baby, 8 kids, 1 dog, no less than 4 handmade Elsa costumes, including my full Elsa the Snow Queen regalia, and even Olaf made an appearance!

Thank goodness the weather was nice, not too hot but not too chilly, because I was in several layers of costume including my thick platinum blonde Elsa wig…whew! I had finished all the final food prep the night before (how-to Elsa finishing party prep (by Nathania)posts will be coming next), and all the last dirty work to get the yard all arranged was done early enough for me to shower and cool down enough for all my Elsa makeup before my special guests arrived from a 5-hour drive! My dear friend Natasha brought her two daughters to their first Britta party, and they were so excited! I had set aside safe ways they could help, like setting the crackers on the plates, putting the water bottles in the ice bowl, and stirring the fruit salad, but we ran out of tasks they were so helpful! They even each helped me put on one Elsa ice shoe…haha! We were all in our Elsa costumes and I was putting the last final touches on all the food displays when our next guests arrived…with Ellie as another Elsa! Photos were best in the shade, so we took a LOT of photos of the four Elsas with Olaf. We’ve all heard of “jazz hands,” but I said, “Everyone do your ice hands!” and they all knew EXACTLY what I meant! πŸ˜‰

Snowflake lights, giant plastic snowflakes and waterfall lightsI had way too much fun with the food and decorations for this party. Of course I had fun with the names for the menu board plus I made signs or labels to display with each item, which you can see in the full gallery below. Lucky for me that my Menu chalkboard with bottles of Melted Snowparents have a bunch of snowflake lights and giant plastic snowflakes for Christmas, so I borrowed those, and they made a huge impact! Even the small snowflake lights I taped to my tier trays and it was so festive for an evening party. I love snowflakes for Christmas as well, so I already had the cookie cutters for the Frozen Fractal cookies, and various snowflake silicone molds so I made a bunch of snowflake ice cubes as well as the chocolate for Love is an Open S’more. I did splurge to buy two posters and the Custom-painted cups Olaf cardboard standee, and since all the plates and napkins I found for sale didn’t fit my vision, I decorated clear plastic cups and plates with my own snowflake designs and aqua spray glitter. They were gorgeous! I carefully washed them all by hand afterwards so I can use them again someday. I even Snowflake stencils reused as decorused the snowflake stencil labels I cut as decorations around the patio since they were coated in aqua glitter too!

Olaf's Summer Cocktails with customized drink umbrellasWe started the evening with small bottles of Melted Snow, and also Olaf’s Summer Cocktails: Mix whatever drinks that make you feel all nice and warm inside, then add a festive summer umbrella! I had bought a giant bag of cheap cocktail umbrellas, picked out just the blue and green ones, then used my cutting machine to make custom snowflake labels just the right size to stick on the open umbrellas. Lots of people used them, but of course I was the one who forgot to add an umbrella to my pina colada…oops!

Do You Wanna Build a Snow Cone?Do You Wanna Build a Snow Cone? I had everything set up on the bar to make your own snow cones, including “adult” snow cones as a pre-mixed bucket of snowy-white pina coladas safely tucked away in the Three Elsas enjoying the snow cones they built togetherfreezer…yum! Here are three Elsas enjoying the snow cones they built together!

Grilled Snowflake Pizzas ready to goWhen the coals were hot enough, we started our Grilled Snowflake Pizzas. The entire outer table was set with homemade hexagonal whole wheat sourdough pizza crusts, two plates of sliced mozzarella cut into various snowflake shapes, sauce Elsa's ice magic must work to make pizzas, too! and various yummy toppings so everyone could make their own pizzas as unique as individual snowflakes! Gail was the one who was able to keep her cheese in the snowflake shape, but arranging the toppings in six-way symmetry Gail's pizza kept the snowflake cheese shape!worked too. They were delicious as long as you remembered to take them off the grill before the bottom of the crust got too crunchy! πŸ˜‰

We were finishing our pizzas by the time the other two clever food items arrived. I had baby carrots on my menu as Little Baby Unicorns, but Audene’s friend Debi, a first time guest, cracked us up with a carrot cake with piping saying “Like a Little Baby Unicorn!” Very clever! Eileen Two Elsas Dancing in the Falling Snowcontinued her streak of creative food contributions by bringing Frozen (Artichoke) Heart Dip and even printed her own sign! They obviously fit right in! πŸ™‚

It was finally getting dark enough to see the looping snowfall video I had used on the front of my house for Christmas, so two Elsas started dancing and singing in the falling snow as Roasting marshmallows at sunset for Love is an Open S'moreothers started roasting marshmallows at sunset for Love is an Open S’more. I thought of the phrase and it made me laugh every time I said it, so it had to be done! I decided that milk chocolate snowflake shapes Tash demonstrates how Love is an Open S'morefrom one of my silicone molds would fit perfectly on a graham cracker, and I topped them with an extra Frozen Fractal sugar cookie. They were set up as open s’mores on the plate, then you needed enough love to warm up your marshmallow to melt the “frozen” chocolate. Good enough story? It didn’t matter since they were s’mores! πŸ˜‰

Souvenir Bubble BottlesBefore we all got settled into our movie watching locations, we made sure everyone had one of the special souvenir bubble bottles. I admit I got this Blowing bubbles any time snow was falling during the movieidea from the Castro Theatre Frozen Sing Along, but it was really cute when the shadows of the bubbles floated across the screen whenever snowflakes were falling, so the three young Elsas spent a lot of the movie blowing bubbles!

It’s always difficult to get a photo of the entire audience when they spread out all over the grass, but Tash made a valiant effort! You can see we had quite a crowd in chairs, bean bags, and blankets. We even had a few more people to the left out of the frame! Large audience at Cinema Brittahytta - ready for Frozen!I couldn’t lean back too much because of my corset and my battery packs on my back, but sitting up properly helped my sing along posture. πŸ˜‰ Speaking of singing, we had to rely on Kevin to sing all the male voices, of course doing an excellent job, but there were plenty of enthusiastic female voices of all ages and all abilities! I asked Tash to get up & try to get video looking back at us singing along to Let It Go, figuring if we got anything at all it should be cute. The beginning of the song was too dim on the screen to shed enough light on us, so I tweaked the image as much as I could, but as the ice magic gets brighter you can see us better, and you need to watch all the way to the end for maximum adorableness! πŸ™‚

More bubbles and an Elsa shoe! ;)In their attempts to get the bubbles into the projector beam, my other two Elsas ended up sitting at the end of my chair. Violet had a sparkly snowflake headband (did you see her take it off at the exact time as the crown during Let It Go?), but Nola’s hair is long enough for an Elsa french braid, and Tash had made some of my aqua shimmer cut fabric snowflakes into Elsa-style hair clips…so cute!
Still enjoying the firelight towards the end of the movieWe actually had two people in the audience who had never seen Frozen before, but thankfully they said our singing and general merriment didn’t distract from their enjoyment of the movie. However, you can tell who had already seen it countless times by who preferred to keep roasting marshmallows over the firepit. It made for a nice tableau!

Olaf and ElsaAfter the movie was over, I couldn’t pack up the projector cart and speakers until I got out of my outfit, so I asked if anyone wanted photos with Elsa and Olaf before I changed…so there was another line, just like the princesses at Disneyland…yay! When everyone else was satisfied with their photos, I asked for some of me and especially the cape, since I didn’t get to take nighttime photos before. We still need to do a proper photoshoot like we did for the coronation dress, so hopefully before the summer is over we will get that chance, but this one with Olaf is pretty darn cute. πŸ˜‰

During my photoshoot with my “fans,” everyone else cleaned up the outside for me! The regular movie night guests know to bring in everything off the grass onto the patio, so that usually happens quickly as everyone carries something, but even everything off the pizza table had already been taken inside before I could get a chance to take any more photos! I finally got out of my wig and dress (probably only 5 hours this time?) and into shorts and a snowflake t-shirt while a few stayed chatting all the way until 1am! What a great party!

Thanks to everyone who made it such a fun night! You can see the rest of the party photos in the gallery below, and watch for more posts how to make your own Frozen Fractals cookies, snowflake cups and plates, Brrrie in Pastry, and Love is an Open S’more!

#Frozen #Elsa #Olaf #Fractals #recipes #snowflakes #snow #costumes

(more…)

Posted in Cinema Brittahytta, Costumes, Edible Art, Parties, Recipes | Tagged , , , , , , , , , , , , , , | 2 Comments

Mary Poppins Movie Night

Backyard Movie NightThe Cinema Brittahytta summer season premiere this weekend was the 50th anniversary of Mary Poppins! 14 people and one cute doggie enjoyed the movie, even though the evening got a bit chillier than some expected. Maybe I need to get out the old solid wool army blanket next time?

I had spent all week getting the backyard and house party-ready, including prepping the food, baking cookies and frosting them Custom Cookie Cutter for Kite Cookieswith a thin coat of royal icing the night before, using a new custom cookie cutter to make a flying kite shape with space for a fluttering tail. While the coals were heating on the grill out back, my last task was decorating the Let’s Go Adam decorating Kite CookiesFly a Kite Cookies using my food coloring pens. The first to arrive were first-time guests, and Adam and his mom were enthusiastic to decorate their own kite cookies…hooray! They had never seen food coloring pens before, so they were excited to find some for their own edible creations at home!

Onyx "helping" Ellie decorate cookiesWhen Ellie arrived, Onyx was “helping” her decorate her kite cookies, but he moved too quickly for a good photo. I think the other cats know they are the talk of the party when they stay hidden in mystery. Every kid wants to see if they can find the other kitties! πŸ˜‰

The Mary Poppins menu for Brittahytta Bar & Grill was Theatre Kettle Corn in the Cinema Brittahytta popcorn boxes, Jolly Holiday Cocktails, Fresh Fruit Salad, Grilled Sweet Potato Salad, Cheese & Crackers, and Kite Cookies! I had Mary Poppins Menufun with my new chalk marker pens. There were lots of reviews that these chalk pens don’t come off of new chalkboard paint and are only for real slate or non-porous surfaces, but I have enough years of real chalk residue on my painted chalkboard that these wipe cleanly off my board…whew! I think these will be quite fun for all the movies this season, plus my other parties!

Jolly Holiday CocktailsThe Jolly Holiday Cocktails were my simplest specialty drink yet, since I made a little card for my top hat holder saying “Choose a cheery parasol to make the beverage of your choice into a Jolly Holiday Cocktail! Add some extra magic with a glowing ice cube!” I had bought a ton of paper cocktail umbrellas at a discount party store, so they Magical Jolly Holiday Cocktailwere set up in my garnish display. Glowing glasses and glowing ice cubes help you find your drink during the movie, plus even work as flashlights for cleaning up afterwards. πŸ˜‰

 
Our old family 8mm film projector was back on display inside the large lantern with the movie clapboard leaning in front. I’m not sure if the chalk colors work for the clapboard, even though I was able to layer the powder blue over the neon green to get a quasi-aqua color…should I go back to classic white for the old clapboard Movie Night Centerpiece & Kite Cookieslook? Since that was the centerpiece for the inside food table, I set out some old photos of my own Mary Poppins costume from when I was 10 years old. You can spy the finished Let’s Go Fly a Kite Cookies, and since I have a plastic top hat ice bucket, I used it for the crackers with the cheese plate…heehee! Even the lemonade jar had a tiny top hat but I didn’t take a photo of the whole bar…oops! I also missed the new Concessions marquee sign on the patio fridge, and the snazzy VIP ENTRANCE sign hanging over the gate. I’ll make sure to photograph those next month when we all enjoy my backyard Frozen Sing-Along, complete with Elsa the Snow Queen in costume…stay tuned!

Posted in Cinema Brittahytta, Outdoors, Parties | Tagged , , , , | Leave a comment

Into Darkness for the End of Summer

Trek Goodies!This past weekend was the summer season finale of Cinema Brittahytta! 29 of us enjoyed watching Star Trek Into Darkness, complete with Starfleetzas, S’more Trek Into Darkness, Saucer Sections, Tasty Tribbles, Beyond the Darkness Cocktails and even a Starship Sandwich! I think this might have been the most creative Cinema Brittahytta potluck ever! πŸ™‚

Only showing 3 movies this year didn’t leave much option for a theme, so I wasn’t sure what the finale would be until I saw the notice that the newest Star Trek movie only released in May would already be on digital download three weeks before the disc release, AND the download date was barely before my last movie night…Awesome! Since I bought it on iTunes, I needed to use my laptop as the player instead of the PS3, which was fine for HDMI to the projector but my outside receiver can’t accept HDMI for the audio. I had Starfleetza Dough Ready for Bakingforgotten about this twist until Saturday afternoon & texted my AV expert if he had any ideas as I was rushing around doing party prep. He found that MacBook Pro stereo mini out just needed a little TOSLink adapter to function as digital audio out, which is as good as we’ve been getting with the PS3. He had the time to find it on his way over, and it worked perfectly for less than $3 from Fry’s…whew! I did have to fuss around with the Displays preferences to get to 1080p, then it was absolutely gorgeous on my big screen with great sound too. Hooray!

As I was brainstorming Trek menu ideas that I had not done before (hey, I’ve already done Trek food and candies a LOT over the years!), I thought of the whole wheat sourdough pizza dough again…if you’re handforming the dough anyway, why not make them a custom shape? I couldn’t think of a clever enough name, so as I was forming the dough I posted a photo to my Facebook friends, and out of many great ideas, Starfleetzas were born! Thanks to Eileen for that gem!

Pouring Ghirardelli Into Darkness for S'more TrekI had made Trek S’mores for Wrath of Khan before, so I already had the food grade silicone chocolate mold, but for Into Darkness I thought Ghirardelli dark chocolate was quite appropriate. Spooning the melted chocolate into the mold and scooting it into the sharp corners works best, then into the fridge to set. Don’t bother attempting to unmold them in summer until well after dark unless you Homemade Graham Crackers as Trek Chevronshave air conditioning! πŸ˜‰ I used my custom-bent chevron cookie cutter with the homemade graham crackers recipe I used all last year for a matching shape around the chocolate, but I was too busy this week to make homemade marshmallows since cutting them into shape is Propane Torch Roasting Marshmallow Cremea giant pain since they’re so sticky! I hoped that I could pipe marshmallow creme and use my full-size blow torch to keep it in place, which looked great. Sadly the plates were too angled and as soon as I plated everything for display, my s’mores slid all over the place. I should have made my own S'more Trek Into Darknessmarshmallows then they would have remained pretty. Ah well, they were still tasty!

Tracia's Starship SandwichI love it when my friends are so creative! Tracia brought a long baguette sandwich, and when she arrived, she cut it & used toothpicks to arrange it into a starship shape complete with nacelles and skinny saucer section! Glad we got a lot of photos since it was so tasty that it pretty quickly didn’t look like a Starship Sandwich anymore. πŸ™‚

Saucer Sections & S'more Trek Into DarknessLyle & Galt are always clever! This time they brought Saucer Sections, chocolate moonpies with peanut butter filling. Very rich but very tasty, and so cute! I think I had two of these…yum! You can also see my sliding S’more Trek Into Darkness behind the Saucer Sections.

Tasty Tribbles & Klingon Apple Spice CakeJerry had alerted me of his plan in advance so I included Tasty Tribbles on the chalkboard menu. He made cream puffs & cream filling from scratch, and coated them in toasted coconut and cinnamon. They looked perfect and were absolutely delicious! I’m glad I got my chance at two of these too! Here you can see them next to my squeaky furry tribble that I bought over 20 years ago at a Star Trek convention. πŸ˜‰

Tracia's Beyond the Darkness Cocktail - the NibiruI had made a recipe card for Beyond the Darkness Cocktails, all including black vodka layered on top as the “darkness.” Tracia & I were the only ones who tried the recipes, and since it was nicely layered, we both made the same one, the Nibiru, named after the planet with the red trees and deep blue waters and sky. It’s basically my Razzle Dazzle-tini recipe from 4th of July but with black vodka. I made a Grande with a glowing ice cube since I wanted it to last longer through watching the movie. πŸ˜‰

Nibiru Grande with the Beyond the Darkness Cocktail Recipe CardBeyond the Darkness Cocktails
“Beyond the darkness, lies greatness.”

Use a few Star Trek ice cubes and black vodka to send your beverage of choice Into Darkness. For the greatness to shine through, use a glowing glass or ice cube in the color of your choice.

Nibiru
Add blue raspberry to lemon lime. Carefully pour raspberry syrup down the side of the glass so it settles at the bottom as red trees under the blue skies of Nibiru. Top with black vodka since you disregarded the Prime Directive.

Galt with his StarfleetzaThank goodness this time I didn’t forget to take photos of pizzas! πŸ™‚ Here is Galt showing off his lovely Starfleetza inside the patio bar with the Trek posters in the background. I only had basic ingredients, pepperoni, cheeses, red sauce, mushrooms, sun-dried tomatoes, artichoke hearts, and even fresh sliced tomatoes from my garden. Everyone loved making the pizzas, whether they were Trek fans or not, and Kian modeled his before baking as a commbadge…haha!

Jerry with his Starfleetza Making Starfleetzas Making Starfleetzas Kian modeled his unbaked Starfleetza as his commbadge :)

29 in the audience watching trailers at Cinema BrittahyttaBy August it’s always dark enough by 8:30 that we could start the movie, but since people are more used to the high summer schedule when it’s not dark until after 9, everyone was still chatting & eating. I had to call people over to the grass and start the trailers so they would sit down to watch! πŸ˜‰ We had two people in the 1080p from iTunes on the 8foot screen...woohoo!audience so we were careful not to spoil them, and thankfully after figuring out the 1080p mirror display setting on my laptop, it was worth the $19.99 iTunes purchase for the HD version!

After-party Making Snow ConesMost of the crowd helped put the equipment away off the grass and left soon after, but since Tracia and family were staying overnight, Jeff, Audene, Julianna and baby Jenna stayed for awhile to chat…and make snow cones! Ellie had shown Kian how to make snow cones earlier, since she was already an expert from Audene enjoys her snow cone...yum!making them the past two movie nights, but I missed getting photos. Hooray for action shots of snow cones! πŸ™‚ Audene made me one, and I used the chai tea syrup, peach and caramel…boy was that really tasty! I might have to make up a recipe using those flavors for something else… πŸ˜‰

There are some more photos below if you’d like to keep reading…and huge thanks to everyone for another fun summer of Cinema Brittahytta! Until next year! πŸ™‚

(more…)

Posted in Cinema Brittahytta, Parties | Tagged , , , , , , , , , | Leave a comment

Don’t Panic!

Your Hitchhiking Hostess with Pan Galactic Gargle Blaster & Tasty TowelsOur July Cinema Brittahytta was the 2005 movie version of The Hitchhiker’s Guide to the Galaxy! 29 of us and one dog enjoyed the normal summer weather and the social time, even if not everyone stayed for the entire movie. Don’t panic – here is your Hitchhiking Hostess with a Pan Galactic Gargle Blaster and
Tasty Towel cookies!

Lyle's lovely Classic Gingerbread Cake, with Guide EntryLyle usually brings something extremely clever as well as delicious, and he did not disappoint this time! Not only did he bring a tasty Two-Ginger Classic Gingerbread Cake, but he wrote and printed his own entry about it ready for inclusion in the next version of the Hitchhiker’s Guide!

Devlishly Delicious Chocolate Cake from JerryJerry was so nice to make me a deliciously devilish chocolate cake with fudge frosting since it was my birthday! We took it out back for me to blow out the candles. I haven’t had so many singers around for awhile to sing me such a lovely Happy Birthday as this. You can probably guess that a lot of these friends I’ve met while singing in various excellent choirs. It’s always fun for me to sing with them, but it’s even more special to hear them sing _for_ me. πŸ™‚

If you can’t read the chalkboard in the photo, this was the menu for Brittahytta Bar & Grill. You can read the separate how-to posts for both the Tasty Towel cookies and the Pan Galactic Gargle Blasters, including a bartender action video!

Don’t Panic!
There’s plenty of hoopy frood food for both strags and hitchhikers! 

Movie Night MenuMake Your Own Snow Cone
Cinema Brittahytta Kettle Corn
Pan Galactic Gargle Blasters
Grill Your Own Planet Pizza
White Bean Hummus Kavula
Cheeses & Crackers
Four Bean Salad
Fresh Fruit Salad
Peach Corn Salad
Tasty Towels
Homemade Vanilla Custard Ice Cream

Partying people with Cinema Brittahytta Kettle CornI haven’t made my homemade ice cream in a couple years, so it tasted REALLY good! Since it makes 6 quarts, even after so many people enjoying it that night, I still have about 3 quarts left to enjoy, and I’m trying to make it last…yum! :-9 The peach corn salad also hasn’t made an appearance in a few years, and it was scarfed down so fast! Everyone commented how much they liked it, so I’m glad I figured out something good, since I couldn’t find the recipe I had found before. πŸ˜‰ Many people grilled their own pizzas, but I blew it and cleaned up before I realized I Make Your Own Snow Conenever got any pizza photos at all…darn! The homemade whole-wheat sourdough crusts were as popular as last year for Forbidden Planet, but I didn’t go as overboard on so many toppings this time and used a couple smaller tables by the grill.

At least I remembered to take one photo of the Cinema Brittahytta custom popcorn boxes with people behind them! Several people made snow cones when they first arrived, some adults spiking theirs, but I didn’t get photos until I made my own after everyone left. Since the snow cones were so popular last month, I was better prepared this time, purchasing actual cone cups with spoon straws, and putting the syrups into smaller squirt bottles with custom labels.

Thanks to everyone who helped me celebrate! The movie was still funny, the company was fun, and I was able to enjoy my birthday doing one of my favorite things: creative theme parties! πŸ™‚

Posted in Cinema Brittahytta, Parties | Tagged , , , , , , , , , , , | Leave a comment

Pan Galactic Gargle Blasters

Pan Galactic Gargle BlasterNot only did I make Tasty Towel cookies, but how can you have a Hitchhiker’s Guide to the Galaxy party without drinking Pan Galactic Gargle Blasters? If you make them authentic to the book description, they should knock you flat, however since I knew I had kids coming, plus most of the adults needed to drive themselves home, I designed mine so it would still be a tasty and fun show with glowing ice cubes and safe drinkable dry ice fog, either with or without any alcohol.

Here is the recipe from the book that I printed as the recipe card, slightly altered by adding the “under a glowing ice cube” phrase:

Pan Galactic Gargle Blaster

“Like having your brains smashed out by a slice of lemon, wrapped ’round a large gold brick…the alcoholic equivalent to a mugging; expensive and bad for the head.”

1. Take the juice from one bottle of Ol’ Janx Spirit.
2. Pour into it one measure of water from the seas of Santraginus V β€” Oh, that Santraginean seawater! Oh, those Santraginean fish!
3. Allow three cubes of Arcturan Mega-gin to melt into the mixture (it must be properly iced or the benzine is lost).
4. Allow four litres of Fallian marsh gas to bubble through it, in memory of all those happy hikers who have died of pleasure in the Marshes of Fallia.
5. Over the back of a silver spoon float a measure of Qualactin Hypermint extract, redolent of all the heady odours of the dark Qualactin Zones, subtle, sweet and mystic.
6. Drop in the tooth of an Algolian Suntiger. Watch it dissolve under a glowing ice cube, spreading the fires of the Algolian Suns deep into the heart of the drink.
7. Sprinkle Zamphuor.
8. Add an olive.
9. Drink… but… very carefully…

For authentic flavor without the brain-smashing, omit the Ol’ Janx Spirit.

To “smash brains with lemon,” I thought the more lemon flavors the better, so I used my home-infused key lime vodka, two kinds of lemonade, club soda and some raspberry for color, so the end result was slightly minty raspberry lemonade with a kick if you included the vodka. I made quick fun labels for the bottles, with the real ingredient in parentheses so people would know what they were drinking. The tricky parts were the sugar cubes and the dry ice tooth…

Ingredients & Instructions for Pan Galactic Gargle BlastersOl’ Janx Spirit = home-infused key lime vodka, from the tree next to my garage
Santraginean Seawater = lemonade
cubes of Arcturan Mega-gin = sugar cubes with one drop blue food coloring each
Fallian marsh gas = club soda (I tried sparkling lemonade but it was overly sweet!)
Qualactin Hypermint extract = mint syrup
Algolian Suntiger Teeth = frozen pink lemonade with a layer of raspberry syrup and dry ice!
Zamphuor = multi-colored sugar crystals
Olive = olives! These didn’t get a special label. πŸ™‚

The glowing ice cubes were easy, since they’ve been on my list to buy some for summer parties as well as Halloween. I had one I saved from DisneyWorld last year, and when I researched online, I discovered lots of bad reviews for the knockoff brands, plus it’s hard to tell what you’ll really get from the various Amazon listings since the off-brands use LiteCube images, so I bought two-dozen official LiteCubes directly from them. I also got 8 rocks glasses that have the color-changing LEDs built into the bottoms, since the light-up martini glasses I acquired for free have been fun but easy to tip over especially in the dark.

Making cubes of Arcturan Mega-ginThe sugar cubes were a little trickier. I searched online and found various recipes for Pan Galactic Gargle Blasters, but many concentrated on the brain-smashing alcoholic aspect. One suggested soaking sugar cubes in flavoring and food coloring as the Arcturan Mega-gin, and I thought that was a great idea. I had been given leftover sugar cubes that have been in my pantry waiting eagerly for some creative use! I tried soaking in lemon extract but that was moist enough it melted the cubes more than I liked. I also decided I needed more color variety, so I used a single drop of blue gel food coloring for each sugar cube and let them dry on a plate in my cupboard. After a day they were still wet on the bottom so I turned them all onto a new plate to dry on all sides. Served in a clear bowl with tongs, they looked very mysterious, and after dropping them into the glass, the blue color stayed on the bottom of the glass until it completely dissolved the sugar.

Making Algolian Suntiger TeethThe best effects were the Algolian Suntiger Teeth! In June I happened upon some SideKick shot glasses in the clearance section of Sur La Table, marked down to $3.99 for the set of 4! They are plastic with a separate bottom chamber you can set things in, then the top section has a perforated bottom…perfect for keeping dry ice away from any skin! I didn’t want to prep each tooth live before serving, and prepping them too early the dry ice would already be all sublimated, plus reveal the trick too early. So I lined the perforated top section of each glass with plastic cling film, froze pink lemonade, then once that was set, for the “fires of the Algolian Suns” to spread “deep into the heart of the drink,” I froze a thin layer of raspberry syrup on top. After they were frozen, I removed the plastic, put them back in the plastic sections, and kept them in the patio bar freezer along with the glowing ice cubes. I was able to prep the bottom sections of the shot glasses with small chunks of dry ice, assemble the frozen top sections together to display in a bowl, and since the solid water ice wasn’t touching the dry ice, it lasted awhile and there was no smoke until the entire tooth was dropped into the liquid in the glass…but then it was quite a show!

Your Hitchhiking Hostess with Pan Galactic Gargle Blaster & Tasty Towels Cyd with her Pan Galactic Gargle Blaster

You can click here to watch Jeff in action making his Pan Galactic Gargle Blaster, and see how the glowing ice cube was necessary to be on top as a weight, otherwise the water ice and dry ice would float up too high. Even if they were a little cumbersome to drink around the ice cube and the shot glass floating around, they looked super cool!

For the other hoopy frood food & fun, check out Cinema Brittahytta “Don’t Panic!”

Posted in Cinema Brittahytta, Parties | Tagged , , , , , | Leave a comment

Tasty Towels

Tasty Towels - Don't Panic!As any worthy hitchhiker around the galaxy knows, the hoopiest froods always know where their towels are. For my Hitchhiker’s Guide to the Galaxy movie night, I decided to make fluffy-looking Tasty Towels that said “Don’t Panic” across the embroidered band. πŸ™‚

None of my sketches matched my vision, so I set up a couple of my own towels in various positions to take photos. The winner was my teal bath towel since the Tasty Towels Frosting Sheetsmidrange color was easy to tweak multiple ways to have a variety of colors in the set. I added the lettering as a layer over the towels, then it was an easy session with my edible printer and frosting sheets. I really like how the terrycloth texture still looks so soft and fuzzy!

Cutting Tasty TowelsThis is my tried and true sugar cookie recipe, made vegan yet again just in case and non-dairy friends or vegans would attend, but normal all-purpose white flour, so the gluten-free people were out of luck. White whole wheat flour is very hard to roll into cookies because it is so sticky, so I’ve given up on trying that for cookies, but it works great in my sourdough pizza crusts.

Tasty Towels Foolproof Sugar Cookies
(featured inside the book Eerie Elegance)

2 cups margarine or butter
2 1/4 cups sugar
3 eggs (can use Energ-G vegan egg replacer)
1 1/2 tsp vanilla
3/4 tsp salt
6 cups flour

Cream the butter and sugar until fluffy. Mix in the eggs, salt and vanilla. Add flour no more than 3 cups at once and mix thoroughly into a dough. Add water only if the dough is too dry. Chill 1 hour. Roll out half of dough 1/8 to 1/4 inch thick. Place on a greased cookie sheet and bake at 325F/163C for 10-12 minutes. These can be frosted. If baking frosting sheets directly on the cookies, pat the bubbles down with a hot pad immediately upon removing from oven. Makes about 5-6 dozen standard-sized cookie cutter shapes.

For baking frosting sheets directly onto cookies, I prefer Nucoa non-dairy margarine for less risk of puffing and spreading. I have tried Earth Balance vegan margarine but that Panic!?!really puffed while baking, cracking the frosting sheets pretty badly. Butter has worked fine but it depends how much water content is in the butter. The moister the dough, the more risk of cracking the frosting sheets as the dough expands and steam escapes during baking.

My college friend Jeff, a big Douglas Adams fan, was finally able to come to his first Cinema Brittahytta which was awesome…but as he thought he would be clever by scooping some homemade ice cream with his Tasty Towel, it broke and left him saying “Panic!” Hahaha! For the other hoopy frood food & fun, check out Cinema Brittahytta “Don’t Panic!”

Posted in Cinema Brittahytta, Parties | Tagged , , , , , , | Leave a comment

Oz the Great and Powerful

Oz MenuThis summer has already been so busy that I’m almost 3 weeks behind telling you about the Cinema Brittahytta Season Premiere! I loved the new Disney movie from March, Oz the Great and Powerful, so I was very pleased it was out on disc just in time for my first summer movie night! I reprised a few of the still-applicable recipes from my Wizard of Oz birthday movie night a couple years ago, including finally completing the Cheddar Brick Road that was cut for lack of time back then. It was over 100F that day, very rare for the South Bay, so my new Over the Rainbow Popsicles were a hit!

Ready for the movie!I knew I wanted to show Hitchhiker’s Guide to the Galaxy on my birthday in July, and every two weeks seemed to be too much compared to the Halloween plans I knew were coming, so I decided on every four weeks this year, which only allows for three movies total (well, four if we count the Return of Clue as an indoor Cinema Brittahytta feature). Less frequency, plus new friends, and a new movie many had missed in theatres resulted in 18 of us enjoying the evening! It cooled off nicely as the sun went down, and it was nice not to need any blankets or jackets during the movie this time.

Grilled Sweet Potato Salad at the beginning of the Cheddar Brick Road
Everything I made was quite healthy as well as fun! The popsicles were 100% fruit, no sweeteners or artificial colors, the rainbow fruit salad also 100% fruit, the Emerald City Green Salad was pears, grapes, artichoke hearts over spinach and greens, with the Field of Poppies and Over the Rainbow Fruit Salad along the Cheddar Brick Roadonly dressing from the artichoke heart marinade. My Grilled Sweet Potato Salad is a summer BBQ staple that only has 1/4 cup olive oil with a bunch of healthy produce. In case any of my non-dairy friends arrived, it was Tofutti non-dairy creamy spread inside the tomatoes, so the worst thing for us was the Cheddar Brick Road. We still indulged, since a lot of the potluck Emerald City Green Salad Field at end of the Cheddar Brick Roadfare was decadent like fried chicken, pizza, and dulce de leche rice cereal treats…yum!

Which Witch Will Win?I don’t want to spoil anyone, but it shouldn’t surprise you there are several witches in this story. I created cocktails with alternate mocktail versions for each witch, calling it “Which Witch Will Win?” but the reasons for the ingredients of each I will let you discover from watching the movie yourself. πŸ˜‰

Making the Field of PoppiesFor the Field of Poppies, I used a very sharp paring knife to cut small tomatoes into five segments but still joined at the bottom. Depending on the seeds, some fell out on their own while others needed scooping for the cream cheese Finished Field of Poppiesto nestle between the wedges. Last time I had spooned the non-dairy cream cheese into the tomatoes, but this time I got smarter and used a piping bag without a tip. A tiny spoon helped place the chopped olives so they didn’t fall all over, and voila, a Field of Poppies!

Over the Rainbow PopsiclesThere actually weren’t any rainbows in this new Oz movie but there were lots of bright colors so I thought I could get away with Over the Rainbow Popsicles. They were all fruit purΓ©e no added sugar or artificial colors or anything, and full details are in a separate post here.

Oz Menu ChalkboardNot in theme but perfect for summer, I had dug out my old manual ice shaver and frozen a bunch of the specific puck shapes to see if anyone would be up for the work of making their own snow cones. Some first-time boys read the menu chalkboard, and when they read “Make Your Own Snow Cones” they got so excited! After checking they could reach the bar and the shaver handle (I knew the glass table wasn’t stable enough for that action!), I Make Your Own Snow Cones in light-up martini glasses!got out the Torani syrups and light-up martini glasses, and the kids went to town, instant new best friends with regular guest Ellie! All my Toranis are sugar-free so at least they weren’t on a sugar high from those. πŸ™‚

Everyone did have a good time, no Rock Band since adults were chatting & eating, but I said they could play any games they found on the PS3 until it got dark enough to show the movie, so a raver version of PacMan provided a bouncy soundtrack for awhile. πŸ˜‰
Popsicles + Kids PS3 Raver Style Pac Man waiting for darkness
Hope you’re enjoying your summer too! Stay tuned for Hitchhiker’s Guide to the Galaxy next!

Posted in Cinema Brittahytta, Edible Art, Parties | Tagged , , , , , , , , | Leave a comment

Season Finale Cinema S’mores

Cinema S'mores14 of us enjoyed the Cinema Brittahytta season finale on Saturday, including the last special summer dessert…Cinema S’mores! Super 8 is a really fun flick, and we could have started much earlier but enthusiastic chatting & grilling delayed the start time even longer than midsummer light! It makes me grin from ear to ear for everyone to enjoy themselves so much. πŸ™‚ Thanks to everyone for a fun summer!

Wafer Paper Film FramesI thought filmstrip-shaped Cinema S’mores would be fitting not only for Super 8, about kids making their own movies in 1979, but also for the season finale of my summer movie season. Originally the plan was just to cut out the chocolate to show a blank white “screen” with the sprocket holes, then I thought maybe I could use the countdown 3-2-1 images…but then I got the brainstorm to find iconic frames from all the movies this summer and print them on wafer paper! I could fit 18 images on a single sheet, so all movies had 2 frames, with a couple extras for Close Encounters and Super 8…so this was also a game for people to name the movie. πŸ™‚

Edible MedalsI also noticed that the attendance fluctuated widely as usual, but two people had come to almost all the movies, so I designed some Cinema Brittahytta Attendance Awards for special graham cracker medals with teal fabric ribbon. I printed these on frosting sheets, but the graham cracker recipe is too puffy and dry for the sheet to bake into the dough as well as it does for my sugar cookies. Lesson learned, but the recipients still ate them!

Homemade Graham CrackersFirst I mixed up modeling chocolate using more Hershey’s chips with corn syrup and let it set overnight in the fridge. Melted chocolate wouldn’t allow me to cut sprocket holes, and I didn’t want to make an expensive silicone chocolate mold for only one event. After the modeling chocolate warmed up enough to roll, I cut the chocolate rectangles with enough room for the sprocket holes to be cut with a straw top and bottom, but not actually cutting the holes yet so I could use them as a guide to cut the graham crackers. Yes, this was the same vegan graham cracker recipe as all summer – I should have it memorized by now, but not quite! I probably could have sized the chocolate filmstrips to fit on normal graham cracker rectangles, but now that I’ve made the tasty homemade ones so often, I decided to finish the summer with homemade. πŸ™‚

Modeling Chocolate FilmstripsAfter the dough was all rolled out and the graham crackers were baking, I used a cut-off drinking straw to cut the sprocket holes in the modeling chocolate. Using a full-length straw was harder to keep the end circular without squishing, plus more difficult to aim. To keep using the same straw, I had to push all the chocolate holes out with a smaller straw after every line I cut. The hardest part of all of this was getting the wafer paper to stick to the chocolate. I had thought of cutting the chocolate out of the center frame so the paper film cel would be under the chocolate layer, but then I thought that wouldn’t be enough chocolate for proper s’more flavor balance. Since the wafer paper color didn’t change that much when sitting on the chocolate, I stuck them on, warming the chocolate by rubbing the wafer paper to ET Hugmake contact. That looked to be working through cutting the sprocket holes, but then some started popping up…ack! I tried a little water with my fine food paintbrush as glue, but the wafer paper can dissolve really quickly. I resorted to weight and a flat baking sheet holding them down while they set overnight in the fridge, and that worked okay. I should have just filled a piping bag with marshmallow creme to use as glue!

For final assembly I wanted the sprocket holes to stand out more than just graham cracker tan, so I used marshmallow creme as “already gooey” marshmallows this time. I went back and forth whether to have a clean edge with white only behind the chocolate, or for a more s’more-style mess. It was too hard to aim perfectly so the messy look was decided for me. πŸ˜‰ So they could all be seen at the same time for the movie identification game, I arranged them nine each on two aqua plates on the main table. We didn’t end up roasting any marshmallows after all, so the pre-melted idea worked just fine!

Cinema S'mores Cinema S'mores

Nice grape harvest this yearGrapes picked just for movie nightThe other idea I had been dying to try for a whole year was fire-roasted grapes. Last year all my grapes split from late-season rain, so I had no harvest at all, but this year has more than made up for it. Friends and I have been enjoying grapes off my six-year-old vines for the past six weeks, and you can see the one single giant bunch among all I picked just on Saturday! I’m very glad this year there have been plenty of grapes to share with the birds & critters in my yard. πŸ™‚

Roasted Grapes on the GrillNot only did more people come, which was awesome, but they also came earlier than recent movies, so I didn’t have the grill going yet. I had planned for my grapes to go first on a separate grill tray with smaller holes so grapes wouldn’t fall through, but by the time coals were hot enough, people wanted to cook what they brought. The separate grill tray would have taken up the whole grill space, so instead I just crammed the grape bunches directly on the grill. I hadn’t oiled the grill so some stuck, but I was able to turn the whole bunches well enough just by grabbing the stems, covering each time for overall heat, then we had delicious steaming roasted grapes! I liked the ones that had stuck with lovely strong char, but all of them were smoke-infused and slightly caramelized, and everyone was surprised at this new taste sensation!

Medal Ceremony - Glen is disappointed he's 2nd place - heh!Everyone was enjoying chatting & grilling & eating so much we didn’t light the firepit or play Rock Band…but when I thought everyone had finally arrived, I called everyone together for a presentation. First I announced that there was one person who only missed one movie night all summer…Glen! He climbed up on my footstool for an Olympic-style medal ceremony to accept his Attendance Award…haha! After the applause & cheering died down, I said, “But there is one person who has attended ALL the movies this year…Sheila!” Even more cheers as Sheila replaced Glen on the ceremonial footstool, and Glen made a goofy disappointed face and slouched as he “only” got second place…hahaha!

Goodbye Summer!Everyone was still enjoying chatting, but I was afraid of the movie running too late, so after approvals of a few people who agreed we should get started, I played the trailers to usher people to take their seats. At least we had the actual movie going by 9:15, which is perfect timing for midsummer when it’s just barely dark, but we could have probably started a whole hour earlier it’s getting dark so soon now! Definitely fall is on the way!

Super8 Cinema S'moreI had filled my plate for moving dining as always, and I picked a Super 8 s’more on purpose…I probably should have tried my real camera instead of my iPhone, but I was very close to getting the same still frame as my s’more! haha…You can click to view the full photo gallery as always.

Hope you enjoyed reading about this fun summer season of Cinema Brittahytta! Next up, Halloween! πŸ˜€

(more…)

Posted in Cinema Brittahytta, Edible Art, Outdoors, Parties, Recipes | Tagged , , , , , , , | Leave a comment

Moon S’mores

ET doll overseeing his Moon S'moresI only got back late Thursday night from my vacation with my grandmother and it was already time for another Saturday Cinema Brittahytta! Any classic scifi series would be incomplete without ET the Extra-Terrestrial, and what would ET be without Reese’s Pieces and the iconic bike flying across the moon? …so I combined them as Reese’s Pieces Moon S’mores!

First I tackled the moon, well before my vacation! Since the actual movie shot in even gargantuan marshmallow scale would be too small to see the Moons printed on frosting sheets to fit on large marshmallows cut in halfbike, I found the Amblin logo online, measured to fit my big marshmallows, then printed it on frosting sheets. I cut the big marshmallows in half so each would have a fresh gooey surface for the frosting sheet to stick. After cutting the marshmallows distort while they dry out in open air, so store them in airtight bags or plastic until serving.

Round Graham CrackersI’m sure glad I like these vegan graham crackers, since I’ve been making them all summer! To go with the moon shape, I used my nesting circle cutters, choosing one slight larger than the marshmallow for the chocolate, then the next larger size for the graham crackers. This allowed everyone to see that the chocolate disc was covered in crushed Reese’s Pieces. πŸ™‚

Pulverizing Reeses Pieces I thought that whole Reese’s Pieces would be too large, so I crushed them inside a zip bag using a rolling pin. I left larger chunks so they could be identified by color and candy coating. It only took half a large bag, and I had bought the candy on sale 2 for 1 before I knew exactly what my menu plans were, so now I have a lot of leftovers…a bit dangerous since I love them!

Melted chocolate spread into circles and covered in crushed Reeses PiecesI traced the smaller circle cutter on wax paper, spooned melted Hershey’s chips and spread them into discs. I had thought of stirring the candy bits into the melted chocolate, but then no one would be able to tell until they tasted, and might not be obvious they were Reese’s Pieces, so I decided on more of a candy bark effect. While the chocolate was still soft, I sprinkled the crushed candy over the top, making sure to have some visible around the edges to peek out from under the marshmallow moon.

ET MenuThere were enough homemade whole wheat sourdough pizza crusts leftover from Close Encounters that I got those out again with as many toppings as I had left. I also cut some pineapple and the rest of the Forbidden Planet watermelon into cubes and put them on skewers for the grill to be different. I have a bumper crop of grapes this year, so I had a big bowl I picked to serve. Everything was ready by 7:30 with no guests yet, so I had plenty of time to take photos.

Dinner & a movie (well trailers first - this was Hotel Transylvania)Sheila arrived first, then Jerry & Troy for their first-ever movie night! The fruit skewers were ok but still got soggy before any good grill marks, so maybe watermelon slices are still the way to go. We enjoyed grilling our pizzas, Jerry & Troy liked my homebrew blueberry hard cider, then Jeff & Audene showed up with Julianna right as we started the movie, but they had to leave a few minutes in because of a phone call. Darn! The four of us enjoyed the movie – it remains a great one! – and stupid me forgot about needing tissue, so I had to resort to using my greasy pizza napkin…heh! Glad my makeup stayed on ok! πŸ˜‰ We finished our s’mores after the movie, and the extra crunch & flavor from the candy was very tasty!

Jerry's S'more Roasting a Moon Britta's S'more (Post Movie Crying)

Full photo gallery below…and there’s only one movie left for this summer so stay tuned!

(more…)

Posted in Cinema Brittahytta, Edible Art, Parties | Tagged , , , , , | Leave a comment

Close Encounters of the Party Kind

Close Encounters MenuThis week for Cinema Brittahytta, 11 of us enjoyed Close Encounters with Flying Saucer Pizzas, a Devil’s Tower Potato Salad, Alien S’mores with homemade Musical Marshmallows by Lyle & Galt, and the Brownie Briquettes served in the tabletop grill made a command performance again! A few people saw a couple Perseid meteors during the movie, but I missed them all…darn!

Devil's Tower Potato SaladI have never seen Close Encounters before, but I knew there was a scene where mashed potatoes were shaped into the distinctive lava plug mountain Devil’s Tower. I didn’t think mashed potatoes were summer BBQ fare, but I thought my grandma’s recipe for potato salad molded into shape would be hilarious. Seeing that everyone laughed, I think it succeeded!

Alien Face Graham CrackersEven with my crazy schedule that week with the giant cake, a face painting gig, and 4 special events to attend, I was able to make some Alien S’mores, cutting the same vegan graham cracker recipe I’ve been using all summer into shape with an egg-shaped cookie cutter, and poking the nose & Alien Chocolate Eyesmouth detail directly into the dough. I traced the same cookie cutter onto wax paper and spread melted chocolate as matching oval shapes, then used the rest of the melted chocolate to pipe the large almond-shaped eyes onto the faces.

Alien S'mores with Musical MarshmallowsLucky for me that Lyle & Galt offered to make homemade marshmallows for the s’mores, and they brought them as Musical Marshmallows in the light grid from the final first contact scene…fantastic, clever AND extremely tasty!
Grilled Watermelon & Grilled PeachesLyle has become my master griller lately! I started grilling the watermelon because I need the practice (the slices need to be nice & thick, then about 2-3 minutes per side to get nice grill marks with carmelization & smoky flavor), but he helped finish them for me, and put the white peaches on to grill…both were very tasty! Thanks Lyle! πŸ™‚

Flying Saucer Pizzas on the GrillThe personal grilled pizzas were such a hit for Forbidden Planet that I brought them back as Flying Saucer Pizzas! I served some of the same ingredients as last time, some others brought some fun toppings too, and this time we had plenty of crusts, thank goodness. Everyone’s looked so tasty I wished I could eat them all! πŸ™‚

Brownie Briquettes AgainSince Tracia & Kian had made a special trip from Davis to stay overnight & attend movie night, by special request I reprised the Brownie Briquettes again. This time I used royal icing instead of marshmallow creme, so the orange sugar didn’t soak in as badly, but the powdered sugar always soaked in, so Glen Eating a Brownie BriquetteI had learned my lesson & only decorated them the hour before other guests arrived. They looked great in the foil-lined little grill again, and they were a hit with all the people who had missed them before, as well as those like Glen who enjoyed them the first time around! πŸ˜‰

Everyone was enjoying making pizzas so much that not many were able to make s’mores before we started the movie, so we continued making them after the movie was over. I got some fun photos of the gooey alien s’mores…hooray!

Master Griller Lyle grilling watermelon & peaches - yum! Kian & Lori Grilling Pizzas Galt & Lyle Roasting Marshmallows Movie time! After-movie s'mores Gooey Goodness Gooey Glen Britta's Alien S'more

As always, you can click to see the entire photo gallery, plus read my grandmother’s potato salad recipe I used for Devil’s Tower…enjoy!

(more…)

Posted in Cinema Brittahytta, Cupcakes, Edible Art, Parties, Recipes | Tagged , , , , , , , | 1 Comment

Monster Munchies & Door S’mores

One of my own MonstersThis past Saturday night 23 of us enjoyed Monsters Inc with Door S’mores & Make Your Own Monster Munchies cupcakes! It is still one of my favorite Pixar movies, and now we’re all caught up for the new Monsters University movie next summer. Afterwards little Boo-age Emma was running around telling everyone “BOO!” & squealing with giggles…I guess we created another monster! πŸ™‚

Door rectangles sized for HersheysYou already know I’ve been on a custom s’mores kick this summer, so of course for Monsters Inc I had to make Door S’mores! Using the same vegan graham cracker recipe, I used my pastry wheel to cut rectangles that were the proper size around 3 blocks of traditional Hershey milk chocolate bars, then I scored the panel patterns into each door and added a little dough Door S'more ready for toasted marshmallowball doorknob. The bottom crackers were cut to match but no decoration added. Some doors opened right and some opened left just for variety, and I was able to squeeze out 21 sets out of the double-batch of dough.

I had thought of making monster cupcakes when I chose the movie, but how exactly? I decided I had enough vivid cupcake papers & matching sugar colors, that I would make red velvet cupcakes but also blue, green & purple velvet to match, plus cream cheese frosting even though it can be problematic in summertime. So many kids & adults have liked the decorate your own idea lately, I decided I could make assorted monster bits and we Monster Bitscould all play like Mr Potato Head to assemble our own Make Your Own Monster Munchies.

Since my birthday was the day before, I wanted an easier day than marathon baking, so the only party prep I did was to have great fun piping royal icing googly eyeballs, and sculpting tentacles, teeth, horns, antennae & arms out of fondant scraps. It took too long to mix colors since so many scraps were too old & dry, so I had to get to my birthday dinner before making anything red, purple or green. I think my favorites are the little hands and the suckers on the tentacles. πŸ™‚

Tapping the Royal Icing Eyeballs into ShapeThe larger eyeballs looked better using the flat side, but the smaller ones had decent shape once I let the royal icing set just enough so it wasn’t sticky anymore, then tapped down the piping point into a round eyeball shape. After they were dry I used a black food coloring pen for the pupils.

Blue, Green, Red & Purple Velvet CupcakesMy buttercream recipe is more reliable for decorating especially in summer, but I know everyone loves cream cheese frosting with red velvet even though it doesn’t last well in California heat. Cake goes stale more quickly when refrigerated, but frosted cupcakes would need to stay in the fridge if made in advance, so I made the frosting several days ahead, but I didn’t bake & frost the cupcakes until Saturday right before Layered Rainbow Velvet Cupcakesserving. From reading the recipe (see the end of this post for the full recipe), I wasn’t sure if one batch would make a full 3 dozen, so I made two batches, each separated into two colors. I probably could have made one batch & separated into four colors, since I had a lot more leftover than I expected!

Since this batter was plenty thick to spread vs. pour (probably because I’m used to oil vs. butter in my cake recipes and this was real butter AND yogurt), I tried some rainbow cupcakes with the leftovers. It was already a very thin layer of batter for 4 colors in each cupcake, so I Rainbow Velvet Cupcake Showing its True Colorsdoubt you’d ever be able to get more colors into cupcakes very well. It did take longer than my disher for sure, since you must carefully spread only the top of the layer to the edges without disturbing the layer underneath. If I had thought of using piping bags for the batter, that might have been easier. Not only did they work, but since I used thin white papers, the color soaked through in a lovely rainbow!

Frosting & Fuzz I had planned on the same easy fuzzy fur technique as the Elmo cupcakes several years ago, but that was with my reliable buttercream. This cream cheese frosting was too solid for piping or spreading right out of the fridge, and there was a very small window at the right temperature before it started melting. I figured out how to work fast enough to pipe one only inside the edges, immediately dip in the matching color sugar, gently smush so the frosting would spread to MJ & Benjamin Making Monstersthe edges and be completely covered. If any frosting was hanging over the paper edges at all, it started dripping pretty quickly, so I gave up on any dome frosting shape. I really like the fuzzy frosting fur matching the cupcakes & the liners!

Of course I had to make a couple example monsters of my own, and by then Louie, MJ & Benjamin had arrived, so MJ & Benjamin made some monsters with me! By then more people were arriving, so Marco & Ben helped grill the watermelon as I got more food out from the Spa-Yeti a la Diablo by Eileenfridge like the cheese tray & fruit salad. Eileen is definitely a theme party kindred spirit…she brought spicy pasta as “Spa-Yeti a la Diablo – Be Careful…It’s Abominable!” complete with a sign of the Yeti serving his lemon snow cones!

I was missing the s’mores firepit action since was frantically trying to make some red tentacles & arms to add to the monster bits, so Louie nicely offered to take photos for me! Not as many s’mores photos this time, but a pretty good messy one of Benjamin…now he thinks we get s’mores every time they come to my house! πŸ™‚

My blue Monster Munchie with the only Mike cocktail Make Your Own Monster Munchies Benjamin's Door S'more Firepit Fun

Even after years of party hosting I still can’t ever get the food quantities exactly right! This time I had TONS of leftover cupcakes, but not enough Door S’mores. I would rather people come last-minute & have fun even if they can’t RSVP, but that often means I don’t have the right quantities of food. It seems like the easy potluck idea for Cinema Brittahytta has lost its charm this year after working so well for several years, so I need menu ideas that aren’t too unhealthy for me to eat lots of leftovers when we don’t end up with a large group. If you have easy, healthy and YUMMY summer BBQ recipe ideas for a crowd, let me know!

As always, you can click to see the entire photo gallery, plus read the Rainbow Velvet Cupcake recipe…enjoy!

(more…)

Posted in Cinema Brittahytta, Cupcakes, Edible Art, Outdoors, Parties, Recipes | Tagged , , , , , , , , , | Leave a comment

Personal Planet Pizzas & Flying Saucer S’mores

Flying Saucer S'moresAfter busting out the Bright Butterflies birthday cake in record time, I ran home to get set up for Forbidden Planet movie night. I had planned for double food quantity vs RSVPs, but little did I know that wouldn’t quite be enough for the largest audience yet this summer, 18 total including the butterfly birthday boy! Everyone enjoyed the Personal Planet Pizzas and the Flying Saucer S’mores, and Forbidden Planet is definitely classic sci-fi worth watching!

The Flying Saucer S’mores were the same vegan graham cracker recipe I used for War of the S’mores, Vegan Graham Crackers Againbut I rolled them thicker this time, and cut simple circles for the main discs and the small bridge domes. I think they were too much cracker vs s’more but others liked them since they like thicker cookies. I think for the next special s’mores I’ll try a thickness between them in hopes of a happy medium.

Chocolate CirclesI had used 60% Ghirardelli chocolate before since I wanted the eyestalks to be as stable as possible. I love Ghirardelli and there are so many fantastic gourmet chocolates these days, however I think the classic s’more flavor is Hershey’s milk chocolate. When bags of Hershey’s milk chocolate chips were on sale, that sealed the deal! I traced the larger circle cutter onto the back of waxed paper, melted the chips in the microwave, then either a piping bag or just careful spooning and spreading gave decent chocolate circles.

Adding the domes to the Flying Saucer S'moresYou need to melt the chocolate completely, but it will need to cool a little before it is stable enough to stay in one place. When it doesn’t leave strings or drips everywhere, use a piping bag with coupler only or large round tip to pipe a tower of chocolate in the center of each large disc, then gently set the small circle on top. Hopefully this won’t squish out all your chocolate and you end up with the flying saucer dome shape like these.

I tried cutting a big marshmallow to be a white disc between large disc layers but that made them look more like hats than flying saucers. So I left them stacked in saucer sets with the chocolate circle between and let the roasted marshmallows be added later. Yum!

Whole Wheat Sourdough Pizza CrustsEarlier in the week I had made all the crusts for the Personal Planet Pizzas from whole wheat sourdough peasant bread (recipe included at the end of this post – hey it’s vegan too!). I made two batches in my bread machine, one batch each evening so the sourdough could feed again overnight. Each batch made 9 rounds about 6.5″ in diameter, and 3 fit on my silicone baking mat. I only baked them 2 minutes each side at 350F just so they would set enough not to fall through the grill. When they were fully cooled I froze them with wax paper between them. They were thawed on party day in just a couple hours at room temperature and ready for toppings.

Personal Planet Pizza ToppingsI bought a LOT of toppings to try and cater to the healthy and the hedonistic! For sauces we had pesto, Alfredo sauce and organic marinara, then grated mozzarella, a 3-cheese combo, crumbled fat-free feta, crumbled Gorgonzola, crumbled goat cheese, fresh basil, baby spinach, sliced red onions, sliced white and baby bella mushrooms, sliced olives, sun-dried tomatoes, artichoke hearts, fresh sweet peppers, roasted peppers, roasted garlic, sliced ham, pepperoni, grilled chicken, Italian sausage. Whew! I almost ran out of aqua dishes…almost! πŸ˜‰

Grilled Watermelon, Grilled Pineapple, Fruit Salad and Forbidden PlanetLyle and Galt arrived first, so Lyle helped grill the watermelon and pineapple before pizzas went on. I knew grilled pineapple was tasty but OMG grilled watermelon is soooo good! I’m not a huge fan of plain watermelon, but after grilling it was smoky and carmelized, and even the juice leftover on the plate was to die for! Perfect that I already had a watermelon to cut so I could leave Lyle’s special Forbidden Planet watermelon intact for everyone to see! πŸ™‚

Galt's Yummy Personal Planet PizzaWith a quick spray of olive oil, we put the plain pizza crusts top down on the grill for crunch, then people were allowed to load up their toppings and get back to the grill. I think about 6 pizzas fit at the same time which isn’t bad. Everyone ate them so fast I only got a photo of one person caught in the act! I almost didn’t get one myself since by the time I was ready to eat there were only 2 crusts left! They were very tasty. Everyone raved about the crusts and most assumed I bought them somewhere. I think these were popular enough to reprise for another movie, especially since I have toppings leftover that will last a while!

The light was already fading when we started the s’mores fire in the firepit, and I think my entire collection of telescoping roasting sticks got used…awesome! Again, the gargantuan marshmallows were a bit too much for the Flying Saucer S’mores I made, but it made for some fun photos…haha!

Elias' S'more Roasting Marshmallows Forbidden Planet with Firepit Britta's S'more (used a smaller marshmallow)

Forboding Flying Saucer S'mores with Roasting Stick Lurking Behind Lyle's S'more Galt's S'more Pizzas on the Grill

No Rock Band this week since everyone was busing making pizzas and s’mores…but a good time was had by all! As always, you can click to see the entire photo gallery, plus read the full whole wheat sourdough pizza crust recipe…enjoy!

(more…)

Posted in Cinema Brittahytta, Edible Art, Outdoors, Parties, Recipes | Tagged , , , , , , , , , , , , | 1 Comment

War of the S’mores!

War of the S'mores!It was looking like a very small group for War of the Worlds movie night, but a surprise visit from my college buddy Dave & his family doubled the attendance! When it was just them & me before others arrived, little Jackson asked, “Is this a party?” and I replied, “Yes, now that you’re here!” πŸ™‚ All 8 of us had a blast with the War of the S’mores homemade graham cracker flying saucers with chocolate eyestalks, and the adults enjoyed the Martian Heat Ray cocktails I created!
Martian Heat Ray in Glowing Red GlassI had never seen War of the Worlds & wanted to wait to see it for the first time on my big screen, so it was a little trickier to come up with special recipes. I knew the specific flying saucer with “eyestalks” that shot heat rays, so I ran with those ideas. For the Martian Heat Ray cocktail, I had a couple bottles of blood orange soda, and even though cinnamon schnapps would be most obvious, I don’t have any in my bar, so I decided spiced rum and ginger liqueur could be tasty “heat.” First try in my tiny tasting glass was excellent! It’s still spicy & tasty if you make it with ginger ale & blood orange soda without the rum for the no-alcohol crowd. Of course we had to drink these in glowing red martini glasses! πŸ™‚

Summer grilling is s’more season and I think custom s’mores are fun to make. I have made custom chocolates and custom marshmallows before, like for Star Trek II: The Wrath of Khan, but I wanted the shapes to be specifically the classic War of the Worlds “eyestalk” flying saucers, so this time I also made my own graham crackers!

Homemade Vegan Graham CrackerI had not seen this film before, so I was going by screenshots only for the design. I made my own kidney-shaped cookie cutter the size I thought was good for s’mores without being too pointy. I found a vegan recipe that looked good using only whole wheat flour & molasses, not special graham flour, so I tried it. I think I rolled these a little too thin, but they were nice and crispy and they held up perfectly for s’mores. (See the end of this post for the full recipe.)

Attaching piped chocolate eyes to stalksSince the cookie dough was crumbly & too fragile for thin stalks to hold together, I made the “eyestalks” by piping melted chocolate onto wax paper with the eyes separate from the stalks. Once they were firmly set, I gently pulled the stalks off the wax paper and glued them to the back of the eyes that were still on the wax paper, helping support the stalk with a little more piped chocolate at the other end, and very very carefully putting them Bracing Eyestalks for Chillingback in the fridge to set. Once those were all set, I piped more chocolate to glue the stalks onto the top of the top crackers, but they needed more support while chilling, so they were circling spare plasticware until they set.

Menacing Eye from White Chocolate & Orange SugarAfter the stalks were solidly in place, I quickly added an eye of melted white chocolate immediately dipped in orange sugar for the heat ray. Don’t wait to pipe several eyes at once, since the white chocolate sets too quickly for the orange sugar to stick!

I left the bottom crackers plain, ready for freshly-roasted marshmallows to melt on chocolate, but of course I piped out chocolate wafers to match the saucer shapes too! I Cute Martian War Machines!traced the cookie cutter onto the back of wax paper, then piped on the other side so I could aim properly. My fridge was full of cookie sheets with chocolate setting in various shapes! πŸ˜‰

I admit that’s a lot of rounds of chocolate work just for s’mores, but everyone loved the “cute” design. I joked that some production designer from the 50s must be rolling in his grave at his Martian War Machines being called “cute!”

As for the evening itself, Dave & family were early, which meant too light for any Rock Band to proceed outside, so there was a lot of both boys running & jumping into the bean bags on the grass while his parents & I caught up since I last saw them a whole year ago. I got out the drum set so the boys could bang on it, and I told Jackson we couldn’t actually play the game until there was no sun on the screen anymore…so he was paying Police Rock Band with Dave!attention! He also kept stalking Onyx and was really trying to get a glimpse of the elusive Ebony. He finally got a good look at her when I fed the kitties when no one else was inside, then I brought Jackson back and stood whispering with him peering from the doorway. πŸ™‚

Glen, Shelia & Ruth arrived, then when it was finally just dark enough, we started Rock Band, and after a couple random songs as I kept checking my salmon on the grill, I heard Poor marshmallow incinerated by a Martian Heat RayThe Police start playing…aaah! Dave’s college band played Message in a Bottle dedicated to me at one of their early gigs, and Dave & Wendy went with me to the Police reunion concert a couple years ago, so that was totally awesome to play Police Rock Band with Dave…woohoo!

The boys are too young for staying up for an after-dark movie plus the long ride home to Oakland, but I insisted we all must have the War of the S’mores before they left! We used my firepit for the first time in over a year so the boys could see their marshmallows roasting. The gargantuan marshmallows were a little too large for my flying saucer crackers, but the ooey gooey mess was loved by all! We even had a roasting stick duel with proper fencing technique between Glen & Ruth. Of course I made everyone pose with their s’mores, and I cracked up at the results…hahahaha!

Britta's s'more Jackson's s'more with Daddy Dave Wendy's s'more Sheila, Glen & Ruth's s'mores!

As always, you can click to see the entire photo gallery, plus read the full homemade graham cracker recipe…enjoy!

(more…)

Posted in Cinema Brittahytta, Edible Art, Outdoors, Parties, Recipes | Tagged , , , , , , , , | Leave a comment

The Circle of Life

Lion King FoodThe second summer Cinema Brittahytta movie was The Lion King, perfect for 9 of us of all ages, even the little ones! I showed off my own family tiki carved by my grandfather in its happy new home in my garden, and my fun menu included Bugs & Grubs, Iced Tea-Keas, Luscious Little Lions, and Tribal S’mores with gargantuan marshmallows that were a huge hit! πŸ™‚

After a sweltering 100F(!) day, the backyard was lovely in the evening shade. We enjoyed grilling & chatting until it was dark enough to play some Beatles Rock Band, then it was time for the main feature. Little Ellie’s interpretive dance to the opening Circle of Life was Lion King Decor & Foodadorable, but it was extra fun that Jeff could come with his wife & little daughter, since it was Jeff & me who saw the first Lion King trailer together in late 1993 and said “We HAVE to see that movie!” It was one of my first promos working at the movie theatre, so for patio decor I had the official poster one-sheet, numbered on the reverse side, Scar & the hyena trio from the standee, some static cling leaves from the original Disney theatre decor kit, and I wore my well-loved & now-faded moonlight shirt for the occasion.

Decorating Bugs & GrubsTrader Joe’s sells a bunch of chocolate-covered dried fruits, including some that are brightly-colored, so I decided that could be a very easy way to make Bugs & Grubs! I used my black food Bugs & Grubs with Fernscoloring pen to draw some legs & eyes on the brightest ones, mixed them with the dark chocolate ones in a clear bowl lined with organic fern clippings from my yard, and voila…”tastes like chocolate!” πŸ™‚

Iced Tea-KeasI am taking poetic license for Lion King “tribal” to include tikis even though they are not African, mainly because I found the tiki ice cube trays at the dollar store that were too perfect with the reveal of my own garden tiki that Iced Tea-Keasmy grandfather carved. I hope we can call them awesome “tribal carvings” and keep having fun. πŸ™‚ The Iced Tea-Keas were tasty but harder to see, since the iced tea didn’t really show the detail of the fun molds, but it was nice to have a flavorful unsweetened tea option.

After the Iced Tea-Keas were all frozen in several batches and the molds washed & dried thoroughly, I outlined just the detail with white chocolate candy melts, let them set in the Making Chocolate Masks for Tribal S'Moresfreezer while I melted milk chocolate & 60% Ghirardelli chips together, the poured the brown chocolate over the white detail. After they set up solid in the fridge, I used my food coloring pens to add some colors to them. I’m still not sure if it Coloring Chocolate Maskswas the chocolate getting too warm or it gumming up my pens that made the color stop transferring to the candies, so about half stayed the white accents only.

Tribal S'more nicely toasted over the coalsI had found gargantuan marshmallows recently, so huge that I can toast the outside three times and still have almost a whole normal marshmallow left, so I used those with normal graham crackers with the tiki masks as the chocolate, ready for melting. Not only did we have many rounds of successful s’mores, but even plain marshmallows were roasted!

Little Girl, Big Grill! The tiki oversees Ellie's destruction of her Tribal S'more Nathania enjoying the gooeyness! Die-hard marshmallow roasting over dying coals

Luscious Little LionsLast but not least were the Luscious Little Lions…so cute! These are the same vegan maple cornbread muffins with coconut manes I made as Cowardly Cornbread for my Wizard of Oz birthday two summers ago. Since I was trying to keep that party as vegan as possible, I had found this recipe and it worked well enough to try again with plain water instead of soymilk. I didn’t bother with the whole corn this time, and I doubled this recipe for about 30 since my mini muffin silicone pan is taller than standard size.

Luscious Little Lions (aka Cowardly Cornbread)

1 cup plain soymilk or water
1/4 cup non-hydrogenated vegan margarine, melted
2 Tbsp. maple syrup
2 tsp. apple cider vinegar
1 cup stone-ground cornmeal
1 cup all-purpose flour
1/4 cup sugar
1 Tbsp. baking powder
1/4 tsp. salt
1 cup frozen corn (optional)
1 cup shredded coconut flakes

Preheat oven to 375 degrees F. Use a silicone mini muffin pan and spray with non-stick cooking spray, or line 12-cup muffin pan with paper liners. Whisk together soymilk (or water), melted margarine, maple syrup, and vinegar in bowl. Whisk together cornmeal, flour, sugar, baking powder, and salt in separate bowl. Stir wet mixture into dry mixture. Coconut added to cornbread batterFold in corn kernels for large muffins, optional for mini muffins.

Spoon or scoop the thick batter into prepared muffin pans about 2/3rds full. Sprinkle shredded coconut around edges of each muffin. Lightly tap the coconut flakes into the batter so it will stick during baking. If any stray coconut is in the middle, tuck down into the batter or scoot aside.

Bake mini muffins 15 minutes at 375F. Since the coconut is touching the moist batter, it won’t toast as quickly. Coconut should be lightly toasted brown the same time the muffins are done.

If making full-size muffins, bake 20 minutes, or until toothpick inserted into muffins out clean. The longer cooking time might burn the coconut before the muffins are done. Cool 10 minutes in pan then unmold. If you keep these enclosed under a glass dome or inside a cookie tin or plasticware, the crispy coconut will start to sag from the moisture in the cornbread, so best to bake these only a couple hours before serving if you can.

Finally I will leave you with my garden tiki watching over my waterfall. I am very proud to have one of my grandfather’s carvings in my own yard! πŸ™‚

My own garden tiki, carved by my grandfather!

As always, you can click to see the entire photo gallery…enjoy!
(more…)

Posted in Cinema Brittahytta, Cupcakes, Edible Art, Outdoors, Parties, Recipes | Tagged , , , , , , , | Leave a comment

Brownie Briquettes

Brownie Briquettes CloseupFor the 2012 Cinema Brittahytta season premiere summer barbecue, I made Brownie Briquettes, glowing charcoal coals devil’s food mini square cupcakes using marshmallow creme and orange crystal sugar! They must have been realistic, since many people walked right past them, and one asked me why there were two sets of hot coals going! πŸ™‚

Erica has been recently going mad for cupcakes with many clever ideas, and on Facebook she posted her black velvet cupcakes served in a foil-lined bowl with tongs several months ago, but they looked like plain unlighted charcoal. I told her I wanted to make them more realistic, with powdered sugar “ash” and especially glowing coals!

Cracking by handFirst step is to find a square baking pan. I found a tiny 24-hole “brownie bites” silicone pan by Wilton for $10 at Michaels then I used a coupon of course. I think a slightly larger pan would be better since these are very shallow holes so make a bite-size briquette. The bonus is that you get over 60 mini cupcakes out of one batch of cake batter! Fudgy dense brownies do not rise enough to get the slight dome shape of a briquette, so I used a devil’s food cake mix with black food coloring added as “cakelike brownies.” If you’re against food coloring, you could try leaving them brown but I don’t think the illusion is as good since they still look like brownies that way.

piping marshmallow creme into the cracksErica’s black velvet cupcakes nicely cracked on top looking exactly like charcoal. Mine however never cracked, none of my 5 dozen at all! So I had to crack them open myself, carefully not cracking all the way through the bottom of the thin cupcake, so I could pipe white marshmallow creme inside so the orange crystal sugar would show up nicely. You could use white frosting instead, but I liked the s’mores reference using marshmallow and chocolate as coals.orange crystal sugar over marshmallow creme If you use frosting that sets, make sure you add the sugar crystals while the frosting is still tacky. The marshmallow creme stays nice and sticky so you can pipe a bunch in a row, then add the sugar in assembly line fashion. An unexpected bonus was that the stray orange crystals that stuck to the top of the cake looked like coals glowing through charcoal texture even without white behind them!

ashy briquettesYou also need some briquettes that have ashed over, so powdered sugar is the obvious choice. However, just dusting them with powdered sugar looks like normal food, so I rubbed the sugar into the cupcake that made it nice and mottled gray. My cupcakes were so moist that I expected the powdered sugar to soak in & need to be redone right before serving, but I didn’t expect all the marshmallow and orange to soak in completely in just 36 hours! Fair warning, decorate these a few hours before serving! I had to redo all mine as I arranged them.

Britta's Brownie BriquettesArranging is up to you. Erica lined a large round bowl with foil, used a cooling rack on top and had tongs, which was enough to suggest a barbecue. I was lucky still to have my old apartment balcony tiny tabletop grill in my shed, so I cleaned it up, lined it with foil, and arranged my Brownie Briquettes inside. I set the plain black ones haphazardly around the outside edges like they hadn’t caught fire yet, then ashy ones, then the glowing ones in the middle so I had a pile of charcoal just like before you spread out the coals for grilling. I gave a final dusting of powdered sugar over everything so it looked more natural pile of charcoal glowing coals. Of course I had clean BBQ tongs, but since the grill grates didn’t come very clean, I set them to the sides for display only. No one expected this to be a dessert, so they kept walking by it, and one person who came later asked why there were two sets of hot coals going! hahaha…now that’s success! πŸ™‚

Not only a successful dessert, but a successful premiere as well! After a whole season with no Rock Band outside, 13 of us plus one dog had a good game going while waiting for enough darkness to watch the first Men In Black in honor of MIB3 opening last week. While they were playing songs I didn’t know how to sing, I took a billion photos trying to get one of my glowing coal brownies in front of the real glowing coals. πŸ™‚ You can check out those photos in the full gallery if you click below. Hooray for summer!

(more…)

Posted in Cinema Brittahytta, Cupcakes, Edible Art, Outdoors, Parties, Recipes | Tagged , , , , | Leave a comment

the end of summer… aka Fun with Homemade Marshmallows

Cinema Brittahytta did not end with my Oz birthday…there was still a whole month of summer left, even though this year the weather was so cool it didn’t really feel like it! πŸ™‚

I knew I wanted to show a Trek-related 3 week series, then we added Kick Ass the week before since it was a new release, and I had missed it in theatres when I was in Australia. I really liked it but boy was it violent! Most definitely rated R, and if you didn’t like Kill Bill, don’t even bother, since the violence is on that level. No special food that week, but I raided my closet to throw together a Teal Girl outfit ala all purple Hit Girl from the movie…heehee!

I also finally bought an aqua stand mixer as an early birthday present for myself, inspired by wanting to make my own homemade marshmallows. I tried vegan gelatin which didn’t work, then I tried maple bacon marshmallows just for fun which I liked but got mixed reviews. I also experimented with colored sugar techniques, and knew I would do some kind of special Trek marshmallow creation but not sure exactly what.

The next week was Star Trek II: The Wrath of Khan, still the best Trek film ever! I found out it was also National S’Mores Day, so that made my special Trek food obvious…Trek S’Mores!

Since my chocolate mold was only Next Generation commbadges, which did NOT go with classic movie Trek, I made a new silicone mold for milk chocolate chevrons since s’mores must be milk chocolate, and made a normal batch of marshmallows (boy that stuff is STICKY!), cut into large rounds that exactly fit on the half-graham cracker and fit the chevron just like the belt buckles in Wrath of Khan.

Even though I hoped they would be melted later like proper s’mores, for presentation I pre-toasted the edges of the marshmallow rounds over a candle. I think they turned out great, we had a blast roasting them over open flame in my firepit, and everyone enjoyed them!

I have been dying to show my fellow geeks the movie Free Enterprise for a couple years, since it makes me laugh so hard but needs the right audience to appreciate it. Since Wrath of Khan figures in the plot, I thought it was perfect to schedule after Khan, and it was well-received…yay! We mixed our own Romulan Ales with Absolut Citron & blue curacao, and I got out almost all of my Trek collection & posters to make the patio look like the apartment of one of the main characters. πŸ™‚

We closed out the season this week with the newest Star Trek, the reboot from last year complete with matching Spock & Kirk posters, and since it was the season finale, I wanted to make one last special dessert…Trek marshmallows in command gold, sciences blue and services red! It was finally warm weather so we didn’t roast these marshmallows but everyone liked them…I think the red ones were demolished first…? πŸ˜‰

I found a metal cookie cutter I wasn’t using and bent it into the Trek chevron shape to cut a new batch of homemade marshmallows, then I dipped the sticky cut edges into colored sugar…services red came out of the jar, but command gold was yellow & orange mixed, and sciences blue was a mix of light blue and purple. This time I wore my Live Long & Prosper cutesy Spock shirt, and I was so hot getting everything ready in the triple-digit heat that I never did cool down! We saw “movie rat” a couple times, which has become a game to see who notices him first running so fast across the roof or power lines. Cinema the Cat came back during the movie to hang out with us, getting nice pets from everyone, then he went to the patio to hang out with Onyx who was inside my bedroom looking out at the patio. Ebony is still protective of her territory, but Onyx & Cinema seem to get along just fine. Cinema stayed out on the patio until well after everyone else left. Since he hasn’t come by too often, I’m glad he joined us for the season finale. πŸ™‚

Now that the movie screen has been taken down, my summer is over…even more so because this time next week I’ll already be in Ireland, and by the time I return to California, it will officially be autumn!

Posted in Cinema Brittahytta, Edible Art, Parties, Uncategorized | Tagged , , , , , , | 4 Comments

my Oz birthday!

The first movie I ever remember seeing was The Wizard of Oz on TV. It became the first movie I ever loved, watching every annual broadcast, reading the original books by age 5, as many as I could get my hands on, and I even saved up $10 allowance to join the International Wizard of Oz Club when I was a tween! When I saw that the new remastered edition of the Wizard of Oz movie came out on Blu-ray last fall, I decided to go back to my roots and have an Oz birthday this year. πŸ™‚

My Oz birthday actually started with taking my mom to see Wicked the musical in San Francisco two days before my actual birthday. It was the worst traffic from Sacramento to SF I’ve ever seen at midday on a Sunday, making us late, but we only missed the first song, & she really enjoyed the show. Hooray!


Mom & Britta at Wicked in San Francisco

I used free Amazon points to buy the Blu-ray “ultimate collector” set for myself & decided the perfect night to show it was on my birthday since it landed on a Tuesday movie night. Since I told people it was my birthday, over twice as many people came than usual, so it was 25 of us plus little Ellie and greyhound Gus – quite a turnout! I’ve never had so much food be gone at the end of a party! Obviously everyone enjoyed the food! Sure made cleanup easier, but only about half the people had actually told me they were coming in advance, so I had only made about 3 dozen of everything. I found a dress at Target that was close enough to be Dorothy-esque, found a paper gingham tablecloth that I trimmed to make Onyx’s bow & my hairbows, and painted a pair of thriftstore shoes with red paint & red glitter to make my own Ruby Slippers. πŸ™‚ I even played software pirate to get a copy of Heartless: The Story of the Tin Man onto my PS3 as pre-movie entertainment (I couldn’t figure out a way to do it legally so I apologize!), and everyone enjoyed that too, surprised it was so well done. I also had a lot of fun with the menu, since I made all of these below, and arranged them along the Yellow Brick Road on the food table with my Oz movie posters from my childhood bedroom walls, my vintage & new Oz books, other items from my small Oz collection, and even the Wicked Witch of the West from my Halloween decor made an appearance gazing into the crystal ball!


Dorothy Britta and Toto Onyx on the Oz patio…watch out for the Wicked Witch of the West!

Oz Menu:
Over the Rainbow Fruit Salad – stacked in my trifle bowl
Ruby Slippersvegan red velvet shoe-shaped cupcakes decorated with red sugar for sparkle
Lollipop Guild – purchased coiled mini lollipops
Yellow Brick Road – gold foil since I ran out of time to make the cheese bricks (darn!)
Scarecrow’s Sweet Potato Straw – sweet potato fries
Tin Woodman’s Axes – vegan gingerbread axe cookies
Cowardly Cornbreadvegan mini muffins with coconut manes & painted faces
Field of Poppies – tomatoes cut into poppy shapes with cream cheese & chopped olives for the flower center
The Wizard’s Emerald City Salad – green salad, spinach, snap peas, marinated artichoke hearts
Glinda’s Bubbly Goodness – non-alcoholic (“good!”) sparkling pink lemonade
Wicked Witch of the West – black vodka with sour apple mixer layered as black & bright green


Huge thanks to Mary Jo who came a little early and made the first Wicked Witch of the West cocktail to enjoy while she cut strawberries and was in charge of the deep fryer for the sweet potato fries!

There were so many people I wasn’t sure if they wanted to play Rock Band, but when Kaelyn requested it, I asked them to sing the Beatles “Birthday” for me…very fun, and different from the now-traditional 17+part made-up-on-the-spot harmonies my singing friends usually do! πŸ™‚

Full documentation, with step-by-step food albums, and even some short videos of some birthday cards that are very cute, are here in gallery of course. I had a really fantastic time, so I’m very thankful to everyone who joined me to celebrate!

Posted in Cinema Brittahytta, Parties, Uncategorized | Tagged , , , , , | 5 Comments

Cinema Brittahytta so far…

I’ve been having a lot of fun with the Cinema Brittahytta backyard movie night series this year. Not only is the patio looking very nice and so usable with the new wetbar, but I’ve been updating my director’s clapboard each time with the evening’s film title & date, and thinking up silly food & decoration ideas when I can. πŸ™‚

Since each year there are still people who haven’t seen it, I’ve decided the traditional season premiere should be the hilarious classic “Office Space,” but this year the night I picked in May was a rare rainy week, so we stayed inside & watched on the big TV instead, still playing Beatles Rock Band beforehand. Due to crazy schedules & Memorial Day we didn’t start up again until June, then Sweeney Todd & the new Alice had already been requested but had to wait until the requestors could attend, so I added Batman & Batman Returns before, classics that we agreed still hold up 20 years later. Then after Alice when people were discussing various Burton films and enough sounded willing, I showed Edward Scissorhands to finish the Tim Burton series for this summer. I could watch Tim Burton all summer, but I know not everyone can, so I thought it was pretty good that I stretched it to five in a row! heehee…I didn’t get Rock Band working outside until Sweeney Todd, but now we’ve been playing each week, which is so much fun on the big screen & plenty of space to spread out. About 8:30pm we can see the game on the screen well enough to play, then by the time it’s getting too dark to see the colors on the instruments, it’s time to watch the main feature. πŸ™‚

Season Premiere Office Space

Even though we stayed inside to watch the movie since the ground was too soggy, this was the public debut of the patio wetbar project with all the movie decor, including the old family 8mm projector.

Sweeney Todd – The Best Pies in London

I made miniature beef & Guinness meat pies inspired by a Jamie Oliver recipe, and I served them with devilish laughter to those who didn’t yet know the plot. πŸ˜‰

Alice in Wonderland Mad Tea Party

I used Mad Hatter-style millinery, my own silver service, teacups & teapots with lace tablecloth, and even borrowed some of Sheila’s stash to create a Mad Tea Party with cocktails in teacups, including “Drink Me” iced tea and an “Eat Me” pastry Brie…then we played Rock Band with Kaeyln in the guitar shades and little Ellie didn’t want to give up the mic! πŸ˜‰

Edward Scissorhands

I couldn’t think of special food for Edward since unfortunately all the sugar cookies were scarfed on the 4th of July, but I did bring my action figure home from work. πŸ™‚ We enjoyed Ruth’s red velvet cupcakes and Sheila’s deviled eggs with slushy fuzzy navels in glowing martini glasses…yum! Only 5 of us that week but we still had a great time playing Rock Band beforehand!

Harry Potter and the Half-Blood Prince

I got out my easiest to reach Hogwarts decor, including the Sorting Hat, crystal ball, some candy boxes, one huge spellbook, one Horcrux, the Snitch, baby Norbert & a wand or two, plus I made butterbeer ice cream and miniature devil’s food Cauldron Cakes. Butterbeer was also on tap of course, even butterbeer floats for those who could handle that much sugar! πŸ˜‰


Since I have never seen the 1982 original, and the sequel comes out this December so others have requested it, we’ll be watching Tron next week (aside from glowsticks & lights, any other theme ideas?)…then an even more special menu is in the works for my birthday the following week, when we will watch the stunningly remastered Blu-ray version of the first movie I ever loved…The Wizard of Oz! πŸ˜€

Posted in Cinema Brittahytta, Parties, Uncategorized | Tagged , , , , , , | 1 Comment

unexpected excitement!

I was able to get enough people for a Tuesday night Cinema Brittahytta & potluck BBQ, so about 11 of us had eaten, chatted with cocktails & cider, started the firepit, and gotten comfy in our chairs & blankets, voting on a smaller scale picture this time to try out Sheila’s vintage portable movie screen, and the side gate was still open since people had been coming in that way. We were about 45 minutes into The Producers (Lane/Broderick movie) not even 10pm yet, when we saw lights bobbing…

(more…)

Posted in Outdoors, Parties | Tagged , , | 3 Comments

Successful Inaugural Cinema Brittahytta!

Tonight was the inaugural Cinema Brittahytta and everyone had a great time!

What, pray tell. is Cinema Brittahytta, you ask?

Posted in Outdoors, Parties | Tagged , , , | 2 Comments