 First of all, if you’d like a Frightful Skull Fountain Kit, no one has any skeleton hands left in stock now, so I only have one kit left until next year. If you act fast, you can buy lucky number 7!
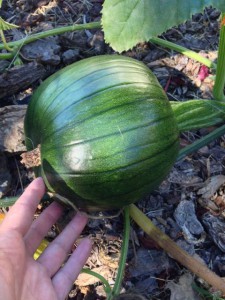
I’ve had a couple more baby pumpkins appear since last week, hand-fertilizing again with my paintbrush whenever I see them open, but so far the only one that has set is the one that was already growing larger last week, and it is even bigger now with a giant stem that seems like it might grow even more! Maybe I’ll have one orange Halloween pumpkin in prime walkway location, and it’ll be a game who can spot the one real pumpkin with all the fake ones in the vines? ![]()
The inside is looking pretty good now! Scary Jerry helped me check the batteries and place all the black LED flicker & real candles everywhere, I got the rest of the portrait gallery up, including the enhanced moving portraits, and the guest bathroom is now all eerily elegant too!
Twelve of the ghosts & portraits received various enhancements since 2012 which required re-editing & re-encoding them all, but at this point the videos are completely finished for all the ghosts, all the portraits, and a new surprise, so that is a huge milestone to be that far along! I’m still cranking through some final video editing since we know a major display will need pre-skewing to keystone them properly, but I am very pleased that is the only video editing left!
 The castle is still getting stabilization enhancements as time goes by, which is the drawback to attempting to set out decor earlier in the month since it has to survive the elements for longer. I love how clear fishing line is invisible, but it is so thin it ends up cutting into the foam so loosens the anchor, so this year I tried some rough brown twine. It seems to be cutting less into the foam, but there is also the drawback that you can see it. For the square towers it’s hidden in stone block seams, but I tied the round towers criss-cross front to back since that’s the direction the wind keeps blowing, and I can see the twine in daylight which is disappointing. At night it will be less visible, but now that we have added the spotlights, the next plan is to paint the visible twine a dark gray or black and see if that makes them invisible at night but not too bad in daylight. For years I have tried to make my Halloween decor look good 24 hours a day, not just at night.
Scary Jerry is our resident lighting expert, and all three of us were involved Saturday night rearranging spotlights for highlighting the towers without having any too brightly lit. I really like our setup, and to make sure everything can be seen from all vantage points, I was on my stepladder pruning in the dark while Scary Jerry stood at the different view points telling me what to prune…haha! It was much more efficient than me having to get down, run over to look, then run back & prune again, which is often what happens. ![]()
 As you can see from their absence in the photos, I’m still working on stabilizing the tower spires. Even the square spire was still going wonky in the slightest breeze with the tower pieces already tied down, and I couldn’t figure out how to stabilize the spire better. Scary Jerry had a brilliant idea to use the foam bubble grip you use to prevent throw rugs from slipping, and I had some, so I cut a strip, anchored it with a few toothpicks around the top edge of the tower, and put the spire back in place. Great idea! For the round spires, I decided to try one by opening the hula hoop, sewing a hem casing to fit, threading the hoop through the casing, then taping it back together before attaching the cone closure with the double-hook tape, and I think that will work. That is the one round spire you see in the phtoos already on the roof and it is still intact just fine. It will just be a matter of cutting through the hula hoop tape each time I take them apart for storage, then re-taping when they go back up. Now I still have to finish all the sewing though, and it’s taking about an hour per spire!
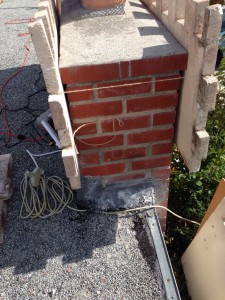 I am very glad I wasn’t finished with the spires yet, since just as of this morning rare 20 mph winds have been blowing all day, even blowing interlocked-corner, tied-down pieces off the roof onto my porch around the corner! I have re-tied everything as tightly as possible three times in three hours already, and taken down the square spire and anchored it with bricks in hopes it won’t go airborne, but as I left for work, the round columns were still working themselves out of their bases and stretching the ties yet again. I hope the ties at least keep the columns on the roof and don’t break anything…and I sure hope this wind stops soon! The extended forecast shows at least 10-14mph through the end of the month, but I have nothing to measure to know how fast the normal breezes have been the past couple weeks when things have been stable enough on the roof. Wish me luck!
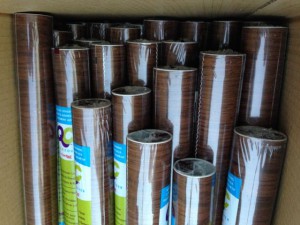 I did get the garage door converted to my wood planks at least! I found a whole bin of matching dark woodgrain contact paper at my local dollar store this spring, but I was afraid using its own adhesive wouldn’t come off the garage door segments to be able to be stored well for the next castle year. I would love to have magnet panels but those are pretty expensive, so I started with some double-stick tape instead, leaving the backing on the contact paper. Since my garage door rolls up, I can only attach the panels at the top unless I cut them, and I was afraid that cutting them might make the edges crunch together as the door panels moved. This was cheap contact paper, so a full roll was only half the height I needed, so I stuck two rolls together, overlapped to keep the backing paper on, then I did the same overlapping between the adhesive and the backing paper to stick all the vertical lengths together in one giant curtain. It was tricky to lift it all by myself to put into position, but I got it done. In the moist night air, edges have been curling, so tape around the edges will be required, but then I can’t open the garage door. The white border around the edge bothered me, and I don’t have enough spare foam to make a “stone” border this year, nor do I want to paint the border to match the house walls, since it looks better white the rest of the year. However, I did have more flagstone gossamer, so I taped that around the white border. It doesn’t match all the tan castle walls in the daylight, but at night it blends okay. At least now my garage door looks much more like it belongs at a castle, especially with my big 6-foot thick plastic rusty chains hanging like the driveway is a drawbridge, and I can still open it, but it’s been getting so
  wrinkled at the edges by opening the door and today’s wind was blowing it every which way, that I taped it all around and decided I just won’t drive my garage-parked Miata until the decor comes down.
Our major setup for this weekend that has continued into the week has been setting up the shed for the Phantom of the Pipes Peppers Ghost illusion. I saved the black-painted frame and screws inside the shed behind the organ, left the black fabric hanging 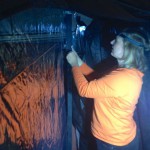 inside the shed, and marked the floor positions with chalk last time around, so the setup should work out okay. Glen has a receiver & speakers to make the pipe organ louder (sadly it couldn’t be heard very well in 2012), so that has made it a tighter squeeze for equipment in the small space behind the
 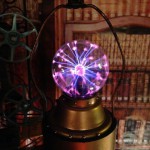 organ. That took most of Sunday evening, so Monday we built the frame and got the shrink film taped on, ready to shrink with the hairdryer tonight.
I can’t 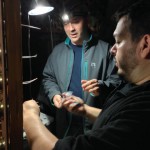 show you too much of the other secret steampunk work we’ve been doing anymore since it would give too much away, but I can tell you it’s going well! Ghoulish Glen let Scary Jerry try some wiring too, and it works!
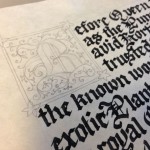 I’ve also made good progress on both illuminated manuscripts but with still a lot of work left, and have a couple smaller
 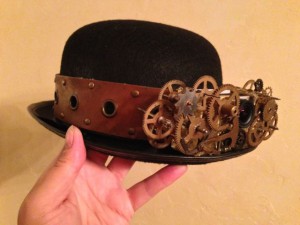 steampunk prop surprises still to finish. However, since I have COMPLETELY FINISHED this fun project in just one day, I have written its own post…the steampunk Photo-Chapeau, otherwise known as the HatCam! See here for the full details and construction photos.
Most of the fruits and veggies can’t be prepared until party week, but I could make these adorable little Mandarin Jack O’ Lanterns! My friend Teje in Norway made these last year so I gave her a  long-distance Creepy Cuisine award (yes, I mailed her a prize!) and was inspired to make some myself! I drew a slightly different face on 74 mandarins, and will display them in two see-through bowls like this wire one. You could use full size oranges but
 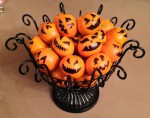 the mandarin oranges look more pumpkin shaped and are a better size for finger food. They last several weeks in the fridge, and since you just draw faces on the rinds with a black marker, these can be done plenty ahead of time…and extra bonus that they are a healthy treat!
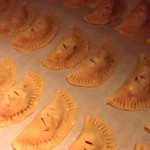 I am so relieved that my party baking is DONE! For my ever-popular Pumpkin Pasties, I bake the filling first, from frozen pumpkin puree I roasted myself from last year’s Halloween pumpkins. After the filling is cool, I spoon it into a plastic container, and it saves in the fridge fine for a week or so, ready for whenever I have time to make the pie crust dough, roll and form into pasties. Now 8 dozen Pumpkin Pasties are made but unbaked in the freezer, spaced apart on parchment sheets stacked inside my sheet pans with the plastic lids, ready to transfer to baking sheets on party morning. So glad I figured that out so many years ago! Gone are the
  days of baking pumpkin pasties all night on party eve!
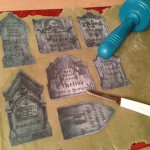
Since the Tasty Tombstones are specific to this year’s plot, there are only 7 designs, so 16 of each means I now have 112 cookies, not quite 10 dozen, so hopefully that will be plenty! Since not as many were eaten last time, I plan to split them into two plates in different areas of the party so they have more exposure.
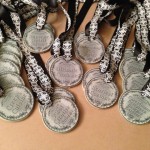 The same cookie dough makes the Edible Medals for the contest prizes. I am so thankful I did the artwork, edible printing, and cutting way back in April and May, since that takes a long time! Then I just had to mix up the cookie dough the day before to chill in the fridge, then spend the marathon evening rolling & cutting the dough for hours for both kinds of cookies. After they were cool, I added the ribbons, plenty long to go around even the largest noggins!
 ![]()
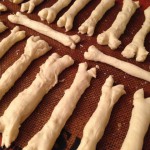
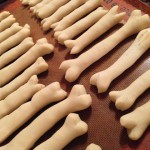 I’ve also been a little frustrated how the sourdough bone breadsticks were more chewy than crispy, so I have tried three different recipes. I need 5 bowls of bone breadsticks so set around different areas of the party, so I figured each bowl could be a different kind, encouraging people to roam for different food. Using the cool metal non-stick bone pan for my sourdough breadsticks made them pretty large and more chewy than crispy, so this year I tried making smaller bone shapes by forming by hand and snipping the ends with kitchen shears. I also tried two other non-sourdough normal yeast recipes, so now there are 258 bone breadsticks safely in the freezer ready to crisp in the oven on party day! You can keep reading below for the three recipes I used, altered for bread machine use.
Next week will be the last pre-party post…sure hope we get everything done in time! ![]()
Sourdough Bone Breadsticks
2 tsp dry yeast (1 envelope) (optional)
10 Tbsp warm water
1/2 c sourdough starter, recently fed
2 tsp sugar (less sugar than original recipe for paler bones)
4 tsp veg oil
1 tsp salt
1/4 tsp soda
3 c flour
Feed sourdough starter overnight. Use 1/2 cup fed starter along with dry yeast and warm water, then add the rest of ingredients to bread machine, and start dough-only cycle. (If your sourdough is vigorous, the extra yeast is not necessary. I didn’t use extra yeast for mine but you still need the water.) After dough has risen, remove from machine and form into breadsticks. Form in a non-stick bone-shape baking pan, or form by hand, cutting strips, rolling them smooth, then cutting the end of the strips in half to make the joint ends. Bake at 350F for 10 minutes or until done. These will be crispy crust but pale colored instead of browning, perfect for bones!
Ingredients
1 1/4 ounce package active dry yeast
1 teaspoon sugar
2 1/2 cups flour
2 tablespoons extra-virgin olive oil
1 teaspoon table salt
Directions
In a large bowl, combine the yeast, sugar and 1 cup lukewarm water (105 degrees to 115 degrees ). Let stand for 5 minutes until bubbly. Stir 1 1/2 cups flour, 2 tablespoons olive oil and the table salt into the yeast mixture. Stir together with a wooden spoon or beat with an electric mixer until the dough is shiny and elastic, 3 to 5 minutes. Add the remaining 1 cup flour and mix until incorporated. Turn the dough out onto a lightly floured work surface, cover with an inverted bowl and let stand for 15 minutes. On the lightly floured work surface, knead the dough until smooth and springy, 5 to 10 minutes. Place the dough in a large bowl, cover with plastic wrap and let rise until puffy, about 45 minutes.
If using a bread machine, combine the yeast, sugar and 1 cup lukewarm water (105 degrees to 115 degrees ) in the bread machine. Let stand for 5 minutes until bubbly. Then add 2 Tbsp olive oil and the table salt into the yeast mixture, then add 2 1/2 cups flour. Set for the dough only cycle, and let rise about an hour after the cycle is complete.
Preheat the oven to 350 degrees. Drizzle the remaining 4 tablespoons olive oil over 2 baking sheets if desired, or use parchment paper or silicone mats. Divide the dough into sections, then roll and stretch small finger size bones until the baking sheet is full. After the pan is full, use kitchen shears to snip the ends of each bone and spread out the cut ends to make a bone shape. These really puff up so leave enough clearance between them. Bake until golden and crisp, about 30 minutes. Transfer the baking sheets to a rack and let the breadsticks cool completely. To freeze for later use, do not drizzle with olive oil and bake just long enough to set the shape but still pale and soft inside, then freeze when cooled. When ready to serve, bake until golden and crisp, about 30 minute from frozen, shorter time if they are thawed to room temperature.
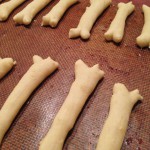 Thin ‘n’ Crunchy Italian Breadsticks
Dough
2 teaspoons instant yeast (one 1/4oz package active dry yeast)
2 teaspoons sugar
1 1/4 teaspoons salt
1 tablespoon Pizza Dough Flavor (optional, but tasty)
1 tablespoon King Arthur Easy-Roll Dough Improver OR Baker’s Special Dry Milk OR nonfat dry milk (optional)
3 cups (11 ounces) King Arthur Italian-Style Flour (I used TJ’s AP Flour)
3/4 cup (6 ounces) lukewarm water
2 tablespoons (7/8 ounce) olive oil
Mix and knead the dough ingredients — by hand, mixer, or bread machine set on the dough cycle — to make a soft, supple dough. Divide the dough in half, cover with lightly greased plastic wrap, and let it rest and relax for 15 minutes (or for up to an hour or so; work it into your schedule as you see fit).
Working with one half of the dough at a time, pat or roll it into a 9″ x 13″ rectangle. Brush the dough lightly with the egg white and water, and sprinkle it with the seeds. Roll the dough lightly with a rolling pin to press the seeds in.
Use a pizza wheel or sharp knife to cut the dough (the short way) into strips about 3/8″ wide. Twist the ends of each strip in opposite directions (as though you were wringing out a washcloth) to make a “twist,” and place them on lightly greased or parchment-lined baking sheets. Cover the breadsticks and let them rest and rise for 30 to 60 minutes, till they’ve puffed noticeably. Towards the end of the rising time, preheat the oven to 425°F.
Bake the breadsticks for 12 to 14 minutes, or until they’re golden brown. Remove them from the oven, and cool on a rack.
Yield: about 3 dozen breadsticks.

 Subscribe RSS
I love how you are always thinking W A Y ahead when it comes to props & design ideas & techniques. You are so organized when it comes to things like that. Maybe using picture anchor screws might help with holding your ramparts together w/o damage & then disguising the “holes” as battle wounds for the walls for some character. On another subject, discovered that there are now blue (yes blue) pumpkins w/ orange insides for you to ponder over AND there is a flower/orchid that blooms in the shape of a monkey’s face! There are others out there, but @ the moment I’m too brain dead to remember them. Hope you had a blast @ Disney today, can’t wait to see video & pics when you get them ready. I so wish I were that close to one.