 Another exhausting weekend of party prep with the Scream Team, plus all week before that on my own every evening…whew! I now have 87 Brittle Bone Breadsticks underbaked in the freezer, ready for finish baking the day of the party, and my costume is now ALL DONE…hooray! Inside decorating is looking great, even though decking the halls still seems like Christmas even with black pine garland and orange lights. 😉 All the spooky wall art is up, but the black LED flicker candles still need to be set out. My dead Christmas tree from 2 years ago was still hanging on to its needles, but I finally got them off enough to bring it inside as a skeleton of a tree. Last year’s tree is clinging to its needles so I will use it outside as another tree to decorate. Scary Jerry put the lights on the inside tree and started hanging ornaments yesterday, but there are plenty more I’ve collected over the past several years on Christmas clearance and Disney Store online deals. Jerry has taken “homework” of present wrapping with him for this week to use all the fun ribbons, wrapping paper, and tablecloths as wrapping paper over empty boxes of various sizes, so under the tree will
  look festive too. I hope there is still time to make the spiderweb snowflakes I designed, but that might get cut for time in favor of larger & more important projects…crossing my fingers!
When I was at Home Depot yet again for more project supplies and 2 for 1 mums for my potted urns, I found a new favorite spooky plant: Lion’s Tail! These blooms are sooo cool cut for Halloween displays, and it’s a drought-tolerant plant that will hopefully do well on drip-irrigation in my side yard and get larger. Here’s hoping!
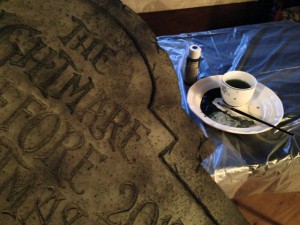 All 8 new gravestones are nicely aged and fully complete, including photos for new Tasty Tombstone cookies and a new quiz. I did the garden hose & spray paint aging one evening, then hand painted accent details over two evenings while watching the first 2013 Halloween Wars and the first episode of American Horror Story: Coven. 😉 I love how the aging technique makes the foam look just like real stone! In this photo you can see how the aging technique alone doesn’t bring out the carving detail quite enough, which is why I hand paint where necessary with watered down black paint. You can always go over again to add darker coloring, but if you start with too dark, it’s too cartoony and you might as well have just written the lettering with a Sharpie pen instead of carving. You can watch this process in action in the Tombstone Trilogy on the first DVD “Eerie Elegance: 13 Fabulous Frights” or watch the Eerie Elegance episodes available online.
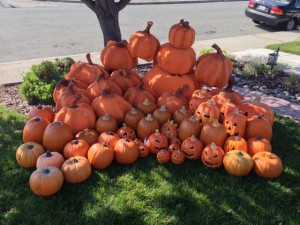 All the hand painting on 13 pumpkins is almost done! There are 2 here in the pumpkin pile that have not yet been handpainted…can you spot them? I told the Scream Team that it looks like a lot of pumpkins all assembled together, but I was afraid when I spread them out around the yard they wouldn’t look like enough…but I was told they look like even more by Sunday evening when most were in final position, so that’s excellent. 🙂 Now to buy the fresh pumpkins to add to this pile!
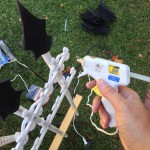 Saturday after dinner after a long building workday, Ghoulish Glen and I cut and glued 152 foam spikes for the 76 fence posts, while watching the pilot of Game of Thrones and the Dark Shadows movie he hadn’t seen. 😉 This technique is from Stolloween which I saw from Jerry’s blog last season. Brilliant idea to make menacing looking spikes that are completely safe, just like a rubber knife! The spikes had to be
 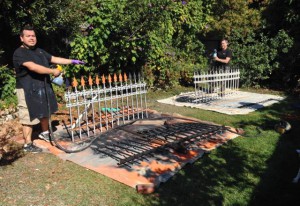 glued together first so they could slip over the top of the post, then hot-glued in final position. Some of the seams popped open during painting so we need to touch up, but they look fantastic!
Both guys started painting on Sunday while I finished gluing the seams on the rest of the spikes, then I kept gluing the spikes on the posts while they were painting the fence panels that were already glued. I thought I had more of my oops paint than only 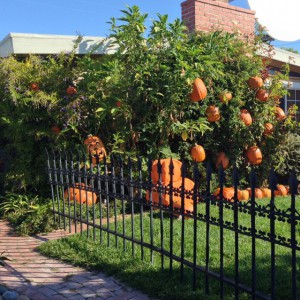 half a gallon, so we ran out of paint by 4pm…ack! I ran to the store and bought a new whole gallon of flat black, so that was plenty to finish, but then our sunshine left before the last coats went on, so we decided they could dry just as well in final position, then I could touch up with a can of black spray paint where necessary. We had gotten the first two panels up before I ran to buy more paint, and when I drove back and saw this view of the bright orange pumpkins nestled among the lush green foliage peeking through the elegantly spooky black fencing, I beamed from ear to ear! 😀
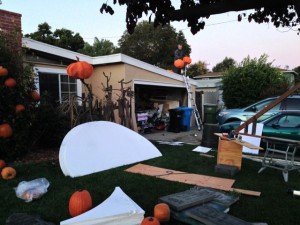 Outside building is almost done! Over 2 days it went from gigantic mess spread out all over the front yard with painting tarps all over my backyard to almost party-ready! I will let you guess how this will all work together since I’m still saving several surprises. 😉 We used enough of my branch collection since the spring that the rest are now in the yard waste can or cut up for firepit use. The gravestones won’t be placed until next weekend when I have all the fresh pumpkins going into position with them.
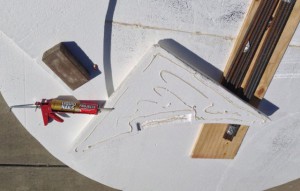 Yes, that is a giant moon you spotted! A bit difficult to hide, so I’ll show you the funny story, but still won’t tell you everything. 😉 I have wanted a moon as part of this decor for several years, but I know that foam catches the breeze much too easily, and a large sheet of foam with a seam would be even trickier. Between my three ideas and Ghoulish Glen brainstorming at Home Depot Saturday morning, by Saturday evening we had a plan we thought had the best chance of working, including the wood frame built and ready to paint, but I needed some really good adhesive for the foam. I bought the adhesive Sunday morning and got everything glued together in my driveway before the rest of the Scream Team arrived. This is two 4x8ft sheets of insulation foam 1.5″ thick,
 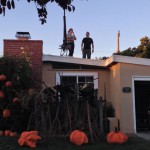 cut into half circles, the seam glued from the back down the length, a scrap of plywood perpendicular to the seam, then the corner scraps of the same foam sheets glued around the edges to help reinforce the foam from snapping off in any wind. I even notched the foam to fit snugly around the plywood edges and glued those down with weights to give it the best chance, then Glen went over everything later from all angles with the pin nailer in hopes of acting like hooks in the foam.
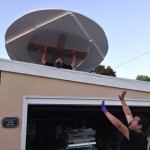 We had painted the angled wood frame on Sunday afternoon, and I wanted as long as possible for the adhesive to set before we attempted moving the moon, but I didn’t want to run out of daylight, so we started around 6pm to get it up to the roof. We used Glen’s Workmate portable workbench as a base, firmly anchored the angled wood frame in the vise of the workbench, then we passed the moon up to Glen on his
 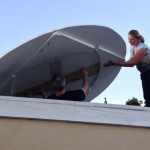 back on the roof…haha! He held that position until I got up to help him, and then we figured out quickly that we would need Jerry up there so we could each hold a side of the moon while Glen could screw the bracket onto the top of the frame. Even though Jerry
  was worried, he thankfully screwed up his courage and helped us…thank you SOOO much! We absolutely could not have hung the moon without Jerry’s help! I did notice the ladder angle was pretty steep, so I repositioned it so it was more like stairs, and we got Jerry down safe & sound.
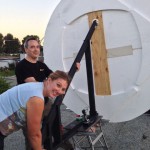 After we got the moon in position, we were still worried that if we did get a gust of wind and the foam did not snap off, it might act as a sail and send the whole structure off the roof into my
 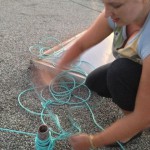 yard…so in addition to using Glen’s exercise dumbbell he had brought before for other testing, I got my strongest rope (yes it happens to be aqua!) and we lashed through the corner of the wood frame around both drain vent pipes on my roof. The foam might still snap off if we get a strong wind, but so far it seems pretty darn stable, so it just might work!
There is still so much more to do, especially the secret projects I can’t reveal. 😉 Jack still needs clothes, more front yard props still need finishing but are at least in process. The patios have been messy work areas still, thank goodness I can spread out there, but now I think we are done enough with major building and painting that I can clean those up this week, arrange furniture, then decorate there. Jack’s laboratory might be a bit tricky so I want some time to see what works best. I will leave you with my front door wreath made from 95% clearance black pine wreath & garland, plastic battery 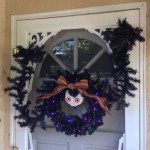 eyes I’ve had for probably over a decade, purple battery lights from Ikea and fun wire ribbon from Hobby Lobby. It’s harder to tell in the photo, but the hands at the top of the door are reaching out, but anchored to the door at the wrists so it’s safe and won’t get tangled in anyone’s costume as they open the door all night. All it needs now is some teeth, and I just splurged on some pumpkin teeth from Spirit that should look great!
That’s all from me until next time, but there’s probably only time for one more party prep progress update before my party! Hope your Halloween season is fun so far!

 Subscribe RSS