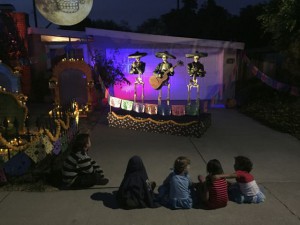
One of our major projects for Halloween 2015 is the Mariachis de Muerte, our skeleton mariachi band! We had already hacked one 3-axis skull kit to make Jack Skellington’s head for Halloween 2013, so 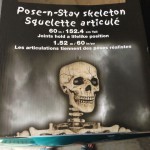 we felt pretty confident we could make the band talk and sing, but we also wanted them to play their instruments too.
The “poseable” skeletons that Costco has been selling the past few years won’t move in all the directions we need 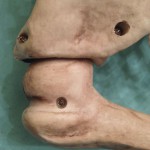 to play our musical instruments, so I’ve been working on modifying them all summer. The shoulders only move forwards and back, not a true rotation to get any angle to the arm, and the wrists only wave back and forth, no rotation either. Luckily I had one more expensive skeleton in my stash who had some better-designed joints,
 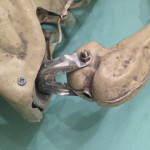 so I used those as a model to modify my three cheaper matching skeletons.
The model skeleton had what looked like thin molded pipe straps, but the only molded pipe straps I could find at 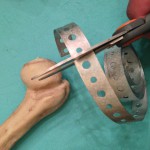 my local hardware stores were the wrong sizes, plus were so thick I didn’t think my dremel would be able to make a decent hole through it. I found galvanized pipe strap tape instead that had predrilled holes and was easier to bend, so I used that for both the shoulders and the wrists.
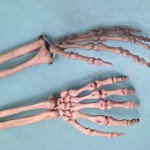 The wrists were fairly easy because the hand end and the arm ends were both solid enough to screw into. Make sure to screw the hand in first, or you can’t reach a screwdriver in the small gap after the arm ends are in place. If you need a servo to move the wrist, you might
 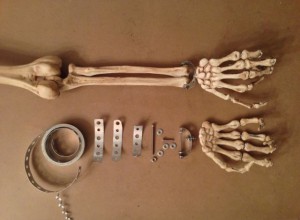 want it a little looser than if you want to pose it to stay in position all season. I used metal washers between the metal and the plastic in hopes of not having the metal tape edges scrape away the plastic.
The shoulders were trickier because there was no actual socket to anchor the strap tape. These original shoulders 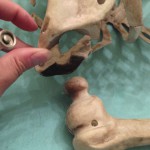 are just an extra ball attached to the shoulder ball so that the tension of the socket
 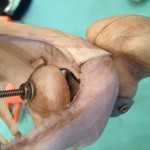 around the thin junction between balls lets it rotate on one axis. I loosened the socket screws to let the whole shoulder knob out, cut off the extra ball joint with a box cutter, then used the extra ball piece as my anchor inside for the strap tape. This is not ideal since it wiggles around loose inside the shoulder, but at least we can get the proper angles for playing trumpet, guitar & violin!
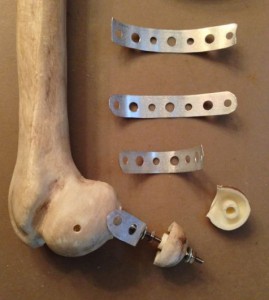
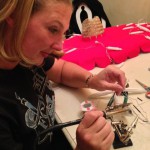
I haven’t seen any skeletons with poseable fingers, but at least these hands weren’t molded mittens like some I have seen. Since the fingers needed to be poseable to play our instruments properly, I decided to try making not 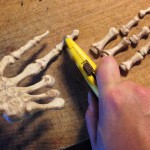 only poseable fingers for this year but articulated hands that could be controlled by servos in future years. Kids, do NOT try this at home! After all this frustration I didn’t think it was a coincidence that a couple skeleton hands were in a “certain” position!
  A box cutter and elbow grease cut the hands apart well enough, however these finger bones are so thin and the plastic melts so quickly that drilling through them cleanly is nigh
 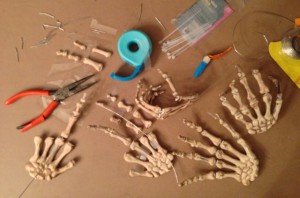 impossible. If you want controllable finger joints, don’t even mess with this plastic and just sculpt your own bones around notched tubing like I did for Jack Skellington in 2013. Aren’t you glad I learned this hand lesson the hard way so you don’t have to waste your time? :/
So, since that plan failed miserably, I wired what I could through the few successful holes in the finger bones, which unfortunately still would spin freely around the wires. In desperation I finally resorted to using my own 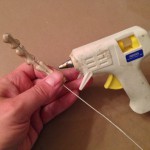 fingers as clamps to secure the cool-melt glue between the finger bones and wires so they would stay in position. Do NOT try this with anything but cool-melt glue, and if you’re not an experienced glue gun shooter or have other reasons for calloused fingertips, be very very careful since it will smart like a minor sunburn.
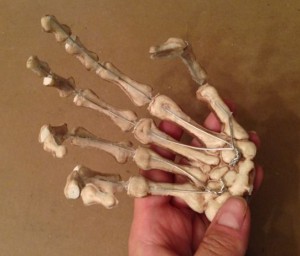 My hot glue hack is lasting okay, but it didn’t work as well as I’d hoped, since as we kept moving the skeletons to engineer how they need to move for the animatronics, finger bones kept falling off. Thankfully I found most of the pieces, so after getting the hands into final position, I reglued them in place, and now they will probably stay the season. I think an off-season project will be to sculpt my own finger bones around tubing for all these skeletons so I can change from wire to string inside depending on the effects we need for the next project. Maybe I’ll be able to make molds and sell skeleton hand kits next year? Hmmm…
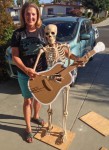 We needed the skeletons to stand on their own, and I was planning ahead for future years where the skeletons most likely will not be standing together, so we mounted each on its own scrap plywood platform, using the Spider Hill PVC feet we had
 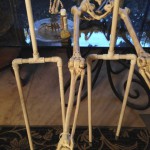 purchased for Jack Skellington for Halloween 2013 and the Spirit Materializer pipe for Halloween 2014. We used smaller heavy-duty PVC so it would hide behind the bones better, but we needed to find the 1″ to 1/2″ reducer bushings that fit inside the 1″ feet tightly, since you can’t use an external joint reducer.
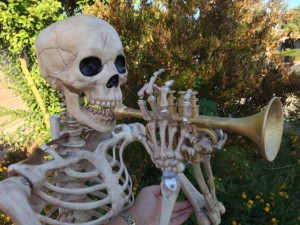 Now that they could stand on their own, how could we engineer their arms to play their instruments? We tackled the trumpet first, since that seemed to be a simple fixed arm position with a lever to rotate the shoulders. Little did we know! I didn’t want any permanent modifications to the skeletons so we could use them again for other scenes, so I only used wire and hot glue that I could peel off later. I spent an entire afternoon wiring the elbows and fingers around the trumpet so that it could rotate up into proper playing position, but I finally got it to look good! Glen spent another few days engineering a PVC assembly where we could pull down in back to rotate the shoulders up, but it stayed as mechanical only for a couple weeks.
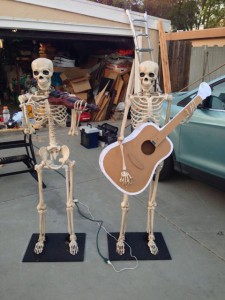 The violin was next since we expected it would be the trickiest, and it was! I wired the right elbow at a decent angle and wired and glued the wrist in place with the hand around the bow, so only the shoulder needed to move. I worked on wiring and gluing the left shoulder in a decent violin position while Glen worked on engineering how to get the shoulder to move at the correct angle. After a lot of trial and error we got him playing well enough using the servo tester…our first moving instrument! I do apologize in advance to all my string musician friends for the improper posture, but he’s only a skeleton without tendons or muscles!
Next was the guitar, another fixed arm with a moving arm. I commented that half the shoulder joints I painstakingly modified were being glued and wired into fixed positions…heh! Ah well, at least they’ll still work  better for future years. When I built the guitar in the spring, I didn’t decorate it because I expected we would have to cut into the structure to add the servo movement, so I expected more papier-mâché repair work as well before any painting could happen. Luckily we learned from the violin shoulder and decided we could mount the servo on the arm and drive the elbow directly, not cutting into the guitar at all! I figured out how to wire it
  through the main hole to the spine, leaving the wire in place to remove the guitar for finishing. I had fun with woodgrain painting techniques, decorating the tuning head as a skull, and even adding tiny skull and bone fret markers. The neighborhood audience we acquired while testing outside didn’t believe it wasn’t a real guitar!
 We had the violin and guitar working great on servos, but the trumpet took the largest hobby servo plus a lot more testing power from larger batteries to lift properly. Since this setup rotated the shoulders every movement, we adjusted everything we could to make sure nothing was rubbing or binding, including shaving away plastic from the shoulder socket so the metal hinge would stop scraping. Sounds like the shoulder surgery my parents have both had.
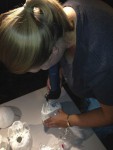 The skull kits came without teeth installed, no hole for movement clearance, and very detailed instructions. Even with our combined arsenal of tools, we still had trouble cutting the large hole! The plastic just melts when drilled or sawed, so by the time you have continued cutting around the circle, it has melted back together in too many spots. It took my new multi-cutter tool with the smallest blade Glen had, then I made all the cuts so Glen wouldn’t be blamed for ruining anything.
  Thankfully he agreed to be my vise at least! He drilled
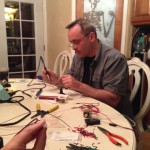
 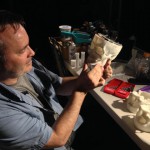 the hole for the jaw rod, assembled and installed all the electronics, and even glued in the teeth for each skull, then they were finally ready to install on the skeletons. Now Glen thinks he has done enough skull engineering that he might be able to install the electronics in any plastic skull with a moving jaw, perhaps even the much lighter weight $5 ones from Target!
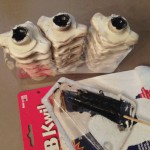 Anchoring the animatronic skulls to the skeletons was another challenge, since the skeleton neck pieces conveniently twisted off and on again, and the original skulls popped off a neck knob, but the neck piece itself was hollow, not enough to anchor the threaded shaft for the skull to stay firm while moving on its servos. I had a can of spray insulation foam left, so I cut off the knobs and filled the neck pieces to be solid, but the foam wasn’t tight enough to hold the
 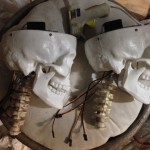 threaded rod either. I tried filling with JB Weld down the center hole, which is solid for drilling, but it was too difficult to get enough JB Weld inside, so that still allowed the threaded rod to twist slightly…so it was back to my trusty friend hot glue for a big blob around the rod, neck, and nut to fix it in place. Sure hope it holds for all the shows but at least it’s easy to add more hot glue.
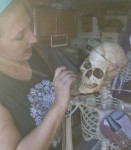 The skull kits came with bright white skulls, so they needed to be painted to match the skeleton patina. I should have painted the skulls before mounting them to the skeletons, since that made for very awkward painting technique. Glen thought I looked like a mother wiping her child’s chin. Haha! We
 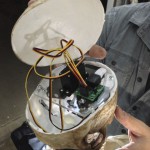 did get the mini controller board hidden inside the skulls so only the CAT-5 cable ran down the back to the controller board, but we also should have planned to hide the control wires through the PVC before it was glued together, but Glen wasn’t convinced that was a good idea until afterwards. The spines hide the wires well enough until the hips, but I
 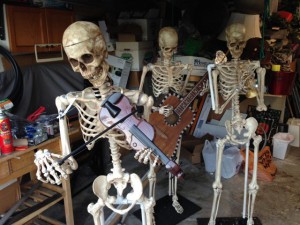 drilled through the PVC feet and plywood bases then also through the top of the hip elbow joint so the wires can slide down one leg into the stage platform that will hide the speakers and controller board. Now all three skeletons are ready for their jackets, hats and programming!
Those of you who might want to try these modifications themselves can view all the step-by-step photos in the gallery below. Stay tuned for the rest of Halloween 2015!
Continue reading →
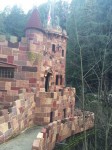 Halloween 2016 is the return of Castle Brittahytta again, and I never turn down a chance at seeing a castle, especially only an hour from my house! Howden’s Castle originally built in 1927 was relisted this week for $1.3 million, after a $1.6 million price last year didn’t sell. I’d heard of it and
  seen online photos as a weekly vacation rental but never seen it live, so since they were having an open house on Saturday, Ghoulish Glen & I took our chance to see it up close. There are some fabulous photos on the MLS listing including 3D walkthroughs and drone footage, but I took photos of the reality,
 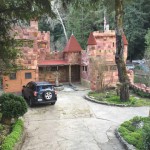 including details odd and interesting, understanding why it hasn’t yet sold. Even if I could afford this price range, I would probably rather build my own vision from scratch with more trees and less close neighbors than retrofit this one.
 ![]()











































 Subscribe RSS