 Before I ever saw the movie Frozen, when I just saw the song Let It Go, I immediately thought of my fiber-optic fabric for Elsa’s sparkling snowflake cape! Add some snowflake appliqués and iridescent glitter fabric paint to translucent blue iridescent crinkle-texture shimmer fabric hanging over fiber-optic fabric, and it would be perfect!
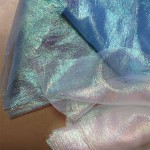 I had used the translucent blue iridescent crinkle-texture shimmer fabric several times before, for fairy wings and crystal ball filler, so I knew it would be the perfect base fabric for color, ice texture, and light refraction. Sure glad I bought my fabric in January
 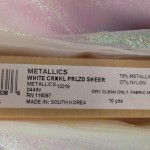 when I did, since by March all my local fabric stores were sold out of that fabric since everyone was buying it for Elsa capes…haha!
My cape could have been much longer and wider to be accurate to the movie, however I intended to wear it at Disneyland for Halloween and didn’t want it trampled and destroyed, so I compromised with a shorter train and a single width of fabric. I had already cut some of my blue iridescent to laminate to the aqua satin to make the ice shingle fabric, so the just under 4 yards that was left folded in half was a perfect 5 foot 8 inches long to hang off the 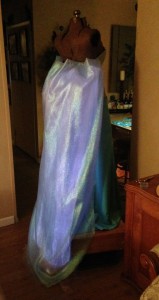 back of the dress bodice. A single layer of the translucent fabric is so sheer that I decided on a double-layer so it would give a little more blue tint and hide the edges of the fiber-optic fabric better. I left the top as a fold, but I machine-stitched around the edges so the shape would hang as a single piece. I didn’t want any inside hem doubling the sheer effect, so I topstitched where I knew I would be painting the scalloped border.
I originally thought I would use my high-density fiber optic cloak that I made for the Glowing Ghostly Guardian Halloween costume in 2012, but when I tested the high-density cloak vs. my normal-density shawl under the blue 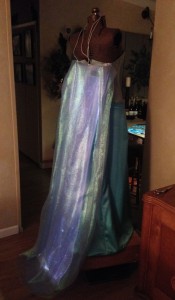 iridescent cape fabric, the shawl was a better sparkling snowflake effect because the points of light are spread farther apart. The cloak is awesome to make an entire person glow, but it was too much consistent light instead of individual sparkles. You probably don’t want to know how much fiber-optic fabric costs, but it sure looks fantastic! For details about working with the fiber optic fabric and the different options available, see this previous post.
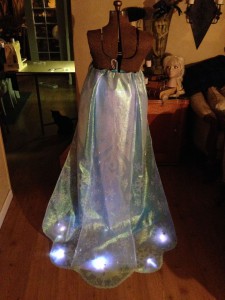
These photos were taken with the lowest lamp setting across my living room, and with the lamp on full you couldn’t see either one so there’s no point in turning on the fiber-optics until dusk or a lower-ambient light room. For how expensive the fiber-optic fabric is and with the best effect only visible in dim light when the rest of the crystalline sparkles won’t show, I wouldn’t purchase it just for this costume, but since I already had it, I might as well take advantage! The fiber optic shawl is not as wide as the snowflake cape, but the cape is more gathered at the top back and won’t spread too wide since I made it only a single width of the fabric, about 45″. Proof of concept testing was a success, so it was onward to the cape construction…
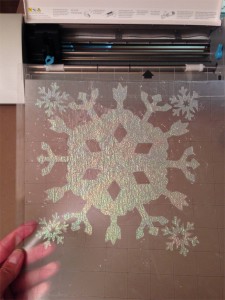 I’ve seen the Cricut cutting machine for years, but my research was that there was no way to design your own shapes to cut, so it was of limited use to me. I recently had to buy a new edible printer, and in my search I found an edible images company reselling the Silhouette brand cutting machines to cut frosting sheets, and after more research, I found that it can import any .png file…voila! The larger Silhouette Cameo that cuts 12″ wide was my birthday present from my parents & grandmother, so I’ve been experimenting. It took some trial and error, but I finally got it to cut the main cape snowflake shape I specifically designed from looking at the movie, then for the smaller snowflakes, I used some of my free online store package credits for other assorted snowflake shapes. I tested on some of the ice shingle scraps and the shimmer fabric cut fine when on the interfacing as a stable base, so I thought my plan would work. I set up the files with as many assorted size snowflakes crammed into 12″x12″ areas so I would use up all my scraps as much as possible, then I was ready to let the cutting machine do its magic.
Since the cutter width is 12″ but it loads from the front and moves the cutting mat back and forth as it cuts, you can leave longer lengths of material or paper intact as long as it’s not too heavy to pull off the sticky cutting mat. This leaves less waste since I just kept trimming the next top edge away from the previous bottom cut edge. I used the same clear double-adhesive fusible interfacing as I used to make the ice shingles for the dress bodice ironed to the back of the white iridescent translucent shimmer fabric for the three main vertical snowflake “arms” down the back of the cape, then that left enough for a 12″ wide strip a full 3 yards long, and another 8″ wide strip slightly shorter, and let those cool. 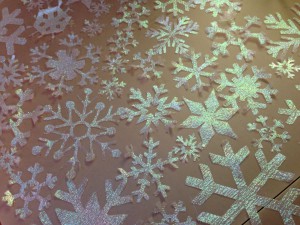 Sometimes I needed a second pass of the iron to be sure the adhesive had glued to all the fabric, but it’s hard to tell where it really stuck until after it has cooled. The iridescent fabric is a crinkly texture, so it didn’t stick well enough to the cutting mat for the interfacing side to be facing up. I did try one sheet by peeling the plastic backing off the interfacing before using the cutting machine, but the slightly tacky interfacing against the sticky cutting mat was too much to remove from the mat intact, so the first two nights I cut them with the plastic backing still attached. The larger the snowflake the easier to peel, but the smallest snowflakes were almost impossible to remove the backing from the fragile fabric without tearing the delicate shapes so they required glue to attach to anything else. However since the cutting mat had acquired so many fabric threads and was pretty chewed
  up after two evenings, I scrubbed it with water and let it dry overnight. The next evening the mat was less tacky but still usable, so I could peel the plastic backing off the interfacing before cutting and actually get enough of the snowflakes off the mat completely intact to iron onto my cape…thank goodness for custom iron-on snowflake appliqués!
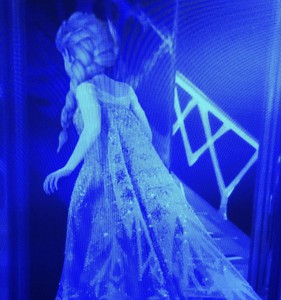
Part of the movie cape design looks like the cape was a giant snowflake in the center, so the “arms” of the flakes hang past Elsa’s waist. I designed my “arms” no wider than my cutting machine, but the angled end designs were too long 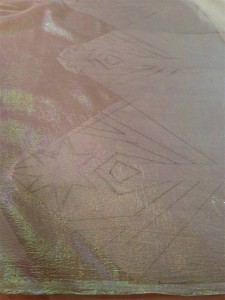 for the machine, so I cut them by hand after drawing them so they would match each other. In only a couple glimpses, you can see those have snowflake shaped holes cut out of the “arms,” so I used the cutting machine for those, saving the snowflakes for use elsewhere on the cape. Since the “arms” were too long for the cutting machine, I aimed the points where the snowflake holes should be, then carefully cut across the strip to have a clean line for the next section. The wider center “arm” got snowflake holes all the way up on both strip sections, but I thought the smaller side “arms” were fine with only the 3 snowflake holes cut closer to the bottom points, leaving the cut strip portion solid at the top. After all the sections were cut, I made sure the edges matched exactly when ironing to the cape, and no one was the wiser!
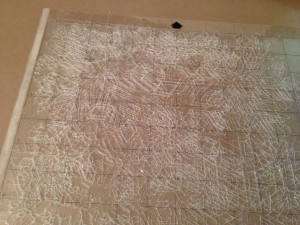 Since my maximum cutting size was only 12″x12″ I made the largest center bottom border snowflake that size, then the other large border snowflakes slightly smaller from the 8″ wide strip. The tiniest snowflakes were cut at the same time to use up the leftovers as extra accessories to go with the two girl-sized Elsa capes I was making for my friend’s daughters. 🙂
By the time I was done with evening three of cutting 124 fabric snowflakes (boy it seemed like more!), too much stickum was gone from the mat, so I had a couple chewed up snowflakes as the fabric moved while the blade was moving. I made it through my last cuts trying some spray adhesive on the mat first which helped enough to get everything cut, but now I think this mat is already toast…but it sure looks pretty!
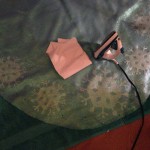 I spread out the cape on my living room floor so I could place everything while seeing the entire cape at once, using two large beach towels over my hardwood floor as a giant ironing board. I positioned the 5 main border snowflakes and ironed them using a presscloth as instructed, but any extra adhesive made the presscloth stick so when I pulled it up, it pulled up some snowflake with it. I kept going without the presscloth, carefully using my iron directly, especially the very point of the iron to anchor all the small
 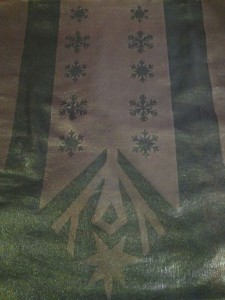 snowflake details. Since the fusible interfacing was clear but added a slight cloudy layer, just one layer of the white iridescent was plenty for the snowflakes to show up over the base blue fabric, and I grinned with glee that it looked so perfect!
Next I placed the snowflake “arms” while ironing extremely carefully to match up the seams where I had to cut them apart to fit in the cutting machine. There was no way I could have matched them so accurately while blind under a presscloth. Can you even spot the seams anymore? I can’t and I know where to look! I’m so glad that worked so well!
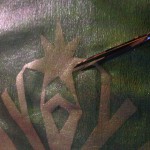 The snowflake “arm” designs from the movie had large stars at the bottom that were not attached, but to keep the relative distance and positioning accurate, I cut them with small strips leaving them attached to the rest of the “arm.” When I ironed, I carefully did not iron those sections but made sure enough of the stars were anchored in place, then I cut away the strips and ironed the rest of the edges.
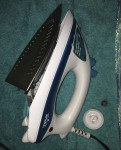 Unfortunately right as I was ironing the last “arm” star, my trusty teal iron that has seen me through over a decade of projects literally fell apart in my hand! It was only attached by the electrical wires, but I very carefully wiggled the iron hot plate into position to get the last bits attached, then there was no way I would be able to use it anymore. At least I didn’t ruin any fabric or burn myself, but I couldn’t continue working on the cape until buying a brand-new iron the next day!
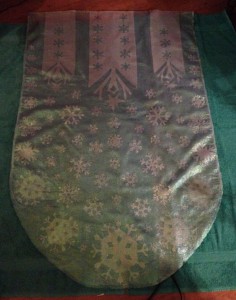 Thankfully a quick trip to Costco was all that was needed to acquire a new iron, an upgrade from what I had before, and also TEAL…hooray! The cape was still in place on the floor mostly undisturbed by the kitties (thank goodness!), so I placed all 60 more assorted snowflakes in position before I started ironing. I kept making some aesthetic adjustments until I was satisfied with the overall look, then after a temperature test on a fabric scrap with the new iron, I was back in business. The ironing in total was one of the quickest parts of the cape project. Good thing too, since that much squatting, kneeling & bending to work on the floor was all I could take in one evening. 😉
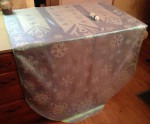 After everything was ironed in place, I couldn’t resist adding some iridescent glitter fabric paint too! I ironed on the floor but my knees, back and elbows couldn’t take it any longer, so I moved the cape to my drop leaf counter instead. Unfortunately that means the first section had to dry before I could scoot it to paint the next section so it took a little longer, but at least the kitties
 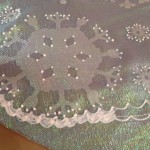 usually leave projects in that area alone. Since my counter is smooth and fabric paint and hot-glue peel off fine, I didn’t even use any paper that might possibly glue itself to the paint seeping through the fabric, but that ended up a moot point because the second layer of fabric was enough to prevent any paint from gluing to the work surface. I used dots for points of sparkle to accent
 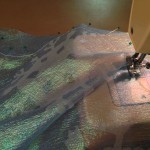 the snowflake designs, plus the edges of the adhesive doesn’t always stay glued, so the dots also help keep the appliqués attached to the cape.
I had sewn the border so the layers would stay together, so I painted the bottom scalloped border over that seam. I used the clear glitter paint first which sealed the edges over the stitching line, but after that dried, it was too clear 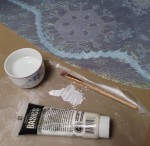 where it ideally should match the white opacity of the snowflakes. I used white acrylic paint thinned with lots of water brushed over the dried glitter border, and that came out just the right shade…and it even still sparkled through the thin layer of white paint!
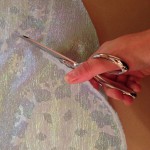 I was using the glitter paint to help seal the cut edge of the cape, so I didn’t trim the final edge until after all the paint was dry, cutting as closely as possible to the paint. Painting a raw edge is much more difficult, especially with all those scallops at the bottom, so I thought trimming afterwards was a better plan. I had also used a thick layer of the glitter paint in hopes it would weigh down the border for more elegant draping.
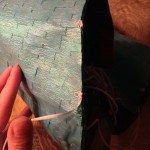 After all the decoration was complete, I needed to attach both the fiber-optic fabric and the cape to the bodice. I couldn’t use anything too large since it would be on the inside when wearing the coronation
 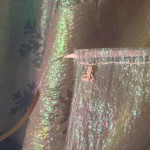 dress, so I decided that several small sturdy white metal hooks on the cape that hooked into matching eyes on the bodice would be best. Five hooks on each side spaced evenly until about 3 inches from the lacing holes was enough. Gravity and the weight of the capes should keep them hooked while wearing.
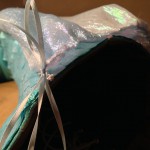 Since I needed the top of the cape to gather but I didn’t want a million hooks, I used the fold at the top of the cape to sew a thin casing and use thin pale blue ribbon through the casing to gather the cape in place after it was hooked to the bodice. I sewed a matching ribbon tie to each of the front eyes on the bodice. Once the gathers were to my liking, I could tie the ribbons together to hold the gathers in place, and tuck the bows inside the bodice.
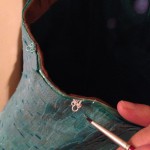 After I knew all the hooks, eyes and gathers would work together, I decided to paint the eyes and white thread just in case I ever decided to wear the bodice without the cape. I used the same aqua shimmer fabric paint as I used to seal the top edge of the bodice. Yes, I pay attention to details. 😉
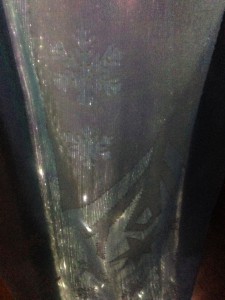 I didn’t want to permanently alter my fiber-optic shawl, so I just safety-pinned it to the inside of the cape at the top and bottom, and that could also be a separate decision when to wear the lights.
 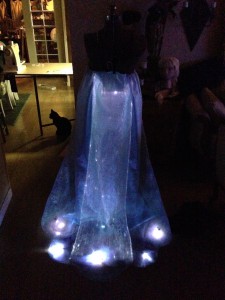 The battery packs for the fiber-optics are at the top and bottom hems, so the top one either needs to be turned on before wearing, or someone needs to turn it on for me, since I can’t reach the middle of my back myself. I also tried some single LED balloon lights in the center of the 5 bottom border snowflakes to disguise that the fiber optic fabric stopped before the scalloped edge of the cape. They need to be turned on individually so I can decide on the spot how much light I want to use, but I least I can reach all of them by myself.
 One problem with this costume is that this entire outfit needs assistance to put on! I can’t lace the bodice tightly enough by myself, and it’s much easier to attach the cape after the bodice is already laced tightly. In a pinch I could attach the cape with their hooks, gently flip them over my shoulder, and reach around to pull the lacing the best I can, but I sure hope I’ll be able to find help to dress me each time I wear it. 😉
Now I’m all ready for Saturday’s singalong Frozen showing up in San Francisco! Stay tuned for the final full magical ice ensemble reveal after the weekend!

 Subscribe RSS


It’s official! If you ever quit your day job, Disney or some stupendous theatre group would be absolutely C-R-A-Z-Y not to take you on! Eat your heart out Tom Ford, Stella McCartney, Valentino…….Absolutely AMAZING!!!!
I am making the Elsa dress for my daughter and I have been studying lots of different methods that people have used to make this cape. I didn’t love the painted option so I was so excited to see how you did it. Your cape came out so beautiful so I decided to emulate your methods. Do you have any tips for machine settings? Blade depth and the like. I started a test run or two and have not had any luck so far. Back to the drawing board but any tips you have would be appreciated!
Thanks, Lisa
Thank you very much! I’m glad you like my snowflake cape!
I had $10 free at the Silhouette store that came with my machine package, so I found several snowflake templates I liked for about $4. I arranged them in different sizes to fit in the maximum mat cutting around so I had less waste. I did design my own snowflake to be the large lacy one around the bottom edge of the cape, but the rest of the stock snowflakes were enough variety for me.
The sheer shimmer fabric is too thin and too crinkly texture to try to cut on its own. I ironed my clear double-stick fusible interfacing to my sheer white fabric before cutting. Even both layers fused together wasn’t very thick so I only had the blade depth at 1 and I could still see cut marks in my mat. My biggest problems were how sticky the mat was, and peeling the interfacing backing off first. If I peeled the interfacing backing off before cutting, then stuck that side on a freshly sticky mat, I couldn’t get them off after cutting. I cut several sheets with the backings on, and after cutting I could only get some of the backings off. The ones that still had the plastic on the back, I didn’t use the iron, just glitter paint around all the edges and they worked fine. After cutting several sheets, the mat was less sticky, but there were a lot of fabric threads stuck to it, which were getting tangled with the blade. By then I had a lot of lint up inside the blade too, so I followed the instructions to blow those out. I stopped for the night and washed the mat with a nylon scrubber to get all the threads off, then let it dry. The next night it was much less sticky, enough that the backless interfacing stuck perfectly! That lasted the rest of my snowflakes ok, but when I was trying to cut the rest of my scraps into snowflakes, the stickiness was so far gone that the blade scooted the fabric around and chewed up snowflakes. I tried some spray adhesive but I guess I couldn’t get complete enough coverage, since when it tried to cut a spot that wasn’t stuck down enough, I got a chewed snowflake scooting around.
The other issue I had was that the interfacing had a hard time sticking completely to the sheer fabric because of the crinkly texture, so there were sometimes “air bubbles” in the middle somewhere, and that would chew up a snowflake or two when the fabric pulled up into the blade. As long as the fabric around it stayed stuck to the mat, it was just the top sheer layer that was chewed, but sometimes it was bad enough to scoot the whole mat off track, so I had to stop that cutting job.
This was my very first cutting machine project, so I expected some trial and error, and I wasn’t disappointed! 😛 But after all my evenings of cutting, I had 65 good iron-on snowflakes and the large “arms” with snowflake holes for my cape, plus enough of the plastic-backed snowflakes worked for two more girl-size capes who attended my Frozen sing along party, and then there were still plenty I cut from the leftover laminated ice bodice fabric for hair snowflakes for me, a headband and hair clips for the girls, and still probably 20 or so for Christmas decorations.
Another thing…after one wearing of about 7 hours, I had some snowflakes starting to separate from the cape. When I finished the girls’ capes and had to use the crystal glitter paint around all the edges since I couldn’t iron those, I thought it looked better anyway, plus would be more secure, so I went back and added crystal glitter paint around the edges of everything on my cape too. That held up great for the Frozen sing along party, and hopefully will do fine at Disneyland for Halloween. 🙂
Good luck! I would love to see how your cape & dress turn out!
Thanks so much for the tips! I really appreciate it. I initially picked out a sparkly mesh fabric with lots of open space for the snowflakes but it definitely did not work with the cutting machine and the interfacing. I am still playing with it but I’ll let you know how it all turns out.
I should have mentioned that your whole dress was amazing. Not just the cape. :-). I have seen a lot of ways to do the bodice as well and my daughter and I definitely thought your bodice was perfect! I appreciate your kind and generous guidance. 🙂
I’m so relieved to find your page. I volunteered to team teach 18 women how to sew the Elsa dress and after seeing the sample cape she brought (ugly thick snowflakes loosely glued on) to our planning meeting, I volunteered to cut snowflakes for all the capes. I’ve never used my silhouette and started to get really scared that this wouldn’t work because I was not finding anyone cutting thin fabric with a silhouette and thought I’d be cutting 180 by hand… in 3 days. Whew! now I know with some practice and a few mistakes, it can be done. Thank you for such clear instructions. Your cape and dress are stunning.
Glad you like my dress & cape and that my instructions are helpful! The interfacing as stabilizer and having the mat be less sticky than brand-new were key for me. Just make sure you have enough extra for a few chewed up snowflakes while you’re figuring out what works best. I hope your project goes well!
Hello,
First of all I want to say that I am thoroughly impressed and grateful that you have made these tutorials! I have been trying my best to do everything completely on my own without any help, but I’ve hit a wall on a few things and your tutorials are perfect for what I needed!
Especially the ice shingles… I spent hours cutting apart blue iridescent circle shaped large sequins to make into rectangles. They worked for what I wanted, but they wouldn’t stick to the fabric no matter what glue I used! Your idea is so much better and I’m so glad I came across this.
The crown is also a wonderful idea! I originally was going to make mine out of thermoplastic or foam, but my main issue was that I wasn’t sure how it would stay on my head! The yogurt container is a BRILLIANT idea that I never would’ve thought of!
The cape still troubles me though… I don’t have any kind of machine like that and I don’t know anyone who does. I’m not a fan of how the painted on snowflakes look, but I don’t have much money left to have someone else print the flakes. I intended on doing a little bit larger cape than yours, but not quite as large as hers really should be. I need help 🙁 I can’t figure out anything and no one online seems to be willing to share information on how they’ve done it.
Lastly, I want to thank you for posting that wig! The ones I have been looking at were MINIMUM $40… And I was looking at lace front and I just wasn’t sure if it would turn out the way I wanted. Unfortunately the US site for that seller was completely out of stock of that item (and also the aqua shirt you put a link to, but that’s okay because I made my own). I’m not surprised they’re both sold out since your tutorial is so amazing! BUT, luckily for me… the seller has a UK amazon site as well. It was free shipping, and it was only $17 on the UK site! So thank you so much! The wig was my biggest expense and therefore my biggest stress, so thank you thank you thank you for posting it! And the snowflakes are just adorable and perfect!
Over all, I adore your work and I appreciate that you’ve posted it!
Thank you!
I’m not sure how it would work with glitter paint, but you could try making a few handcut stencils of snowflakes out of cardstock or plastic, then use a foam stencil brush so you don’t get the puffy paint line effect from the glitter paint. You could also always cut out all your snowflakes by hand but it will take a LONG time! Do it while watching some TV?
Thank you for your comments and glad you appreciate my tutorials! Yeah, since it’s almost a year of Frozen mania since I bought my accessories, some places have sold out or changed. Very glad you found the same wig since it is perfect, very comfortable to wear, and it’s a very good quality wig! I almost want to buy a second wig so I can keep them styled differently. 😉
I would love to see photos of your finished outfit when you’re finished! 🙂