 We were discussing after dinner that Gail’s birthday was coming around again, so Ruth handed me the rest of the jar of chocolate pearls we had just enjoyed at Alexander’s Patisserie to use as decoration, and Glen said, “You should make a cake with as many kinds of
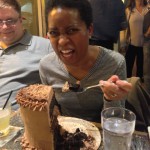
 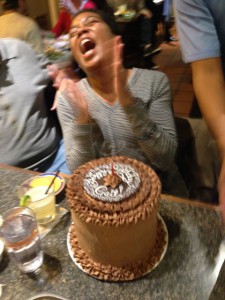 chocolate as possible…” so I accepted the challenge! Death by Chocolate would be too obvious plus a bit morbid for a birthday, so I asked everyone who enjoyed it for help naming it. Achocolypse Now was pretty funny, but Chock Full o’ Chocolate seemed to be the winner of the evening…and the birthday girl’s reaction to this cake was priceless! 😀
First was recipe planning to see how many kinds of chocolate I could fit into a single cake! I knew Gail had loved the chocolate mousse frosting I found last year, so I planned 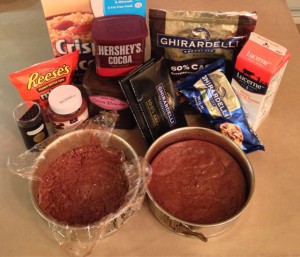 that for the outside, then I thought I could find a couple different cake recipes and filling recipes, plus we had just enjoyed an Alexander’s chocolate tart with a crispy rice crust, so why not use that idea too? I only have two 8″ springform pans, which take time to bake, cool, clean & dry before using again, so I wanted to bake on two evenings, then assemble the night before the Friday dinner celebration. I walked to buy the rest of the groceries on Tuesday night, then got started baking!
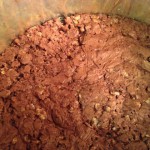 All the complete recipes are at the very bottom for reference, so I’ll just hit the highlights. Since the crispy rice treats wouldn’t be used for sculpture, I used marshmallow creme since it’s easier to melt, and it took about a cup and a half of 60% dark chocolate chips before it seemed chocolatey enough to me. I lined my springform pan with plastic wrap then gave it a quick hit of non-stick spray to make sure the sticky cereal treats would come out. I pressed it as firmly as possible into all the edges, then let it cool in the pan to be sure it set in the shape that would match the rest of the layers.
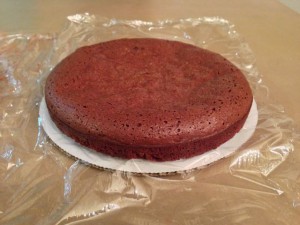 The flourless chocolate cake was a single-layer recipe, so that made sense to bake the same evening as the crust. It’s amazing that there is no flour at all but it is so cake-like! All you gluten-free people should enjoy this one! Sorry it’s not vegan since the eggs make it fluff even if you replaced the delicious butter. 😉 I stayed with normal cocoa powder with 60% dark chocolate chips for this cake to contrast with the extra dark cocoa powder for the blackout cake layers. Since this cooled reasonably flat with only a short poofy ring that was even all around, I didn’t trim it flat and just compensated with filling when I assembled the full cake. Since I needed the pan for the next cake but I knew it would be 2 days until I assembled everything together, after this layer was cooled, I wrapped it in plastic and set on the cardboard cake round to move it safely out of the way.
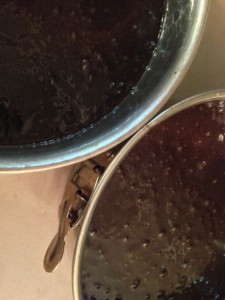 The next evening I made the blackout cake recipe using special dark cocoa powder, not quite what the recipe called for, but it seemed to turn out just as dark and definitely tasty! I have never seen a blacker cake batter without using food coloring! This might be useful for future Halloween recipes… 😉 These layers took forever to bake, so ignore the recipe time and just keep checking with a toothpick in the center until it comes out clean. The top will crust much earlier and fool you, but it will be completely gooey inside! After these cooled they had domed so high that I trimmed them…which gave me my first taste of the baked cake…sooo good! I had a couple tasty fingerfuls of the batter while cleaning the bowl, but the finished cake was even better,
 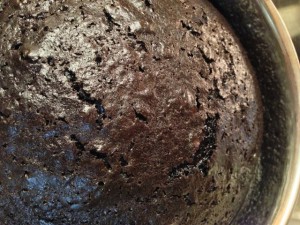 with a very moist fudgy texture, more like between a brownie and a cake. This might be my new favorite chocolate cake recipe. 😉
After the blackout layers were cool enough to remove from the pans they were still warm, so I set them on foil on cooling racks, then wrapped them completely in the foil to stay moist for assembly the next evening. I should have mixed up all the ganache to chill before I gave up for the night since it was supposed to chill 6 hours before whipping…oops! I realized that on Thursday in time to mix all three ganaches by 6pm, and 5 hours of chilling was thankfully enough for them to whip properly. I spent the rest of that evening starting the next edible art project for Sunday’s Oscar party, which is another story entirely… 😉
I knew there were different ratios of chocolate to cream for different end purposes, but I didn’t know ganache could be whipped into a frosting until I was searching chocolate recipes online. I 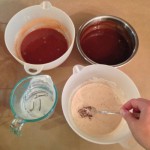 found this recipe with basic instructions for different kinds of chocolate including how to whip them into frostings and fillings, plus a hazelnut ganache recipe using the popular spreadable confection. Analyzing the recipes it looked like I should be able to whip the hazelnut ganache the same way if I paid attention to the ratios,
 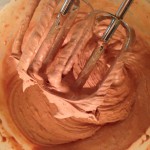 using 1 part chocolate to 2 parts cream. I also used the shelf-stable boxed whipping cream from Trader Joe’s since it was less time to heat the cream enough to melt the chocolate. I tried the hazelnut ganache first over a double-boiler so I could melt the chocolate spread more easily with the cream, but for the
 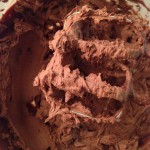 other two I microwaved the cream in a measuring cup, then poured over the chocolate prepared in plastic mixing bowls with matching lids. All three recipes I thought weren’t chocolatey enough flavorwise, so I risked doubling the chocolate back to 1:1 ratio, covered them to chill in the fridge, then 5 hours later
 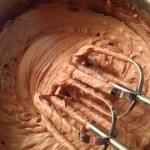 I pulled them out in order to whip them for immediate cake assembly. The milk chocolate and the hazelnut whipped perfectly into soft creamy fillings immediately from the fridge, but the dark chocolate was so stiff that it needed 20 seconds in the microwave before it whipped to a lovely fudgy filling. I had planned the fillings to contrast visually with the cake layers, so the milk chocolate went on the bottom, but now knowing the consistencies, I would put the stiffest filling on the bottom to support all the weight of the cake layers above it!
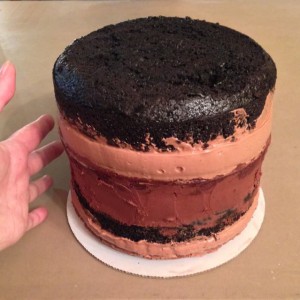 The whipped ganache recipe had warned to use immediately or it would set firm again, so I whipped each one right as I was assembling the cake. From the bottom up, here is the chocolate crispy rice layer, milk chocolate whipped ganache, blackout chocolate cake layer, dark chocolate whipped ganache, flourless chocolate cake, hazelnut whipped ganache, and the other blackout chocolate layer…and when everything was assembled, I couldn’t believe how tall it was! I’d made 3-layer cakes before and they were never this tall. If I could get it to dinner safely, it would sure be impressive!
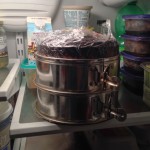 The poor milk chocolate ganache layer was already squishing out from all the weight, so I quickly wrapped the entire cake in plastic wrap, then put both my springform rounds around it to stay vertical while it chilled overnight in the fridge. The whipped ganache recipe had warned to chill the fillings at least one hour before icing the outside, and since the outside would be the chocolate mousse frosting, it is better to make as close to serving as possible so the whipped cream doesn’t break.
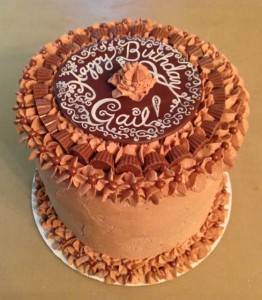
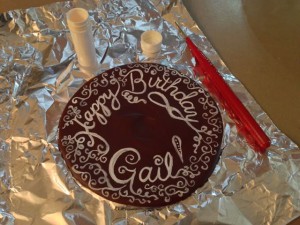 I can handpaint lettering much fancier than I can pipe chocolate, so I had melted more 60% dark chocolate chips into a circle plaque, then when it was solid, I painted a fancy birthday message so it would be ready to place on top after the cake was frosted last-minute. This white chocolate paint is sure fun with my fine watercolor quality food brush, but sometimes you need to go over it again for more vivid white, like I did to make the birthday message stand out from the extra curls.
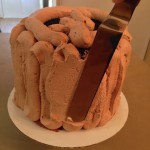 I was going to pipe big fluffy stars as decoration anyway, and it is sure easier to pipe frosting on the sides of a cake before spreading, especially for a cake this tall! Before frosting it was already 7″ tall, so even my largest offset spreader couldn’t smooth the full height! It took several passes to get the sides perfectly vertical, then I did get the top
 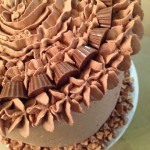 quite flat, but you’d never know after all the fluff I added. After I put the stars around the top edge and filled in around the sideways mini Reese’s cups, I decided there was enough frosting left to swirl more on top under the chocolate birthday message plaque. 😉
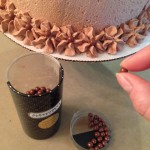 I originally thought I would sprinkle the chocolate pearls around, but since my stars turned out like flowers, I thought placing each pearl in the center of each flower was prettier. One last star in the center of the chocolate plaque was perfect to hold the candle and it was done…but how to get it to dinner safely when it wouldn’t
 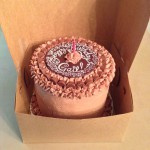 fit in any of my cake carriers…? Thankfully Jerry had given me some cake boxes, and even though they were too short by a few inches, they were the perfect diameter, and I was able to bend the lid and tape it to a different height. Huge thanks to our dinner serving crew for storing such a big monster in the fridge & getting it safely to the table for the birthday girl!
So, how many kinds of chocolate could I fit into one cake? I count 10 different recipes!
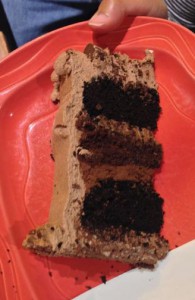 chocolate crispy rice layer
milk chocolate whipped ganache
blackout chocolate cake layer
dark chocolate whipped ganache
flourless chocolate cake
hazelnut whipped ganache
(other blackout chocolate layer – recipe makes two 8″ rounds)
chocolate mousse frosting over all
mini Reese’s cups for edge decor
Alexander’s chocolate pearls for flower centers
solid chocolate plaque for handpainted birthday message
= 10 different chocolate recipes in a single cake! 🙂
The finished cake was almost as tall as Birthday Girl Gail, the Queen of Chocolate! I’m so glad she enjoyed it! Amazingly I was able to cut intact slices and get most of them whole onto each plate, but no thinner than two mini cups wide, so the slices were quite large! The birthday girl managed a whole slice by herself, but most of us split one slice between two of us. My baking early and keeping each cake covered kept them plenty moist, and everyone enjoyed the Chock Full O’ Chocolate Cake!
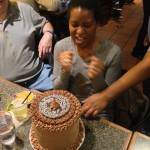
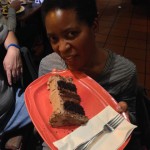
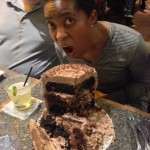
Click to keep reading for all the recipes used for this copiously chocolatey creation! 🙂
These recipes are listed in order of construction from the bottom up:
For the Chocolate Crispy Rice Treats crust, I used half the recipe from the cereal box, melting chocolate chips into the already-melted marshmallows & butter until it looked chocolatey enough. I only made a small batch as the crust since I didn’t want too many tempting leftovers! 😉
Chocolate Crispy Rice Treats
1/8th cup butter
1 cup marshmallow creme or about 5 large marshmallows
1 1/2 cups 60% Ghirardelli baking chips
3 cups crispy rice cereal
Melt the butter & marshmallows over a double-boiler or in a microwave. Add chocolate chips after the marshmallows are completely melted. Mix in the cereal and spread onto greased foil or plastic wrap.
Some whole marshmallows have more gelatin or get too old to melt well in the microwave, so melting them stovetop is more reliable, plus you can watch the chocolate melt vs. possible burning in the microwave when the marshmallows and chocolate melt at different rates. Marshmallow creme has no gelatin and is easier to melt, but it won’t hold as firm if you are constructing shapes from your cooled crispy rice treats.
—
The first filling layer was milk chocolate whipped ganache:
Milk Chocolate Whipped Ganache
(from http://www.food.com/recipe/whipped-chocolate-ganache-filling-or-frosting-106954)
Yields 3 1/2 cups
2 cups heavy cream
6 oz 72% bittersweet chocolate with 4 tsp sugar
if using 50-60% bittersweet chocolate, use 8 oz of chocolate and omit the sugar
if using 60-64% chocolate, use 7 oz of chocolate and omit sugar
Since I only wanted a single layer of filling, I used 1 cup heavy cream, heating it in the microwave until warm enough to melt the chocolate, then pouring over 4 oz of milk chocolate chips. This didn’t seem chocolatey enough, so I doubled the chocolate to 8 oz, then chilled in the fridge. 5 hours was enough chilling time, and this fluffed perfectly straight out of the fridge into a soft creamy filling that would get squished by too many layers of weight above it. Chill the assembled cake at least 1 hour before icing.
—
The top and bottom cake layers were just the cake portion of this Blackout Chocolate Cake recipe, which makes two 8″ round layers. I used normal AP flour, cornstarch, and Hershey’s Special Dark cocoa powder, but no espresso powder, and the cake was still very rich and dark black.
Blackout Chocolate Cake
(from http://www.kingarthurflour.com/recipes/chocolate-fudge-blackout-cake-recipe)
2 cups sugar
2 cups King Arthur Unbleached All-Purpose Flour
2 tablespoons Cake Enhancer, Instant ClearJel, or cornstarch
3/4 cup Double-Dutch Dark Cocoa or Dutch-process cocoa (I used Hershey’s Special Dark cocoa)
2 teaspoons baking powder
1/2 teaspoon baking soda
1 teaspoon salt
1 teaspoon espresso powder, optional; for enhanced chocolate flavor
4 large eggs
3/4 cup vegetable oil
2 teaspoons vanilla extract
1 1/4 cups water
Preheat the oven to 350°F. Lightly grease two 8″ x 2″ round cake pans. Line them with 8″ parchment circles, if desired, and grease the parchment; this step will ensure your cake’s crumble-free turnout from the pan.
To make the cake: Whisk together the dry ingredients. Add the eggs, oil, and vanilla; beat on medium speed for 2 minutes, scraping the bottom and sides of the bowl. Stir in the water; the batter will be thin. Pour the batter into the two prepared pans. Bake the cakes for 35 to 45 minutes at 350F, or until a toothpick inserted into the center comes out clean. Tapping to springback is not done enough! Remove the cakes from the oven. Cool them for 15 minutes, then turn them out of the pans to cool completely on a rack.
—
The second filling layer was dark chocolate whipped ganache:
Dark Chocolate Whipped Ganache
(from http://www.food.com/recipe/whipped-chocolate-ganache-filling-or-frosting-106954)
Yields 3 1/2 cups
2 cups heavy cream
6 oz 72% bittersweet chocolate with 4 tsp sugar
if using 50-60% bittersweet chocolate, use 8 oz of chocolate and omit the sugar
if using 60-64% chocolate, use 7 oz of chocolate and omit sugar
Since I only wanted a single layer of filling, I used 1 cup heavy cream, heating it in the microwave until warm enough to melt the chocolate, then pouring over 4 oz of 60% dark chocolate chips. This didn’t seem chocolatey enough, so I doubled the chocolate to 8 oz, then chilled in the fridge. 5 hours was enough chilling time, but this was too stiff after chilling to whip. After microwaving 20 seconds it whipped into a very stiff fudgy filling. This never got squished even with two layers of cake above it! Chill the assembled cake at least 1 hour before icing.
—
The middle cake layer was this Flourless Chocolate Cake, which only makes a single 8″ round layer:
Flourless Chocolate Cake
(from http://www.epicurious.com/recipes/food/views/flourless-chocolate-cake-14478)
4 ounces fine-quality bittersweet chocolate (not unsweetened) (I used 60% Ghirardelli baking chips)
1 stick (1/2 cup) unsalted butter
3/4 cup sugar
3 large eggs
1/2 cup unsweetened cocoa powder (plus additional for sprinkling)
Preheat oven to 375°F and butter an 8-inch round baking pan, with springform sides if possible. Line bottom with a round of parchment paper and butter paper.
Chop chocolate into small pieces. In a double boiler or metal bowl set over a saucepan of barely simmering water melt chocolate with butter, stirring, until smooth. Remove top of double boiler or bowl from heat and whisk sugar into chocolate mixture. Whisk the eggs together in a separate bowl, then add eggs to chocolate mixture and whisk well. Sift 1/2 cup cocoa powder over chocolate mixture and whisk until just combined. Pour batter into pan and bake in middle of oven 25 minutes, or until top has formed a thin crust. Cool cake in pan on a rack 5 minutes and invert onto a serving plate.
Dust cake with additional cocoa powder and serve with sorbet if desired. (Cake keeps, after being cooled completely, in an airtight container, 1 week.)
—
The third filling layer was hazelnut chocolate whipped ganache:
Hazelnut Whipped Ganache
(from http://ingoodtaste.kitchen/chocolatenutella-ganache/)
3/4 cup Nutella Hazlenut Spread (about half a jar)
1 cup heavy cream
1 teaspoon coarse sea salt
Since this original recipe is a 1:1 chocolate-to-cream ganache but the whipped ganaches above were 1:2 chocolate-to-cream, I used the same 3/4 cup hazelnut spread and salt but doubled the heavy cream so I could whip this ganache like the other two. This one also seemed to want more chocolate flavor, so I doubled the amount of hazelnut spread then chilled in the fridge. 5 hours was enough chilling time, and this fluffed perfectly straight out of the fridge into a soft creamy filling that would get squished by too many layers of weight above it. Chill the assembled cake at least 1 hour before icing.
—
Over everything was the same Chocolate Mousse Whipped Cream Frosting from last year since everyone loved it and it spreads so easily! This cake was so tall I made two batches of this recipe to cover it all with a generous layer and still have some for decorative borders!
Chocolate Mousse Frosting
(from http://www.cooks.com/recipe/r74ya4rg/chocolate-mousse-frosting.html)
4 c. heavy whipping cream
2 c. sifted confectioners’ sugar
1 c. sifted cocoa powder
Dash of salt
In a chilled bowl blend ingredients, then whip until mixture holds a peak. Frosts 2 (9 inch) round layers, split in half plus sides and top. Refrigerate.

 Subscribe RSS