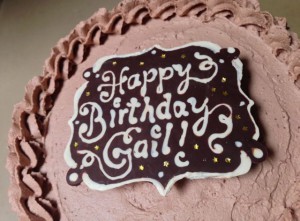
 It was Gail’s birthday this past weekend, and Gail LOVES chocolate, so I’m very happy she asked me to make her cake! She asked for chocolate mousse frosting, which I expected would be challenging for decoration, so I tried a piped chocolate plaque that I could just set on top. I think it worked out pretty well, and all 14 at the table said it was delicious!
I saw some gorgeous photos of cakes using traditional Joconde Imprime techniques a couple years ago, so I thought I could try it on a small scale with piped chocolate instead of cake to make writing inlaid into the flat chocolate plaque. I started by drawing the message and the outline shape on the back side of some wax paper, so I could turn it over and pipe the chocolate away 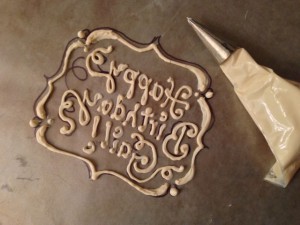 from the ink, and the design was already reversed. You could also use parchment paper, but since it wasn’t going into the oven, wax paper worked fine. I found out I really need a smaller piping tip for writing in chocolate this small, and the white chocolate candy melts cool more quickly so can be tricky to lay completely flat against the wax paper. At least it cooled fine without even going into the fridge!
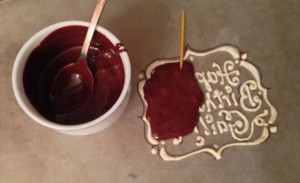 After the white chocolate was completely solid, I melted my trusty 60% cocoa Ghirardelli baking chips,and carefully spooned the melted dark chocolate over the solid white piping without scooting or smearing in case the white started melting again under the warmth of the liquid chocolate. When I got close to the edges, I used a toothpick to scoot just the top liquid to the edges so I wouldn’t
 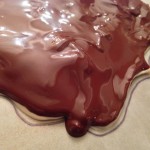 disturb the white chocolate or spill over and end up with a messy edge. I made sure it was a thick layer of dark chocolate so the plaque would be nice and solid. I was working on the wax paper on a cookie sheet, so I set the whole tray in the fridge overnight to set up completely.
In the morning I unpeeled the wax paper to investigate the design. There were a few spots where the white had not 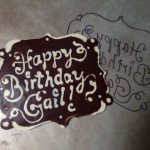 fully stuck to the surface, so the dark chocolate sneaked under some edges. I used a toothpick to scrape away the dark chocolate around the edges of
 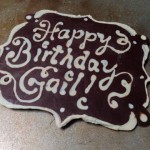 the writing pretty well, but there were a couple edge sections that were too thick to scrape away. For those I melted the leftover white chocolate and used a toothpick to repair the border. I also haven’t used my tiny edible gold stars in ages, so I dabbed miniscule spots of melted white chocolate with the tip of a toothpick, then used a clean toothpick to grab one star and place it on the dab of
 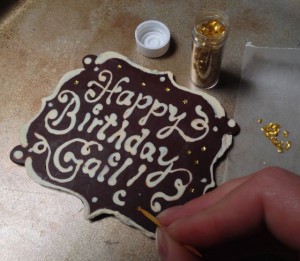 chocolate. The white chocolate cools so quickly you can only place one star at a time. You had to look closely, but you could see the sparkle!
I had baked the cakes the previous evening, so they were plenty cool and ready for frosting. I wasn’t sure if real mousse would work as frosting or if it might slide off the sides or break the emulsion before serving, so I searched online for “chocolate mousse frosting” and found this recipe with decent reviews. Since I noticed this recipe was easily divided, I actually made it using 4 cups cream and adjusted the rest of the ingredients to have more than enough for generous frosting on a 2-layer 9″ round cake. I had put my 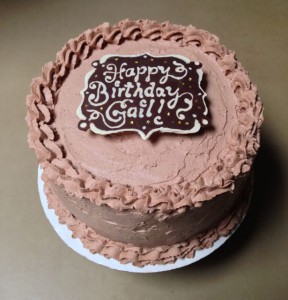 metal mixing bowl and metal whipping attachment in the freezer overnight, so the heavy whipping cream fluffed perfectly, and the frosting came together easily. I worked quickly since I was afraid the cream might lose stability at room temperature, but it stayed fine through my fastest and neatest cake frosting yet. I used a large piping tip on the sides using a generous amount, then smoothed with an offset spatula, not getting any cake crumbs in my edges and very straight sides. Even the edge where the top met the sides was a perfect sharp corner…I almost didn’t want to cover it with decoration! But I wanted as much mousse for the birthday girl as possible, so I added frills to to the top and bottom edges. It wasn’t as chocolatey or rich as real mousse, more like chocolate whipped cream, but it was delicious and velvety. The only drawback was that I used so much frosting as filling between layers that by the time it arrived to dinner, one side was sagging just a little…but the flavor and texture were worth the wonkiness!
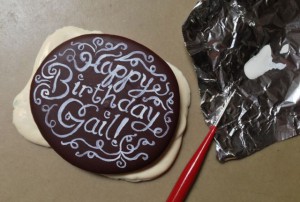 I had a little melted chocolate left both white and dark, so I smoothed them into a couple neat pucks on wax paper, thinking I might try some chocolate curls. When I got the plaque in place on a nice tall mound of frosting, I didn’t think it needed the curls. Since Gail would never turn down MORE chocolate, I decided I could wrap up the pucks as a homemade chocolate bar…but a bit boring just plain, so I used my ChocoWhite food color and my fine food brush and had fun painting another birthday message for her.
 ![]()
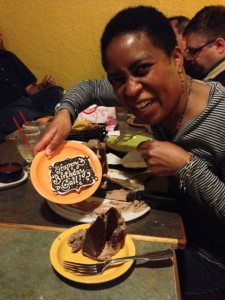 The birthday girl loved all her chocolate, and we carefully cut her cake into 16 slices since we unexpectedly had 14 for a really fun Friday dinner that night! Sure glad there was enough cake!
So, not too bad for my first try at reverse inlay decoration. I would still like to try a message or intricate design in sponge cake eventually, but I need another event and a clever idea!
You can keep reading for the full Chocolate Mousse Frosting recipe…until next time!
CHOCOLATE MOUSSE FROSTING
4 c. heavy whipping cream
2 c. sifted confectioners’ sugar
1 c. cocoa powder
Dash of salt
In a chilled bowl blend ingredients, then whip until mixture holds a peak. Frosts 2 (9 inch) round layers, split in half plus sides and top. Refrigerate.

 Subscribe RSS
OMG! Gourgeous! I’ll be using this technique for my dad’s birthday cake. Thank you so much for sharing!