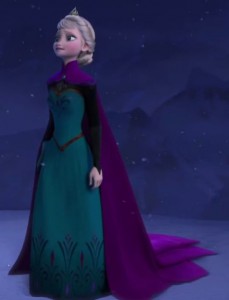
 I wasn’t able to see the new Disney classic animated musical “Frozen” until mid-January almost two months late, but ever since it came out, so many of my friends have been telling me “Britta, you are Elsa!” Heh! I saw the video of “Let It Go” online and I could see some of why they said that. One friend said there was “an excessive amount of teal in this video” and right away I saw the chance to use my fiber optic cloak for her ice cape at the end of that song. When I did see the movie, I loved it, definitely identifying with Elsa in more ways than just appearance and color preference, and immediately announced I would make BOTH outfits, Elsa’s coronation dress and her ice dress! Honestly I haven’t spent so much of my first movie viewing planning costume designs since I saw Corpse Bride!
 Since my costume for Halloween 2014 is already completed because of plot reasons, I had no new costume projects at all planned for this year, so why not do two costumes now before Halloween chaos hits? I didn’t know where I was going to wear these, but the singalong movies were released January 31st, so I rushed the coronation outfit in hopes of being done in time to see one of those in costume.
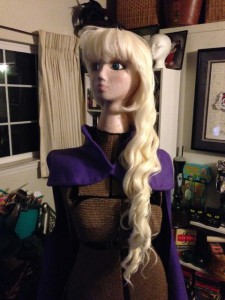 I do have a long vintage 60s hairpiece but it was my mom’s so not the platinum blonde hair that Elsa has. Since it also isn’t as thick as the movie, I used some free Amazon points to buy a styleable long pale platinum blonde wig, which was excellent quality especially for only $20. I have seen some cosplayers online wearing pure white wigs, but close scrutiny of any images as well as the movie shows it is definitely a very pale blonde, not pure white. Since so many others have done these costumes already, plus the official Disney park princess outfit, I wanted mine as accurate as possible, but I knew I’d have to take some license because I have real-world physics to deal with that the animators can ignore…like having her hairdo that is obviously only a twist magically turn into a long braid when she takes it down. It was too hard to get the bun to look anything close to the movie, so I didn’t braid it first. I knew I would restyle it completely before wearing it as the braid. Thank goodness this wig is good enough quality that I can brush it well and hair doesn’t fall out!
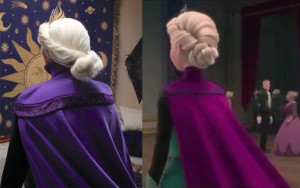
 The other thing I noticed while starting my design process was that the two outfits are very similar shapes: full-length A-line skirt attached to sweetheart neckline strapless bodice, over a long-sleeved shirt. I also noticed that the aqua ice dress skirt was lined with a darker teal. Since any bodice containing boning needs two sides anyway, I thought why not save some closet space by making the main dress reversible? All I needed to do was plan
 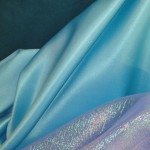 where the slit would be for the ice dress, then handstitch it closed when wearing as the coronation dress.
I had excellent timing for this project, since it was a 50% & 60% coupon weekend at the fabric store which only happens a couple times each year. Nothing I bought was regular price, all 40% -60% off, but even though I was frugal and used a lot of supplies I already had, I still spent $82 including $50 for fabrics on supplies for just this costume, not including the ice dress version yet. The full materials list with costs is at the bottom if you’re interested.
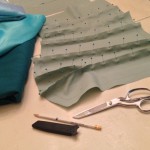 I knew the corset bodice would be tricky and time-consuming, so I tackled that first. I had aqua canvas in my fabric stash that I knew would work as coutil. It’s not as soft a surface as true coutil but since I would be wearing a shirt underneath the bodice either side,
 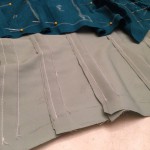 I didn’t think it worth the extra expense. The aqua canvas wasn’t as bright as the aqua dress fabric, but the whole ice bodice would be covered in the ice “shingles” anyway, so as long as it was in the right color family, it should work. I fitted the corset to me well enough and adjusted so the top curved around more than a standard corset, but then I didn’t have enough bronze ribbon
 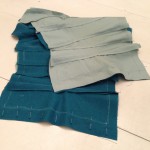 to add trim before I closed up the top seam. I also looked through my steel boning stays and none were long enough for the front point, so since I was buying more online anyway and I had sewn my boning channels wide enough already, I splurged for 1/2″ wide stays instead of the standard 1/4″ stays. I moved on to other tasks while waiting for the boning to arrive…
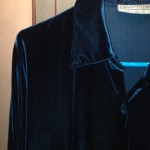 I found a pale aqua mesh shirt on eBay for only $9, so that was fine for the ice dress, but I couldn’t believe I had turtlenecks in every color under the sun EXCEPT black for the coronation
 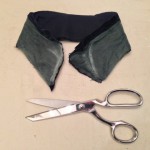 dress. However, when reviewing the “Let It Go” video again, it had a mandarin collar anyway, and looked like it had a velvety texture. I had an oversized dark green stretch velvet blouse in my closet I hadn’t worn in many years, so I tried it on, and it looked like there was plenty of room to take it in to be fitted on each arm, and closing up the front completely. The underside of the
 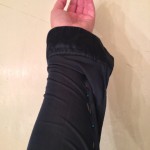 collar was satin, so I had to cut the collar off, take in the seam to create the curve, then sew it back on. The top button was a little too tight to be comfortable, plus it didn’t help the collar stand up properly, so I changed to a hook and eye further up the neck. I left the neck
 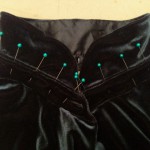 open with enough overlap to look closed, and because of the stretch, sewing it closed from the painted chest section down to the bottom hem worked fine. Luckily my friend had given me a hand-me-down serger machine, or I couldn’t have preserved the stretch after
 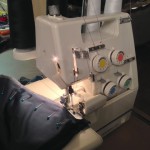 taking in the seams! This was my first serger project ever, tricky since I had no instructions for this machine, but it worked out just fine…whew!
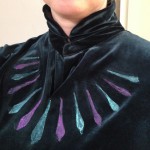 I already had shiny teal fabric puff paint (of course!) and had bought the correct color purple, but because the shirt was stretch velvet, I thought it was safest to paint the chest teardrops while wearing
 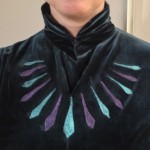 the shirt so it would be stretched the same as when wearing it. I had already marked them in chalk but I needed to brush the paint into shape for the layer to be consistent, so that took awhile, and then once that dried, I needed a second coat. Thankfully this plasticky paint
 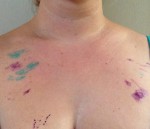 dries fairly quickly, so it was only about 3 hours total I had to wear the shirt while it dried…but then I had paint all over me of course! I expected that, and it’s easier to get paint off human skin than a lot of other surfaces! 😉
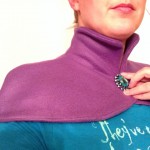 I bought 3 yards of purple fleece on 60% off which was plenty for a longer train than I had even planned. No way would I be able to walk anywhere with as long a train as the movie! I love this cloak since it has fitted shoulders giving it elegance. Those were tricky
 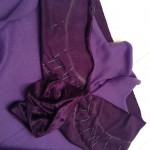 to fit on myself, but I just kept pinning the seam inside out until it seemed to fit my shoulders. That was easy when wearing a cotton t-shirt, but when I tried it on with the stretch velvet shirt underneath, the fleece sticks on the velvet, so I might need help getting it to hang properly. 😉
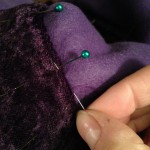 I found purple crushed panné velvet that looked like the perfect texture for the cloak trim. The trim curves to match the front curve of the cloak, and I knew from experience that stretchy velvet is very finicky, so I sewed that as a flat tube exactly in shape with the cloak, then handstitched the final tube to the fleece using a hidden hem stitch so you couldn’t see any stitches and it would have the raised edge you can see on screen.
 I didn’t find a single blue oval jewel at any craft store, but I found a fancier one I thought would work just fine. Since it was a dark pewter filigree edge with extra jewels, I painted a gold panel to place behind so some gold would show around the edges of the main jewel. Since Elsa obviously removes her cloak dramatically with only one hand, I insisted on a single large flat hook & eye, so the jeweled brooch was purely decorative.
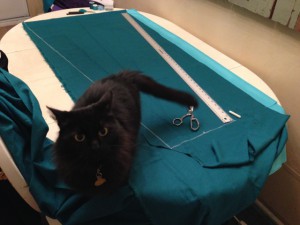 Next was the skirt. I figured that 4 panels with seams at the legs should work for the ice dress slit and give enough A-line shape. My two fabrics weren’t the same width, so the aqua sparkle satin determined how wide the triangular gores could be. I folded the teal linen offset so the excess fabric would be a large strip along the side, and I carefully cut all the fabric layers together, with kitty help from Ebony as always. She loves large swaths of fabric and tries to steal pins! The top was my waist divided by 4 then added a little buffer for seam allowance, then I sewed
 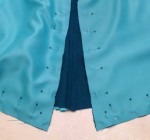 each side together lengthwise except for the slit, then sewed them together, leaving the waist open for turning right side out. I knew the waist seam wouldn’t be straight across when attached to the bodice, but since the angle of the A-line accounted for my hips too, by making it long enough, I could pin to the proper height before cutting any excess.
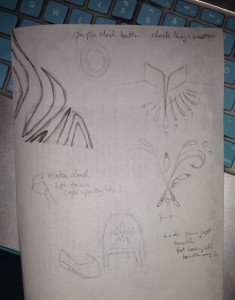
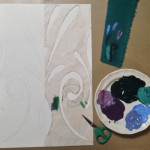 It was a good thing I remembered I needed to paint the teal side of the skirt before I attached the skirt to the bodice! 😉 First I carefully handstitched the slit together with a hidden hem stitch so none of the aqua side would show or be painted accidentally. I sketched the repeat, noting it doesn’t even reach her knees for scale, then cut my own stencil to keep the repeat
 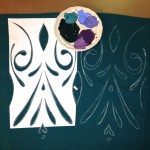 accurate and sized to the fabric panel width so the repeat was even. It’s hard to tell even on the big screen, but close scrutiny looks like there is shading especially in the purple petal sections, and the design was obviously inspired by traditional
 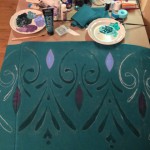 rosemaling, so I used some rosemaling style shading techniques, even letting the tails of the swirls fade away. Since I had a good purple color already in a shiny puff paint tube for the shirt, I brushed that on as the purple petals, but all the other colors were standard acrylics mixed with textile medium so they wouldn’t be crunchy. I used a scrap sheet of cardboard between skirt layers so no paint would stick to the aqua satin, but even standing at my counter painting
 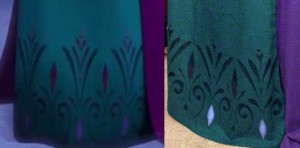 upside-down, my back was killing me after SEVEN hours of painting over two nights!
I didn’t paint the bodice until after the bronze ribbon trim was added to the top edge, since that placement was dependent on the trim and how the bodice actually fit. First I stitched it as close to the ribbon edge as possible along the stitching line I had marked in chalk, then I sewed both tops together, embedding as little of the ribbon as possible while still catching it in all the stitches to give a clean finished edge to the teal side without showing on the aqua side. After a very close trim 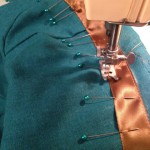 and very good pressing with the iron for the top edge to be flat, I pinned & sewed the other side of the bronze ribbon, making sure it followed the curve of the corset shaping. Only after all that was I able to “stitch in the ditch” to hold the corset panels together vs. shifting, making sure not to sew through a boning channel. Only then I was finally ready to paint the bodice while it was still a smaller section before assembling it to the skirt.
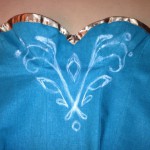 You only see the back of Elsa’s coronation dress in a couple shots during “Let It Go” since she was wearing the cloak constantly until she ran to North Mountain, but it does have a smaller version of the front design on the back. I only painted the front of my bodice since I designed lacing in the back for flexible wearing for body shape changes (hopefully for the better!), and the back would usually be covered by the purple cloak anyway. The aqua canvas behind the bodice painting was thick enough that I didn’t expect it to bleed
 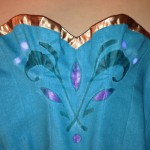 through. I didn’t make a stencil for this design, just held it on me to mark where the major swirls should hit proportionally, then sketched it in chalk to match before painting, using the same colors and techniques as the skirt.
I did have some quarter-inch stays in my corsetry stash, but none were long enough for the center point, so I decided if I was buying new anyway, and I happened to sew my channels wide enough, I’d go for super-sturdy half-inch stays instead and bought online from Lacis instead of driving up to 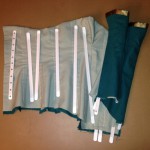 Berkeley on a weekday. My big splurge was the new lacing stays I had never seen before! They are $5 each where the other stays are only $0.50 max, but they have the holes already punched in the metal. Traditional corset patterns suggest boning on either side of the grommets, but when the grommets are under pressure of tight lacing, if your fabric isn’t sturdy enough, the lacing will pull grommets out of the fabric. By setting the grommets through the metal holes, there’s no way that’s ever happening again!
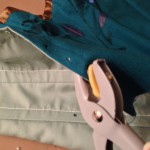 Thankfully the silver eyelet grommets I already had were the right size for the pre-punched lacing stays so I had plenty and the proper tool to set them! Before punching any fabric holes, I traced where I could feel the holes with the lacing stay in the channel, then removed the stay and punched the holes in the fabric with my eyelet tool. That never makes a large enough hole, but it’s a good start without chewing up your fabric or slicing your fingers by trying to poke a hole with your scissors. I widened each hole with scissors.
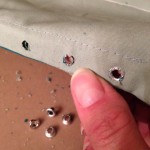 These eyelets are a single piece of metal, so the back side spreads to anchor to the fabric and is definitely a “wrong side” that double-piece grommets don’t have. I decided that since the aqua side would have overlapping ice shingles that could hide the rough side of the eyelet, I would set them for the teal side.
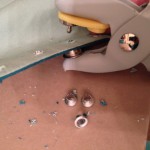 This means you poke the eyelet through the fabric from the finished side, then clamp down with the eyelet tool from the wrong side, making sure the bottom lip of the tool is lined up perfectly with the rounded “right side” of the grommet, and squeeze only when perfectly perpendicular to the fabric. I have fought with this cheap fabric store eyelet tool with horrible instructions for 14 years now, but finally know it well enough to get it to work reliably!
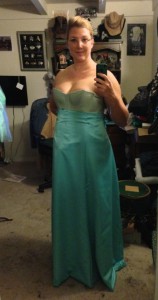 After both the skirt and bodice were painted and the grommets all set, I added the steel boning and roughly pinned so they wouldn’t fall out. Then it was the tricky task of pinning the skirt in position attached to the bodice. I pinned roughly to start while wearing it aqua side out to properly place the front slit, adjusted what I could while wearing it especially for height (fitting a back-laced bodice on yourself is extra tricky!), then pinned it flat, tucking the raw edge under so I could aim the curve and point where the ends of the boning were. I topstitched the aqua side which helped the skirt hang flat, then closely trimmed away as much of the seam allowance on the teal side so I could add the bronze ribbon trim, which I
 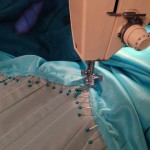 knew would cover all ills on the teal side. I pinned profusely so the bronze ribbon would be a smooth curve, then used aqua bobbin thread while sewing the bronze trim resulting in blending stitches on the aqua side that should easily be covered by ice shingles later.
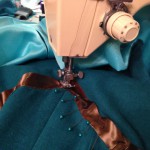 One of my outstanding design issues was skirt closure in the back. I attached my skirt to the bodice since I know from many years of corsets that the bottom front points tend to stick out from a separate skirt, and even worse on my own body. Even the official Disney Parks Elsa ice dress has this issue! To solve that I knew I would attach the skirt to the bodice so it would hang properly with a smooth line, but how would the skirt close in back
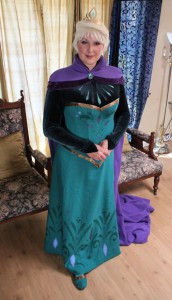
 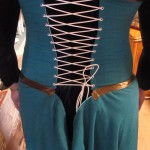 when the corset still had a gap when it was laced? Luckily I had sewn the skirt large enough that it fit around my hips without cutting a slit, so I didn’t have to worry about any closure, leaving the extra fabric loose to gather and fold over itself depending how tightly the bodice was laced. Since both outfits included capes, no one should notice if there was extra fabric bunching at the back of the skirt or if the back hem hung lower than planned. Then the ice on the bodice was still pending, but the dress was finally complete enough to wear as the coronation outfit!
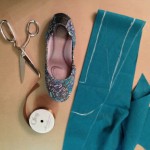 I already had some black ballet slipper flats with aqua jewels on them that were my backup plan for shoes, but since I noticed Elsa’s matching shoes in the movie, I really wanted to make them too. I had some elastic ballet slipper flats
 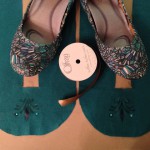 made from cloth that I rarely wore, so I decided why not cover them with teal linen & bronze ribbon leftovers and paint them to match the dress? There are two good shots of her coronation shoes, and thankfully one is in the “Let It Go” video that is available on YouTube in HD, so I was able to pause and sketch enough of the design to do it justice. I traced the shoes to get the rough shape for the teal fabric, leaving
 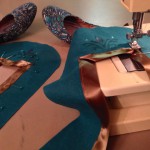 enough to turn under and handstitch to the shoe fabric, before I painted both shoe covers while they were still flat. I could finally put my paints and brushes away since that was the last rosemaling for this project!
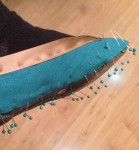 Her shoes have matching bronze trim, so for the smoothest line, I machine stitched the bronze ribbon over the edge of the teal linen. I was planning on handstitching the other edge of the ribbon inside the shoe edge, but the ribbon was so nicely flat against my foot only attached at the
 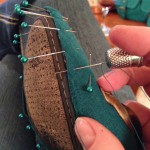 heel, I left it unattached. Then I had to try them on to stretch out the elastic enough to pin the rest of the fabric to the sole edges, then it was handstitching while watching TV to finish them. I tried just a whipstitch but I couldn’t get the right angle even with a
 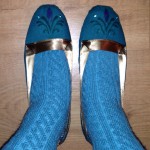 curved needle, so I figured out that a straight stitch perpendicular to the sole could catch the shoe fabric and come out top as long as I used a thimble to push through all the layers. I already had aqua socks so I used those instead of tights. I really love Elsa’s aqua gloves especially the delicate painted design, but I decided that I wasn’t going to wear gloves for the singalong movie, so I didn’t worry about those for now, but I reserve the right to make them later if I change my mind! 😉
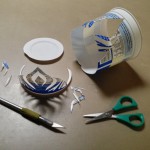 Last but not least, the crown! Elsa’s crown is a simple and elegant design, but trickier than I expected since those sharp points at the top do not want to stay in the same curved plane. I didn’t want to use real metal
 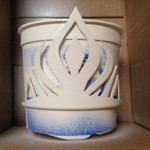 since that would stay too sharp to wear around children, and curving fun foam or tagboard wouldn’t stay in the same curve I wanted. Luckily a plastic quart yogurt container was the perfect curvature, so I carefully cut the crown with my craft knife, leaving the bottom edge as a sturdy headband. I didn’t have any confidence that my gold paint would stay on the slick plastic, so I covered it
 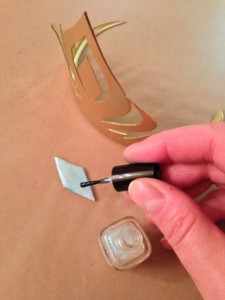 with a couple coats of white spray primer while bracing it around the remnants of the plastic container in hopes the curved points wouldn’t pop up. After the primer was completely dry, I added a couple coats of metallic gold spray paint inside and out, making sure to get the cut edges too. I couldn’t find the perfect diamond shaped blue jewel at any craft stores, so I used opalescent paint instead. Not bad for probably only a couple dollars of supplies at most! 🙂
I’ve now digitized my crown sketch into a downloadable template. It should print the size I made my crown, but that might be a little large for smaller heads, so you can resize it on your computer, then print on scratch paper and cut out to trace around it onto whatever plastic container fits for you. Even though it’s just thin plastic, if you are worried about the points being too sharp for younger princesses, cut them out slightly rounded instead and it will still look great. Just click on this image to load the large version, then right-click to Save Image As to your own computer. Enjoy!

All of this work was done on evenings and weekends so it took me about 3 weeks to get everything done…and sadly because I spent the holiday weekend celebrating family birthdays, I missed the Frozen Sing Along theatre shows by days! *sigh* I have already planned to show Frozen for my Cinema Brittahytta summer movie series this year, but I’ll wear the ice dress for that, and it’ll be too warm for the coronation outfit 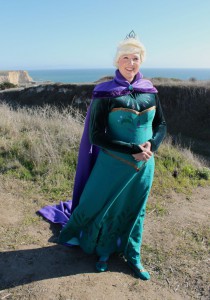 even to try a costume change during that party…so my friend Jerry graciously consented to be photographer and we decided since any snow was too far a drive, we would try the beach instead, with sand instead of snow and Northern California’s answer to Norwegian fjords. Here’s just a peek, but see this page for the full photo shoot, and even a video of me singing in costume! 🙂
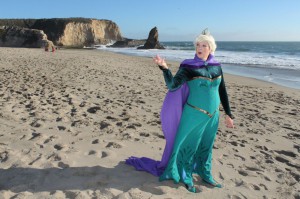
Queen Elsa of Arendelle at the Fjords
Now for the full materials list and what I spent. Luckily I had a lot of craft supplies I did not have to buy new!
$20 long platinum blonde wig with free Amazon points
total for coronation dress (includes basic ice dress structure):
$82 total materials cost includes base dress for the ice dress
dark spruce green stretch velvet blouse = $0
already had fabric for corset base coutil = $0
steel boning including two $5 lacing stays from Lacis incl handing & tax = $25
silver eyelets & eyelet tool = $0
already had 7 yds heavy duty white corset lacing = $0
4 yds teal linen/rayon blend = $24
3 yds aqua glitter satin = $15
3 yds purple fleece = $11
1/2 yd purple panne velvet = $1.50
bronze ribbon for trim, leftovers + new roll = $1.50
textile medium & various colors of acrylic paints = $0
aqua shiny fabric paint = $0
purple shiny fabric paint = $1
brooch for cloak = $3
shoes = $0
crown = $0
Hope you enjoyed these instructions as much as I enjoyed making the costume! 🙂

 Subscribe RSS
Pingback: DIY Elsa's Crown from Frozen - A Disney Pixar Blog Hop | Hydrangea HippoHydrangea Hippo
very nice work, thank you so much for the crown template 🙂
Hi, I just converted your png to a Silhouette Cameo cut file for my little girl’s birthday. Would you like it to add to your website? It can be cut out of cardstock, cardboard, felt, fabric, or puffy foam. I know lots of moms out there who would LOVE it!
Nice work! Sure, I can host that! Thank you very much!
I tried a sheet of fun foam for some snowflakes, but my Silhouette just chewed it up. I had my blade the longest possible, but it has cut a lot already. It still goes through label paper fine, but maybe I need a new blade? When you email me the file, could you please give me some tips? I only got my Silhouette this spring, specifically for all my snowflakes on my Elsa cape. 🙂
Thank you so much for your concise instructions.
I have made the cape (the train and the bolero jacket thing) but don’t know how to attach the train to the bolero thing without becoming throttled by the weight of the train. Could you advise how you attached them together.
Thanks
Myra
Sorry but I just saw this. I made the back of the cape as a single piece, with two front pieces that had a seam along the shoulders. The closure at the throat pulls a little, but not uncomfortably, and since I used fleece the cape isn’t that heavy. Good luck!
This Britta from Austin, TX says a big Thank You! Finishing up the Elsa costume when my 6 year old (who is far too much like me) explains that the crown is a necessity even though I had disregarded the need since Elsa chunks it before transforming into THE dress. And to think I almost chunked that expired yogurt container yesterday…
Thanks for the inspiration and tips. You do amazing work!
Britta
Hi! I purchased an Elsa coronation dress from Aliexpress and unfortunately was disappointed with the design that is painted on the bodice and skirt. The colors are all wrong, the design itself on the skirt is wrong- for example the diamond and crescent shapes on the skirt are absent- basically, what a nightmare for anyone that appreciates faithful replicas! Anyway I decided to try to paint over top of the current paint to try to correct the colors and add the little details that are missing, and was searching for inspiration which is how I found your tutorial and wanted to say, you did an amazing job!! Thanks for the detailed pictures and description! And a yogurt container repurposed into a crown- CLEVER! I bought two different crowns that are similar to hers but have been struggling to find a crown that is *exactly* like the movie, so I will give the yogurt thing a go!
You did a fantastic job on this costume. I love your attention to detail, it is important to get that great look that you’ve accomplished. Those shoes, omg, how great are they. You make a beautiful Elsa, those shoes and the crown are excellent finishing touches. Awesome job!