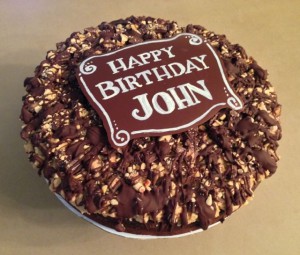
 Another Margarita Friday birthday cake! Birthday boy John absolutely loves peanut butter with chocolate, specifically peanut butter cups. I stumbled upon a recipe several months ago and thought I should try it for his birthday. Not only was it delicious, it looked absolutely decadent, with all the goodies abundantly dripping all over the sides!
The original recipe is for a 9″x13″ pan then cut and served as rectangular brownies, but I wanted it to be more in birthday cake format, so I used my 9 1/2″ round springform pan to bake the brownie layer. I used 1 cup of Ghirardelli ground chocolate powder plus about 1/4 cup of unsweetened cocoa powder, so I used slightly less sugar since the ground chocolate is already sweetened. The batter didn’t look as 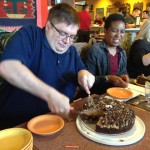 fudgy as my Ghirardelli scratch brownie recipe, but it turned out plenty dark after baking. I think I prefer either a little less cooking time or my own recipe as a fudgier brownie, but definitely include chopped mini peanut butter cups inside! This was tasty but dense and difficult to cut…but the birthday boy wouldn’t let that stop him!
 ![]()
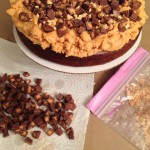 The peanut butter fudge frosting layer was very tasty, not surprising since it was 2 cups peanut butter, 1 cup butter and 1 cup cream cheese along with the sugar! This was an excellent consistency that was spreadable without losing shape, and still creamy like fudge. Immediately after adding the peanut butter layer, I sprinkled more chopped mini peanut butter cups
 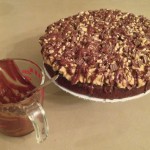 and chopped roasted peanuts, patting them in place so they wouldn’t fall off in transit.
After all the goodies were in place on top, I melted semi-sweet Ghirardelli baking chips and drizzled over the entire cake…extra decadence already! Be sure to use wax paper or foil to protect the edges of your cake board from stray chocolate that stains.
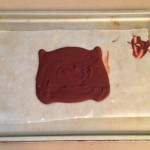 I finished all that the night before serving, when it was cool enough to bake in my house! Since I knew the pile of decadent goodies would make piping a birthday message nigh impossible, while the chocolate was still melted, I spread out a plaque shape onto wax paper and put both the plaque and the cake safely in the refrigerator overnight.
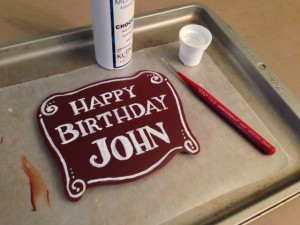 My new favorite decorating product is ChocoWhite from Kopykake, which is an opaque white food paint that even works over dark chocolate! I so wish I had this when I was making my Ghoulish Gingerbread Haunted House several years ago! You can also paint on any color of fondant or anything else you can think of, so I painted a birthday message on the chocolate plaque, using my smallest fine watercolor brush dedicated for food use.
 After we all sang Happy Birthday and John made his wish, I recommended thin slices, since this was denser than cake. Everyone loved it but agreed that small slices were best. There was almost half left, so I sent it home with the birthday boy so he could extend his enjoyment all week long!
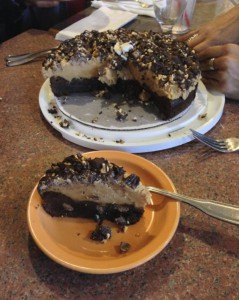
Keep reading for the full recipe for both the brownie layer and the peanut butter fudge frosting layer. I hope you enjoy making your own Peanut Butter Fudge Brownie someday!
http://communitytable.com/22609/donnaelick/reeses-peanut-butter-fudge-brownies/
Reese’s Peanut Butter Fudge Brownies
By DONNA ELICK
SERVES 18
ACTIVE TIME 20 min.
TOTAL TIME 45 min.
INGREDIENTS
Brownie:
1 cup unsalted butter
2 cups granulated sugar
1 cup unsweetened cocoa powder
1 Tbsp vanilla extract
3 large eggs
1 cup all-purpose flour
½ tsp baking powder
½ tsp salt
1 (12 oz) bag mini Reese’s Peanut Butter Cups, cut into quarters (divided)
Peanut Butter Fudge Frosting:
1 (8 oz) block cream cheese, softened
1 cup unsalted butter, room temperature
4 cups powdered sugar, sifted
1 (15 oz) jar natural peanut butter
1 Tbsp vanilla extract
½ tsp salt
(1/4 cup chopped roasted peanuts)
6 oz milk chocolate chips, melted
DIRECTIONS
Preheat oven to 350°F. Line a 9×13 baking dish with parchment paper, set aside.
Place butter in a large microwave safe mixing bowl, melt completely. Add sugar, cocoa, vanilla and eggs. Whisk to combine well. Add remaining ingredients. Whisk until completely combined, but do not over mix.
Pour into prepared baking dish. Sprinkle 10-15 mini Reese’s Peanut Butter Cups cut into quarters over batter, press into batter with a spatula until they are covered. Bake for 20 minutes or until a tooth pick comes out clean. Place in the freezer to cool, about 15 minutes.
Meanwhile: Combine cream cheese and butter in the bowl of a stand mixer fitted with a paddle attachment. Beat on medium speed until smooth and creamy, about 3 minutes. Add sugar. Beat on low until combined, then switch to medium speed and eat until light and creamy. Add peanut butter, vanilla and salt. Beat mixture until well combined.
Spread frosting over top of cooled brownie. Sprinkle remaining peanut butter cups over the top of the frosting.
Drizzle melted chocolate over top of brownies. Serve and enjoy.

 Subscribe RSS