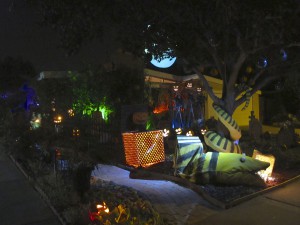
 The Pumpkin Chorus show in the front yard was a LOT of work for the entire Halloween Scream Team! Not only decor projects I already showed during the summer, like Snakey coiled around the tree, the lighted present boxes, building scarecrows and an old fence from scrap wood and branches, a new “iron” graveyard fence, carving and painting 8 new gravestones, and making, sealing, and painting 15 papier-mache pumpkins larger than I could buy, but also filming ourselves made up as black & white jack o’lantern faces and lip-syncing to the song many many times, lots & lots of video editing by me, then the final evening it was still touch & go getting placement correct plus a final render that was finally party-ready at 6:30am! Since this was one of this year’s secret projects, now I can reveal how we did it…
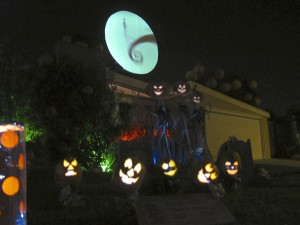 Glen had been surfing YouTube over New Years and found one guy who did whole-house projection from his front yard with a super-short-throw projector, plus another guy who filmed himself in makeup to make a few singing pumpkins. Since I had already wanted as many glowing jack o’lanterns as possible in the front yard anyway for Nightmare Before Christmas, our new vision was like the Tiki Room at Disneyland, so at first it would look like the pumpkin faces were just glowing like the carved plastic ones, but then they would surprise you by waking up and singing.
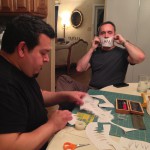 The basic technique is demonstrated in this video where we saw it originally: draw black “holes” of a jack o’lantern face on a white face and cover the rest of your head with a tight-fitting white t-shirt so it blends with the white makeup. Try to cover any natural holes like nostrils in your “carved” design otherwise you will see them too. Keep your eyes closed or you’ll see eyelids move and reveal white eyes inside the black eye designs, so you’d better know your lyrics by heart! White teeth will show inside your black mouth design too, so try to lip-sync with your lips over your teeth. Yes, too many things to remember and it got tricky, so thankfully many
  pumpkin mouth shapes are forgiving as long as you do “ma ma-ma ma” at least in time to the words. We played the song during filming, and I kept the audio in each pumpkin face track until the final edits, since that was very helpful to line everything up together for timing between the different pumpkin takes.
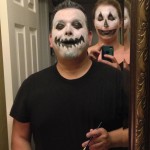 We had four filming sessions over the summer trying out different face designs, since we wanted to have as many pumpkins singing as possible. We did try some paper and foam cutout mouths, but it was too difficult to prevent hard lines around the edges, plus they didn’t move very well with our own mouths. We got better over time of course, both at designs that moved the best with our own eyebrows and mouths, keeping our eyes closed and hiding our teeth, and makeup application. I’ve had plenty of makeup fun for stage and costumes over the years, and Jerry was a theatre major in
 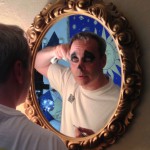 college, so he had his own kit, but this was Glen’s first full-face makeup ever. 😉 The trickiest was getting the sides of our faces to not have sharp shadow lines too close to the moving facial features to mask out. Soft shadows would usually fade away when I adjusted the contrast and gamma settings in Final Cut Pro, but I spent countless hours with an 8-point garbage mask & keyframes masking out my own temples since my eyes are so close to the sides of my face! Argh!
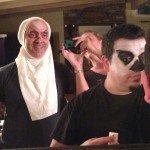
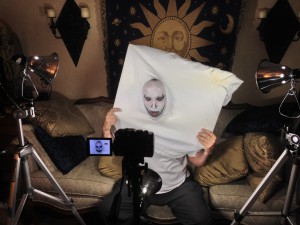 For the white “wimple” (anyone else thinking of the Sound of Music nuns, or is that only me who played Maria in 6th grade? haha!) we finally discovered that white fabric bandage tape over the fabric seam and my skin gave the least line around my face, but we had to be careful there was no makeup where the tape needed to stick, plus the tape
 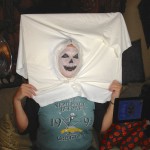 couldn’t be too close to moving features either. Use very bright light close to wash out any shadows in your white areas, since as long as they aren’t too dark or too high contrast compared to
 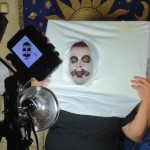 the rest, they should wash out when you tweak it in post-production. We found the best lighting arrangement was two sidelights and one directly in front clamped to the camera tripod.
After the filming is done, it’s all video editing. Since the original is black features on white, you need to invert so it is white features on a completely 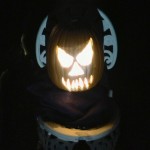 black background. I tweaked the gamma and the contrast until I got the cleanest edges I could, still not as clean as CGI but the fluid organic movement was worth it, then anything extraneous like face edge lines I masked out using an 8-point garbage mask, traveling during movement using keyframes as necessary. We ran a quick close-range test after a summer movie night and it worked well! I also had to re-center almost every take using traveling keyframes to keep them on center since the pumpkin “screen” for each couldn’t move around and they were only so large. Why is it so hard to hold your head still and in position while lip-syncing for 4 minutes? 😉
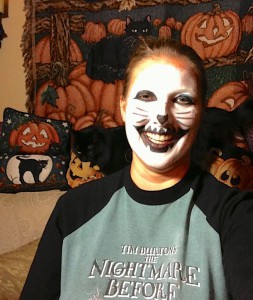 We analyzed the original video for what style of facial features worked better than others, plus learned even more from trial and error. Faces that only have the mouth move are not as noticeable especially at a distance, so my naturally expressive “eyebrow acting” became the standard. Jerry couldn’t believe how I could move mine so much and said I must have double-jointed eyebrows. Haha! In the last session, when I had already started decorating inside, Glen thought I should try a cat face jack o’lantern, so we thought it would be a funny photo with the Catoween tapestry in the background…then right as the shutter was going, Ebony jumped up on the back of the couch behind me!
The Moon Screen was separate footage, some clips from the movie like Jack and Zero on Spiral Hill, with the rest from handheld video I shot inside Haunted Mansion Holiday last November. Combining them was tricky in itself because I was often moving when the video was being filmed, plus none of 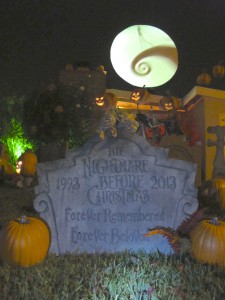 them matched in size or even color. The coffin sleigh with skeleton reindeer is only about 6″ wide and you’re on the moving track pretty fast right past it! I put them all together in one sequence, adjusted scale sizes and skewed to as round as possible, then I tweaked the colors so the wide variety of pale yellow shades met in the middle. Dissolve transitions between them also helped of course, then it was the same blank moon at the beginning and end for a clean loop. I only had so much possible footage so this loop wasn’t timed to the song, just repeated on its own timing, including in the dead time when the song wasn’t playing. That worked well since there was still something impressive going on when the pumpkins were just glowing, then when the song started it was an extra surprise when the pumpkins started singing. I have posted this Moon Montage video by itself with no watermark or credits if anyone else would like to use a Nightmare-Before-Christmas-inspired moon view for their Halloween displays!
That was already countless hours of computer work all summer, but I couldn’t finalize the video editing for projection until I knew how to skew and position everything in the front yard. Using 30% of the entire 2013 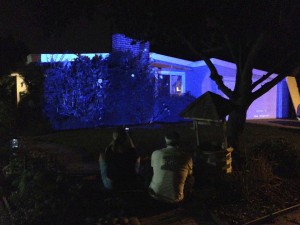 budget, in the spring I had bought a new super-short throw theatrical projector that was able to cover my whole house from my short front yard. Straight on would have been better performance but my yard is too shallow, so I put it under the front tree so it hit the house at an angle. The angle was so extreme that projector keystoning compensation couldn’t help, and images were enlarged toward the garage because they were almost twice as far away from the projector as the main house. We tested during the summer to get the correct positioning before I built the custom projector box from scrap plywood & hinges, but we couldn’t adjust all the pumpkin face placement or the moon until all that was built, stabilized, and in final position.
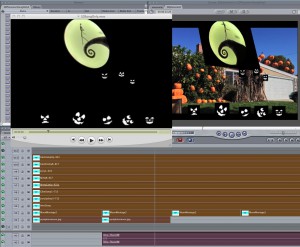 By mid-October I finally had all the pumpkin faces edited and timed together with a full minute buffer of dead time before the 4-minute song, which was a bit time-consuming to flip footage back and forth for each pumpkin to have a full minute of frozen face with seamless transitions at each flip. As soon as we got all the pumpkins and the moon screen in place, I took a photo in daylight from as close as I could get to the projector angle, but since the projector is a wider range than any camera lens, my iPhone did a better job than my Canon G-11, but it still wasn’t perfect. We knew that would only be rough placement anyway, and we would need to keep adjusting after projecting several times, but I spent several hours trying to place the faces and the moon in the same sequence in the right places, and skewing the moon so it would be round after projecting at such an angle, and all of that work took quite a while to render. Sure glad I have two computers so I can be patient and use the other laptop during rendering times!
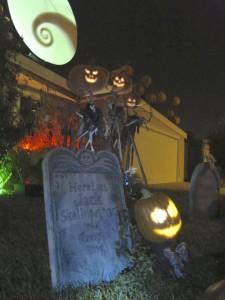 With everything else going on the final week before the party and video render times taking so long for multiple layers, final placement was a rush on Friday night, using a 1 second clip of the main sequence that would render in only 20 minutes so I could keep copying it to a USB stick and run it out to the front yard computer connected to the projector to see how good I guessed. After doing that for several hours, at 2am I finally got the placement spot-on, screen-shot all the specific placement numbers to copy into each track on the full song sequence, then 8 pumpkin faces and one moon, scaled, positioned & skewed was finally rendered and exported by 6:30am the day of the party…whew!
Here’s a video showing highlights of the entire editing process, what the footage looks like, and how it appears in the final display:
 Having the moon screen a full 8 feet across was ambitious, but it was sure impressive from even down the street! I had posted before how we built and set up the moon, but now you know why we went through all that craziness. 🙂 Once people got closer
 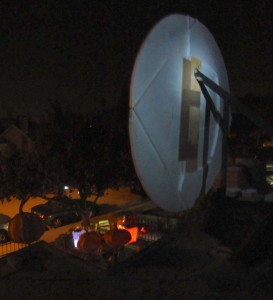 to the house, they saw the pumpkins singing too, and the stationary decor like Snakey and the lighted presents not only gave whimsical foreground interest, but it hid the projector of course. If you don’t recognize it, there is a scene in the movie with the striped snake eating a tinsel Christmas tree after already eating a present box, so that was perfect around the front tree and to hide the projector! The Jack in the Box even hid the projector beam from the walkway when leaving the house, and we had
 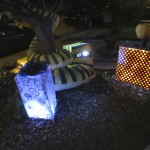 so many people ask where we were hiding the projector that we considered that a great success!
The graveyard fence was to discourage people from standing in the projection area and blocking the view, but during my party people went in 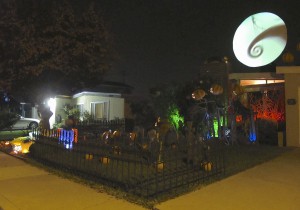 anyway. For the group photos it worked well since they were supervised so we could fix anything like tripping over cables right away. Thankfully the fence did its job for trick or treaters since none of them wandered into the grass…perfect! Did you notice that the graveyard fence looks fancy enough to surround a castle too? 😉
Here’s the full Halloween 2013 Front Show again to remind you how it looked in person…then stay tuned since next I get to tell you the secrets of how we created our animatronic Jack Skellington and Zero the Ghost Dog!

 Subscribe RSS

Very cool. I really enjoyed the song on the inspiration video. Makes me think maybe some Halloween caroling/sing-a-longs for future parties?
We did that about 10 years ago, and I had the Scarols and Nightmare songbooks ready on the piano this year, but people seem to be hard to corral together for activities lately. We do hope to expand the Pumpkin Chorus in 2015 with guest pumpkins…wanna be one? 🙂 Kind of like Eric Whitacre’s Virtual Chorus, so as long as your video meets the requirements and you lip-sync to our songs by the end of August, then I edit everyone together for the final show. I’m thinking Monster Mash, Addams Family, Purple People Eater, and other spooky classics for next time, more variety so it’s not the same song over & over, but I’m open to song suggestions.
Great job!