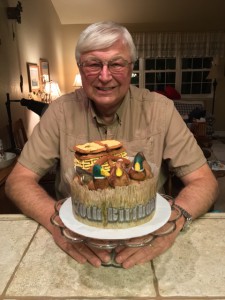
 My mom had her milestone birthday last year with the number included but not advertised on the Delicious Daisies Cake, and this year was my dad’s turn! Since I sculpted him six realistic silver salmon for his 60th birthday cake, my mom & I brainstormed how to include some of his other hobbies as this Vintage Outdoorsman Cake, with an antique wicker fishing creel and vintage wood duck decoys surrounded by cut wafer paper duck blind grass saying “Happy 70th Birthday, Gary!” in “platinum” to celebrate 70 years!
My first step was measuring the cake size so I knew my canvas size to sculpt the wicker fishing creel and duck decoys, plus how large to make the digital artwork to use my edible printer with wafer paper for the duck blind grass and birthday message. My dad requested  German chocolate cake, which has delicious nutty caramel coconut frosting, but tricky texture to decorate! My plan was to wrap the frosted cake in plastic wrap and use the springform rings around the plastic wrap to hold the gooey frosting in place for transit, then add the duck blind grass very last. I measured the ring circumference which was about 23″, then designed the birthday message to be about 17″ long
 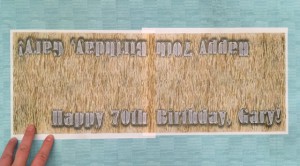 by 2″ high on 3.5″-4″ grass, with extra pages of plain grass printed to piece everything together around the full circumference. I know from experience the wafer paper curls fairly quickly in ambient moisture, but the duck blind grass should stand upright, so I planned to cut the grass texture but keep the wafer sheets flat until just before presenting the cake.
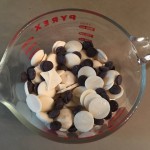 Before I could start sculpting, I mixed up some modeling chocolate to be a base wood color, using a mix of white chocolate and semi-sweet baking chips, so I had to guess at how much corn
 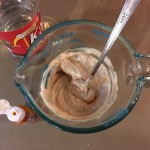 syrup to use since all the recipes are for specific chocolate ratios, not mixes between them. I also tried mixing a wicker color of modeling chocolate by adding a small amount of semi-sweet
 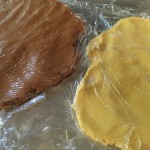 chips and a touch of yellow gel food coloring to the white chocolate chips. Modeling chocolate always needs to set in the fridge overnight as slabs covered in plastic wrap first, then it’s shelf-safe as long as kept in plastic.
I think the mix of different chocolates made my modeling chocolate more brittle than usual, since I couldn’t soften it enough just by kneading at room temperature. 30 seconds in the microwave was enough that I could knead the hot, almost gooey sections with the solid 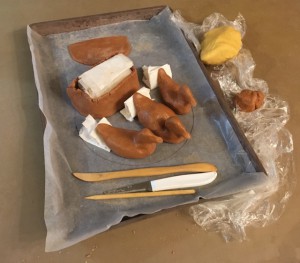 sections into one consistent soft ball, then continue to sculpt for an hour or so before it got too solid again. I formed the basic duck decoy shapes while the modeling chocolate was very soft, then let them set with some folded wax paper and paper towel support so the tails and necks wouldn’t slump. It was extra tricky shaping the fishing creel base until the modeling chocolate firmed up a bit,
 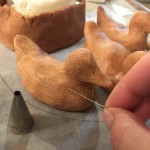 and setting overnight required folded wax paper support inside so it didn’t collapse on itself. After the creel was formed, the duck decoys were solid enough to hold their shape, then I was able to continue sculpting details, including woodgrain texture using a sewing pin and eyes stamped using a large piping tip.
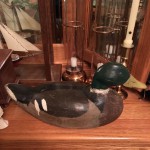 My mom had sent me photos of the antique duck decoy hen and drake at their house, so I used them as models to paint my chocolate duck decoys. I wanted them to look aged, not freshly painted, so letting some of the base chocolate color show was intentional like the paint was wearing away. I’ve been
 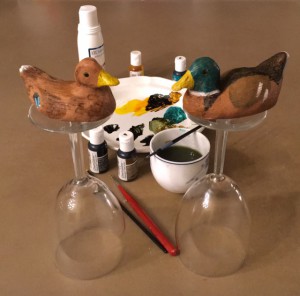 using ChocoWhite plain on dark chocolate and fudge for a couple years now, but this was my first attempt at mixing colors with the ChocoWhite to make opaque chocolate paint…very nice to discover that my gel food colors worked great! I used black, black/brown, medium brown, yellow/brown, and teal, some mixed with ChocoWhite when needed, like the yellow beaks and teal heads of the drakes. I was very pleased how they turned out so much like the originals! Since I made three duck decoys, I painted the third as another drake since they are prettier. 😉
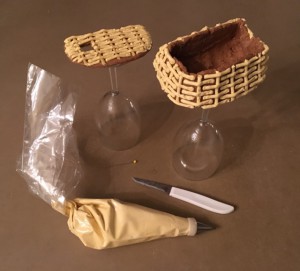 The fishing creel still needed its wicker texture, but the white modeling chocolate was too chalky to roll thin enough for the wicker, so I mixed up some
 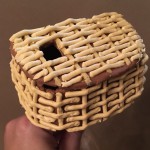 royal icing, using yellow & brown gel color to tint the wicker color, then piped the woven pattern instead. That needed to dry overnight before I could add straps to the creel…and even though the darker modeling chocolate was fine for sculpting, I couldn’t roll it thin enough to be leather straps without it cracking, so thankfully I saved the leftover royal icing from the wicker, and it was light enough I could add enough brown and red gel food coloring for the correct leather color. My
 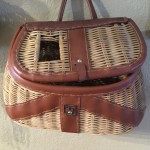 ribbon piping tip wasn’t quite as large as it should have been,
 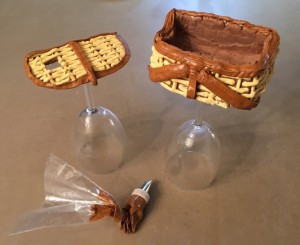 but it ended up still looking quite similar to the original wicker creel hanging on my parents’ wall!
I used a devils food cake mix in my springform pans, but I made the nutty caramel coconut frosting from scratch using an online recipe since I couldn’t access my mom’s family recipe. Since the frosting is cooked on the stove, you need to wait until the frosting is completely cooled before frosting the cake, otherwise you have a melted mess falling off the cake. As soon as everything was cool enough, I frosted the cake on a cardboard round, then immediately covered with plastic wrap and used the open springform ring to hold the frosting in place for 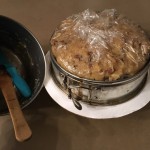 transit, and locked down the airtight plastic cake carrier in hopes it wouldn’t dry out between Thursday night to Saturday evening. The online frosting recipe (below) that was more opaque had 75% more evaporated milk and 2 extra eggs than the family recipe that was always more translucent. The birthday boy still liked it but my mom & I think we prefer the family recipe…that I now have in my files! 😉
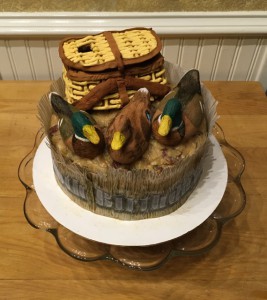 Cutting the wafer paper sheets was easy enough, since it was just chopping the edge randomly to look like the cut grass used to make duck blinds. Since the wafer paper curls in ambient moisture, I kept it flat between two magazines until I assembled the entire cake just before serving. I did need to use some royal icing to glue the overlapping seams, and it’s easier to use a table knife to hold the wafer paper flat while the royal icing dries instead of accidentally getting wet or sticky fingers stuck to the wafer paper. Adding the sculpted decorations on top was easy since everything fit just as expected…sure glad I measured well!
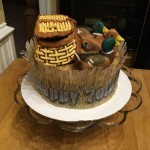
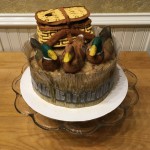
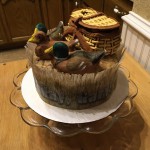
Since the birthday message wrapped around the whole cake, it required three photos to read it all, so I also made a 360-degree video:
…and here is the birthday boy blowing out his candles!
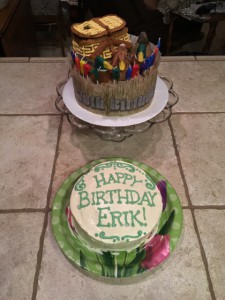 I found the Happy Birthday letter candles so put them around the front edge. It was also my brother’s birthday in two weeks so we celebrated double birthdays when I was in town. We used another silly spinning singing lotus candle like my mom’s birthday last year for my brother’s cake, but this one didn’t do the same closing trick…darn! I told my brother he’ll get a fancier cake when he turns 70! 😉
Hope you’ve enjoyed the Vintage Outdoorsman Cake as much as the birthday boy! You can keep reading to see the German chocolate frosting recipe including the differences from our family recipe…
German Chocolate Cake Nutty Caramel Coconut Frosting
1 cup sugar
1 cup evaporated milk (family recipe is only 1/4 cup)
1/2 cup butter or margarine
3 eggs, beaten (family recipe is only 1 egg)
1 1/3 cups flaked coconut
1 cup chopped pecans (I used half pecans & half walnuts)
1 teaspoon vanilla
In 2-quart saucepan, cook 1 cup sugar, the evaporated milk, 1/2 cup butter and 3 eggs over medium heat, stirring constantly, until mixture begins to bubble. Remove saucepan from heat. Stir in coconut, pecans and 1 teaspoon vanilla. Cool completely, about 30 minutes.
Place 1 cake layer, top side down, on serving plate. Spread with 1/3 of frosting. Repeat with remaining cake layers and frosting, ending with frosting.

 Subscribe RSS