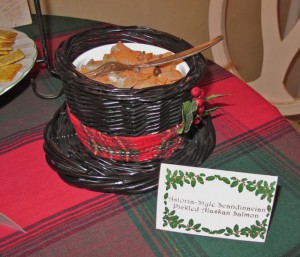
 Pickled herring is the standard Scandinavian delicacy, but I grew up with a big jar of “pickled fish” always at Christmas at my Grandma Peterson’s house. All of us Peterson cousins would pick out the pink meat from all the floating spices and onion slices, dish ourselves cereal bowls full, and chow down…yum! It wasn’t until years later I learned the “fish” was salmon and that it wasn’t a normal thing at all, but unique to Astoria’s Scandinavian population, since salmon was plentiful there instead of herring. Years ago when my dad starting taking his annual Alaska summer fishing trip and coming back with lots of delicious wild salmon filling his freezer, he began salting it & smoking it, then I decided to keep the Peterson tradition alive by pickling some salmon each Christmas.
Not everyone likes pickled fish (more for my family & me!), so I only set out a little bit at my parties so people can taste it…but last year at my Holiday Happy Hour there was an unexpected rush of people really enjoying it & asking for the recipe! Now that I have just finished the 2013 holiday batch of pickled salmon, finally here is our family recipe so you can try it too!
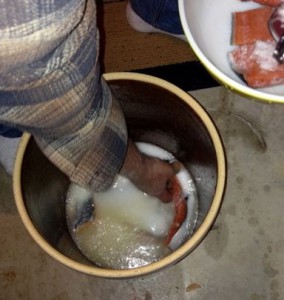 Before pickling, you must have salt fish cured for 30 days minimum, so plan ahead!
Salted Salmon
Cut salmon into chunks about 4-6″ with the skin on. You could use a glass bowl or large wide mouth jar if no ceramic crock. Never use plastic or any type of metal. Pat fish dry, rub about 1 tablespoon of brown sugar on meat side of fish. Layer into the ceramic crock with fish skin side down, a layer of rock salt to cover all voids and fish, then keep layering fish meat side up with rock salt until the last layer with skin side up and a last 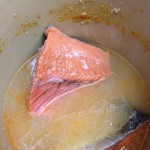 layer of rock salt covering everything. After 7 days check to see if liquid brine has formed. If no liquid, add water to rise to top of fish. You may need to use a plate weighted with a stone or jar of water to hold the fish down from floating. Store in a cool dark area with an old towel over opening. The towel keeps the smell down and bugs
 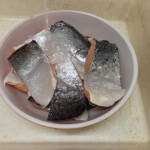 away but allows air to circulate. Your salt fish is ready to use after a minimum of 30 days. Brine acts like a refrigerator and will preserve the fish a long time without spoiling, but the chunks of salt will dissolve over time. Remove what you want to use for pickling or smoking, and leave the remainder in the brine. Before using salt fish in other recipes, rinse fish in cold water for 24 hours, either running a trickle from a faucet, or at least changing water frequently. One note is don’t rinse your fish for too long or it can lose its structural integrity and end up mushy and falling apart after pickling. Still tasty but much harder to eat!
 Astoria-Style Scandinavian Pickled Alaskan Salmon
Get your ingredients and supplies together:
salt fish, rinsed for 24 hours, sliced across the grain into strips
white or yellow onions sliced into rings
brown sugar
pickling spices (allspice, cinnamon sticks, whole cloves, bay leaves, but mostly allspice)
2 parts cider vinegar to 1 part water, enough to cover all jars
sweet pickle juice (optional – not in mine but my Great-Aunt Helen made it that way)
enough wide-mouth jars with leakproof lids for all your fish
Cut the onions first so you have plenty of sliced rings ready for layering. Some people like eating the pickled onions along with the fish, so slice them thin enough for easy eating. Leaving them in rings looks pretty when layered in the jar. While your hands are still oniony, separate your pile into individual rings so it is easier to grab just a couple when you are layering into the jar later.
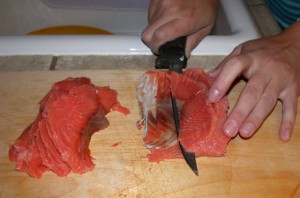 Cut your rinsed salt fish across the grain on a slant, very thin but still thick enough to hold together. Cut off rind and skin. Trying to trim all of the rind and skin off the chunk of fish first wastes too much fish for my taste, since this stuff is precious! If you practice enough and have a very sharp fish boning knife that flexes well, you can slice the strip and angle the bottom of the strip of the skin in one motion, as in the photo.
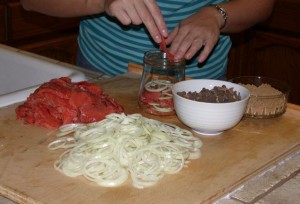 If you are in a smaller space (like an RV on the drive up for Christmas…been there done that!) it is easiest to clean up the fish-slicing mess and arrange everything in order on a clean surface so you are ready for assembly.
In a wide-mouth jar, place a layer of thin sliced rinsed salted salmon, covering the entire layer without overlapping, then a few onion slices, spread out to cover the layer, sprinkle a large pinch of the pickling spices evenly across the layer, then sprinkle a large pinch of about a rounded teaspoon of brown sugar across the entire surface. Continue layering until the jar is full, leaving just a little headspace. The original recipe says to place two bay leaves on top, but we haven’t noticed any difference skipping that step. I find it easier to keep filling a small bowl with brown sugar since I can’t save leftovers, and same with the spices. When layering, my fish hand is the same one I use for the brown sugar and spices, then my other hand for the onion slices. One small onion is enough per quart of filled jar space, but as long as you keep your onion hand separate so the other ingredients are not contaminating your onion pile, you can save any leftover sliced onions for sandwiches, salads or cooking.
Once all your jars are full of layers, cover with a brine made of 1 cup vinegar to 1/2 cup water, using a table knife or similar to ensure the liquid reaches the bottom of the jar without air bubbles. Here is an alternate 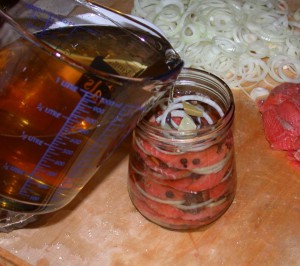 family recipe if you have some sweet pickle juice waiting to be used. We tried a couple jars of this brine for the first time this year, but we couldn’t tell much difference. Perhaps Great-Aunt Helen didn’t use as many spices when she used the sweet pickle juice?
Helen Sorkki’s brine:
2 cups vinegar
1 cup sweet pickle juice
1 cup water
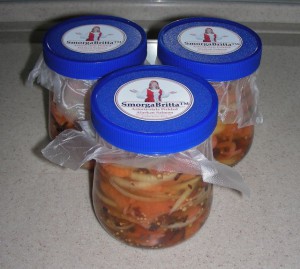
If you are unsure how watertight your jar lids are, use a layer of plastic wrap for safety. Add your own labels if you like, but stick them on the lids at room temperature, since most label adhesive and tape won’t stick to cold surfaces. Let flavors meld in fridge 2 days before serving for best flavor. These can last unopened in the fridge up to a year, but discard if you see any creamy residue.
I always associate pickled salmon with the special Scandinavian holiday recipes we make, and the timing works out well from the summer Alaska fishing trip, to 30 days salting, to Thanksgiving weekend pickling ready for Christmas season, but of course nothing is stopping you from enjoying this recipe year-round. Hope you enjoy it whenever you like!

 Subscribe RSS
