Of the six ghosts for Halloween 2012, there were two each of three different display techniques, so I might as well group them by technique. The easiest displays were the plain video screens showing the Watery Wraith in the wishing well and the Tower Ghost in the tallest tower, so I’ll start with them…
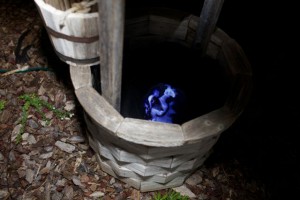 The Watery Wraith Haunting the Well was an easy display setup with just a digital photo frame sitting inside the well, but quite challenging to film the ghost footage! I have a small wooden garden wishing well that has been in my backyard since before I bought my house. I’ve always wanted to use it for Halloween but had no good ideas until we needed ghost haunting locations. Why not have it haunted by someone wrongly drowned as a witch? This was the only ghost who was filmed before
 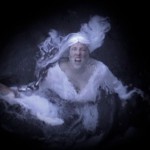 filming her portrait, since this was my ghost dress from 2003 that was already in tatters, also the Ghost In Chains dress from my first video ghost in 2011. The Watery Wraith was also the very first ghost filmed for 2012, so we learned lessons that helped as we went along.
In the brainstorming emails from last spring, my mom offered that we could film me “drowning” in their backyard swimming pool 3 hours away from me, and my annual Halloween shopping weekend friend Tash made a special trip to be there to help with filming! I sewed a bunch of black weedblocker fabric strips together to make a large 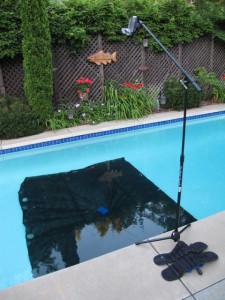 black backdrop 10x12ft, with a casing on one end for a 10ft PVC as a curtain rod so it could be used for filming other ghosts too, but I didn’t realize it should have been even larger to make sure there was enough background all around me.
For the proper perspective of looking down into the well, the camera needed to be directly above me, so I brought one of my microphone stands with an adjustable boom arm, and lashed a mini tripod to it to hold the camcorder. My ghost writer’s idea was to film under the surface of the water so we could put a layer of actual water over the image for realism, but we didn’t have a wide-angle lens or a deep enough pool to get my entire body in field that way, so the camera was about 5 ft above water level 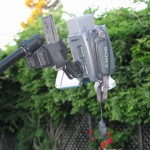 about about 4ft out over the water from the pool edge, which was far enough we needed some exercise weights on the stand base to counterbalance the camera and boom arm. This setup showed the surface ripples in the water, which was perfect when shown on the digital photo frame, without any actual water required over the surface for the illusion to work.
We started in the deep end so I could actually pretend to drown. Getting the lightweight black fabric to stay on the bottom was tricky, since it wanted to float, and 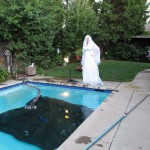 still needed rocks to hold the edges down, and it still wanted to float up in the middle when I moved above it. Treading water in a waterlogged dress while trying to look like you are drowning, all while being totally blind without contacts or glasses and only able to hear directions when your ears happened to be above water, was quite a challenge! I ended up sputtering & coughing up a bunch of water after each take. 😉 Since the chain was hollow plastic, it kept floating up around me, so I looped it through my big toes to try to pull it down, making it extra hard to tread water. You can see some “behind the scenes” footage here. We
 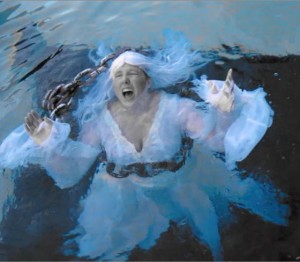 started filming as soon as the direct sunlight was gone, and we tried artificial lighting but the best lighting was natural dusk that made the white dress & hair glow against the black background, so we were done before sunset.
After reviewing the footage we did get, we decided I could use the following evening moving the whole setup to where I could stand, thinking I should have more control without as much “actual” drowning & sputtering (so much for that plan, as you can see here), plus the backdrop being immediately under my feet should help maximize the black area behind my floating arms. Good plan, except that I had problems with too much floating! I had to balance exercise weights on my thighs to keep my butt 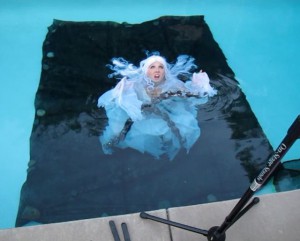 from popping up in back when I’d try my best to sink! After a bunch of giggle fits, I finally got the hang of it, plus getting the proper hand placement to cover wig edges when the hair would float as I sank, and slyly pulling the chain down with me, so we got enough usable footage to be worth the second setup. The wig & dress dried out fine, and I was able to handstitch all the tatters into the hems and add bright gold trim to film her portrait the following week.
I knew the actual audio wouldn’t be very usable except maybe some of the end sinking bubbles, so I set the camcorder on the pool edge and filmed a bunch of audio in the pool, gurgling, bubbling, and rattling some chains against an old metal anchor my 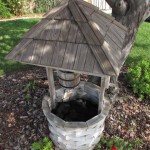 dad had in the garage. I used those during editing to add enough sound to attract attention for passersby to lean over and look into the well. The volume on the
 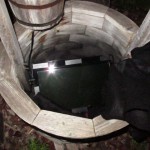 digital photo frame was pretty good, even though I had the edges covered with black felt to hide the rectangular display area.
Since the wishing well isn’t very deep, I helped the illusion of depth by spray-painting the insides black, fading from blackest at the bottom up toward the edge. In daylight everything was obvious, but outside in the dark it was quite believable. Since the well has a roof, I had to prop the digital photo frame at an angle using the power supply so 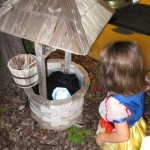 it wouldn’t glare at the viewing angle. The kids really liked this one because since it was perfectly at their height, they could watch it for quite awhile. 🙂
What could improve the effect would be a smaller video on a larger screen with a bottomless tube you could set over the screen so you don’t see any rectangular display. However, you would have to disguise the portion of the screen that sticks out around the bottom of the tube, and you wouldn’t have the ability to adjust the viewing angle if you need to peek in under a roof. You can try it yourself by purchasing the Watery Wraith video including sound, from EerieElegance.com!
I’m sure you recognize the Tower Ghost as my Glowing Ghostly Guardian costume, which you already know was a lot of work through the summer to make all the accessories like the spear, shield, and crown. Since I knew I was wearing the costume as a ghost for my party, we filmed Queen Brittahilde’s portrait first in early September, then I added the sheer white fabric to the leather bodice and talcum powder to the crown & spear for filming the ghost. I had made the ghost chemise and skirt earlier in the summer to be ready, and I braided the white wig to match when I 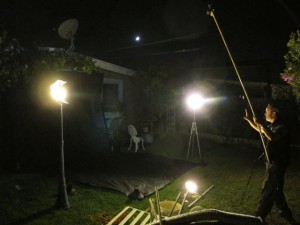 braided the copper wig for the portrait. By the time we filmed this ghost, we had enough practice with the backyard stage setup, hanging the black backdrop on the movie screen trellis, weighting down the corners on the grass, and lighting from each side to avoid lighting the background. Having no light hit the background improved the auto-contrast in the camera, and made the black match the absolute black I was able to generate by masking in Final Cut Pro, so it worked great.
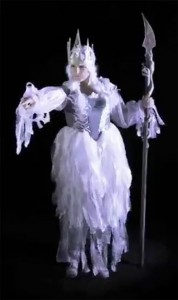 This was easier filming than many of the 2012 ghosts, since standing in the tower, she only had so far she could move or she would be out of view. We knew we wouldn’t see her legs in the tower display, but I wanted to film the full body since you never know how we might want to use the footage in the future, or who else might want a full stature warrior queen ghost. 😉 My big fan was running to give some flutter movement to all my translucent tatters on the sleeves and skirt. We came up with a way to change hands with the spear that looked cool, and I imagined looking at the sidewalk and the front pathway, scrutinizing everyone coming near the castle, pointing when I saw someone extra suspicious.
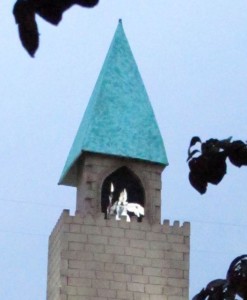
My partner in crime had a spare 24″ computer monitor that conveniently rotated vertically on its stand. He also had two sturdy collapsible workbenches that stacked, so I designed the tall tower around the setup, aiming the arched balcony “door” to fit 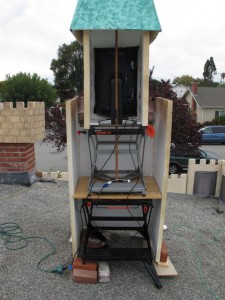 exactly with the monitor. When we hauled everything up to my roof 2 days before the party, we realized my tower roof stabilization pole could snap into the back of the monitor stand and fit into one of the holes of the workbench. That was fantastically stable (which was a huge relief since none of that was my own equipment!), but it made the tower pieces not fit as planned, since the balcony opening had to be as close to the monitor screen as possible for the illusion to work. You could only see the offset tower walls from the far sides though so I didn’t worry about it. There was a bit of glare from the monitor surface and blue glow from the “black” areas of the video, but adding one layer of sheer black scrim taped taut over the monitor screen worked perfectly. It really looked like she was standing in the tower, looking down at everyone below, even looked like the spear came outside in front of the window in spots!
 As for the video, if you read the Seven Moving Portraits post, you know I was scrounging for media players that would run video, and had a few iDevices of different generations at my disposal that were easy to hide, but getting them to work with the various cables I was able to acquire was a challenge. We had the space inside the tower to use a DVD player, but since my iPad was available and we did have a Dock to RCA cable, that worked fine with the iPad sitting on the lower workbench under the monitor. The trick was that none of the iDevices allow looping video (still annoying!), so I had to encode a 6 hour mp4 file to load onto my iPad, and was very glad that the battery lasted fine. I obviously didn’t leave the iPad out overnight, but since the foam tower structure provided cover from average overnight moisture, we were okay with leaving the rest of the setup through Halloween night.
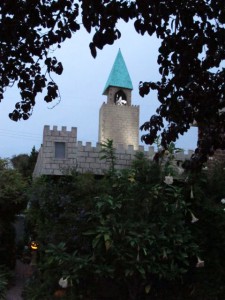 Of course Halloween day there was enough breeze to start tower failure…aack! Even though I had used monofilament to lash all the foam pieces to each other and bricks to keep them in place at the bottom, I had to reset everything quickly before any trick-or-treaters showed up. All the trick-or-treaters loved all my ghosts, and luckily they were gone by the time it started drizzling. I couldn’t manage the heavy monitor by myself on the ladder so I brought a trash bag up and covered it tightly to keep it safe, until its owner could come over and help me get all the equipment off the roof and dismantle the castle walls. You can see both the Tower Ghost and Swashbuckler Sally in the middle tower in this video.
Even though there is no audio track, the Tower Ghost is one of the best values, since you get 21 minutes of continuous footage of an ancient tattered medieval warrior queen silently watching and pointing toward the living, twirling her spear periodically from side to side. Buy your own copy on EerieElegance.com for only $5, no shipping!
Of course these were the “easy” ghosts…they get more complicated as we go along! Stay tuned for the Secrets of Swashbuckler Sally & the Pumpkin Queen…

 Subscribe RSS