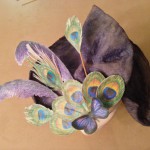
 When I first started attending Margarita Friday, there was a woman in another group who always wore fabulous fancy hats to dinner. I asked my group who she was, and they said, “That’s Hat Lady Sheila”…they didn’t even know her full name! When Sheila invited me to her birthday party house concert this year, I decided to make a Wearable Edible Feathered Hat for Hat Lady Sheila! The hat was decorated with wafer
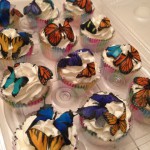
  paper feathers and a butterfly to tie in with Lighter Than Air Cupcakes, lemon angel food topped with lemon whipped cream frosting and bright butterflies. The birthday girl did model & chomp the hat, proving that it was both wearable AND edible! Read on for the full construction secrets…
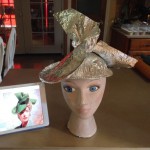 First the inspiration! For the edible hat to be wearable, it must balance on its own, since there are no edible elastic options for any straps! I searched online and found some fun designs, and several like a skull cap or simple pillbox would have been much easier, but my favorite design was this flounced felt Vogue pattern, so I decided to be ambitious! First I cut a slit in a sturdy foil pie pan and used a bullnose clip to hold it in the shape that fit my foam head, then I used several sheets of foil to form the hat over the pie pan.
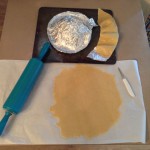 I figured that pastillage or gum paste would be the best choice for an edible hat since they are sturdy when dried, but those don’t taste very good, so I wanted to try my vegan sugar cookie dough that works so well with the frosting sheets. The cookie dough does puff while baking, so I decided against carving any texture, hoping it might end up flat enough to look like felt when sprayed with the food coloring sprays I have used before for Mardi Gras Mask Cookies. I loved the flounce sticking up, but I have baked dough on forms before, and too vertical an angle the dough slides off while baking, so I made the flounce a separate piece so it could hopefully take the ripple shapes properly.
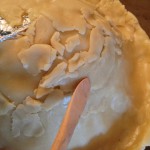 If you’ve ever rolled a pie crust then flipped it into a pie pan, you know it can be tricky even using a dishtowel or parchment paper since the dough likes to break. Well this was even trickier since the shape was convex and broke at the top where it needed the most stability to be wearable, so I ended up needing to repair several places using my wooden sculpting tool to smooth the edges, then the heat of my fingers to melt the dough together. The bottom edge was rolled back and pinched similar to a pie crust in hopes it wouldn’t pull back from the foil edge too much while baking.
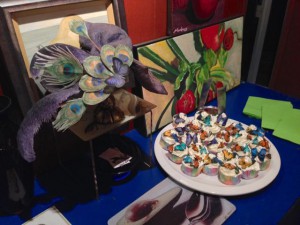
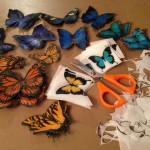
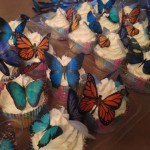
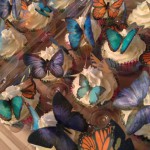
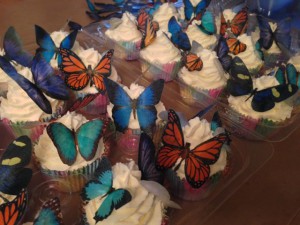 Since the dough was quite warm from all the handling, I put it in the fridge to chill before baking, hoping it would keep shape better. While I was waiting, I finished the two-dozen Lighter Than Air cupcakes. I had baked the angel food cupcakes with lemon zest the night before (recipe below), so I mixed up the whipped cream frosting (recipe below) adding a little lemon extract, piped big swirls on the cupcakes, and added the wafer paper butterflies I had already cut earlier in the week. Sadly even with only one hour covered in the fridge, the frosting was too moist creating condensation which melted all the butterflies, so I would recommend a non-refrigerated buttercream frosting instead, just like I have used successfully with these butterflies before, even for cupcakes transported in a metal tin…as you can see in my Etsy shop, since I sell many of these sets of Bright Butterflies every spring.
 ![]()
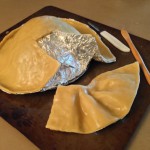 After the cupcakes were finished, I baked the cookie hat, watching it like a hawk every couple minutes so it wouldn’t slide too much or overbake. I got it out at the perfect time, just barely golden-brown at the thinnest edges, then let it cool completely before removing from the foil forms.
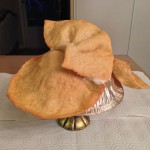 Thankfully the hat did balance on the candlestick I had planned for display, but I kept it on the sturdy foil pie plate form first for any royal icing that might drip. I couldn’t get the flounce to stay as vertical as I hoped since gravity prevented the royal icing from holding it in place long enough, so it sat back at an angle instead. The dough did bubble while baking more than I hoped, especially where I had to repair it, but I thought the birthday girl would still appreciate the concept of a wearable edible fancy hat.
 ![]()
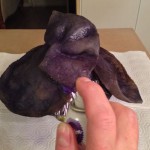
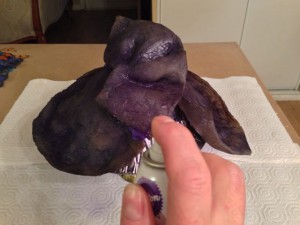 I had sprayed the underside of the hat edges first while holding it in the air, then set it back on the form and got the royal icing glue in place before spraying the rest of the hat. I know purple is one of Sheila’s favorite colors, and it would go well with all the peacock feathers and butterflies I had prepared. Even with the bubbles from baking, the food coloring spray gives unfrosted baked cookie dough a felt fabric look that I discovered experimenting with my Mardi Gras Mask Cookies. Fun to use experiments intentionally for a new design!
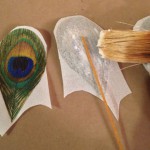 I had prepared all the hat decorations earlier in the week, cutting all the butterflies over a couple nights (hand cramps!), and cutting feathers. I have several peacock feather designs in my Etsy shop, so I cut some of the peacock teardrops and the realistic peacock plumes, then glued them with royal icing back to back over
 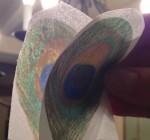 dry spaghetti as the feather shafts to give them height.
The wafer paper is slightly transparent, so you can line up both pieces using a strong light. I left the edges rough so I could trim them together the next evening after 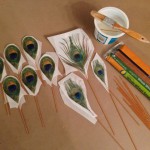 the royal icing was dry. The royal icing cannot be too wet, and the royal icing tends to curl, so let the glue dry under weights, like bags of sugar to fill around the spaghetti shaft. After the royal icing glue was completely dry,
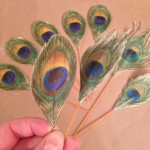 I carefully cut around the feathers and cut some texture into the edges of the teardrops to look more feathery. Since the shaft only was halfway up the feather, for the realistic plumes I curled them slighty for a more lifelike bend. Just be careful not to break the brittle dry spaghetti shafts!
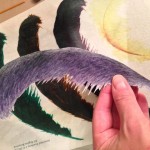 I also wanted some larger plumes, so I used two wafer paper purple ostrich plumes. Instead of gluing those back to back, I used a food coloring pen to handcolor the unprinted side, and I actually liked the handcolored side better so used that as the front! I used royal icing to glue long dry spaghetti as the shaft, all the way
 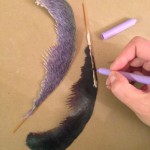 until the natural curve in the feather. After the icing was dry, I colored the royal icing and dry spaghetti to blend in with the ostrich plume color. I also carefully bent the edge of the feather to give it more 3D shape and to fall
 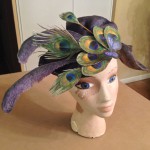 the correct direction.
All of the wafer paper decorations were ready before I even started sculpting the hat, so as soon as the food coloring spray was dry enough not to leave fingerprints, I started adding feathers to cover the seam between hat sections. It always 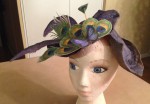 takes what seems like an eternity for royal icing to set enough while you are rushing to finish the project, and this required a thumb pinch human clamp to let it set against gravity. Just in case it didn’t last the trip, I took as many photos as I could think of to show the
 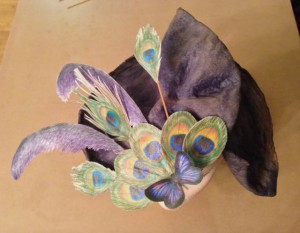 different angles. It finally did set enough to transport to the party, thankfully closely monitored in my own hands!
It is difficult to show in photographs, but what is wonderful about this wafer paper is that the sheen of the paper surface reproduces the natural iridescence of feathers and butterfly wings perfectly!
There was also a 1961 theme for this party, so stay tuned to see my Breakfast at Tiffany’s outfit in a separate post. You can also click to view the full recipes below. Hope you enjoyed my Wearable Edible Feathered Hat as much as the birthday girl!
The hat dough was the vegan version of my Foolproof Sugar Cookies, using Nucoa margarine and Ener-G egg replacer:
Foolproof Sugar Cookies
(featured inside the book Eerie Elegance)
2 cups margarine or butter
2 1/4 cups sugar
3 eggs (or vegan egg replacer)
1 1/2 tsp vanilla
6 cups flour
3/4 tsp salt
4 Tbsp milk (can use water – only if moisture is needed)
Divide dough in half. Only add milk or water if the dough is too dry to hold together. Chill at least 1 hour. Roll out half of dough 1/8 to 1/4 inch thick. Place on a greased cookie sheet and bake at 375F/190C for 12 minutes. These can be frosted. Makes about 5-6 dozen standard-sized cookie cutter shapes.
The cupcakes are the same recipe I used for the Psychedelic Tie-Dye Angel Food Cake but with zest of one medium lemon added, spooned into 30 paper-lined cupcake tins, and baked until a toothpick came out clean:
Yield: 1 10-inch cake
A classic cake made from whipped egg whites. Light and spongy, it’s perfect topped with whipped cream and fresh fruit or served with ice cream.
Ingredients
1 cup cake flour (113 grams)
1 2/3 cup (333 grams) sugar
1 3/4 cup egg whites, from about 13 eggs
1/2 teaspoon salt
1 teaspoon cream of tartar
1/2 teaspoon vanilla
Strawberries for serving, optional
Instructions
Preheat oven to 300 degrees.
Sift the flour 3 times, then add 2/3 cup of the sugar and sift 1 more time.
Beat the eggs until frothy. Add the salt and cream of tartar and beat till they just begin to form soft peaks. Add the remaining sugar 2 tablespoons at a time and beat until they hold soft peaks. Beat in the vanilla.
Sift the flour mixture over the whipped egg whites in 4 additions, folding in each addition by hand until just incorporated.
Spoon into an ungreased 10 x 4 inch tube pan. Rap on a hard surface a few times to release any bubbles. Bake until spongy to the touch and a toothpick inserted into the center comes out clean, about 1 1/4 hours for full-size cake, 12-20 minutes for cupcakes.
If the pan has feet, invert it onto a flat surface. Otherwise, invert over the neck of a bottle. Let cool 2 hours. Use a thin knife to cut around the edges and release the cake.
Note: The cake can be made one day ahead. Store in the pan uncovered at room temperature.
Recipe adapted from The Gourmet Cookbook.
I topped the cupcakes with the same whipped cream frosting I’ve been using the past year, but 2 tsp lemon extract instead of any chocolate. This tasted great with the angel food cupcakes, but if you want to use the wafer paper butterflies, I would recommend a buttercream frosting instead:
Whipped Cream Frosting
4 c. heavy whipping cream (2 pints)
2 c. sifted confectioners’ sugar
2 tsp vanilla
In a chilled bowl blend ingredients, then whip until mixture holds a peak. Frosts 2 (9 inch) round layers, split in half plus sides and top. Refrigerate.



















 Subscribe RSS