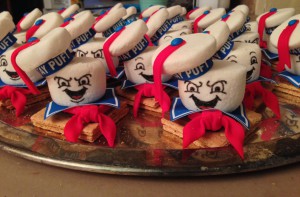
 Of course as soon as I decided to show Ghostbusters in my summer movie series, I immediately thought of Stay Puft S’mores! Since each s’more would be an individual serving, I knew making the entire marshmallow man in such a tiny scale would not only be hard to see, but it would be a LOT of work to make enough to serve a crowd! I thought just the heads would work, and the giant marshmallows I had found last year were the perfect size.
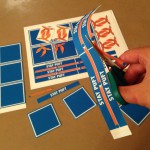 Since the STAY PUFT writing on the hatband would be too small to pipe anyway, I decided to design a printed frosting sheet for the hatbands. I also printed the blue sailor collars with the white border so the blues would match, and since there was still some room on the sheet, I printed the red scarves and tassels too. The sailor collars were sized to fit a normal purchased graham cracker square so they could hang over the chocolate layer angled for the points to hang on the flat sides of the graham cracker.
 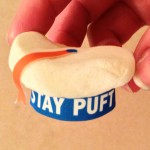 It is a little tricky to cut strips so thin from the frosting sheets, since the strips want to separate from the backing and curl up, so it works best to leave as large a chunk as possible in your hand, and cut away each strip as you go, even the white space. I got enough frosting sheet pieces cut
 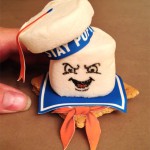 out, then I started cutting some marshmallows to see what proportions looked best. When I had a successful hat, I grinned from ear to ear and posted as a teaser on the Britta Blvd Facebook page and Twitter! The initial full proof of concept model didn’t include the chocolate layer, but it looked perfect…hooray!
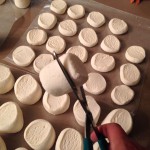 The proportions were just right that cutting a slice a quarter of the way through the marshmallow created the hat and the head, each with a conveniently sticky side for assembly. I worked with wax paper and kept the sticky side down for the heads for later sticking to the collars on the day of the party. The hats needed a little coaxing back into shape after cutting, but pulling the edges of the sticky side out back into a circle shape, then letting them sit open to the air a bit helped.
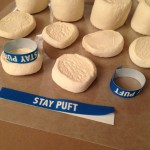 Don’t let them dry out all the way though, since you need some stickiness to get the hatbands in place! Keep the backing on the hatband strip as long as you can because the thin frosting sheet strip is fragile. When you are ready to add a hatband to a marshmallow, separate the strip from the backing, loop it around into a circle that looks the right size with the marshmallow hat, then gently press the hatband into the marshmallow so it sticks in place. There should be some overlap of the hatband,
 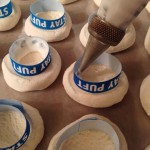 which helps it stay in place and support itself.
I did try cutting a section of marshmallow to support inside the hatband, but it prevented the hat from sitting properly on the head at the correct jaunty angle. I already knew that royal icing works well with frosting sheets, so I covered the inside of each hatband with a good coat of royal icing, using a piping tip for accuracy. Make sure to get the royal icing all the way to the top, since otherwise the weight of the marshmallow can collapse the hatband during assembly. Yes, I just said the 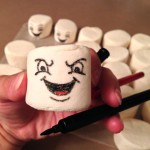 “weight of the marshmallow”…never thought I’d say that!
As I was developing the design, I thought others might want to make their own Stay Puft S’mores, so I was trying to make it as easy as possible. I tried some wafer paper and frosting sheet scraps stuck to the side of the 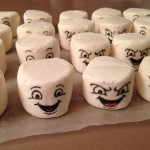 marshmallow for the faces, but you could see the edges and it affected the marshmallow texture, so I decided just to draw all the faces by hand with my food coloring pens. I chose the original happy face and the angry Gozer face and drew a dozen of each, giggling to myself during each face…hahaha!
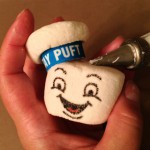 With the faces still sticky-side down on wax paper, I packed them into airtight tins so the marshmallows wouldn’t dry out, but I left the hats in the open air so the royal icing could dry. The next evening after all the royal icing was dry inside the hatbands, I used the same royal icing and piping bag to attach the hats to the heads. To get the correct jaunty angle,
 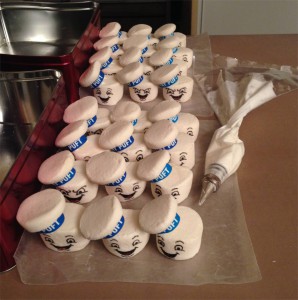 I set the first row of heads with the hats leaning against the tin, then each row leaned against the previous row. The bottom edge of the hat could sit on the top of the head on the previous row, and that happened to be the perfect angle. I really laughed at my little parade of Stay Puft marshmallow sailors! They are all standing at attention, but some of them are pretty upset about it! 😉
You could use the red tassels and scarves from the frosting sheet and be almost done already, but I wanted a more 3D look, especially so the backs of the tassels would also be red, so I bought some red edible clay. I could have made my own batch of marshmallow fondant, but for such a small amount I didn’t feel like fighting to get the vivid red color I wanted, and this pouch was $5 before the 40% coupon I used, so a 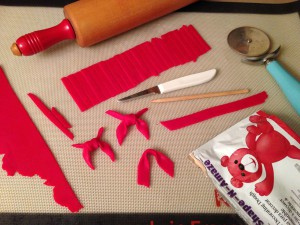 good deal. It rolled out easily but still stayed firmer for sculpting than rolled fondant does, so it was a good choice. I cut the straight strips for the tassels with my pizza cutter, then I cut more strips for the scarves. One strip was cut to taper at each end, the other didn’t matter, then a shorter strip looped around the two in the middle to create the knot. I bent the strips to make the cloth folds and made sure
 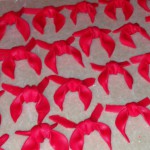 to squish the back of the knot so it would all hold together. Take heed, since the flatter and smaller these are the easier your assembly will be! Mine kept creeping larger which made them thicker, and those were the scarves that caused problems later. 😉
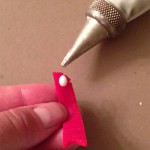 That was the end of another evening’s work, since everything had to dry again before I could move forward. The next evening the royal icing hats had set fine, so I could transfer them on the wax paper into the tins so they could still support each other. I used the same white royal icing to glue the tassels to the center of each hat, bending the tassel slightly to encourage it to hang straight down. I wanted the tassels to hang towards the front anyway, which worked well since they could be attached while the ranks of heads were still supporting each other.
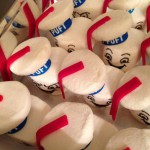 As the tassels were drying, I mixed some of the royal icing as blue as possible to match the hatbands and collars for the top button…but I soon realized that the hat angle was too steep and the royal icing wanted to droop! Since they were already inside tins, I propped up one side of the tin from underneath so the hat tops were vertical, piped all the blue buttons, then let them all dry with the tins propped up. I guess I should have
 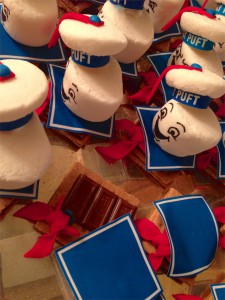 taken a photo of that too, since it looked pretty silly. 😉
After the blue buttons were dry, the lids went on the tins to keep the marshmallows soft until party day, when assembly began! Even though I had broken all the graham crackers and chocolate into the correct shapes beforehand, it took longer than I expected since the 3D edible clay scarves wouldn’t stay in place on the graham crackers without a dab of royal icing glue first. Once I got all those stuck in place, I was able to remove the sailor collars from their backing sheets, drape them over the chocolate and the scarf, then stick the marshmallow head firmly onto the collar.
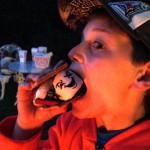
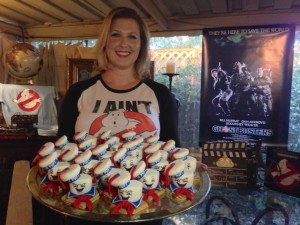 I was finishing the last assembly as the first four people arrived, and as soon as I was done and reaching for my camera, two of them scooped me by starting to take photos with their iPhones before I could! haha…Of course I also requested a photo with my creations in all my Ghostbusters decor on the patio. Everyone loved them, and yes, we did cross the streams to roast Mr. Stay Puft and chomp him as Stay Puft S’mores!



 Subscribe RSS