My Cinema Brittahytta Frozen Sing Along party was a lot of fun, but it was also a lot of work fashioning such festivities! I was able to get everything done in time because my parents and I already had acquired lots of Christmas snowflake supplies over years of collecting, plus I spread out my projects and food preparations the whole month leading up to the party. Of course my Elsa the Snow Queen costume was finished a couple months before, thank goodness! I’m so glad I planned this well, because then I was able to enjoy my out-of-town guests and have a great time at my own party!
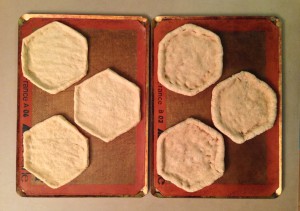 First up were the pizza crusts since they stay fine in the freezer for several weeks. I know they last that long because I love eating a pizza for dinner if there are any party leftovers.
 ![]() I used the same whole wheat sourdough pizza dough recipe I’ve been using for a couple summers now, since it is always a hit. Since my plan was Grilled Snowflake Pizzas, I made hexagonal whole wheat sourdough pizza crusts so everyone could arrange their toppings to make their own pizzas as unique as individual snowflakes!
I used the same whole wheat sourdough pizza dough recipe I’ve been using for a couple summers now, since it is always a hit. Since my plan was Grilled Snowflake Pizzas, I made hexagonal whole wheat sourdough pizza crusts so everyone could arrange their toppings to make their own pizzas as unique as individual snowflakes!
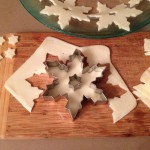 I have a whole collection of modular make your own snowflake cutters from long before I became a Frozen fan, so in addition to using them for the Frozen Fractal cookies, I used the same cutters on two packages of sliced
 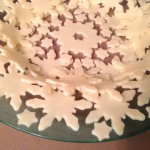 mozzarella so we could add various white snowflake shapes on top of our pizzas. I ended up with two full plates of stunning snowflakes, even the tiny stars that were cut out of the middles. The tiny stars were very popular with the tiny kids!
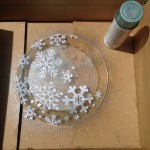 None of the plates and napkins I found for sale fit my vision, so I decorated clear lightweight plastic disposable cups and plates with my own snowflake designs and aqua spray glitter. For the plates, I used removable label
 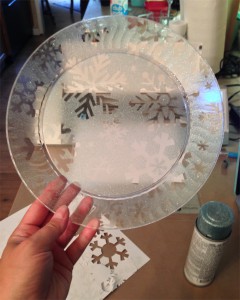 paper in my new cutting machine to cut more of the same snowflakes designs I had used for Elsa’s Sparkling Snowflake Cape, stuck the snowflake labels to the back of the plates as stencils, then used aqua glitter spray paint to give a sparkling coat of ice. Since this was only on the back of the plate, there’s no risk to the glitter getting into any food. I was able to resuse the same labels several times before they got so much glitter on them that they started curling upwards instead of sticking to the plates. I think about 4 pages of labels were enough for all 20 plates, but I did go through 3 cans of spray glitter, which was the largest expense. I used coupons on each can, but they were still $5 each and only small cans. One tip is that the glitter clogs the spray nozzle, so try to use up a
  whole can in one session, or you might end up wasting the rest!
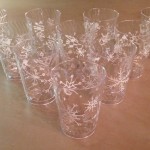
For the cups, I used a white paint pen to draw assorted snowflakes by hand, lower than anyone’s lip would touch the cup just to be safe. After all those were dry, I used the last of the aqua spray glitter 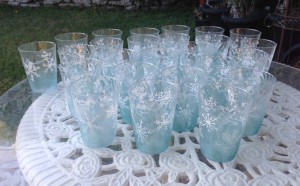 carefully pointed away from the lip of the cup to spray only the bottom edge, using short sprays so the glitter would fade from clear to more aqua at the bottom.
I really love how these turned out! So elegant and just like Elsa’s ice creations in the movie! They were technically disposable, but since the plates were fairly sturdy plastic and none of the cups had cracked, I carefully washed them all by hand afterwards so I can use them again someday. I did spend about $35 on the full set of 20 plates and 20 cups, so nice to be able to keep them. ![]()
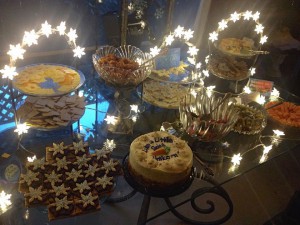 Lucky for me that my parents have a bunch of snowflake lights and giant plastic snowflakes for Christmas, so I borrowed those, and they made a huge impact! Even the small snowflake lights I taped to my tier trays, and it was so festive for an evening party. The larger snowflake lights had a subtle twinkle effect, not blinking enough to be annoying, but just a twinkle, which was
  perfect. I used 4 strings around the outer patio and across the grape arbor bench which looked lovely over the firepit, one string across the french doors from the kitchen entering the patio, and another string over the food table across the posters. Some people did notice
 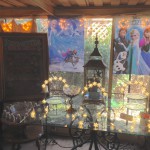 that I placed the snowflake lights very carefully compared to the posters…one is in Elsa’s hand!
I love snowflakes for Christmas as well, so in addition to the cookie cutters for the Frozen Fractal cookies, cheese and pastry, I also have various snowflake silicone molds. I used one of the molds for decorative ice cubes but forgot to take any photos of them…oops! I wasn’t originally planning on s’mores since we already had “Do You Wanna Build a Snow Cone?”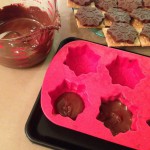 to make, but as soon as I thought of “Love is an Open S’More” I could not resist! The less intricate snowflake silicone mold was the perfect size to sit on a standard graham cracker square, and also the smallest Frozen Fractal cookies fit on top perfectly! I have made custom s’mores
 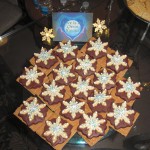 several times before, and I love my semi-sweet Ghirardelli, but s’mores just need the Hershey’s milk chocolate flavor to be proper s’mores. Two bags of Hershey’s milk chocolate chips melted in the microwave were plenty to make 18 chocolate snowflakes. The molds were deep and intended for
 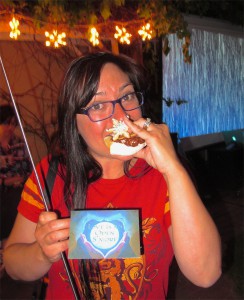 baking, not candy, so it was tricky to judge how thick to make the chocolate so I could remove it from the mold intact but not to be too thick for a s’more. Two spoonfuls ended up as too thick, so one spoonful of melted chocolate spread around into all the corners was just thick enough to remove from the mold, and only slightly thicker than a Hershey’s bar…perfect! They were set up as open s’mores on the plate, then you needed enough love to warm up your marshmallow to melt the “frozen” chocolate. Good enough story? It didn’t matter since they were s’mores! Delicious!
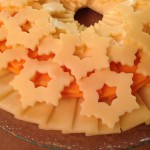 I was on-schedule enough that the night before the party I had time to cut more cheese slices into snowflakes for the cheese tray. I used the normal rectangles for most of the tray, and I only had one snowflake cutter that fit inside the precut cheese slices, so I cut those out and arrange them on top over the cheddar so they would stand out. I love adding little details like this!
I realized while making the Brrrie in Pastry that I don’t think I have it as searchable recipe instructions. I think I can get some better photos from the beginning for the upcoming Patriotic Pastry Brie, but here are the basics. I purchase the baby Brie rounds and frozen puff pastry sheets. Thaw the puff pastry in the fridge for a few hours, unfold one 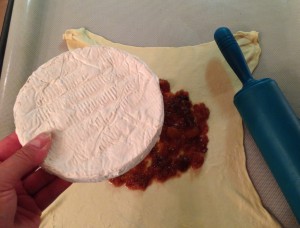 sheet, pinch the folds back together, then roll in all directions to stretch out the sheet. I use a large silicone mat so I don’t need any flour. I would recommend parchment paper if you don’t have a silicone mat. Keep flipping the pastry over between rolling it out or it will get too thin to lift off your rolling surface. Use the cardboard the Brie came in to gently mark the dough in the center. This is where to spread your fillings, and so you know you have rolled your sheet large enough. I used apricot preserves with dried cranberries for years, but after I started making my spiced loquat preserves from my own fruit tree in 2006, that became the hands-down favorite filling!
You can spread the filling to bake only on top of the Brie, or have it come down the sides a little. If the filling comes down the sides, you have a greater risk of developing leaks in the 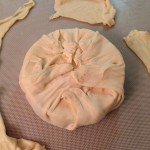 pastry, so fair warning. After spreading the filling, do not wait too long before putting the Brie round in place, since the pastry can start getting soggy and refuse to release from your rolling surface. Fold the pastry around the Brie, starting with the flat sides since they are the shortest. Trim the corners and fold them also to the center. This side doesn’t need to be pretty since it will be hidden, but you want to secure all the pastry so there are no holes, so pinch everything together well. Immediately pull the entire Brie in pastry gently off the rolling surface and set on
 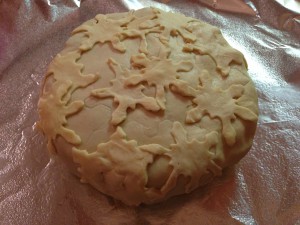 greased foil on a cookie sheet, with the pinched pastry ends on the bottom. If you wait too long to flip it onto the cookie sheet, you will also have problems with the weight of the Brie squishing the pastry too thin.
Now you can roll out the corners you trimmed away and cut out whatever decorations you would like on the top. For this Brie I used snowflakes of course! If you work quickly, you should be able to stick the pastry decorations on the Brie just as raw dough, but if it takes longer to construct your design, you might need milk or egg wash as glue. I use a piece of foil large enough I can pinch it sealed as a tent and keep in the fridge overnight before 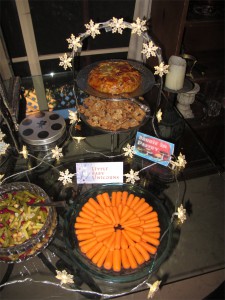 baking just before the party. If you are saving it overnight, it is better to add the final milk or egg wash just before baking so it doesn’t get gummy. However, if you don’t use any sort of protein wash at all, it won’t brown very well. Bake in the oven at 400F for at least 15 minutes, maybe longer, but keep checking. Once it has browned and no spots are doughy anymore, remove from the oven. Let it cool several minutes, then pull away the foil to set carefully on a serving plate. If you set it out too quickly, your guests could burn their mouths! Since the Brrrie in Pastry is extremely decadent, add something healthy nearby like a plate of baby carrots as Little Baby Unicorns.
 ![]()
Except for the plates and cups, most of the food styling and decorations were very inexpensive since I was reusing what I had or borrowing from my parents. I did splurge to  buy two posters and the lifesize Olaf standee, but the diecuts around Olaf left too much white cardboard around his arm and his twig hair for my taste. I knew that was for stability because those areas were too skinny and easy to break, but I decided to try cutting them out and reinforcing them from the back. I used an extra layer of scrap cardboard behind
  his arm, but the twigs were too skinny for that. Since I was using hot glue to anchor the scrap cardboard to his arm, I tried building up layers of hot glue on the back of the twigs and the arm, letting each layer cool and harden before adding another. Not only did this reinforce the twigs pretty well, but they could also now even bend without creasing! Kids were
 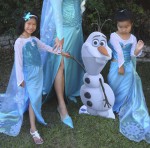 even able to hold Olaf’s hand for photos.
 ![]()
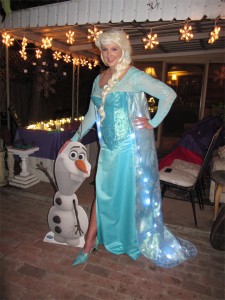
I was very thankful that had finished all the final food prep the night before, and all the last dirty work to get the yard all arranged was done early enough for me to shower and cool down enough for all my Elsa makeup before my special guests arrived from a 5-hour drive! My dear friend Natasha brought her two daughters to their first Britta party, and 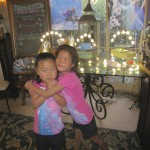 they were so excited! I had turned all the snowflake lights on already, so as they walked in their first view was of the twinkling snowflakes, Frozen posters, and the food table…and they gasped & hugged each other!
 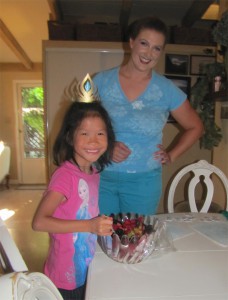 I’m so glad they had such a fabulous time!
I had set aside safe ways they could help, like setting the crackers on the plates, putting the water bottles in the ice bowl, and stirring the fruit salad, but we ran out of tasks they were so helpful! They even each helped me put on one Elsa ice shoe…haha! We were all in our Elsa costumes and I was putting the last final touches on all the food displays when our next guests arrived…whew! This doesn’t always happen for my parties, especially for the crazy time that is Halloween, so I told Kevin how proud I was that everything was set out and our costumes were on before the party started…and he said we should go out and buy lottery tickets…haha!
Hope you can use these tips to create your own Frozen festivities! Don’t miss the full Frozen Sing Along party, including an adorable sing along video of Let It Go Live!
#Frozen #Elsa #Olaf #Fractals #recipes #snowflakes #snow #costumes #parties

 Subscribe RSS
Wow I love your snowflake plates and glasses! I am getting married in Kauai in May and aqua/mint are my colors. I am going to try this with a starfish design. What brand of plates/glasses did you use! Thanks for the inspiration!! Katherine
Glad you like them! Sorry I don’t have the packaging anymore. The plates were just from a grocery store but I’m sure a party store will have similar. The cups are a big pack of several hundred that Costco always has in stock. I like them because they are a smaller portion size, good for both kids & adults, so I use them for my parties year-round. Good luck with your wedding!