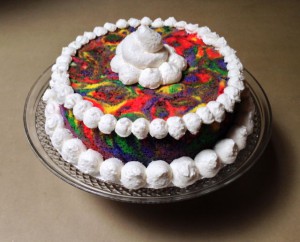
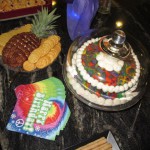
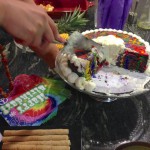
 My friend Cyd’s favorite cake is angel food, which is challenging to create into edible art. The fluffy delicate cake texture does not carve or stack well, plus it isn’t usually frosted completely to use that as creative decoration. Since we had chosen a 60s cocktail party as the theme of her milestone birthday party, and Cyd loves bright colors, I decided to try coloring the cake batter before baking to make a tie-dye design throughout the cake itself. I think it came out pretty good for a first try, and the birthday girl absolutely loved it!
 ![]()
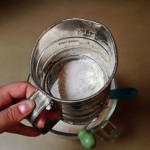 I hate sifting but I didn’t want to ruin this cake, so my grandmother’s old sifter came in quite handy and worked great. The good news is that the 100% organic egg whites from the carton did fluff properly in my stand mixer, and I had just enough cake flour! I was worried so had two dozen fresh eggs on stand-by in the fridge, but I didn’t want to have so many yolks leftover if I could help it.
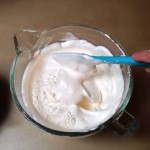 The recipe instructions were to sift the cake flour into the soft peaks of the whipped egg whites 4 times, only folding gently, not stirring, so I obeyed, not wanting the meringue to fall.
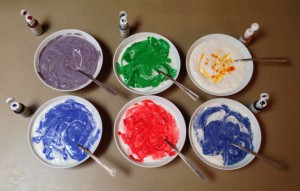 I wanted several colors so gently spooned some cake batter into six bowls, then carefully stirred in vivid gel food coloring, trying to leave streaks of white and darker streaks of color. The bowls started nicely streaky, but as I spooned the batter into the ungreased tube pan, the colors kept mixing more consistently on their own.
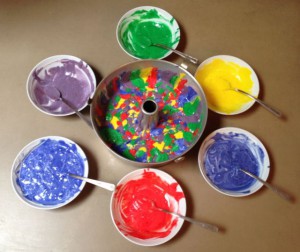 Cyd’s favorite color is purple so I used two purple gel colors and mixed my own shade of purple, too.
 ![]() Trying to swirl the batter into patterns while spooning didn’t work very well, so I just kept going with blobs of various sizes, randomly spacing colors so not too much of any single color would dominate. By the time I got to the end of the batter, I spooned larger blobs since that would be facing the cake plate. As an experiment I used a table knife and dragged two circles through batter all the way to the bottom to see what pattern might emerge, but I was afraid of doing too much stirring that might start mixing the colors together. Thankfully that made a cool feathered pattern around the top!
Trying to swirl the batter into patterns while spooning didn’t work very well, so I just kept going with blobs of various sizes, randomly spacing colors so not too much of any single color would dominate. By the time I got to the end of the batter, I spooned larger blobs since that would be facing the cake plate. As an experiment I used a table knife and dragged two circles through batter all the way to the bottom to see what pattern might emerge, but I was afraid of doing too much stirring that might start mixing the colors together. Thankfully that made a cool feathered pattern around the top!
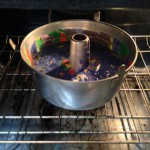 If I try another tie-dye cake, I would spoon layers of white batter into the pan, add drops of color directly in, then use a table knife to drag color patterns through the white, and continue with multiple layers to keep the sides interesting. I think that would be less handling of the batter so more chance of keeping the most fluff. By mixing the colors first an then spooning the batter, it took enough time that I was watching the fluff sag even though I was spooning blobs as quickly as possible, so I rushed it into the oven as soon as all the batter
 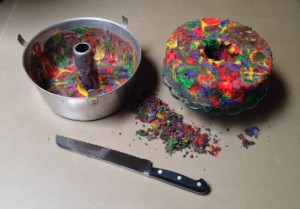 was in the pan. Of course once it was baked, the top surface and sides where it had pulled away from the pan had browned so the colors weren’t as vivid. I cooled it upside-down per the recipe instructions so the foam
 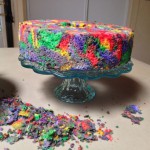 has its best chance to set without collapsing, and I left it upside-down in the pan overnight to keep it moist. This is a tube pan but is NOT the fancy springform style with removable bottom plate, so since it was ungreased to make sure there was no grease that could make the egg white foam fall, I had a heck of a time removing the cake from the pan! Once it came out and I trimmed the brown off the sides, it looked gorgeous from all angles!
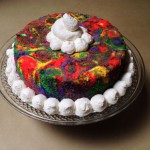 I really didn’t want to cover up the wonderfully-bright tie-dye, so I started decorating with whipped cream frosting only around the bottom border plus a swirl to fill the center hole, but that looked a little too bare. I changed to a smaller tip and piped a
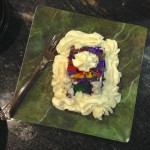
 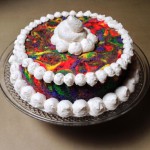 matching dot border along the top which made it look finished without too much coverage. I also decided that the birthday girl would rather see the tie-dye than a piped birthday message. That wasn’t enough frosting for serving, so I brought the piping bag of frosting to add more to each plate as we served it at the party.
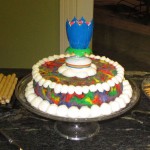 These crazy lotus birthday candles that spin & open into multiple candles while playing Happy Birthday were going around the internet this spring, so I bought a few to try them. This was my first try, and it never sang while it turned, plus was only 8 petal candles instead of the 14 that was advertised, but it was still fun, especially to read the badly-translated instructions on the box. After I left the party, Cyd told me the candle finally started singing from the trash can about 1am, and kept singing through the morning…haha!
Hope you enjoy making your own tie-dye cake! The full recipes for the Angel Food Cake and the Whipped Cream Frosting are below if you keep reading. For the rest of the story you can click to read the rest of the 60s cocktail party fun and the Vintage 1960s Pineapple Cheese Ball!
Whipped Cream Frosting
4 c. heavy whipping cream (2 pints)
2 c. sifted confectioners’ sugar
2 tsp vanilla
In a chilled bowl blend ingredients, then whip until mixture holds a peak. Frosts 2 (9 inch) round layers, split in half plus sides and top. Refrigerate.
Yield: 1 10-inch cake
A classic cake made from whipped egg whites. Light and spongy, it’s perfect topped with whipped cream and fresh fruit or served with ice cream.
Ingredients
1 cup cake flour (113 grams)
1 2/3 cup (333 grams) sugar
1 3/4 cup egg whites, from about 13 eggs
1/2 teaspoon salt
1 teaspoon cream of tartar
1/2 teaspoon vanilla
Strawberries for serving, optional
Instructions
Preheat oven to 300 degrees.
Sift the flour 3 times, then add 2/3 cup of the sugar and sift 1 more time.
Beat the eggs until frothy. Add the salt and cream of tartar and beat till they just begin to form soft peaks. Add the remaining sugar 2 tablespoons at a time and beat until they hold soft peaks. Beat in the vanilla.
Sift the flour mixture over the whipped egg whites in 4 additions, folding in each addition by hand until just incorporated.
Spoon into an ungreased 10 x 4 inch tube pan. Rap on a hard surface a few times to release any bubbles. Bake until spongy to the touch and a toothpick inserted into the center comes out clean, about 1 1/4 hours.
If the pan has feet, invert it onto a flat surface. Otherwise, invert over the neck of a bottle. Let cool 2 hours. Use a thin knife to cut around the edges and release the cake.
Note: The cake can be made one day ahead. Store in the pan uncovered at room temperature.
Recipe adapted from The Gourmet Cookbook.

 Subscribe RSS