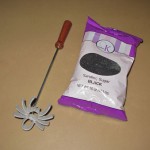
 Longtime readers might remember that I’ve been trying to make savory Fried Spiders for years, but only minor success since they were very fragile and many fell apart on the display tray. When I saw this spider rosette form on Amazon, I absolutely had to try them!
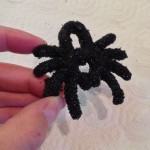 I have enjoyed eating rosettes many Christmases in my life, but I had never tried making them before and my mom never made them either. Luckily I have a friend Kathy who is the Rosette Queen, so I asked her and she graciously replied with her secrets. I used her tried & true recipe & tips, replacing the eggs & milk with vegan substitutes and added a couple drops of black gel food coloring while mixing in my blender that is older than I am. Frying them in the deep fryer also older than me, then sprinkling them with fine black sanding sugar instead of powdered sugar, we had adorable fuzzy, black, crispy, fried, tasty tarantulas!
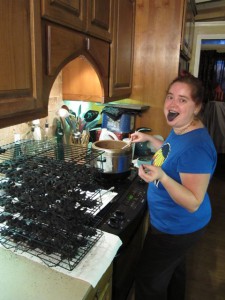 These take a LONG time since you are frying each one individually for 2-3 minutes, adding sugar while reheating the metal form, then repeating, so it took about 5 hours to make almost 9 dozen, which was only two batches of batter. I was so glad that Angie volunteered to help, since not only was I able to get other decorating done while chatting with her while she fried spiders all afternoon, but she had a nostalgic blast back to when she & her mom would make Christmas rosettes in North Dakota! They always used granulated sugar on their rosettes, so Angie knew tips how best to use the black sanding sugar. I love it when a plan comes together!
I was a little sad that most of my party food went uneaten because it was so warm inside, but the benefit to having 7 dozen spider rosettes leftover is that now I know as long as they are kept in a good airtight cookie tin with wax paper between layers, they last over 2 weeks still crispy and tasty! One week is probably a slightly better flavor, but I enjoyed eating them all the way to the end, black tongue & all. ![]()
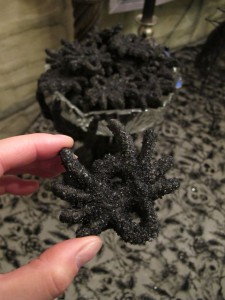 Spooky Spider Rosettes
aka Fried Spiders
adapted from
Kathy Henricks Traditional Scandinavian Rosette Recipe
2 eggs, slightly beaten (or Ener-G vegan egg replacer)
1 cup milk (or rice milk)
2 teaspoons granulated sugar
1 cup all-purpose flour
1/4 teaspoon salt
1 tablespoon vanilla extract (or almond or lemon)
couple drops black gel food coloring
canola oil or vegetable oil for frying
Add eggs (or egg replacer) first in blender and mix well. Add sugar and milk then mix again. Sift flour before measuring into blender, then add salt and mix again until batter is smooth and about the consistency of heavy cream. Add flavoring and food coloring. Let the batter set for about 30 minutes in a flat-bottomed shallow container large enough to fit the rosette iron form. While the mixture is resting, heat the frying oil to 375F, either in a heavy pan or deep fryer. Oil should be hot enough to brown a piece of bread while counting sixty.
Once the frying oil is up to temperature, dip the rosette iron into the hot oil to heat it for at least two minutes, then drain excess oil on paper towel. Dip heated iron in batter to not more than three-fourths its height. If only a thin layer of batter adheres to the iron, dip it again until a smooth layer forms. It will be partly cooked, from the heat of the iron. Plunge batter-coated iron quickly into the hot oil and cook from two to three 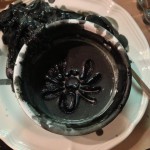 minutes until active bubbling ceases. Remove from iron and drain on paper towels. If they will not release on their own, use a table knife to gently push them off the iron. Immediately put the iron back into the oil to reheat, then sprinkle the finished rosette with powdered or granulated sugar. If your rosettes are not crisp the batter is too thick, and should be diluted with milk.
One last hint from me is to use a container only slightly larger than your iron form shape for less waste. Even though we had the perfect size flat-bottom dish, I still had a layer of batter that refused to stick to the iron when it got too low…but the hot iron cooked the spider in the dish! ![]()
Hope you enjoy making Spooky Spiders!

 Subscribe RSS
