Why does 3 weeks seem like so long to go but also not enough time to fit everything we want to do? Here’s this week’s progress…
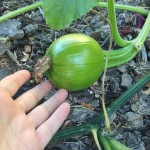 I have more baby pumpkins! There are a couple so new I’m not sure if they’ve actually set, even though I attempted to hand-fertilize each one with a paintbrush when I saw them open each morning. One is already as big as my other pumpkins in only a week of growing, and I’ll be watching the others! Maybe I’ll have Thanksgiving pumpkins?
 ![]()
Inside decorating has continued, with switching to the spiderweb curtains, pillows & lampshade, other spooky pillows, and changing the living room tapestry to the Catoween design…more details to come over the next few weeks of course!
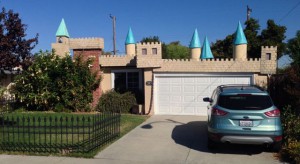 Castle Brittahytta is now up, including the graveyard fence, and the new round towers and spires! Last week I used my last hour of daylight after work each evening to
 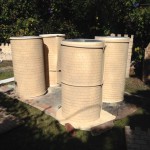 handpaint the stone block pattern on one tower before moving on to other projects, so that took almost all week to get all four finished. Of course I had to choose the hottest day of our autumn heat wave here in California! Seriously, it was almost 100F on Saturday, but Ghoulish Glen & I got everything
 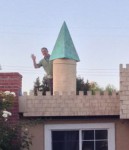 done where I needed help, like lifting heavy things to the roof and anchoring the rampart walls to the roof edges. Sunday I had to buy more supplies to finish the spires, then in the afternoon on my own I spent 2 hours stabilizing the main rectangular tower against the wind using scrap poles, foam & a lot of brown twine tied every which way, but ironically the round towers aren’t budging at all now that they are in the nested bases I built. I think it’s because they’re aerodynamic so the wind blows around them vs. a flat sail that catches any breeze. We
 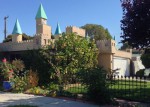 will see how they last, since I won’t be able to take them down until after November 5th this year…
The round towers are working better than expected! I thought they’d blow over too easily, but the plywood bases aren’t even weighted down, 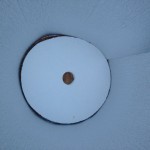 just the nesting circles of 1.5″ thick foam holding the 1/2″ foam in the cylinder shape, with two hula hoops and the spire holding the cylinder in shape along the height. The same wind that was blowing the main tower around so badly wasn’t even making the round towers wiggle, so that’s great news! My original plan was a center post of 1″ thick PVC so the spire would hang from the post, but the PVC mounts came loose from the plywood bases (argh! wasted time screwing those and cutting holes in the foam to fit them!), so I tried setting the spire directly on the top of the tower…voila! More PVC for the steampunk device and building future projects I guess…at least it’s easy to store!
 The reason I can set the spires directly on the towers is because of the wooden dowel umbrella spines I added, so they are not just vinyl cones but have a rigid skeleton. I used Gorilla Tape, extra-sticky duct tape, to attach the dowels on the inside of the vinyl shapes, on my driveway so I could press the best seal
 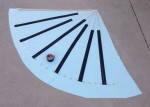 possible with the adhesive, then the hula hoop had to be right at the bottom edge of the dowels or it wouldn’t hold shape. I tried to skimp on tape since I was running out, but I learned you can only not tape at the very top where the dowels come together at the point, otherwise your fabric will still sag. I used self-adhesive heavyweight exterior double-hook tape (new 3M stuff that is the same interlocking shapes on both sides vs. hook & loop Velcro style)
 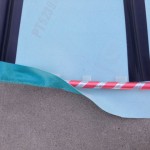 in a long length to close the cone, plus in small chunks I placed in advance to attach the hula hoop around the bottom. I started at each dowel, pulled up the extra vinyl and stuck it well, rolled the hoop to the next dowel to anchor that in place, then rolled it to anchor the spots between the dowels, until the whole hula hoop was on. For the overlap, I hung the spire on a PVC post so I could adjust where the long closure tape should meet, plus adjust the last spots for the hula hoop hem. Since it is marine vinyl it should last fine in any rain too.This makes a spire that can stand on its own that also can be taken apart to store flat!
Sadly, I came home from work on Monday to see that four of the spires had collapsed, which threw two of the towers underneath off balance enough to fall over, so the adhesive doesn’t stay stuck to the inside of the marine vinyl for more than 24 hours. One spire just fell off its tower, and one was completely intact on its tower with no problem. This is exactly why I wanted to start the castle early, so there would be time for any necessary tweaks. From seeing how the tape mostly held to the 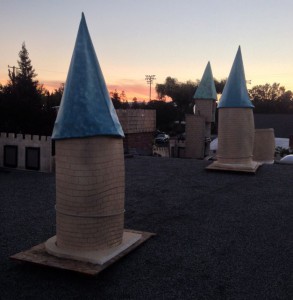 dowels, with only a couple spots coming loose, but almost all the double-hook tape adhesive had given up around the hula hoops, I am moving to another design thought I had along the way, looking for heavy-duty snaps to close around the hula hoops. These hoops cannot be opened and re-closed otherwise I would just sew a bottom hem like a curtain rod casing. At least I know the design works, just needs to be reinforced, so I’ve already started sewing…which is much trickier with the dowel already in place, plus sewing through adhesive isn’t good for my needle, so I keep breaking thread as I go along. It took a whole hour to get one spire sewed last night, and that doesn’t include the snaps yet. This is going to take a while, but I think they will stay intact once I’m finished. Obviously if you’re going to try making these spires, I recommend sewing scrap fabric inside as channels for the dowels BEFORE inserting the dowels for a much easier sewing task.
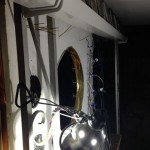 Of course this year the castle is only one of many projects! I’ve added a vinyl gutter to the temporary roof over the backstage area, so if we do get any more rain, all the electronics should be safe. Of course now we probably won’t get any more rain, but it’s better to be safe than sorry! I also have a plan to decorate the gutter to look integrated with the steampunk device…
I have also been continuing with more video editing, making several edits, then rendering while sleeping, at work, or outside doing other projects like this weekend. Still lots more detail 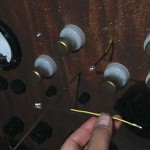 work to finish but I can see the end of the tunnel! All the major renders are done, just some tweaks left plus audio details, so I don’t think I’ll get stuck with any week-long render issues, but I’m still trying to stay as ahead as possible. If all my editing can be completed by two weeks ahead of the party, I will be extremely pleased!
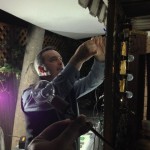 I got to stick all the LEDs through the foam panel and wire some other lights to the pigtails and
  switches…and they even worked! The major wiring project is almost complete so we can rearrange the backstage area into final position, continue with building the rest of the steampunk device, and put away the steampunk junk boxes to rearrange the patio space better. Also, this means that VSA programming will begin very soon, which is excellent since we know we will need as much time as possible to fine tune everything!
Until next week!

 Subscribe RSS


Everything is looking awesome so far!