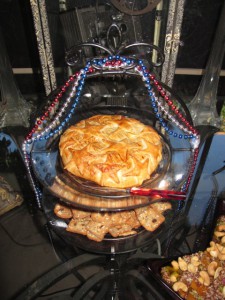
 I recently realized that I didn’t yet have my Baked Brie En Croute recipe documented properly, so I took the opportunity while making the Fireworks and Fun food for July 4th, 2014. The basic recipe is simple and I originally found it on the inside lid of the baby Brie, but you can tailor it to your own tastes and different holidays. Be creative! Since I have been making these now for well over a decade, I have some hints you might find helpful when making your own, plus many examples of the different kinds of decorations you can do with the pastry!
one 6″ baby Brie round with full rind
one sheet frozen puff pastry, thawed
fillings of your choice (optional)
suggested fillings:
apricot preserves + dried cranberries
plum jam + prunes soaked in port
spiced loquat preserves
Roll the puff pastry sheet large enough to completely encase the Brie round. Add filling to the pastry in a circle. Set the Brie round on the filling, then wrap the pastry around the Brie, pinching together all ends so there are no holes. Use pastry scraps to decorate the top as desired. Can be made the night before and stored covered in the fridge. Brush with milk or egg wash immediately before baking. Bake on greased foil at 400F for at least 15 minutes until nicely browned. Let cool slightly, then transfer to a serving plate by peeling the foil from the bottom of the baked Brie. Serve with a table knife or cheese spreader to cut slices onto crackers.
That’s the short version for your recipe files. Now for all my helpful hints! ![]()
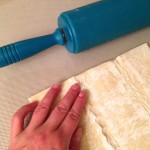 I purchase the baby Brie rounds and frozen puff pastry sheets. Thaw the puff pastry in the fridge for only a few hours since it shouldn’t be sticky, just flexible enough to unfold without ripping. Unfold one sheet onto your rolling surface, pinch the folds back together from both sides of the sheet so it doesn’t tear, then roll in all directions to stretch out the sheet. I use a large silicone mat and a silicone rolling pin so I don’t need any flour. I would recommend parchment paper if you don’t have a silicone mat.
 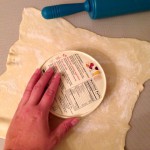 Keep flipping the pastry over between rolling it out or it will get too thin to lift off your rolling surface. Use the round cardboard box from around the Brie to gently mark the dough in the center. This is where to spread your fillings, and so you know you have rolled your sheet large enough. I used apricot preserves with dried cranberries for years, and I have seen several combinations for sale that are more savory, added almonds or other
 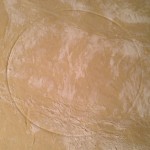 nuts, but the favorites for my crowds seem to be sweet plus enough acidity bite to counter the fat of the cheese and the pastry. After I started making my spiced loquat preserves from my own fruit tree in 2006, that became my guests’ hands-down favorite filling!
You can make just the Brie En Croute with no filling, but why when a filling is so much tastier? ![]() You can spread the filling inside your circle mark to bake only on top of the Brie,
You can spread the filling inside your circle mark to bake only on top of the Brie, 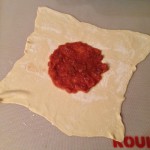 or add a border outside the mark to have it come down the sides a little. If the filling comes down the sides, you have a greater risk of developing leaks in the pastry, so fair warning. After spreading the filling, do not wait too long before putting the Brie round in place, since the pastry can start getting soggy and refuse to release from your rolling surface.
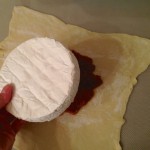 I have seen some people cut off the top rind before encasing in pastry, but I don’t bother. The rind is thin enough that the flavor gets lost in the flaky pastry and gooey filling, and as soon as you remove the rind, you run a greater risk of having a melted cheese mess while baking. Keeping the whole rind around the Brie inside the pastry, the entire shape stays intact while baking and easy to transfer to a serving plate, with the Brie getting melted plenty. If you decide to cut and remove the top rind, be sure the naked Brie side is placed down against the filling before wrapping in pastry.
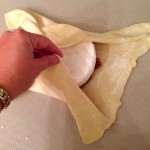 Fold the pastry around the Brie, starting with the flat sides since they are the shortest. Trim the corners and fold them also to the center. This side doesn’t need to be pretty since it will be hidden, but you want to secure all the pastry so there are no holes,
 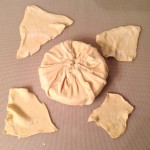 so pinch everything together well. Immediately pull the entire Brie in pastry gently off the rolling surface and set on greased foil on a cookie sheet, with the pinched pastry ends on the bottom. If you wait too long to flip it onto the cookie sheet, you will also have problems with the weight of the Brie squishing the pastry too thin.
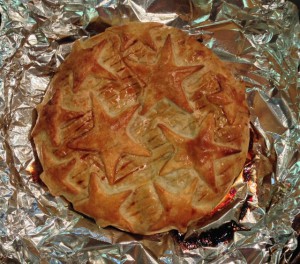
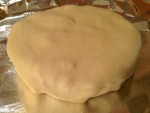 Now you have a virgin canvas ready to decorate! You can roll out the corners you trimmed away and cut out whatever decorations you would like on the top. Use cookie cutters if you have them, like snowflakes for Christmas or a Frozen party, stars for 4th of July or a space party, or cut shape free hand into whatever you like.
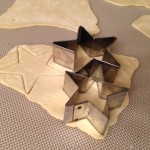 If you roll the scraps too thin, it will be very difficult to pull them off your rolling surface in the same shape you cut. If you really want to be elaborate, the puff pastry always comes two sheets to a package, so you could use the whole other sheet for decorations. For numbers and letters since they are so fragile, I often transfer my rolled pastry to the paper that came around the Brie. It was folded so you have a circle where the top is, then you can cut your letters backwards and remove only the excess dough. After your design is set, carefully flip the whole paper
 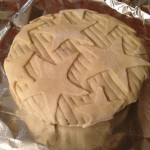 on top of the covered Brie, then gently tap the pastry down before removing the paper. This takes practice, and you need to be good at thinking backwards for anything with numbers or letters!
I have several past examples here, from very simple to quite elaborate. One that is really easy and very cute is to cut ribbons and 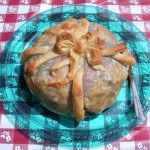 sculpt a bow in the center. The bow will flatten a little during baking, but it is usually still recognizable as a bow. Since the Brie is displayed on a plate, having the design come down around the sides looks nicer than only on the top. If you work quickly, you should be able to stick the pastry decorations on the Brie just as raw dough, but if it takes longer to construct your design, you might need milk or egg wash as glue. You can also only use the protein wash on select areas as part of your design, since those areas will end up darker than the plain pastry.
  The Gravibrie I made for the movie Gravity at an Oscars party is the best example of that technique. You can also score lines into the pastry like the stripes behind the stars, but be careful not to cut through the pastry or you’ll have
 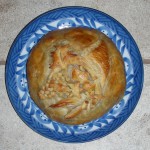 filling leakage spoiling your design. The flatter the design with good contact with the pastry background, the better it stays intact. More 3D designs like the Thanksgiving cornucopia can pull away from each other because the puff pastry shrinks while baking. Of course numbers and letters are
 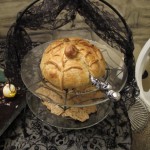 great, especially a year for New Years Eve or question marks for a Clue party, and a spider sitting in its web is perfect for Halloween!
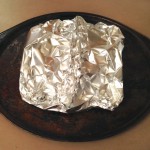 Once all your decoration is done, either bake right away, or it can last up to two nights covered in the fridge. I usually prepare mine the night before my party so I have the time to enjoy the decoration process. I use a piece of foil large enough I can pinch it sealed as a tent and keep in the fridge overnight before baking just before the party. If you are saving it overnight, it is better to add the final milk or egg wash just before baking so it doesn’t get gummy. However, if you don’t use any sort of protein wash
 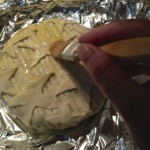 at all, it won’t brown very well. Bake in the oven at 400F for at least 15 minutes, maybe longer, but keep checking. Once it has browned and no spots are doughy anymore, remove from the oven. Let it cool several minutes, then pull away the foil to set carefully on a serving plate. It is best
 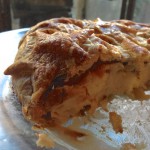 when warm and gooey, but if you set it out too quickly, your guests could burn their mouths!
I hope you enjoy making your own Bries En Croute, as simple or elaborate as you desire!
#recipes #Brie # pastry

 Subscribe RSS

YEA!! Thank you for this!! I’ve been wanting to do something like this for quite sometime. And now the ideas are rolling in my head, and gears are spinning…
What if YOU put your own spin on the name & call it Baked Bri-E-tta En Croute? Sorry…that’s my brain wheels spinning…