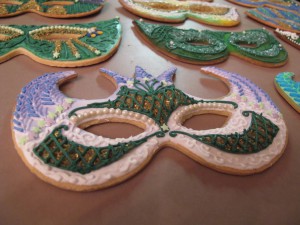
 The life size Mardi Gras Mask Cookies I made the last few years never did get their own complete how-to post, let alone showing the different successful techniques that progressed from simpler to more elaborate each year I made them. So here they are, even including specific Etsy shop listings for supplies that might help you, in plenty of time to make your own for Mardi Gras on March 4th this year!
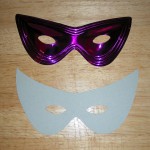 I had been making small full-face mask cookies ever since the first Mardi Gras Masquerade, but in 2009 I thought of making life size stick masks! I used one of the cheap plastic masks in my Mardi Gras decor stash as a model, made a cardboard template with eyeholes in the correct place, then used my foolproof sugar cookie recipe, using a knife to cut the dough around the cardboard template. Since these are so large, they do use a lot of dough. I was only able to get 15 masks out of my full dough batch that usually
 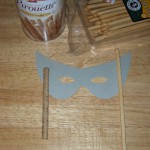 yields 5 dozen small cookies. To support themselves, the life size mask cookies need to be thick and make sure they are baked completely crisp!
I knew I could use the large pretzel rods for the sticks, but I was hoping for a more elegant look that also matched the sugar cookie dough. I tried some cookies and thin breadsticks and decided to use the breadsticks the first year. 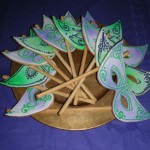 Unfortunately since Mardi Gras is during the rainy season where I live, the moisture made the sticks lose structural integrity, so the other years I used the pretzel rods since they never got soggy.
The first year I used only white royal icing thinned with corn syrup as the smooth basecoat, then used food coloring sprays on some, and had green and purple royal icing for piping designs. They were fairly simple but they were still impressive since this was the very first year anyone saw them, and it was still
fun for people to decorate their own for the Best Edible Mask contest.
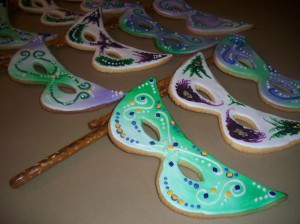 Since by Mardi Gras 2010 I had bought a lot of multicolored quins, sprinkles and edible pearls for the Corset Cupcakes, I made my masks more elaborate, and had plenty of extra fun supplies for guests to decorate their own. I baked the cookies thicker and used pretzel rods this time, anchored with thick blobs of royal icing, but some cookies still broke in the middle yet again due to the damp weather. At least cookies breaking while all sorts of guests were decorating them made for some funny moments! 😉
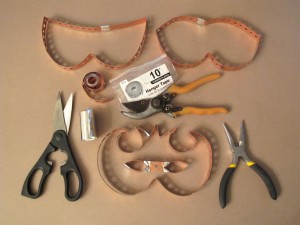 For Mardi Gras 2011 I decided the same cat-eye mask shapes were getting boring, and I had found copper pipe strapping tape I could bend into my own cookies cutters and anchor closed with metal flashing tape. I made three masks but with separate eye-hole pair cutter that could be used with any mask.
Not only do I use multiple batches of the full foolproof sugar cookie recipe (3 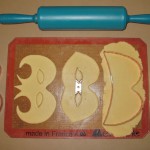 eggs) since I could only get about 15 full masks from one batch, but I usually need 2-3 big batches of royal icing (3 egg whites each batch) to do the basecoats for 3 dozen plus the decorating and gluing on the sticks. I roll the dough directly on a silicone mat or parchment paper so I don’t have to move the cut cookies and the intricate designs stay intact. 2 bags of large pretzel rods usually have enough unbroken sticks for 36 masks.
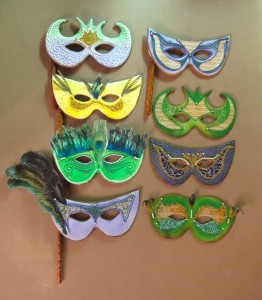
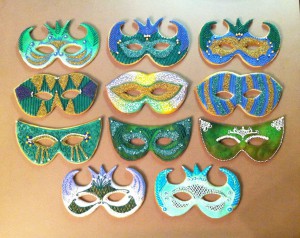 2011 was probably my best scheduled Mardi Gras season, probably because my costume was recycled from another skirt plus purchased items, so I really enjoyed decorating the mask cookies! I used a lot of techniques, like clear piping gel or royal icing over only a section at a time then adding glitter sugar, tapping off the excess. This is just like glue and glitter, save the excess for later use, and it will only stick in the targeted areas. Piping
 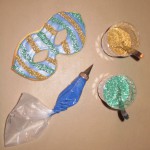 gel doesn’t dry like royal icing does, but royal icing isn’t clear, so you risk the icing color showing through. As long as the glitter sugar completely covers the piping gel, you can still stack cookies without messing any designs. By adding more piping gel or icing to only one section at a time, after the previous section was glittered, you can make fun designs like this one!
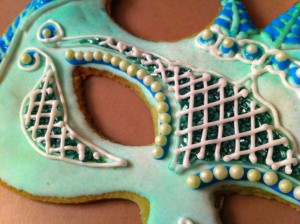 This year the basecoats were white, periwinkle (I could never get my royal icing to be a vivid royal purple by mixing my gel colors – argh!), green food sprays over white basecoat, and when I ran out of white icing, I sprayed some food color directly on the cookie which gave a soft velvety texture that was interesting. The food sprays easily make shaded areas and can combine colors on the same masks, but obviously before adding any surface details. You can get even fancier by piping intricate designs even OVER glitter sugar layers, adding edible pearls, sprinkles or quins, anything you can imagine. I really liked piping different colors for the feather barbs on the spiky masks, and I loved piping freehand curlicues and
 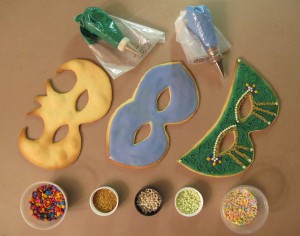 spirals as a tone-on-tone brocade texture. For the decorating contest I kept buying the small decorating tubes since they were cheap and convenient for a variety of colors, however that icing never ever dries. This is fine for the decorating contest, but trying to use them for your own decorating in advance means you will not be able to stack your cookies without them sticking together and messing up your intricate designs!
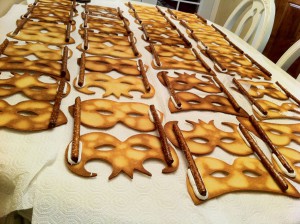 Decorating the masks before adding the sticks was easier for me since they stayed flat with no risk of any pressure from piping cracking the cookie, and you didn’t have a stick in the way if you needed to hold the cookie or change angles for easier piping. Of course this means your decorations must be absolutely rock hard dry before attempting to set them face down, no buttercream or purchased decorating icing! I would not recommend the melted sugar method for the sticks that I tried for 2011, since the sugar gets gooey from ambient moisture, where the royal icing stays solid. Unfortunately the royal icing takes longer to dry, so you need enough space to let them sit not stacked on top of each other until they dry. That’s also why they’re in facing pairs, since the opposite cookie props up the stick to the same level as the cookie it’s glued to so it keeps full contact while drying. After these are completely dry, store in airtight cookie tins, facing each other so their sticks
  support each other. Finding large enough cookie tins to store these can be tricky, but the rectangular holiday tins of purchased cookies from Costco have worked well, so I have quite a collection now.
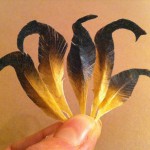
Year number 4 of making mask cookies meant I needed something new again! I had always wanted to make realistic edible feathers somehow, and luckily only a couple months before Mardi Gras 2012 I had bought my edible printer for the Ghoulish Gingerbread Haunted House…voila edible feathers from wafer paper! Some of my favorite Mardi Gras masks I had purchased as decor used music score paper in the designs, and I’ve always loved damasks and brocades, so I printed a variety of those too. I printed a whole assortment of real feathers from game birds to ostrich plumes on rice paper to decorate the edible masks! When I was cutting them out for my own masks, I  noticed even though the weather hasn’t been moist this week, the feathers would curl, so I left them as whole papers for the decorating table. Wafer paper will distinegrate in too much moisture, but gluing them on with a small bit of royal icing works fine. These were very popular on the entire inside table I had dedicated to mask decorating, as you can see in the party post for Mardi Gras 2012!
Now you know all the secrets of my Mardi Gras Mask Cookies so you are ready to make your own! If you would like some Edible Feathers, you can purchase these sets below from my Etsy shop:
Decorate your edible art with realistic feathers! Photos of real feathers are printed on wafer paper, then you cut them out yourself and use them however you like! Edible quills for wizards, Mardi Gras mask cookies, fancy hat cupcakes, whatever you like!
The examples pictured have been cut carefully including separating some individual barbs for realistic texture. Cut this way they will not survive shipment, so the page is sent to you intact to cut yourself as detailed or not as you wish.
Edible Feathers 1 – Pre-Printed Wafer Paper Sheet
Edible Feathers 1:
Single pre-printed 8.5″x11″ wafer paper sheet includes assorted gold, green & purple feathers, along with realistic pheasant & duck feathers
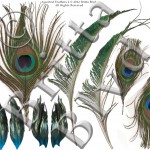
Edible Feathers 2 – Peacock & Iridescent – Pre-Printed Wafer Paper Sheet
Edible Feathers 2 – Peacock & Iridescent:
Single pre-printed 8.5″x11″ wafer paper sheet includes peacock tail feathers
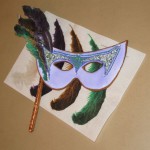
Edible Feathers 3 – Ostrich Plumes Facing Right – Pre-Printed Wafer Paper Sheet
Edible Feathers 3 – Ostrich Plumes Facing Right:
Single pre-printed 8.5″x11″ wafer paper sheet includes 4 ostrich plumes in white, gold, green & purple.
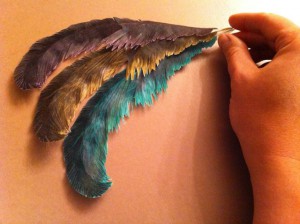
Edible Feathers 4 – Ostrich Plumes Facing Left – Pre-Printed Wafer Paper Sheet
Edible Feathers 4 – Ostrich Plumes Facing Left:
Single pre-printed 8.5″x11″ wafer paper sheet includes 4 ostrich plumes in white, gold, green & purple.
 You can also find plenty of other Mardi Gras Masquerade party ideas here on Britta Blvd. However you choose to celebrate, don’t forget to “Laissez les bon temps rouler!” 🙂

 Subscribe RSS