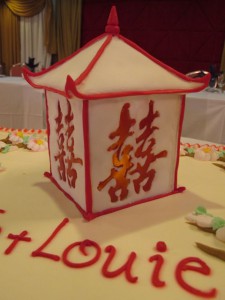
 While I was making the giant Hogwarts student cake and having the busiest week of my life with 4 major special events in the same 8 days, I was also squeezing in making an edible cake topper for my dear friends’ wedding! Thankfully it was a fairly small task in comparison, but some of the detail closer to their Chinese wedding banquet still took several hours. I’m so glad that Mary Jo & Louie & their families loved the Double Happiness Lantern!
There was some back & forth deciding what to do. The first request was a free-standing see-through red sugar piece of the double happiness characters, but from my previous sugar work, I had no confidence of being able to transport anything that fragile on the curvy 2 hour drive to the coast, plus once it got there it might be tacky and starting to melt, losing detail and falling apart. I thought of using a sugar cookie surround for a window of the Chinese 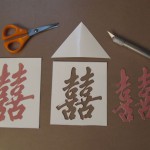 characters in sugar, then because a single cookie would be boring from the side, I thought of a Chinese lantern! I sent the happy couple a few draft designs, then they decided they liked the white lantern with red edging & red sugar characters the best. I was also off the hook for a topper for their beach wedding, since they decided it worked best with the Sunday banquet, so that bought me a few days more time, plus less transit worries!
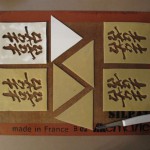
Louie had a good resolution double happiness image file, so I printed that at size on sturdy photo paper and very carefully cut out the characters with a craft knife to make a stencil. Just using paper would have warped or ripped taking it off the unbaked cookie dough, but photo 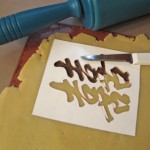 paper cardstock weight was just right. I used the scraps of the photo paper to figure out the triangle shape for the best roof angle to have a small overhang but not too shallow a point, then I was ready to bake.
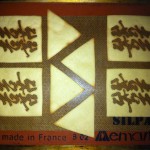
I rolled the cookie dough directly on my silicone baking sheets, then used my dull paring knife to cut the characters very, very carefully and remove them from the rest of the dough. There is no way I could have kept the detail intact moving it to another cookie sheet, so I love my silicone baking sheets! All 4 lantern sides and 4 roof pieces fit on one sheet, but the characters took quite awhile to cut. I had exactly enough sugar cookie dough left from baking all the candy boxes and other accessories for the Hogwarts student cake…whew!
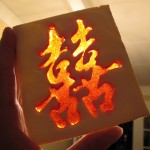
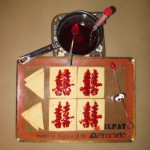 The baked lantern pieces sat safely in my pantry while I finished the Hogwarts student cake and attended 3 of the events, then Thursday night after dinner & a show with friends, I put the lantern cookie pieces back on the silicone sheets, cooked my trusty hard candy recipe, added red gel food coloring, and drizzled the molten candy into the windows. Since they windows were so detailed, I couldn’t aim as well as I hoped and still get no empty holes in the windows, even using a metal skewer to guide the sugar flow, so I went overkill and hoped I could use the royal icing over it to clean it up. This ended up a lot more work than I expected but the result was good. You don’t have much time before the sugar completely cools & hardens too much, so it’s spoon syrup as fast as possible!
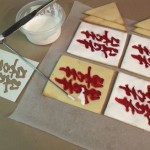 Thursday night after the sugar had cooled enough I started adding the white royal icing, also leftover from the cake work. I wanted a nice smooth surface to match the white fondant that would cover the roof, so I thinned the stiff royal icing with some corn syrup so it would find its own level, then started with the detail…boy that took FOREVER! I had to resort to a skewer for the fine detail areas! It was a good 2 hours in 2 separate shifts before I had all 4 sides covered in white to my satisfaction! Those had to dry flat before I could assemble the lantern.
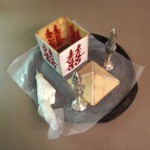 When they were completely dry late Friday night, I assembled the 4 sides using the stiff royal icing, covering the seams and cleaning up all the edges like caulking as I went along. I also built a cardstock form for the roof and assembled the roof pieces separately for easier decorating, and also so the roof could be removed to add the tealight later. There was no floor piece for the lantern since I thought that was simpler.
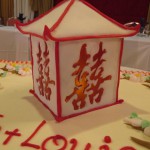
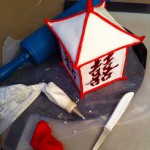 By early Saturday afternoon, everything was finally dry enough for final decorating! I rolled out some leftover white fondant from the cake work to cover the roof in one piece, setting it in place over a thin layer of royal icing so it would stick to the cookies, smoothing it, pinching the rooflines for definition, and pinching the corners into the curved pagoda shape. Since I had leftover red fondant too, I rolled those into ropes and used tiny dots of royal icing to glue them to the edges. I could have used red icing to pipe the lines, but
 the ropes were more forgiving of some of the uneven edges. plus allowed for a little extra flair where they met at the corners, even along the bottom. I was very pleased how it turned out, then it went back into the pantry while I hosted Close Encounters movie night!
 ![]()
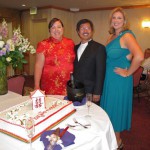
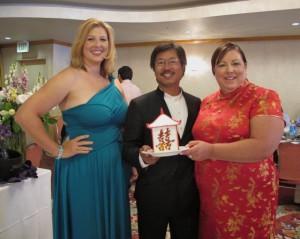 Even with overnight guests and an unfamiliar part of town, we arrived in plenty of time for the topper to be added to the bakery cake before most of the guests arrived…whew! It looked perfect, with even the same shade of red on the cake matching the topper! I had fresh batteries in my LED flicker tealight, so it lasted the whole banquet no problem. When it was time to cut the cake in the kitchen, I jumped up to help remove the topper to a plate, since they wanted to take it home with them. I had brought it in a small close-fitting box with bubble wrap, so I repacked it for them too! The cookies, royal icing and fondant will last indefinitely, but depending on the moisture in the air, the candy windows might eventually start melting…but we will always have the photos!
 ![]()
Full photo gallery below, and congratulations again to Louie & Mary Jo!



 Subscribe RSS