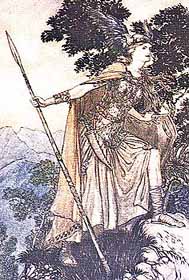
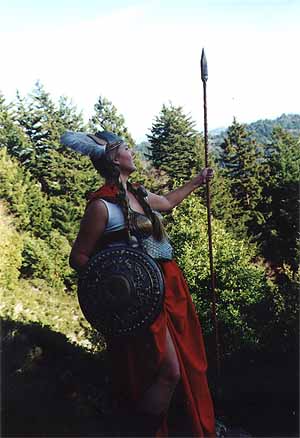
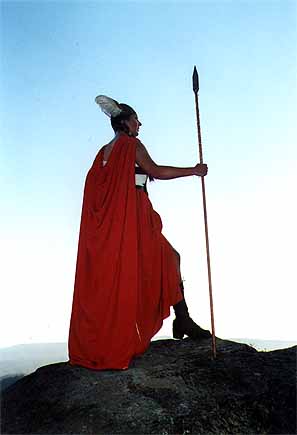
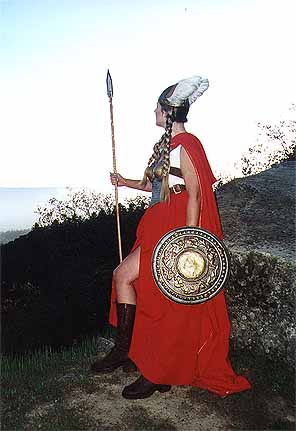
Brittahilde the Valkyrie
(MardiGras 2001)
Ever since I was given the nickname Brunnhilde by my Advanced Placement European History teachers my senior year in highschool, I have wanted to do a Valkyrie costume, but due to my perfectionist tendencies, I kept avoiding it because I could not find a way to make a good custom breastplate.
Lo and behold, but Costco was selling swimsuits on thin plastic female torso forms! I did not notice that this form actually fit my own shape until after I got the swimsuit home, but then I got all enthused that I could finally be a Valkyrie! Alas, my friend then announced she planned to be a Valkyrie for Halloween, so it was postponed once again until Mardi Gras 2001, but at least I got to make a different breastplate for the Amazon Goddess costume in the meanwhile.
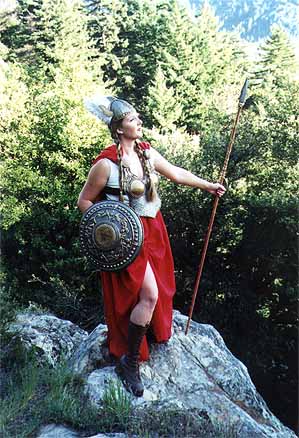
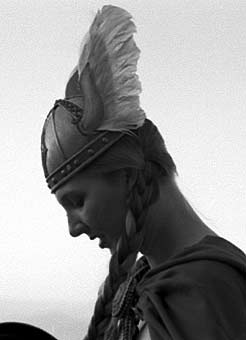
Yes, that is all my OWN hair for the braids!
(However, it was chopped 14" inches shorter about a month after these pictures were taken, but it's still shoulder length.)
Helmet:
I found a very inexpensive plastic horned Viking helmet with the horns easily removable. Since the silver & gold plastic was too unrealistic, but still a good, non-shiny finish, I used raw umber acrylic paint to antique the entire helmet. For the wings, I had found a winged masquerade mask on clearance after Halloween, so I cut off the white wings, made them more realistic with a very thin wash of the same raw umber acrylic paint, then hot-glued them to the inside of the helmet through the horn holes so they would stay at the correct angle.
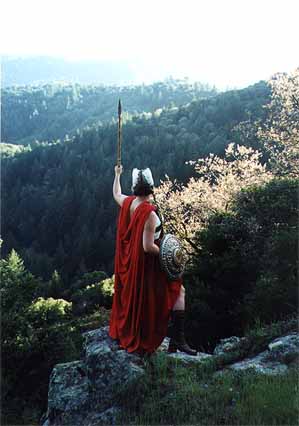
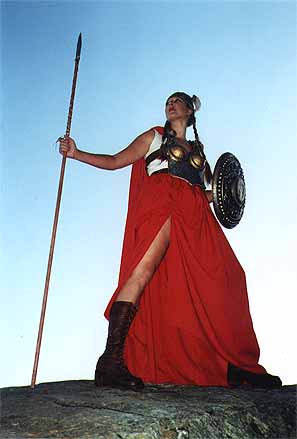
Spear:
Since I wasn't pleased with my prior attempt of using a redwood branch I found in the woods for a rustic spear, this time I bought a 6-foot hardwood dowel at Home Depot. I carved the spear point out of a pine garden stake, since pine is soft to carve, and it already had the basic pointed shape. Once the point was completed, I had to notch the bottom of the point and the top of the dowel so they would be stable. (When they say "hardwood" they aren't kidding! That took quite awhile, since I had no power tools!) After getting a good fit, I painted the spear point silver and stained the dowel with a light coat of mahogany stain, then tied on the point with gold cord, continuing the lashing all the way down the pole to use as a grip at hand level.
Breastplate:
The plastic torso was too thin to hold up the stomach shape under the papier-mache, so I stabilized it underneath with whatever was handy. I coated the whole plastic torso with petroleum jelly, then used Celluclay instant papier-mache. This stuff is great! It comes as a fine paper powder that is already infused with glue, so all you do is mix it with the correct amount of warm water, knead it to mix it well, then you have papier-mache clay that you can leave as thick as you want! This makes for a very sturdy breastplate for normal wear, but obviously not for any real battles. Since when making a sturdy layer, the Celluclay is so thick, make sure you make your holes and trim your edges while it is still wet, otherwise you'll need a power drill to make any holes and will risk breaking the rest of the shape if you wait until afterwards. (I learned this lesson the hard way while making the Amazon Goddess breastplate!)
After waiting about a week for this thick layer to dry, it was still moist where it was in direct contact with the plastic torso, so since it was stable enough to keep its shape, I took it off the torso mold and placed it in the oven at the lowest temperature ("warm" on my oven) so it would dry slowly and thoroughly.
Once it was completely dry and cool, the texture was not completely smooth, but since I was adding more decoration anyway, it was not really an issue. I cut out rows of scales out of tagboard (backs of tablets I had saved over time) for the stomach section, then hot-glued them overlapping in rows to the main base. The other decoration was made with finely-woven nylon cording (clothesline from Home Depot) and plastic pearls by the yard, hot-glued onto the main base according to the design I had planned. At this point, none of the colors matter, so I used whatever I found that will give me a good shape.
Once all the decoration was in place, I coated the entire breastplate with Activa Li-Qua-Che liquid papier-mache, which brushes on just like paint, stirring well always to keep it from settling to the bottom. I used several coats to get the gold circles as smooth as possible, since those were the only places that did not have extra decoration, so they were still the base Celluclay texture. Since this liquid papier-mache is white, it works as a primer coat over all the various colors, so then it was ready for gilding.
I found leafing paint at a craft store, but this does require paint thinner/mineral spirits for cleanup, so make sure you are prepared or you can ruin a good brush very easily, along with gold and silver hands for quite awhile, too! My plan was for a silver background with gold accents, so I painted the entire breastplate with the gold and silver leafing paint, leaving time to dry between colors. After the leafing paint is completely dry, it needs a water-based sealer otherwise it remains slightly tacky and could rub off on other surfaces. Since I did not want any shine since I wanted armor that looked used in battle, I used matte-finish ModgePodge to seal, then after that was dry, I used raw umber acrylic paint to antique the entire breastplate.
But how does the breastplate stay on, you ask? I used a leather belt with buckle around the waist, with leather thongs as beltloops on the back of the breastplate. At the chest, a wide leather strap was attached to the sides of the breastplate with leather thongs, then the strap had industrial snaps at one side. Attached to the chest strap at the back were the two shoulder straps, which attached with leather thongs to the holes at the top shoulder pieces of the breast plate. All those holes were made when the Celluclay was initially drying.
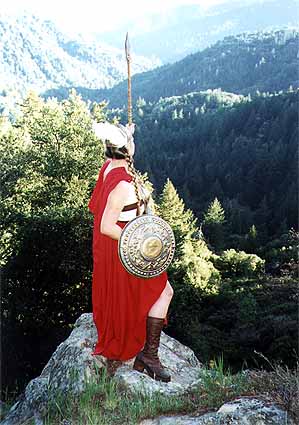
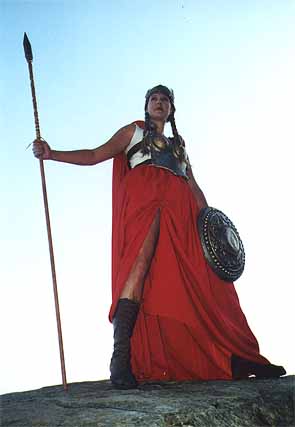
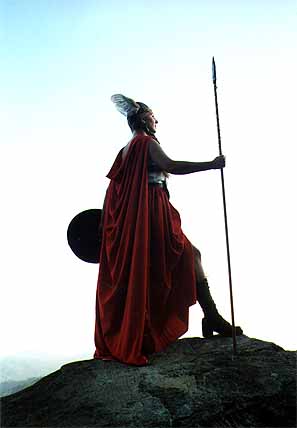
Shield:
At a discount store I purchased a flimsy plastic shield that looked pretty good, but it had a lion as the center emblem, which I did not feel was appropriate for a Valkyrie. So, I removed the plastic handle, cut out the center lion emblem, made a new gold disk emblem edged with silver pearls to match the silver-edged gold disk theme in the breastplate, added more pearls and nylon cording along the outer edges to help maintain the theme, and covered the entire shield with a few coats of liquid papier-mache for more stability than the flimsy plastic. The inside was spray-painted black, but the face was repainted using gold and silver leaf paint, then a leather strap was added to the back as a new, more authentic handle.
Sword:
This sword was purchased for the Amazon Goddess costume when the redwood spear plan failed, but there was no scabbard made at that time. I created a scabbard from matboard (the very same kind used for matting artwork) because it is thin and still strong. I folded the matboard on each side to be slightly concave so that the sword would easily slide in and out of the scabbard, then hot-glued around all sides except the top. I cut leather to fit the shape and used a very thin layer of Aleene's Super Tacky white glue to attach the leather to the matboard. Then this time I painted the pearls by the yard with the gold leafing paint ahead of time, otherwise it would have been too difficult to paint without messing up the nice brown leather. then carefully hot-glued the pearls as decoration onto the scabbard. I also made a leather loop at the top of the scabbard at an angle that slid onto the waist belt.
Shirt:
Since I knew I was making a cape, I figured a backplate was excessive, but I still needed a little more coverage than just the breastplate would give me. So, since I wanted coverage around the sides but not really sleeves, I used a small, natural off-white, fitted t-shirt, and cut it down to more of a tank top shape to wear under the breastplate.
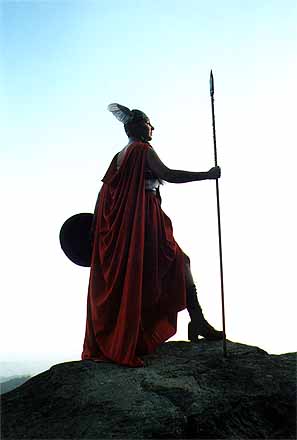
Cape & Skirt:
The skirt was a tablecloth found at the Salvation Army for $3.50, cut in half to make the waist, which was just a simple elastic casing waistband since I wanted as much draping as possible. Since I needed the cape to match, I took the tablecloth to the fabric store, and I got lucky and found 4 yards of matching red! 2 yards was plenty for cape length, but I sewed the cape like a pillow to face itself vs. worrying about hemming all around the cape. To add extra decoration as well as help the cape stay relatively flat at the edges, I used flat gold braid just inside the edge topstitching it all around the cape.
Boots:
The boots are the same boots from the Amazon Goddess costume, which are vintage 1970s platform lace-up boots that have since been painted a more natural color than their original orange-rust fake leather look with flesh-colored plastic heels! You can see the boots in their original glory in my 1970s disco party costume.
More Images...
Copyright ©1996-2008 Britta Blvd. All rights reserved. All text, photos, graphics, artwork and other original material on Britta Blvd
are copyrighted and may not be published, broadcast, rewritten or redistributed without prior written consent.