Here are the instructions for cutting & folding my original artwork Marauders' Map I created
for my Year 6 at Hogwarts party in 2005. Although I still claim copyright on my original artwork,
my map is freely available for fellow Harry Potter fans as long as it is for non-commercial
use only. By downloading my map, you agree to my terms of use. Sale or distribution of
this material is prohibited without my express authorization. Please contact me to discuss resale or
distribution terms if you are interested.
Thank you,
Britta Peterson
britta@britta.com
www.britta.com

1. Print out your map on a sheet of 8.5x11" parchment paper.

2. Find the faint lines near the edge of the patio and the Honeydukes coffeetable to make gentle mountain folds (fold backwards) in approximately thirds lengthwise. Do NOT crease these folds!
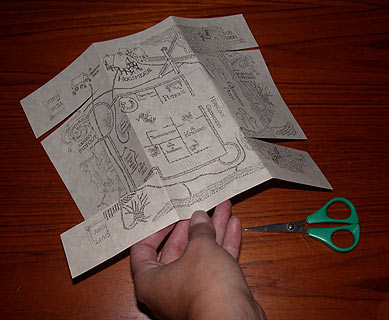
3. Find the faint lengthwise lines that mark the outline of the front cover image and cut only to where you just folded. You will notice that on this cut line, the design doesn't match anywhere until after it's folded into the final pattern.
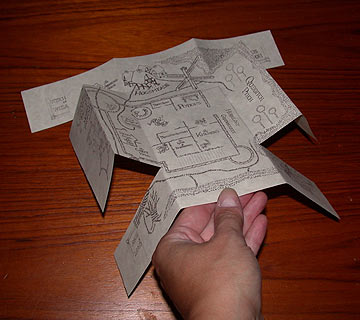
4. Find the faint lines that mark the inner edges of where the front covers meet in the middle. You will see that the design changes at the same line. Make mountain folds on those lines.
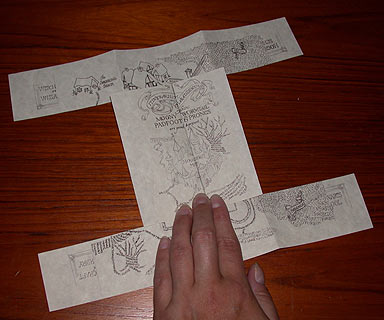
5. Bring the last two mountain folds together to meet in the middle. Carefully adjust the middle until the design meets, then press down to finger-crease the outer edge folds. Don't worry about a crisp crease yet, since you still might have a final adjustment at the end.
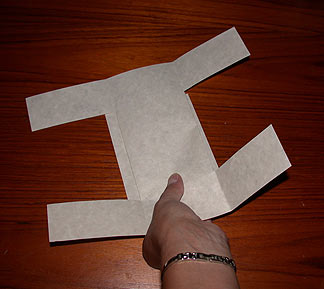
6. Turn over and you'll see your top flap edges hang over the folds from the back view.
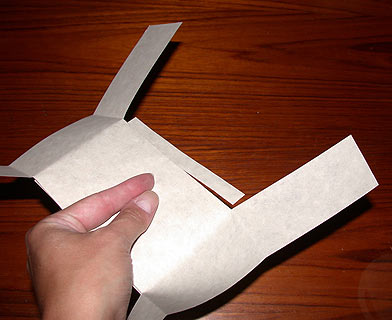
7. Trim the front cover flaps either now, or you can wait until after the final folding.
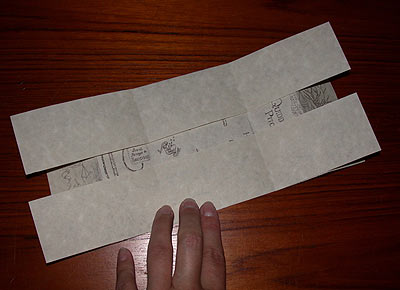
8. Turn back over so you see the drawing again. Unfold the front cover you just folded so it is out of the way. Use the cross-marks where the inner ends of the cuts are to fold the top and bottom strips across in valley folds as shown. Your original gentle mountain folds should meet up with the side folds of the front cover. Adjust a little if necessary, since sometimes the cuts can end in slightly different places.
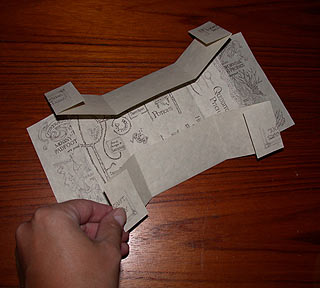
9. Find the faint lines and design edges for the Hogwarts School of Witchcraft and Wizardry lettering on the edges of the horizontal flaps. Mountain fold all four ends as shown.
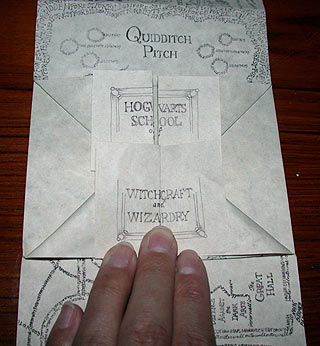
10. This step is a bit tricky. Take the pair of end flaps from one side that match together, i.e. "Hogwarts School." Pull the flaps around so that the folded edges meet and the lettering matches up, then gently smash down so you end up with the angled folds, taking care that you don't stress the corners so much that they rip. This will require some adjusting of the angles and the edge where the front cover will fold over this section. Your priority is that the lettering matches up with the front cover still able to fold over everything, since you can trim the other edges for a clean look. Repeat this with the other side lettering so all your lettering meets in the middle now.
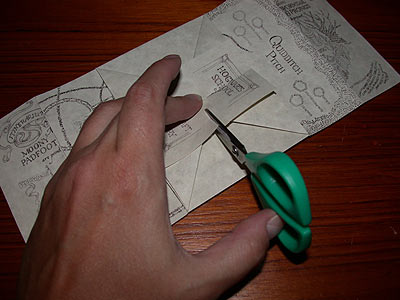
11. Due to the paper printable area, you have overlap at the middle, so make a cut through all the flaps as shown to trim the overlap, but be careful you do NOT cut through too many layers. You do want to cut through the angled folds, but you want to be careful not to go through the other side, so it's easiest to cut from the outside in for each side. Depending on your cuts (and how much you care!), you might want to open the map back up and trim all the way across to have a clean final exterior edge when unfolded. Yes, I painstakingly trimmed all my maps because I'm that picky. ;) It helps the map stay flat to use a folding bone on the school lettering layer before folding the whole map.
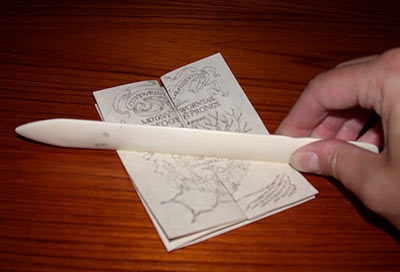
12. Carefully fold everything together, making sure that you haven't caught anything misfolded inside. Holding the front cover together to be sure the design meets properly, then use a folding bone to make crisp folds and to help keep the map flat.
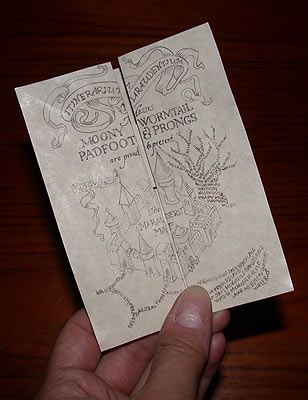
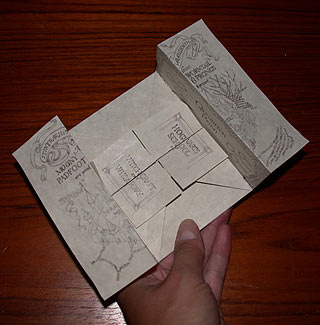
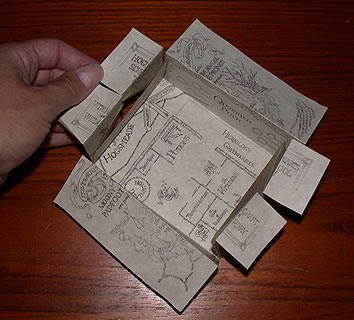
Voila! Your own Marauders' Map!
Original artwork and instructions by Britta Blvd © 2005-2006 All Rights Reserved.