I’ve shipped a few Frightful Skull Fountain Kits already, including one all the way to Australia! Thanks to Horrific Finds for featuring my kit on their Facebook page this week! You also still have time to buy other products from Eerie Elegance for your party or haunt, including Fabric Frames, seven Ghosts for Sale and Tasty Tombstones!
It’s only one month left until Halloween, so I’m sure you will be building your projects soon if you haven’t already started them! Do you have a project that needs to look like wood? Maybe some walls, doors, or perhaps even a giant steampunk device? Watch this new Eerie Elegance video to learn this simple and customizable Painted Woodgrain technique using standard brushes that is very convincing, especially for large scale projects! Don’t forget you can also find other projects & recipes from both books Eerie Elegance and Enhanced Eerie Elegance as episodes on YouTube.
Now back to my own party preparations! I wanted one last cleaning & dusting by my housecleaners first which was this past Friday, so now the stone walls are up inside and more decorating can continue, like the portrait gallery, bathroom, black candles, curtains, pillows and Catoween tapestry. It is much easier to do a little bit of decorating at a time when I need a break from another project, so I’m glad I’m this far along already.
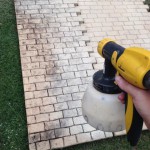 Castle improvements are underway! The castle walls lasted fine for a 1 year storage period between 2011 & 2012, but my friendly neighborhood rats found that all the crenellations made a good nest even though they were stored in the open on my shed roof. Not too much damage was done, but of course the worst damage was the functional interlocking corners for the corner towers! I’ve tried to stabilize those with extra foam behind the joint, but they’ll probably need to be tied around as well.
  Often the leaves staining the foam gives it a cooler aged patina, but not when the other wall was covering half with a clean line! I needed to buy a whole gallon of paint anyway, so while my sprayer was out, I gave a light coat over the stains to help them blend better across all the walls. The plan is to put up the castle walls next weekend, then hope & pray for no windstorms for the next month! Even with watering less due to the California drought, this summer my
 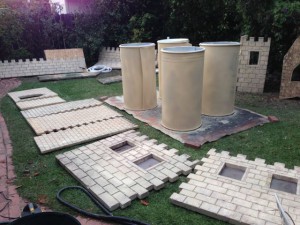 plants have grown so much in front that I think I will leave them tall to help as an extra windbreak for those castle ramparts.
 ![]()
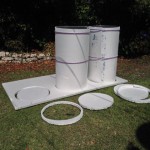
For Halloween 2012 Castle Brittahytta had some square pyramid copper spires, pretending that the towers under the spires were too short to see past the outer ramparts, but we always really wanted round towers with round spires, so I’ve been working on various plans to make round towers that I can store easier between displays. I have settled on 1/2″ thick insulation foam in 4-foot by 8-foot sheets gently rolled inside of cheap hula 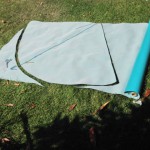 hoops, then into thick foam nesting circles mounted to scrap plywood bases. This way we can shim the plywood on my slanted roof instead of attempting to shim foam to level. The 3/4″ thick foam doesn’t bend this tightly, and the 1/2″ foam is too thin to carve the stone block detail, so after spraying the base coat, I am handpainting the stone seams hoping they will match the carved seams well enough at a distance.
 The new spires are teal marine vinyl sponge-painted with aqua for copper verdigris texture, cut into a 4-foot tall cone, with velcro anchoring the bottom edge around another cheap hula hoop, and more velcro for the main vertical seam. The vinyl is not quite stiff enough for the cone to hang perfectly since the sides sink in a bit like a witch hat,
 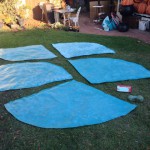 so I will be buying some thin wood dowels to be umbrella spines. I will handstitch the wood dowels to the inside of the vinyl, since then all 5 spires should be able to be stored flat between displays. 8 feet of 1″ PVC will be the center post for each tower, mounted into the plywood base, then the spire will hang on top of the post,
  and the post should also help the foam rounds from falling over completely. I’m waiting for the PVC mounting bases to arrive, then we’ll see if we also need some extra bracing, because the center post is so tall with the vinyl spire, wooden dowels & hula hoop hanging from it that it might push the center post off-balance too easily.
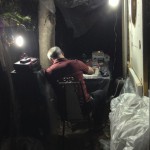 Ghoulish Glen & Scary Jerry have cut, stripped and crimped a bunch of wire and begun wiring to terminal blocks, since there is a lot of VSA animation going on for our props this year.
 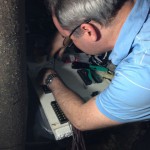 It doesn’t look very exciting at this point, but that’s why I can still show it to you.
 ![]()
Not only does our “backstage” area need protection from possible rain, like the 2-hour downpour we finally had last week, but I have an aphid infestation in that tree that I can’t get rid of, so it drips sticky stuff all over everything. I had rigged some clear tarps so my plants would still get light, but 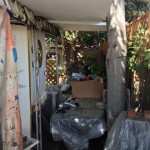 the clamps holding the tarps to the metal roof failed with the weight of the collected rain pooling in the tarp, dumping all the water onto the table at once! Glad the essential electronics were double-protected by a big box! I have sacrificed two fullsize 1.5″ thick foam sheets as a roof so the rain can run to the side, even though I probably need to use some more thick foam for stabilizing the new towers. I also have plastic tarps hanging along the screen to protect against rain since the bookcase wallpaper already hanging in the Library Laboratory. We shall see how this goes, but it all seems to be working for now…
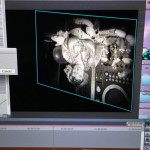 With my grandmother’s biography and now all these Halloween video projects, I have become a video editing machine, cranking out version after version! I found hints online to get my old Final Cut Pro working properly on Mountain Lion, officially impossible according to Apple, and my new 3TB USB 3.0 drive with my newer laptop is definitely faster than my old FireWire 800 drives and the old laptop, but I’m still pushing the limits by rendering files that are 6 hours long with lots of stacked effects and multiple layers. I’ve even been fighting with attempting to get surround sound encoded, but we’re still not sure if that filetype will work with VSA…this is a lot of work but we are also learning a lot that we can build on for future projects!
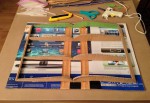 I don’t think I’m revealing too much by saying that I’m working on a couple of illuminated manuscript style books. I had gone to a library sale and bought several large format books,
 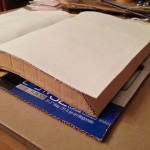 but unfortunately they all had too many glossy or color pages mixed in with the older pages for the look I want, plus none were thick enough anyway, so now I am building open books from scratch. There was no way I was going to spend that much on
 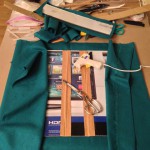 parchment paper to actually fill an entire large book, so these books are hollow, with the open facing pages that lay on top. I now have a large format printer that can fit 11″x17″ paper, so I bought some 11″x17″ parchment online, and have sized these books so that each facing page is 11″ wide.
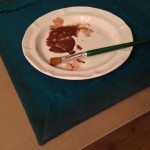 Lucky for me dark aged teal will be perfect for this book, and I had plenty of linen-style fabric leftover from Elsa’s coronation dress! I hotglued the fabric around the book cover, not worrying about faceplates because the book pages would cover enough, then I drybrushed
 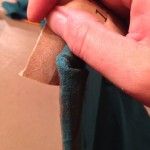 dark brown acrylic paint on all the edges as a thousand years of finger grime and age, then I even took some sandpaper to the edges and corners since fabric books fray over time too. Not sure everyone will notice these details but I like the result!
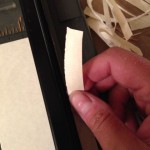 I used to have a deckle edge blade for my paper cutter but I couldn’t find it, so I hand ripped strips of parchment paper, using my paper cutter brace as the edge which worked well. The deckle edge is still a clean cut, so I think the torn edges look much more
 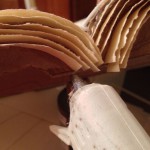 realistic anyway, even though it takes a long time! I left one side as a clean cut for best contact with the glue. I hotglued the strips to the cardboard page edges, leaving some space between them but not enough so that anyone would be able to see the supporting cardboard. I have overlapping corners this way, but I don’t
 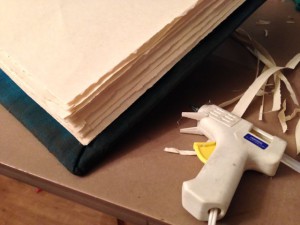 think anyone will notice that, and they blend in like the pages aren’t all trimmed the same. I really love how this looks!
The first book is now ready to create the open pages, which have already been sketched and scanned to adjust size before I hand paint the final illuminations, and now I can refine my building technique for the second book. I think the second book can be slightly smaller than 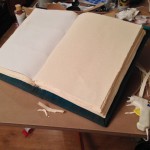 this one, but they are so large because too many of my friends couldn’t even read the Tasty Tombstone clues I have had before! So I am making giant books to display larger text, and many ancient keepsake manuscripts like this were indeed that large…but I’m also going to have a tricky time with the calligraphy because none of my pens are thick enough chisel tips for that scale, so I might have to cheat by using a font to print the text, or maybe handletter the size I can then scan & enlarge on the printer. It also makes for a tricky display since this size doesn’t fit well on any of my fancy metal easels! I’ve seen some images online of old books displayed on fancy pillows, so maybe that could work?
Back to work for me…hope all your projects are going well!

 Subscribe RSS